 TOOL HUNTER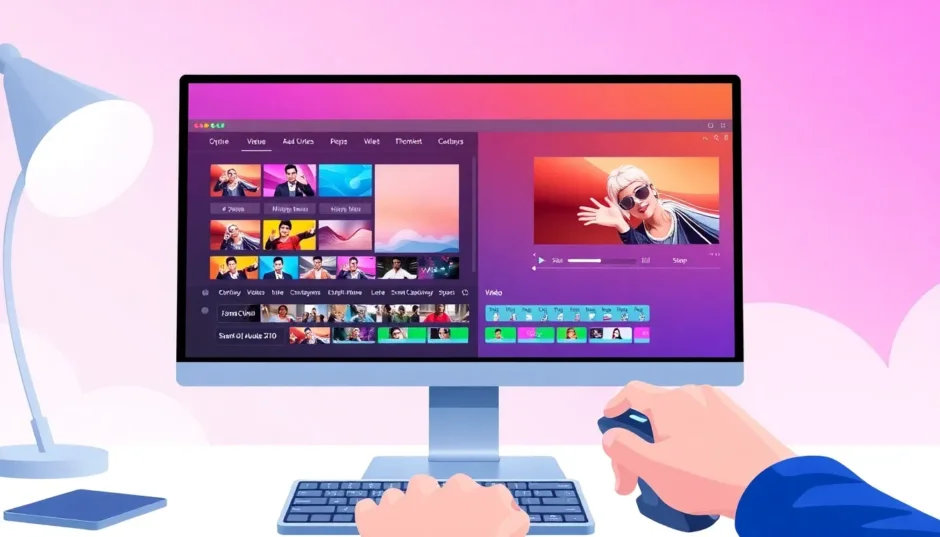

CapCut for PC: The Complete Free Video Editing Software Guide
Video editing used to mean either paying hundreds of dollars for professional software or settling for a stripped-down tool that could barely trim a clip. CapCut for PC changed that equation. What started as a mobile app for quick social edits has grown into a full desktop editing suite that rivals paid programs, and it still costs nothing for the core experience. This guide walks you through everything you need to know: how to get CapCut desktop running on your machine, how to actually use it well, and how it stacks up against the browser-based CapCut online video editor and other free video editing software you might be considering.
Whether you are a YouTuber building long-form content, a small business owner producing product videos, or a complete beginner who just wants to cut together a birthday montage, the desktop version of CapCut gives you room to grow. Let’s break it down.
Table of Contents
Why CapCut for PC Deserves a Spot on Your Desktop
The jump from mobile to desktop is bigger than it looks
The mobile version of CapCut is genuinely good at what it does, but a phone screen forces compromises. Multi-track editing on a six-inch display is cramped. Precise trimming with a finger is approximate at best. The desktop version removes those constraints entirely. You get a full-width timeline where you can stack video layers, audio tracks, text overlays, and effects without everything collapsing into a pile.
That expanded workspace matters most when a project gets complicated. A simple vlog with one camera angle and background music works fine on mobile. A ten-minute YouTube video with B-roll, picture-in-picture commentary, animated lower thirds, and layered sound design does not. CapCut for PC is built for that second category.
It is genuinely free at the entry level
One of the most common questions about CapCut is whether the free tier is usable or just a teaser. The honest answer is that the free plan covers an enormous amount of ground. Core editing tools, transitions, filters, text, audio tools, and export options are all available without paying. There is a Pro tier that unlocks certain premium effects, cloud storage, and advanced AI features, but plenty of creators never need it.
For anyone searching for free video editing software that does not watermark exports or cripple basic features, CapCut desktop is one of the strongest options available right now. That is a meaningful distinction, because many free editors either stamp a logo on your output or lock resolution behind a paywall.
Cross-platform workflow is a real advantage
CapCut exists on desktop, mobile, and the web. That means you can start a rough cut on your phone during a commute, open the same project on your laptop at home, and finish it there. The CapCut online video editor handles quick browser-based edits when you are on a borrowed computer and cannot install anything. This flexibility is not just a marketing point; it genuinely changes how you work, because the friction of moving between devices disappears.
The scale behind that ecosystem is worth noting: CapCut launched in May 2019 and grew from roughly 100 million users that year to around 1 billion by the third quarter of 2024, according to published CapCut user growth statistics. That kind of adoption shapes how the software develops, because feedback comes from an enormous and varied creator base.
Getting CapCut Desktop Installed and Running
System requirements you should check first
Before downloading anything, verify that your machine can handle the software comfortably. CapCut desktop runs on Windows 10 (64-bit) or later and macOS 10.14 or above. For Windows users, Windows 10 or 11 is strongly recommended for stability.
On the hardware side, the minimum specs are modest: an Intel Core i3 or equivalent AMD processor, 4GB of RAM, integrated graphics or a GPU with 2GB of VRAM, and roughly 10GB of free storage. That will get the program open and running basic edits. For anything involving 4K footage, heavy effects, or long timelines, you want more headroom: an Intel Core i5 or AMD Ryzen 5, 8GB to 16GB of RAM, a dedicated GPU with 4GB or more of VRAM, and ideally an SSD for faster media loading.
If you are editing on an older laptop, do not be discouraged. CapCut will still work, but expect longer export times and occasional preview lag on complex projects.
Downloading and installing the desktop app

Installing CapCut desktop is straightforward. Go to the official CapCut website, find the download section, and choose the version for your operating system. Windows and Mac installers are both available. Once the download finishes, open the installer, follow the prompts, and choose an installation location if you want to keep it off your main drive. The whole process takes a few minutes.
There is also a Microsoft Store listing for CapCut, which some users prefer because it handles updates automatically and avoids the need to manually download new versions. Either route works fine.
A quick note on the web version
If you cannot install software on your computer, the CapCut online video editor runs directly in a browser. You upload your media, edit on a timeline, and export. It is not as powerful as the desktop app, and large files can be slow to upload, but it is a legitimate option for quick projects or when you are working on a machine you do not control. Think of it as a complement to CapCut desktop rather than a replacement.
A Practical Walkthrough: Editing Your First Video in CapCut for PC
Setting up a project and importing media
When you open CapCut desktop, you will see options to create a new project or continue an existing one. Starting a new project drops you into the editing interface with an empty timeline. From there, you can either click the import button or simply drag and drop files from your file explorer directly into the media panel. Videos, photos, and audio files all come in the same way.
If you are working with a lot of footage, spend a minute organizing before you start cutting. Rename clips meaningfully, or sort them into bins if your project is large. This small habit saves real time later.
Cutting, splitting, and arranging clips
Drag a clip from the media panel onto the timeline to begin. The playhead marks your current position, and the split tool cuts the clip at that point. A typical editing rhythm looks like this: move the playhead to where you want a cut, hit split, delete the unwanted section, and repeat.
Once clips are on the timeline, you can drag them to reorder, drag their edges to trim, and stack them on separate tracks for overlays. This is where the desktop version pulls ahead of mobile, because you can see several tracks at once and keep track of what is layered on top of what.
Adding transitions, effects, and text
Transitions live in a dedicated panel. Drag one between two clips on the timeline and it applies automatically. Keep transitions subtle in most cases; a simple cross dissolve or a quick swipe reads better than a flashy effect that distracts from the content.
The effects library is enormous and covers everything from color treatments to motion effects. Text works similarly: add a text layer, type your copy, then style it with fonts, animations, and positioning. Once you have a text style you like, save it as a preset so you can reuse it across your video and keep your branding consistent.
Working with audio
Audio is where a lot of beginner edits fall apart. CapCut gives you several tools to prevent that. You can detach audio from a video clip, adjust volume levels per track, and add background music from the built-in library or your own files. The audio enhancer tool reduces background hum and echo, which is a lifesaver for footage recorded in imperfect rooms.
For voiceover work, the text-to-speech feature offers a wide range of AI voices if you would rather not record your own. It is not a replacement for a real human voice in every context, but it is useful for quick explainer content or when you need a placeholder track.
Exporting and sharing
When your edit is done, click export and choose your format, resolution, frame rate, and codec. For most social platforms, 1080p at 30 or 60 frames per second is the sweet spot. If you shot in 4K and your audience watches on large screens, exporting at 4K is worth the extra time. CapCut also offers direct sharing to platforms like TikTok and YouTube, which skips the download-and-reupload step.

The AI Features That Set CapCut Desktop Apart
Auto captions and transcription
Auto captions are one of the most practical features in CapCut for PC. The software analyzes the audio in your video, transcribes the speech, and generates synced subtitles automatically. It supports more than a dozen languages, which makes it useful for reaching international audiences. There is also a keyword highlight option that detects important phrases and styles them differently, which keeps viewers reading along.
For anyone publishing to social media, captions are not optional anymore. A large share of viewers watch with sound off, so subtitles directly affect how long people stay with your video. Having this built in, rather than requiring a separate subscription tool, is a significant advantage of this free video editing software.
Background removal and chroma key
Removing a background used to require a green screen and careful lighting. CapCut’s AI-powered auto removal can isolate a person from the background with a single click, no green screen needed. The results are not always perfect, especially with complex hair edges or busy backgrounds, but for quick talking-head videos it works surprisingly well.
For more controlled work, the chroma key tool handles green screen footage with adjustable intensity and shadow settings so you can blend the new background convincingly.
Script to video and AI-assisted creation
The script-to-video feature takes a written script or a simple idea and assembles a rough video from stock footage, transitions, and background music. It is not going to replace a human editor for anything nuanced, but it is genuinely useful for producing volume content quickly, like educational clips or social media posts where speed matters more than cinematic polish. You can then refine the result manually in the timeline.
Keyframes and motion tracking
Keyframes let you change a clip’s properties over time: position, scale, rotation, opacity. Set a keyframe at the start and another at the end, and the software interpolates the movement in between. This is how you create smooth zooms, sliding text, and animated graphics.
Motion tracking takes it further by locking an element to a moving subject in your footage. Add a text label and it will follow the person as they walk across the frame. These are the kinds of features that separate a basic trimmer from a real editing tool, and they are available in CapCut desktop without a subscription.
CapCut Desktop vs the Online Editor vs Other Free Tools
Desktop versus browser-based editing
The CapCut online video editor is convenient, but it has real limitations. Uploading large video files takes time, browser performance caps how complex your timeline can get, and you are dependent on an internet connection. The desktop app processes everything locally, which means faster previews, no upload wait, and no risk of losing work if your connection drops.
That said, the online editor has its place. If you are on a work computer with restricted install permissions, or you need to make a quick cut on a machine that is not yours, the browser version gets the job done. Many creators use both: the web editor for quick turnarounds, the desktop app for serious projects.
How CapCut compares to other free video editing software
There is no shortage of free video editing software, and each has strengths. DaVinci Resolve is more powerful for color grading and professional post-production, but its learning curve is steep and its hardware demands are higher. iMovie is excellent if you are on a Mac and want something Apple-native, but it is limited on Windows. Clipchamp is beginner-friendly but less feature-rich. InShot leans mobile-first.

CapCut for PC sits in a useful middle ground. It is easier to learn than Resolve, more capable than Clipchamp, and more flexible than mobile-first tools. It is not the best choice for every project, but for the majority of creators producing social content, tutorials, vlogs, and marketing videos, it covers the essentials and then some.
Where CapCut desktop falls short
No tool is perfect, and it is worth being honest about the trade-offs. The desktop interface still carries some design DNA from the mobile app, which some users find less refined than dedicated professional software. Certain advanced AI features sit behind the Pro subscription. Some creators have raised concerns about terms of service and data handling, which is a legitimate consideration if you work with sensitive footage. If privacy matters to your workflow, the CapCut privacy policy is the place to read exactly how personal information is collected, used, and shared before you commit to the platform.
And if you need granular control over color science or complex compositing, a tool like DaVinci Resolve will serve you better. Knowing these limitations helps you decide whether CapCut is the right fit or just the right starting point.
Tips, Tricks, and Troubleshooting for CapCut Desktop
Fix the “nothing clicks” problem
One of the most common complaints about CapCut desktop is that clicking on effects, text, or keyframes stops responding. The fix is usually simple: go to settings from the home screen, find the draft section, and clear the cache. You can also shorten the cache duration from the default 30 days to 15 to reduce how often this happens. It is a minor annoyance, but knowing the fix saves a lot of frustration.
Copy and paste attributes between clips
If you have styled a clip exactly how you want it and need the same look on another clip, you do not have to redo the work. Right-click the clip with the settings you want, choose copy attributes, then right-click the target clip and paste attributes. You can select which attributes to apply, from transforms to text styles to color adjustments. This single feature saves hours on projects with consistent styling.
Organize your timeline and learn shortcuts
Group related clips together and keep your timeline tidy. A cluttered timeline makes it harder to find the section you need and slows down every adjustment. Learn the keyboard shortcuts for splitting, undoing, and zooming, because reaching for menus for every action adds up over a long edit.
Save your work regularly
CapCut auto-saves projects, but manual saves are still worth doing, especially after major changes. If the app crashes or your computer restarts unexpectedly, having a recent save point protects you from losing progress.
Watch for the red box warning
If you see a red outline around a clip on your timeline, it usually means CapCut cannot locate the original media file. This happens when you move or delete source files after importing them. Keep your footage in a stable folder until the project is exported, and the warning will not appear.
A Quick Reference for New Users
If you are just getting started, here is the short version of everything above:
- Download: Get the installer from the official CapCut site or the Microsoft Store, and check your specs first.
- Import: Drag files straight into the media panel and rename them meaningfully.
- Edit: Split at the playhead, trim clip edges, and stack overlays on separate tracks.
- Enhance: Add subtle transitions, save text presets, and clean up audio with the enhancer.
- Automate: Turn on auto captions and try background removal for quick talking-head edits.
- Export: Choose 1080p for social, 4K for large screens, and share directly to TikTok or YouTube.
None of these steps require a paid plan, which is why so many people treat CapCut desktop as their default free video editing software rather than a stopgap.

Choosing the Right CapCut Setup for Your Workflow
The version of CapCut you use should match how you actually work. If you edit regularly and work with large files, the desktop app is the clear choice: local processing, a full timeline, and no upload limits. If you travel often and edit on whatever device is available, the CapCut online video editor keeps you moving without installation. If you shoot on your phone and want to start edits immediately, the mobile app is right there.
Many creators end up using all three, moving projects between devices as their day unfolds. That is the real strength of the CapCut ecosystem: it does not force you into a single way of working.
For anyone weighing free video editing software options, the practical recommendation is simple. Install CapCut desktop on your main computer, learn the core editing workflow, and explore the AI tools as you get comfortable. The learning curve is gentle enough that you can produce something watchable on day one, and deep enough that you will still be discovering features months later. That combination is rare, and it is the reason CapCut for PC has become a default choice for so many creators.
Frequently Asked Questions
Is CapCut for PC really free?
Yes. The core editing tools, transitions, filters, text options, audio tools, and export settings are available on the free plan. A Pro tier unlocks certain premium effects, cloud storage, and advanced AI features, but many creators finish entire projects without ever paying.
What are the minimum system requirements for CapCut desktop?
You need Windows 10 (64-bit) or later, or macOS 10.14 or above. Minimum hardware is an Intel Core i3 or equivalent, 4GB of RAM, integrated graphics or a GPU with 2GB of VRAM, and about 10GB of free storage. For 4K editing, aim for a Core i5 or Ryzen 5, 8GB to 16GB of RAM, and a dedicated GPU.
Can I use the CapCut online video editor instead of installing the app?
Yes. The browser version lets you upload media, edit on a timeline, and export without installing anything. It is slower with large files and less capable than the desktop app, but it works well for quick edits on computers where you cannot install software.
Does CapCut desktop add a watermark to exported videos?
No. Exports from CapCut desktop do not carry a watermark, which is one of the main reasons it stands out among free video editing software options that often brand your output or restrict resolution.
Why does clicking on effects or keyframes stop working in CapCut?
This is usually a cache issue. Go to settings from the home screen, open the draft section, and clear the cache. You can also reduce the cache duration from 30 days to 15 to make the problem less frequent.
What does the red box around a clip mean?
A red outline typically means CapCut cannot find the original media file, usually because it was moved, renamed, or deleted after import. Keep your source footage in a stable folder until you finish exporting the project.
Can I move a project between the desktop app and my phone?
Yes. CapCut is built as a cross-platform tool, so you can start a project on mobile or the web and continue it on the desktop app. This is one of the biggest practical advantages of the ecosystem, especially for creators who edit in short sessions throughout the day.