TOOL HUNTER

Ever thought about making your videos look more polished or keeping certain things private? Knowing how to blur videos online is a super handy skill. It’s not just for hiding stuff—it can add style, smooth out transitions, and make your content feel more intentional.
We’re surrounded by videos every day. On TikTok, Instagram, YouTube… you name it. If you’re creating videos too, you probably want them to grab attention. A blur effect can help direct your viewers’ eyes, hide distractions, or just give your clips a cool, artistic vibe.
Maybe you need to blur someone’s face for privacy, cover up a messy background, or soften a bright light. Or perhaps you just like that dreamy, cinematic look. Whatever your goal, this guide will walk you through how to blur videos online—easily, for free, and without downloading any software.
We’ll explore what blur effects are, why they’re useful, and give you a full tutorial using one of the best free tools available. We’ll also check out other options in case you want to experiment. Let’s jump in!
Table of Contents
- What is Blur and Why Should You Use It?
- CapCut Online Video Editor: A Top Choice for Blurring Videos Online
- How to Blur a Full Video Online Using CapCut
- How to Blur Specific Parts of a Video Online
- How to Blur the Background of a Video Online
- Other Tools to Blur Videos Online
- Wrapping Up
- Frequently Asked Questions
What is Blur and Why Should You Use It?
Blur is a visual effect that softens part—or all—of your video. It works by blending pixels together, which reduces detail and sharpness. That might sound like it’s making your video worse, but actually, it’s a creative choice that can improve your footage in many ways.
Imagine a character waking up in a film. At first, everything’s fuzzy, right? Adding a blur that slowly sharpens can make that moment feel real and engaging.
Blur is also awesome for smoothing transitions between clips. Instead of a jarring cut, a soft blur can make the shift feel natural and easy on the eyes.
And of course, sometimes we record something amazing only to notice later there’s something in the frame we’d rather hide—a personal detail, a stranger’s face, or just clutter. Instead of reshooting or trashing the video, you can simply blur it out. Problem solved!
Whether you’re new to video editing or do it every day, learning how to blur videos online is a tool you’ll use over and over.
CapCut Online Video Editor: A Top Choice for Blurring Videos Online
When it comes to blurring videos online, CapCut is a standout. It’s a free, browser-based editor that’s both powerful and user-friendly. No downloads—just open it up and start editing.
What makes CapCut great for blurring videos? For starters, it offers multiple blur effects: halo, pixel, motion, and more. Each one creates a different mood, so you can pick what fits your video best.
But CapCut isn’t just about blur. It includes all the essential editing tools—trimming, cutting, rotating, adding text, music, and more. It even has advanced features like speed controls, background removal, and AI helpers to make editing smoother.
Another plus: CapCut has a built-in library of free stock videos, images, and music. If you need extra content to spice up your project, it’s right there.
You can import videos from your computer or cloud services like Google Drive or Dropbox. When you’re done, export in high quality and share directly to platforms like TikTok, Instagram, or YouTube.
Best of all, CapCut is totally free and doesn’t add watermarks. Your final video will look clean and pro.
CapCut — Your all-in-one video & photo editing powerhouse! Experience AI auto-editing, realistic effects, a huge template library, and AI audio transformation. Easily create professional masterpieces and social media viral hits. Available on Desktop, Web, and Mobile App.

How to Blur a Full Video Online Using CapCut
Want to give your entire video a soft, dreamy look? Or maybe hide details throughout? Here’s how to blur the whole video easily with CapCut.
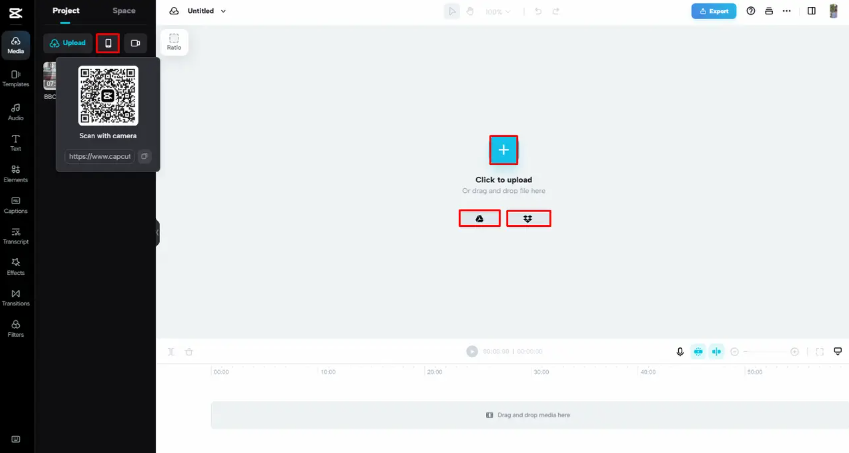
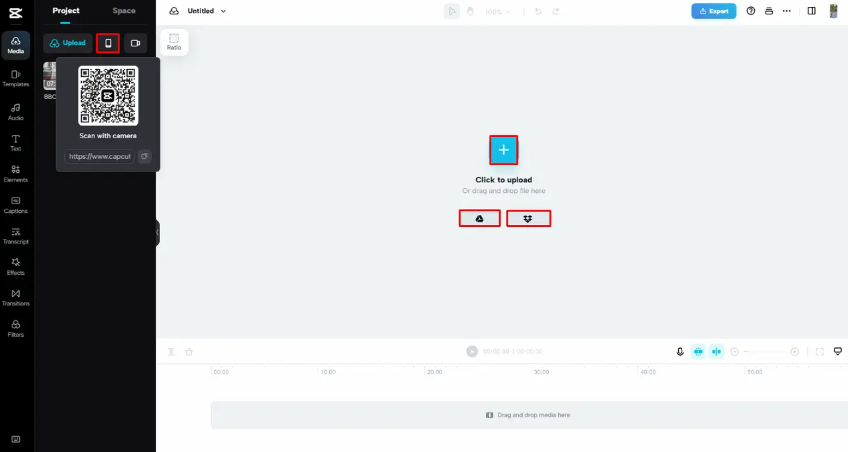
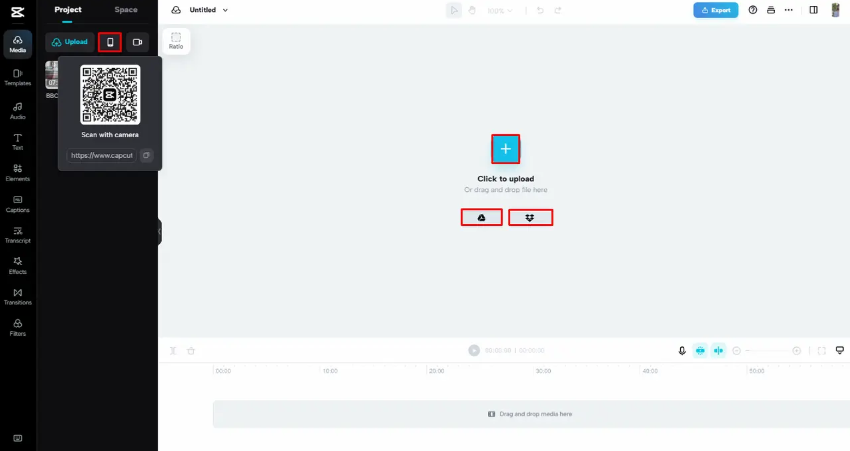
Step 1: Upload Your Video
Go to the CapCut website and create a free account. Once you’re in, upload your video by dragging and dropping it from your computer. You can also import from Google Drive, Dropbox, or CapCut cloud. Using your phone? Scan a QR code to transfer files quickly.
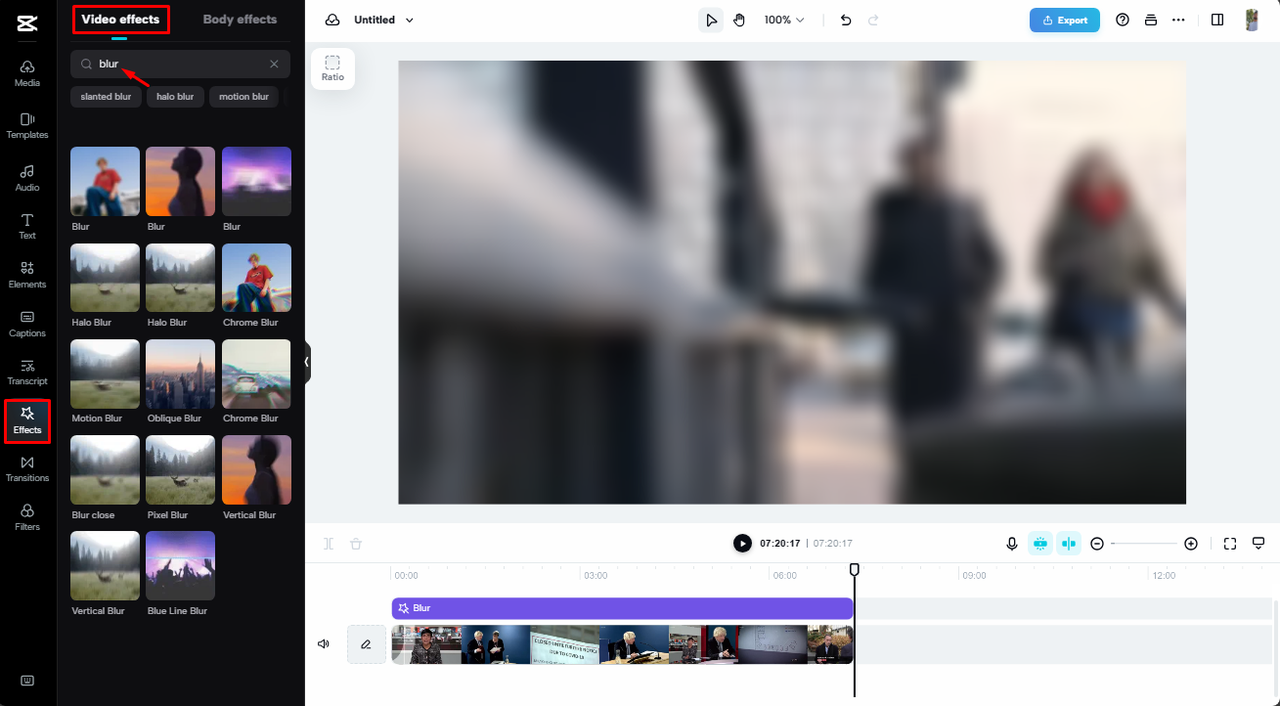
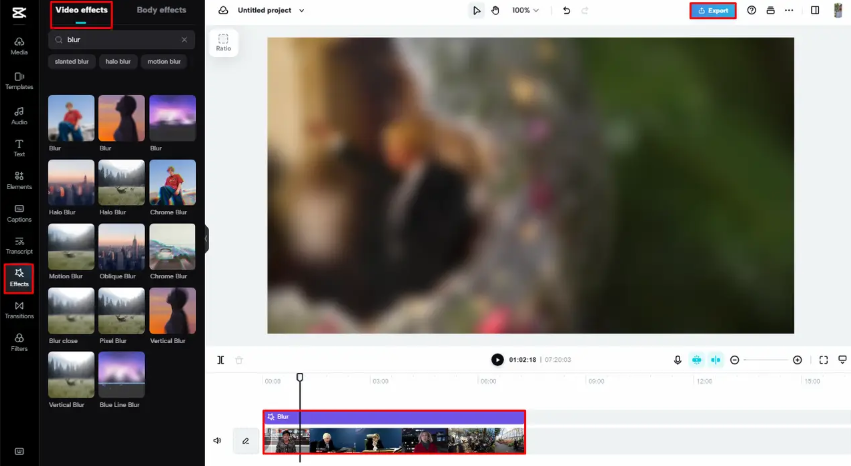
Step 2: Apply the Blur Effect
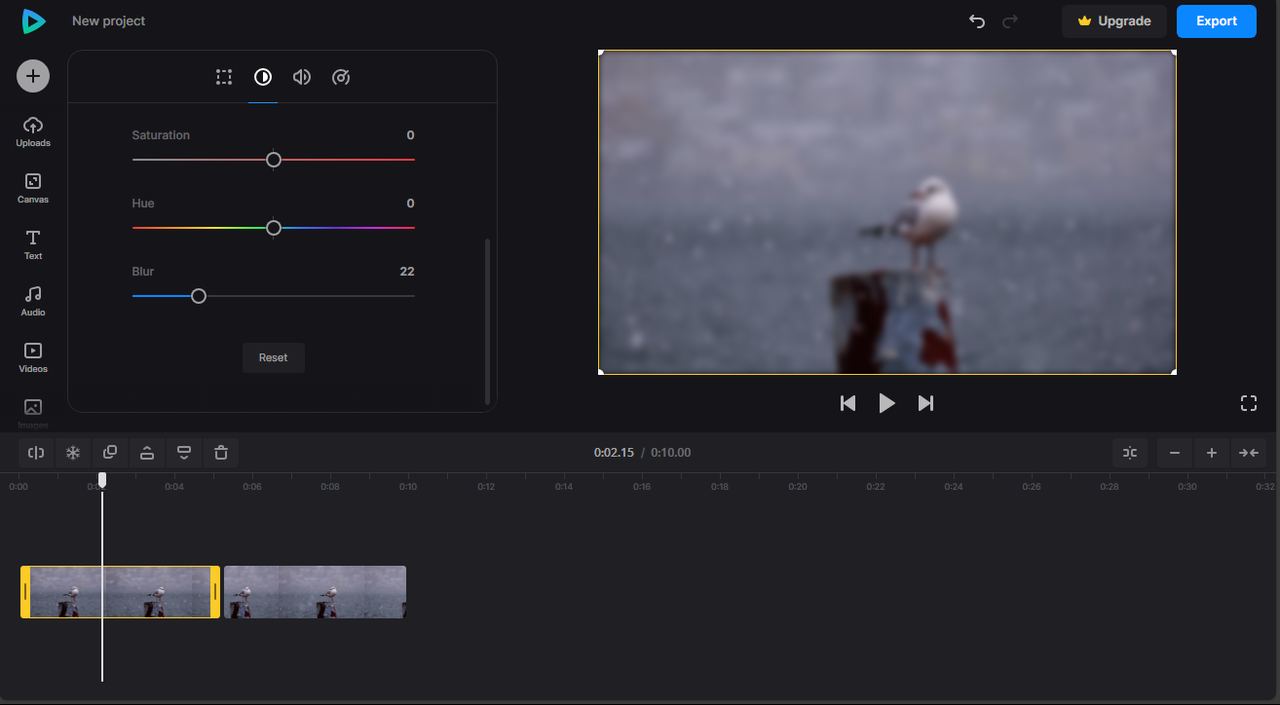
After uploading, your video will appear on the timeline. On the left toolbar, click “Effects,” then “Video Effects,” and choose the “Blur” category. Pick the blur style you like—each gives a different feel.
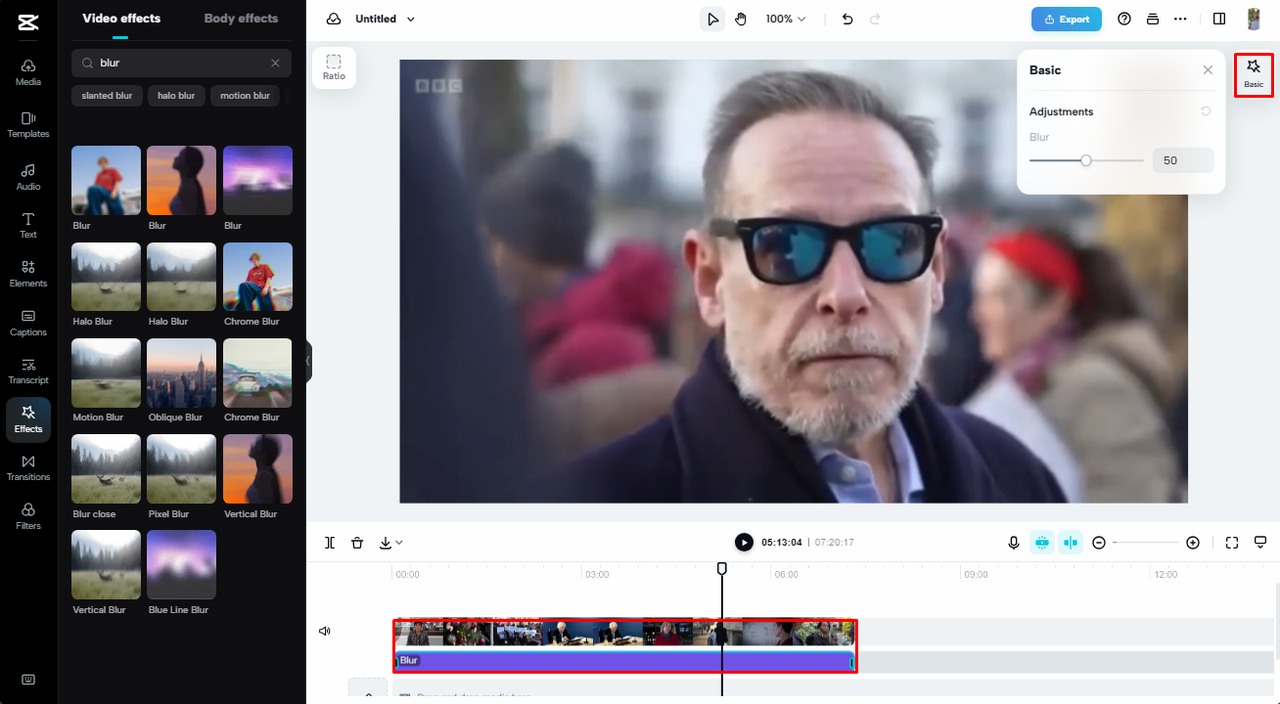
Drag the blur effect to cover your whole video on the timeline. Want to adjust how strong the blur is? Go to the “Basic” tab on the top right. There you can change intensity and speed.
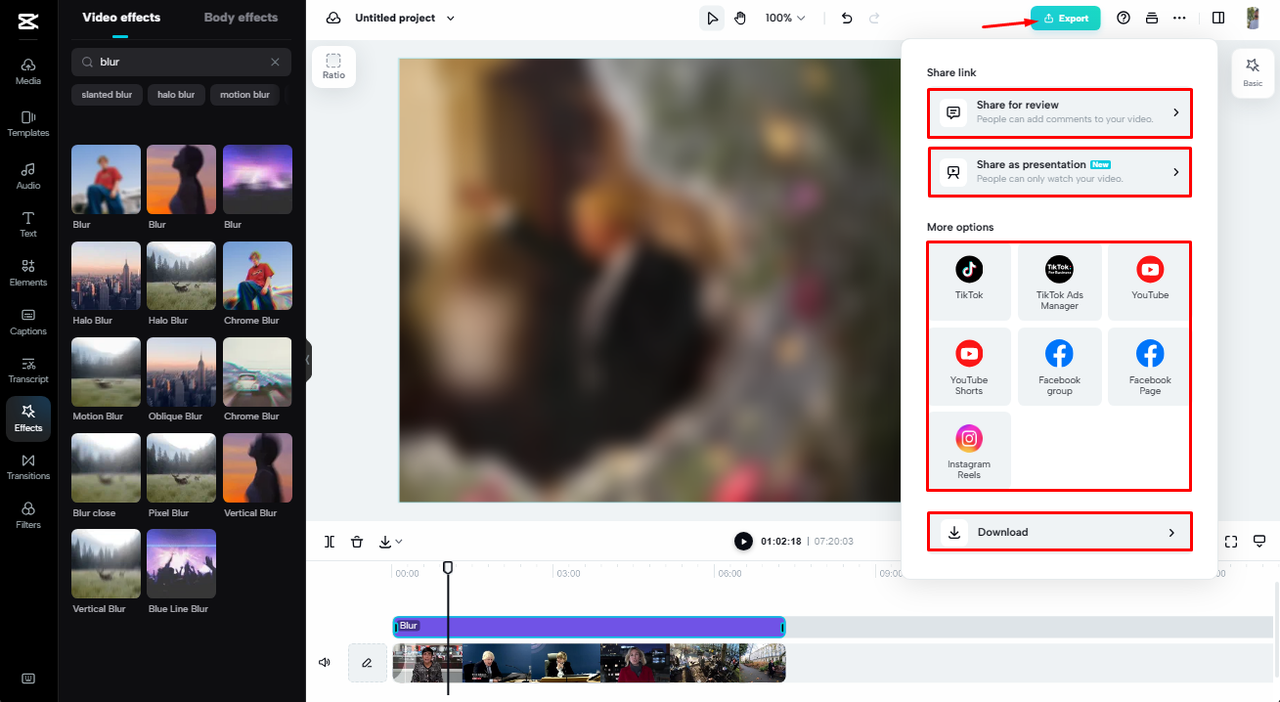
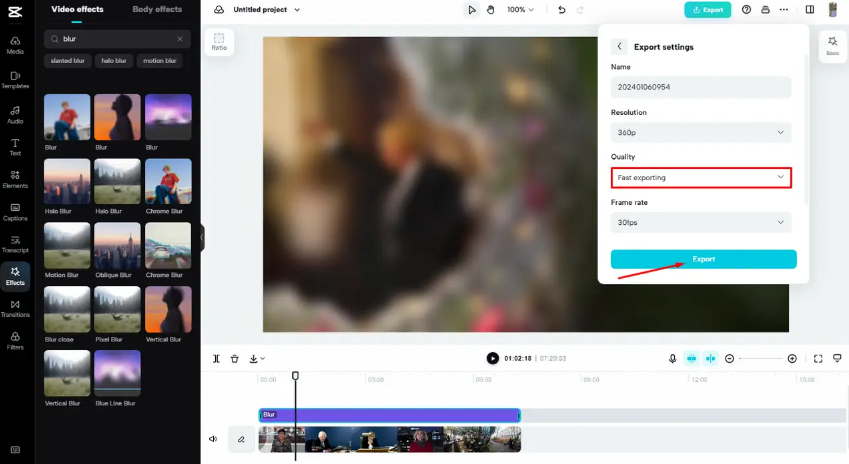
Step 3: Export Your Video
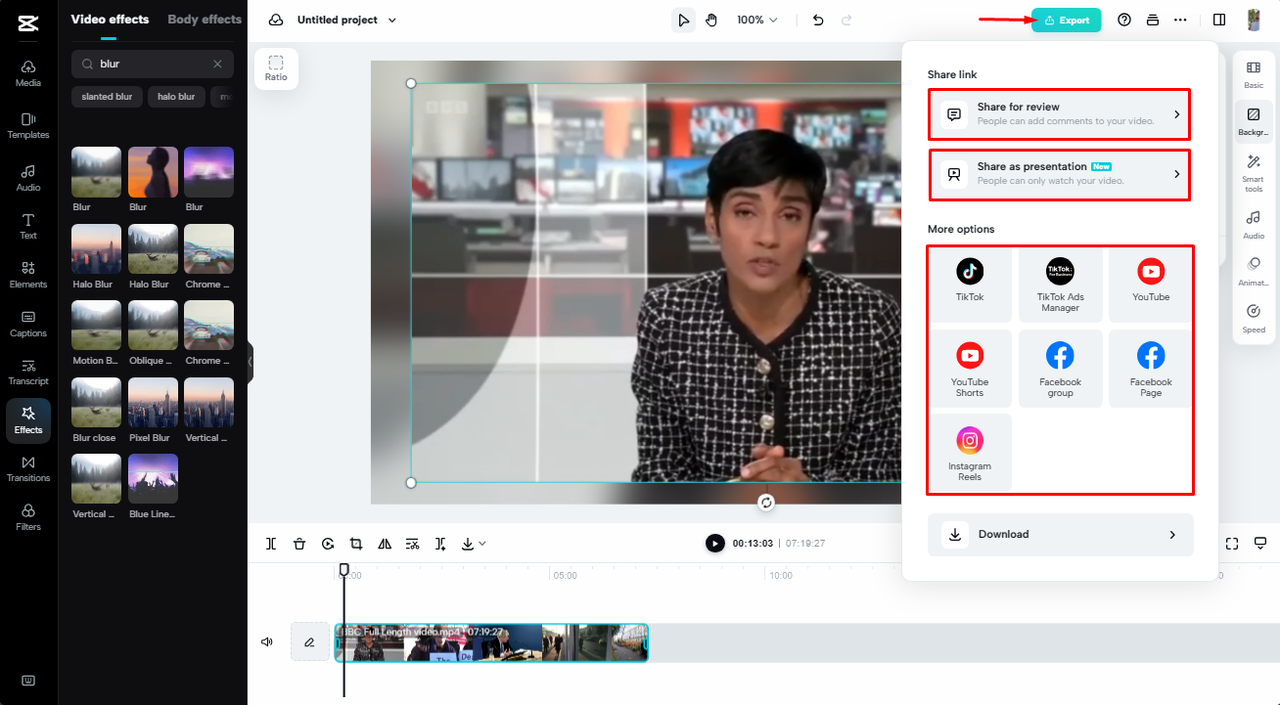
Happy with the blur? Click “Export” in the top right. You can choose your video’s quality, format, and resolution before saving. If you want a smaller file, select “Fast export”—it keeps quality high but reduces size.
Once done, save the video to your device or share it straight to social media. Working with others? Use “Share for review” to get feedback.
That’s it! Three steps and you’ve blurred your entire video.
How to Blur Specific Parts of a Video Online
Sometimes you only want to blur one area—like a face, license plate, or sensitive info. Here’s how to blur parts of a video online with CapCut.
Step 1: Upload Your Video
Upload your video just like before. Use drag-and-drop, cloud import, or QR code.
Step 2: Apply a Mask to the Blur
First, add a blur effect to the whole video (as in the previous section). Export that version. Now, re-import the blurred video into CapCut and place it over the original on the timeline. You’ll have two layers: the original on bottom, the blurred on top.
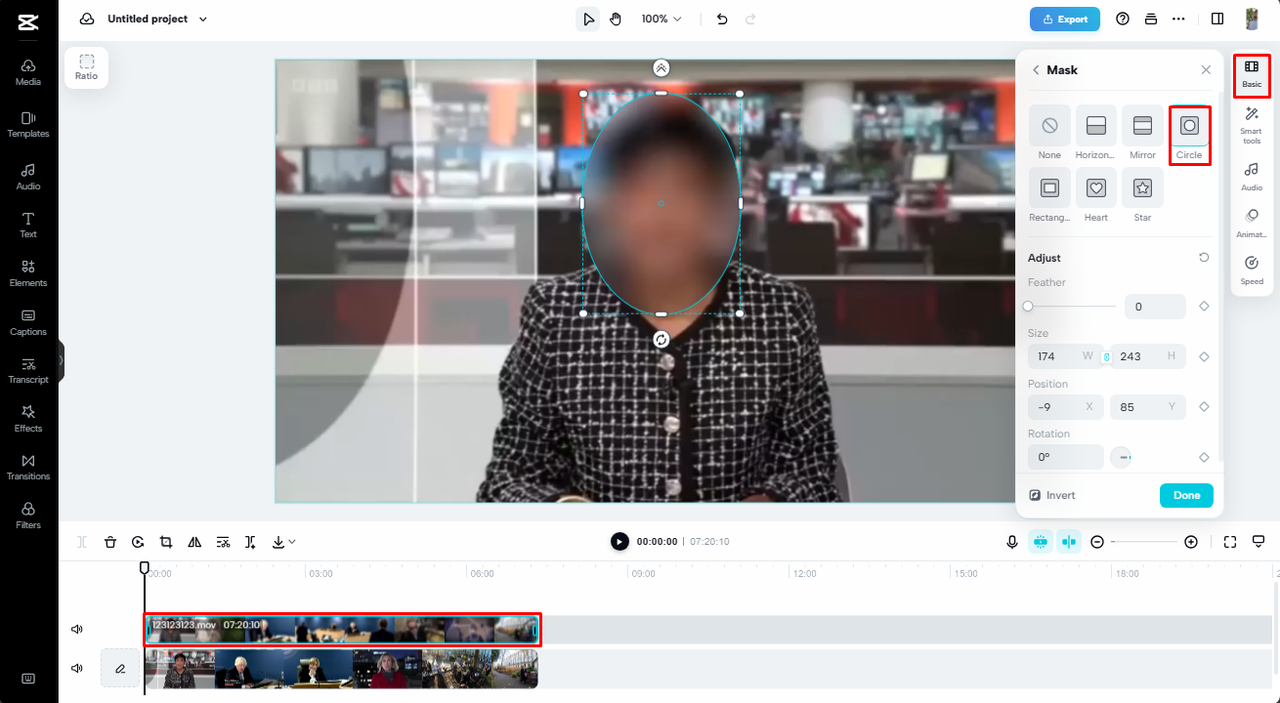
Select the top blurred layer. Go to “Basic” settings and find the “Mask” option. Masks let you reveal only parts of the top layer. Choose a shape—rectangle, circle, or custom—and place it over the area you want blurred.
Everything outside the mask will show the original clear video. Everything inside stays blurred. You can resize or move the mask if the object moves.
Step 3: Export the Video
Once your mask is set, export again. Now only the selected part is blurred. Save or share as needed.

This method is perfect for privacy or focusing viewers’ attention.
How to Blur the Background of a Video Online
Blurring the background can make your subject pop—great for interviews, tutorials, or vlogs. CapCut doesn’t have a one-click background blur, but you can still do it.
Step 1: Upload Your Video
Upload your clip to CapCut through any method.
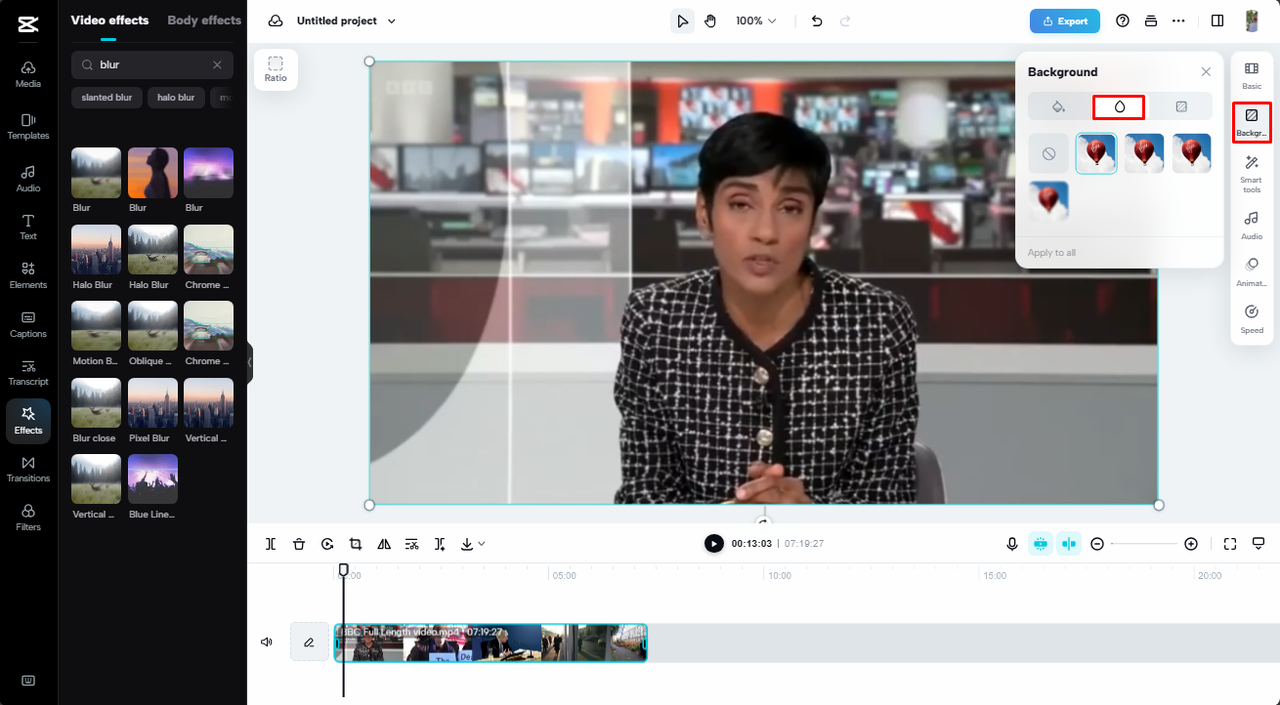
Step 2: Add Background Blur
On the right toolbar, click the “Background” menu. Here you’ll find blur effects for the background. Try different styles to see what fits.
Step 3: Export the Video
Once you’re happy, export. Your subject stays clear while the background gets a nice, soft blur.
Ideal for making your main content stand out.
Other Tools to Blur Videos Online
CapCut is great, but there are other options too. Each has its strengths.
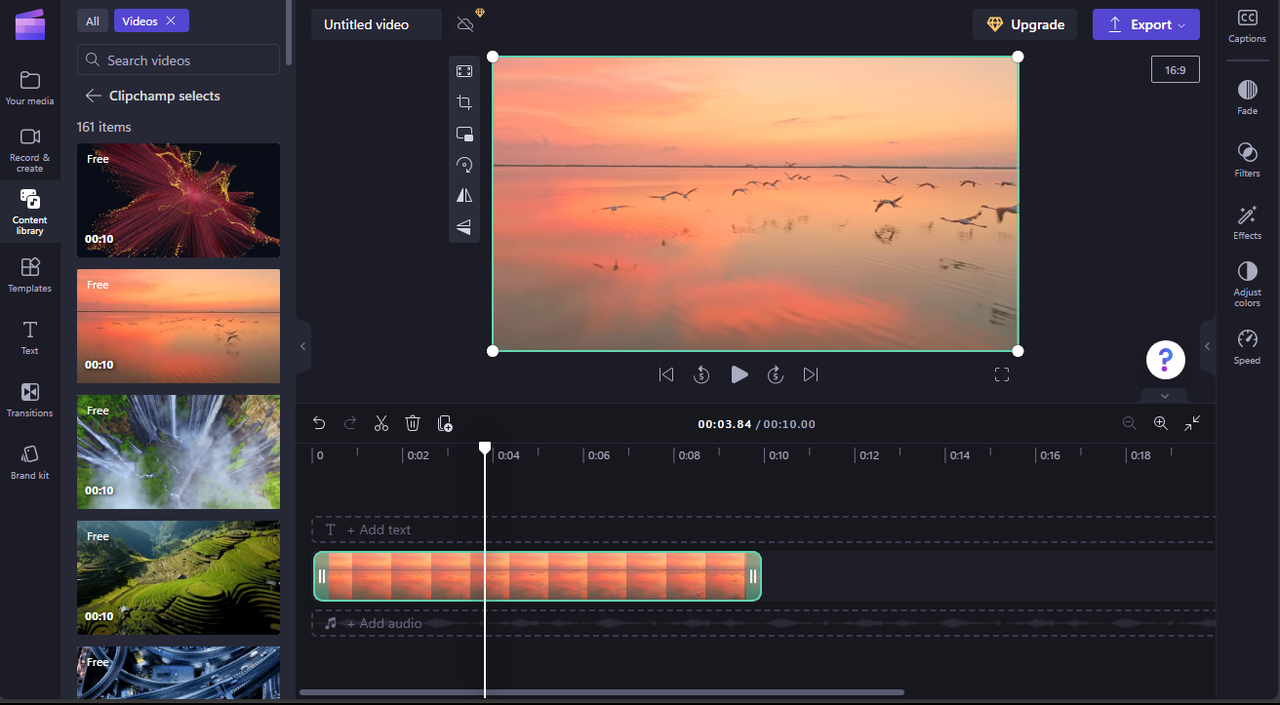
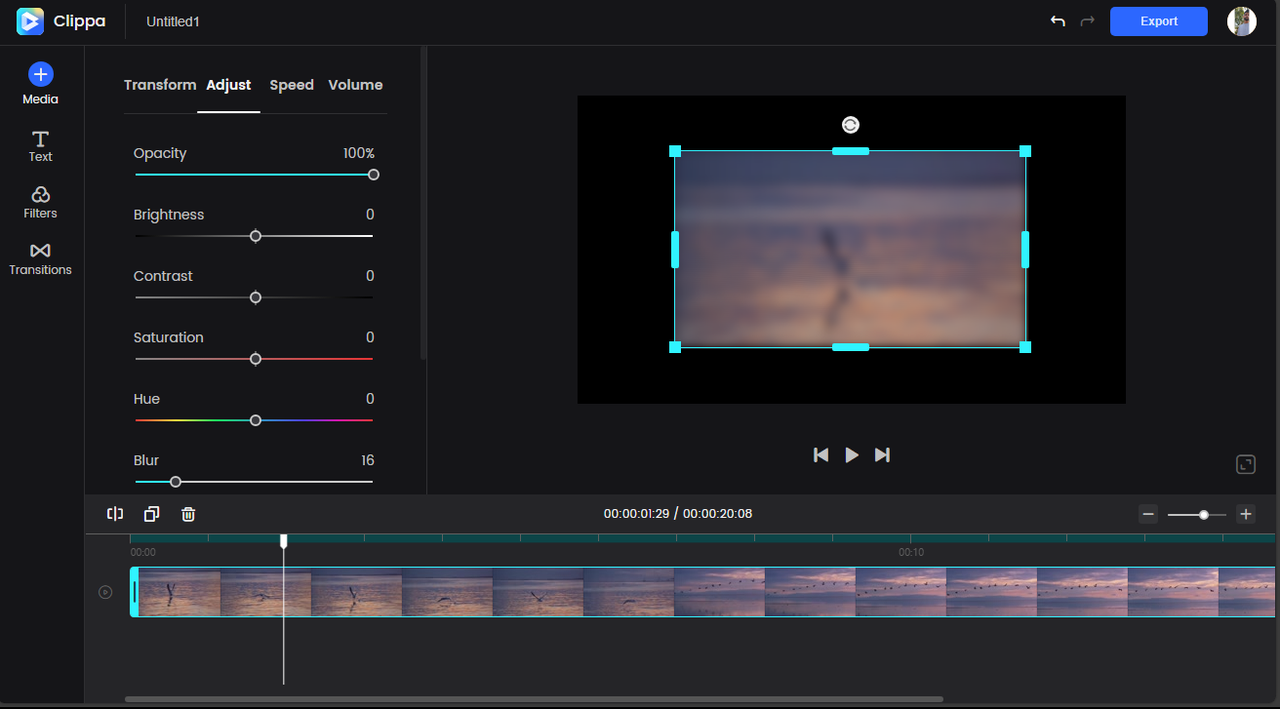
Clipchamp
Clipchamp is a free online editor with blur effects. It’s easy to use—blur the whole video or parts. It also has motion blur for action scenes. Some users find it a bit slow sometimes.
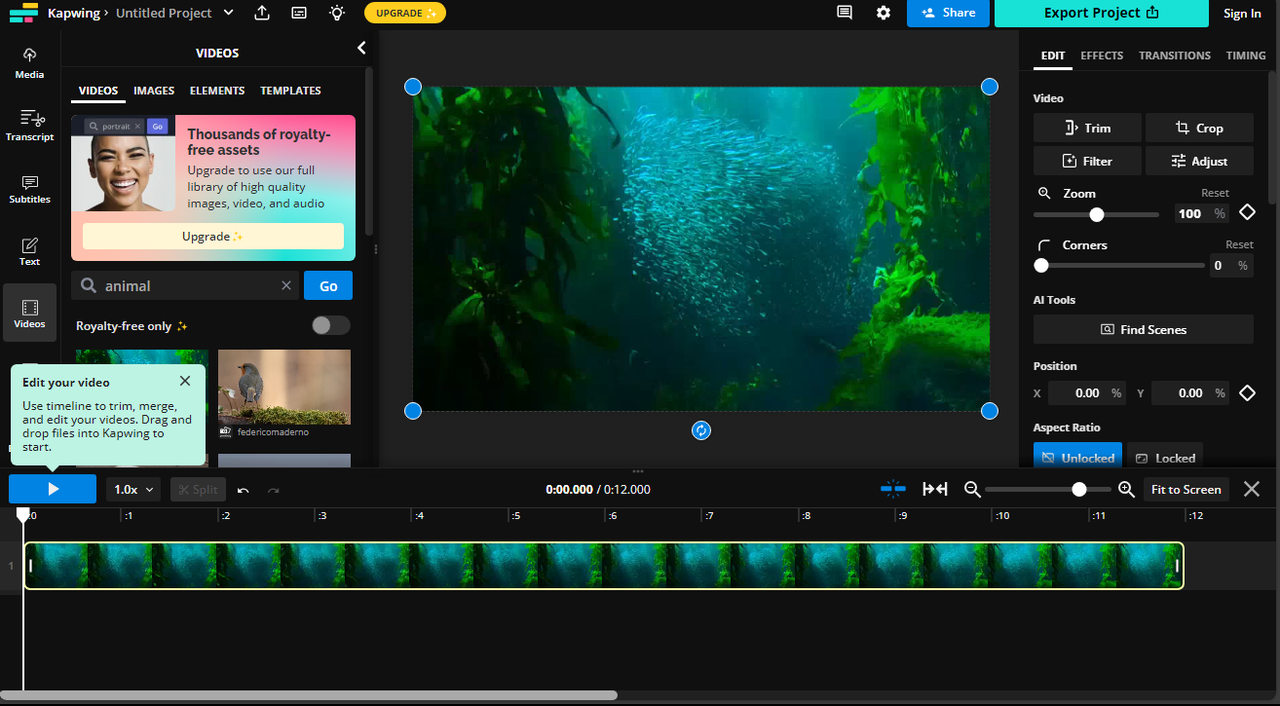
Kapwing
Kapwing offers precise blur controls with a slider. Good for backgrounds or hiding private info. It supports auto-subtitles too. The free version has a file size limit, and occasional bugs.
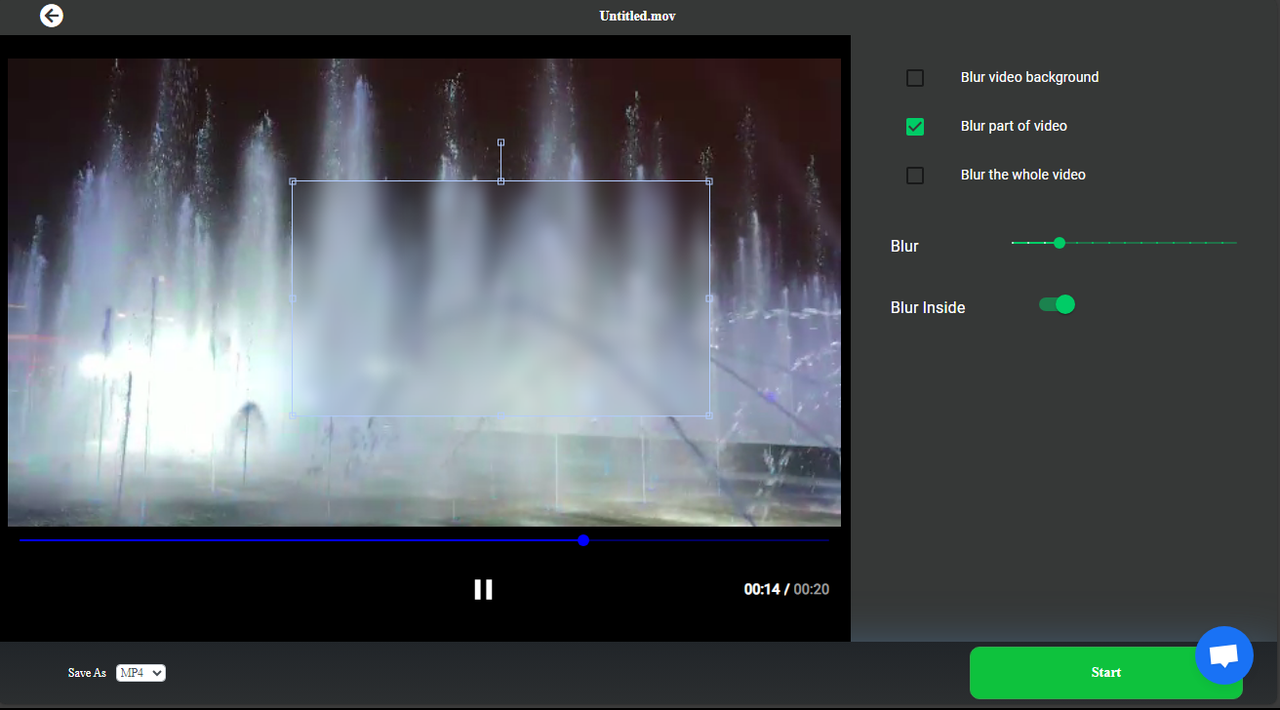
PickFrom
PickFrom is a simple, free tool just for blurring. You can blur parts, the whole video, or the background—no ads or installs. It lacks advanced features, though.
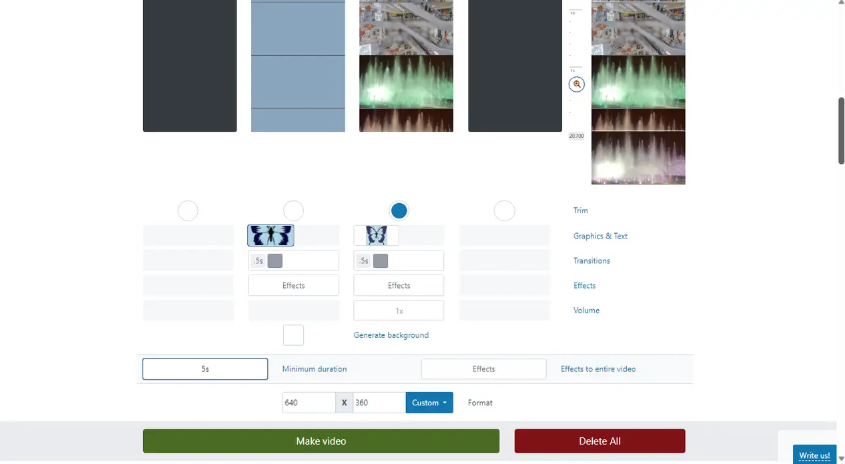
MovieMakerOnline
A basic, free editor for quick blurring. You can blur all or part of a video, and it has a media library. The site isn’t the most intuitive, and it misses advanced tools.
Clideo
Clideo is user-friendly and supports background blur. Import from cloud storage, export up to 4K. Free and easy, but you can’t blur specific areas—only full video or background.
Gemoo
Gemoo is a simple editor for blurring whole videos. It has color filters and transitions, and it’s free without watermarks. But it only does full video blur, and exports max at 720p.
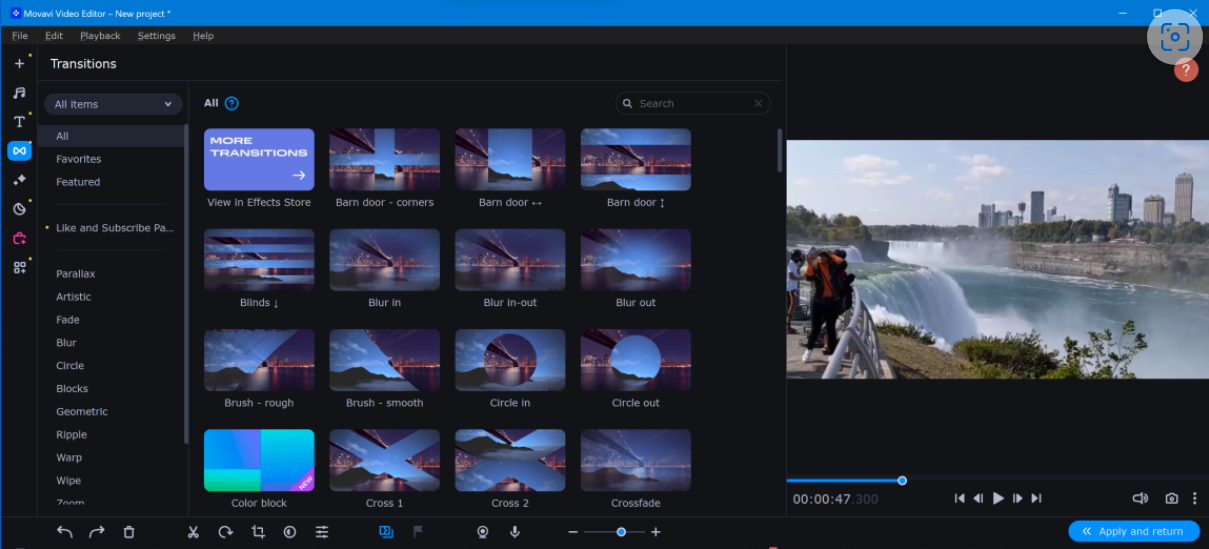
Movavi
Movavi is more advanced, with motion and privacy blur. Nice interface, direct social sharing. But the free version is limited—watermarks and paid features.
Your choice depends on what you need: simplicity, specific features, or types of blur.
CapCut — Your all-in-one video & photo editing powerhouse! Experience AI auto-editing, realistic effects, a huge template library, and AI audio transformation. Easily create professional masterpieces and social media viral hits. Available on Desktop, Web, and Mobile App.
Wrapping Up
Knowing how to blur videos online is a useful skill for any video maker. Blur effects can hide details, set a mood, or just make your videos look more pro.
There are lots of tools out there, but CapCut is a top pick because it’s free, powerful, and easy. You can blur the whole video, parts of it, or just the background—no watermarks, and tons of extra features.
Other tools like Clipchamp, Kapwing, and PickFrom are also good, depending on what you’re looking for.
Next time you edit, try adding a blur. It’s simpler than you think and can totally change your video’s vibe.
Frequently Asked Questions
How can I make the blur effect look better?
Most tools let you adjust blur strength. In CapCut, use the slider under “Basic” settings to tweak intensity until it looks just right.
What’s the easiest free way to blur a video online?
CapCut is one of the easiest. It’s user-friendly, guides you step-by-step, and blurs full videos or parts quickly—all for free, no watermarks.
Can I blur a video online without a watermark?
Yes! CapCut, Clipchamp, and PickFrom all let you blur without adding watermarks. Always check before exporting if you’re using a new tool.
Now that you know how to blur videos online, why not try it? You might be surprised how much a little blur can improve your videos.
Some images courtesy of CapCut.