TOOL HUNTER

Ever wondered how to make your videos more engaging and accessible? Adding captions is the answer! Whether you’re creating content for social media, educational purposes, or just for fun, captions help everyone understand and enjoy your videos better. Many people watch videos without sound, especially in public places, so captions ensure your message isn’t lost.
If you’re looking for a simple and free way to learn how to add captions to videos, you’ve come to the right place. This guide will walk you through everything from basic considerations to detailed steps using various tools. For a quick start, CapCut video editor is highly recommended—it’s user-friendly, free, and packed with features. But we’ll also explore other options like Adobe Premiere Pro and iMovie.
By the end, you’ll know exactly how to add captions to videos like a pro. Let’s dive in!
Why Adding Captions Matters
Before we get into the how-to, let’s talk about why captions are essential. First off, they make your videos accessible to a wider audience. This includes people who are deaf or hard of hearing, as well as those in quiet environments like libraries or offices where sound might be off.
Captions also improve comprehension. Even if viewers can hear the audio, reading along can help clarify accents, technical terms, or dialogue in noisy settings. Plus, videos with captions tend to have higher engagement rates—viewers are more likely to watch until the end. And don’t forget SEO benefits: search engines can index caption text, making your videos easier to discover online.
So, learning how to add captions to videos isn’t just a technical skill; it’s a way to enhance your content and reach more people.
Key Considerations Before You Start
Ready to add captions? Hold on—there are a few things to consider first. Good captions aren’t just about transcribing words; they need to be readable, accurate, and well-timed.
Readability Is Crucial
If your captions aren’t easy to read, they won’t be effective. Focus on four elements: size, color, background, and font.
Size matters—too big, and captions block the video; too small, and they’re unreadable. Aim for a balance that’s visible but not distracting. Color contrast is also key. Use dark text on light backgrounds and light text on dark backgrounds. A semi-transparent background behind text can boost readability.
Placement is another factor. Captions are usually at the bottom of the screen to avoid covering important visuals. However, adjust if needed to avoid obscuring faces or actions. Font choice might seem minor, but it impacts readability. Stick to clear, simple fonts—avoid fancy or thin styles that are hard to read.
Accuracy Matters
When you add captions to videos, accuracy is non-negotiable. The text must match what’s being said to avoid confusion or misinterpretation. If there’s sensitive language, use symbols or rephrase instead of omitting it. Also, ensure captions cover the entire video, not just parts.
Synchronization Is Key
Have you ever seen captions out of sync with the audio? It’s frustrating! Synchronization ensures text appears exactly when words are spoken, making it easier for viewers to follow along.
Positioning Your Captions
Where you place captions affects the viewing experience. The bottom of the screen is standard, as it allows viewers to watch and read without distraction. The center is rarely ideal, as it blocks the action, while the top can work in some cases. Whatever you choose, keep it consistent throughout the video to avoid jarring shifts.
How to Add Captions to Videos Using CapCut
Now for the fun part—how to add captions to videos! We’ll start with CapCut, a free, user-friendly tool perfect for beginners and pros alike.
CapCut works on both desktop and mobile, offering a range of features. Here, we’ll focus on its captioning capabilities.
Step 1: Upload Your Video
First, download and install CapCut—it’s completely free. Open the app and create a new project. Click “Import” to upload your video, or drag and drop the file. If you don’t have a video ready, CapCut offers AI-generated content and stock materials to practice with.
CapCut — Your all-in-one video & photo editing powerhouse! Experience AI auto-editing, realistic effects, a huge template library, and AI audio transformation. Easily create professional masterpieces and social media viral hits. Available on Desktop, Web, and Mobile App.

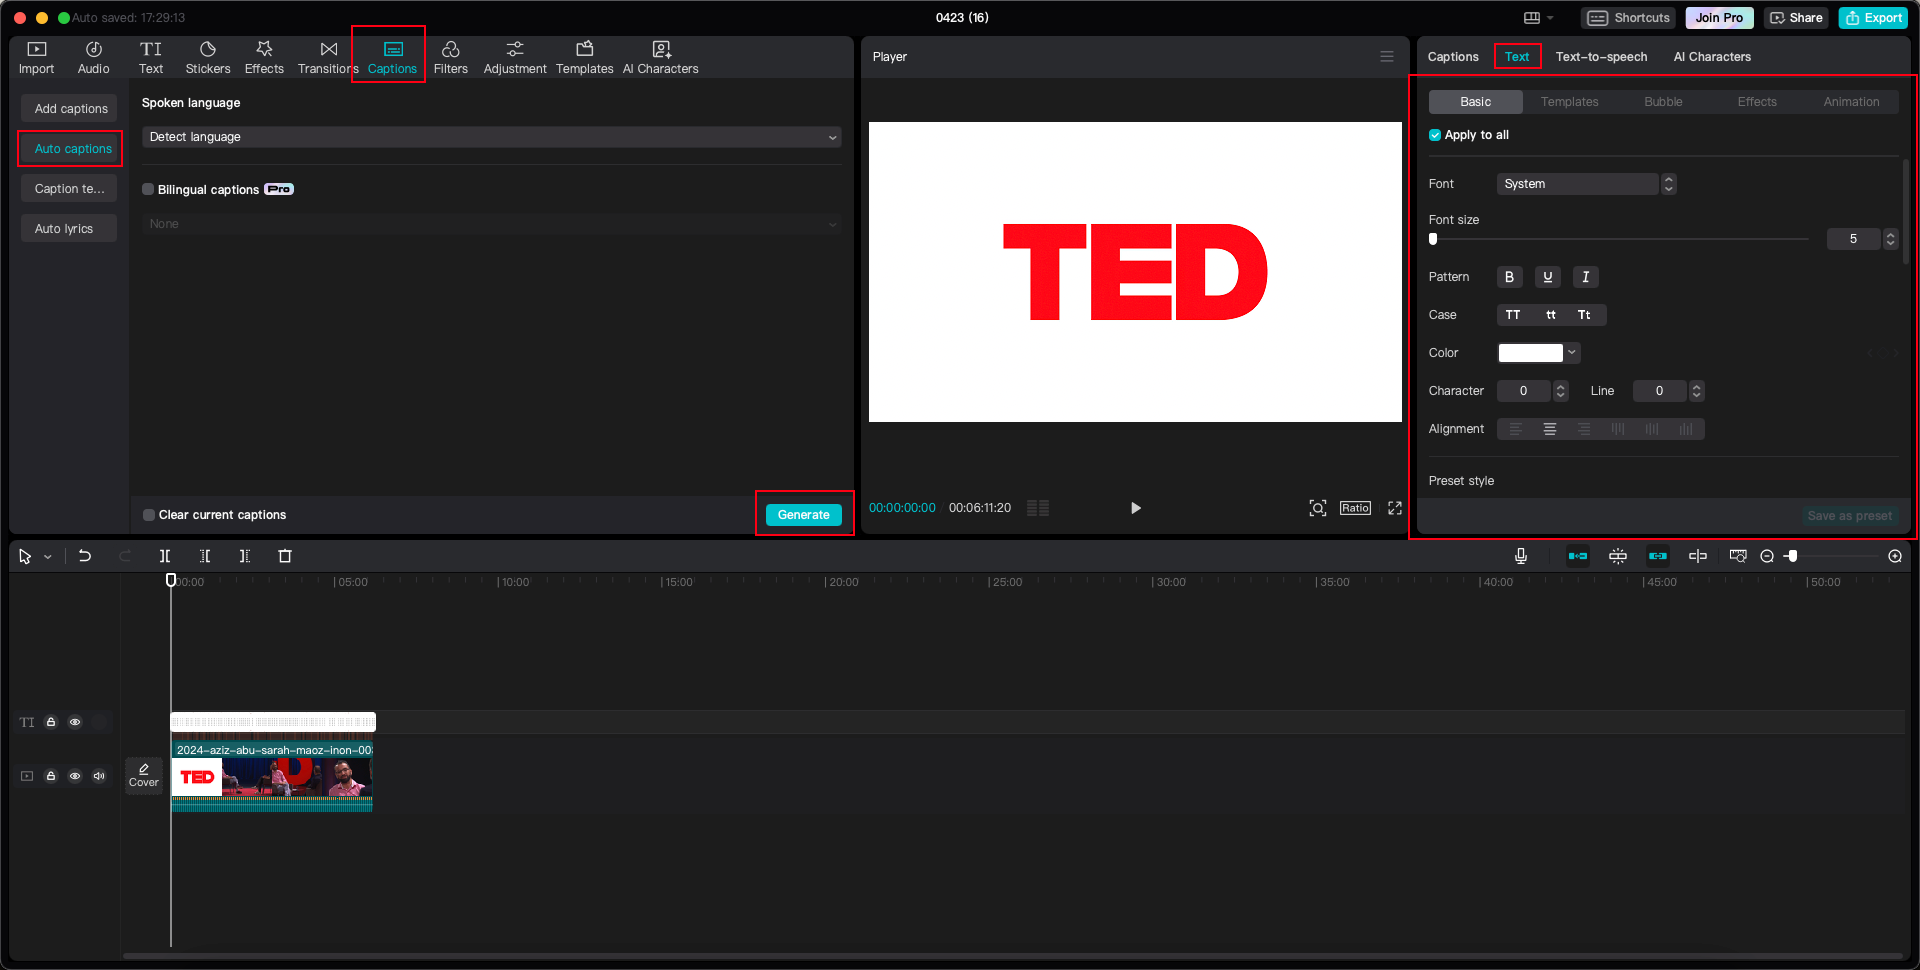
Step 2: Add Captions to Your Video
In the top-right toolbar, click “Captions,” then select “Auto Captions” and hit “Generate.” CapCut will automatically transcribe your video. Once done, customize the captions—adjust fonts, colors, sizes, or add animations for flair.
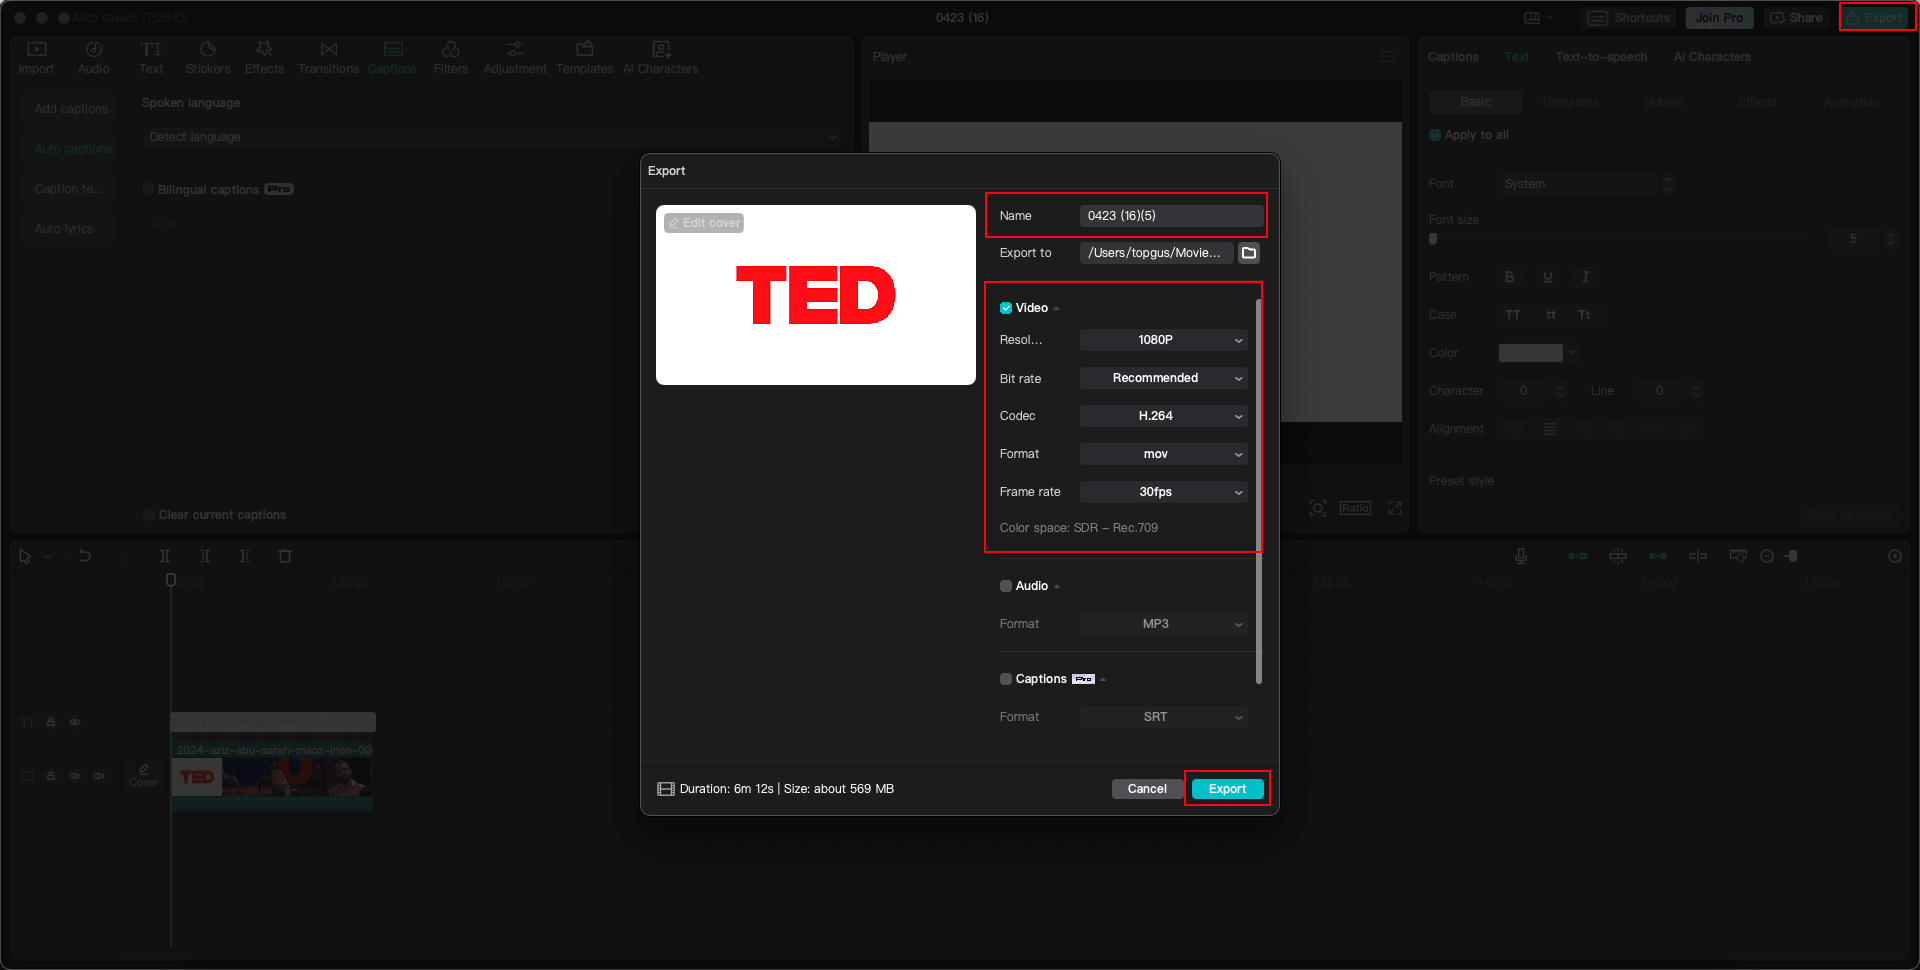
Step 3: Export or Share Your Video
When you’re satisfied, click “Export” to save your video. Choose your preferred settings for resolution, format, and frame rate, then download your captioned video.
How to Add Captions in Premiere Pro
For those using professional software, Adobe Premiere Pro is a top choice. Here’s how to add captions to videos with it.
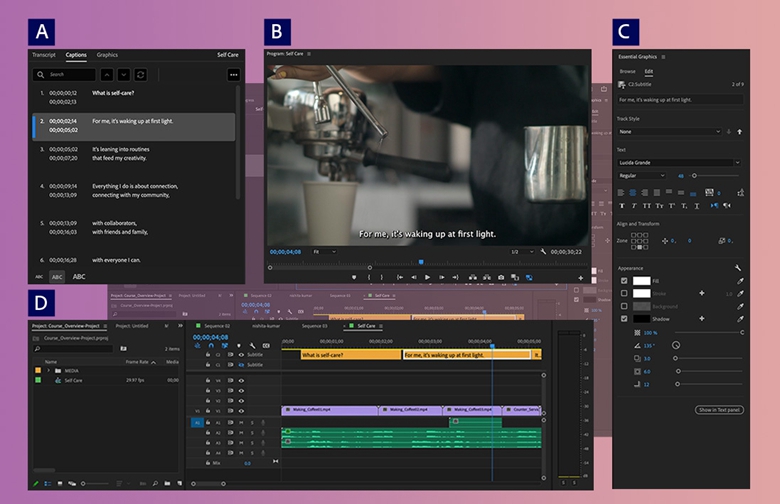
Open your project, then go to Window > Text to access the Captions Panel. Click “Transcribe Sequence,” select your audio track, language, and speaker count, then hit “Create.” Premiere will transcribe the video. Review and edit the text, then click “Create Captions” to add them to your timeline.
How to Add Captions in iMovie
Mac users often rely on iMovie for its simplicity. Here’s how to add captions to videos with it.
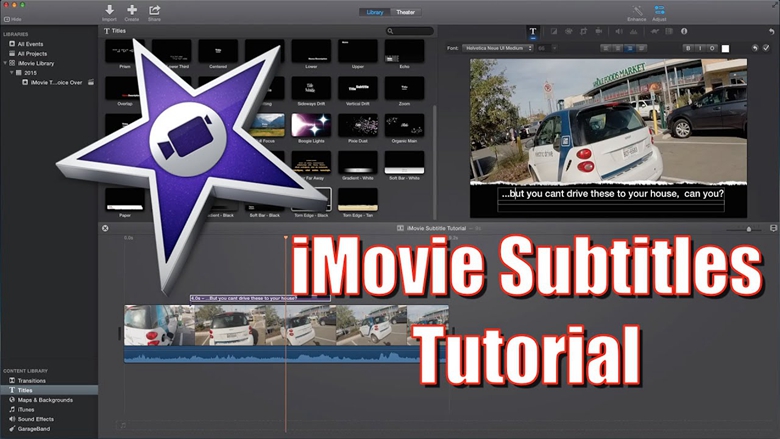
Create a new project and import your video. Go to “Titles,” choose the “Lower” style, and type your captions. Adjust the duration by dragging the text clip in the timeline—5 seconds per caption is a good rule of thumb. Copy and paste captions throughout the video, and use brackets for non-speech sounds like [music]. Export as an MP4 or share directly to platforms.
Wrapping Up
And there you have it—a comprehensive guide on how to add captions to videos! We’ve covered why captions matter, key considerations, and step-by-step instructions for CapCut, Premiere Pro, and iMovie.
If you want the easiest option, CapCut is ideal—it’s free, versatile, and saves time with auto-captions. But Premiere Pro and iMovie are great alternatives if you’re already using them.
Remember, good captions are readable, accurate, and synced. Take your time to get them right, and your audience will thank you.
CapCut — Your all-in-one video & photo editing powerhouse! Experience AI auto-editing, realistic effects, a huge template library, and AI audio transformation. Easily create professional masterpieces and social media viral hits. Available on Desktop, Web, and Mobile App.
Frequently Asked Questions
How can I add captions to videos on an iPhone?
Use apps like CapCut or iMovie from the App Store—both are user-friendly and effective.
What’s the easiest way to add subtitles automatically?
CapCut’s “Auto Captions” feature under the “Text” menu generates captions based on audio automatically.
Can I add captions to videos for free?
Yes, CapCut offers free captioning with no hidden costs or subscriptions.
How do I add subtitles without installing software?
Use CapCut’s online editor—just upload your video on their website and add captions there.
Is there a free way to add subtitles on Mac?
CapCut has a free Mac version. Download it or use the online editor to add captions without cost.
Some images sourced from CapCut.