TOOL HUNTER
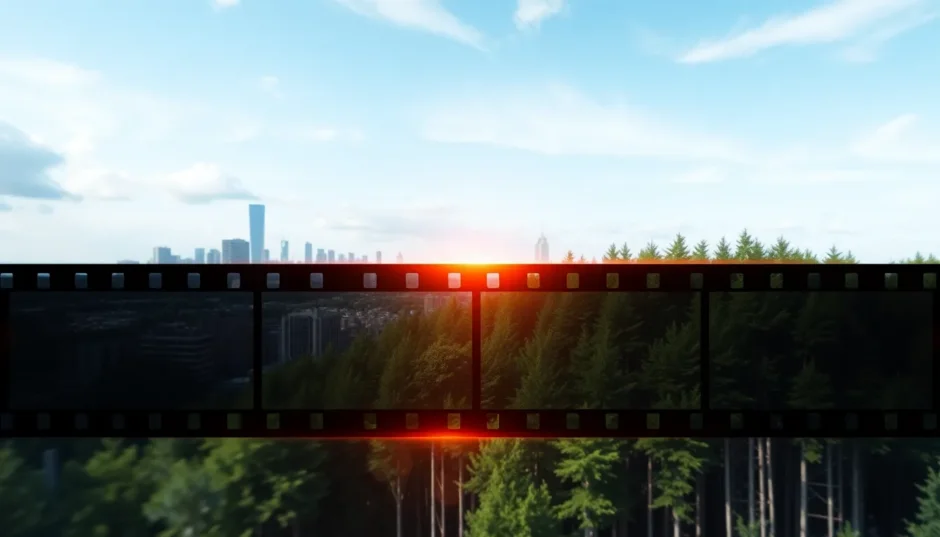

Ever watched a movie where one scene melts smoothly into the next? That’s the magic of a dissolve transition! It’s one of the most classic and widely used techniques in video editing, and once you understand it, you can make your own videos look way more polished and professional.
Whether you’re editing a vlog, a short film, or a TikTok clip, knowing how and when to use a dissolve can totally change the vibe of your content. It helps your story flow better and keeps your viewers engaged without those awkward, jumpy cuts.
In this guide, we’ll break down everything you need to know about dissolves—starting with the basic dissolve definition, how it’s used in films, the different types you can play with, and even how to create your own step by step. Let’s dive in!
What Exactly is a Dissolve in Video Editing?
So, what is a dissolve? In simple terms, it’s a transition where one shot gradually disappears while the next one appears at the same time. Imagine two images overlapping for a moment—like a gentle handoff rather than an abrupt switch. This creates a soft, blended effect that feels smooth and intentional.
But the dissolve definition isn’t just technical—it’s a storytelling superpower. Filmmakers use dissolves to show that time has passed, like when a character goes from being a kid to an adult in just a few seconds. It can also signal a change in location or mood. Instead of just hopping from one place to another, a dissolve helps the audience stay connected to the story.
Think about a travel vlog: you might see someone packing their suitcase, and then—through a dissolve—the scene smoothly changes to them arriving at a beautiful beach. It feels natural, right? That’s the power of a well-placed dissolve.

How Do Editors Use Dissolve Transitions?
Dissolves are super flexible and can be used in tons of creative ways. Pretty much all video editing software—from fancy professional programs to free mobile apps—includes dissolve effects because they’re such a fundamental part of visual storytelling.
One of the biggest reasons editors use dissolves is to make scene changes feel seamless. Instead of a hard cut that can feel jarring, a dissolve guides the viewer gently from one moment to the next. It keeps things flowing so the audience doesn’t get distracted.
Dissolves are also great for setting a certain mood. Because they have a soft, dreamy feel, they can make a scene seem nostalgic, thoughtful, or even a little mysterious. For example, if a character is remembering something from the past, a dissolve can help show that we’re entering a flashback.
Another classic use is to show the passage of time. Let’s say you’re making a video about a plant growing. Instead of just cutting from a seed to a full-grown tree, you could use a series of dissolves to smoothly show each growth stage. It looks way more elegant!
Dissolves also work wonders when you’re changing locations. If your video moves from a busy city to a calm forest, a dissolve can connect those two places visually without confusing the viewer.
And let’s be real—dissolves just make your videos look more pro. Even if you’re new to editing, using dissolves in the right places can make your work feel more intentional and well-crafted.
Different Types of Dissolve Transitions
Not all dissolves are created equal! There are actually several types, each with its own style and purpose. Here’s a quick tour through some of the most popular ones.
Standard Dissolve
This is the most basic type of dissolve. One shot fades out while the next fades in—simple but effective. It’s perfect for general use, like showing time passing or moving between two related scenes.

Cross Dissolve
A cross dissolve (or crossfade) is similar to a standard dissolve, but both shots overlap more equally. You see both images blended together for a moment before the new one takes over. It’s super smooth and works in almost any situation.

Fade to Black / Fade to White
This one’s a classic. The shot gradually fades to black or white, often used to show that a scene—or the whole video—is ending. Fade to black feels final, while fade to white can seem more hopeful or like a new beginning.

Match Dissolve
This is a creative one! A match dissolve blends two shots that have something visually in common—like similar shapes, colors, or movements. For example, a shot of the moon could dissolve into a shot of a basketball because both are round. It’s a clever way to connect ideas.

Ripple Dissolve
Want to add some flair? A ripple dissolve makes it look like the first shot is rippling away as the next one appears. It’s a fun, dynamic effect that’s great for dream sequences or flashbacks.

Blur Dissolve
In a blur dissolve, the first shot gets blurry before sharpening into the next one. This can create a dreamy, disorienting, or soft look—perfect for showing a character’s dizziness or a hazy memory.

Color Dissolve
This type uses color to blend the two shots. For example, the first shot might dissolve into a burst of red before the next scene appears. It’s a stylistic choice that can really set the mood.

Zoom Dissolve
A zoom dissolve combines zooming with dissolving. One shot zooms out while the next zooms in, all while blending together. It adds energy and motion to your transition.

Morph Dissolve
This one’s advanced but super cool! The first shot actually morphs and transforms into the second shot. It’s great for showing changes, like a kid growing up or an object transforming into something else.

Shape Dissolve
Here, the transition happens through a shape—like a heart, star, or circle. The first shot disappears into the shape, revealing the next shot. It’s playful and great for adding a creative touch.

How to Create Your Own Dissolve Transition
Ready to make your own dissolves? It’s easier than you think, especially with a tool like CapCut. CapCut is a free, user-friendly desktop video editor that’s perfect for beginners and pros alike. Here’s how to get started.
Step 1: Import Your Clips
First, download and install CapCut. Open it up and click “Create project.” Then, import your video clips by clicking the import button and selecting the files from your computer. They’ll show up in your media library.

Step 2: Add a Dissolve Effect
Drag your clips down to the timeline in the order you want them. Click on the “Transitions” icon in the toolbar—you’ll see a bunch of cool effects. Search for “dissolve” and pick the one you like. Drag and drop it between your two clips. You can make the dissolve longer or shorter by dragging its edges on the timeline.

Step 3: Export Your Video
When you’re happy with your edit, hit the “Export” button. Choose your settings—like resolution and format—and let CapCut do its thing. Once it’s done, you can share your video anywhere!

Why CapCut is Perfect for Dissolves
CapCut isn’t just a simple editor—it’s packed with features that make creating pro-level videos easy. You get tons of effects, transitions, text tools, and even advanced options like color correction and audio editing. Plus, it’s totally free!
CapCut — Your all-in-one video & photo editing powerhouse! Experience AI auto-editing, realistic effects, a huge template library, and AI audio transformation. Easily create professional masterpieces and social media viral hits. Available on Desktop, Web, and Mobile App.

Tips for Using Dissolve Transitions Like a Pro
Dissolves are awesome, but only if you use them the right way. Here are some do’s and don’ts to keep in mind.
Do use dissolves to show time passing or location changes. They make those transitions feel smooth and natural.
Do try to blend shots that have something in common—like similar colors or compositions. It makes the dissolve feel more intentional.
Do play with the duration. A slow dissolve feels dreamy, while a fast one feels energetic. Match it to the mood of your video.
Don’t overdo it. If you use dissolves between every single shot, they’ll lose their impact and make your video feel slow.
Don’t use dissolves in action scenes. Hard cuts work better for keeping the energy high and the pace fast.
Don’t forget context. If a scene is tense or urgent, a dissolve might kill the vibe. Always think about what fits the story.
Wrapping Up
And that’s a wrap! Now you know what a dissolve is, why it’s useful, and how to create your own. Whether you’re making movies, vlogs, or social media content, mastering the dissolve can take your videos to the next level.
Remember, the key is to use dissolves thoughtfully—where they make sense and add to your story. With a little practice, you’ll be using them like a pro in no time.
CapCut — Your all-in-one video & photo editing powerhouse! Experience AI auto-editing, realistic effects, a huge template library, and AI audio transformation. Easily create professional masterpieces and social media viral hits. Available on Desktop, Web, and Mobile App.
Frequently Asked Questions
What does “dissolve” mean in video editing?
In video editing, a dissolve is a transition where one shot gradually fades out while the next fades in, creating a smooth blend between scenes. It’s often used to show time passing or changes in location.
Can I control how long a dissolve lasts in CapCut?
Yes! In CapCut, you can easily adjust the length of a dissolve by dragging its edges on the timeline. Make it slow and dreamy or quick and subtle—it’s up to you.
How do I add a dissolve to my video?
It’s simple! Place two clips next to each other on the timeline, then drag a dissolve effect between them. CapCut makes it easy to customize the timing and style.
Some images sourced from CapCut.