TOOL HUNTER

Adding logos to your photos is one of those simple tricks that can really make your work stand out. Did you know that 93% of how people feel about a brand comes from their logo? That’s a huge number! Whether you’re running a small business, writing a blog, or just want to make your personal photos look cooler, learning how to add a logo to a picture is super useful.
If you’ve been searching for ways to add logo to photo, you’ve come to the right place. I’m going to show you six different methods using online tools that are actually easy to use. Each tool has its own special features, so you can pick what works best for you. We’ll start with CapCut because it’s really good for beginners, then check out five other options that also get the job done.
By the time you finish reading this, you’ll know exactly how to put logo on pictures without any stress. Let’s jump right in!
Why Learning to Add Logos Matters
Before we get into the actual steps, let’s talk about why putting logos on your photos is worth your time. When people see your logo on images, they start to recognize your brand. It’s like when you see a swoosh symbol and immediately think of a certain sports brand – that’s the power of logo recognition!
Also, if you’re sharing pictures online (which pretty much everyone does these days), having a logo on them gives you a bit of protection. It’s not perfect, but it makes it harder for people to use your photos without giving you credit. Plus, it just makes everything look more professional and put together.
Now let’s look at the actual ways you can learn how to add your logo to a photo.
Using CapCut for Adding Logos to Pictures
CapCut is becoming really popular for photo editing, and it’s especially great for adding logos. What’s cool about it is that it’s designed for regular people, not just professional designers. The interface is clean and doesn’t have a million confusing buttons everywhere.
The best part? It’s completely free. Like, actually free – no hidden costs or anything. That’s pretty rare these days when everything seems to want your credit card information.
How to add a logo to a picture with CapCut
Here’s how you can use CapCut to put your logo on pictures:
First, you’ll need to open CapCut and create an account if you don’t have one already. Don’t worry – it’s free and only takes a minute.
Next, upload the photo you want to work with. Just click the upload button and find your image file on your computer.
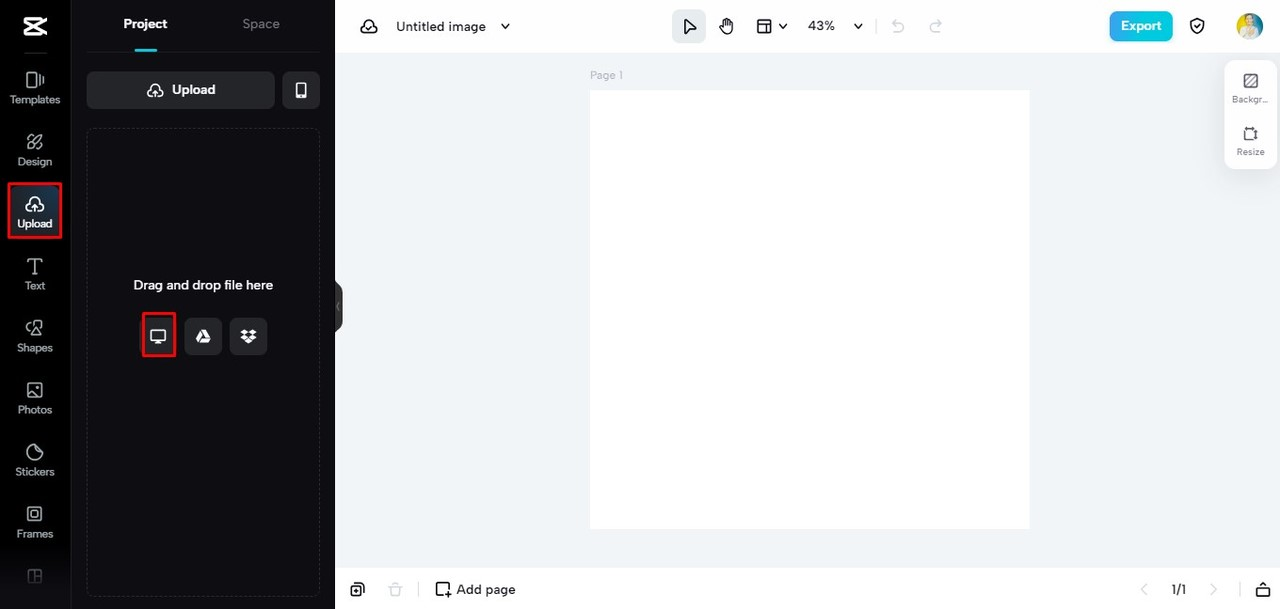
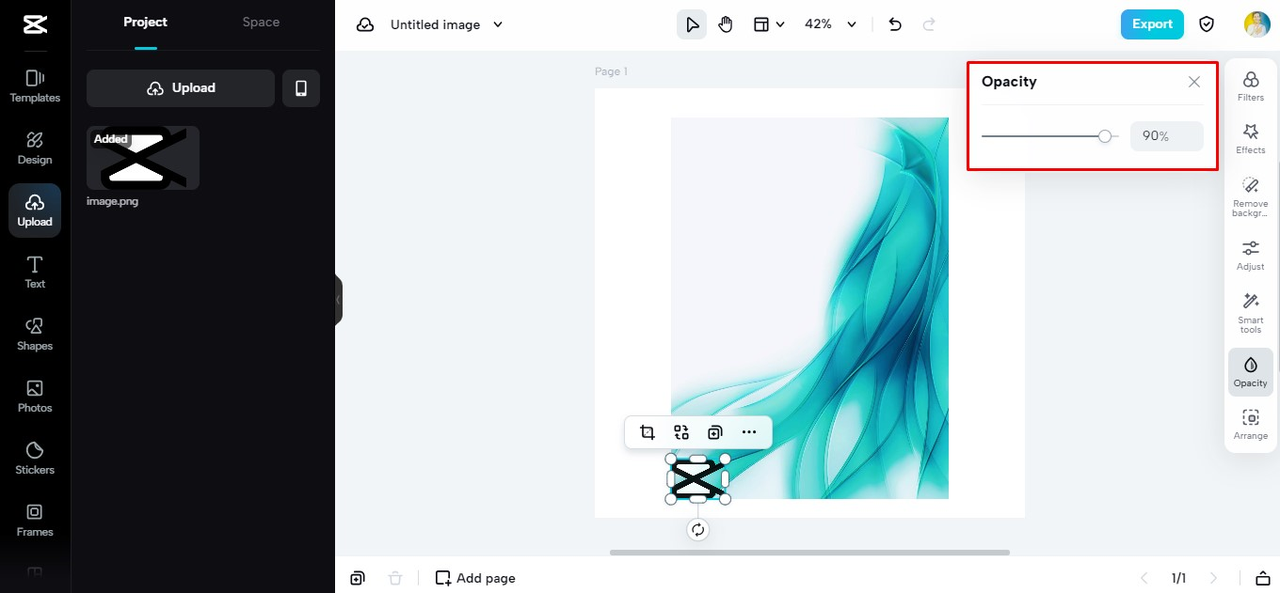
Now upload your logo file. Once it’s there, you can move it around, make it bigger or smaller, and even adjust how transparent it is. This is really useful if you want your logo to be noticeable but not too in-your-face.
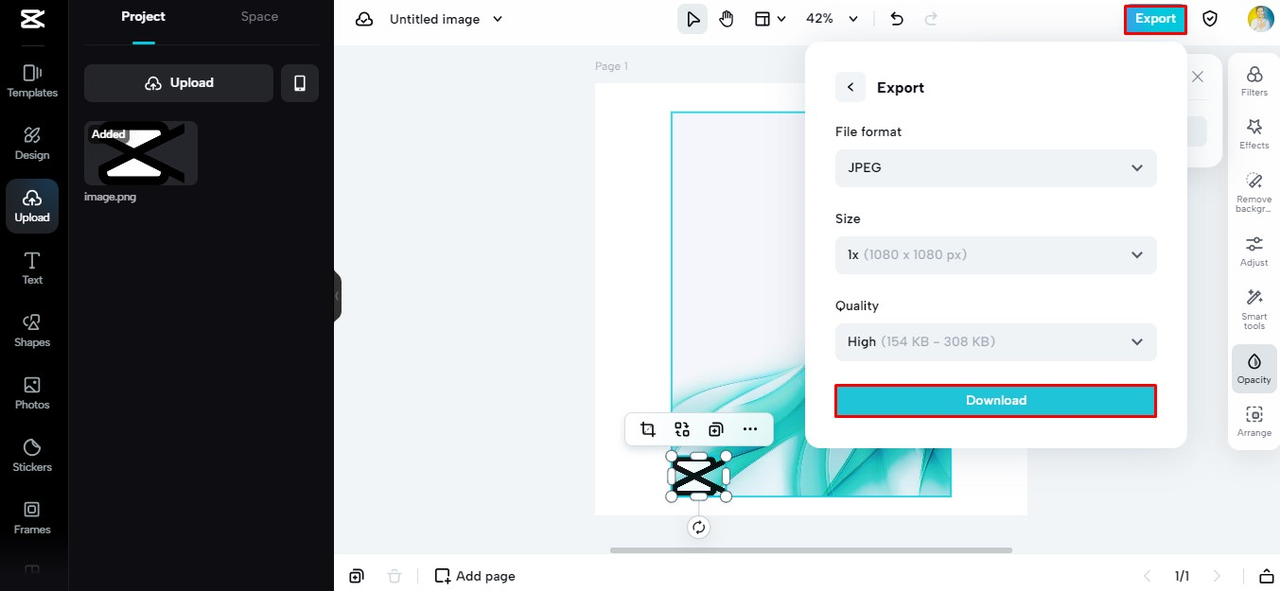
When you’re happy with how it looks, just hit save and download your new image with the logo perfectly placed.
Other awesome features in CapCut
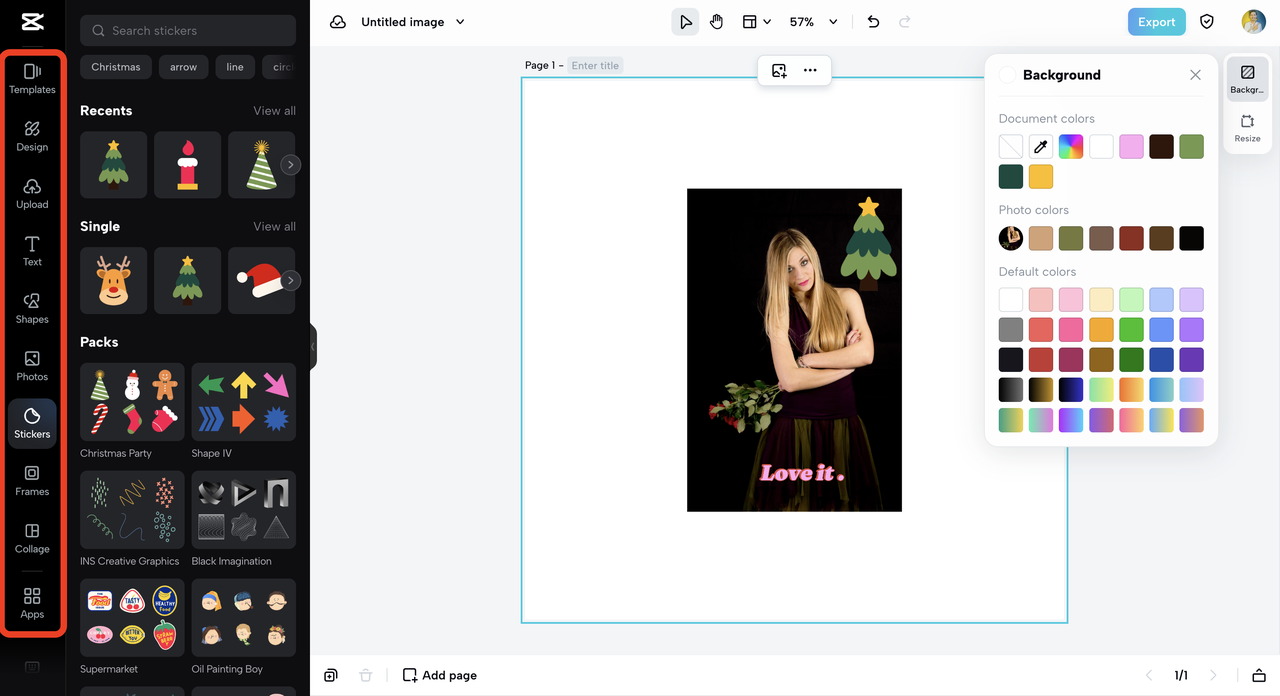
CapCut isn’t just about adding logos – it’s got tons of other cool features too. You can add text, stickers, and shapes to make your images more interesting and fun.
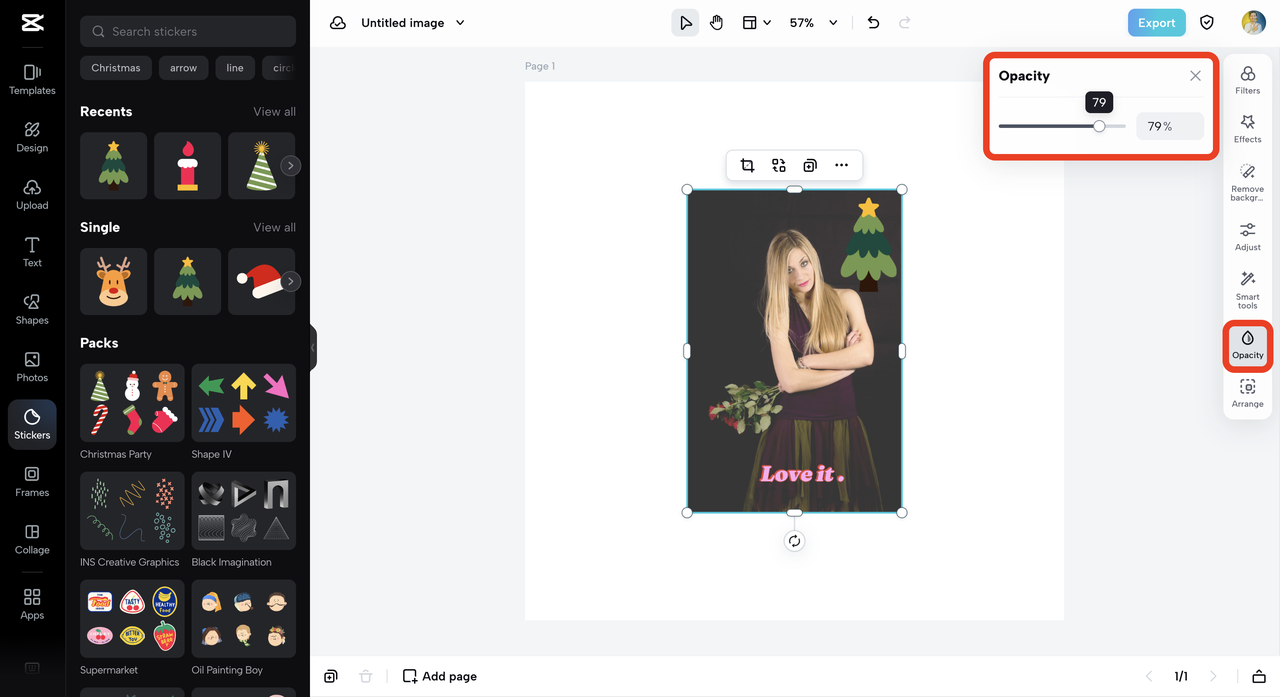
The opacity adjustment is super helpful when you’re figuring out how to add logo to photo. It lets you make your logo see-through so it blends nicely with your image instead of looking like it was just slapped on top.
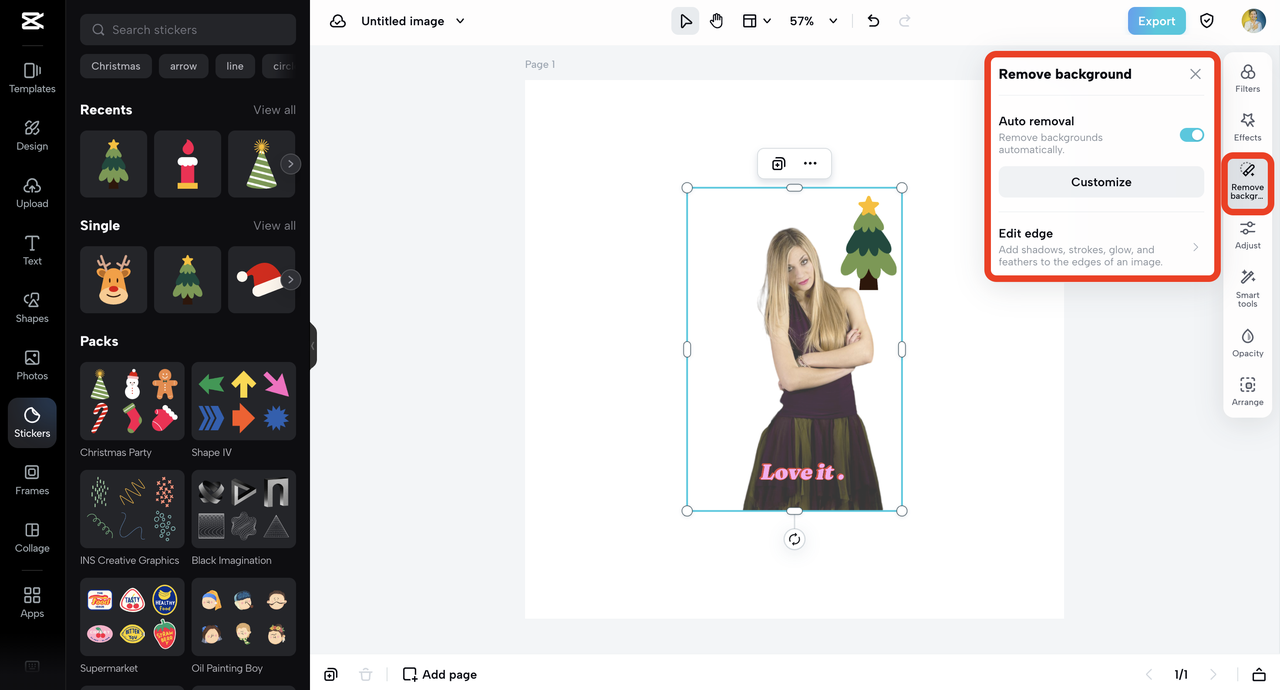
There’s also this great background removal tool that lets you clean up your images and make the focus exactly where you want it.
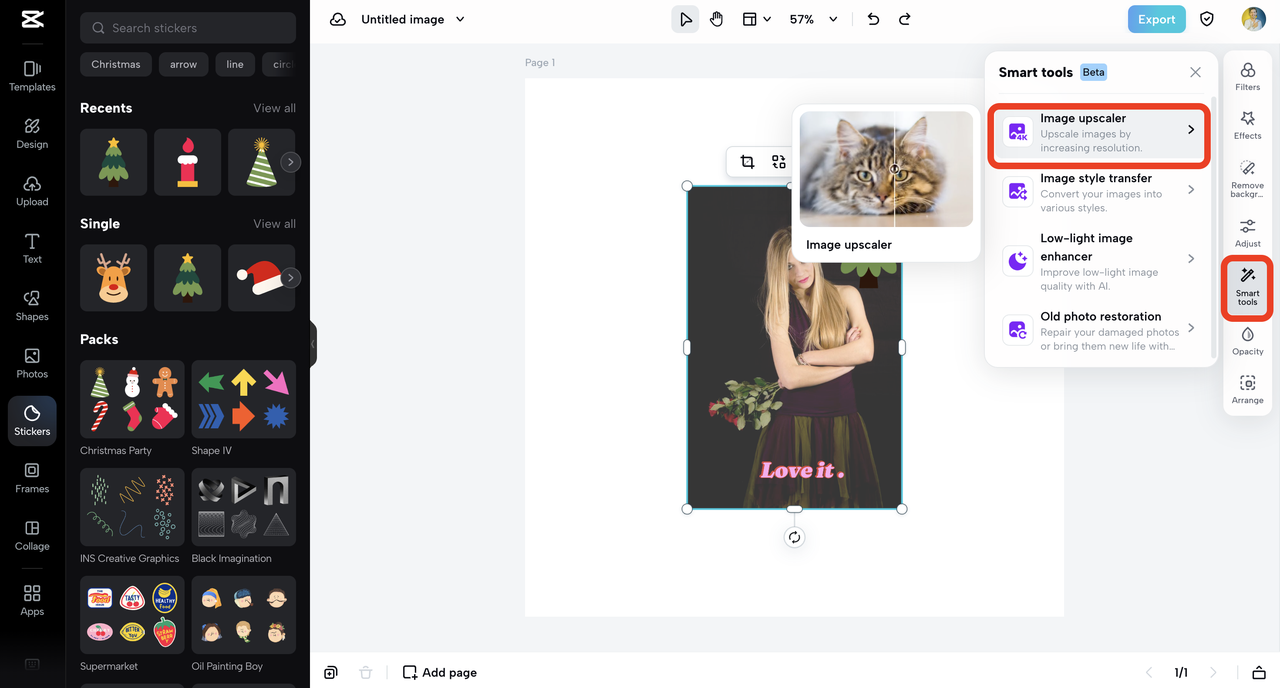
If you’re working with photos that aren’t the best quality, the image upscaler can help make them look sharper and clearer.
What’s good and not so good about CapCut
Like any tool, CapCut has its strengths and weaknesses. The good stuff includes how easy it is to use – even if you’ve never edited photos before, you’ll figure it out quickly. The quality of the final images is really professional-looking, and it has way more features than just logo adding.
On the not-so-great side, since it’s an online tool, you need internet to use it. Also, you do have to create an account, which some people might not love.
How much it costs
Here’s the best part – CapCut is 100% free! No payments, no subscriptions, no sneaky costs. This makes it perfect if you’re just starting to learn how to add a logo to a picture and don’t want to spend money right away.
CapCut — Your all-in-one video & photo editing powerhouse! Experience AI auto-editing, realistic effects, a huge template library, and AI audio transformation. Easily create professional masterpieces and social media viral hits. Available on Desktop, Web, and Mobile App.

Adding Logos with IO Tool
IO offers a super simple online tool that’s specifically made for adding logos to photos. It’s designed to be straightforward and efficient, which is great when you just want to quickly add a logo without dealing with complicated software.
The IO tool is completely free, and you don’t even need to create an account or sign up for anything. This makes it really convenient for those quick logo additions when you’re in a hurry.
Steps for adding logos to photos with IO
Using IO to add your logo to pictures is pretty straightforward:
First, go to the IO add logo to photo tool and upload your image.
Then, click on the “Add Logo Image” button and upload your logo file.
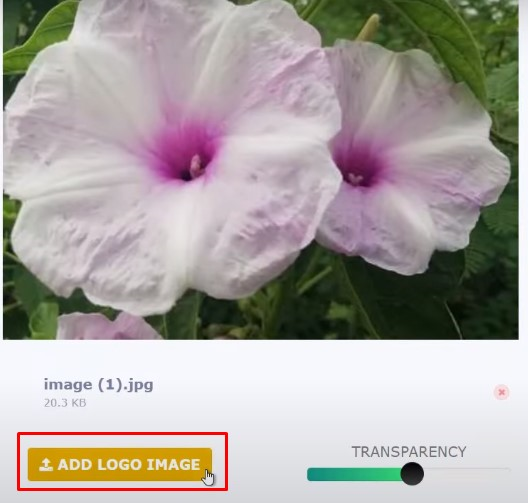
Use the transparency slider to adjust how see-through your logo appears. This helps blend the logo with your photo so it doesn’t look awkward or out of place.
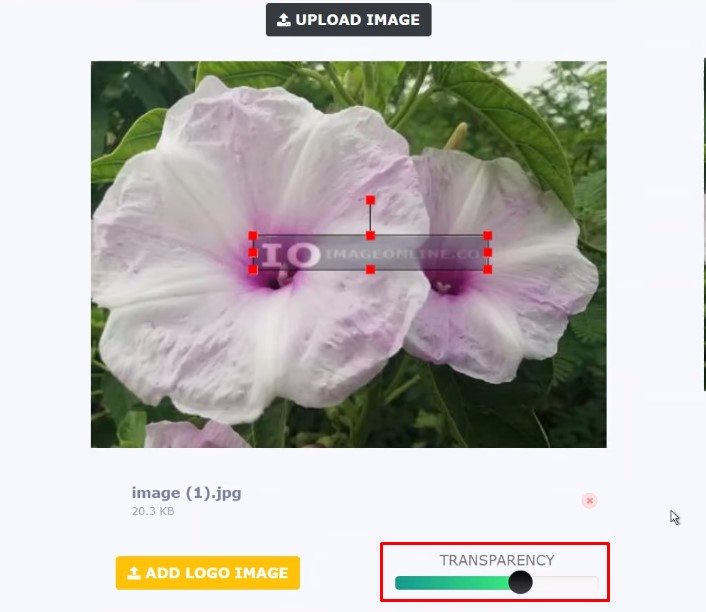
Finally, take a look at how your image looks with the logo added, and download it in either PNG or JPG format.
The good and bad of IO
IO’s logo adding tool has some nice benefits. It’s really simple to use with an interface that’s perfect for beginners. You don’t need to sign up or create an account, which is great if you hate giving out your email address. Plus, it processes your images right on your device, which means your photos stay private and secure.
On the downside, IO doesn’t have many editing features beyond adding logos. It’s mainly focused on just that one job. Also, since it’s an online tool, you need internet connection to use it.
Cost information
The IO add logo to photo tool is completely free to use. There are no hidden charges or limits on how many photos you can edit. This makes it a great option if you need to quickly learn how to put logo on pictures without spending any money.
Using Fotor for Logo Addition
Fotor is another great online photo editing tool that includes features for adding logos to your images. It’s user-friendly and offers a good range of editing tools to make sure your logo fits perfectly with your photo.
Fotor works well for both beginners and people who have some experience with photo editing. The platform makes it quick and efficient to add logos to your pictures while keeping everything looking professional.
How to add logo to photo with Fotor
Here’s how you can use Fotor to put your logo on pictures:
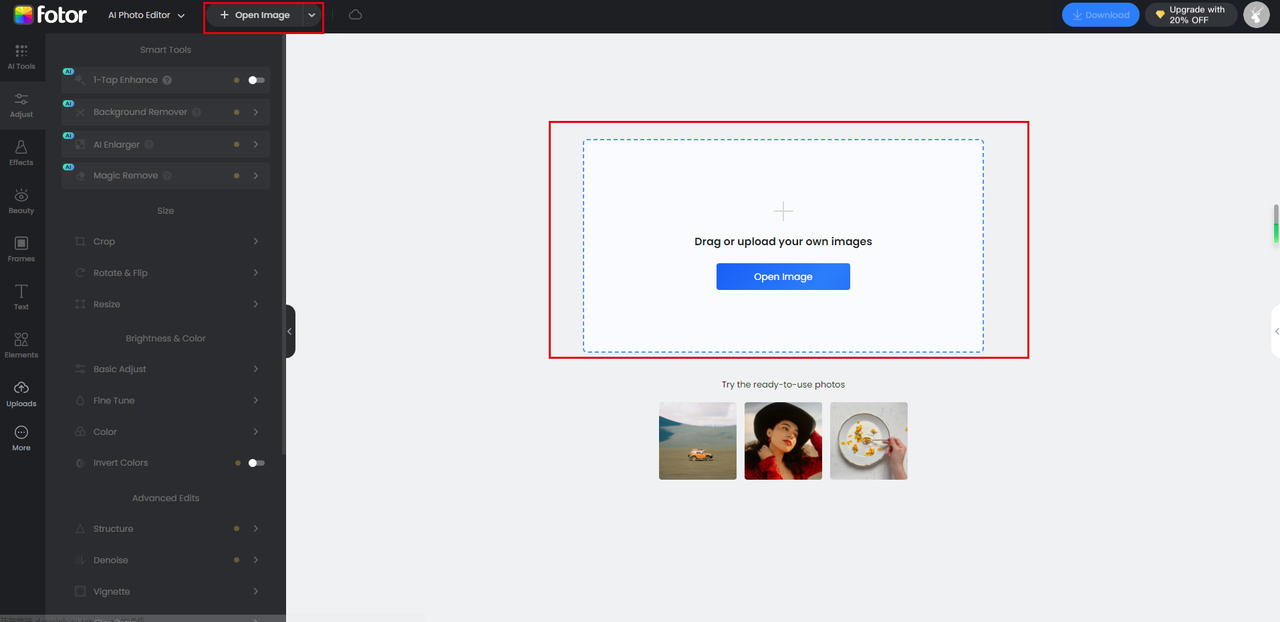
First, go to Fotor’s “add logo to photo” feature and upload your photo.
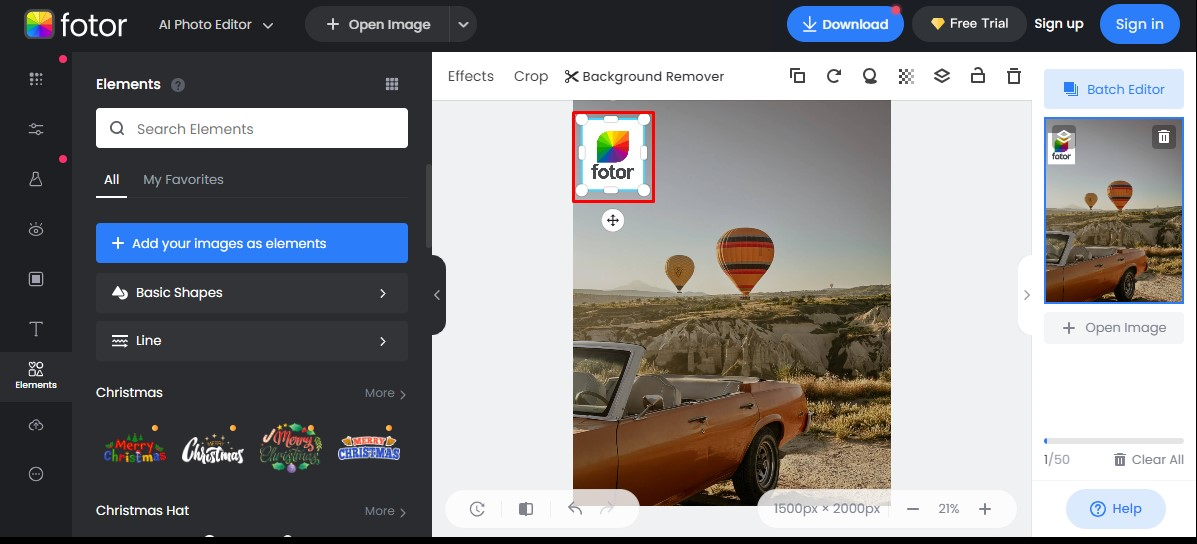
Drag and drop your logo onto the photo and move it to where you want it.
Use the editing tools to resize, rotate, and adjust how transparent your logo is until it looks just right.
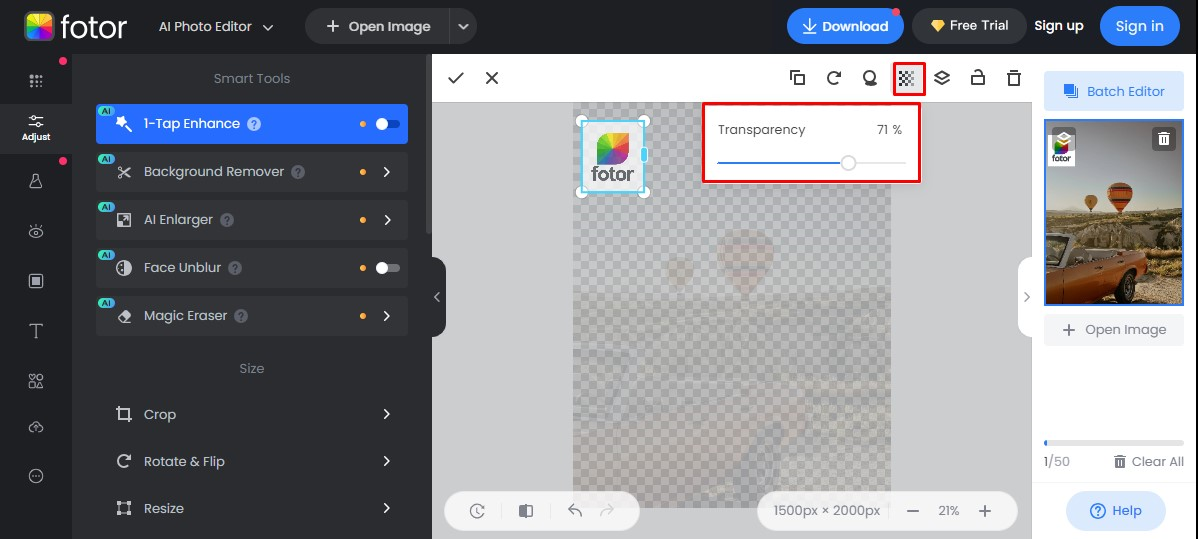
When you’re happy with how everything looks, export the photo in high-resolution format and download it to your device.
What’s good and not so good about Fotor
Fotor has several advantages when it comes to learning how to add your logo to a photo. The process is pretty easy and fast with a clean interface. It offers good editing tools including cropping, rotating, resizing, and opacity adjustments. Plus, it lets you export in high resolution so your images keep their quality.
On the less positive side, Fotor needs an internet connection since it’s an online tool. Also, while it has good basic features, it might not have some advanced editing capabilities that professionals might want.
Pricing details
Fotor offers both free and paid versions. The free version covers basic features, which might be enough if you’re just learning how to add a logo to a picture. If you need more advanced tools, Fotor Pro costs about $3.33 per month, and Fotor Pro+ is around $7.49 per month.
Pixelixe for Logo Integration
Pixelixe is another online tool that helps you put logos into your photos smoothly. Whether you’re working on personal projects or professional branding, Pixelixe makes the process straightforward and accessible to users of all skill levels.
With its user-friendly interface and different editing options, Pixelixe helps you create polished-looking images with your logo added in just a few steps.
Steps for adding logos to photos with Pixelixe
Using Pixelixe to add your logo to pictures is quite simple:
Visit Pixelixe’s website and upload the photo you want to edit.
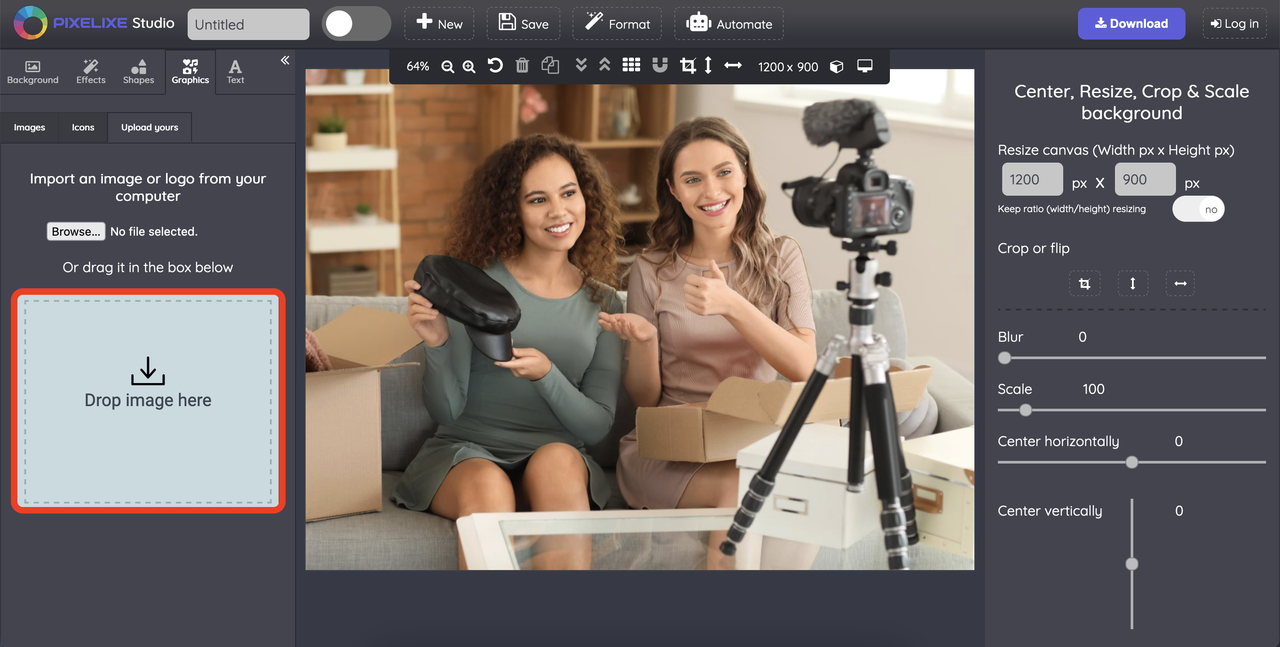
Upload your logo and place it on your image where you want it to appear. You can use the editing options to resize, rotate, and adjust how transparent your logo is.
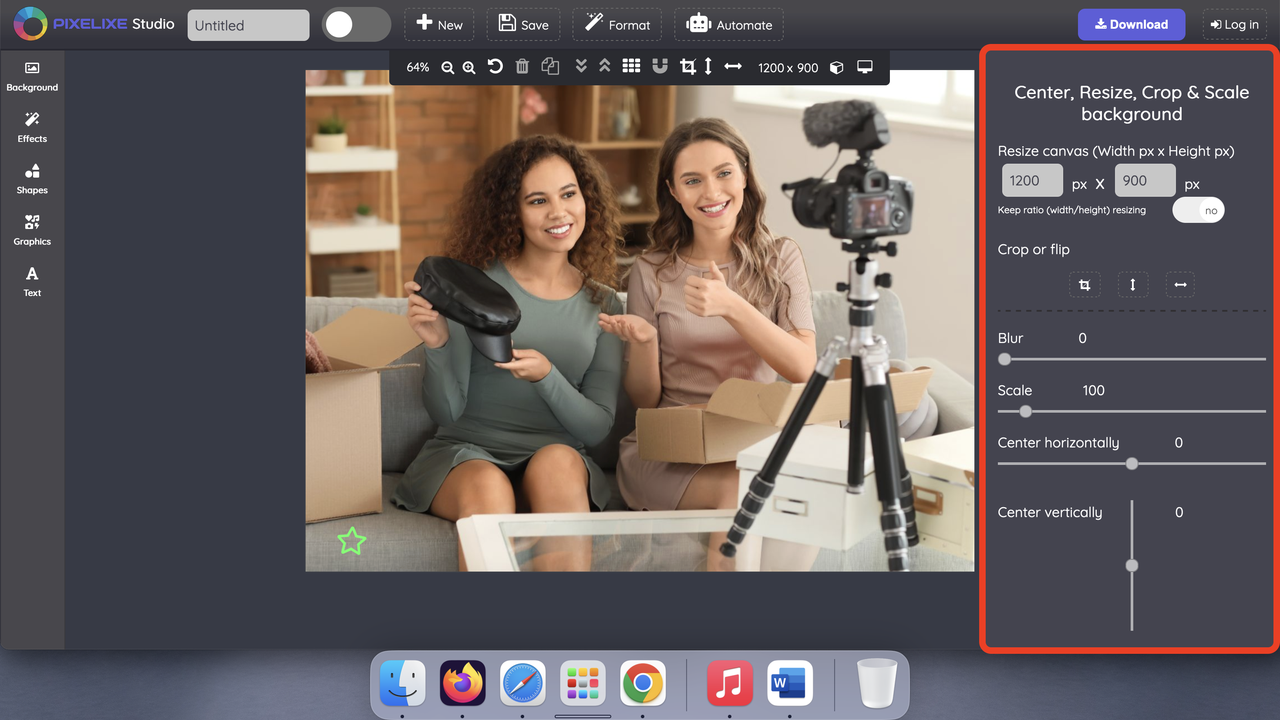
When you’re happy with how everything looks, save and download your photo with the logo added.
Pros and cons of Pixelixe
Pixelixe has several positive aspects. It has an intuitive interface that’s user-friendly for people with different experience levels. It offers versatile editing options including resizing, rotating, and opacity adjustments. Plus, it produces high-quality output that keeps a professional look.
On the downside, Pixelixe requires an internet connection since it’s an online tool. Also, it’s more focused on logo addition rather than advanced editing features, so it might not be the best choice if you need more comprehensive editing capabilities.
Pricing information
Pixelixe offers a free version with essential features, which might be enough if you’re just learning how to put your logo on a picture. They also have premium plans with more advanced options: Pixelixe Create costs $9 per month, Pixelixe Automate is $49 per month, Pixelixe Scale is $99 per month, and Pixelixe Enterprise is $249 per month.
Using Toolxox for Logo Addition
Toolxox provides a straightforward solution for adding logos to photos. It’s designed to be simple and convenient, whether you’re an aspiring influencer or a small business owner looking to personalize your images.
With its user-friendly interface and practical tools, Toolxox makes it easy to enhance your visual content by adding your logo without needing advanced technical skills.
How to add logo to photo with Toolxox
Using Toolxox to put your logo on pictures involves these steps:
Access Toolxox’s interface and upload your photo.
Upload your logo file.

Position the logo where you want it on your image and make any adjustments needed.

When you’re satisfied with the result, save and download your photo with the logo added.
Advantages and limitations of Toolxox
Toolxox has some nice features for those learning how to add a logo to a picture. It has a user-friendly interface that’s suitable for people with minimal editing experience. It offers logo customization options like resizing and opacity adjustments. Plus, it provides a quick and simple process for adding logos to photos.
On the less positive side, Toolxox has a somewhat outdated and traditional interface. Also, it’s primarily designed for basic logo integration rather than advanced editing features.
Cost details
Toolxox is completely free to use. There are no costs associated with using this online tool, making it accessible to everyone who wants to learn how to put logo on pictures without spending money.
CapCut — Your all-in-one video & photo editing powerhouse! Experience AI auto-editing, realistic effects, a huge template library, and AI audio transformation. Easily create professional masterpieces and social media viral hits. Available on Desktop, Web, and Mobile App.
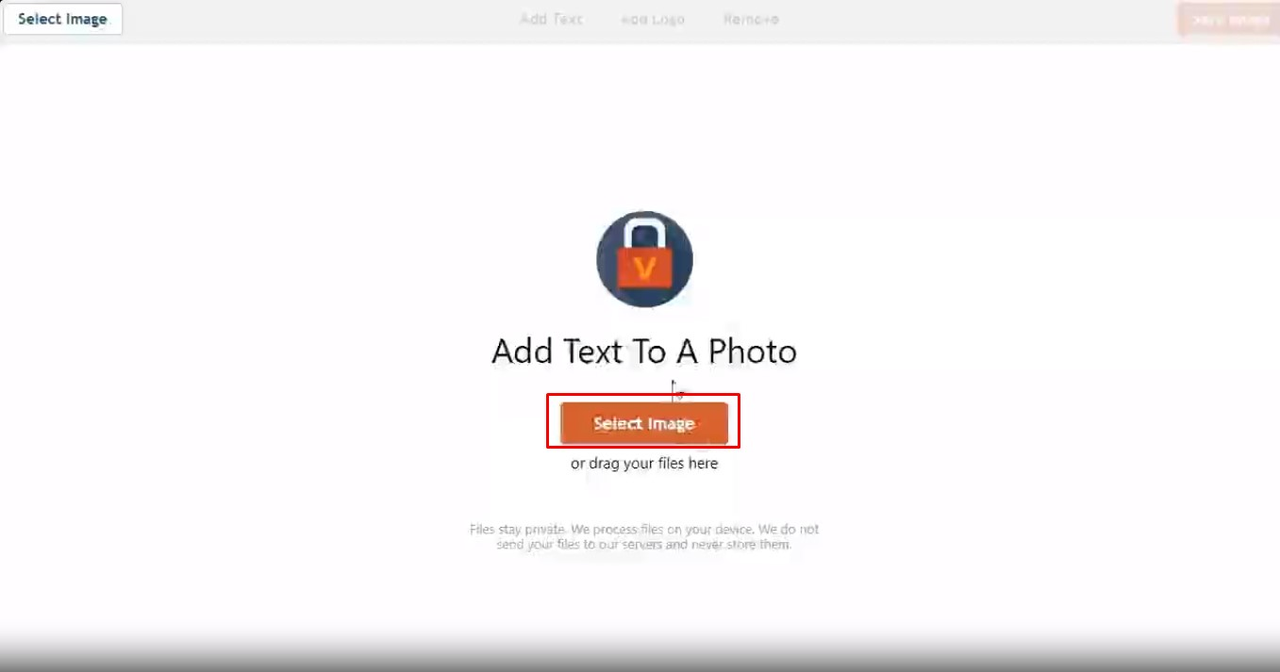
Visual Watermark for Adding Logos
Visual Watermark is a trusted platform for adding logos to photos while maintaining your brand identity. Whether you’re a content creator or business owner, this online tool simplifies the process of logo integration.
With its straightforward interface and range of editing features, Visual Watermark makes it easy to add logos to photos regardless of your skill level.
Steps for adding logos to photos with Visual Watermark
Using Visual Watermark to add your logo to pictures is straightforward:
Go to Visual Watermark’s website and upload your photo.
Upload your logo file and place it on your image where you want it.

Use the editing options to resize, adjust opacity, and fine-tune where your logo is placed.
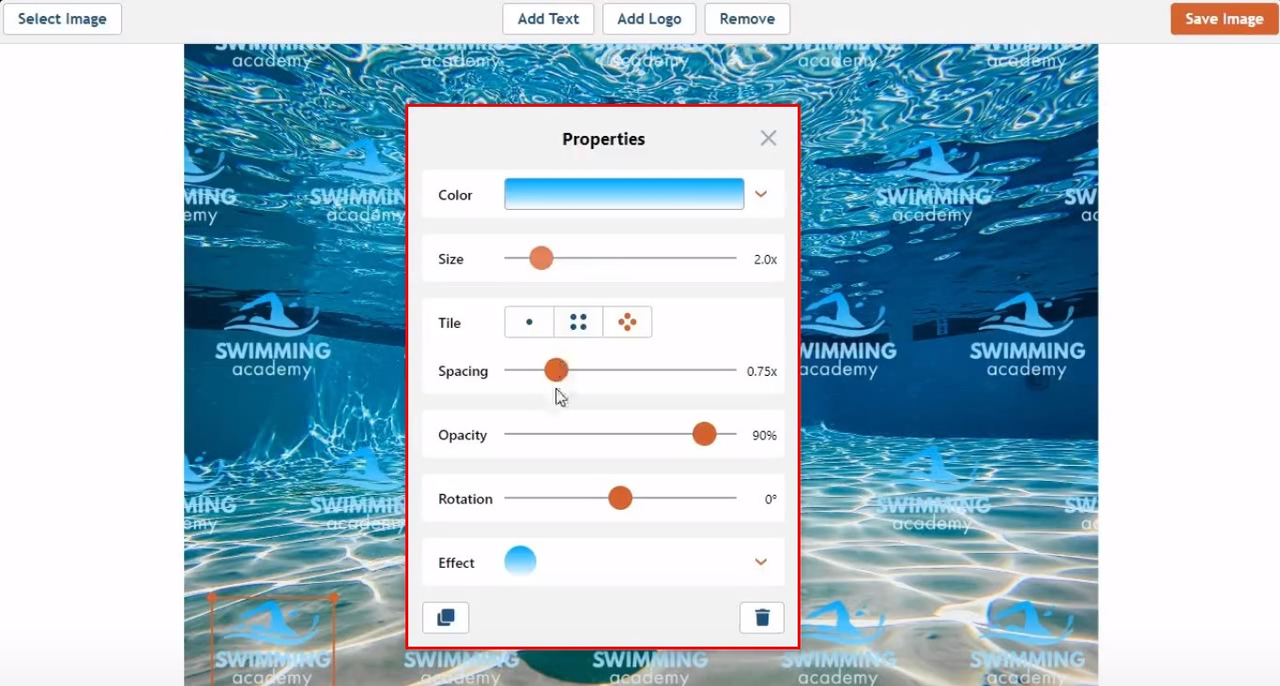
When you’re happy with how everything looks, save and download your photo with the logo added.
Pros and cons of Visual Watermark
Visual Watermark has several positive aspects. It has an intuitive interface that’s suitable for all users. It offers comprehensive editing features including resizing, opacity control, and precise placement. Plus, it ensures high-quality output that maintains a professional appearance.
On the downside, Visual Watermark requires an internet connection since it’s an online tool. Also, while there is a free version, some premium features may require a paid subscription.
Pricing options
Visual Watermark offers both free and paid plans. The free version provides basic functionality, while premium plans unlock additional features and options for users who need more advanced capabilities when learning how to add your logo to a photo.
Tips for Choosing the Right Tool
Now that you know about different tools for adding logos to photos, how do you pick the right one for you? Here are some things to think about when choosing a tool for learning how to add a logo to a picture:
First, consider whether you want to pay for a tool or use a free one. Many tools offer free versions that might be perfect for your needs. But paid versions often come with more features and better results.
Think about compatibility with your devices and file formats. Make sure the tool works well with your