TOOL HUNTER

Video content is everywhere in our digital lives. We capture moments, share experiences, and consume media daily. But large video files can quickly become a problem – they fill up your phone’s storage, take forever to upload, and might even fail to send through messaging apps or email.
The solution lies in compression – the process of making video files smaller while maintaining acceptable quality. While there are many tools available, one of the most accessible options might already be on your computer: VLC Media Player. Most people know VLC as a versatile media player that handles almost any format, but it also offers powerful video compression capabilities that many users overlook.
Learning how to compress video with VLC is an incredibly useful skill that can solve so many everyday digital problems. Whether you’re trying to free up space on your devices or need to share videos without dealing with frustrating file size limits, VLC provides straightforward solutions.
Table of Contents
- Understanding Video Compression Needs
- Three Effective Methods for VLC Video Compression
- Beyond Basic Compression: When You Need More Than VLC Offers
- Comprehensive Guide to Video Compression with CapCut
- Advanced Features That Extend Beyond Compression
- Choosing the Right Tool for Your Needs
- Practical Applications and Real-World Usage
- Conclusion: Empowering Your Video Management
Understanding Video Compression Needs
Before diving into the technical steps, it’s important to understand why you might need to reduce video size. Modern smartphones capture high-quality videos that can easily consume several gigabytes of storage for just a few minutes of footage. Social media platforms impose strict file size limits, and email services often block large attachments entirely.
When you compress videos with VLC, you’re not just shrinking files – you’re making your digital life more manageable. You can keep more memories on your devices, share content instantly with friends and family, and upload videos to platforms without worrying about size restrictions. The best part? With proper settings, you can achieve significant size reduction without noticeable quality loss.
Three Effective Methods for VLC Video Compression
VLC Media Player offers multiple approaches to reduce video size. Each method serves different needs and provides varying levels of control over the final output. Here are three practical techniques that anyone can master.
Adjusting Video Encoding Parameters
The most effective way to reduce video size through VLC involves tweaking the encoding settings. This method gives you precise control over the compression process by adjusting technical parameters that determine file size and quality.
Think of it this way: video compression involves balancing several factors. The codec (compressor-decompressor) acts like a language translator that determines how efficiently video information is stored. The bitrate controls how much data is used per second of video – lower bitrates mean smaller files but potentially reduced quality. Frame rate affects how many individual images appear each second, with lower rates saving space.
Here’s how to compress a video in VLC using encoding adjustments:
- Launch VLC and navigate to Media > Convert/Save from the top menu
- Click Add to select your video file, then click Convert/Save
- In the profile selection, choose an appropriate format like H.264 + MP3 (MP4)
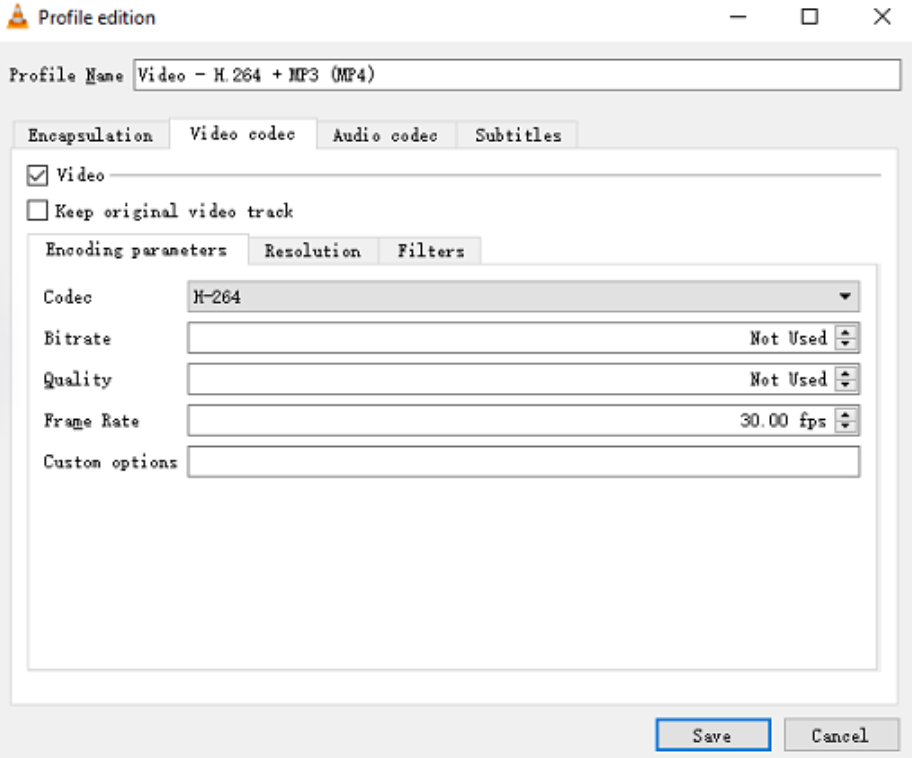
- Click the wrench icon to access advanced settings
- Under the Video codec tab, adjust bitrate, quality, and frame rate values
- Lower values typically create smaller files but may affect quality
- Set your output destination and click Start to begin compression
This method represents the core approach to VLC video compression, allowing you to fine-tune the balance between file size and visual quality based on your specific needs.
Converting to Different Video Formats
Sometimes the simplest way to reduce video size involves changing the file format entirely. Certain modern formats are specifically designed for efficient compression, allowing you to maintain quality while significantly reducing file size.
The H.265 (HEVC) format, for example, offers approximately double the compression efficiency of the older H.264 standard while maintaining similar video quality. This means you can cut file sizes in half without noticeable quality degradation, making it perfect for storing and sharing high-resolution content.
Here’s how to compress video with VLC through format conversion:
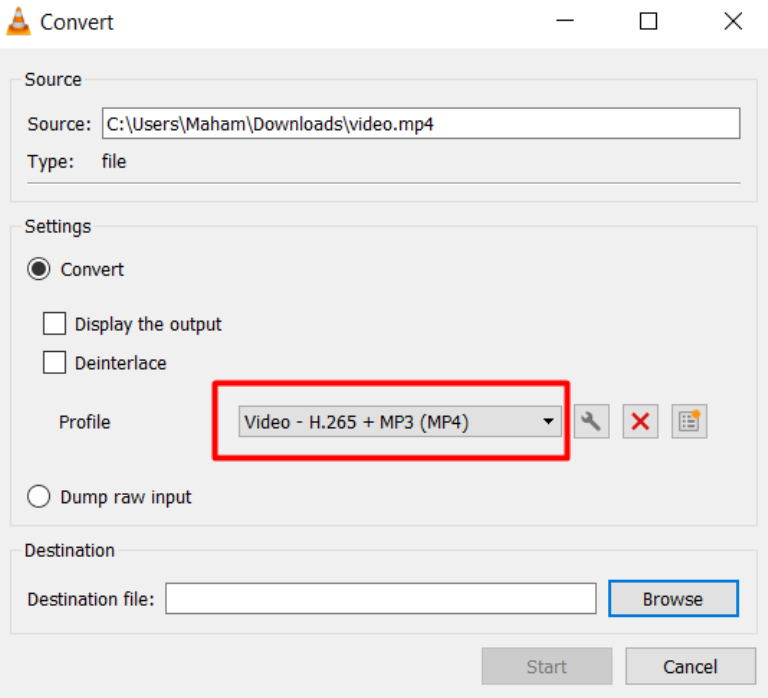
- Open VLC and access Media > Convert/Save
- Add your source video file
- From the profile dropdown, select a compression-optimized format like H.265
- Optionally customize settings by clicking the profile edit icon
- Choose your output location and start the conversion process
This approach is particularly useful when working with videos in older, less efficient formats. By converting to modern codecs, you can achieve substantial space savings while potentially improving compatibility with current devices and platforms.
Cropping to Reduce Dimensions
Another effective method to reduce video size through VLC involves cropping unwanted areas from your footage. This approach works particularly well when your video contains unnecessary peripheral content that doesn’t contribute to the main subject.
When you crop a video, you’re essentially removing pixels from the final output. Fewer pixels mean less data to store, resulting in smaller file sizes. This method works best when combined with other compression techniques for maximum effect.
Follow these steps to compress videos with VLC using cropping:
- Open your video in VLC and play it
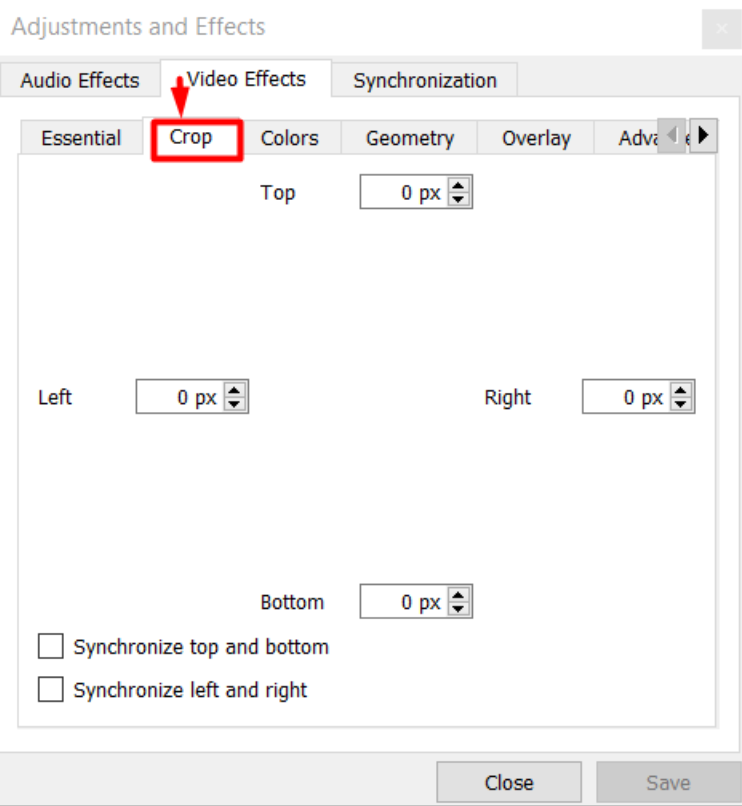
- Navigate to Tools > Effects and Filters
- Select the Video Effects tab and enable the Crop filter
- Adjust cropping values to remove unwanted areas
- Preview the results and apply when satisfied
- Use the Convert/Save function to export the cropped version
While cropping alone might not dramatically reduce file size, it becomes incredibly effective when combined with other compression methods. It’s also perfect for improving video composition while simultaneously saving space.
Beyond Basic Compression: When You Need More Than VLC Offers
While VLC provides excellent compression capabilities, it primarily functions as a media player rather than a full-featured video editor. There are situations where you might need more comprehensive tools – perhaps you want to compress your video while also adding creative elements, improving visual quality, or combining multiple clips.
This is where dedicated video editing software like CapCut becomes valuable. It offers robust compression features alongside a complete suite of editing tools, making it perfect for content creators who need more than basic file size reduction.
CapCut — Your all-in-one video & photo editing powerhouse! Experience AI auto-editing, realistic effects, a huge template library, and AI audio transformation. Easily create professional masterpieces and social media viral hits. Available on Desktop, Web, and Mobile App.

Download App | Sign Up for Free
CapCut serves as a powerful alternative for those who find VLC’s interface too technical or limiting for their creative needs. It provides a more intuitive, visual approach to video compression that appeals to beginners and experienced creators alike.
Why Consider CapCut for Your Video Projects?
There are several scenarios where CapCut might serve your needs better than VLC’s compression tools. If you’re working on projects that require combining multiple video clips, adding background music, incorporating text overlays, or applying visual effects, CapCut provides an integrated solution that handles everything in one workflow.
The software is specifically designed for content creation, whereas VLC focuses primarily on media playback with added conversion features. This fundamental difference means CapCut offers a more streamlined experience for editing and compression workflows.
Additionally, CapCut’s interface is designed with accessibility in mind. The compression settings are presented visually, with real-time file size estimates that help you make informed decisions about quality versus size trade-offs. This approach can feel less intimidating than VLC’s technical parameter adjustments for users who prefer a more guided experience.
Comprehensive Guide to Video Compression with CapCut
CapCut makes video compression accessible through a straightforward process that integrates seamlessly with its editing features. The software handles compression during the export phase, allowing you to focus on creative editing first and technical optimization last.
The process typically involves three main stages: importing your footage, editing your content, and exporting with optimized compression settings. This logical workflow ensures you don’t have to think about file size until you’re ready to save your final product.
Importing Your Video Footage
Getting your video into CapCut is designed to be as flexible as possible. The software supports multiple import methods to accommodate different working styles and source materials.
You can drag video files directly from your computer into the CapCut workspace, use the import button to browse your filesystem, or even pull content from cloud storage services. This flexibility ensures you can start working with your footage regardless of where it’s stored.
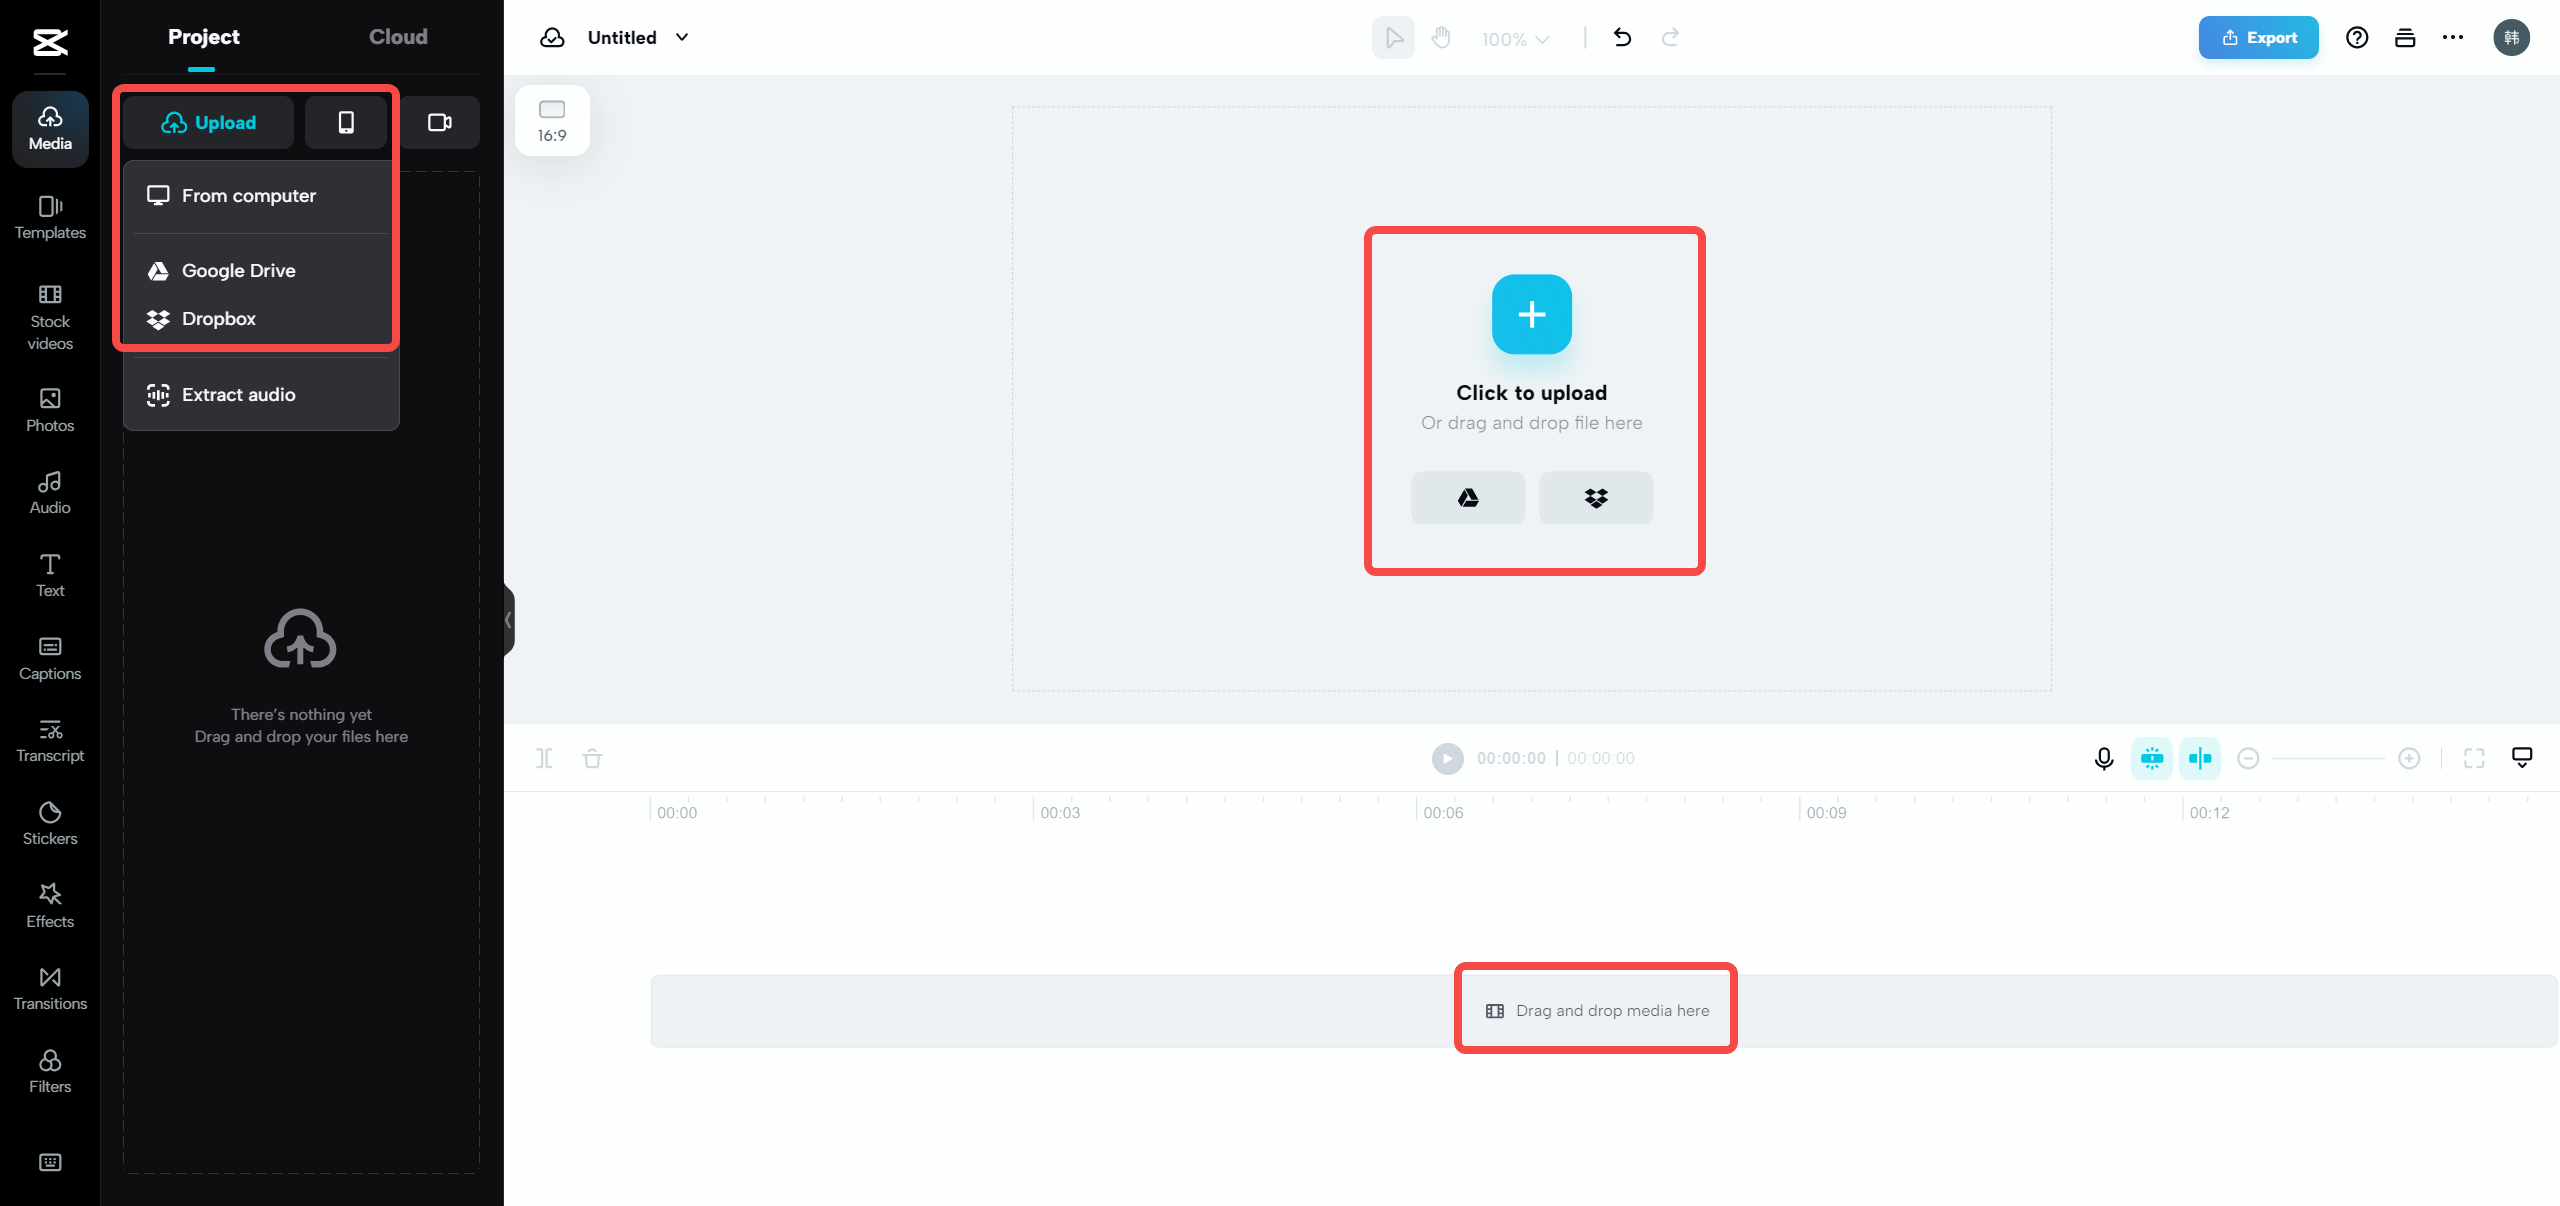
The software supports a wide range of video formats, eliminating concerns about compatibility issues that sometimes arise with other editors. This comprehensive format support means you can work with footage from various sources without needing preliminary conversions.
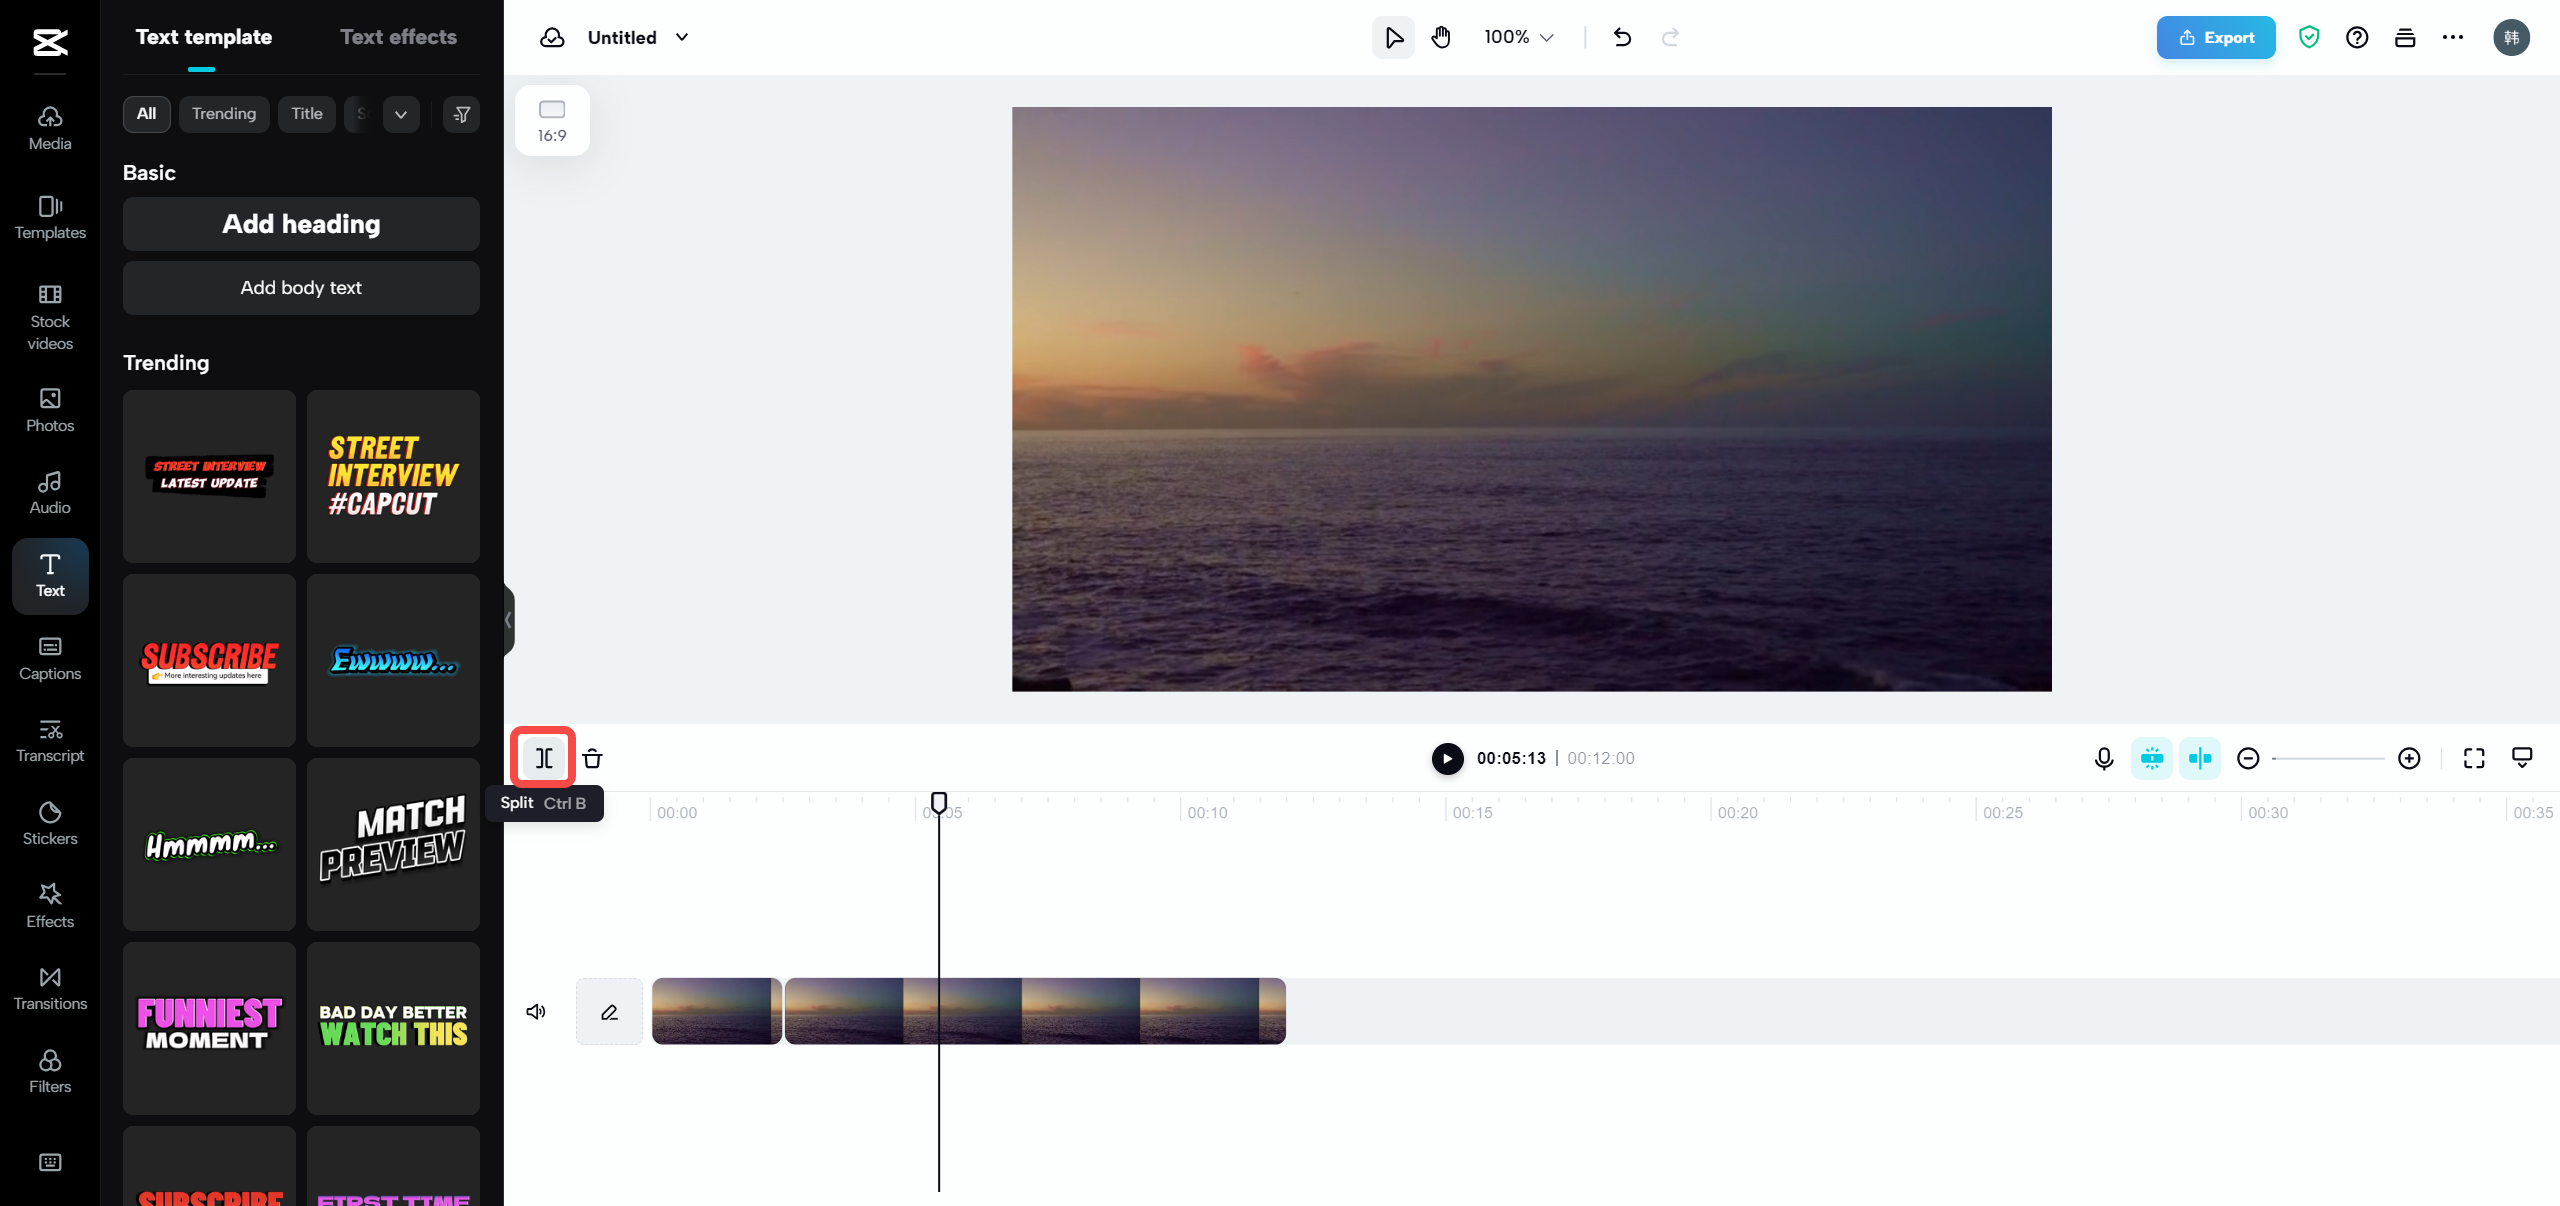
Editing and Enhancing Your Content
This is where CapCut truly distinguishes itself from basic tools like VLC. The editing phase allows you to not only compress your video but significantly enhance its quality and engagement potential.
You can trim unwanted sections, rearrange clips, apply color corrections, add transitions, incorporate text and graphics, and even use advanced features like motion tracking and green screen effects. Each of these edits can contribute to overall file size reduction while improving the final product.
The platform offers both basic editing tools for quick projects and advanced features for more sophisticated productions. This scalability makes it suitable for everything from simple social media clips to complex multi-layered video projects.
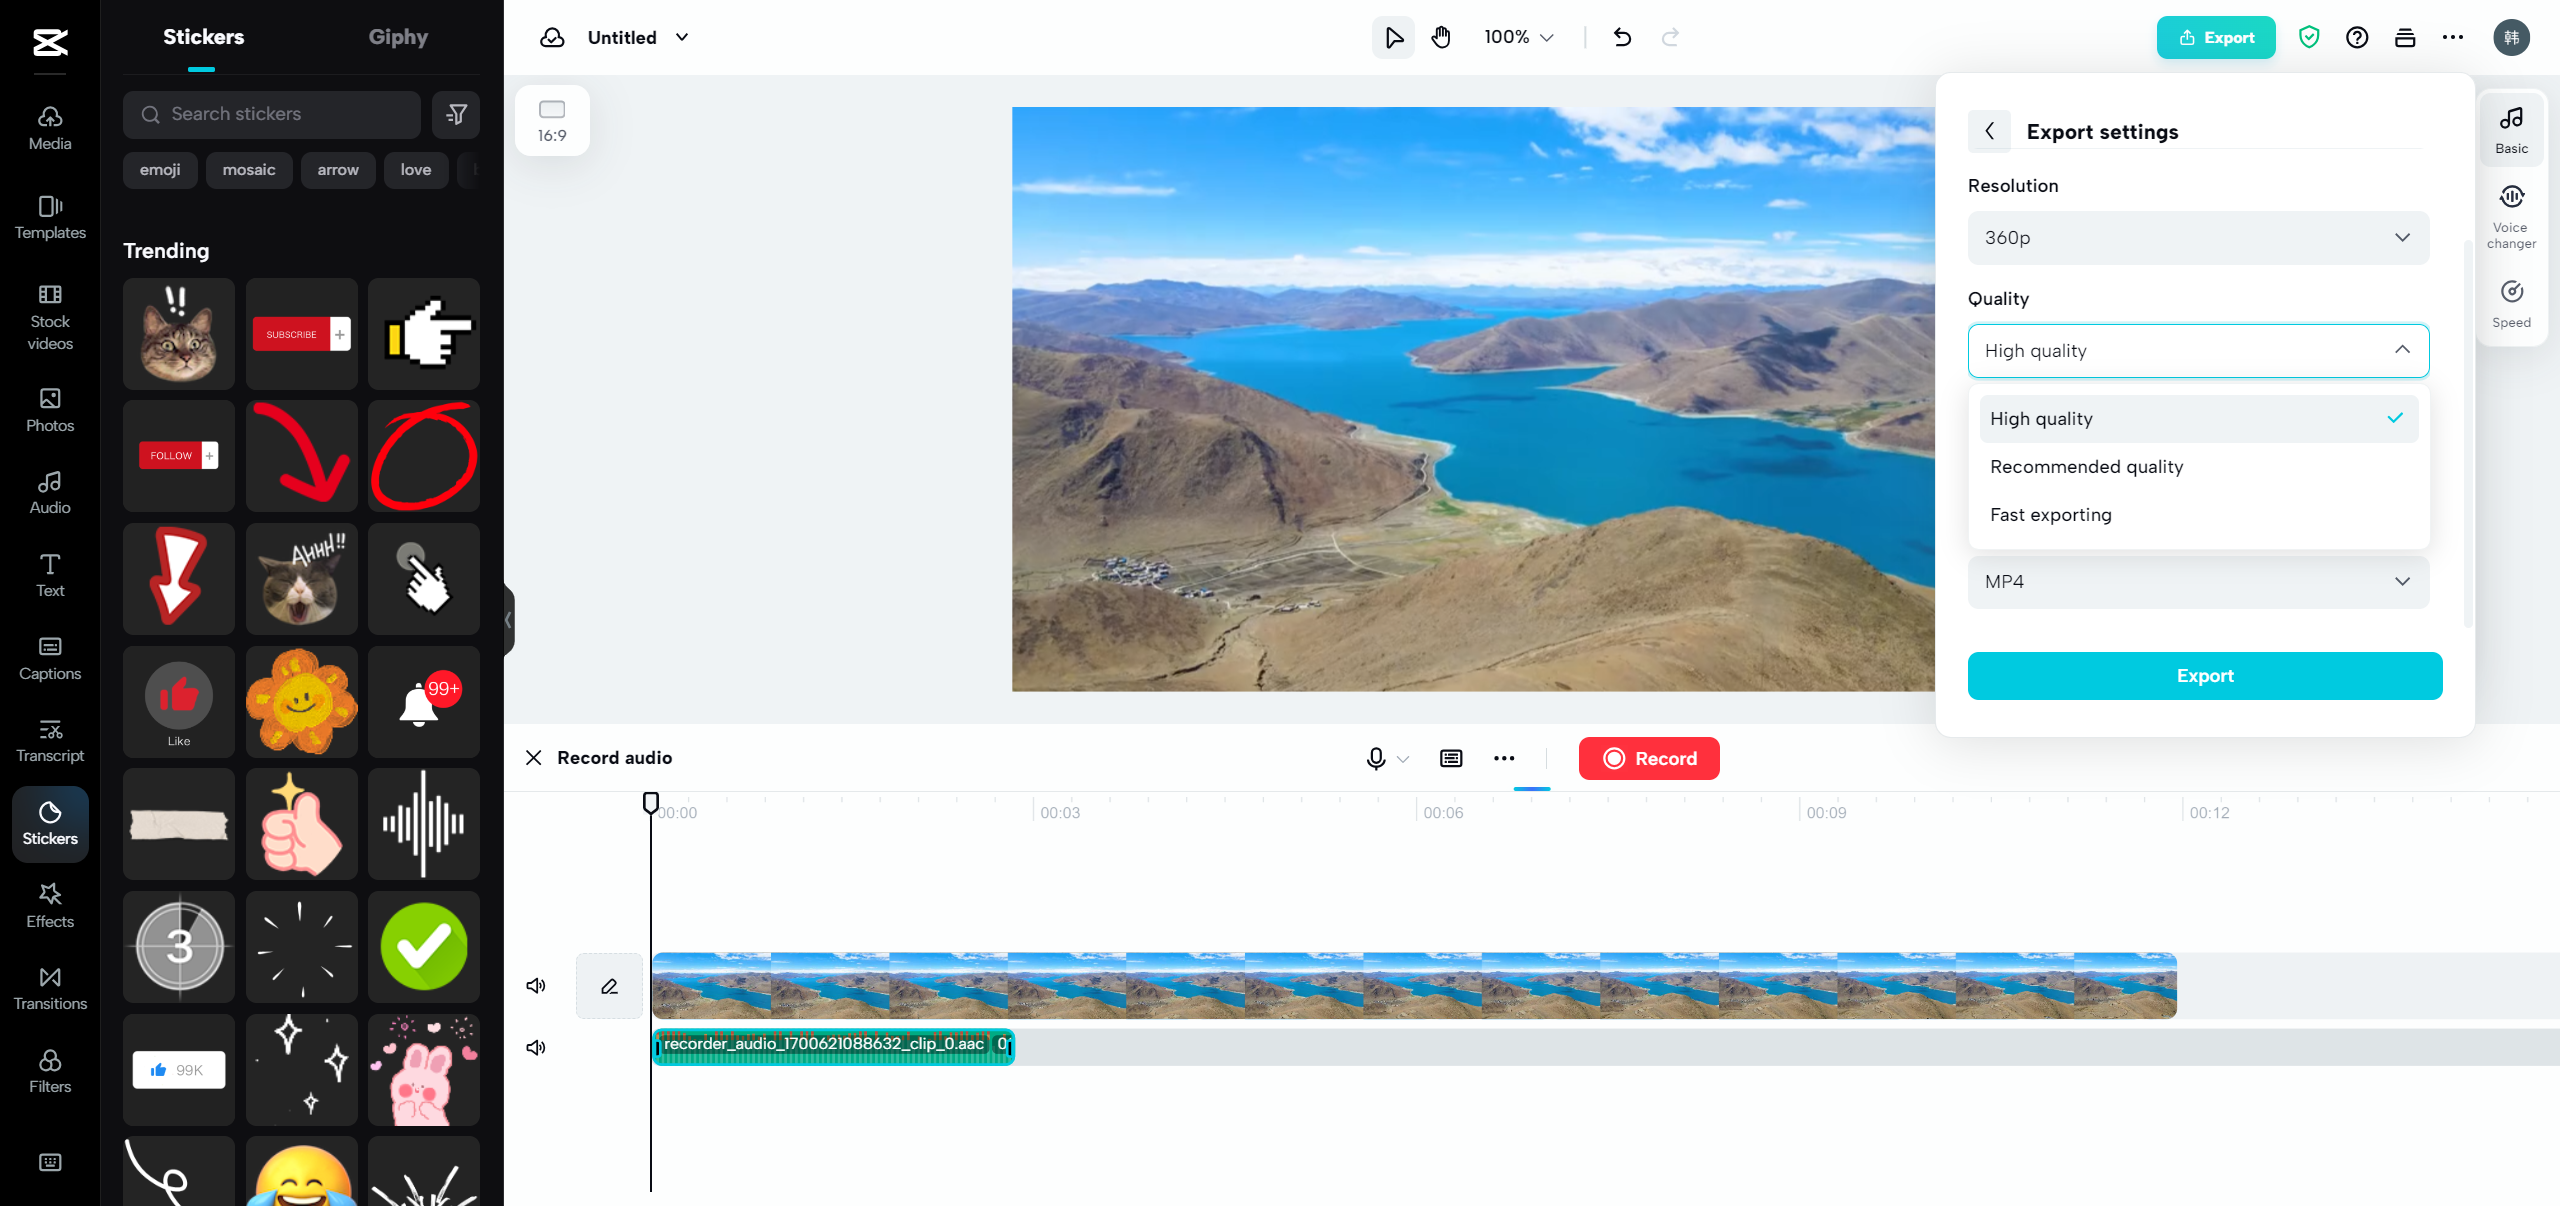
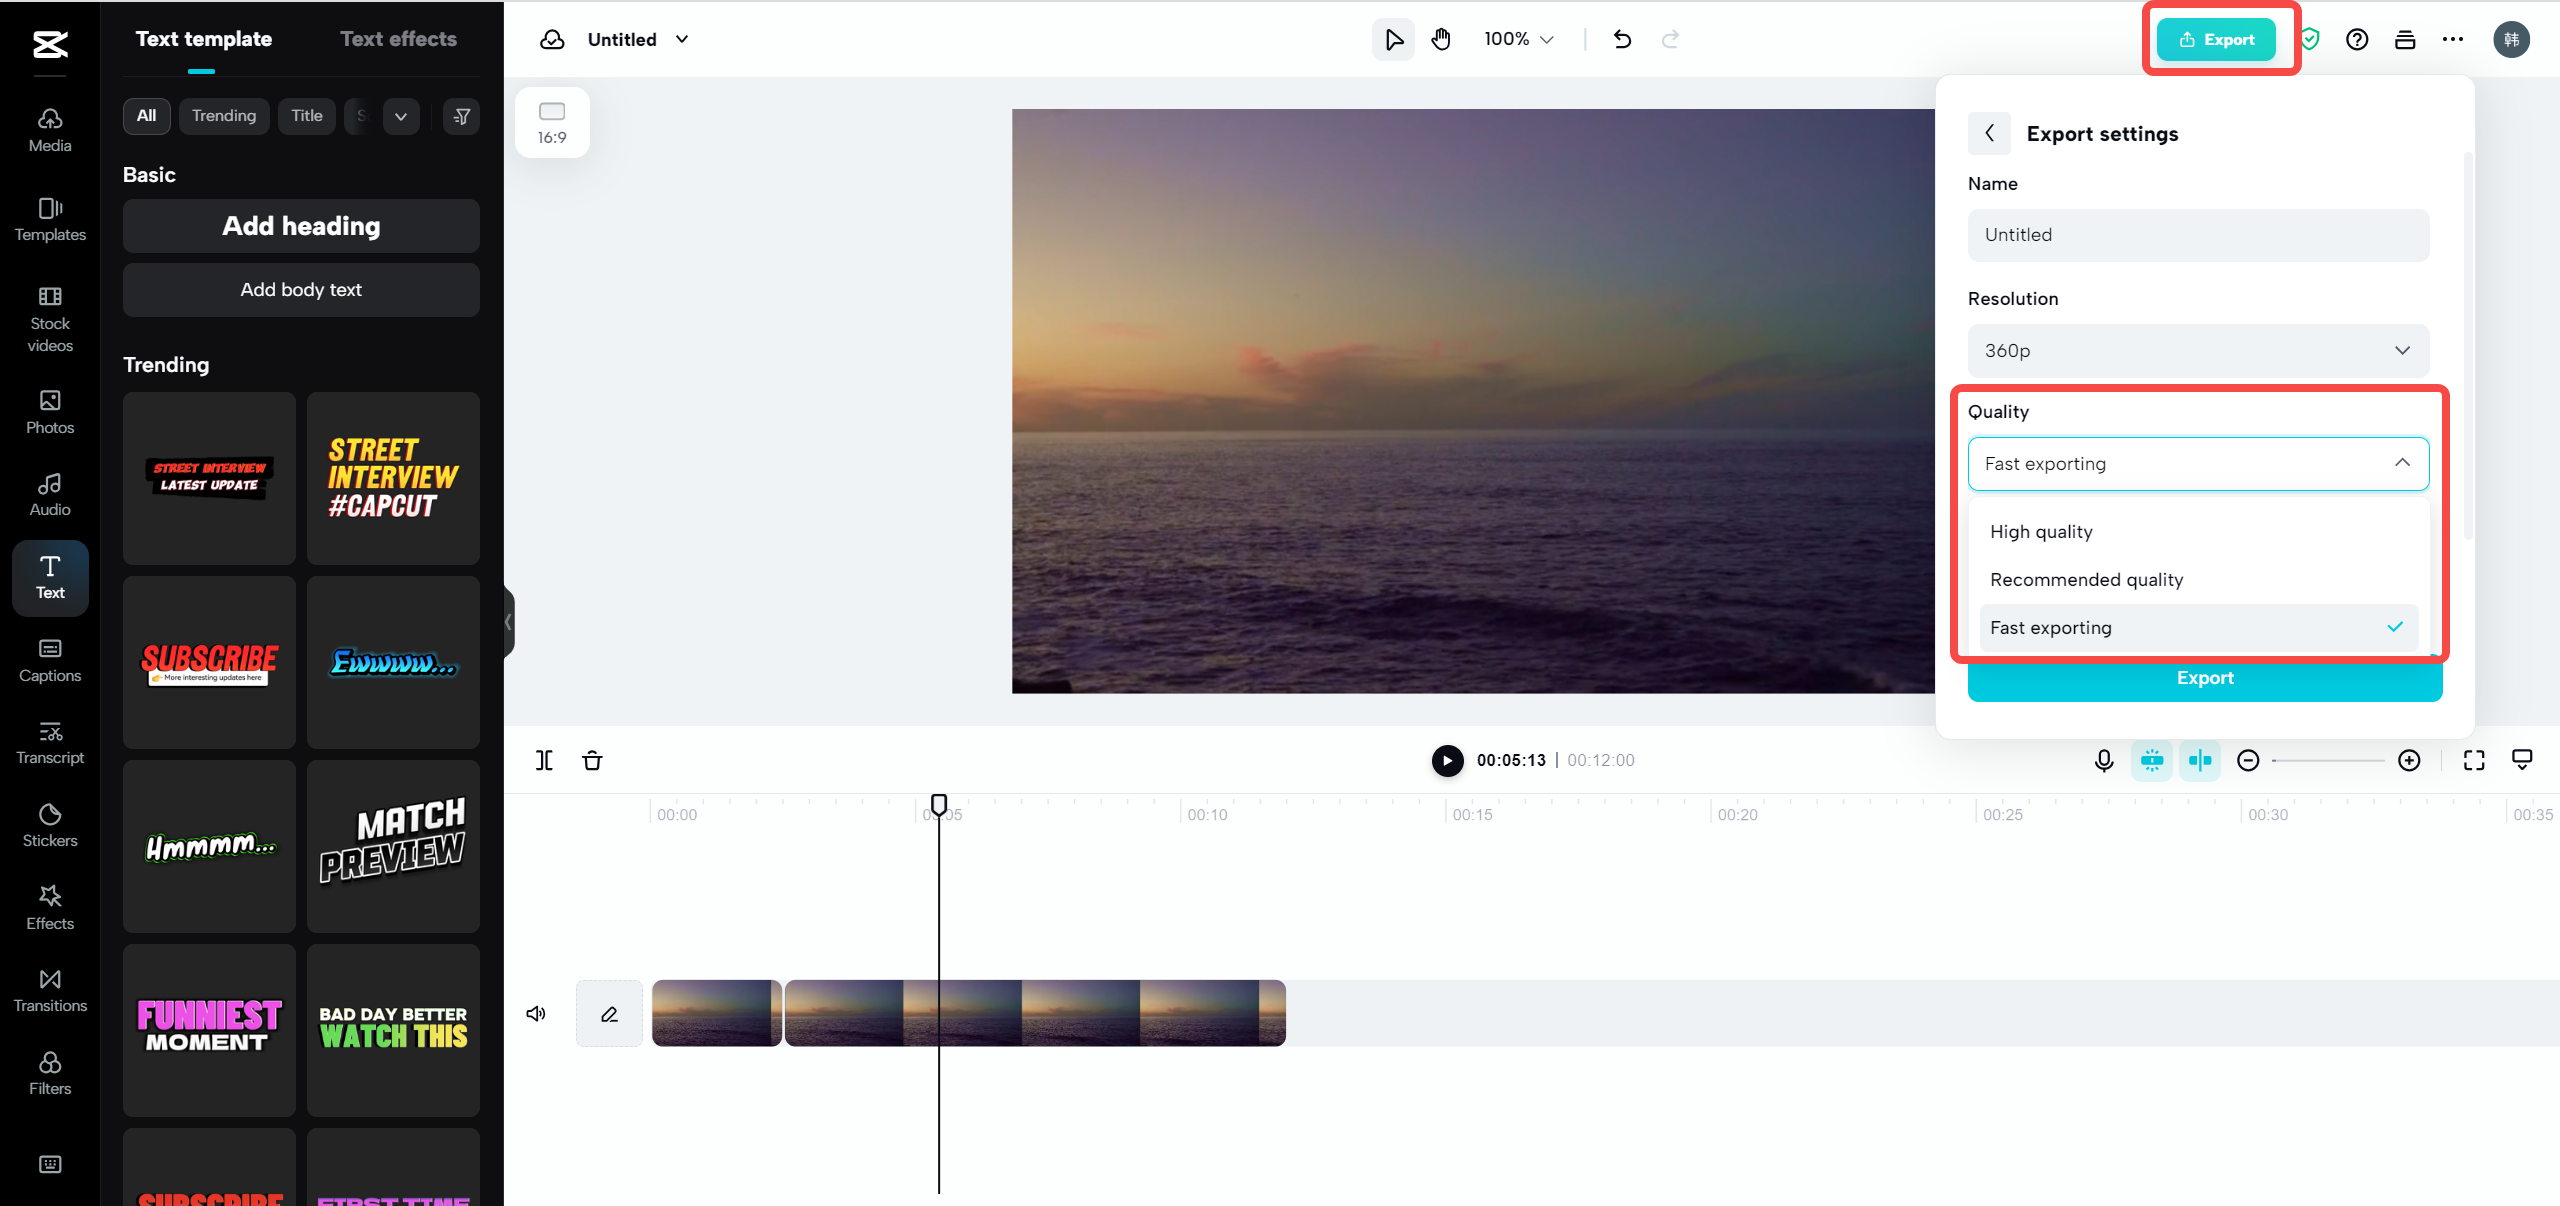
Optimizing Compression During Export
The actual compression happens during CapCut’s export process, where you can balance quality and file size according to your specific needs. The software provides multiple approaches to this optimization.
You can choose from preset quality levels (low, medium, high) or manually adjust bitrate and resolution settings for precise control. The interface shows estimated file sizes for your chosen settings, helping you make informed decisions about the trade-offs between quality and storage requirements.
For social media sharing, CapCut offers platform-specific optimizations that ensure your videos meet technical requirements while looking their best. These tailored settings eliminate guesswork and technical research when preparing content for different platforms.
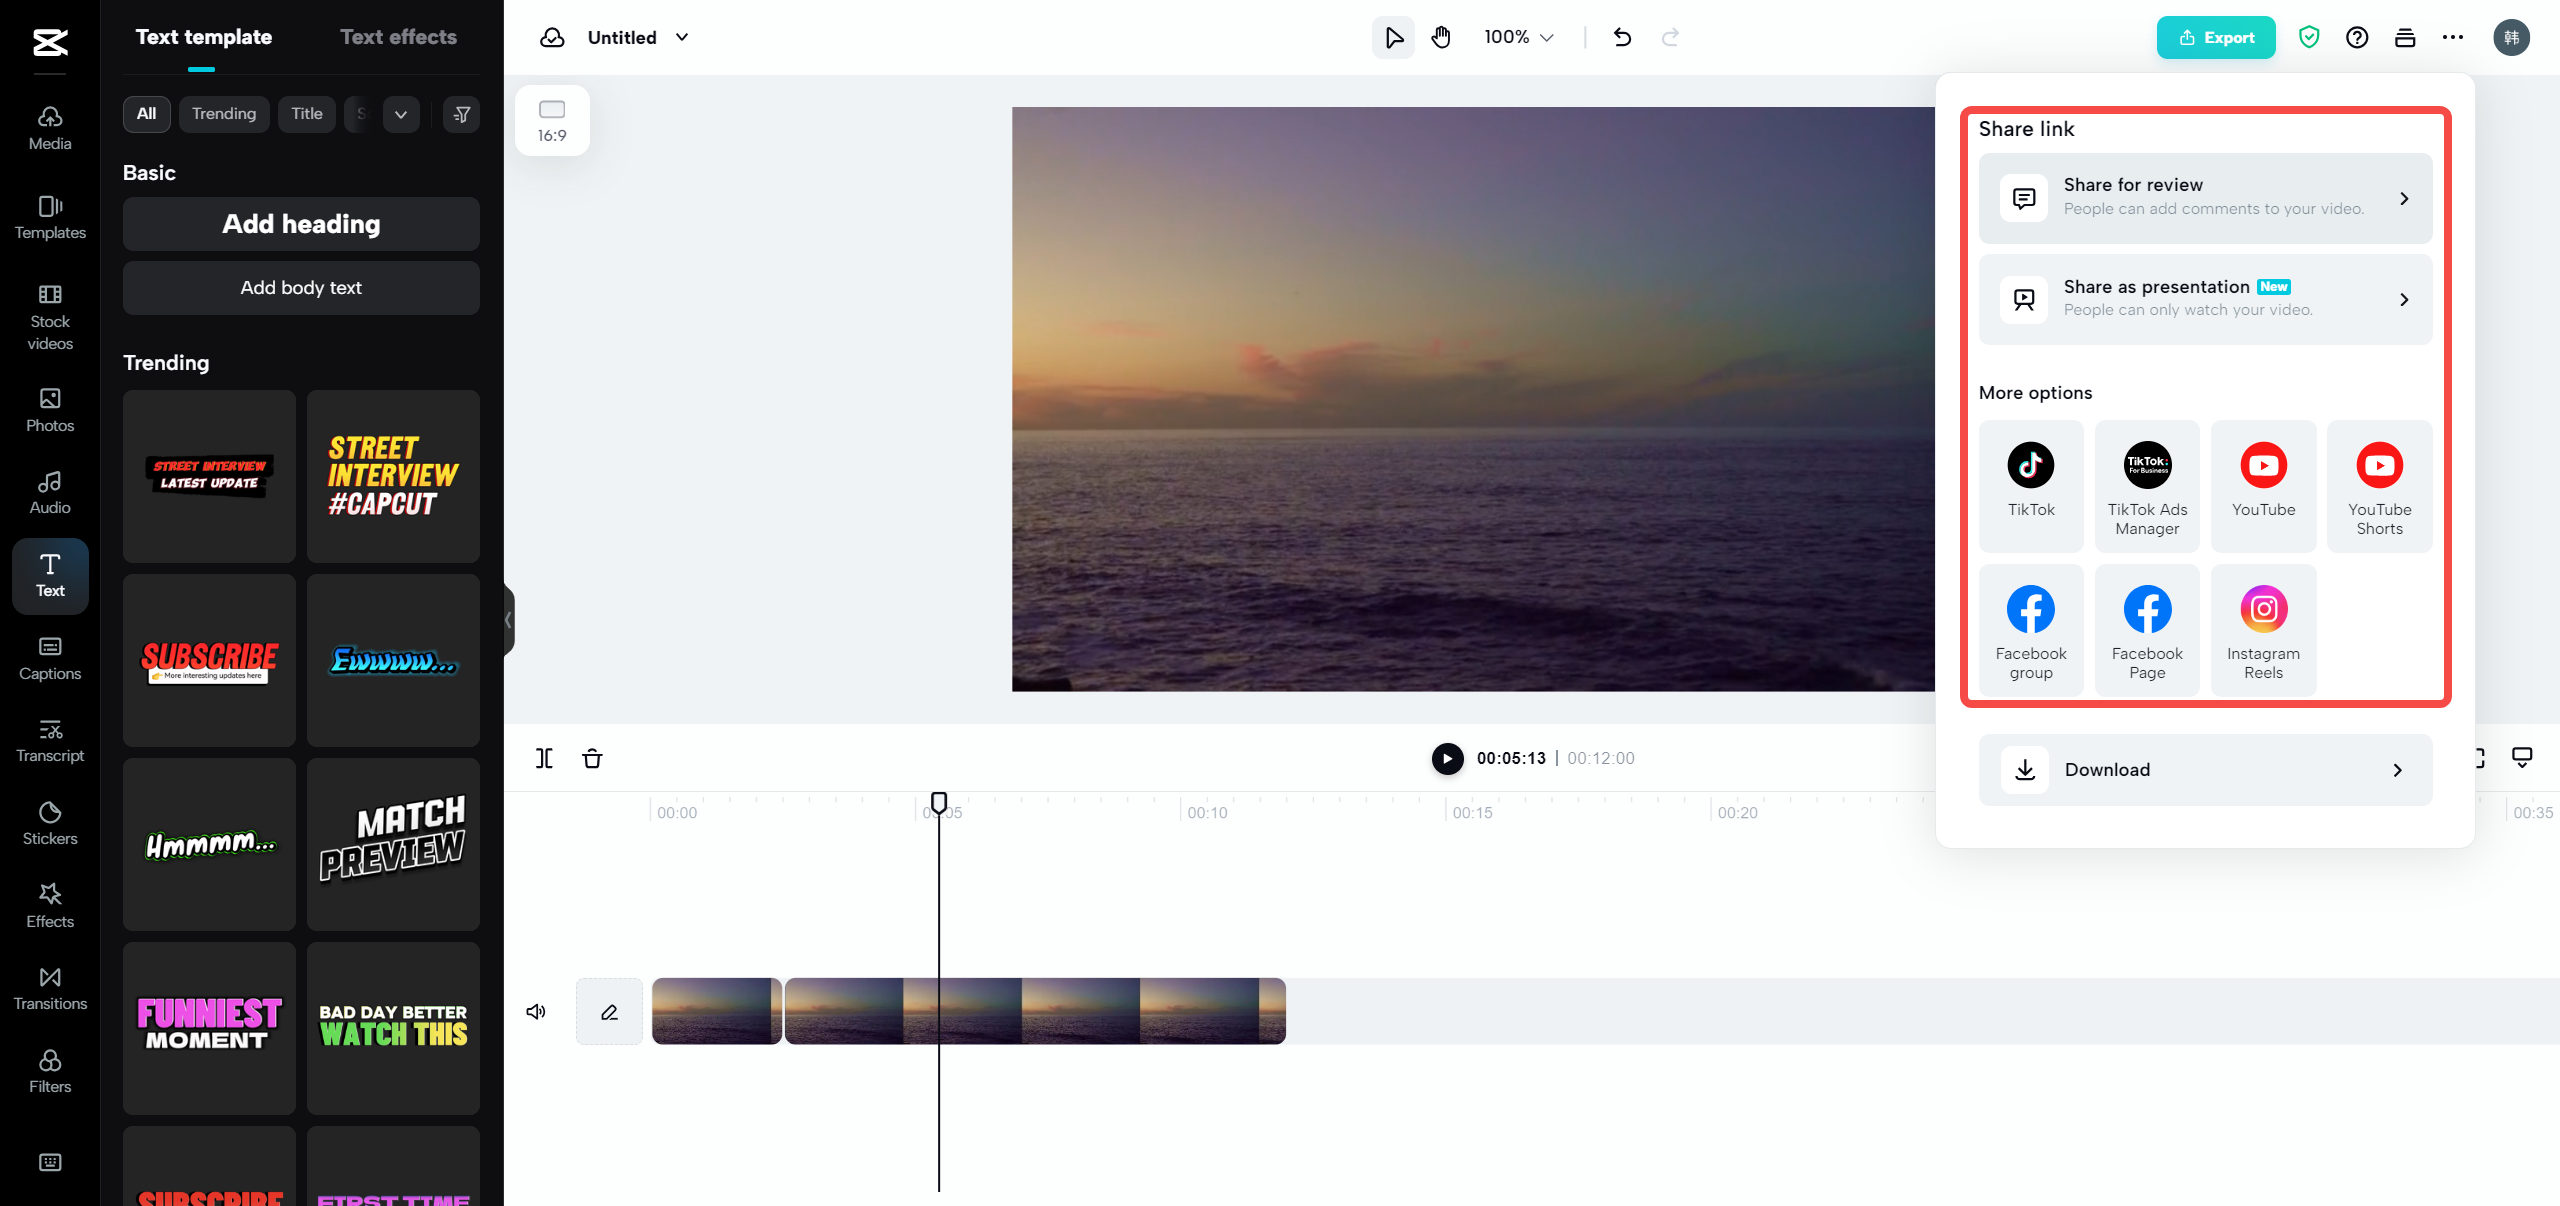
Simplified Sharing and Distribution
Once your video is compressed and exported, CapCut simplifies the sharing process with integrated distribution options. You can directly upload to popular platforms without leaving the application.
This seamless sharing capability saves time and reduces friction when publishing your content. The software handles format conversions and optimization specific to each platform’s requirements, ensuring your videos look their best wherever they’re viewed.
The combination of robust compression, comprehensive editing, and streamlined sharing makes CapCut an attractive option for content creators who regularly produce and distribute video content across multiple platforms.
Advanced Features That Extend Beyond Compression
While learning how to compress a video in VLC is valuable, CapCut offers extensive capabilities that transform simple compression into comprehensive video production. These additional features can elevate your content while still achieving efficient file sizes.
CapCut — Your all-in-one video & photo editing powerhouse! Experience AI auto-editing, realistic effects, a huge template library, and AI audio transformation. Easily create professional masterpieces and social media viral hits. Available on Desktop, Web, and Mobile App.
Download App | Sign Up for Free
Accessibility and Cost Considerations
One of CapCut’s most significant advantages is its free-to-use model with no watermarks on exported videos. This approach makes professional-quality video editing accessible to everyone, regardless of budget constraints.
The interface is designed with intuitive navigation and clear labeling, reducing the learning curve typically associated with video editing software. This accessibility means even first-time editors can achieve impressive results without extensive training or experience.
Cloud-Based Workflow and Collaboration
CapCut addresses modern content creation needs through cloud integration that enables flexible workflows and collaborative editing. Your projects are stored online, accessible from any device with internet connectivity.
This cloud approach eliminates storage limitations on local devices and facilitates teamwork on video projects. Multiple editors can work on the same project simultaneously, with changes synced across all devices in real-time.
The collaborative features are particularly valuable for content teams, educators, and social media managers who need to coordinate video production across multiple contributors or locations.
Professional Editing Tools Accessible to All
CapCut packs an impressive array of professional editing features that rival expensive software packages. These tools allow you to create polished, engaging videos that stand out from basic compressed footage.
The automatic subtitle generation feature saves significant time while improving accessibility. The software can detect speech and create accurate subtitles automatically, with options for translation into multiple languages.
Advanced color grading tools enable you to correct exposure issues, enhance colors, and create specific moods through color manipulation. These adjustments can dramatically improve video quality without increasing file size.
Visual effects and motion graphics capabilities allow you to add professional touches like animated text, transitions, and special effects. These elements can make your content more engaging while remaining efficient in terms of storage requirements.
The combination of these advanced features with robust compression capabilities makes CapCut a comprehensive solution for content creators who want to produce high-quality videos without excessive file sizes.
Choosing the Right Tool for Your Needs
Both VLC and CapCut offer valuable video compression capabilities, but they serve different purposes and user needs. Understanding these differences will help you select the right tool for each project.
VLC Media Player excels at quick, straightforward compression tasks. It’s perfect when you need to reduce video size without any editing, especially when working with single video files. Since many users already have VLC installed, it provides a convenient solution for occasional compression needs.
The software’s main advantages include its widespread availability, zero cost, and ability to handle virtually any video format. However, its editing capabilities are limited, and the interface can feel technical for users who prefer visual workflows.
CapCut, meanwhile, shines when compression is part of a larger content creation process. It’s the superior choice when you need to edit your video before compression, combine multiple clips, add effects or text, or prepare content for specific platforms.
The software’s intuitive interface, comprehensive editing tools, and integrated compression make it ideal for regular content creators, social media managers, educators, and businesses producing video content.
Practical Applications and Real-World Usage
Understanding how to compress video with VLC and CapCut has numerous practical applications across different scenarios. Students can compress lecture recordings to save storage space. Travelers can reduce vacation video sizes for easier sharing. Social media users can optimize content for different platforms’ requirements.
Business professionals can compress presentation recordings for email distribution. Content creators can manage their storage while maintaining a library of raw footage. The applications are virtually endless in our video-centric digital landscape.
The key is matching the tool to the specific task. For quick, single-file compression, VLC’s conversion features are often sufficient. For edited content with multiple elements, CapCut’s integrated approach provides better results with less effort.
Conclusion: Empowering Your Video Management
Learning how to reduce video size through tools like VLC and CapCut empowers you to take control of your digital content. No longer will you need to delete precious memories to free up space or struggle to share important videos with others.
Both tools offer valuable approaches to video compression, with VLC providing quick, technical solutions and CapCut offering comprehensive editing with integrated compression. The choice depends on your specific needs, technical comfort level, and creative requirements.
CapCut — Your all-in-one video & photo editing powerhouse! Experience AI auto-editing, realistic effects, a huge template library, and AI audio transformation. Easily create professional masterpieces and social media viral hits. Available on Desktop, Web, and Mobile App.
Download App | Sign Up for Free
By mastering these tools, you’ll never again feel frustrated by large video files. You’ll be equipped to handle storage limitations, sharing challenges, and platform requirements with confidence and efficiency.
Some images courtesy of CapCut