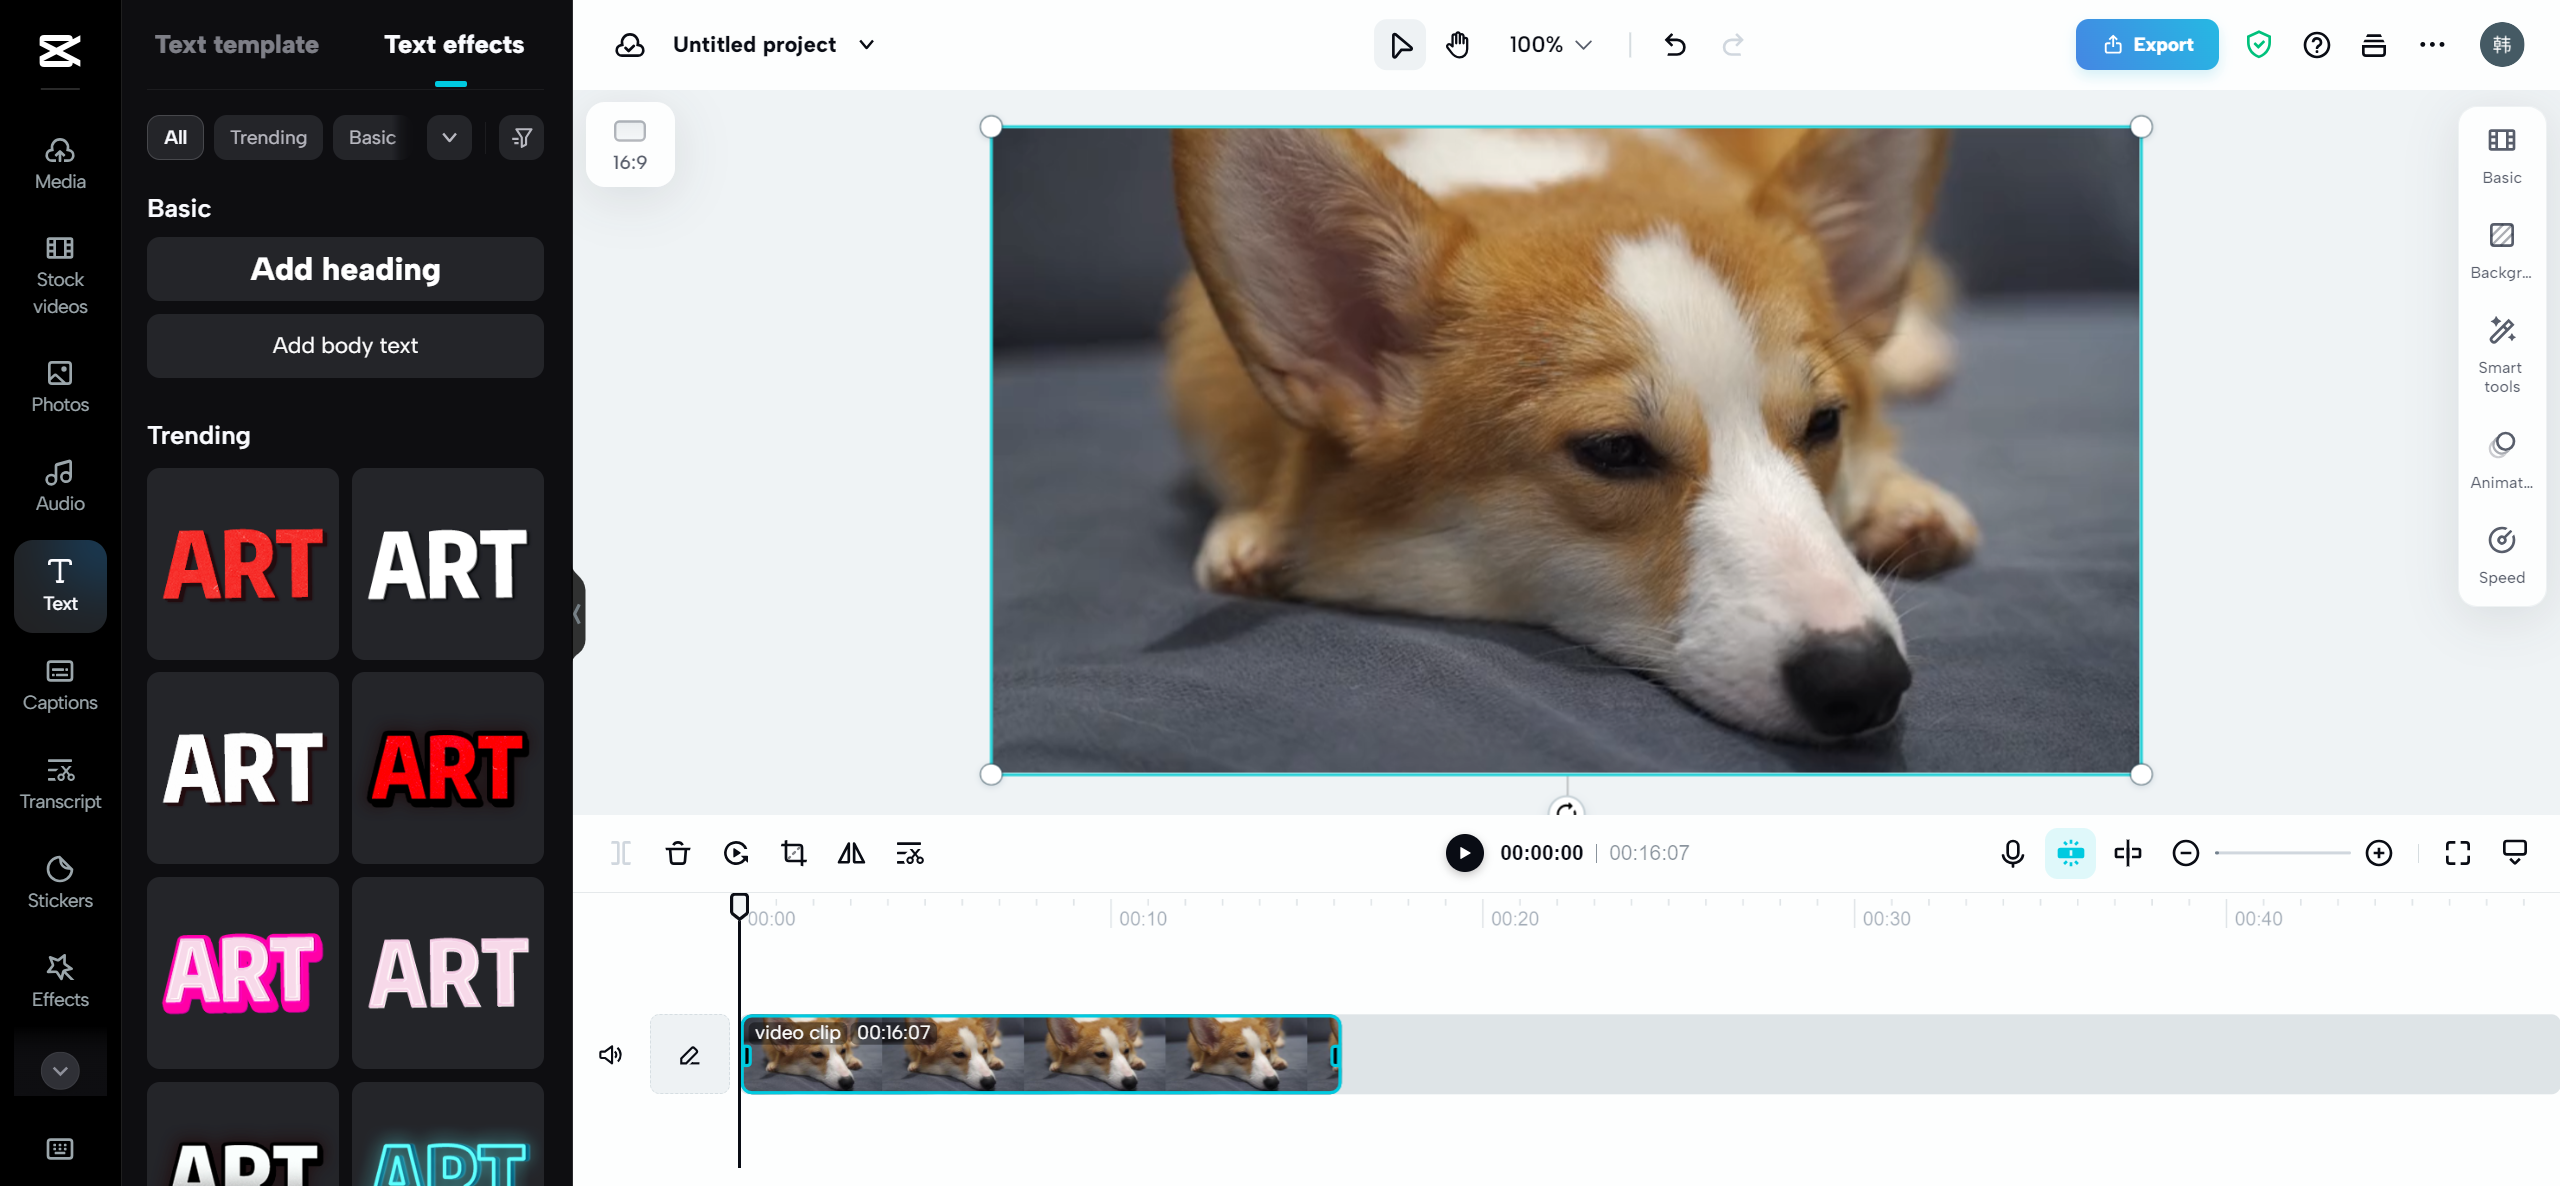
TOOL HUNTER
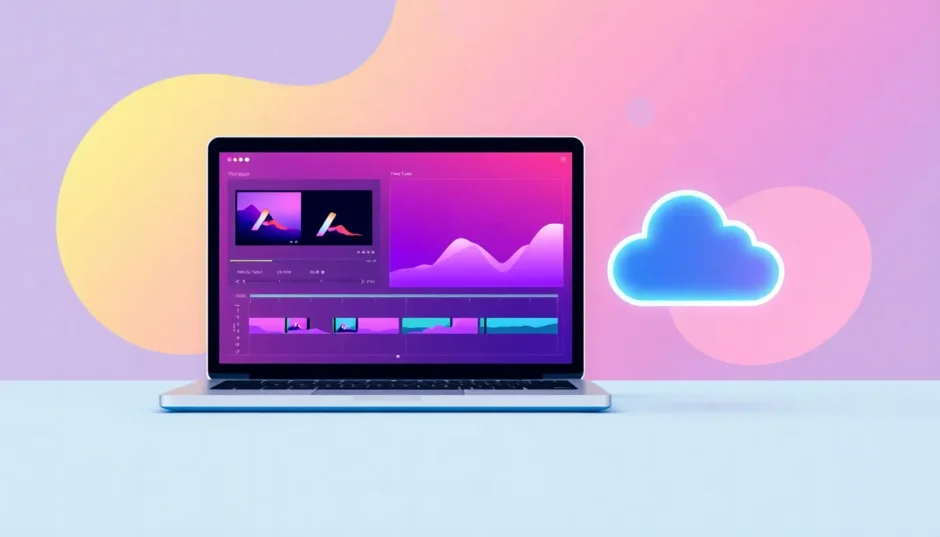

Ever tried to put together a bunch of video clips into one single awesome movie? Maybe you’re searching for a free, simple tool that works on both Windows and Mac to make video merging a breeze. It might sound a bit technical, but guess what—VLC Media Player makes it incredibly straightforward. Yep, that same VLC you use to watch videos can also help you merge them without any fuss. Whether it’s compiling holiday memories or creating a school project, VLC offers a smooth and efficient way to get it done.
In this article, I’ll guide you step-by-step on how to merge videos using VLC. Plus, I’ll introduce you to a fantastic alternative—CapCut video editor—which comes loaded with extra features in case you’re looking for something with more flair. So whether you stick with VLC or explore CapCut, you’re covered. Let’s dive in!
How to merge videos in VLC: a complete tutorial
You might already have VLC installed on your computer. If not, no worries—it’s free and easy to download. But having VLC isn’t enough; you need to know the correct steps to actually merge videos. Let’s break it down.
Step 1: Import your videos
First things first, you need to bring your video clips into VLC. Here’s how:
- Install and launch VLC Media Player.
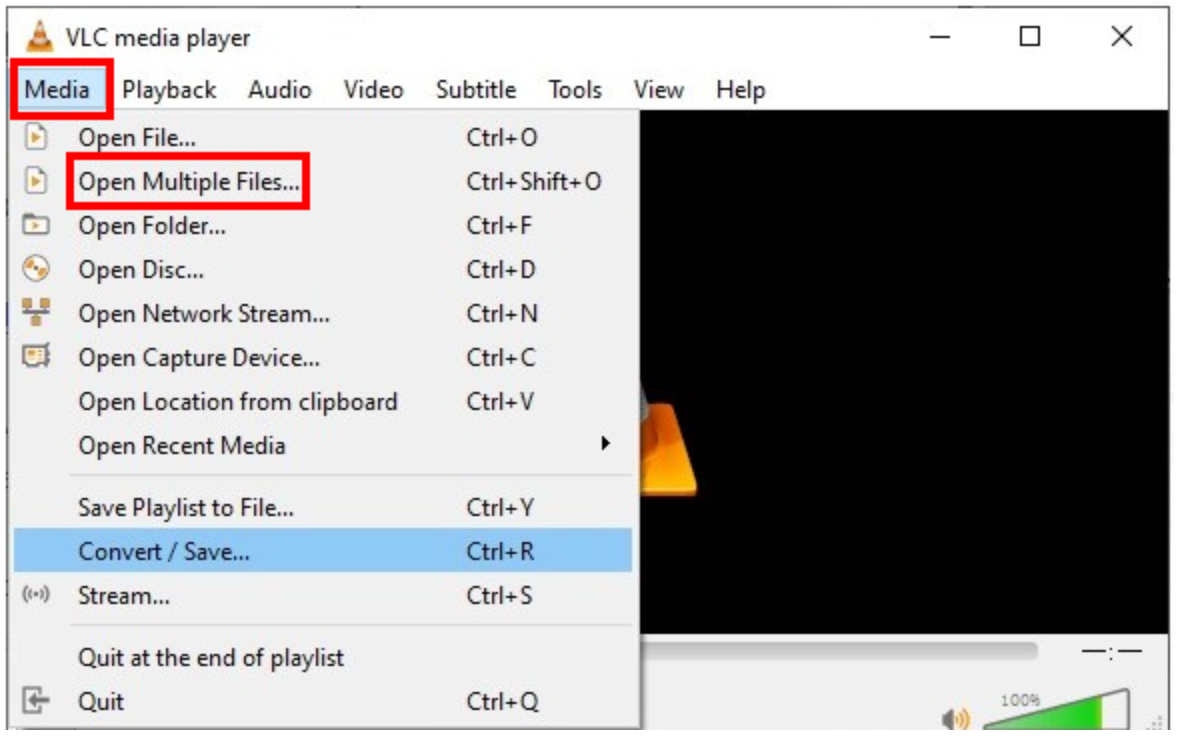
- Click on “Media” in the top menu.
- Select “Open Multiple Files” from the dropdown.
- A new window will appear—navigate to the “File” tab.
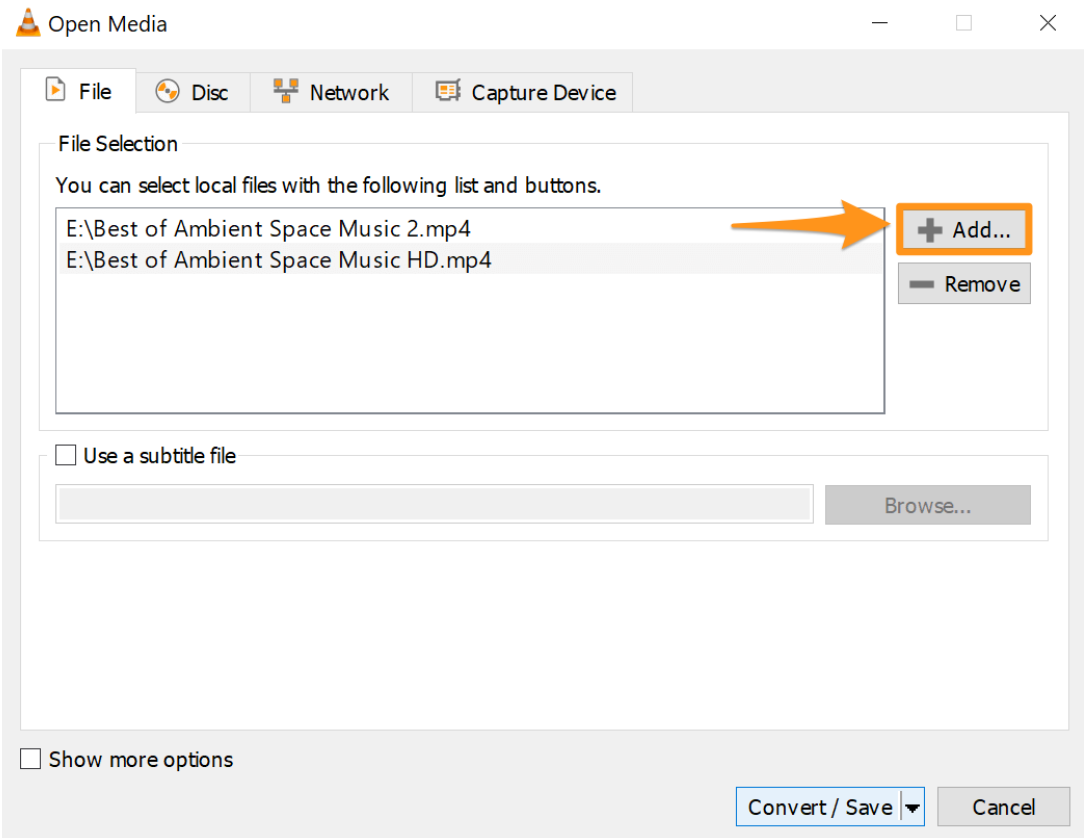
- Click “+Add” to select and import all the videos you wish to merge.
Step 2: Merge videos in VLC
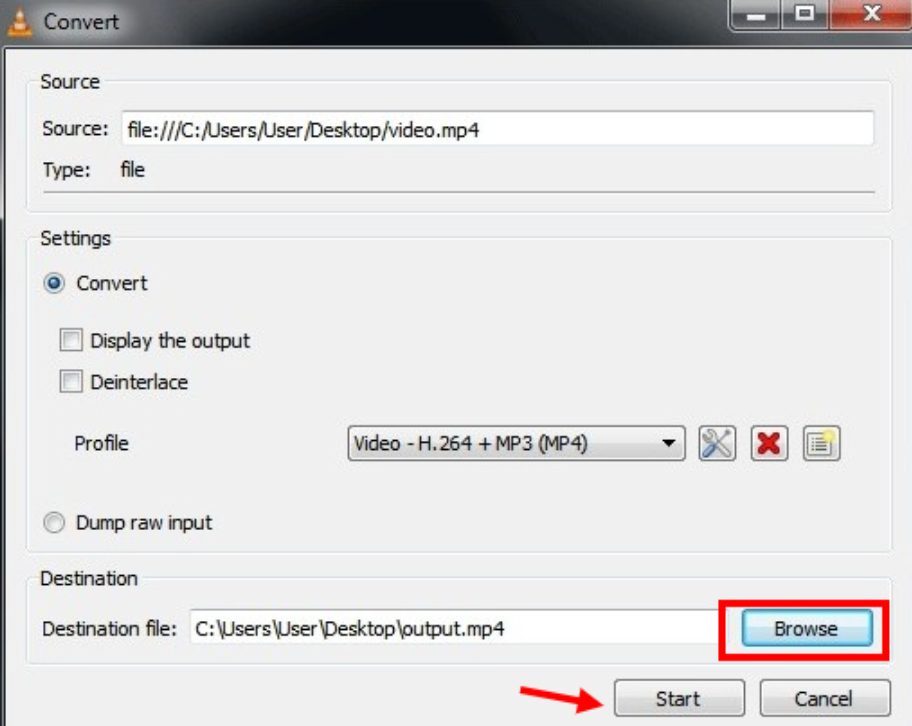
Once your videos are imported, locate the “Convert/Save” dropdown button at the bottom right. Click it and choose “Convert.” This action tells VLC to start merging your clips.
Step 3: Export your merged video
You’re almost there! In the next window, click “Browse” to choose where you want to save your new video. Hit the “Start” button, and VLC will combine your clips into one file. Now it’s ready to share or edit further.
Merging videos with VLC is pretty simple, but sometimes you might run into issues—especially if your videos are in different formats or shot in portrait mode (like with your phone). Don’t stress; I’ve got some troubleshooting tips coming up.
Common issues and how to fix them when using VLC to merge videos
VLC is awesome for basic edits, but it’s not perfect. Sometimes, things go wrong. Maybe your videos have incompatible formats, or perhaps they were recorded vertically. Here’s how to tackle common problems.
Keep your software updated
An outdated system or an old version of VLC can cause issues. Make sure your computer’s operating system is up to date, and regularly check for the latest version of VLC. It runs on Windows, macOS, Linux, Android, and iOS, so updates are important for smooth performance.
Update your video codecs
Sometimes the problem lies with video codecs. Here’s how to update them:
- Open VLC, go to “Help” > “Check for Updates.”
- Click “Yes” to download the latest updates for VLC and its codecs.
- Choose your preferred download location and click “OK.”
- A progress bar will show the download and installation. Once it’s done, you’re good to go.
Even after troubleshooting, VLC might not meet all your needs. Maybe you’re looking for more advanced features, or you’re on a Mac and realized VLC doesn’t support merging videos there. That’s where having a solid alternative comes in handy.
CapCut: the best alternative when VLC merge videos fails
Don’t get me wrong—VLC is great for simple merging. But sometimes you need more power, flexibility, or just a smoother experience. Enter CapCut video editor. It’s user-friendly, packed with features, and best of all, most of its tools are free!
CapCut is perfect for merging videos. You can trim clips, enhance video quality, add effects, and so much more. It’s a reliable choice when you want to combine videos and audio without compromising quality.
CapCut — Your all-in-one video & photo editing powerhouse! Experience AI auto-editing, realistic effects, a huge template library, and AI audio transformation. Easily create professional masterpieces and social media viral hits. Available on Desktop, Web, and Mobile App.

Let me walk you through some of CapCut’s standout features.
Merge videos effortlessly
One of CapCut’s simplest yet most useful features is video merging. You can seamlessly combine multiple clips into one cohesive video—ideal for storytelling or compiling highlights.
Keyframe animation for dynamic edits
This advanced feature lets you create movement and transformations within your video. For example, you can make text fade in, slide across the screen, or spin. By setting keyframes at specific points, you control how elements behave over time.
Smooth transition effects
Transitions add a professional touch to your videos. CapCut offers a vast library of options—fades, zooms, wipes, flips, and more. Just drag and drop them between clips on the timeline.
Collaborate through the cloud
Working with a team? CapCut’s cloud collaboration allows multiple users to edit the same project simultaneously. It’s perfect for group assignments or remote collaborations.
Smart export options
When your video is ready, exporting is a breeze. CapCut lets you adjust resolution, quality, and format effortlessly, ensuring your video looks great on platforms like YouTube, TikTok, or Facebook.
Since VLC doesn’t allow you to merge videos on Mac, CapCut is especially useful for Mac users exploring how to merge videos on Mac.
How to merge videos using CapCut video editor
New to CapCut? No problem! Here’s a straightforward guide to help you merge videos quickly.
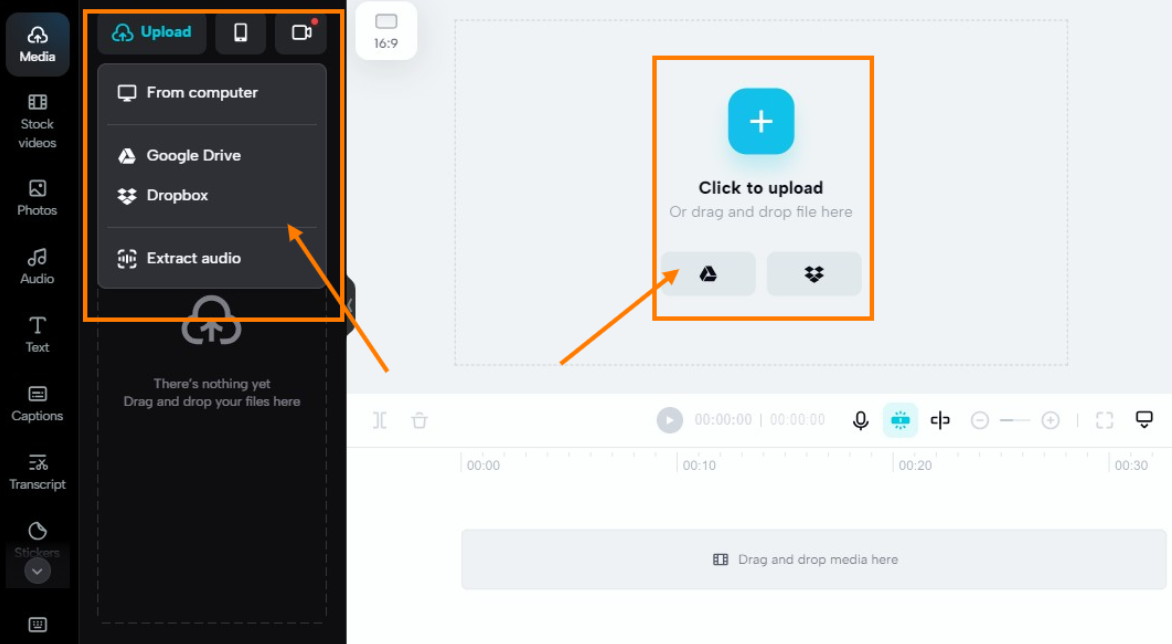
Upload your videos
First, download CapCut from the official website. Open the application and create a new project. You can import videos from your computer, Google Drive, Dropbox, or even your phone by scanning a QR code. Click “Upload,” and your videos will be ready for editing.
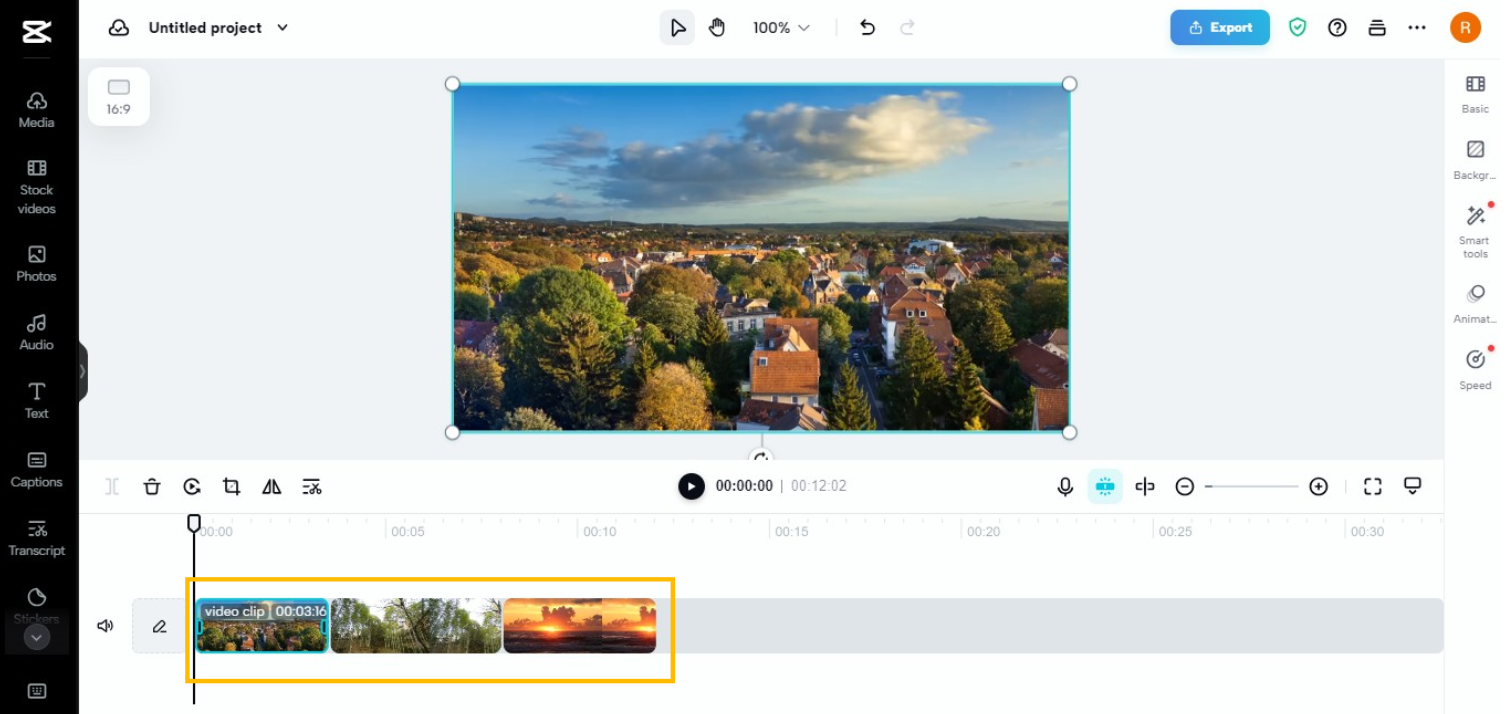
Merge and enhance your clips
After selecting your videos, drag and drop them into the editing timeline to merge them. Want to make your video more engaging? Add transitions between clips! CapCut offers spins, wipes, blurs, flips, and more. You can also rotate videos, insert subtitles, add stickers, and even use AI tools for special effects.
CapCut — Your all-in-one video & photo editing powerhouse! Experience AI auto-editing, realistic effects, a huge template library, and AI audio transformation. Easily create professional masterpieces and social media viral hits. Available on Desktop, Web, and Mobile App.
Export and share your creation
Once you’re satisfied with your project, click “Export” to save it. Adjust the resolution and quality settings to ensure optimal output. Now, your video is ready to shine on social media!

Wrapping up
So there you have it! Whether you’re new to video editing or just need a quick way to merge clips, both VLC and CapCut are excellent tools. VLC is simple and efficient, especially for basic merging on Windows. Now you know how to merge videos in VLC like a pro.
But if you ever need more advanced features, or if you’re on a Mac, CapCut is a powerful and user-friendly alternative. Best of all, most features are free! With these two options, you can choose the tool that best fits your video merging needs.
Frequently asked questions
How can I merge multiple videos into one?
With CapCut video editor, it’s easy. Just add your clips to a project, arrange them in order on the timeline, and they’ll play as one single video.
Will merging videos in VLC reduce their quality?
Yes, often it does. VLC re-encodes videos during merging, which can lead to quality loss. If you want to maintain high quality, CapCut lets you adjust settings to preserve it.
Can I use VLC to merge videos on a Mac?
Unfortunately, no. VLC doesn’t support video merging on Mac. If you’re a Mac user, CapCut or other similar tools are better options.
Can I change the output format after merging in VLC?
Yes, VLC allows you to convert the merged video to a different format using its conversion feature. However, for a simpler and more reliable experience, CapCut is a great upgrade.
Some images used in this article are sourced from CapCut.