TOOL HUNTER

Have you ever been watching a YouTube Short and suddenly noticed that buttons, captions, or other screen elements are covering up something important in the video? It can be super frustrating, especially when you’re trying to focus on detailed visuals or follow along with a tutorial. Trust me, you’re not alone—this is something that happens to a lot of people.
But guess what? There’s actually a pretty easy way to deal with this. In this guide, I’m going to walk you through how to use the YouTube Shorts remove overlay feature so you can say goodbye to those annoying distractions. Once you know how to do it, your viewing experience will be way better because you can actually concentrate on the video content.
We’ll talk about what the YouTube Shorts hide overlay feature is, why it’s useful, and then I’ll show you exactly how to use it step-by-step. I’ll also give you some handy tips in case you run into trouble with navigation overlays. And as a bonus, I’ll introduce you to an awesome editing tool called CapCut that makes creating cool YouTube Shorts a breeze.
Table of Contents
- What Exactly Is the YouTube Shorts Hide Overlay Feature?
- Why You Might Want to Use the YouTube Shorts Hide Overlay Feature
- How to Actually Use the YouTube Shorts Hide Overlay Feature
- 7 Simple Ways to Fix Navigation Overlay Problems on YouTube Shorts
- Bonus Tip: Make Amazing YouTube Shorts Easily with CapCut
- Wrapping Up
- Frequently Asked Questions
What Exactly Is the YouTube Shorts Hide Overlay Feature?
So, the YouTube Shorts hide overlay feature is basically a setting that lets you remove text, icons, or other graphics that pop up on the screen while a video is playing. This is really handy if you want your videos to look cleaner and more professional. When you get rid of extra stuff that’s not needed, the main part of the video stands out more, and people watching won’t be as distracted.
This is perfect for anyone who likes a simpler, more focused way of watching videos. Whether you’re checking out a how-to video, a short story, or just a clip with really nice visuals, hiding the overlay can totally change the experience.
Why You Might Want to Use the YouTube Shorts Hide Overlay Feature
When you’re creating or even just watching YouTube Shorts, it’s important that the content is easy to watch and engaging. The YouTube Shorts hide overlay feature can help with that. Here are a few reasons why it’s a good idea to use it:
First off, it makes your videos look neat and tidy. By taking away distracting overlays, what you’re watching becomes much clearer. This is awesome whether you’re showing an action scene or a beautiful nature shot.
Second, it helps people watching focus more on what you’re sharing. When there’s less clutter on the screen, viewers can pay better attention to your story or the point you’re making. That means they might watch all the way to the end instead of clicking away.
Third, your video will seem more organized. The YouTube Shorts remove overlay tool makes sure only the most important parts of the video are visible. That gives your content a more polished feel.
Fourth, your video will flow better. When overlays are out of the way, moving from one scene to another feels smoother. This is extra helpful if you’re explaining something step by step or telling a story.
And finally, your videos will just look more pro. Getting rid of stuff that doesn’t need to be there adds a nice touch that can help your Shorts stand out.
How to Actually Use the YouTube Shorts Hide Overlay Feature
Using the YouTube Shorts hide overlay feature is easier than you might think. You only need to follow a few simple steps to make your videos look cleaner. Here’s what you do:
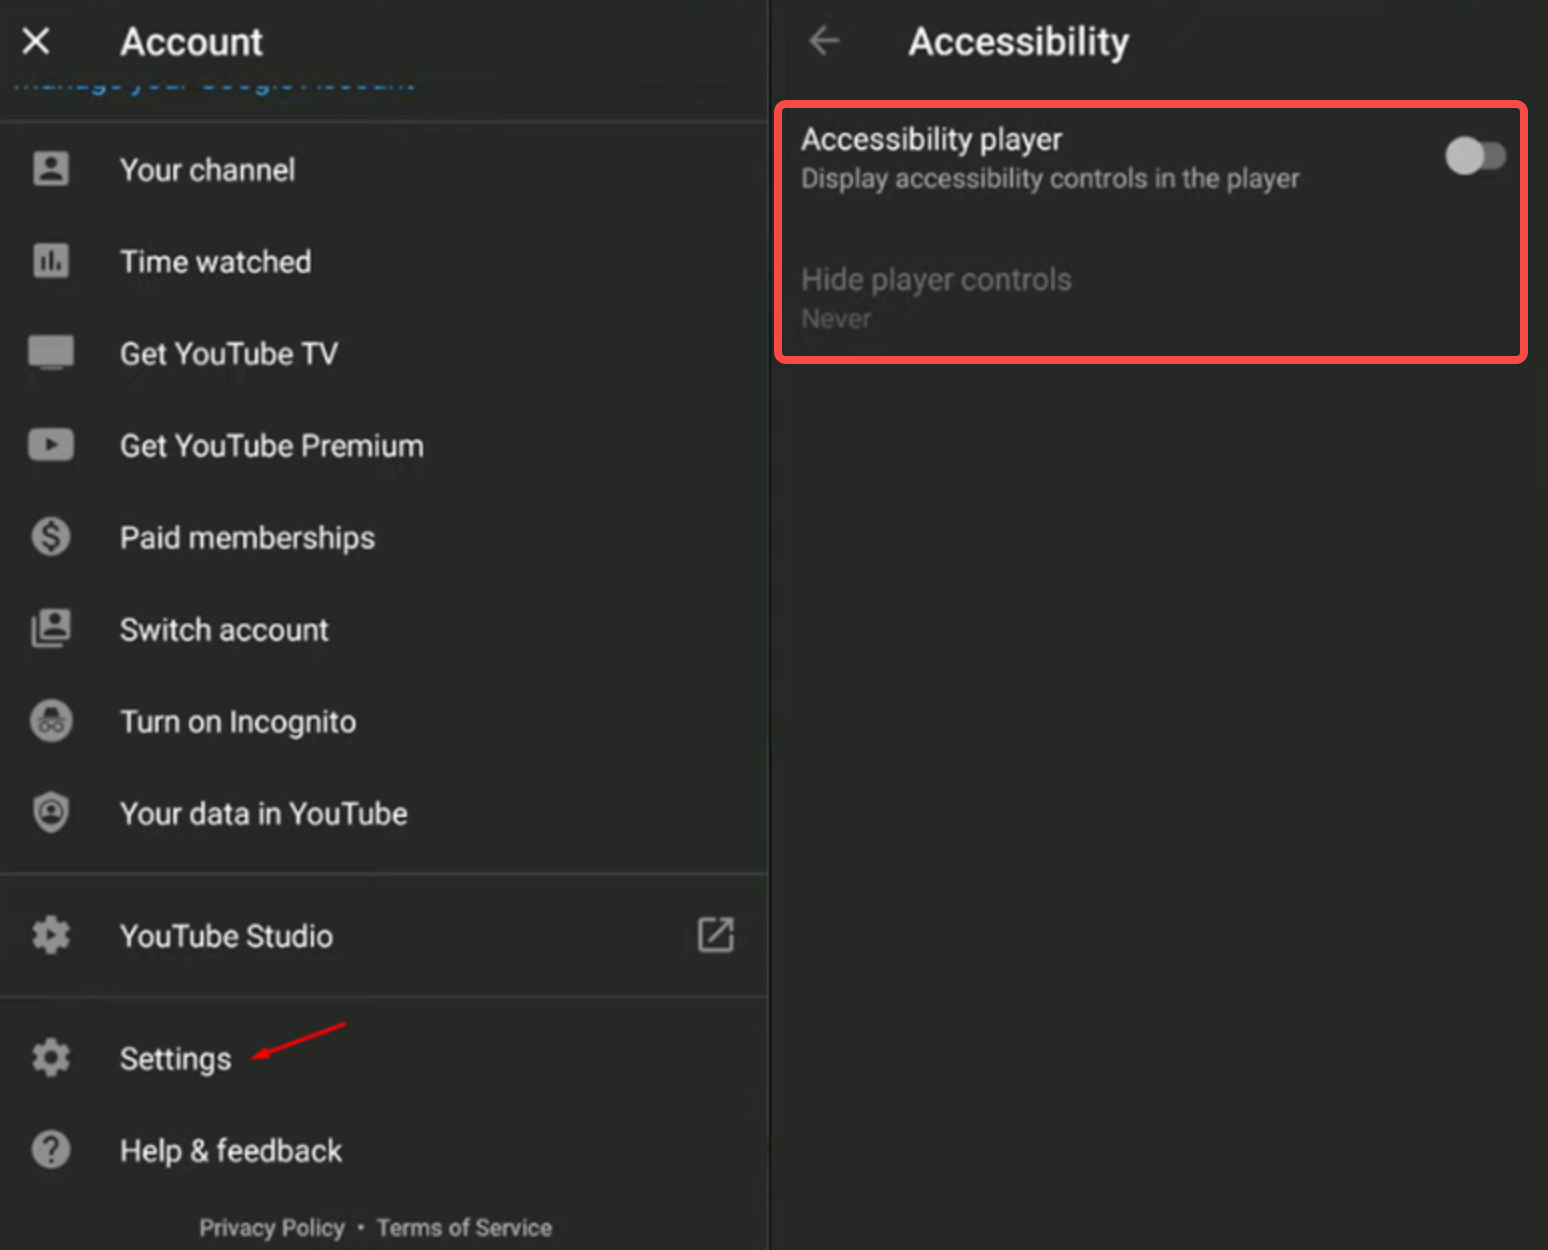
Start by opening up the YouTube app on your phone or tablet. Once you’re in, go to the Settings menu. This is where you can change all kinds of preferences to make the app work how you want.
Next, find the Accessibility option. Once you see it, just turn it off. When you disable this setting, it automatically applies the YouTube Short remove overlay to your videos. Seriously, it’s that easy!
After you’ve made the change, play a video to check if the overlay is gone. If you still see buttons or text on the screen, just go back to the settings and double-check that you saved everything right.
This works on most devices, including Android phones. So if you’re trying to figure out YouTube Shorts hide overlay Android, you should be good to go.
7 Simple Ways to Fix Navigation Overlay Problems on YouTube Shorts
Sometimes, you might have issues with navigation overlays on YouTube Shorts. These problems can make it tricky to interact with videos the way you want. If that happens, no worries—here are a few things you can try to fix it.
One common fix is to clear the cache and data for the YouTube app. To do this, go to your device’s Settings, then Apps, and find YouTube. Tap on Storage, and then choose Clear Cache and Clear Data. This gets rid of temporary files that might be causing issues.
Another thing to check is if your device’s software is updated. Updates often include fixes for app bugs. Go to Settings, then Software Update, and install any updates that are available.
You should also take a look at your YouTube settings. Open the app, tap your Profile, go to Settings, and check out the Shorts or Playback options. Adjust or reset any settings that could be messing with overlays.
It’s also smart to check your accessibility features. Sometimes, settings like Magnification or Large Text can cause overlay problems. Go to Settings, then Accessibility, and turn off any features that might be getting in the way.
If you’ve turned on any experimental features on YouTube, try disabling them. In the YouTube Settings, look for Try New Features and turn off anything related to Shorts.
If nothing else works, you can send feedback directly to YouTube. Go to your Profile, then Help & Feedback, explain the issue you’re having, and send your report.
Lastly, try testing YouTube Shorts on a different device. This can help you figure out if the problem is with your device or with the app.
Bonus Tip: Make Amazing YouTube Shorts Easily with CapCut
If you’re into making great YouTube Shorts, you should definitely check out the CapCut desktop video editor. This tool is loaded with features that help you create pro-looking videos without a ton of effort.
CapCut lets you trim your videos smoothly, add cool AI effects, and even includes motion blurring for better transitions. Whether you want clean looks or eye-catching overlays, CapCut has what you need.
One of the coolest things about CapCut is that it’s free to download. You can get it from the official website and start using it right away.
CapCut — Your all-in-one video & photo editing powerhouse! Experience AI auto-editing, realistic effects, a huge template library, and AI audio transformation. Easily create professional masterpieces and social media viral hits. Available on Desktop, Web, and Mobile App.

Cool Features You Get with CapCut
CapCut comes with a bunch of advanced features that make editing videos both fun and simple. Here are some of the best ones:
First, CapCut has preloaded free video overlays. These are ready to go and can add a lot of style to your content without much work.
Second, with one-click overlay blending, you can mix overlays into your video seamlessly. This saves time and makes your videos look more pro.
Third, CapCut includes AI-powered video upscaling. This feature can make your video resolution better, so older or lower-quality footage looks sharper.
Fourth, instant flicker removal makes sure your videos play smoothly without weird lighting issues.
Fifth, advanced video stabilization helps fix shaky footage. This is great for action videos or stuff you shot while moving.
How to Edit YouTube Shorts Using CapCut
Editing YouTube Shorts with CapCut is pretty straightforward. First, download and install the CapCut desktop video editor from the official website. Once it’s on your computer, you can start editing right away.
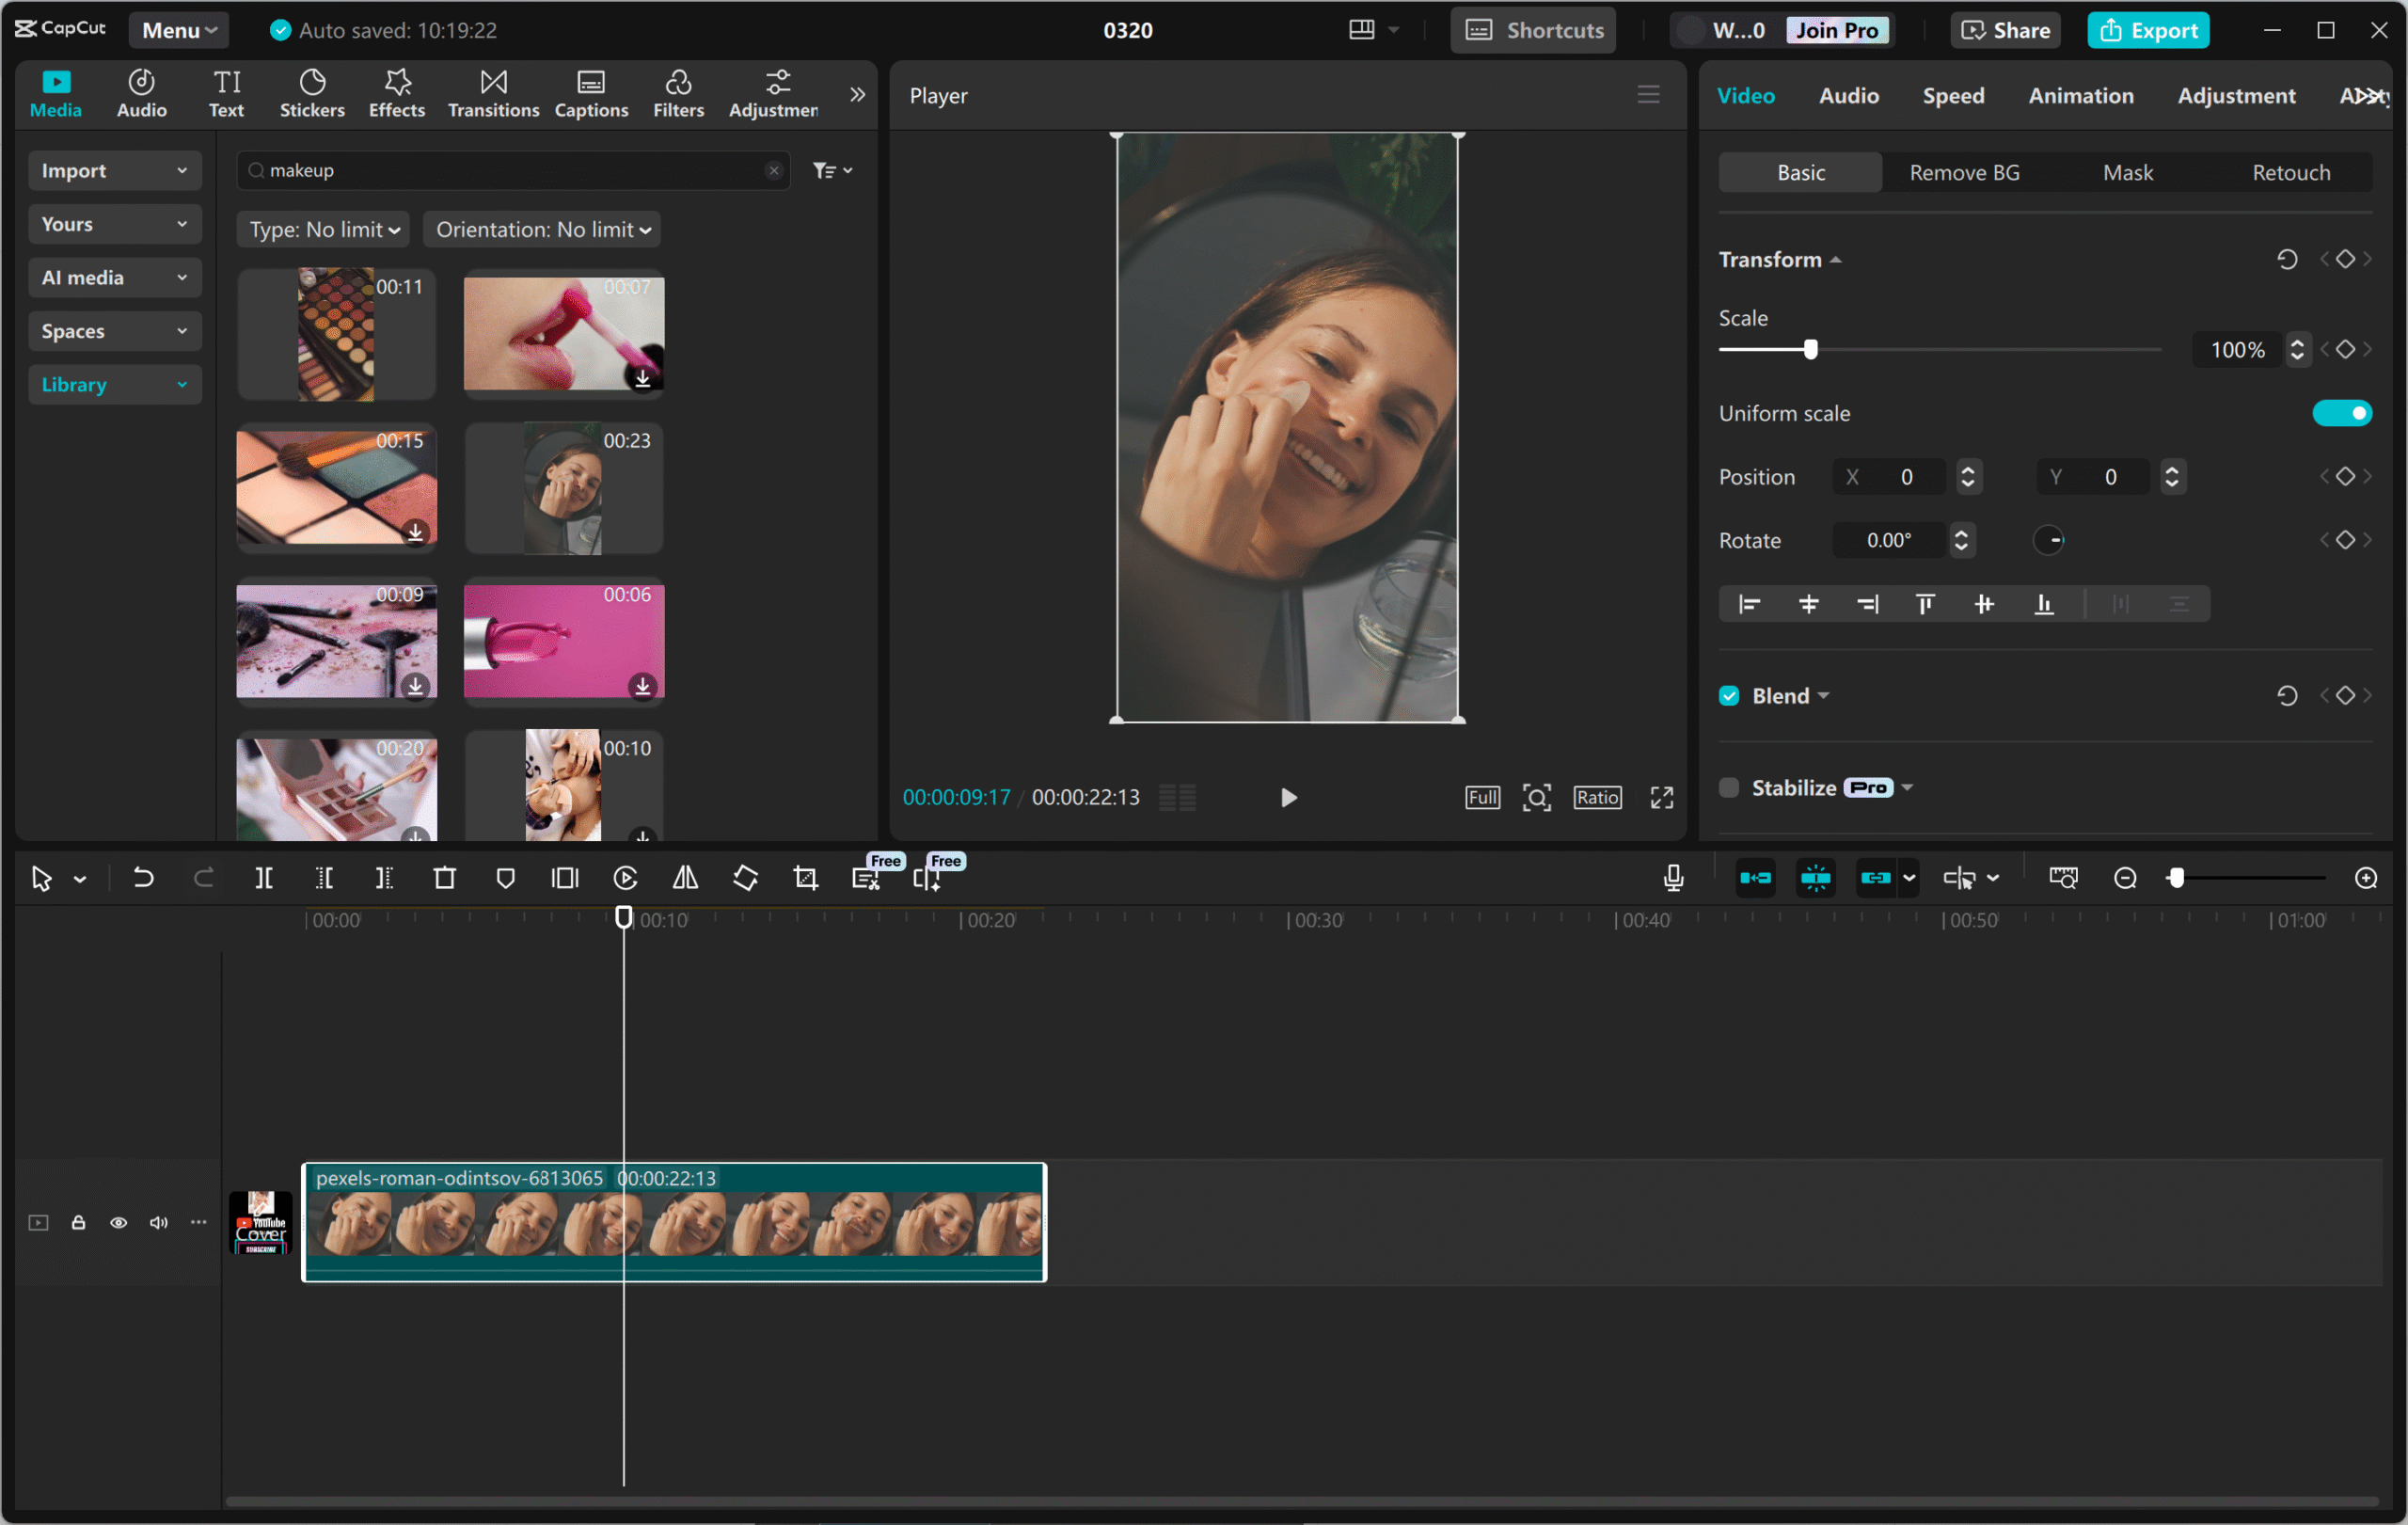
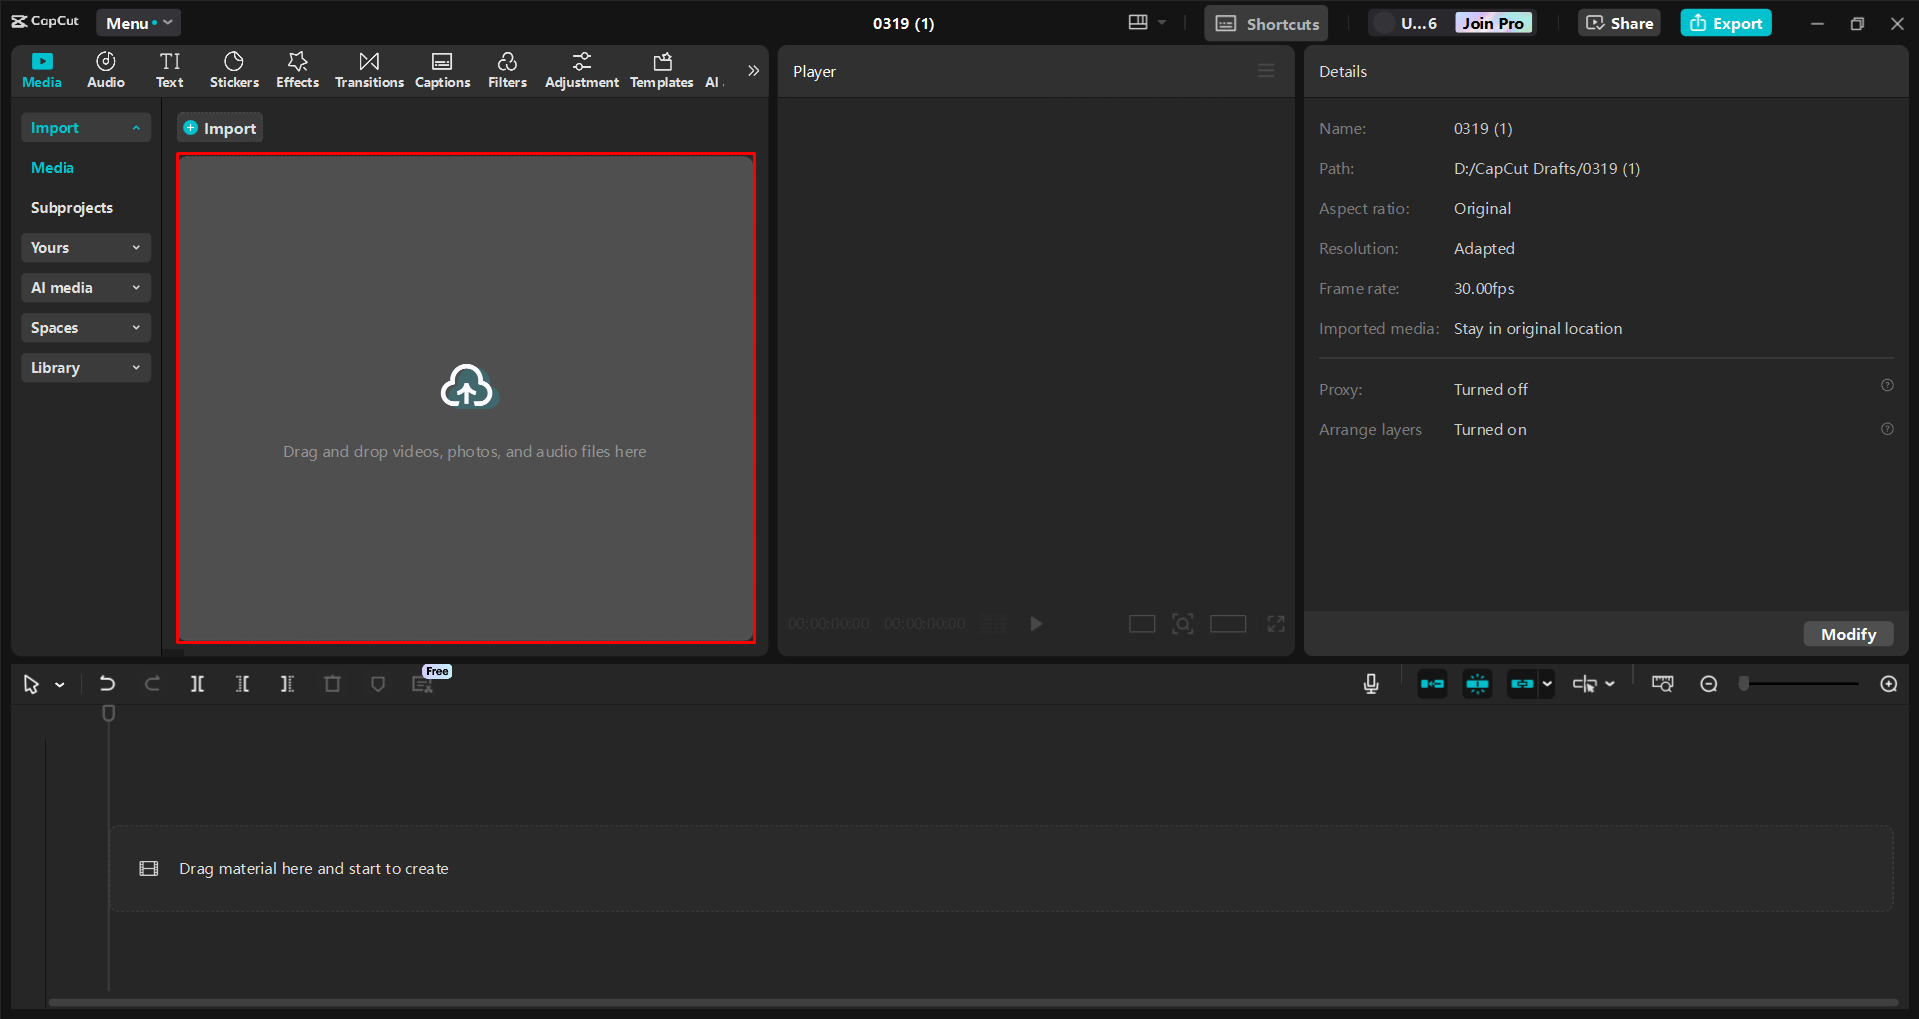
Start by importing your video into CapCut. You can do this by clicking Import or just dragging and dropping your file into the workspace. Then, move it to the timeline to start editing.
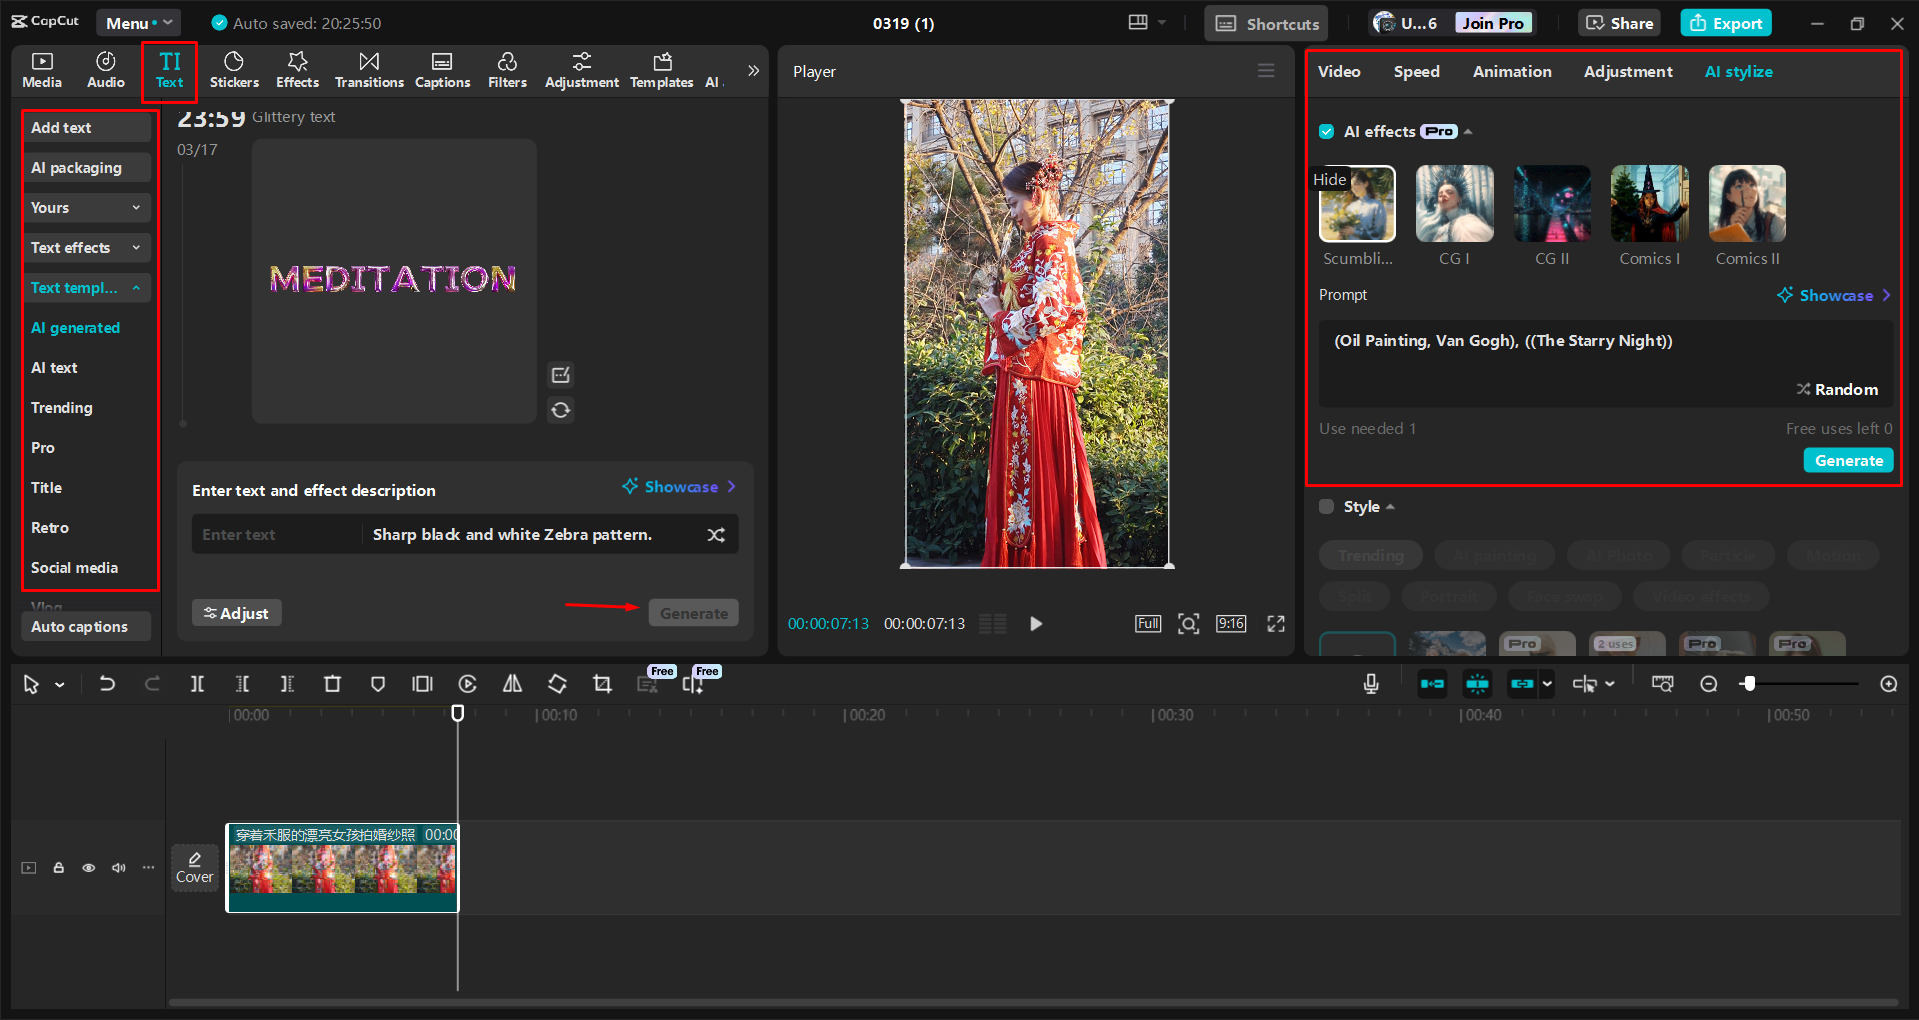
Next, edit your video. Use the Auto Reframe tool to make it the right size for YouTube. Cut out any parts you don’t want, and add captions if you need to. You can also change fonts, use AI effects, or adjust colors to make your video pop.
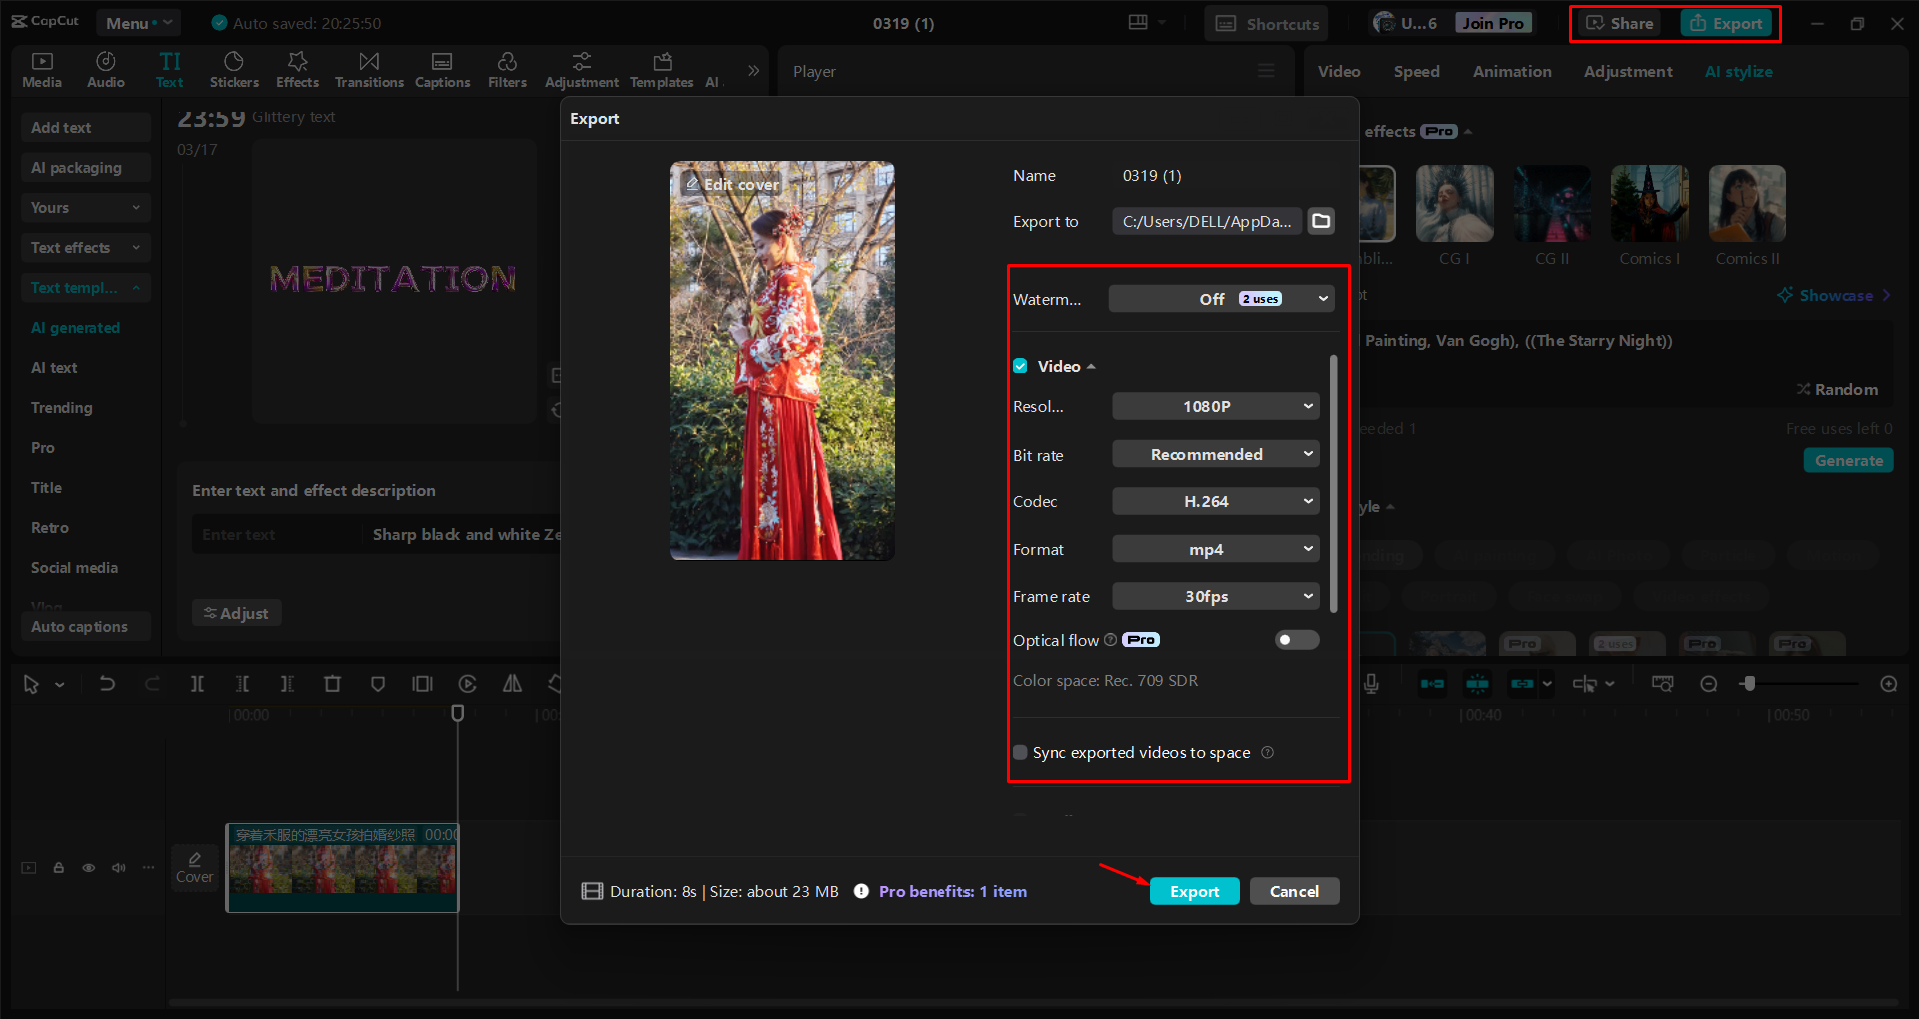
When you’re finished, export your video. Click Export, pick the best format and resolution, and save it to your computer. Then you can share it directly to YouTube.
CapCut — Your all-in-one video & photo editing powerhouse! Experience AI auto-editing, realistic effects, a huge template library, and AI audio transformation. Easily create professional masterpieces and social media viral hits. Available on Desktop, Web, and Mobile App.
Wrapping Up
Using the YouTube Shorts hide overlay feature is a simple but effective way to make your videos better. It takes away distractions and lets your content really stand out. Whether you’re sharing a story, teaching something, or just having fun, this feature can make a big difference.
If you want even more control over your videos, give CapCut a try. It’s a powerful tool that can help you create stunning YouTube Shorts without a hassle.
Frequently Asked Questions
How can YouTube Shorts hide overlays be used to hide on-screen controls?
The YouTube Shorts hide overlay feature takes away on-screen controls like the play button, pause icon, and volume buttons. This lets people watch without distractions. But it only works when the video is playing, not while you’re editing. For more control, you can try using the CapCut desktop video editor.
Can overlays stop users from interacting with YouTube Shorts controls?
Usually, overlays don’t block users from using controls, but if they’re too big or in the wrong place, they can cover important buttons. This might make it harder to pause or change settings. Making sure overlays are placed correctly can fix this. Tools like CapCut can help with placement.
How does where you put overlays affect hidden controls in YouTube Shorts?
If overlays are in the wrong spot, they can block controls and make it hard for people to use the video. It’s important to put them where they won’t be in the way. Good placement makes for a smoother experience. CapCut can help you position overlays just right.
Some images courtesy of CapCut.