TOOL HUNTER
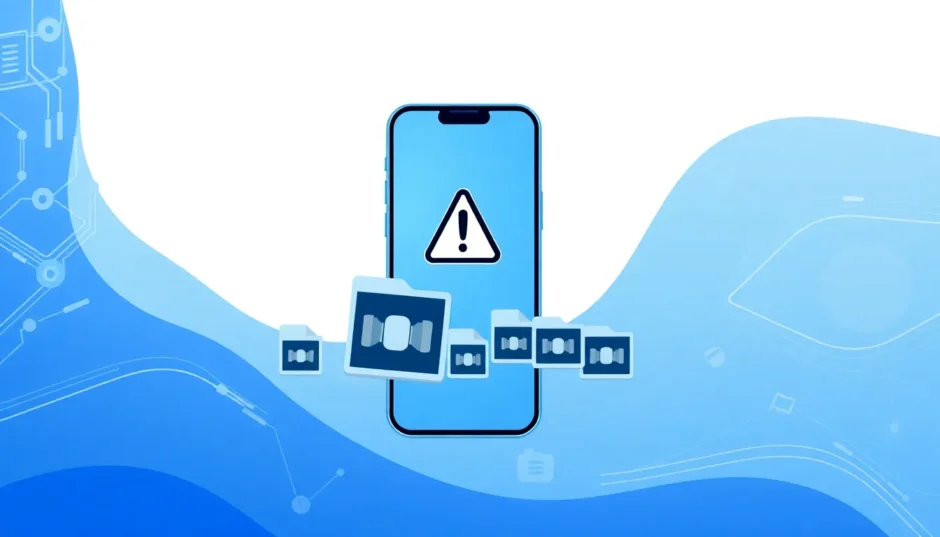

Ever found yourself staring at that dreaded “Storage Almost Full” notification on your iPhone, wondering how you’re going to make space without deleting your favorite videos? Trust me, you’re not alone. With iPhones capturing such incredibly detailed and high-resolution footage, it’s no surprise that our devices run out of room so quickly. But what if you could keep all those memories and still free up gigs of space? That’s exactly what we’re diving into today.
In this guide, we’ll walk through everything you need to know about video compressor apps for iPhone. We’ll cover why compressing videos is such a game-changer, how you can tweak your settings before you even hit record, and the best tools to shrink those files afterward. Whether you’re a social media enthusiast, a casual shooter, or just someone trying to keep their iPhone clutter-free, learning how to compress a video on iPhone is about to make your life a whole lot easier.
Why Learning to Compress Video on iPhone Matters
Let’s be honest: the iPhone camera is nothing short of amazing. It captures life’s moments in stunning clarity, but there’s a catch—those beautiful videos eat up storage like there’s no tomorrow. Before you know it, you’re stuck with constant alerts and no space for new photos or apps. What’s even trickier is that iPhones don’t come with a built-in feature to compress videos after you’ve recorded them.
That’s where knowing how to reduce video size becomes essential. Not only does it help you reclaim precious storage, but it also makes sharing your videos smoother—especially on social media or messaging apps where large files can be a pain. The best part? You can compress videos on iPhone without sacrificing the quality you love. Sounds almost too good to be true, right? With the right tools, it’s totally doable.
How to Reduce Video Size Before You Start Recording
Here’s a little-known secret: you don’t always need third-party tools to keep your video sizes in check. If you plan ahead, you can adjust your iPhone’s camera settings to record in lower resolutions, which naturally leads to smaller files. It’s a simple yet effective way to avoid storage headaches down the line.
Here’s how you do it:
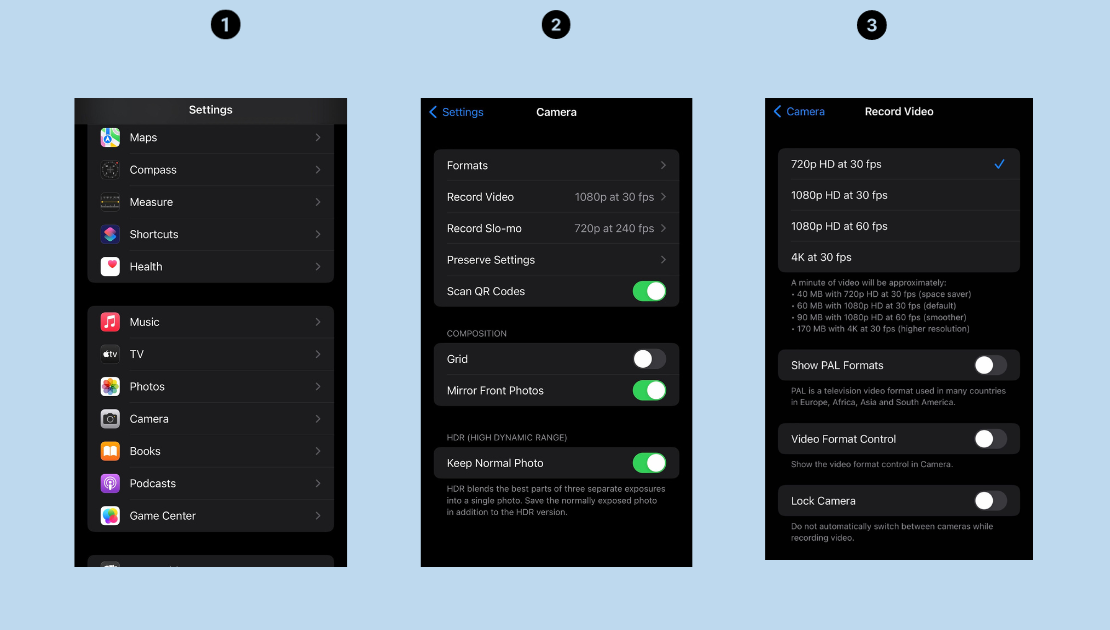
Open your iPhone’s Settings app, scroll down until you see Camera, and tap on it. Next, select Record Video. You’ll see a list of options like 1080p at 30fps or 4K at 60fps—each with a note showing how much storage it uses per minute. By choosing a lower resolution, you’re telling your iPhone to save smaller files from the get-go. It’s a smart move if you don’t always need ultra-high definition and want to keep things manageable.
Of course, this won’t help you with videos you’ve already shot in high quality. For those, you’ll need to turn to other methods—which is where video compressor apps for iPhone really shine.
How to Compress Video on iPhone After Recording
So, you’ve got a bunch of large video files sitting in your camera roll. Now what? One of the easiest and most effective ways to shrink them is by using online compression tools. The beauty of these is that you can access them right from your browser—no downloads or installations needed.
When it comes to online options, CapCut Online Video Editor is a standout choice. It’s not just a basic editor; it’s a powerful, user-friendly tool that makes compressing videos on iPhone a total breeze.
Using CapCut Online Video Editor to Compress Video on iPhone
CapCut Online Video Editor is loaded with features that are perfect for both editing and compression. Here’s what makes it one of the best video compression app for iPhone options out there:
- Lightning-Fast Compression: You can reduce video size in seconds, with options to tweak resolution and frame rate to find that perfect balance.
- Built-in Editing Tools: Trim, crop, split—removing unwanted parts not only cleans up your video but also helps slash file size.
- High-Quality Results: Even after compression, your videos stay sharp and clear.
- Wide Format Support: Whether your video is in MP4, MOV, AVI, or other formats, CapCut can handle it.
Ready to give it a try? Here’s a simple step-by-step guide on how to compress a video on iPhone using CapCut.
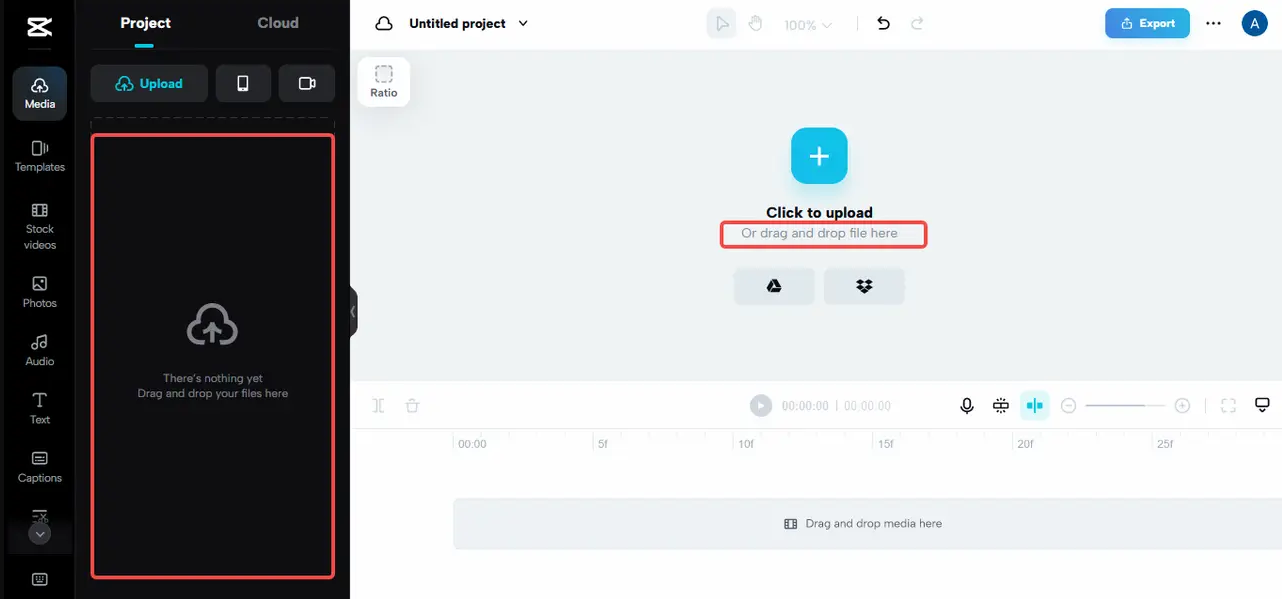
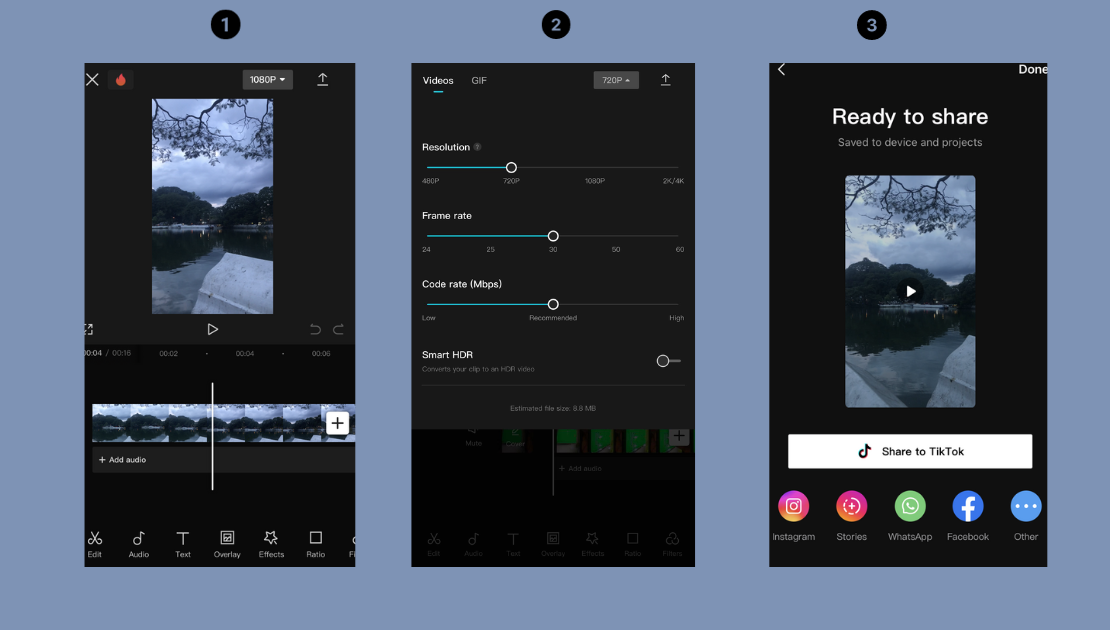
Step 1: Upload Your Video
Head over to the CapCut website and start a new project. You can upload your video directly from your iPhone, or from cloud storage like Google Drive or Dropbox. There’s even a nifty QR code feature that lets you transfer files straight from your phone.
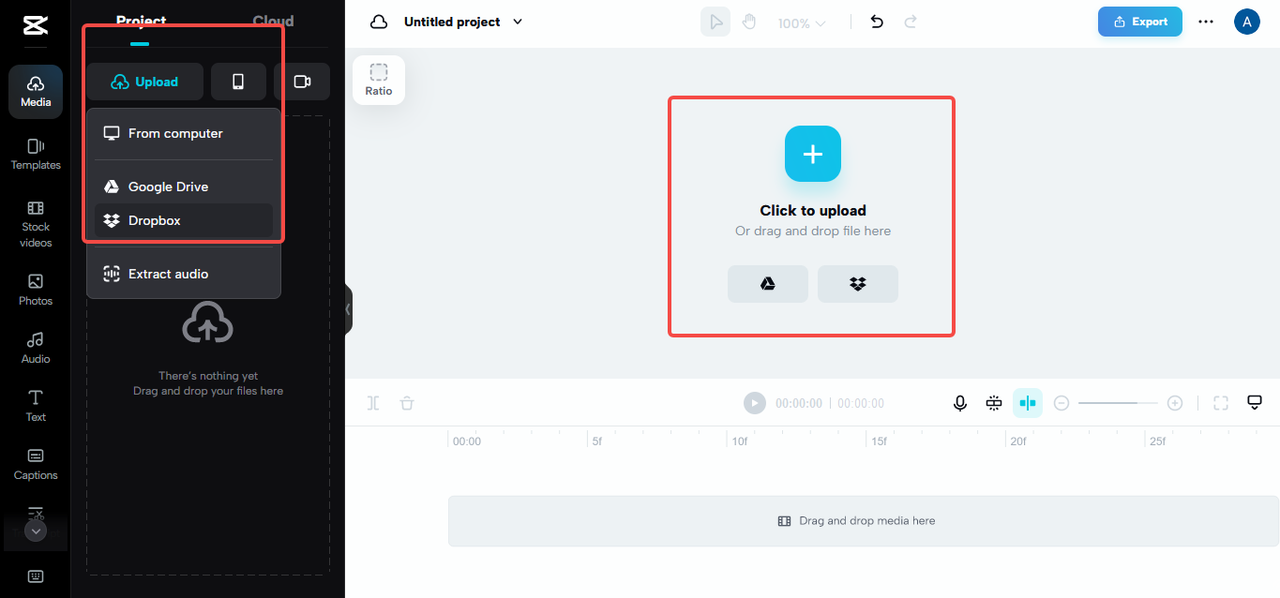
You can also drag and drop your file right into the editor—it doesn’t get much easier than that.
Step 2: Edit and Compress
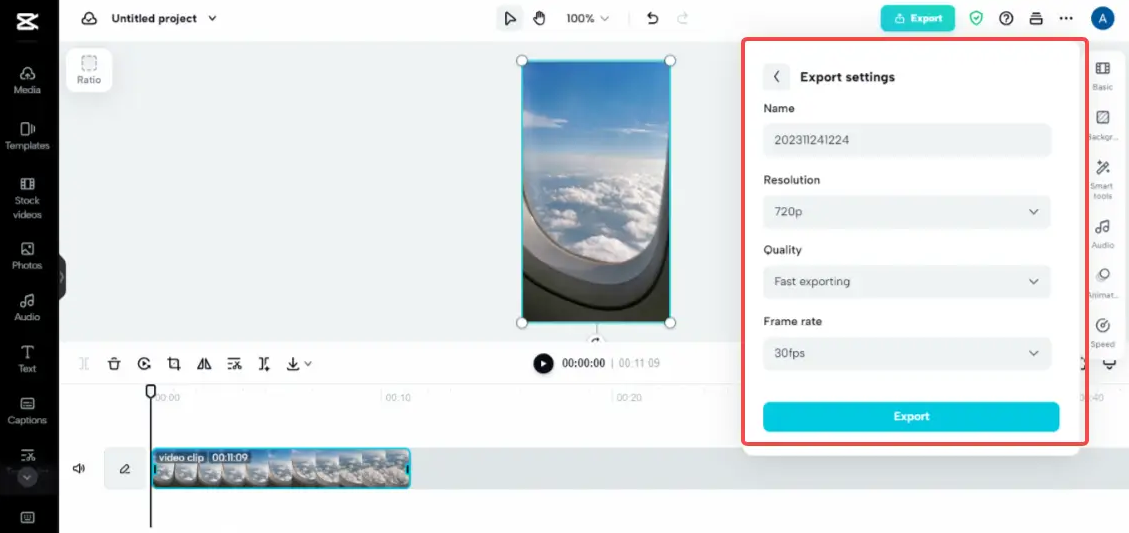
Once your video is uploaded, you can trim out unnecessary parts or split it into smaller segments. This alone can reduce the file size. When you’re done, head to the export settings and choose the ‘Fast exporting’ option. You can also manually adjust resolution and format to control the final size.
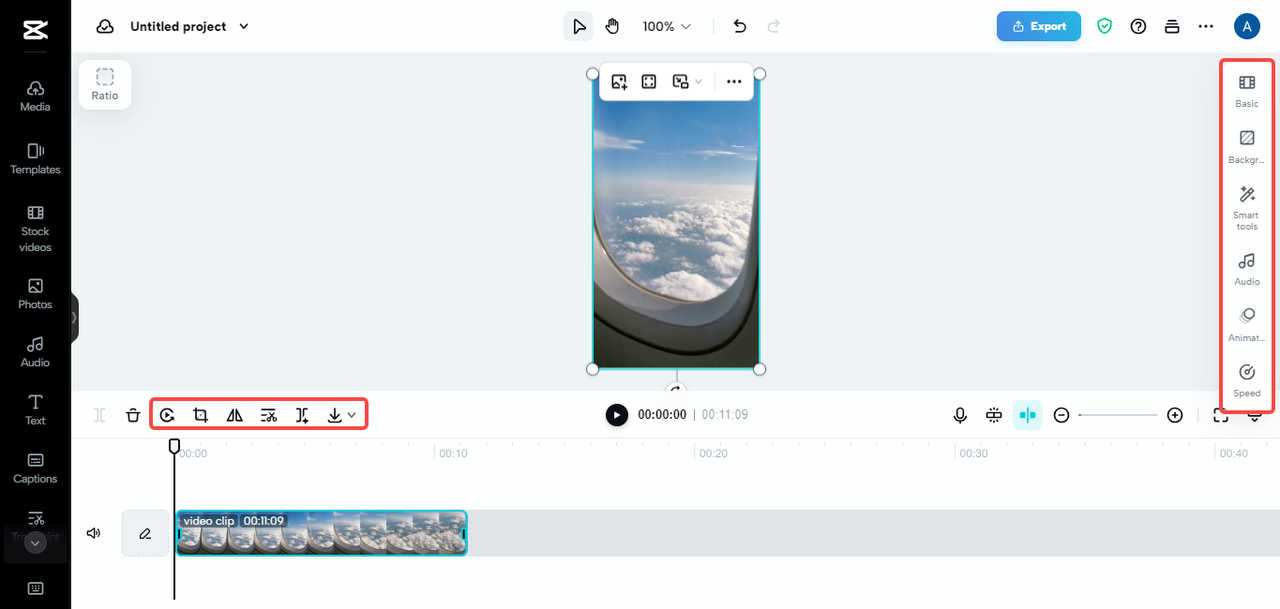
Play around with these settings depending on how much you want to compress your video. Lower resolution and frame rate mean smaller files.
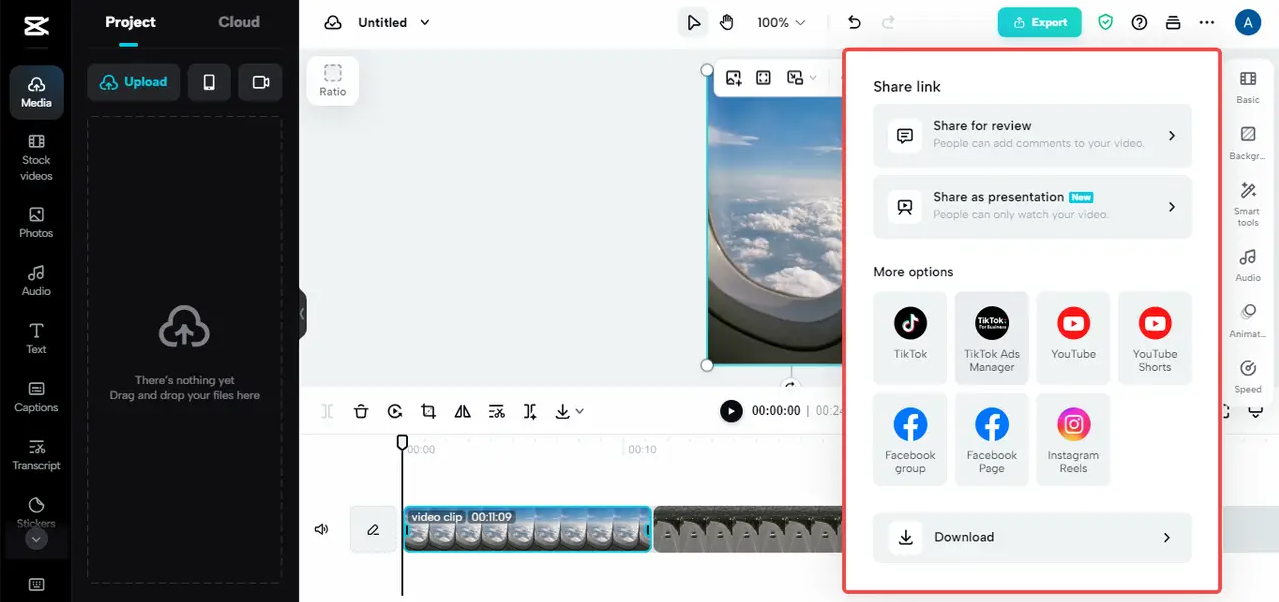
Step 3: Export and Share
Once everything looks good, you can download the compressed video straight to your iPhone or share it on platforms like Instagram, TikTok, or Facebook.
CapCut is easily one of the most reliable ways to compress video on iPhone, but it’s not the only player in the game. If you prefer a dedicated mobile app, there are plenty of great video compressor apps for iPhone worth trying.
CapCut — Your all-in-one video & photo editing powerhouse! Experience AI auto-editing, realistic effects, a huge template library, and AI audio transformation. Easily create professional masterpieces and social media viral hits. Available on Desktop, Web, and Mobile App.

Top Video Compressor Apps for iPhone Worth Checking Out
If you’d rather use a dedicated app instead of an online tool, you’re in luck. The App Store is packed with video compressor apps for iPhone that are simple, effective, and perfect for quick jobs. Here are five of the best:
1. CapCut Mobile Editing App
Yes, CapCut has a mobile app too—and it’s just as powerful as the online version. It’s perfect for compressing videos on the go, with an intuitive interface and plenty of editing features.
How to use it:
- Open the app and create a new project.
- Select your video from the gallery.
- Trim or crop as needed, then adjust export settings like resolution.
- Export and save—it’s that easy.
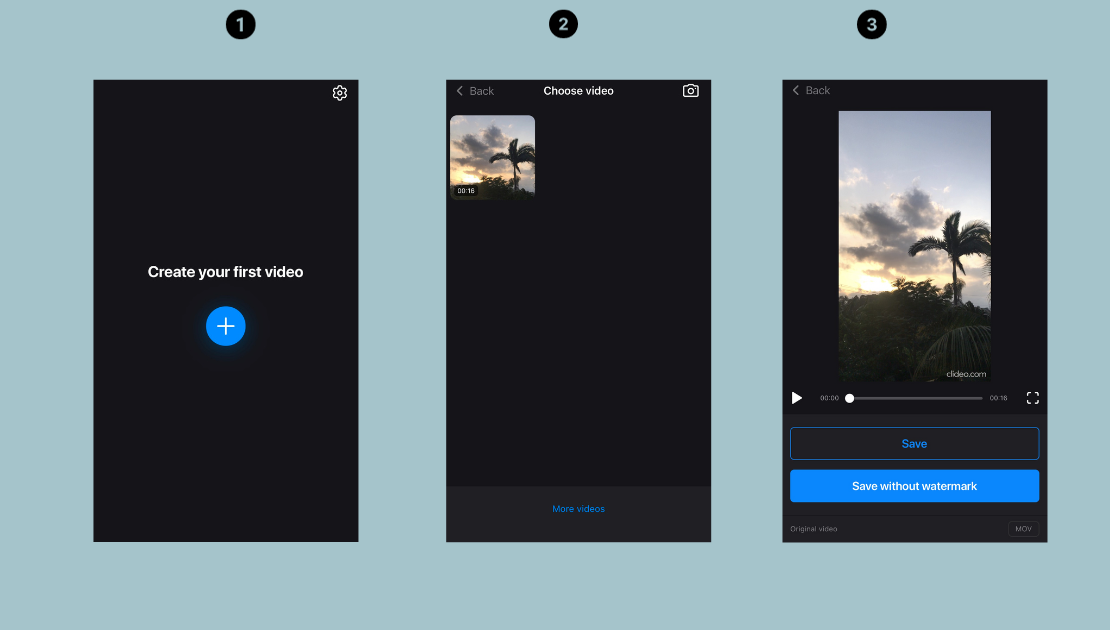
2. Cliedo
Cliedo is straightforward and super user-friendly. It focuses purely on compression, making it a great choice if you want something quick and simple.
How to use it:
- Tap the ‘+’ button and pick your video.
- Choose your compression level.
- Wait a few seconds, and save the new file.
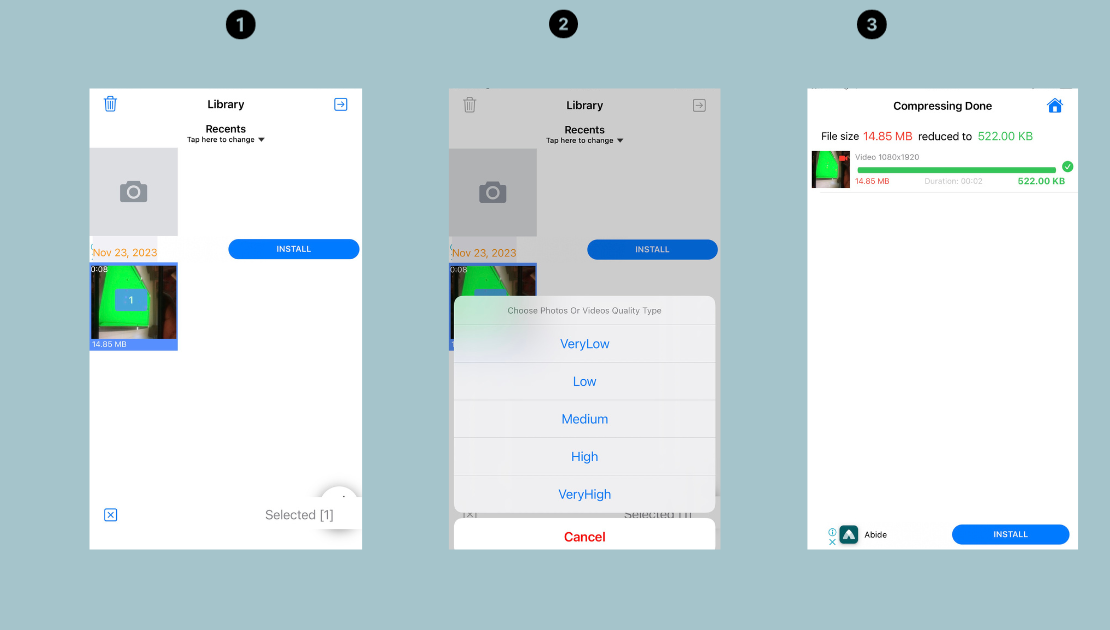
3. Proton Video Compressor
This app is known for speed and power. It handles large files effortlessly and offers multiple compression levels so you can choose between size and quality.
How to use it:
- Select a video from your library.
- Pick from options like Low, Medium, or High quality.
- Let the app work its magic, then save the output.
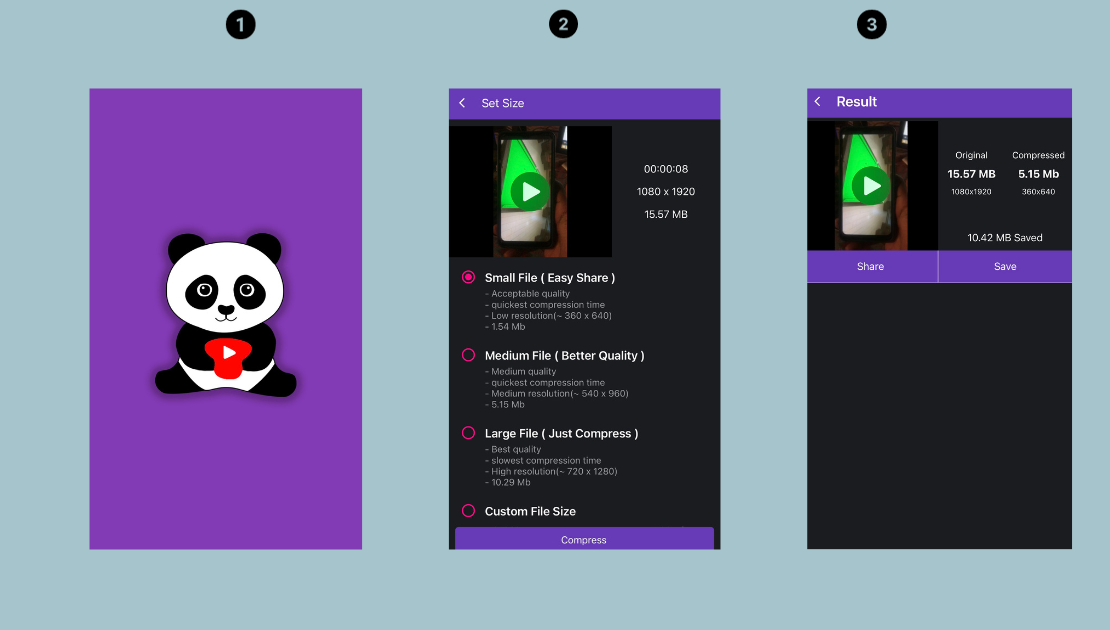
4. Panda Video Compressor
Panda is another powerful tool with a clean interface. It offers various compression settings and keeps your videos looking great.
How to use it:
- Open the editor and select your video.
- Set your desired size or quality.
- Compress and save or share instantly.
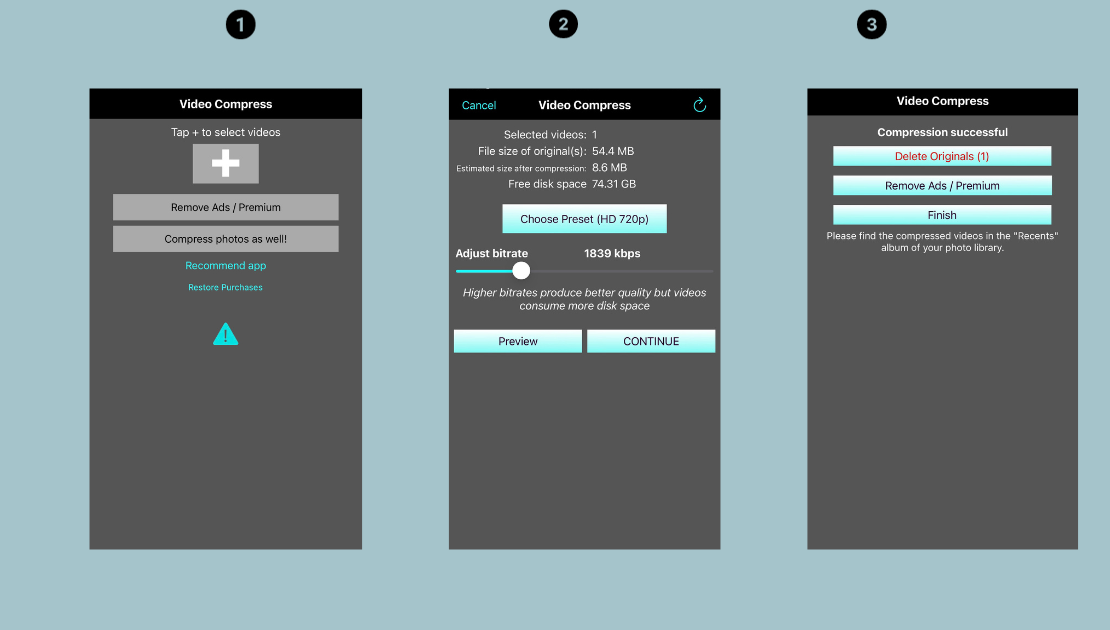
5. Video Compress – Shrink Vids
As the name suggests, this app is all about shrinking video sizes. It’s easy to use and perfect for quick, hassle-free compression.
How to use it:
- Tap the ‘+’ to select a video.
- Adjust compression settings as needed.
- Start the process and save the result.
So, Which Method Should You Choose?
At the end of the day, the best method depends on your needs. If you want maximum control and extra editing features, online tools like CapCut are fantastic. If you prefer something quick and mobile-friendly, dedicated video compressor apps for iPhone are the way to go.
No matter which you choose, learning how to compress a video on iPhone is a skill that’ll save you storage, reduce sharing headaches, and let you hold onto all those video memories without compromise.
CapCut — Your all-in-one video & photo editing powerhouse! Experience AI auto-editing, realistic effects, a huge template library, and AI audio transformation. Easily create professional masterpieces and social media viral hits. Available on Desktop, Web, and Mobile App.
Frequently Asked Questions
How can I compress a video from my iPhone without losing quality?Using a tool like CapCut ensures you maintain high quality even after compression. You can also trim unwanted parts to reduce size without affecting the main content.
What’s the best video format for compression on iOS?MP4 and MOV are among the most recommended formats because they offer a great balance between quality and file size.
What’s the easiest way to compress video on iPhone?Definitely by using apps like CapCut, Cliedo, or any of the other video compressor apps for iPhone we mentioned. They’re designed to be simple and efficient.
And there you have it—everything you need to know about how to compress a video on iPhone. It’s easier than you think, and once you start, you’ll wonder how you ever managed without it.
Some images in this article are sourced from CapCut.