TOOL HUNTER
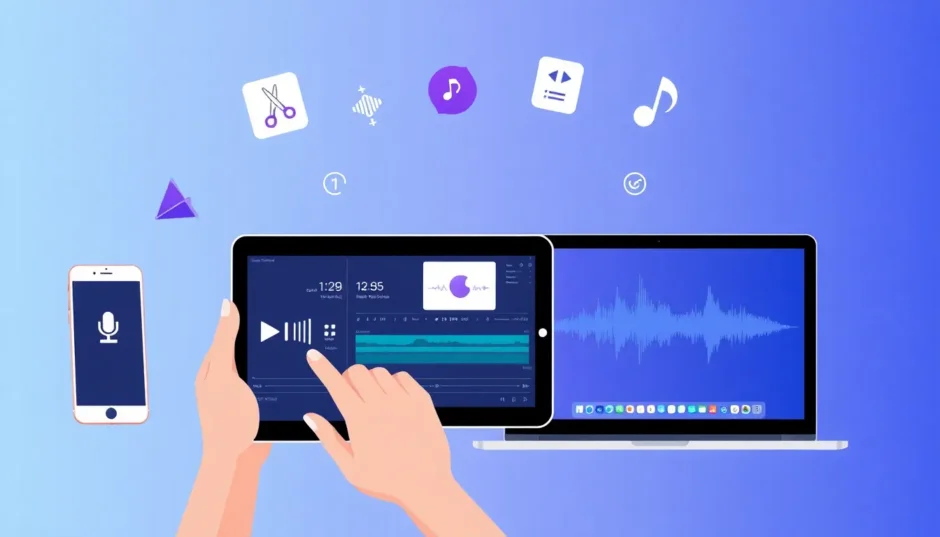

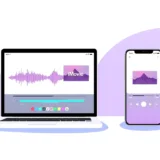
If you’ve ever wanted to make your videos sound more professional but weren’t sure where to start, you’re in the right place. Learning how to edit audio in iMovie can completely transform your projects from amateur to polished. Whether you’re working on a school project, a YouTube video, or just preserving family memories, good audio makes all the difference.
Many people focus only on the visual aspects of their videos, but poor audio quality can ruin even the most beautifully shot footage. The good news is that iMovie provides surprisingly powerful tools for audio editing that are accessible to everyone. In this comprehensive guide, we’ll walk through everything you need to know about iMovie audio editing on both mobile devices and computers.
Table of Contents
- Getting Started with Audio Editing in iMovie on iPhone and iPad
- Mastering Audio Editing in iMovie on Mac
- Advanced iMovie Audio Editing Techniques
- Beyond iMovie: Exploring Professional Audio Editing Options
- Putting It All Together: Creating Professional Audio in Your Projects
- Conclusion: Finding the Right Tool for Your Audio Editing Needs
Getting Started with Audio Editing in iMovie on iPhone and iPad
For iOS users, iMovie offers a convenient and free solution for basic video and audio editing. The mobile version packs quite a punch despite its simple interface. If you’re wondering how do I edit audio in iMovie on your iPhone, the process begins with getting the app installed and familiarizing yourself with its layout.
Once you have iMovie installed from the App Store, launching the app reveals a clean interface where you can start new projects or work on existing ones. The plus icon is your gateway to importing media and accessing audio tools.
Importing Audio Files and Music
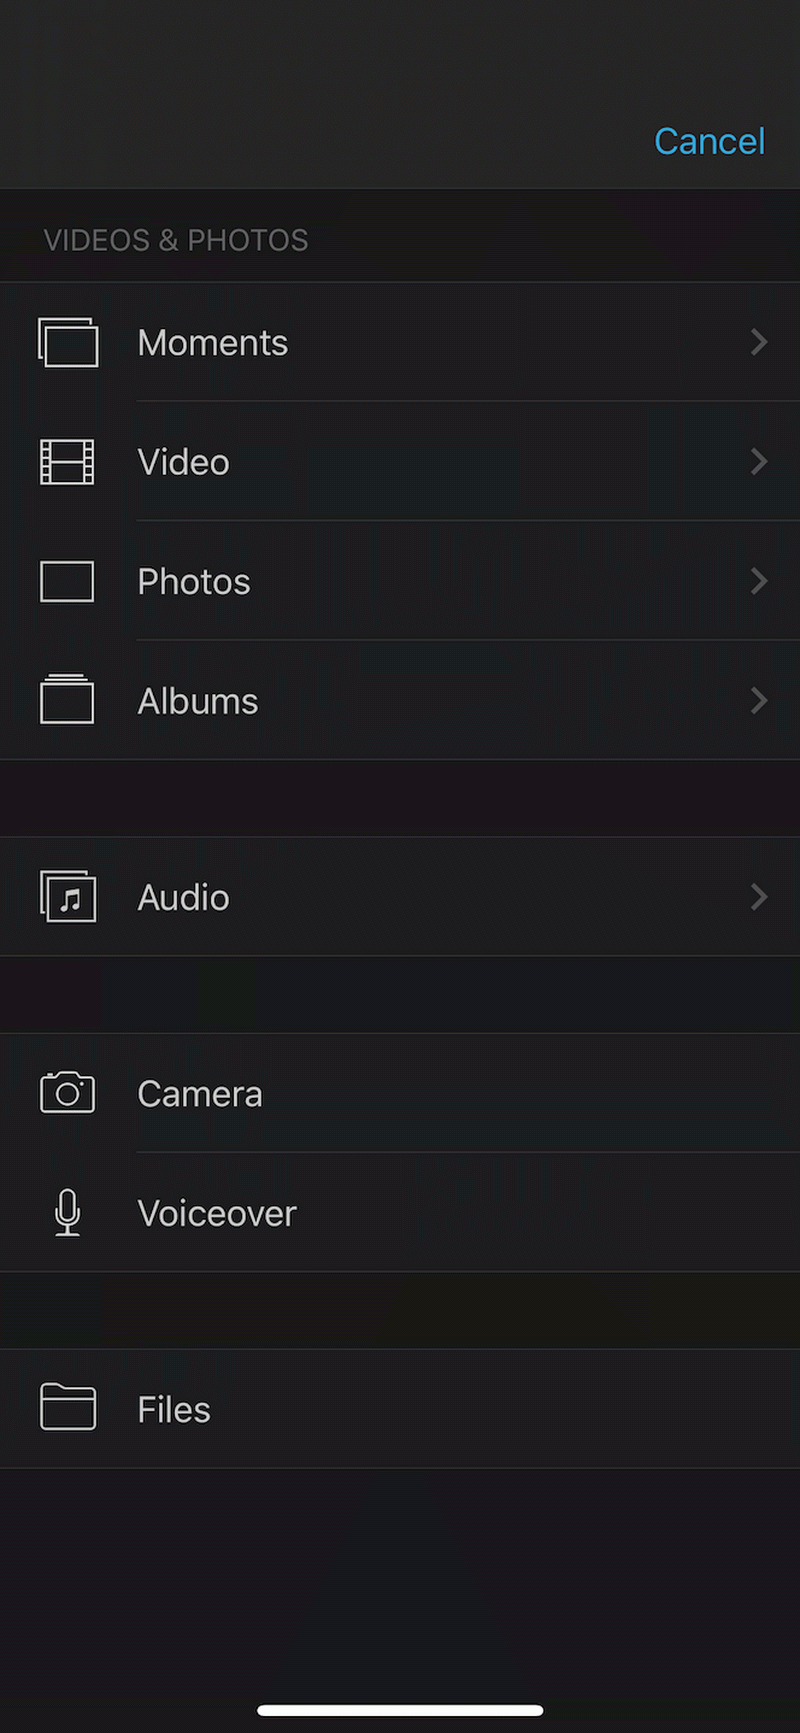
To begin your iMovie audio editing journey, you’ll need to import your audio sources. Tap the plus icon in your project window, then select Audio. From here, you can access music from your Apple Music library or import audio files stored on your device.
An alternative method involves importing a video clip first, then separating its audio track for editing. This technique is perfect when you want to enhance the existing audio from your video recordings or replace it entirely.
Enhancing Your Project with Sound Effects
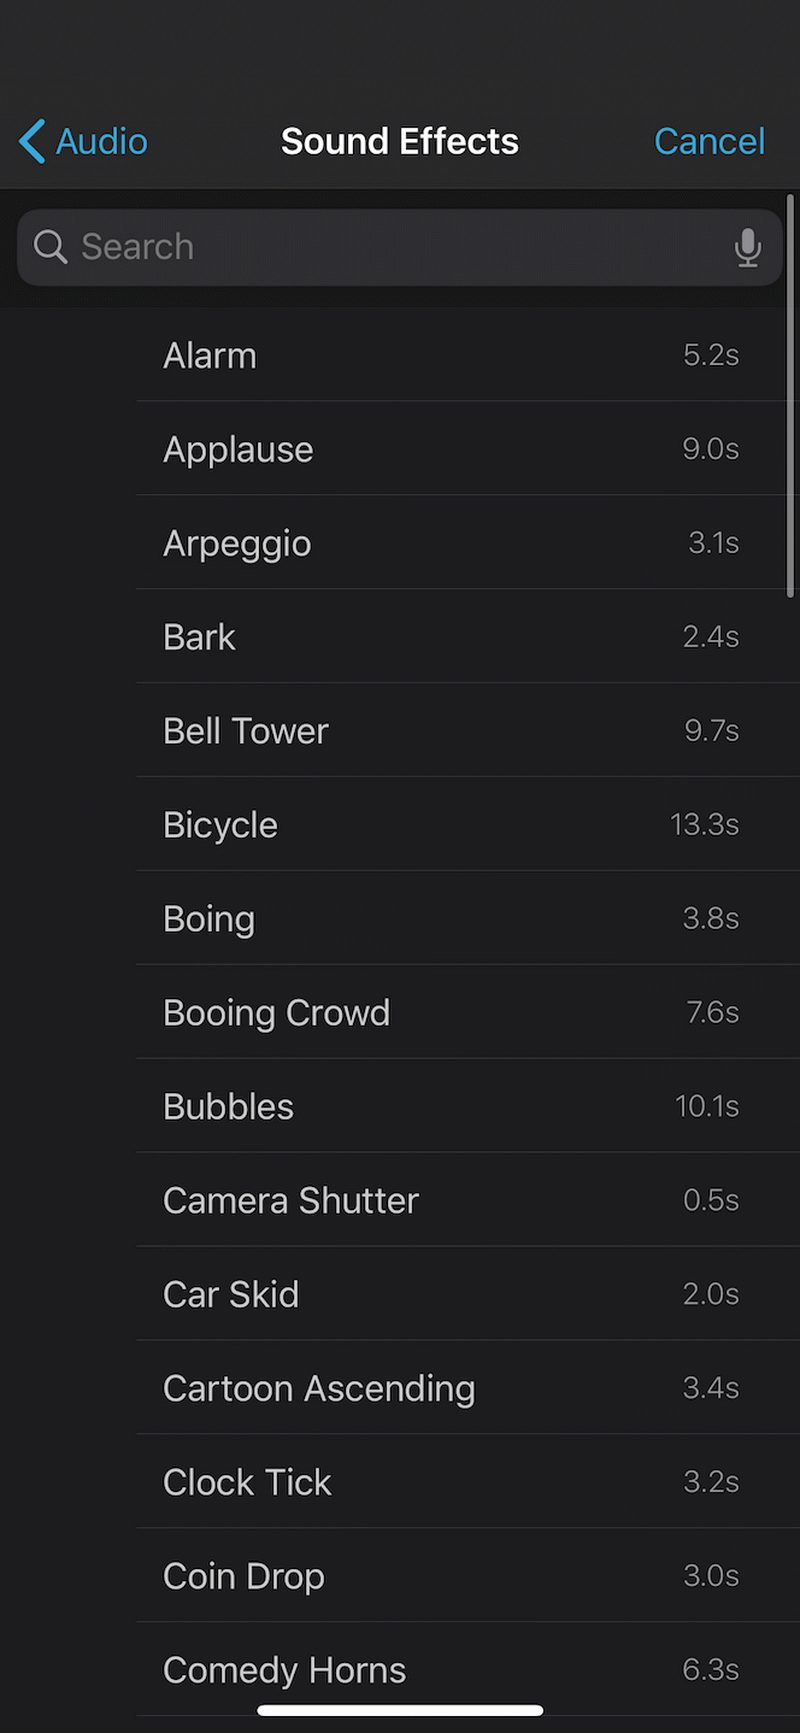
Sound effects can add depth and emotion to your videos. The process for adding them is straightforward in iMovie. Scroll through your timeline and position the playhead where you want the effect to begin. Tap the plus button, select Audio, then choose Sound Effects. You can preview different options before committing by tapping on them.
Once you’ve found the perfect sound effect, a simple tap on the plus icon adds it to your project timeline. You can then adjust its position and duration to match your visual content perfectly.
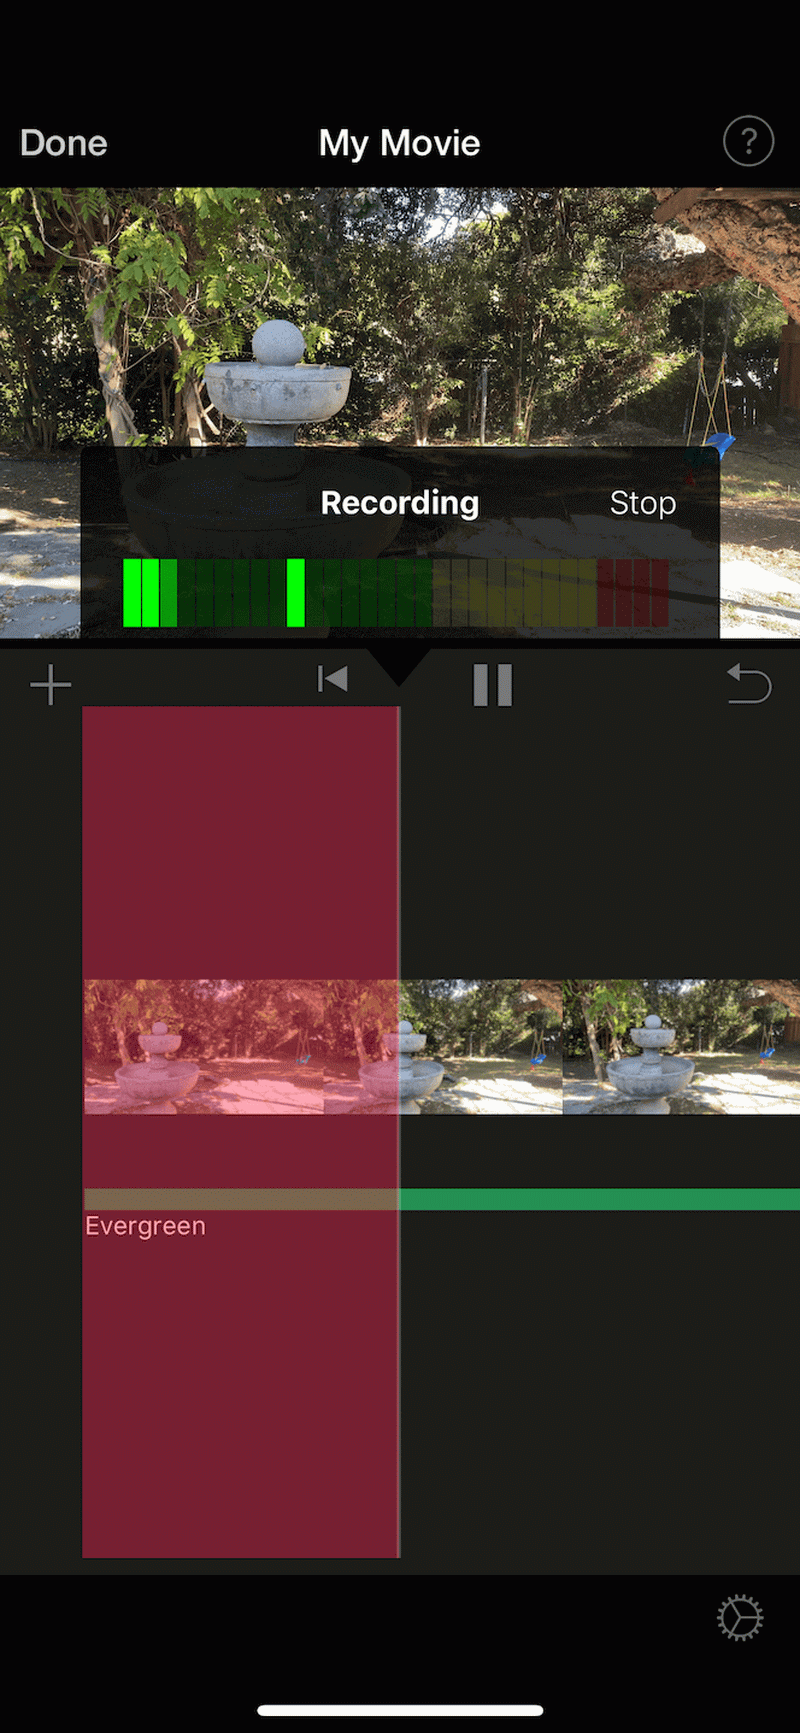
Recording Voiceovers Directly in iMovie
Adding narration or commentary is simple with iMovie’s built-in voice recording feature. Position the playhead where you want your voiceover to begin, then tap the plus icon and select Voiceover. The app will show a recording interface with a big red button – tap it to start recording.
When you’re finished, tap Stop and you’ll have options to review, accept, or retake your recording. This feature is incredibly useful for adding explanations, storytelling, or personal touches to your videos.
Rearranging Audio Elements
Sometimes you need to adjust the timing of your audio clips. To move an audio clip in iMovie, simply tap and hold it until it lifts from the timeline, then drag it to your desired position. This is particularly helpful when you’re trying to sync sound effects with specific visual moments or rearranging musical elements.
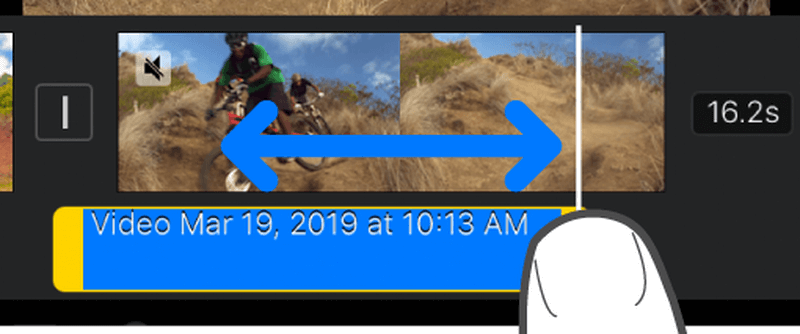
Trimming and Cutting Audio Clips
Learning how to trim audio in iMovie is essential for removing unwanted sections or tightening up your audio tracks. Tap on the audio clip you want to adjust, and yellow handles will appear at its edges. Drag these handles to set new start and end points for your clip.
This function is perfect for cutting out mistakes, creating tighter edits, or isolating the best parts of a longer audio recording. When you tap outside the clip, the trimming handles disappear, and your changes are saved.
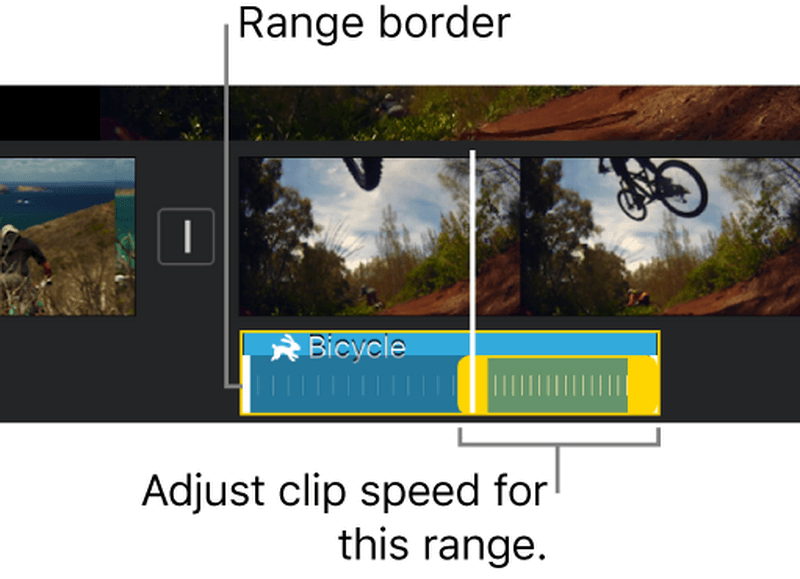
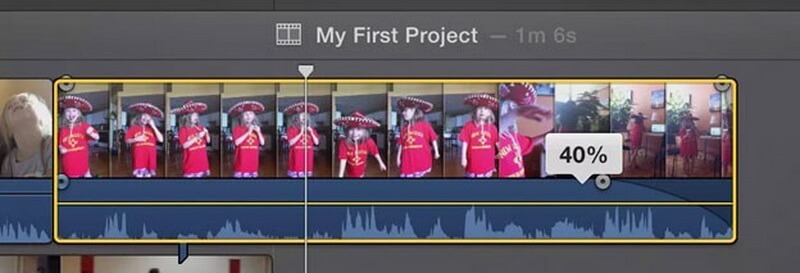
Adjusting Playback Speed
iMovie allows you to change the speed of your audio clips, which can create interesting effects or help match audio to video length. Tap on your audio clip and select the speedometer icon to access speed controls. Yellow sliders will appear that let you create speed adjustment ranges within your clip.
You can create multiple speed zones within a single clip by tapping “Add” in the inspector panel. Dragging the slider to the right increases speed, while moving it left slows things down. This feature is great for creating slow-motion dramatic effects or speeding up lengthy sections.
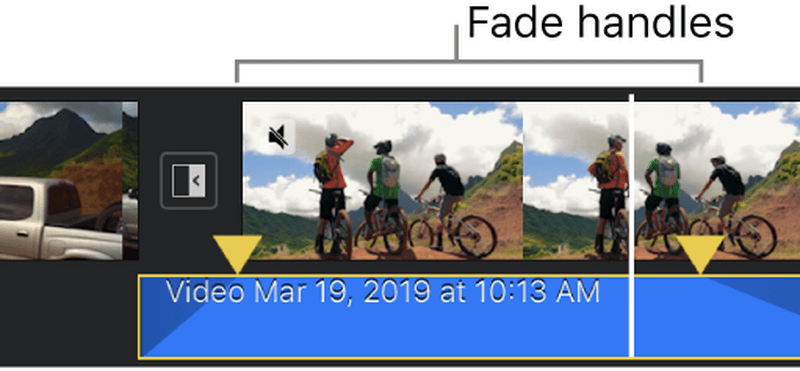
Creating Smooth Transitions with Fade Effects
Professional audio editing often involves smooth transitions rather than abrupt starts and stops. iMovie’s fade features help you achieve this polish. Select your audio clip and tap the audio icon (which looks like a waveform). Then choose Fade and use the yellow sliders to adjust the duration of your fade-in and fade-out effects.
These gradual volume changes are perfect for making music introductions and endings feel natural, or for smoothly transitioning between different audio clips in your project.
Mastering Audio Editing in iMovie on Mac
The Mac version of iMovie offers a more comprehensive set of tools for audio editing, taking advantage of the larger screen and more powerful hardware. The process of how to edit audio in iMovie on Mac shares some similarities with the mobile version but provides greater precision and additional features.
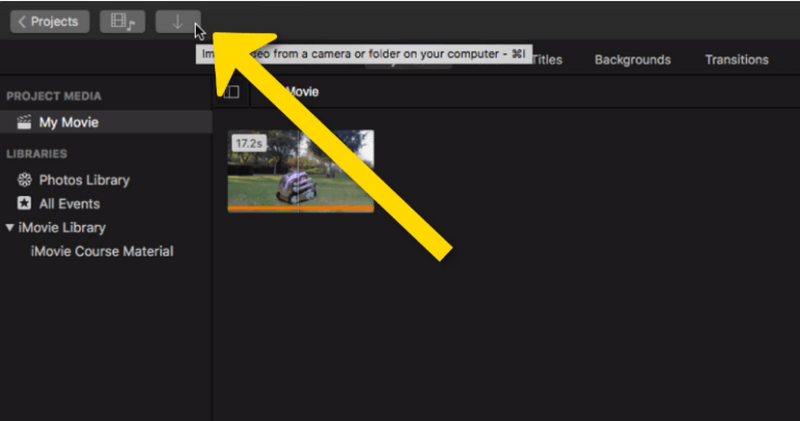
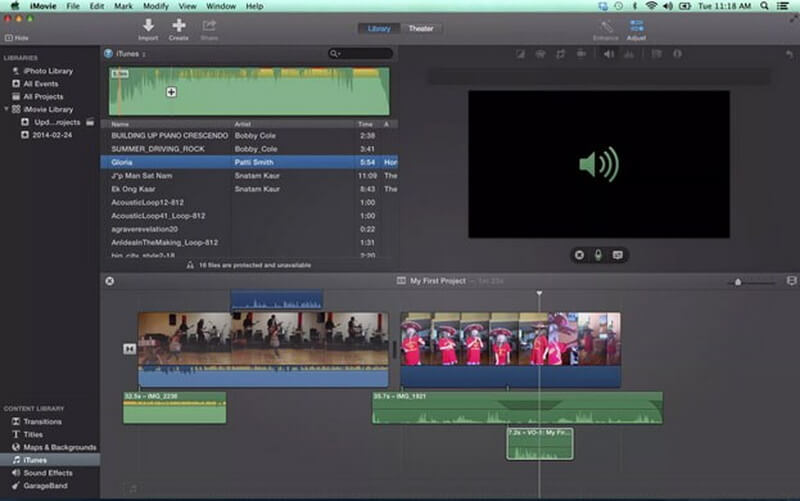
Importing Audio into Your Mac Project
Begin by launching iMovie on your Mac and clicking the import button (arrow icon) to bring your audio files into the media library. iMovie supports various audio formats, giving you flexibility in your source material. Once imported, simply drag and drop your audio clips into the timeline to begin working with them.
The timeline interface provides a visual representation of all your project elements, making it easy to see how audio and video elements align. You can zoom in for more precise editing or zoom out for a broader view of your project’s structure.
Precision Trimming Techniques
When you need to make precise cuts to your audio clips, right-click on the clip in the timeline and select “Trim to Playhead.” This function lets you set exact start and end points using trim handles that appear around your clip. This method gives you more control than the mobile version, perfect for frame-accurate editing.

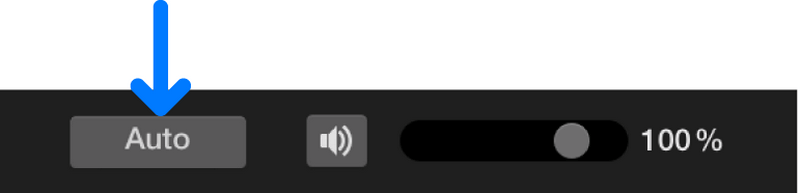
Automatic Audio Enhancement
iMovie includes an automatic audio enhancement feature that can quickly improve your sound quality with a single click. Select your audio clip and click the volume icon, then choose “Auto.” iMovie will analyze your audio and apply optimal volume and equalization settings.
This is a great starting point for beginners or when you need to quickly improve audio that was recorded in less-than-ideal conditions.
Reducing Background Noise
Poor audio quality often stems from background noise, which can distract from your main content. iMovie includes a noise reduction tool to help minimize these unwanted sounds. Select your audio clip and click the noise reduction and equalizer icon (it looks like a waveform with sliders).
Check the “Reduce background noise” box and adjust the slider until you achieve the right balance between noise reduction and audio quality. Be careful not to overdo it, as excessive noise reduction can make voices sound artificial.

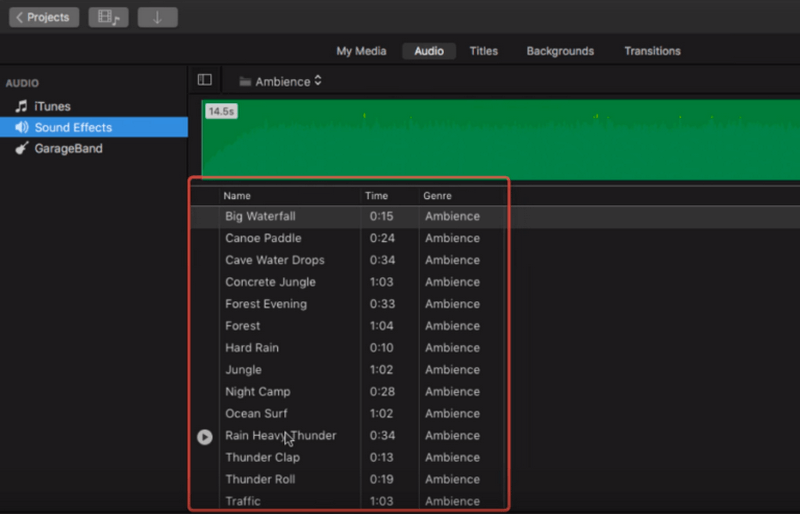
Adding Professional Sound Effects
The Mac version of iMovie comes with an extensive library of royalty-free sound effects that can enhance your projects. Click on the Audio tab in the top left corner, then select Sound Effects to browse the available options.
The library is organized into categories, making it easy to find the perfect sound for any situation. Simply drag your chosen effect into the timeline and position it where needed.
Advanced iMovie Audio Editing Techniques
Once you’ve mastered the basics of how to edit audio in iMovie, these pro tips will help you work more efficiently and achieve better results. These techniques apply to both mobile and desktop versions unless otherwise specified.
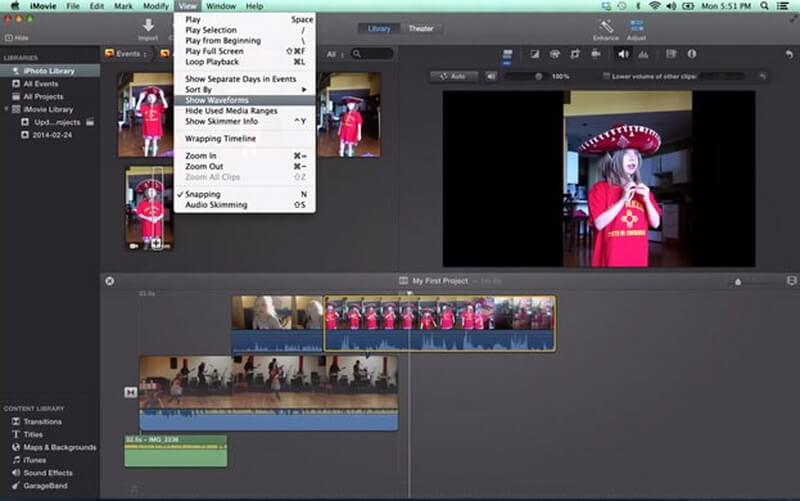
Visual Editing with Waveforms
For precision editing, enable waveform display which provides a visual representation of your audio’s volume and patterns. On Mac, go to the View menu and select “Show Waveforms.” On iOS, waveforms are automatically displayed for most audio clips.
Waveforms make it easier to identify specific sounds, find edit points, and ensure consistent volume levels across your project. The visual peaks correspond to louder sections, while valleys represent quieter moments.
Precise Volume Adjustments
While iMovie offers overall volume controls for entire clips, you can also make precise volume adjustments to specific sections. On Mac, position your cursor over the audio clip and press the R key to activate range selection. Click and drag to select a portion of the clip, then adjust the volume line that appears.
This technique lets you create dynamic audio levels within a single clip, such as lowering background music when someone is speaking then raising it again afterward.
Accessing iMovie’s Audio Library
Beyond sound effects, iMovie includes a library of royalty-free music clips that you can use in your projects without worrying about copyright issues. Expand the iMovie Library in the left sidebar and browse through the available audio content.
These tracks are professionally composed and categorized by mood and genre, making it easy to find the perfect background music for your project.
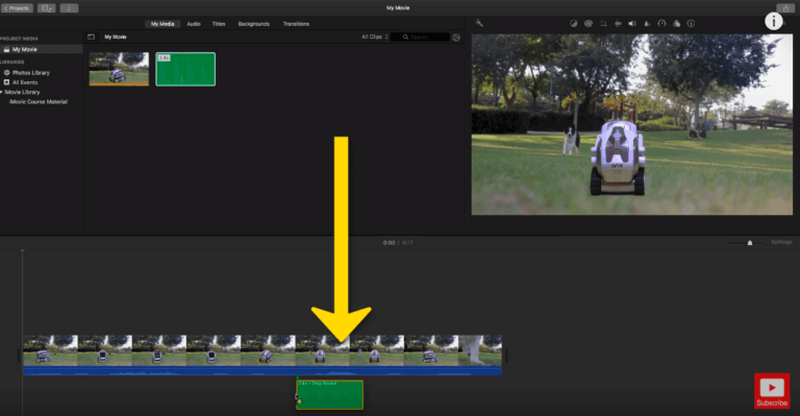
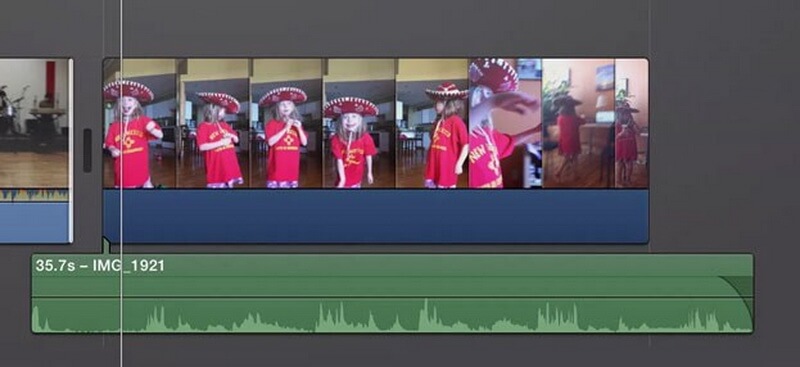
Separating Audio from Video
One of iMovie’s most powerful features is the ability to detach audio from video clips. This lets you work with the audio independently from the visuals. Right-click on a video clip in your timeline and select “Detach Audio” (on Mac) or use the modify menu (on iOS).
The audio will appear as a separate clip that you can edit, move, or enhance independently from the video. This is perfect when you want to improve the audio quality of a video recording or replace it entirely while keeping the visuals.
Beyond iMovie: Exploring Professional Audio Editing Options
While iMovie provides solid basic audio editing capabilities, sometimes you need more advanced tools or a different workflow. This is where specialized audio editing software can make a significant difference in your final product quality.
Filme – Best Video Editor for Beginners.Explore Your Creativity, Limitless

Check More Details | Download Now! | Check All Deals
For those looking to advance beyond iMovie’s capabilities, iMyFone Filme offers a more comprehensive set of audio editing tools while maintaining user-friendliness. This software bridges the gap between basic editors like iMovie and professional-grade applications that can have steep learning curves.
Filme provides enhanced audio editing features including more precise control over audio levels, advanced noise reduction, and a wider variety of audio effects and transitions. The interface is intuitively designed, making the transition from iMovie relatively seamless.
One of Filme’s standout features is its built-in audio recording capability that captures both microphone input and system audio simultaneously. This is perfect for creating voiceovers with background music or recording audio from various sources in one go.
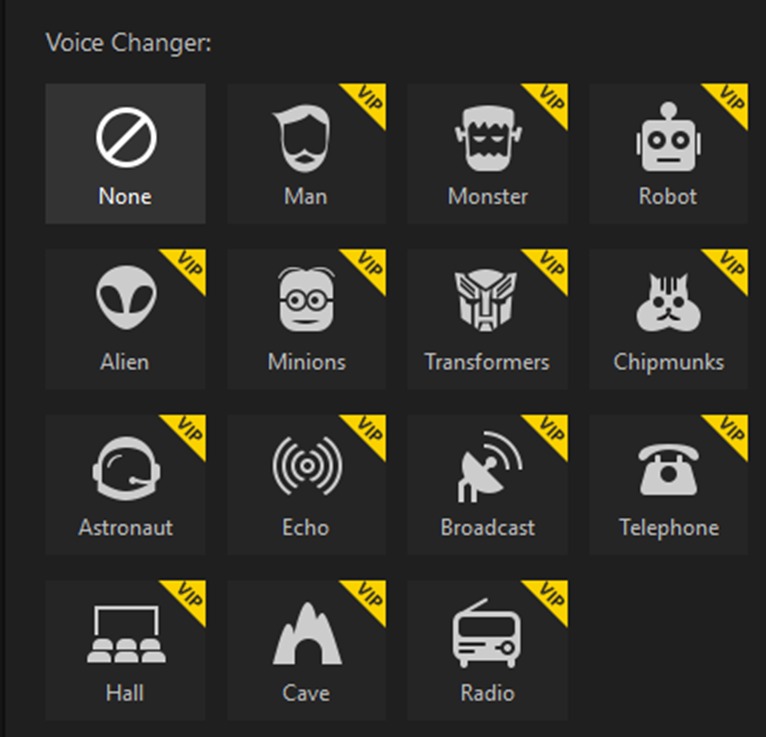
The software also includes fun voice-changing effects that can add entertainment value to your projects. From chipmunk voices to robotic effects, these tools can bring creative elements to your audio that aren’t available in iMovie.
Getting Started with Filme for Audio Editing
Installing Filme is straightforward from the official website. Once launched, the home interface provides clear options for starting new projects or working with existing media. The timeline-based editing will feel familiar to iMovie users, reducing the learning curve.
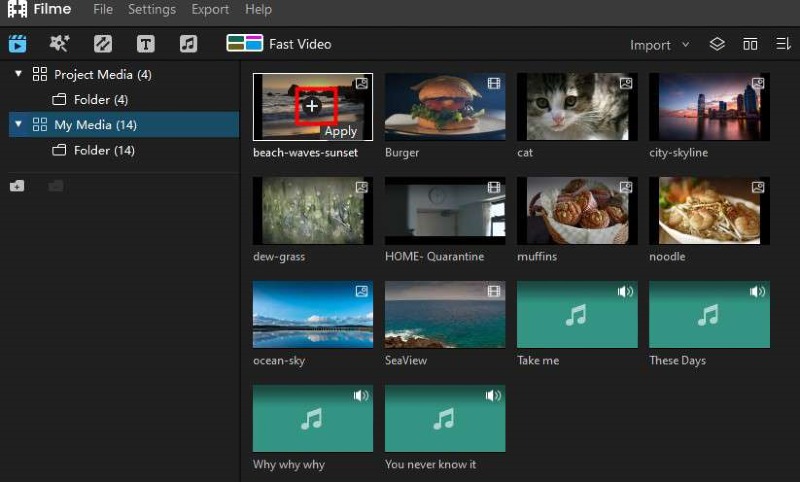
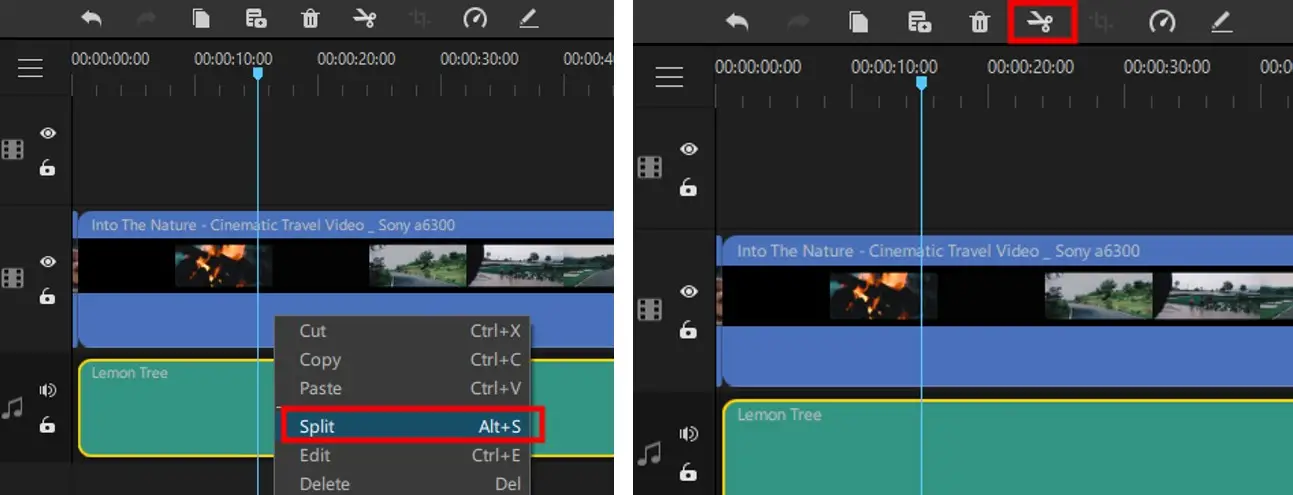
To import audio, click the plus sign and select your audio files. Once in the timeline, you can apply various effects and edits. Splitting audio clips is simple: position the playhead where you want to make a cut, right-click, and select Split. This non-destructive editing means you can always readjust your cuts later.
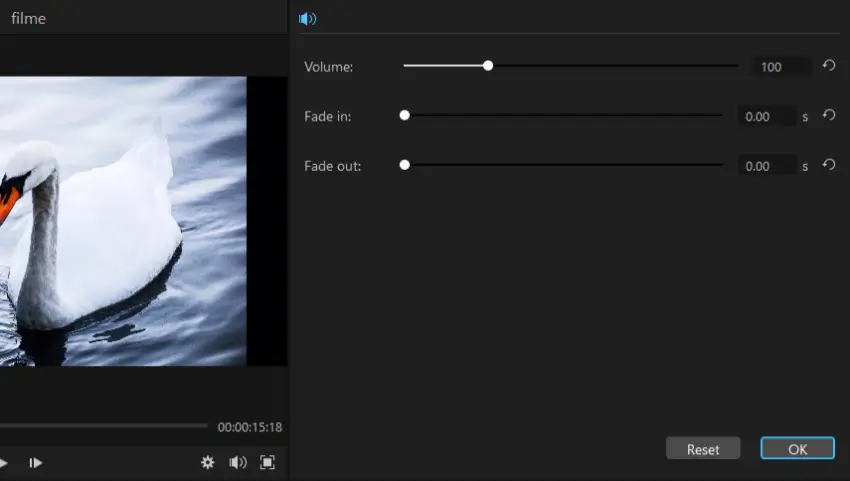
Double-clicking on an audio clip opens detailed editing options including volume controls and fade effects. The interface provides visual sliders for precise adjustment of these parameters, giving you more control than iMovie’s basic fade options.
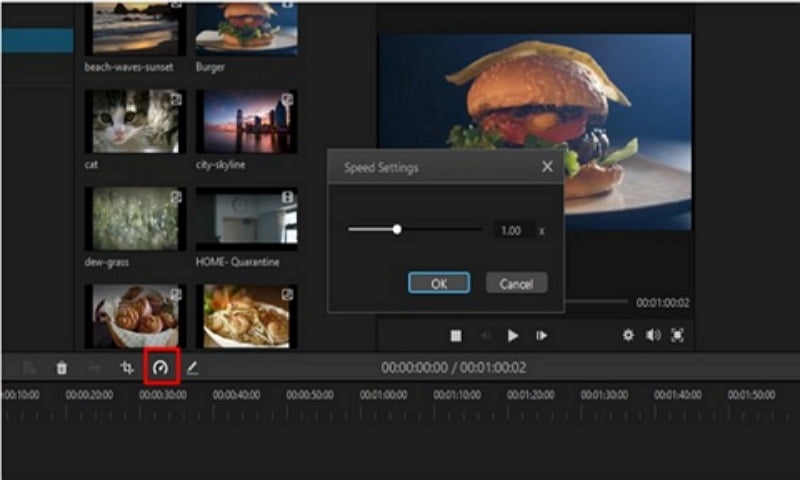
Speed adjustment in Filme offers similar functionality to iMovie but with additional precision controls. You can set exact speed percentages or duration times, which is helpful when you need to match audio to specific video lengths.
The voice changer effects in Filme provide creative options beyond what’s available in iMovie. Double-click an audio clip to access editing options, then browse through the voice effects in the right panel. You can preview each effect before applying it to your project.
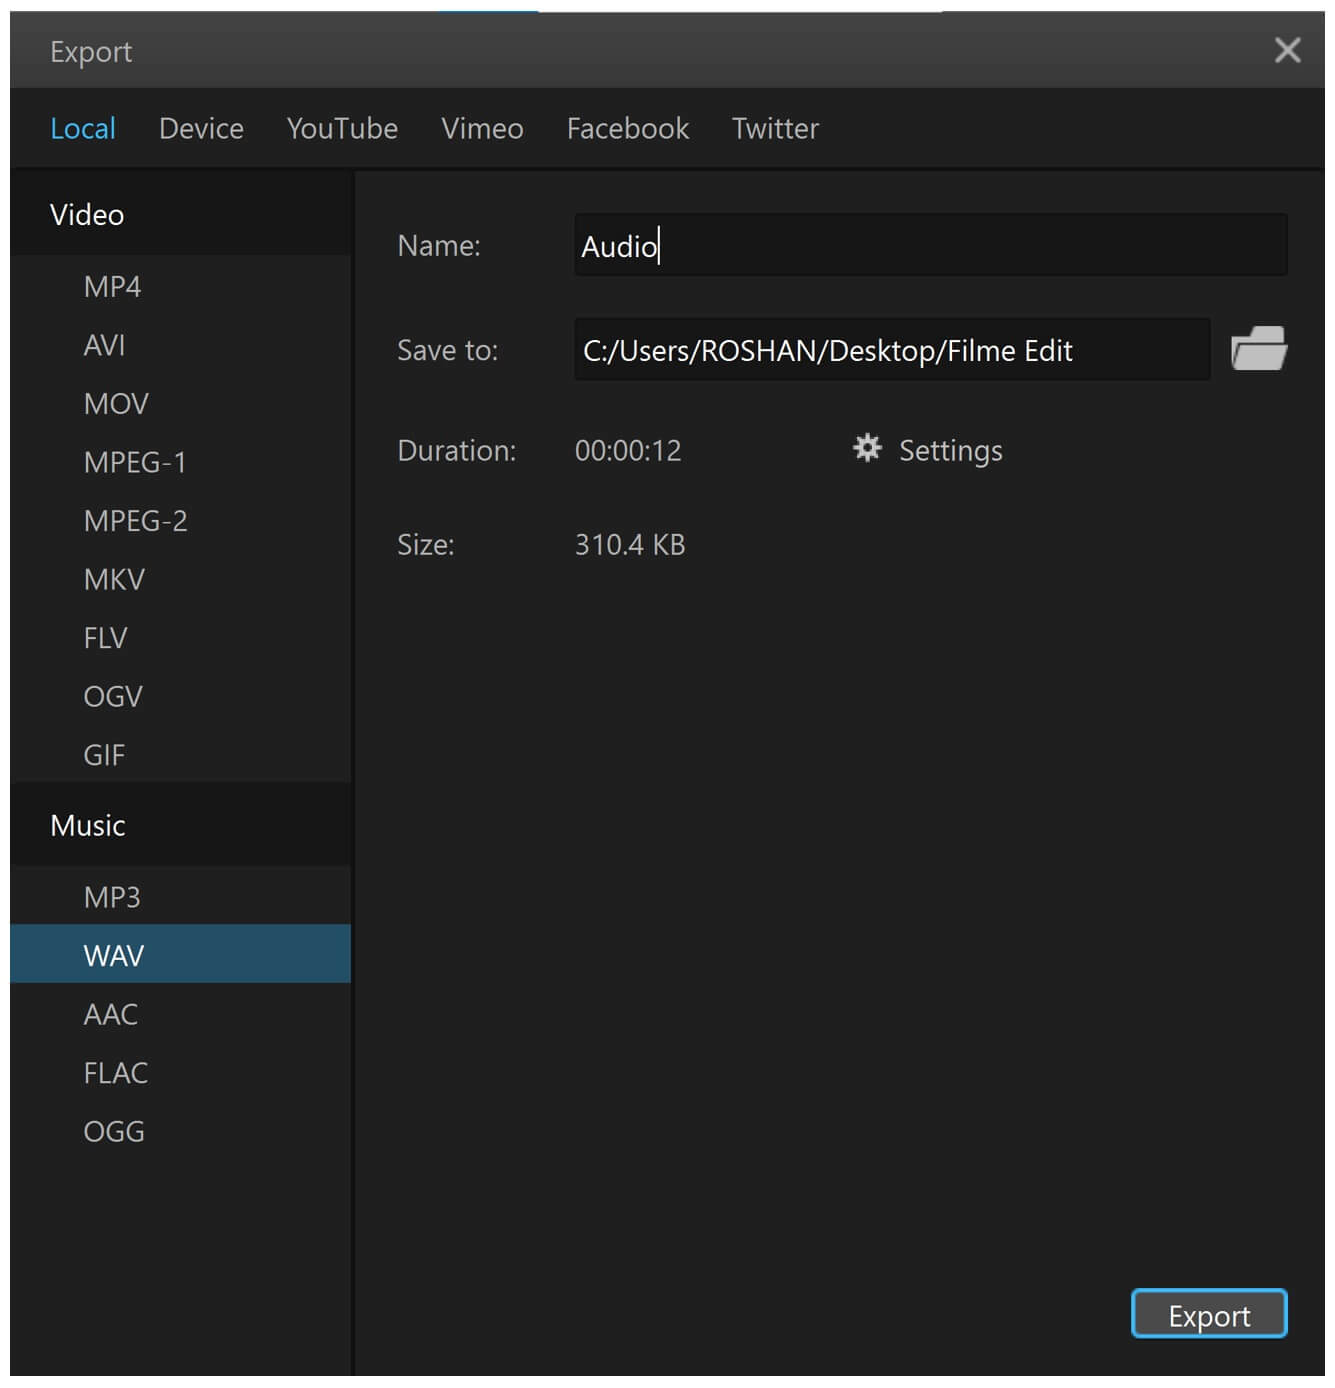
When your project is complete, exporting offers multiple format options optimized for different platforms like YouTube, Instagram, or professional editing workflows. The export settings balance quality and file size, giving you flexibility depending on your needs.
Filme – Best Video Editor for Beginners.Explore Your Creativity, Limitless
Check More Details | Download Now! | Check All Deals
Putting It All Together: Creating Professional Audio in Your Projects
Now that you understand the tools available for iMovie audio editing, let’s discuss how to approach your projects for the best results. Good audio editing isn’t just about knowing which buttons to press—it’s about developing an ear for what sounds right.
Start by organizing your audio elements before you begin editing. Identify which elements are most important in each scene—usually dialogue takes priority, followed by key sound effects, with music supporting the mood. When learning how to edit audio in iMovie, this hierarchy will guide your mixing decisions.
Pay attention to volume balancing between different audio elements. Background music should complement rather than compete with dialogue. Use the volume adjustment techniques we discussed to duck (lower) music when important dialogue occurs, then bring it back up during pauses or action sequences.
Consider the pacing of your audio edits. Just like visual cuts, audio transitions should feel intentional rather than random. Use fades to smooth transitions between different audio segments or when moving from one scene to another.
Don’t overlook the importance of room tone or ambient sound. Even “silence” in videos benefits from a subtle background atmosphere that matches the location. If you’ve removed original audio because of quality issues, consider replacing it with appropriate ambient sounds from iMovie’s library or other sources.
When working on how to trim audio in iMovie or make other precise edits, don’t be afraid to zoom in closely for frame-accurate adjustments. Small timing tweaks can make the difference between audio that feels slightly off and audio that perfectly matches the visuals.
Remember that good audio editing often goes unnoticed—it’s when audio is poorly edited that viewers take notice. Your goal is to create a seamless audio experience that supports the story without drawing attention to itself.
Conclusion: Finding the Right Tool for Your Audio Editing Needs
Learning how to edit audio in iMovie opens up creative possibilities for your video projects. The software provides a solid foundation for basic to intermediate audio editing needs, especially for casual creators, students, or those just starting their editing journey.
The mobile version offers remarkable capability for on-the-go editing, while the Mac version provides additional precision and features for more serious projects. Whether you’re learning how do I edit audio in iMovie for the first time or looking to improve your existing skills, the techniques covered in this guide will help you achieve better results.
For those whose needs have outgrown iMovie’s capabilities or who require more advanced audio features, alternatives like Filme provide a natural next step without the overwhelming complexity of professional-grade software. The key is matching the tool to your specific needs, skill level, and project requirements.
Filme – Best Video Editor for Beginners.Explore Your Creativity, Limitless
Check More Details | Download Now! | Check All Deals
Regardless of which tool you choose, remember that great audio is what separates amateur productions from professional ones. With the knowledge from this guide, you’re well-equipped to take your projects to the next level through effective iMovie audio editing and beyond.
Some images courtesy of iMyFone