TOOL HUNTER

Have you ever spent hours editing a video only to discover the audio doesn’t match up with the visuals? That moment when someone’s mouth moves but the words come out a second later can ruin an otherwise perfect video. This common frustration happens to everyone from social media creators to professional filmmakers who can’t line up music and video properly.
Getting your audio and video to play nicely together is one of those skills that separates amateur-looking content from professional-quality productions. Whether you’re trying to figure out how to sync music to video for a dance compilation or need to align dialogue clips with interview footage, proper synchronization makes all the difference.
The good news is you don’t need expensive software or technical expertise to solve this problem. Today we’re going to explore multiple methods that show you exactly how to sync audio and video using various tools. By the end of this guide, you’ll have several options to ensure your projects always have perfect alignment between what viewers see and what they hear.
Understanding Audio and Video Synchronization
Before we jump into the how-to steps, let’s quickly cover what we mean by synchronization. When we talk about how to sync audio and video, we’re referring to the timing relationship between the visual elements and their corresponding sounds.
This could be making sure a person’s lips match their spoken words, ensuring musical beats hit exactly when certain visual elements appear, or aligning sound effects with the actions that create them. The technical term for this is “lip sync accuracy,” though it applies to more than just talking faces.
Professional standards suggest audio should be within 15 milliseconds of the corresponding video for viewers to perceive it as properly synchronized. When the timing is off by more than this, people will notice something feels wrong even if they can’t pinpoint exactly what it is.
How to Synchronize Audio with Video Using Desktop Applications
If you prefer working with software installed on your computer, desktop applications offer powerful features and don’t require an internet connection. These programs typically provide more advanced controls and handle larger files better than online options.
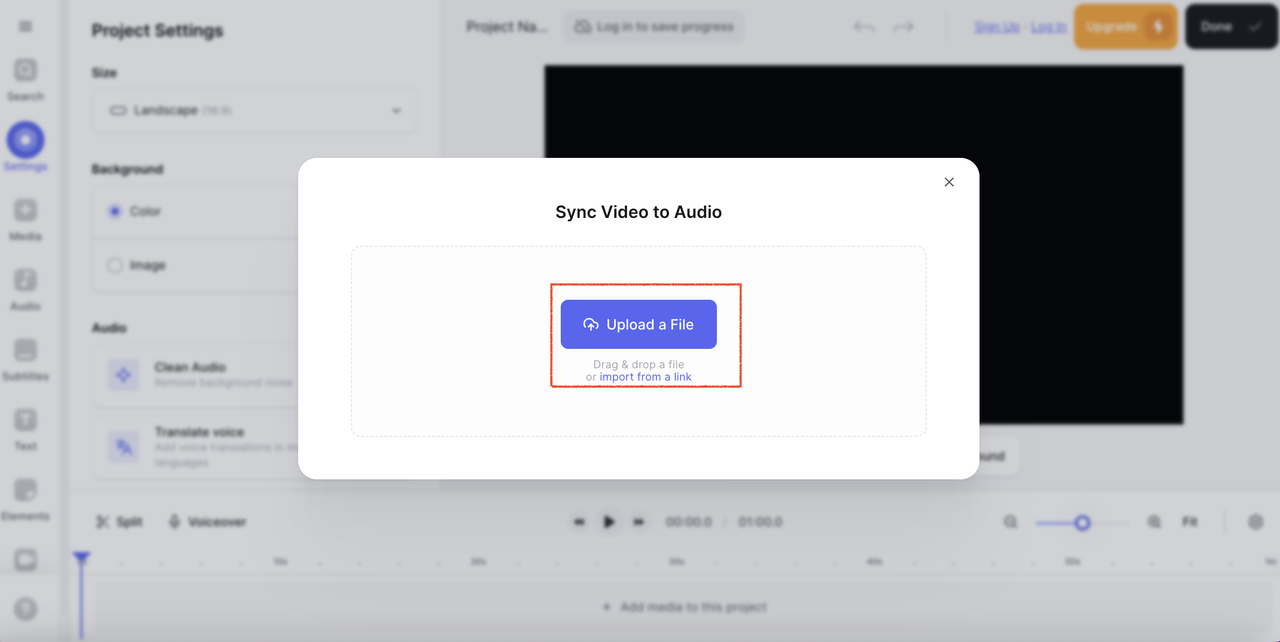
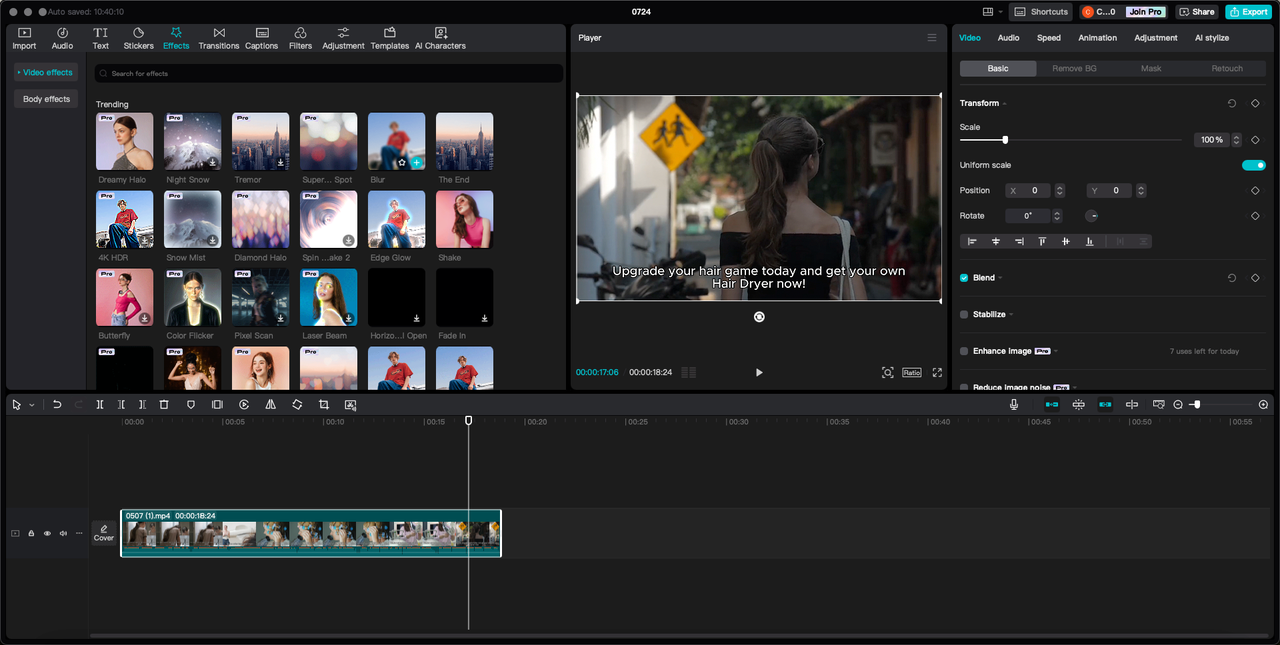
CapCut: Simple One-Click Synchronization
CapCut has gained popularity for its straightforward approach to video editing. This free desktop software simplifies the process of how to sync audio and video with an intuitive one-click synchronization feature that automatically aligns your tracks.
What makes CapCut especially helpful for learning how to line up clips with song is its ability to analyze and match your audio and video without complicated manual tweaking. Whether you’re working on a simple vlog or a more elaborate project, CapCut helps ensure your audio matches your visuals seamlessly.
How to sync audio and video with CapCut:
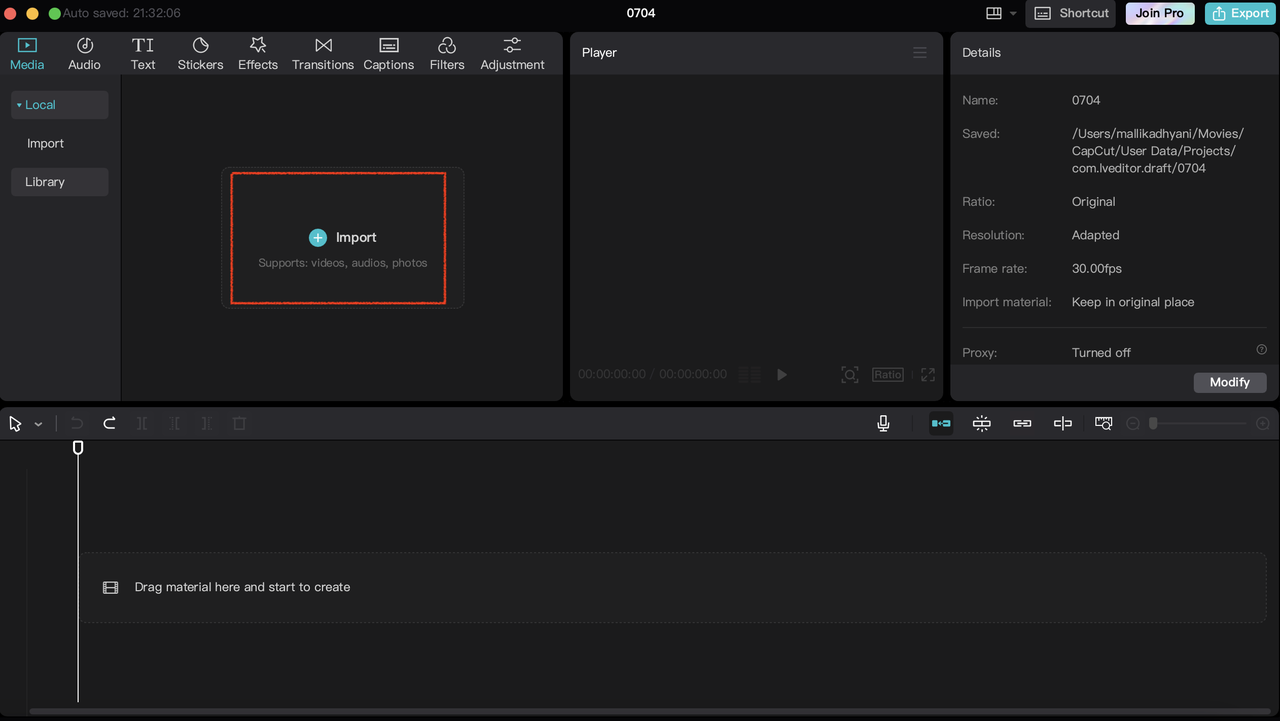
Getting started with CapCut is pretty straightforward. First, you’ll need to download and install the software on your computer. The free version includes all the essential features you’ll need for basic synchronization tasks.
Once you’ve launched the program, click the “Import” button in the media section to bring your video and audio files into your project. You can select multiple files at once if you’re working with several clips that need synchronization.
After importing your files, you’ll see them appear in the media library. To begin the synchronization process, drag both your video and audio files from the library and drop them onto the timeline at the bottom of the screen. This is where all your editing will happen.
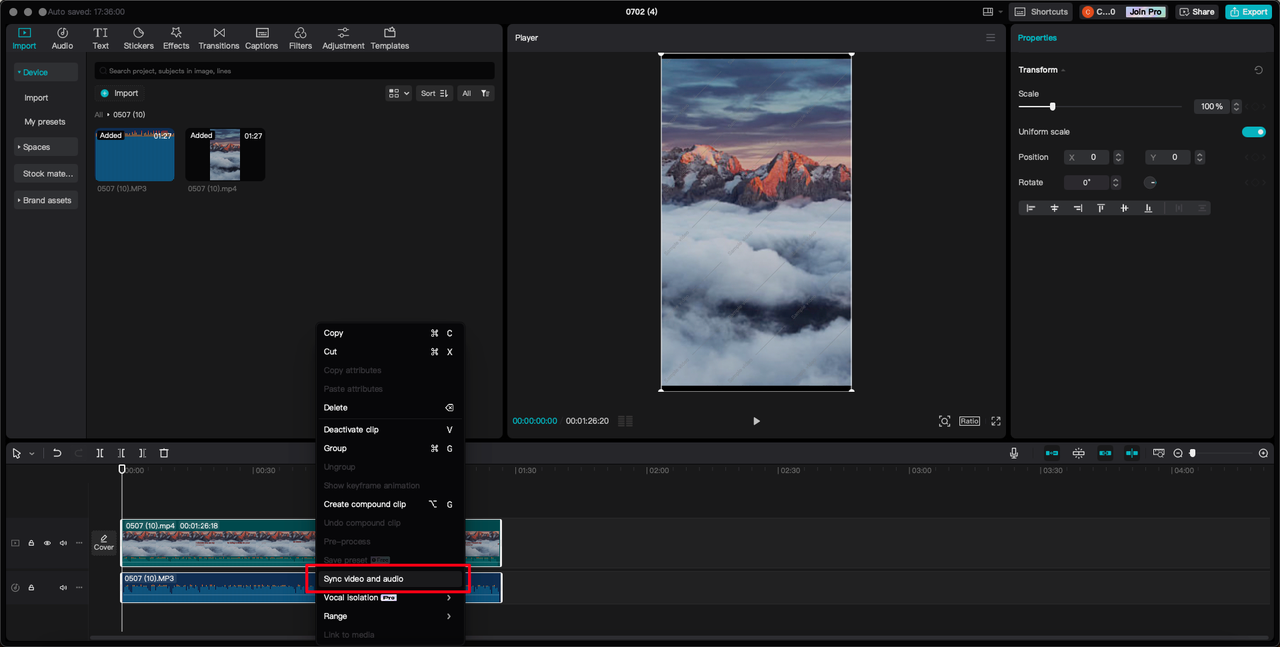
Now for the key synchronization step. Select both the video and audio tracks by clicking on them while holding down the “Ctrl” key on Windows (or “CMD” on Mac). Right-click on the selected tracks and choose “Sync video and audio” from the menu that appears.
CapCut will analyze the tracks and automatically align them properly. The software uses smart algorithms to detect patterns in both the audio and video, matching them up based on their waveforms and other characteristics.
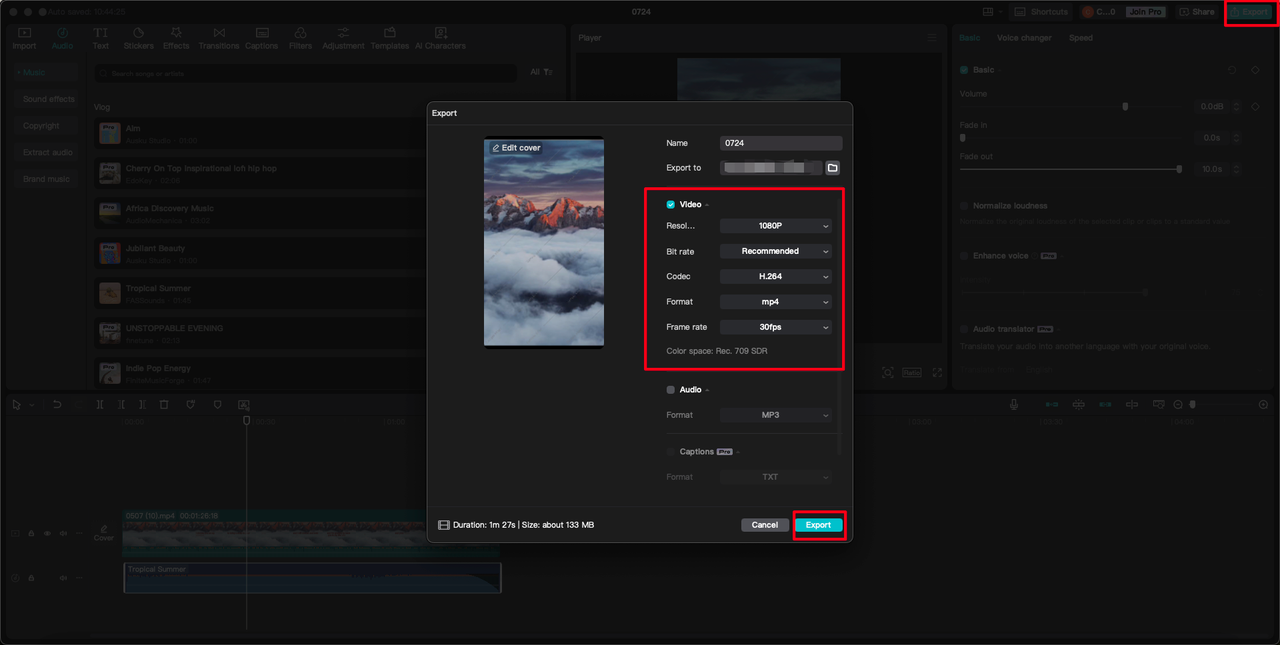
Once your audio and video tracks are synced, play back the timeline to preview the result. If everything looks good, click the “Export” button at the top right corner to save your synchronized video. You can choose your preferred resolution, frame rate, and format before finalizing the export.
CapCut — Your all-in-one video & photo editing powerhouse! Experience AI auto-editing, realistic effects, a huge template library, and AI audio transformation. Easily create professional masterpieces and social media viral hits. Available on Desktop, Web, and Mobile App.

iMovie: Apple’s Beginner-Friendly Option
For Mac users, iMovie provides a versatile and approachable option for learning how to synchronise audio and video on PC and Mac systems. This free software comes pre-installed on most Apple devices and offers a streamlined interface that’s great for beginners while still providing enough features for more experienced editors.
iMovie’s strength lies in its simplified timeline and straightforward controls, which make it relatively easy to line up clips with song tracks or dialogue. The program supports various video formats and includes basic editing tools like trimming, splitting, and transitions.
How to align sound and video with iMovie:
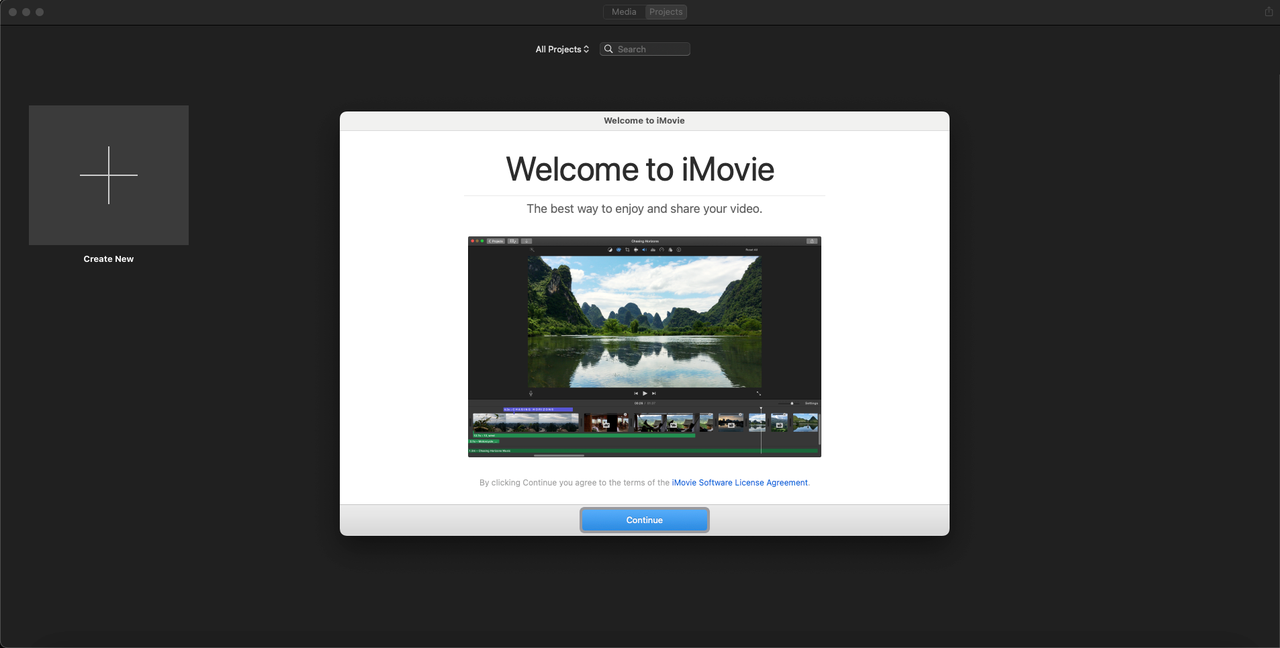
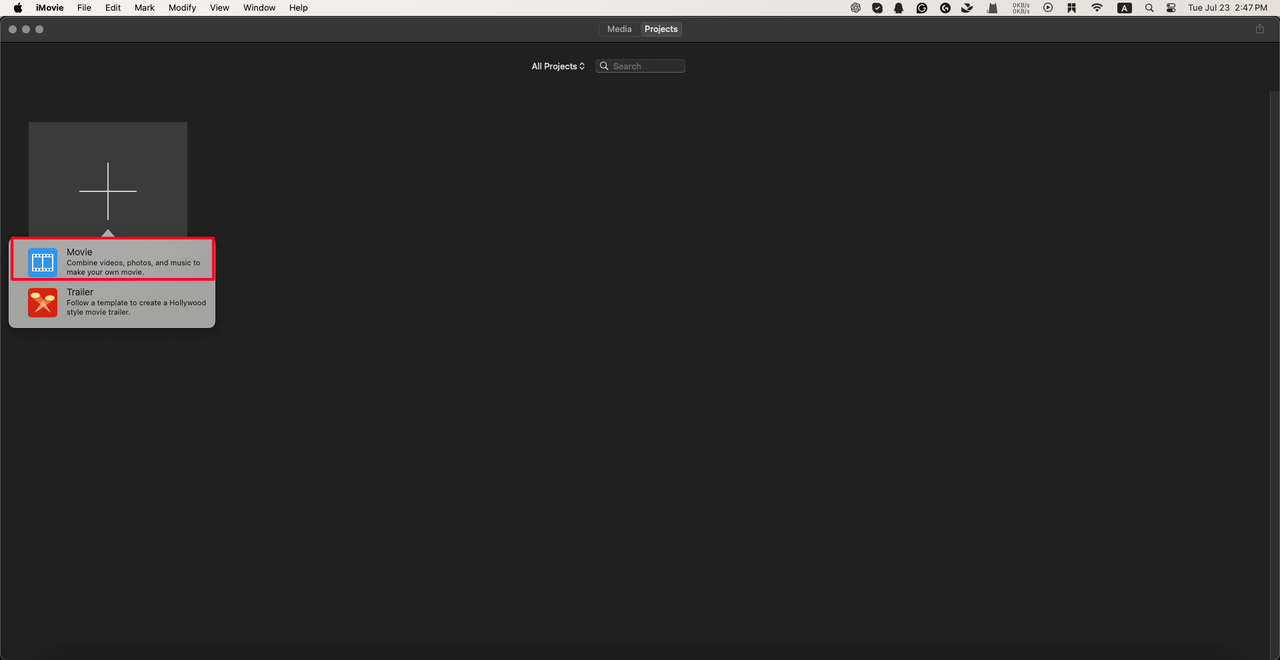
Start by launching iMovie on your Mac and creating a new project by clicking “Create New” and then selecting “Movie.” This opens a fresh workspace where you can import your media files.
Click “Import Media” in the toolbar, then navigate to where your video and audio files are stored on your computer. Select the files you want to work with and click “Import Selected.” Your media will now appear in the iMovie library, ready to be added to your project.
Drag your imported video and audio files from the library to the timeline at the bottom of the screen. This is where you’ll arrange your clips in sequence and make any adjustments needed to achieve perfect synchronization.
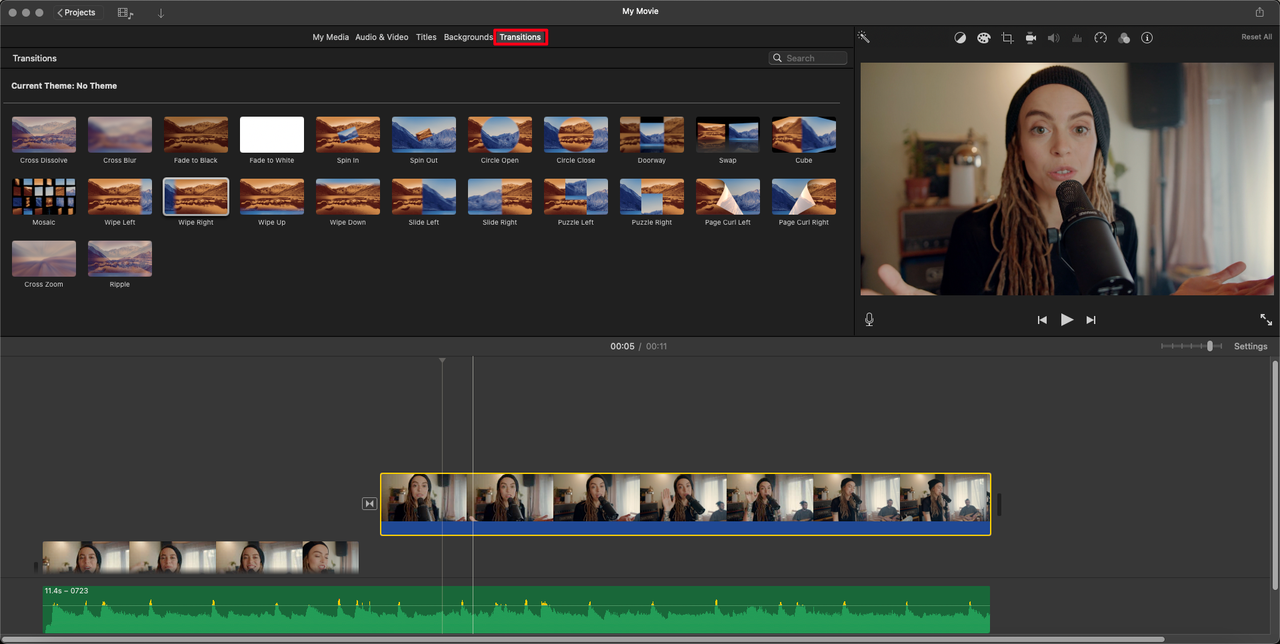
If your clips need trimming or splitting, use the provided tools to make these adjustments. iMovie offers various editing options to help you fine-tune your project. You can also add transitions between clips by clicking the “Transitions” tab and dragging your chosen effect between video segments.
For those wondering how to sync music to video specifically, iMovie allows you to easily adjust the timing of your audio track relative to the video. Simply click and drag the audio clip along the timeline until it matches up with the visual elements.
Once you’re satisfied with the synchronization, enhance your project by adding titles, backgrounds, and effects using the corresponding tabs. When everything looks perfect, export your project by clicking the “File” menu, selecting “Share,” and choosing your preferred output option.

Final Cut Pro X: Professional-Level Synchronization
For those who need advanced features and precision controls, Final Cut Pro X represents the professional end of the spectrum when it comes to learning how to sync audio and video. This software is widely used in the film and television industry for its robust capabilities and sophisticated tools.
Final Cut Pro X offers multi-camera editing, 360-degree video support, and advanced motion graphics capabilities alongside its synchronization features. While it has a steeper learning curve than consumer-level editors, it provides unparalleled control over the synchronization process.
How to sync audio and video with Final Cut Pro X:
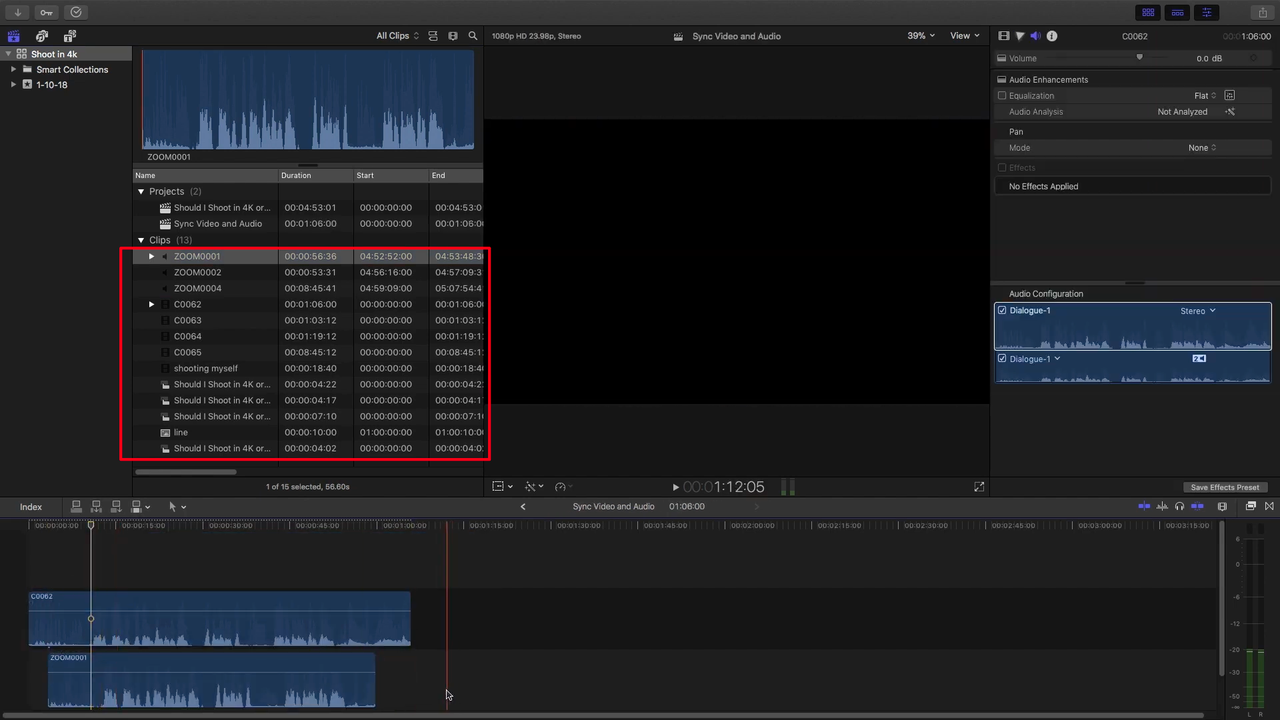
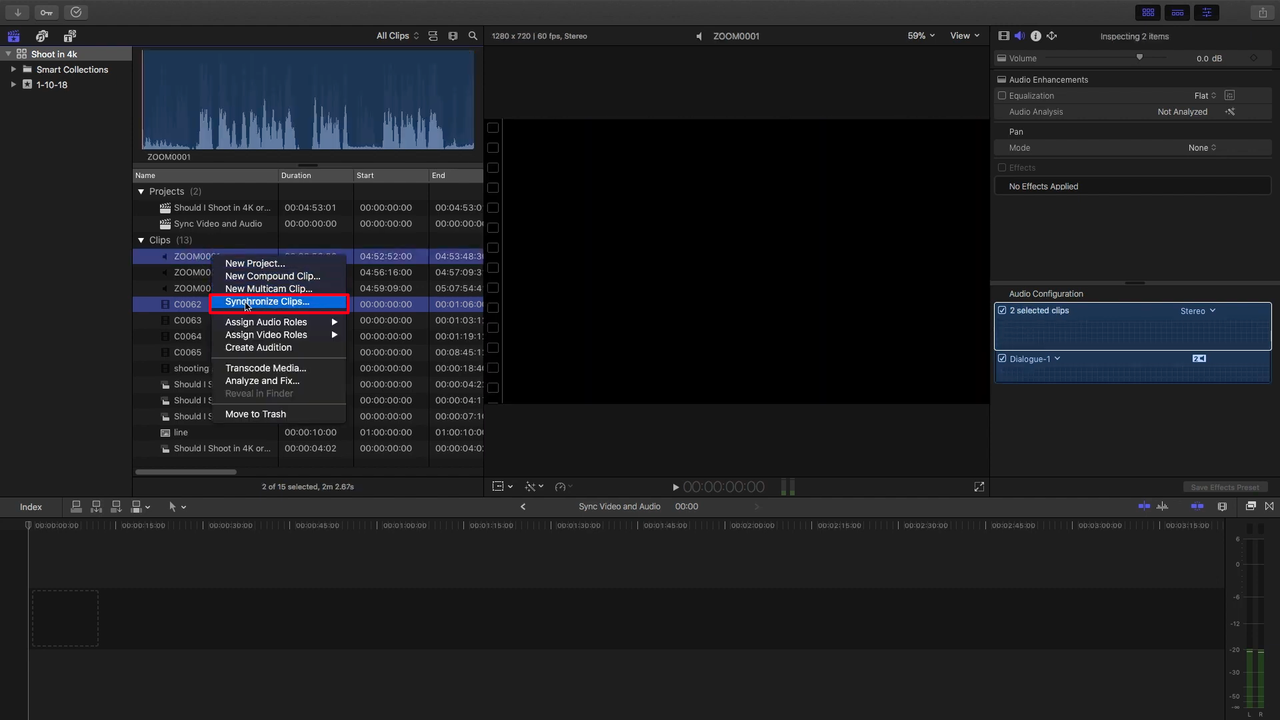
Begin by opening Final Cut Pro X and creating a new project or opening an existing one. In the project browser, select the video clip you want to sync by clicking on it. Then, hold the Command key on your keyboard and select the audio clip you want to sync with the video.
Both clips should now be highlighted in your project browser window. Right-click on one of the highlighted clips and choose “Synchronize Clips” from the context menu that appears. Alternatively, you can use the keyboard shortcut Option-Command-G to start the synchronization process.
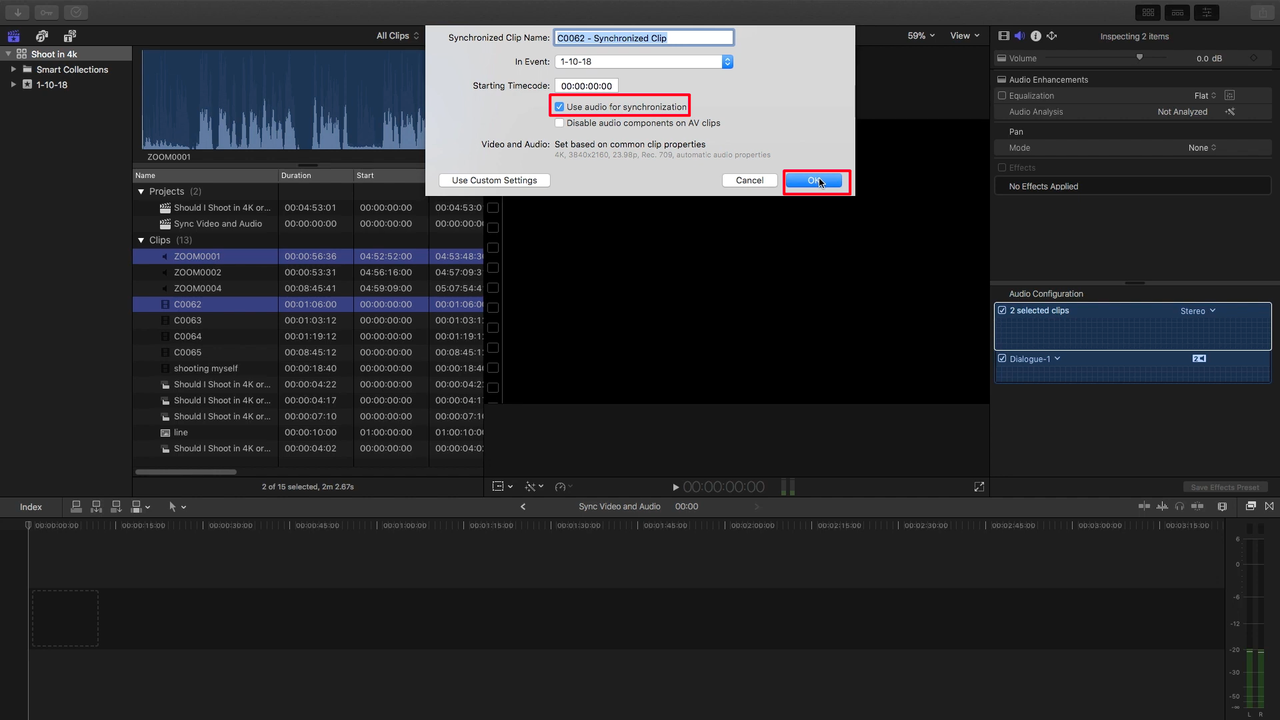
Final Cut Pro X will create a new synchronized clip in your project. Play back this clip to check that the audio and video are properly aligned. The software uses advanced analysis to match clips based on their audio waveforms, making it particularly effective for complex synchronization tasks.
If you need to make additional adjustments after the automatic synchronization, you can manually fine-tune the alignment in the timeline. Final Cut Pro X provides frame-accurate controls that let you nudge audio earlier or later by tiny increments until the synchronization is perfect.
Once you’re completely satisfied with the results, export your project by choosing File > Share > Export File or pressing Command-E. Final Cut Pro X offers numerous export options to ensure your synchronized video meets whatever specifications you require.
VLC Media Player: More Than Just a Player
Many people don’t realize that VLC Media Player, the popular open-source multimedia player, includes tools that can help with basic audio-video synchronization tasks. While it’s not a full-featured video editor, VLC can be surprisingly useful for quick fixes when you can’t line up music and video properly.
VLC supports an enormous range of audio and video formats, which makes it particularly helpful when you’re dealing with files that other programs might have trouble with. Its synchronization features are somewhat basic compared to dedicated editors, but they can be perfect for minor adjustments.
How to match audio with video with VLC player:
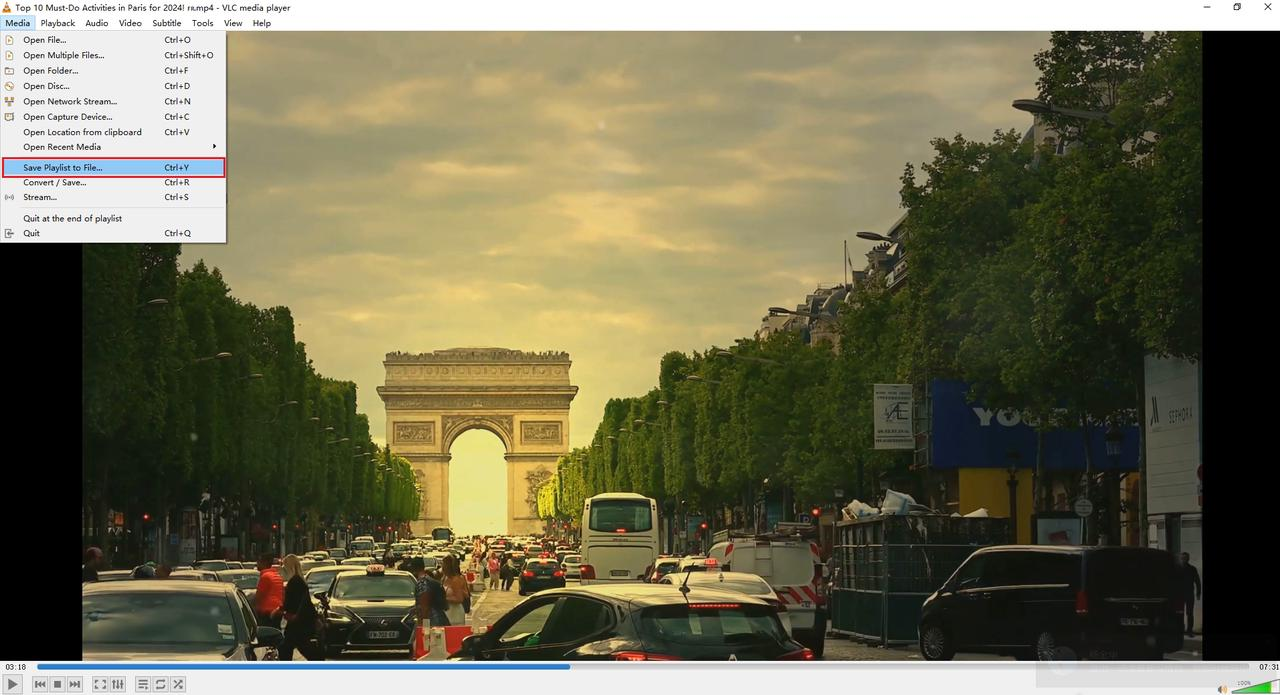
Start by launching VLC Media Player and opening the video file you want to adjust. You can do this by clicking on “Media” in the menu bar, selecting “Open File,” and browsing to the video file on your computer.
Once your video is playing, access the synchronization settings by clicking on “Tools” in the menu bar and selecting “Effects and Filters” from the dropdown menu. This will open a new window with various adjustment options.
Navigate to the “Synchronization” tab in this window. Here you’ll find the Track Synchronization setting under the “Audio/Video” section. This is where you can make adjustments to fix synchronization issues.
Enter a value in milliseconds to adjust the timing. If the audio is ahead of the video, you’ll want to enter a positive value to delay the audio. If the audio is lagging behind the video, enter a negative value to hasten the audio.
You’ll need to experiment with different values while watching your video to find the perfect synchronization. The changes happen in real-time, so you can immediately see the effect of your adjustments.
Once you’ve achieved proper synchronization, you might want to save these changes. To export your synchronized video, navigate to “Media” in the menu bar, then click “Convert / Save.” Add your video file, choose a profile, and select a destination to save the synchronized version.

How to Match Audio with Video Using Online Tools
Not everyone wants to download and install software on their computer, especially if they only need to sync audio and video occasionally. Online tools offer a convenient alternative that works directly in your web browser without any installation required.
Onlineconvert.com: Simple Web-Based Solution
Onlineconvert.com provides a straightforward way to sync audio with video files through your web browser. This platform supports a wide range of file formats, which means you can probably use it regardless of what type of media files you’re working with.
The interface is designed to be intuitive enough for users with minimal technical knowledge, making it a good option for those who are new to learning how to synchronise audio and video on PC or any device.
How to sync audio and video with Onlineconvert:
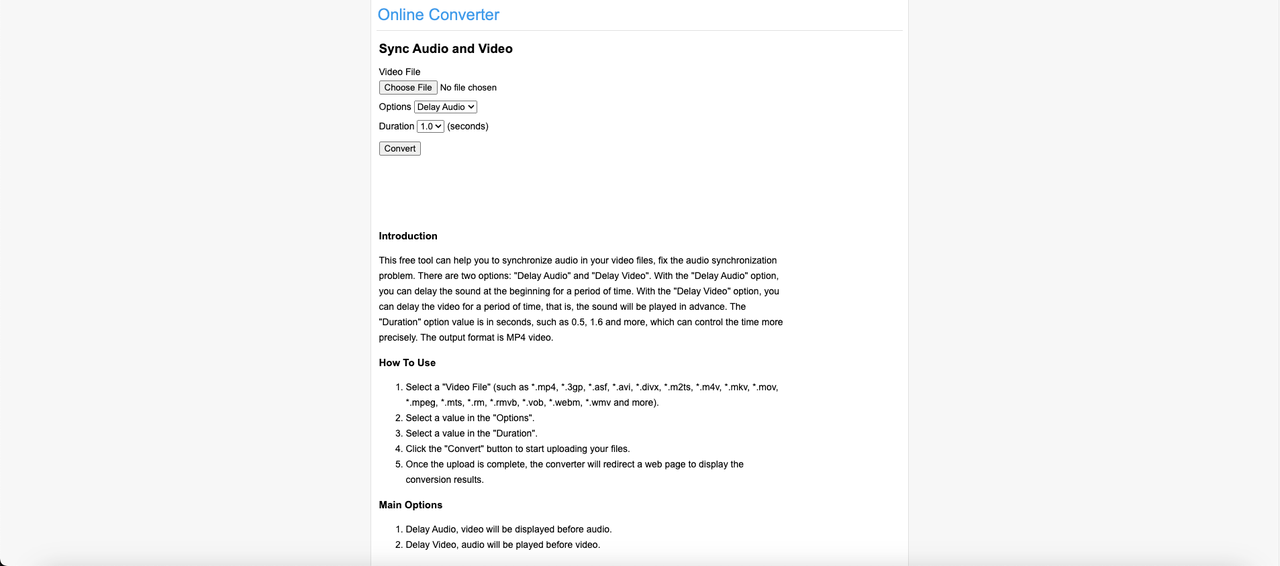
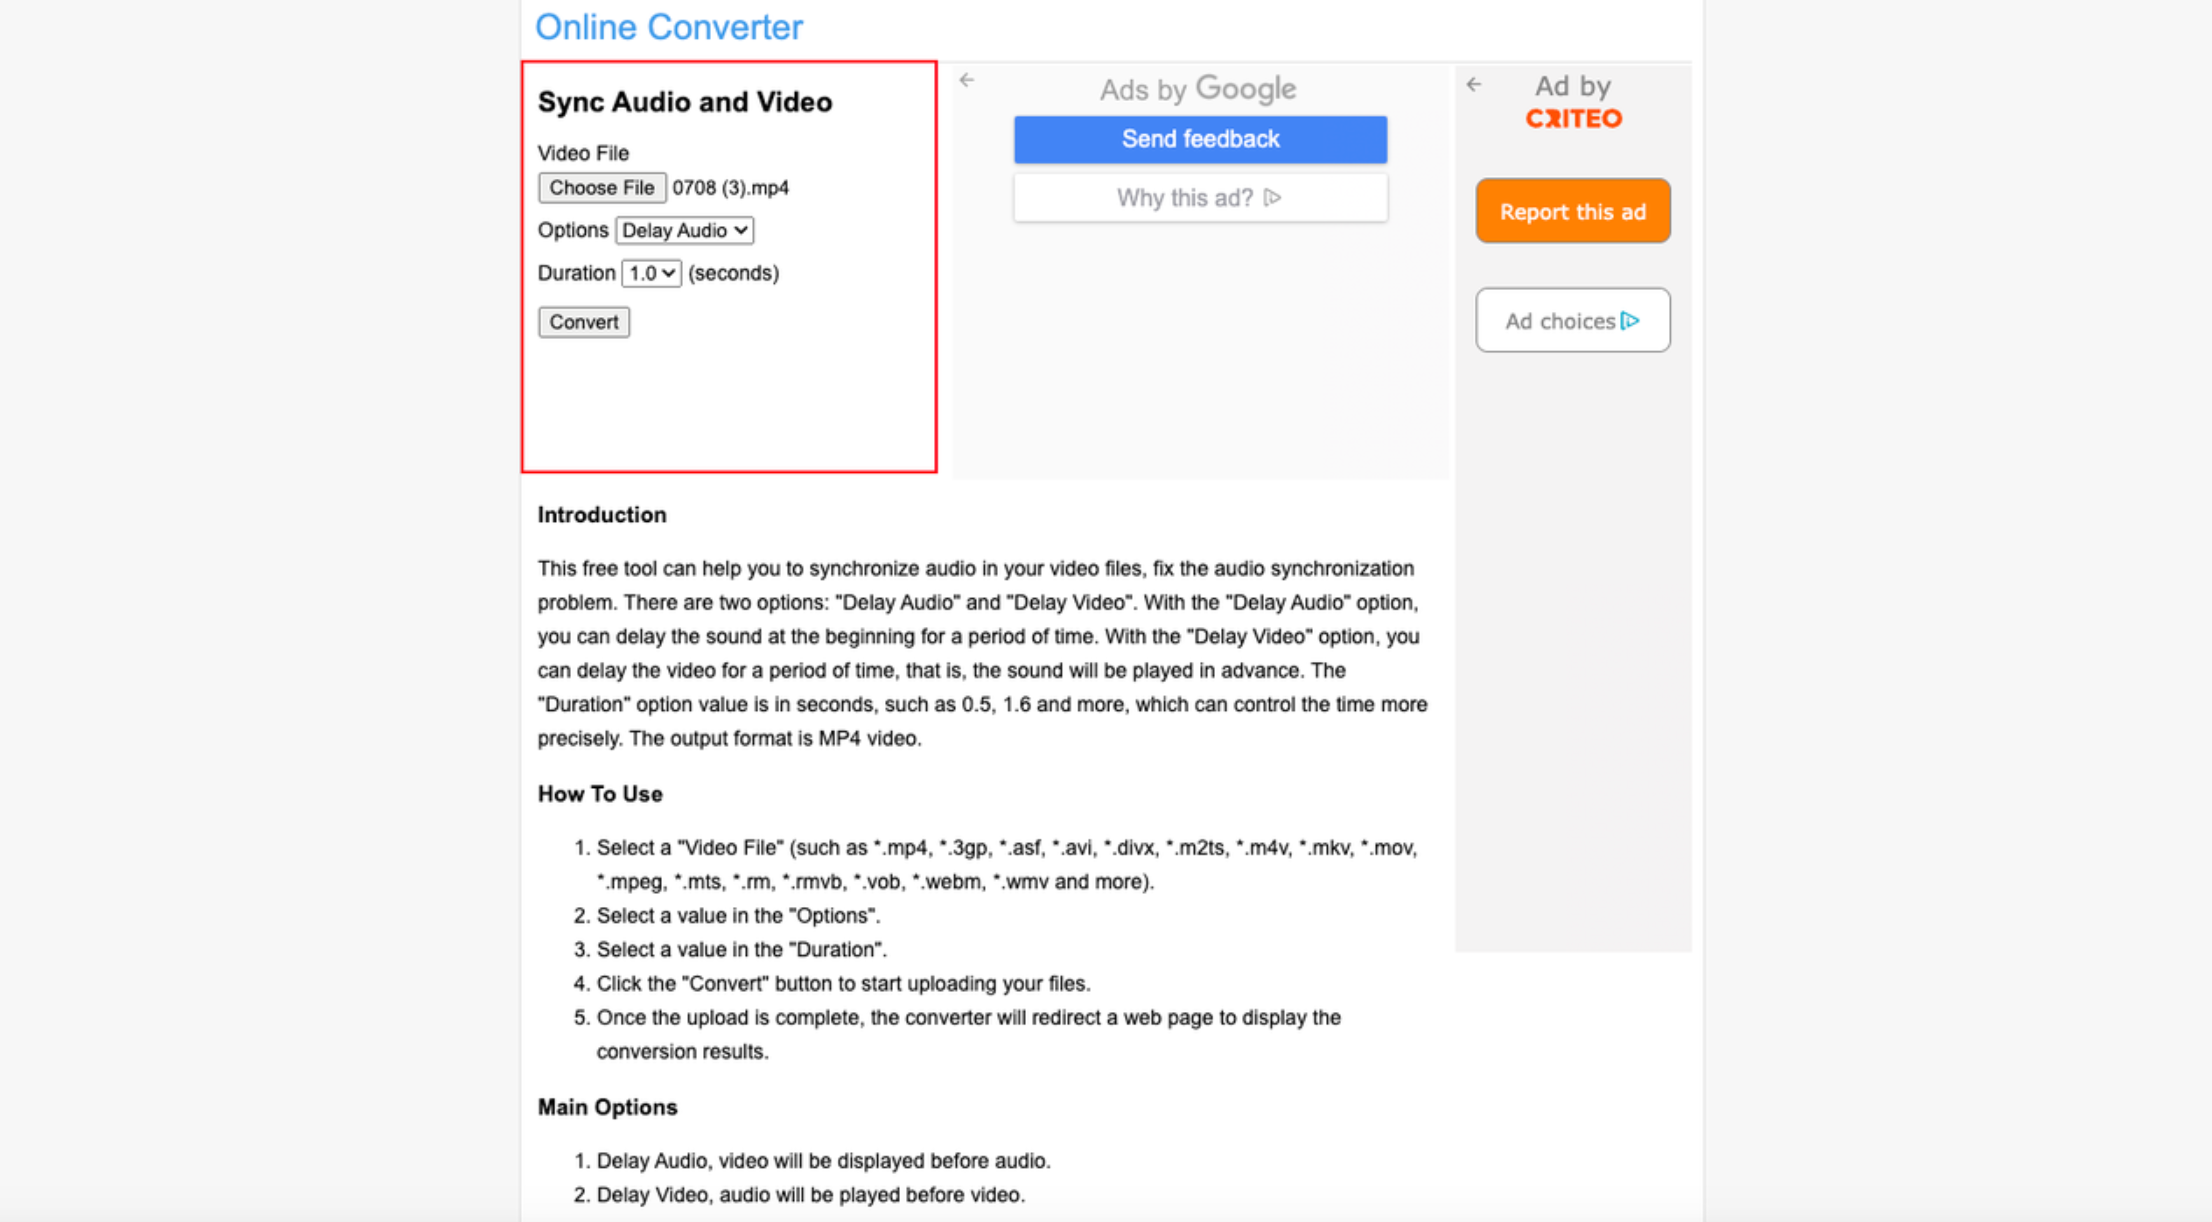
Start by visiting the Onlineconvert.com website in your browser. Look for the audio-video synchronization tool among their many conversion options.
Click on the “Choose File” button to upload your video file from your computer. The website will guide you through the process with clear instructions at each step.
Once your video is uploaded, you’ll see options to adjust the audio and video synchronization. The interface allows you to enter specific delay or advance values for the audio track measured in milliseconds.
If your audio is playing too early, you’ll want to enter a positive value to delay it. If the audio is lagging behind the video, enter a negative value to make it play earlier. The ability to specify exact millisecond values gives you precise control over the synchronization.
After making your adjustments, click on the “Start” button to begin the synchronization process. The website will process your video file and apply the synchronization settings you specified.
Once the processing is complete, a download link will appear for you to save the synchronized video file to your device. The whole process typically takes just a few minutes depending on the size of your file and your internet connection speed.
VEED.io: User-Friendly Browser Editor
VEED.io offers a more comprehensive online video editing experience that includes robust synchronization capabilities. The platform is designed with content creators in mind, providing an intuitive interface that makes it easy to align audio tracks precisely with video.
What sets VEED.io apart is its combination of user-friendly design with relatively advanced features. You get timeline-based editing similar to desktop software but accessible through your web browser without any downloads or installations.
How to synchronize sound and video with VEED.io:
First, navigate to the VEED.io website and sign into your account. If you don’t have an account yet, you’ll need to create one, but the process is quick and straightforward.
Once you’re logged in, click on the “Upload” button to import your video and audio files. You can drag and drop files directly onto the interface or browse your computer to select them.
After your files are uploaded, you’ll see them displayed on a timeline at the bottom of the screen. This timeline works similarly to those in desktop editing software, allowing you to visually align your audio and video tracks.
Drag the audio file to the correct position on the timeline, aligning it with the video. Use the playback feature to check that audio and video are in sync as you make adjustments. You can zoom in on the timeline for more precise control over the positioning.
VEED.io provides additional editing tools to help perfect your synchronization. You can trim, cut, or extend either the audio or video tracks to make them fit together seamlessly. The platform also offers features for adjusting volume levels and adding audio effects if needed.
When you’re satisfied with the synchronization, preview your project to ensure everything aligns correctly. Then you can save and export your synchronized video directly from the browser. VEED.io offers various export options depending on your subscription level.