TOOL HUNTER
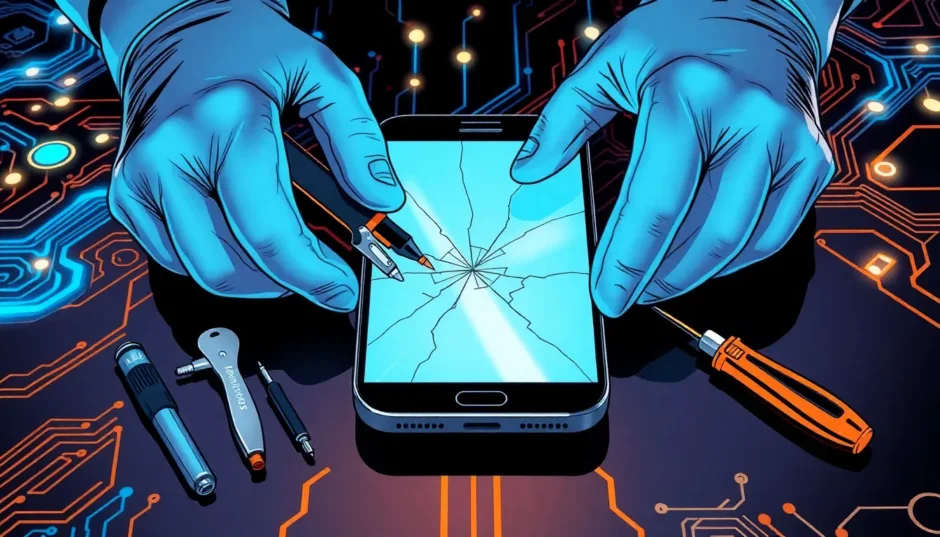

Has your Samsung Infuse’s screen seen better days? A cracked or shattered display isn’t just annoying—it can make texting, browsing, or even answering calls a real challenge. Shards of glass can even make it dangerous to use. But here’s the good news: you don’t have to run to a pricey repair shop or buy a brand-new phone. With some basic tools and a bit of guidance, you can perform a samsung infuse screen replacement right at home.
This guide is packed with everything you need to confidently tackle the repair. We’ll explore why a screen replacement might be needed, what tools you should have on hand, and we’ll walk through each step of the process. Whether you’re new to DIY fixes or have some experience, this tutorial will help you restore your phone safely and affordably.
Why Replace Your Samsung Infuse Screen?
There are plenty of reasons why someone would choose to perform a samsung infuse screen replacement. The most common scenario is accidental damage—like dropping your phone and watching the screen spiderweb into cracks. Even a small crack can grow over time and eventually make the device unusable.
Sometimes, screens develop problems without any physical impact. You might notice lines, color distortion, or unresponsive areas. These issues often mean the internal components are failing. When that happens, a samsung infuse screen replacement is the best way to bring your device back to life.
Doing the repair yourself can save a lot of money. Professional repairs can be expensive, and labor costs add up quickly. By handling the samsung infuse screen replacement on your own, you only pay for the part—keeping your budget intact.
There’s also the benefit of time. If you depend on your phone every day, you probably don’t want to be without it for days. A DIY repair means you can get your Samsung Infuse working again in just a couple of hours.
And let’s not forget the satisfaction of doing it yourself! Successfully completing a samsung infuse screen replacement feels amazing and might inspire you to try other gadget repairs down the line.
What Tools Do You Need?
Before starting your samsung infuse screen replacement, make sure you have the right tools. Good preparation helps avoid mistakes and prevents damage to your phone.
The most important item is a high-quality replacement screen. Be sure it’s designed specifically for the Samsung Infuse. You’ll usually have two choices: glass-only (which is harder to install) or a full LCD assembly (much easier for beginners). For most DIYers, the full assembly is the better pick.
You’ll also need a precision screwdriver set. Phone screws are tiny, so regular screwdrivers won’t work. An electronics repair kit usually has everything you need.
A plastic spudger or opening tool is essential for prying open the phone without scratching or denting the casing. Metal tools can cause damage, so stick with plastic.
Tweezers are super helpful for handling small parts and connectors. Your fingers might be too big for those delicate interior pieces.
A heat gun or hair dryer can be useful too. Many phones use adhesive to hold the screen in place. A little heat softens the glue, making it easier to remove the broken screen.
Finally, set up a clean, well-lit workspace with a soft surface. A magnetic mat can help keep screws and small components from getting lost.

Step-by-Step Samsung Infuse Screen Replacement
Ready to start? Here’s a detailed walkthrough for your samsung infuse screen replacement. Read all the steps first, and remember—patience is key. Rushing can lead to mistakes.
First, power off your Samsung Infuse completely. This is a critical safety step to avoid electrical damage during the repair.
Next, remove the back cover and take out the battery. This ensures no power is running through the device. Also, take out the SIM and SD cards if present.
Now, locate and remove all the screws holding the phone together. They’re usually around the edges. Keep track of which screw goes where—they might be different lengths. A magnetic mat or small bowls can help you stay organized.
Once all screws are out, gently separate the front and back parts of the phone. Use your plastic tool to carefully pry the casing apart. Go slow—if something feels stuck, there might be a hidden screw.
Inside, you’ll see the phone’s components. Find the ribbon cables that connect the screen to the motherboard. These have small connectors—flip them up gently to release the cables. Be extra careful; these parts are delicate.
Now, remove the old screen. If it’s held by adhesive, use your heat gun or hair dryer on low to warm the edges. This softens the glue so you can lift the screen out carefully.
Time to install the new screen! If your replacement includes adhesive, apply it to the frame. Then, align the new screen properly and set it in place.
Reconnect the ribbon cables to the motherboard. Make sure each connector is secure. It’s a good idea to double-check everything before moving on.
Now, reassemble the phone. Put the halves back together and return all the screws to their correct places.
Before sealing everything up, test the new screen. Put the battery back in (leave the cover off for now) and turn on the phone. Check that the display works and responds to touch. If everything looks good, finish reassembling. If not, power off and recheck your connections.
Finally, snap the back cover on. Congrats—your samsung infuse screen replacement is complete!

Troubleshooting Common Issues
Even with careful planning, you might hit a snag during your samsung infuse screen replacement. Here’s how to handle common problems.
If the adhesive won’t let go, apply more heat. Work slowly around the edges with your plastic tool. Don’t force it—you could damage the frame.
Ribbon cables can be tricky. Use tweezers for better control. Make sure the connector locks are fully open before inserting the cable, and secure them after.
If the new screen doesn’t work, check all connections first. If it still doesn’t function, the part might be defective. Unfortunately, this sometimes happens with aftermarket screens.
Stripped screws are a pain. Always use the right screwdriver size. If a screw gets stripped, you may need a special tool to remove it.
Worried about losing screws? A magnetic mat or organizer can help. If you do lose one, don’t stress—replacement screw sets are available online.
If you get stuck, look for video tutorials online. Sometimes seeing someone else do the repair makes all the difference.
Keeping Your New Screen in Great Shape
After finishing your samsung infuse screen replacement, you’ll want to keep that new display looking good. Here’s how to protect it.
Start with a quality screen protector. These thin layers absorb impact and prevent scratches. They’re way cheaper to replace than a whole screen.
A protective case is also a smart move. A good case reduces the risk of damage from drops. You can find slim options that don’t add bulk.
Avoid carrying your phone in the same pocket as keys, coins, or other hard items. Even tough screens can get scratched.
Clean the screen regularly with a soft microfiber cloth. Don’t use harsh chemicals—they can damage the coating. A little water or screen cleaner is fine.
Keep your phone away from extreme heat or cold. Don’t leave it in direct sunlight for a long time—high temperatures can harm the screen.
Finally, handle your phone with care. It might feel sturdy, but it’s still a delicate device. Treat it nicely to avoid another samsung infuse screen replacement anytime soon.

When to Call a Professional
A DIY samsung infuse screen replacement isn’t for everyone. Here’s when you should consider professional help.
If you run into problems you can’t solve, take your phone to a repair shop. Experts have experience and special tools most people don’t.
If your phone has other issues—like water damage, charging problems, or broken buttons—a pro can address everything at once.
If you’re not confident about your repair skills, that’s okay. It’s better to pay for a professional repair than accidentally cause more damage.
If you’re short on time and need your phone back fast, a shop might be the better option. DIY repairs can take longer if you hit snags.
Finally, if your phone is under warranty, check if a DIY repair will void it. Sometimes, it’s worth using authorized services to keep your coverage.
Picking the Right Replacement Parts
Your samsung infuse screen replacement will only be as good as the parts you use. Here’s what to look for.
Try to find OEM (Original Equipment Manufacturer) parts. These are made by Samsung’s suppliers and offer the best quality and fit. They can be pricier and harder to find, though.
If OEM isn’t an option, look for reputable third-party brands. Read customer reviews to avoid screens with color, touch, or durability issues.
Decide between glass-only and full assembly. Glass-only is cheaper but requires special skills and tools. Most DIYers should choose the full assembly.
If a price seems too good to be true, it probably is. Super cheap screens often have quality issues and may fail quickly.
Check what’s included. Some kits come with tools and adhesive; others don’t. Know what you’re getting before you buy.
Finally, review the return policy and warranty. Even good parts can be DOA. Make sure you can return or exchange a defective screen.

Wrapping Up
Replacing your Samsung Infuse screen might seem intimidating, but it’s totally doable with some patience and the right guide. The money you’ll save is a huge plus, and the pride you’ll feel after is pretty awesome too.
Take your time, follow the steps, and don’t force anything. Keep your workspace tidy and organized.
If you need help, there are tons of videos and forums online where people share advice and experiences.
A successful samsung infuse screen replacement can extend your phone’s life by months or even years. Repairing instead of replacing is also better for the environment—it reduces electronic waste.
Whether you’re doing it to save cash, for the satisfaction, or to be eco-friendly, replacing your own screen is a rewarding project. With this guide, you’ll have your Samsung Infuse working like new in no time.
Frequently Asked Questions
-
How long does a samsung infuse screen replacement take?
If it’s your first time, set aside 1–2 hours. With practice, you can do it in 30–45 minutes. Don’t rush—taking your time prevents mistakes.
-
Is replacing a Samsung Infuse screen hard?
It’s moderately challenging. If you’re comfortable with small tools and can be patient, you should be okay. The trickiest parts are the connectors and adhesive.
-
How much does it cost?
A good quality screen assembly usually costs between $30 and $60. That’s a lot less than the $100 or more you’d pay at a repair shop.
-
Can I replace just the glass?
It’s possible, but it’s much harder. You need special tools to separate the glass from the display. For most people, replacing the whole assembly is easier.
-
What if the new screen doesn’t work?
First, check all the connections. If it still doesn’t work, the screen might be defective. Contact the seller for a replacement or refund. If you’re unsure, ask a professional for help.
Some images courtesy of CapCut.