TOOL HUNTER

Creating eye-catching posters begins with one crucial step: selecting the right dimensions. Whether you’re designing for a major event, promoting a local gathering, or expressing your artistic vision, understanding proper poster dimensions in Photoshop is essential for achieving professional-looking results that grab attention.
This comprehensive guide explores everything you need to know about working with poster dimensions in Photoshop, from choosing the correct measurements to optimizing resolution for both print and digital formats. We’ll also introduce CapCut as a powerful alternative for resizing and designing posters, providing a detailed comparison to help you select the best tool for your specific needs.
Understanding Photoshop Poster Dimensions
Getting your poster dimensions right in Photoshop is the foundation of any successful design project. The perfect poster size dimensions in Photoshop depend on your specific use case – whether it’s for physical printing or digital display.
For printed materials, you’ll typically work with inches or centimeters, while digital posters use pixel measurements. Understanding this distinction is crucial because getting your Photoshop poster resolution wrong can lead to blurry prints or unnecessarily large file sizes.
When setting up your document, consider where your poster will be displayed. A large format print for a bulletin board requires different dimensions than a social media graphic. The standard poster pixel size varies significantly between these applications, making it important to plan your project accordingly.
How to Adjust Poster Dimensions in Photoshop
Let’s walk through the step-by-step process for modifying your poster dimensions in Photoshop. This method ensures precise control over your final output, whether you’re working with handbill size Photoshop requirements or larger format designs.
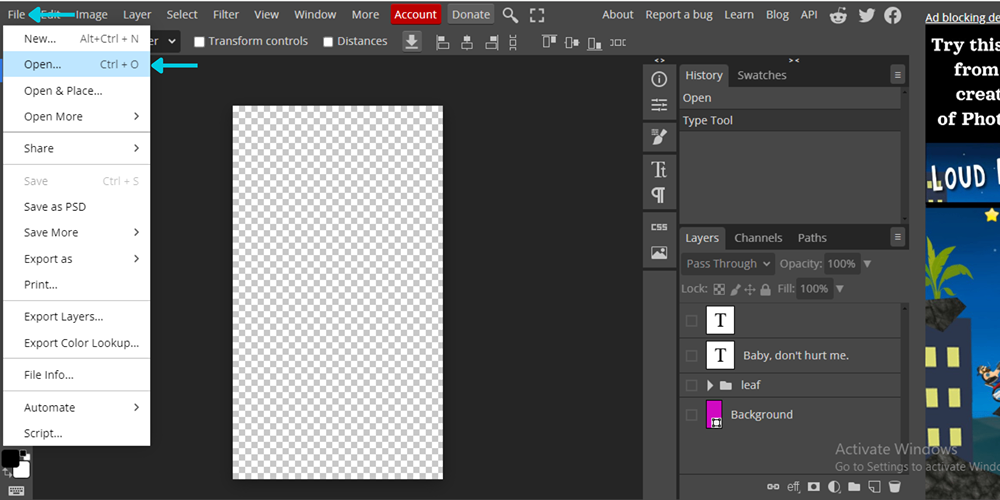
Begin by launching Adobe Photoshop on your computer. Navigate to the File menu located in the top-left corner and select Open to choose the image file you want to resize for your poster project.
Once your image is open, locate the Image tab in the top menu bar. Clicking this will reveal a dropdown menu containing various image editing options and settings.
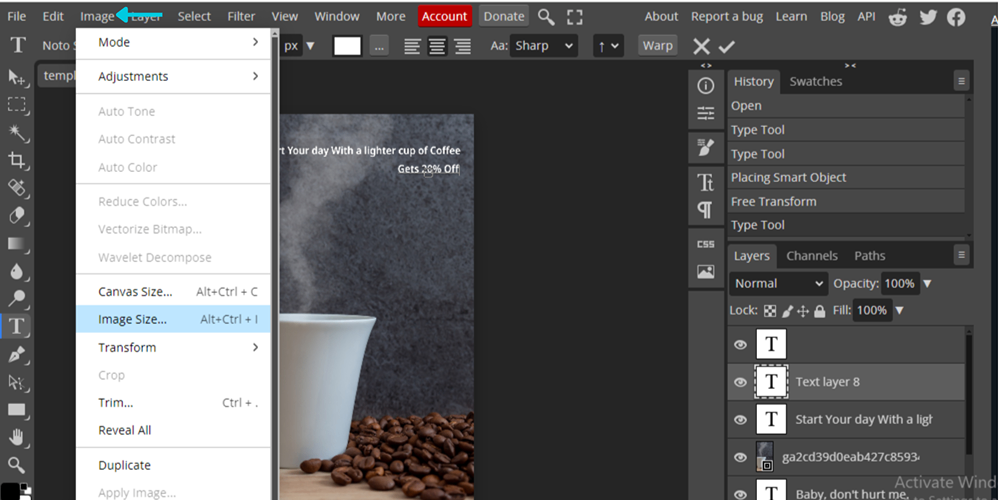
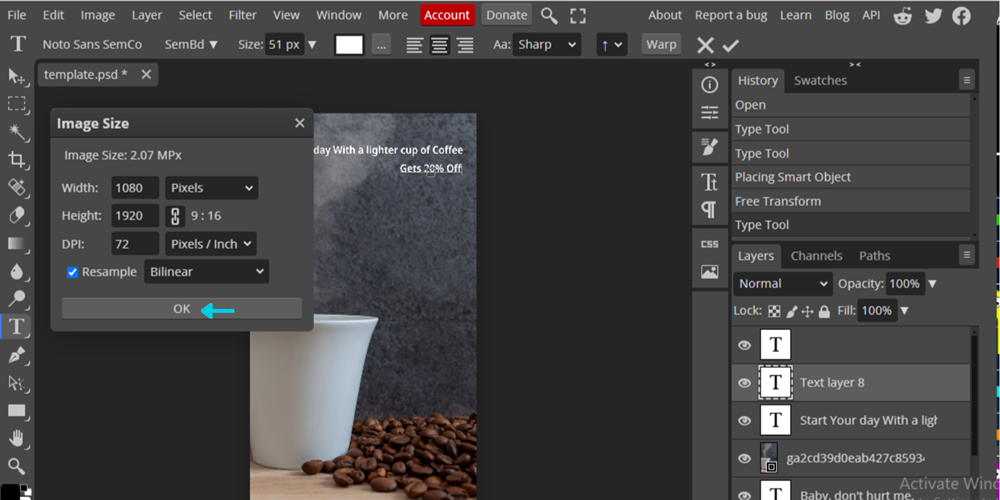
Within the Image dropdown menu, find and select the Image Size option. This opens a dialog box where you can adjust both the dimensions and resolution of your image to meet your specific poster requirements.
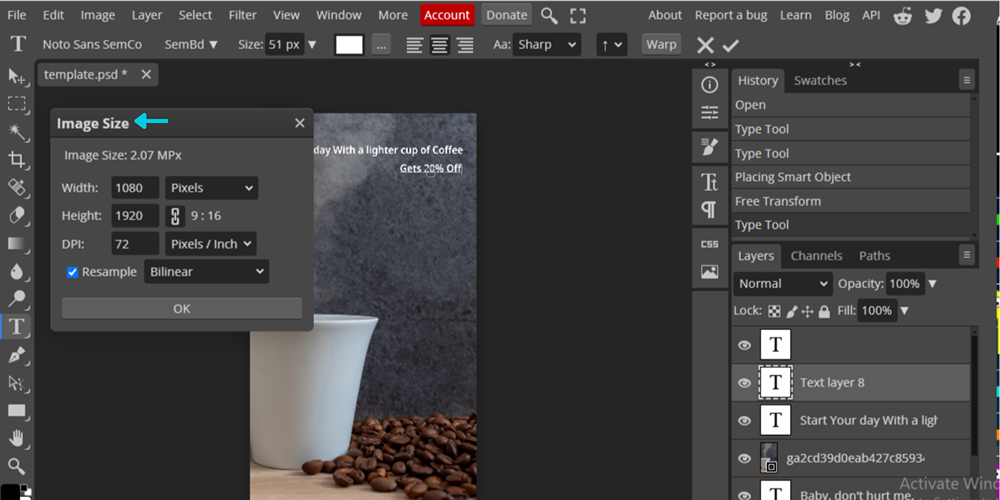
In the Image Size dialog box, you can modify the width, height, and resolution values. You can input these measurements in pixels, inches, or centimeters based on your needs. Maintain the aspect ratio if consistency is important for your design. After making your adjustments, click OK to apply the changes to your image.
Limitations of Photoshop for Poster Resizing
While Photoshop is powerful, it has some limitations when working with poster dimensions. One significant issue is potential quality loss when resizing images, particularly when enlarging beyond original dimensions. This can result in pixelation and distortion that compromises professional results.
The process can also be time-consuming, especially when working with multiple images or complex designs. Manually inputting dimensions and carefully considering resolution settings for each project demands considerable attention to detail.
Additionally, Photoshop’s resizing approach can limit future editing flexibility. Once you’ve adjusted your poster dimensions, making further revisions or changes to the layout often becomes challenging without starting over or compromising quality.
How CapCut Addresses These Challenges
CapCut offers innovative solutions to these common Photoshop limitations. The platform’s resizing tools incorporate advanced algorithms that maintain image quality during dimension adjustments, significantly reducing distortion and pixelation issues.
The process is streamlined with intuitive features and presets that allow quick dimension adjustments without manual input. This efficiency is particularly valuable when working on multiple projects or tight deadlines.
Perhaps most importantly, CapCut’s non-destructive editing approach preserves full flexibility for future adjustments. You can resize your posters while retaining the ability to make further revisions without compromising your original design integrity.
CapCut — Your all-in-one video & photo editing powerhouse! Experience AI auto-editing, realistic effects, a huge template library, and AI audio transformation. Easily create professional masterpieces and social media viral hits. Available on Desktop, Web, and Mobile App.

CapCut: Alternative Approach to Poster Dimensions
Discover CapCut’s innovative approach to handling poster dimensions, which offers efficient methods for achieving your desired visual outcomes. The platform provides creative techniques that extend beyond conventional resizing tools, enhancing your overall poster design experience.
Begin by accessing CapCut through your web browser or mobile app. Log into your account to access the full suite of editing features and tools available for your poster projects.
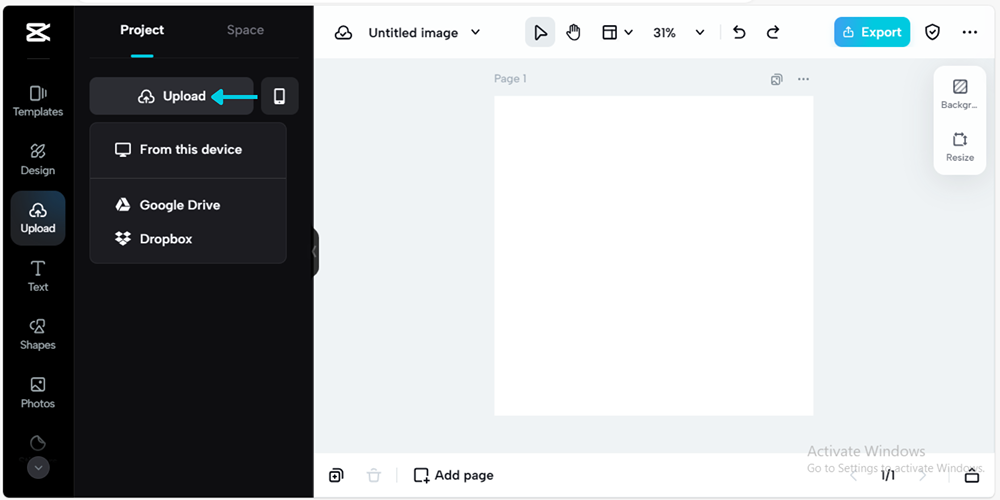
Once logged in, locate the media import option. You can upload your poster image directly from your device or select from existing files in your CapCut media library if you’ve previously used the platform.
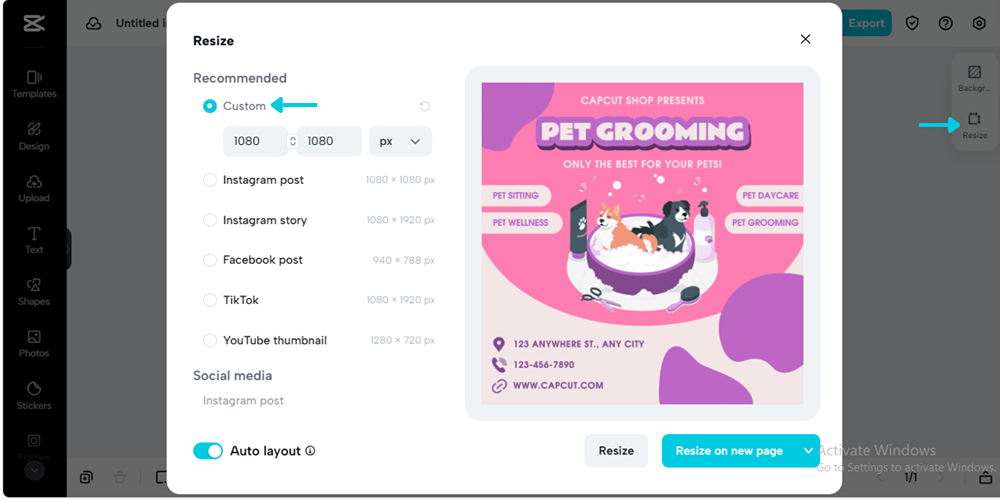
Within CapCut’s editing interface, find the resizing tools designed for easy dimension adjustment. These intuitive features allow you to scale your poster up or down to perfectly fit your required size or aspect ratio specifications.
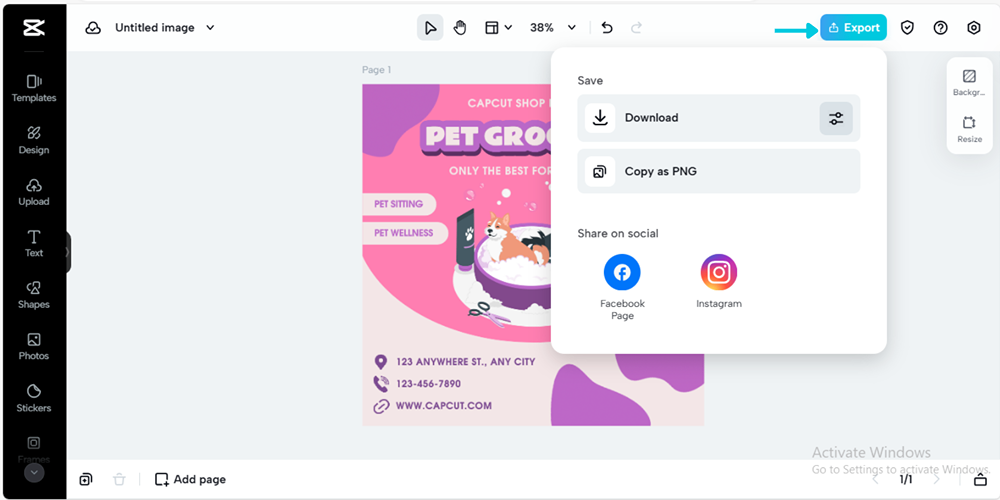
After resizing your poster, carefully review the results to ensure they meet your requirements. When satisfied, export your resized poster in your preferred format (JPEG, PNG, etc.), ready for sharing, printing, or additional editing.
Additional CapCut Features for Poster Creation
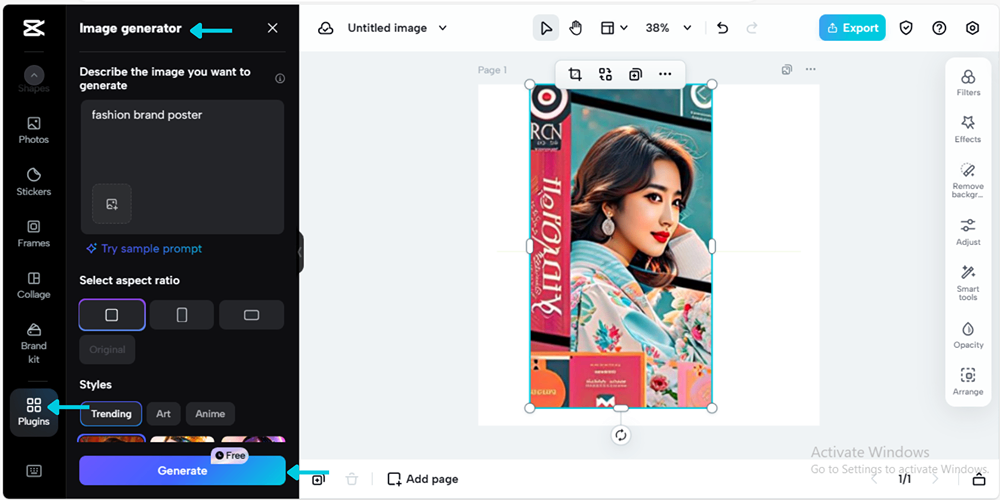
CapCut offers numerous features beyond basic resizing that can enhance your poster creation process. The text-to-image generator transforms written content into visually compelling images that elevate poster appeal. Users can customize fonts, colors, and styles to match their poster themes while adding artistic effects and overlays for unique design touches.
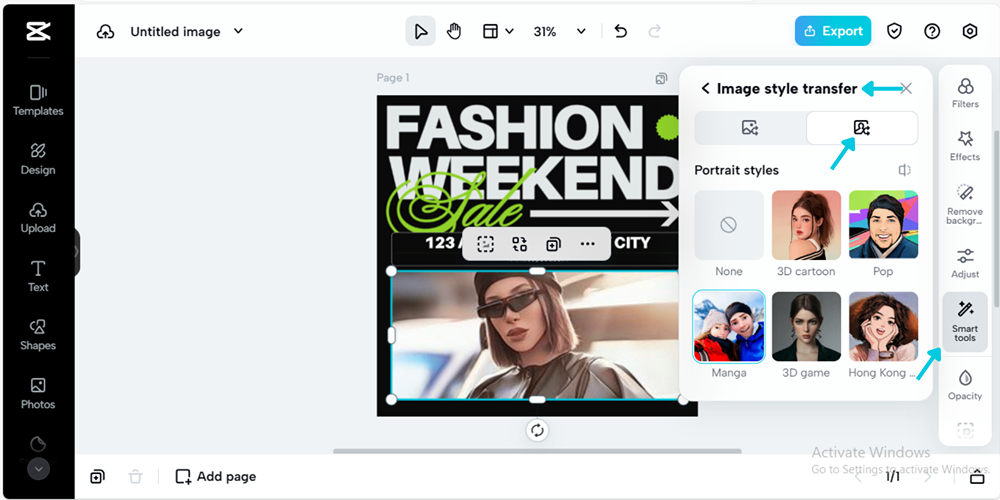
The portrait generator enables creation of striking portrait images that integrate seamlessly into posters. With controls for adjusting facial features, expressions, and backgrounds, users can personalize portraits to match their design vision. Various filters and enhancements allow experimentation to achieve desired aesthetics.
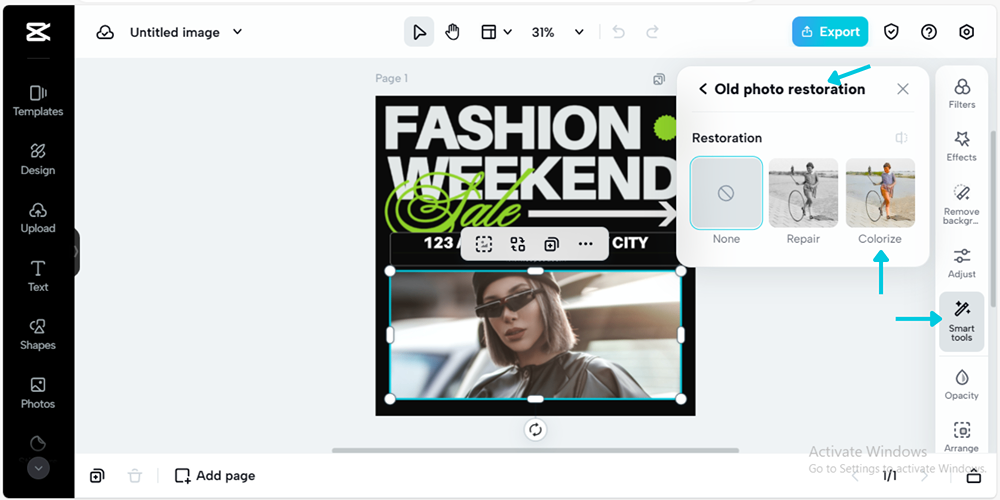
CapCut’s photo colorizer tool brings life to poster images by revitalizing black-and-white photos or enhancing colored images. Users can fine-tune hues, saturation, and contrast to ensure pictures align with poster aesthetics and color schemes.
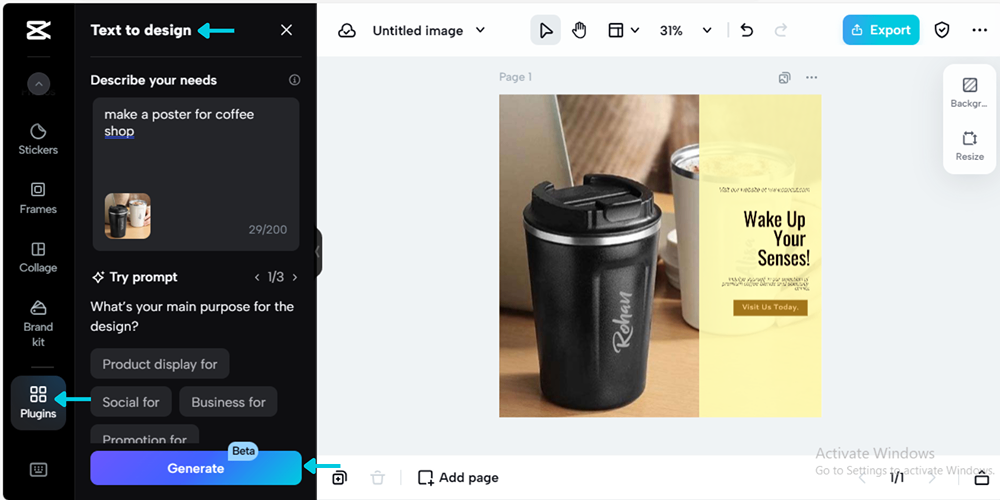
The text-to-design feature transforms basic text into dynamic design elements that enhance visual impact. With various templates, shapes, and graphics, users create captivating designs tailored to specific themes. Layout customization flexibility encourages creative exploration and visually engaging poster designs.
The background changer feature enables effortless background swaps to enhance poster aesthetics. Users can choose from CapCut’s background library or upload custom images for seamless integration. Advanced blending and adjustment options ensure cohesive, polished poster designs with perfectly integrated backgrounds.
Comparing Photoshop and CapCut for Poster Design
When evaluating editing software for poster design, both Photoshop and CapCut present distinct advantages and limitations. Understanding these differences helps determine which platform best suits your specific needs and workflow requirements.
Advantages and Disadvantages of Photoshop
Photoshop offers an extensive array of powerful editing tools, including layers, masks, and filters that provide exceptional control over image manipulation. The software supports high-resolution images and professional-grade features that ensure quality results suitable for both print and digital media.
The platform supports numerous file formats and integrates seamlessly with other Adobe products, facilitating efficient workflows for designers and photographers working across multiple applications.
However, Photoshop’s comprehensive feature set can overwhelm beginners, requiring significant time investment to master effectively. The software is part of Adobe’s Creative Cloud subscription, which may prove expensive for individuals or small businesses. Additionally, Photoshop’s resource demands necessitate powerful computer hardware for optimal performance.
Advantages and Disadvantages of CapCut
CapCut features a user-friendly interface with intuitive editing tools that make it accessible to beginners and casual users. The platform’s availability as a mobile app enables editing videos and images on mobile devices without computer access.
The software includes features specifically tailored for social media platforms, including built-in templates and streamlined sharing options that simplify content creation for digital channels.
However, CapCut may lack some advanced editing features available in professional software like Photoshop. As primarily video editing software, its image editing capabilities might be limited compared to dedicated photo editing applications. The free version includes watermarks on exported content, requiring subscription for watermark-free results.
Ideal Use Cases for Photoshop
Photoshop excels for professionals requiring precise image editing control for projects involving branding, advertising, and digital artwork. Photographers benefit from its retouching capabilities, color adjustment tools, blemish removal features, and composite image creation functions.
The software’s support for high-resolution images and CMYK color space makes it ideal for designing print materials including posters, flyers, and brochures that require specific color accuracy and resolution standards.
Ideal Use Cases for CapCut
CapCut perfectly serves users creating engaging content for social media platforms like Instagram, TikTok, and YouTube. The mobile app convenience facilitates quick edits to videos and images directly on smartphones or tablets without computer access.
The platform suits casual users needing basic editing tools for personal projects including slideshows, vacation videos, and social media content that doesn’t require professional-grade editing capabilities.
CapCut — Your all-in-one video & photo editing powerhouse! Experience AI auto-editing, realistic effects, a huge template library, and AI audio transformation. Easily create professional masterpieces and social media viral hits. Available on Desktop, Web, and Mobile App.
Making the Right Choice
Ultimately, the decision between Photoshop and CapCut depends on your specific requirements, expertise level, and preferred editing environment. Photoshop offers unparalleled flexibility and control for professional image editing and design projects, while CapCut provides user-friendly solutions for casual users and social media content creators, particularly on mobile devices.
Consider your project requirements, technical proficiency, budget constraints, and desired output quality when selecting between these platforms. Many designers actually use both tools for different aspects of their workflow, leveraging each platform’s strengths for specific tasks.
Frequently Asked Questions About Poster Dimensions
What represents typical poster dimensions in Photoshop?
Typical poster dimensions in Photoshop vary based on intended use. For physical prints, common sizes include 18×24 inches or 24×36 inches for standard posters. Digital posters often use 1080×1920 pixels for social media or screen display. The size of flyer in Photoshop typically ranges from 8.5×11 inches for standard handbills to 11×17 inches for larger formats. Always verify specific requirements for your project to ensure correct dimensions.
Which resolution works best for Photoshop posters?
The ideal Photoshop poster resolution depends on output format. For printed materials, 300 pixels per inch (PPI) ensures high-quality results that appear sharp and professional when physically produced. Digital posters typically use 72 PPI since screens display content at lower resolutions than printed materials. The poster pixel size should accommodate your specific output requirements while maintaining image quality and file size efficiency.
How does handbill size in Photoshop differ from poster sizes?
Handbill size in Photoshop typically refers to smaller printed materials like flyers or leaflets, usually measuring 8.5×11 inches or smaller. Poster dimensions involve larger formats ranging from 18×24 inches to much larger display sizes. The Photoshop poster resolution requirements remain similar between these formats, but the physical dimensions significantly impact design considerations and layout approaches.
What constitutes proper poster pixel size for digital displays?
Proper poster pixel size for digital displays depends on viewing distance and screen resolution. For social media, 1080×1080 pixels works well for square formats, while 1080×1920 pixels suits vertical displays. For larger digital signage, dimensions might reach 3840×2160 pixels or higher. Consider where your digital poster will be displayed and adjust your poster pixel size accordingly for optimal viewing quality.
How do I create posters using CapCut?
Creating posters with CapCut involves a straightforward process. Begin by importing your base image into the platform. Use the resizing tools to adjust dimensions according to your specific requirements. Customize your design with text, effects, and graphics available within CapCut’s extensive library. The intuitive interface makes poster creation accessible even for beginners without design experience. Finally, export your completed poster in your preferred format for sharing or printing.
Conclusion
Mastering poster dimensions represents a crucial skill for creating visually compelling designs that effectively communicate your message. Whether working with Photoshop’s professional tools or CapCut’s user-friendly interface, understanding how to properly size your posters ensures optimal results for both print and digital formats.
Remember that the ideal poster dimensions in Photoshop differ from those in CapCut, with each platform offering unique advantages for specific use cases. Photoshop provides unparalleled control for professional designers, while CapCut offers accessibility and convenience for quick projects and social media content.
By understanding the strengths and limitations of each platform, you can make informed decisions about which tool best suits your specific needs. Many designers find value in using both applications for different aspects of their workflow, leveraging Photoshop for detailed image manipulation and CapCut for efficient resizing and social media optimization.
Regardless of your chosen platform, always consider your final output format when determining dimensions and resolution. Proper planning ensures your posters maintain quality and impact whether viewed on screens or in physical form. With these insights and techniques, you’re well-equipped to create stunning posters that effectively capture attention and communicate your message.
Some images courtesy of CapCut