TOOL HUNTER
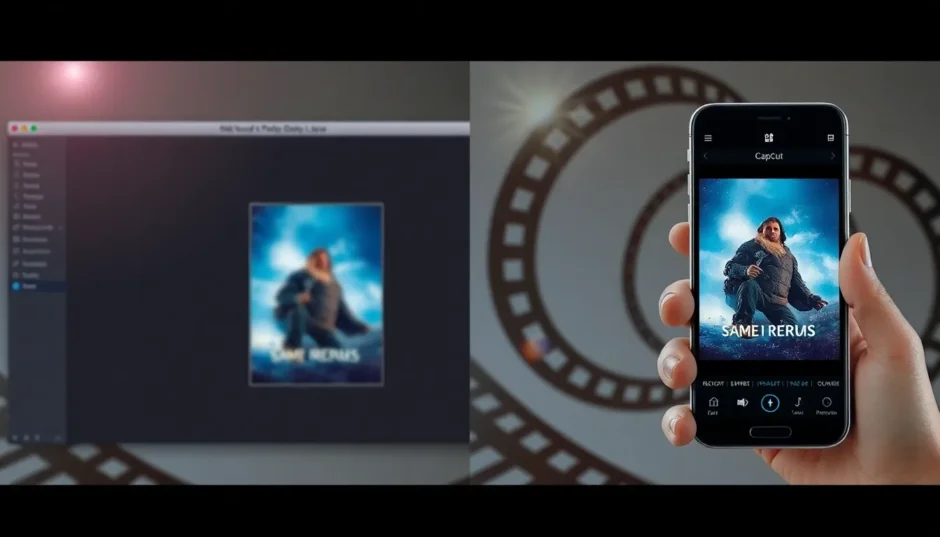

Making a movie poster is one of the most fun parts of sharing a film with the world. It doesn’t matter if you’re a pro filmmaker, a hobbyist designer, or just a movie lover—getting the movie poster size in Photoshop right is a big deal. These days, your poster might end up on social media, a website, a printed handout, or even a huge billboard. If the size isn’t correct, it might look blurry, cropped weirdly, or just unprofessional.
This guide is here to help! We’ll cover everything about resizing film posters—using both Adobe Photoshop and a cool alternative called CapCut. You’ll get clear steps, honest comparisons, and handy tips so your poster always turns out clean, sharp, and ready to impress. Let’s jump in!
Table of Contents
- Why correct movie poster dimensions in Photoshop are so important
- How to resize film poster size in Photoshop
- How CapCut serves as an excellent alternative for movie poster resizing
- Photoshop vs. CapCut: which one is right for you?
- Tips to resize your poster without losing quality
- Frequently asked questions
- Final thoughts
Why correct movie poster dimensions in Photoshop are so important
When we talk about movie poster dimensions in Photoshop, we’re really talking about making sure your poster fits perfectly everywhere people see it. Get it wrong, and your hard work might end up pixelated, stretched, or missing important edges.
The most standard size for a movie poster is 27 inches by 41 inches. That’s the classic one-sheet size you see in theater lobbies. But sometimes you need other sizes—maybe for Instagram, a website banner, or a DVD sleeve. That’s why understanding film poster size in Photoshop is such a useful skill.
How to resize film poster size in Photoshop
Adobe Photoshop is the industry standard for a reason. It’s packed with tools that give you total control. Here’s how to resize your poster properly using Photoshop.
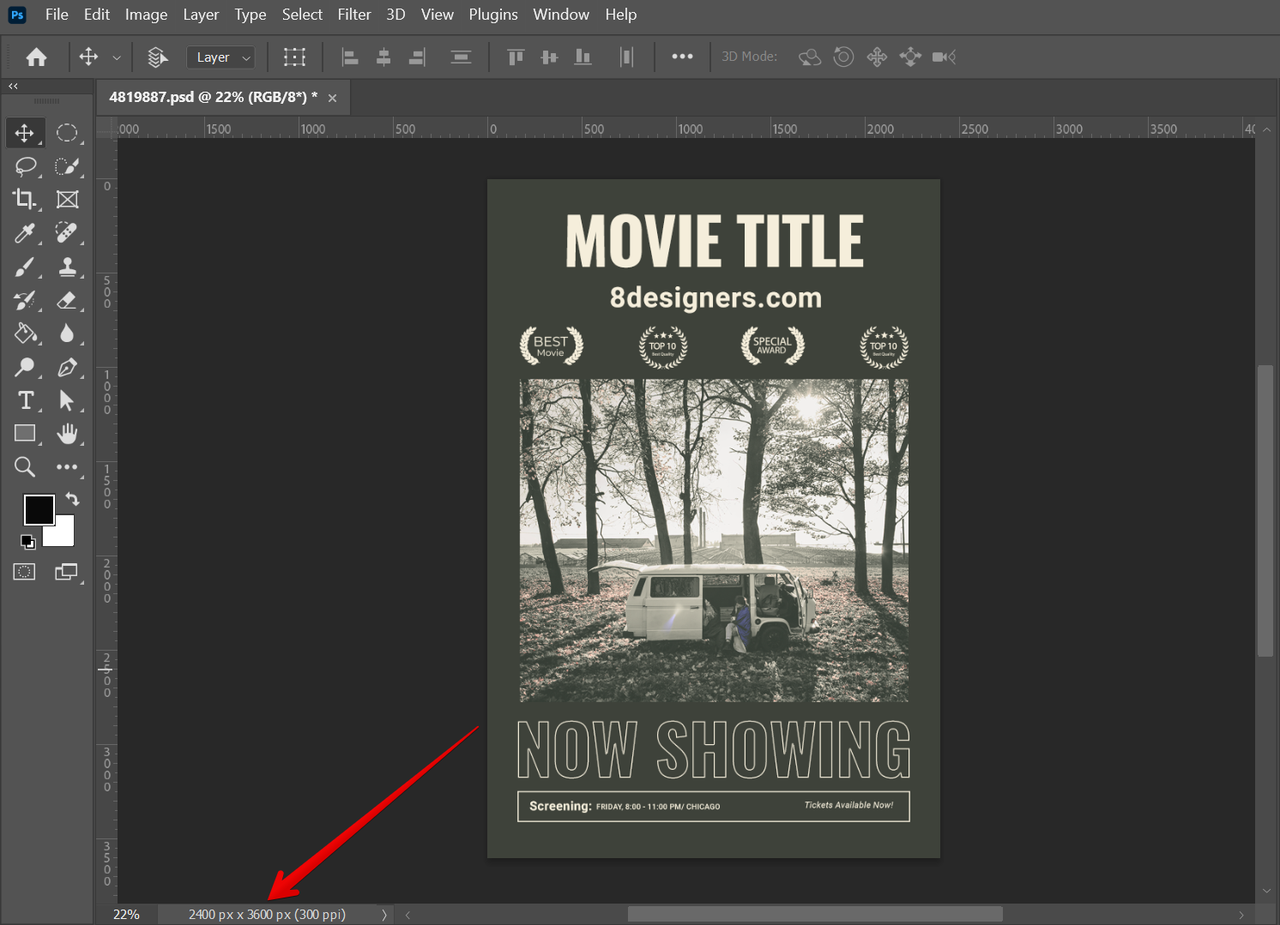
Start by opening your image in Photoshop. Go to the “Image” menu up top and choose “Image Size.” A window will pop up where you can type in your target dimensions. Set the units to inches and type in 27 for width and 41 for height.
Always remember to lock the aspect ratio. That little chain icon makes sure your image doesn’t get warped. You can also set the resolution here—300 PPI for print, or around 72–150 PPI for digital use.
Click OK, and Photoshop will resize your image. You might want to do some final tweaks like sharpening or color correction. Then save it in your preferred format—JPEG for web, PDF for print, etc.
That said, Photoshop isn’t for everyone. It can be overwhelming when you’re just starting out.
The drawbacks of using Photoshop for movie poster size
As powerful as Photoshop is, it has some downsides. First off, the learning curve is steep. There are a million buttons and menus, and it takes time to feel comfortable.
It’s also pretty demanding on your computer. If you’re working with a large file—like a high-res movie poster Photoshop size—you might experience lag or slow performance, especially on older machines.
That’s why many people are turning to alternatives like CapCut.
How CapCut serves as an excellent alternative for movie poster resizing
You might know CapCut as a video editor, but it’s also awesome for images. It’s simple, fast, and doesn’t require a high-end computer. That makes it perfect for adjusting movie poster size in Photoshop-like projects, especially if you’re not a full-time designer.
One of the best things about CapCut is how easy it is to use. The layout is clean and intuitive—no confusing menus. Plus, it works on desktop, web, and mobile, so you can edit on the go.
Step-by-step guide to resizing with CapCut
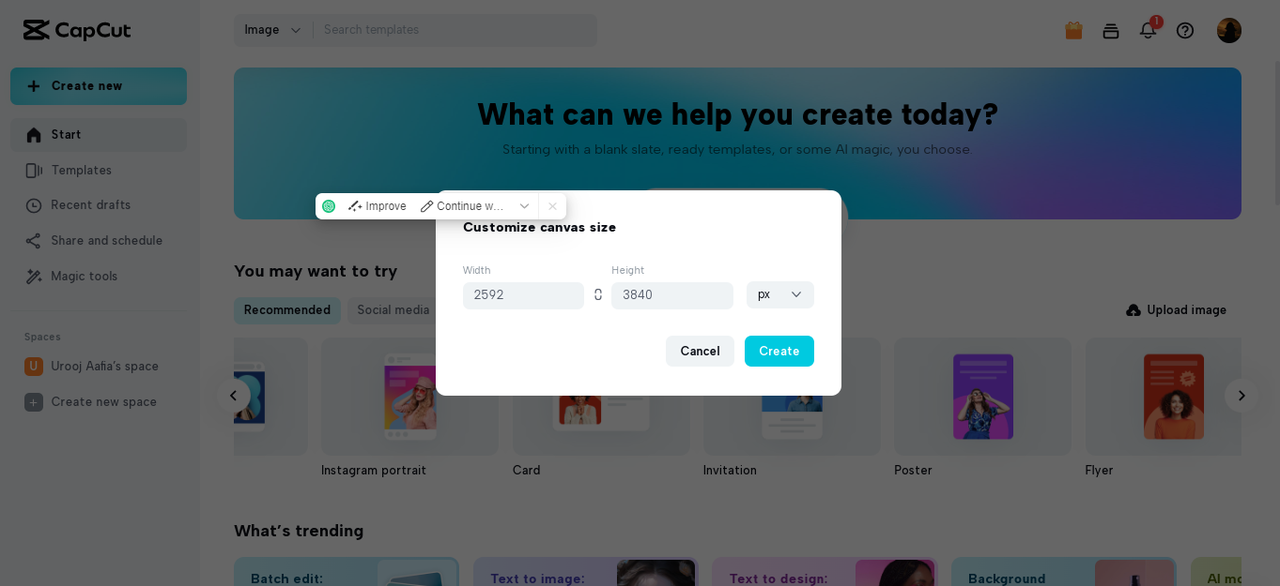
Open CapCut and start a new project. Choose “New Image” and set your canvas to the standard movie poster dimensions: 27×41 inches (or 2592×3840 pixels if you prefer working in pixels).
Upload your poster image. CapCut will automatically fit it to the canvas without distorting it. You can preview the result and make any small adjustments if needed.
When you’re happy, export your poster. CapCut lets you save in all the standard formats like JPEG, PNG, and more.
Why CapCut is a powerful alternative
CapCut has some big advantages over Photoshop, especially for beginners. It’s way easier to learn—you can jump in with no experience. It’s also faster for basic tasks like resizing. And it runs smoothly even on less powerful devices.
But there’s more! CapCut also includes fun and practical extras to make your poster stand out.
Awesome extra features in CapCut
CapCut isn’t just about resizing. It comes with filters, effects, and smart tools that add a pro touch in seconds.
You can apply filters to change the vibe of your poster—go vintage, moody, bright, whatever you like!
There are also AI-powered tools like auto-cropping and background removal. These save tons of time and let you focus on the creative stuff.
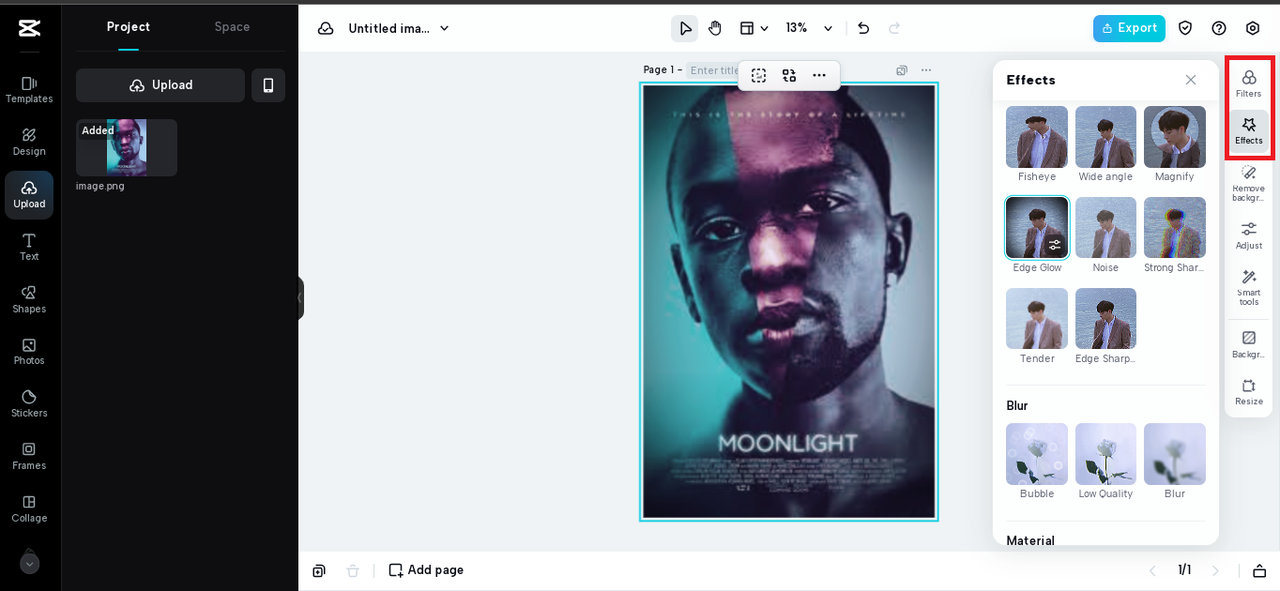
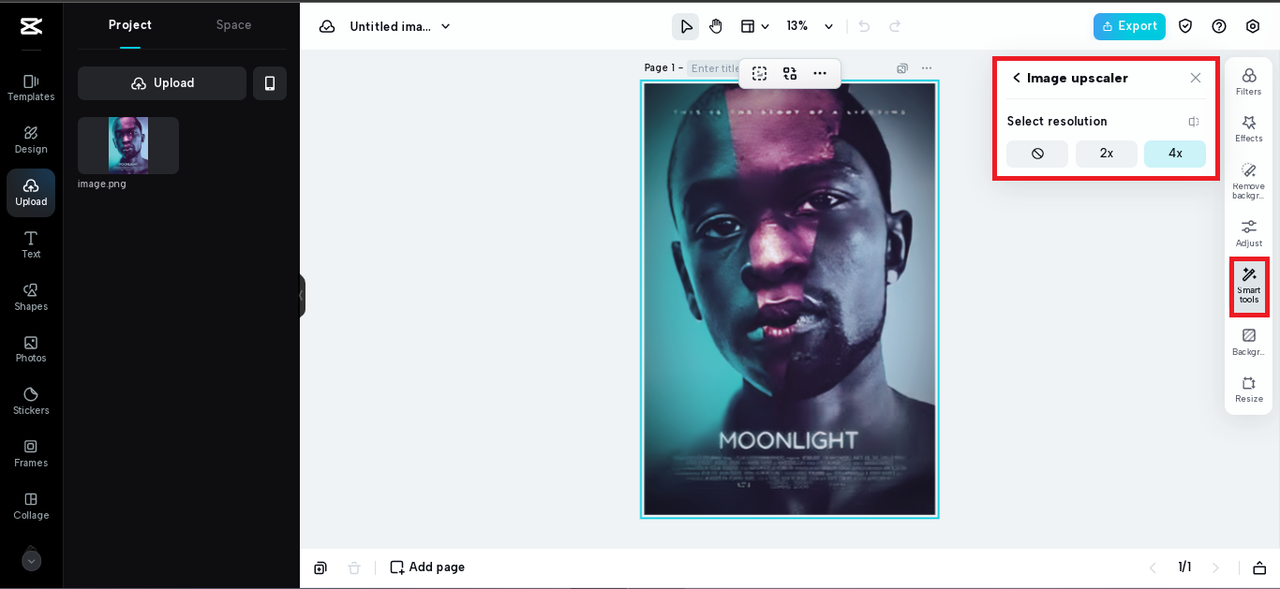
Another super useful tool is the image upscaler. It lets you enlarge your poster without losing clarity—great for big prints or high-resolution displays.
CapCut — Your all-in-one video & photo editing powerhouse! Experience AI auto-editing, realistic effects, a huge template library, and AI audio transformation. Easily create professional masterpieces and social media viral hits. Available on Desktop, Web, and Mobile App.

Photoshop vs. CapCut: which one is right for you?
So which tool should you pick? It depends on what you’re looking for.
If you want total control and don’t mind a learning curve, Photoshop is your best friend. You can tweak every little detail.
But if you want something fast, easy, and mobile-friendly, CapCut is a fantastic choice.
Here’s a quick breakdown:
- Photoshop: more features, more control, but harder to learn and heavier on your computer.
- CapCut: simpler, faster, works everywhere, but not as many advanced options.
Think about how and where you like to work. If you’re often on your phone or tablet, CapCut is probably the way to go.
Both tools can help you nail the perfect movie poster size in Photoshop quality—it just depends on your style and needs.
Tips to resize your poster without losing quality
No matter which app you use, these tips will help keep your poster looking crisp and professional.
Always begin with a high-quality image. The better the original, the better the result.
Set the correct resolution: 300 PPI for print, 72–150 PPI for digital.
Keep the aspect ratio locked! This is the number one rule to avoid stretching or squashing.
If you’re using CapCut, trust the resize tool—it’s designed to maintain quality.
When exporting, always choose the highest quality setting available, especially if you’re printing.
Solving common resize problems
Sometimes things don’t go as planned. If your image looks blurry after resizing, try starting over with a higher-resolution original. Resizing in smaller steps can also help.
If colors look wrong, check your color profile and settings.
And if the image looks stretched, you probably forgot to lock the aspect ratio. Always keep that enabled!
Frequently asked questions
What’s the best resolution for a movie poster?
For online use, 72–150 PPI is fine. For printing, you need at least 300 PPI to keep it looking sharp.
How can I avoid blurry images when resizing?
Always start with a high-res image and resize gradually. Use resampling options in Photoshop or trust CapCut’s built-in tools.
Can I use CapCut for professional printing?
Absolutely! CapCut has strong editing features and can easily handle print-ready resizing.
CapCut — Your all-in-one video & photo editing powerhouse! Experience AI auto-editing, realistic effects, a huge template library, and AI audio transformation. Easily create professional masterpieces and social media viral hits. Available on Desktop, Web, and Mobile App.
Final thoughts
Getting your movie poster size right in Photoshop or CapCut doesn’t have to be stressful. With the right tools and a bit of practice, you can create stunning posters that look great everywhere.
Whether you prefer the power of Photoshop or the simplicity of CapCut, the most important thing is that you enjoy the process and love what you make. So go play around, get creative, and make something amazing!
Some images courtesy of CapCut.