TOOL HUNTER
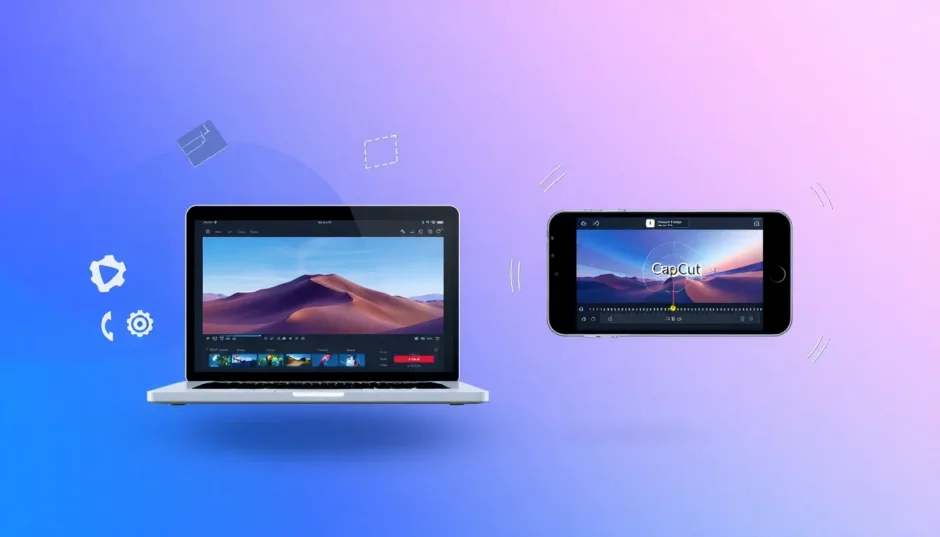

In video editing, making still pictures move can really change how your project feels. Lots of editors use something called the Ken Burns effect. It’s a cool way to zoom and pan smoothly across photos, making them way more fun to watch.
This effect is named after Ken Burns, who is a famous documentary maker from America. He used it a bunch in his movies to help old photos feel alive. These days, you can see the Ken Burns effect everywhere—in docs, slideshows, music clips, and even on social media.
This guide will show you how to get the Ken Burns effect working in both Final Cut Pro and CapCut. No matter if you’re just starting out or have been editing for a while, you’ll pick up some handy steps to make your videos look amazing.
Table of Contents
What Exactly is the Ken Burns Effect?
The Ken Burns effect is a method that adds motion to still images. Normally, it means slowly zooming in or out while also moving across the picture. This not only makes the image feel active but also helps direct the viewer’s eyes to certain spots.
It’s super helpful when you’re dealing with photos that don’t move, like old family pictures or product shots. Instead of a flat, still image, the Ken Burns effect brings energy and life. It’s perfect for storytelling since it adds visual spice and points out what’s important.
You’ll often notice this effect in documentaries, where it helps historical photos tell a story. But it’s also great for slideshows, ads, or even personal videos. And with programs like Final Cut Pro and CapCut, it’s easier than ever to add.
Different Types of Ken Burns Effect in Final Cut Pro
Final Cut Pro has a few styles of the Ken Burns effect. Each one gives a different kind of motion, so you can pick what fits your video best. Let’s check out the most common ones.
The standard Ken Burns effect is the basic one. It mixes a slow zoom with a pan. You choose where the zoom starts and ends to make a smooth move. It’s good for adding a bit of motion without being too distracting.
If you want to control the timing, try the timed Ken Burns effect. You can set how long the zoom or pan takes. This is useful when you need the movement to match voiceover or music.
For something different, there’s the reverse Ken Burns effect. It zooms out instead of in. This can make it feel like you’re pulling back from the subject, which is nice for showing more background or ending a scene.
If you just want to move across without zooming, use the pan-only effect. It slides the image side to side or up and down without resizing. Great for wide shots like landscapes or group photos.
Then there’s the diagonal pan and zoom. It moves and zooms at an angle. This adds a lively feel and is perfect for pointing out specific parts of a picture.
How to Add Ken Burns Effect in Final Cut Pro
Putting the Ken Burns effect in Final Cut Pro is pretty simple. Even if you’re new to editing, you can do it by following these steps.
First, bring your image into Final Cut Pro. Drag it from your computer right into the timeline. Or use the import button to get it into your project.
Once your image is in the timeline, you might want to change how long it shows. By default, still images last four seconds. You can make it longer in the preferences if you want.
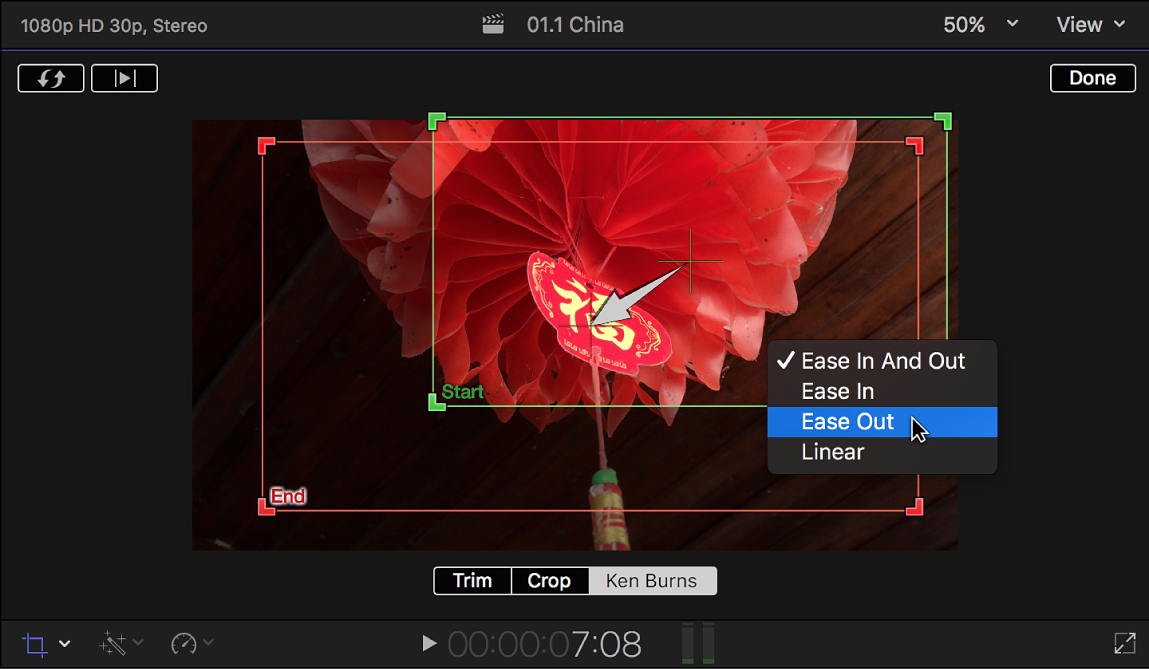
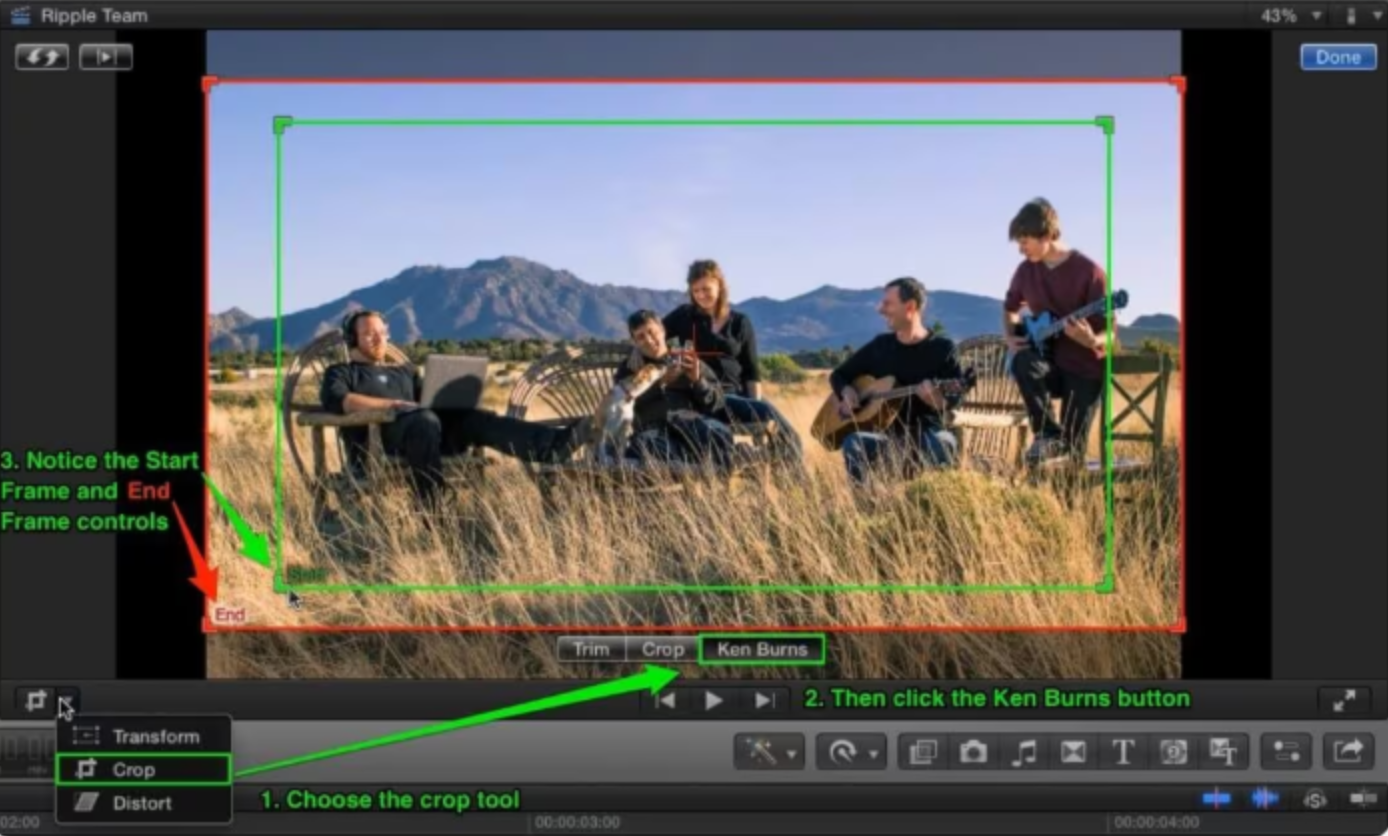
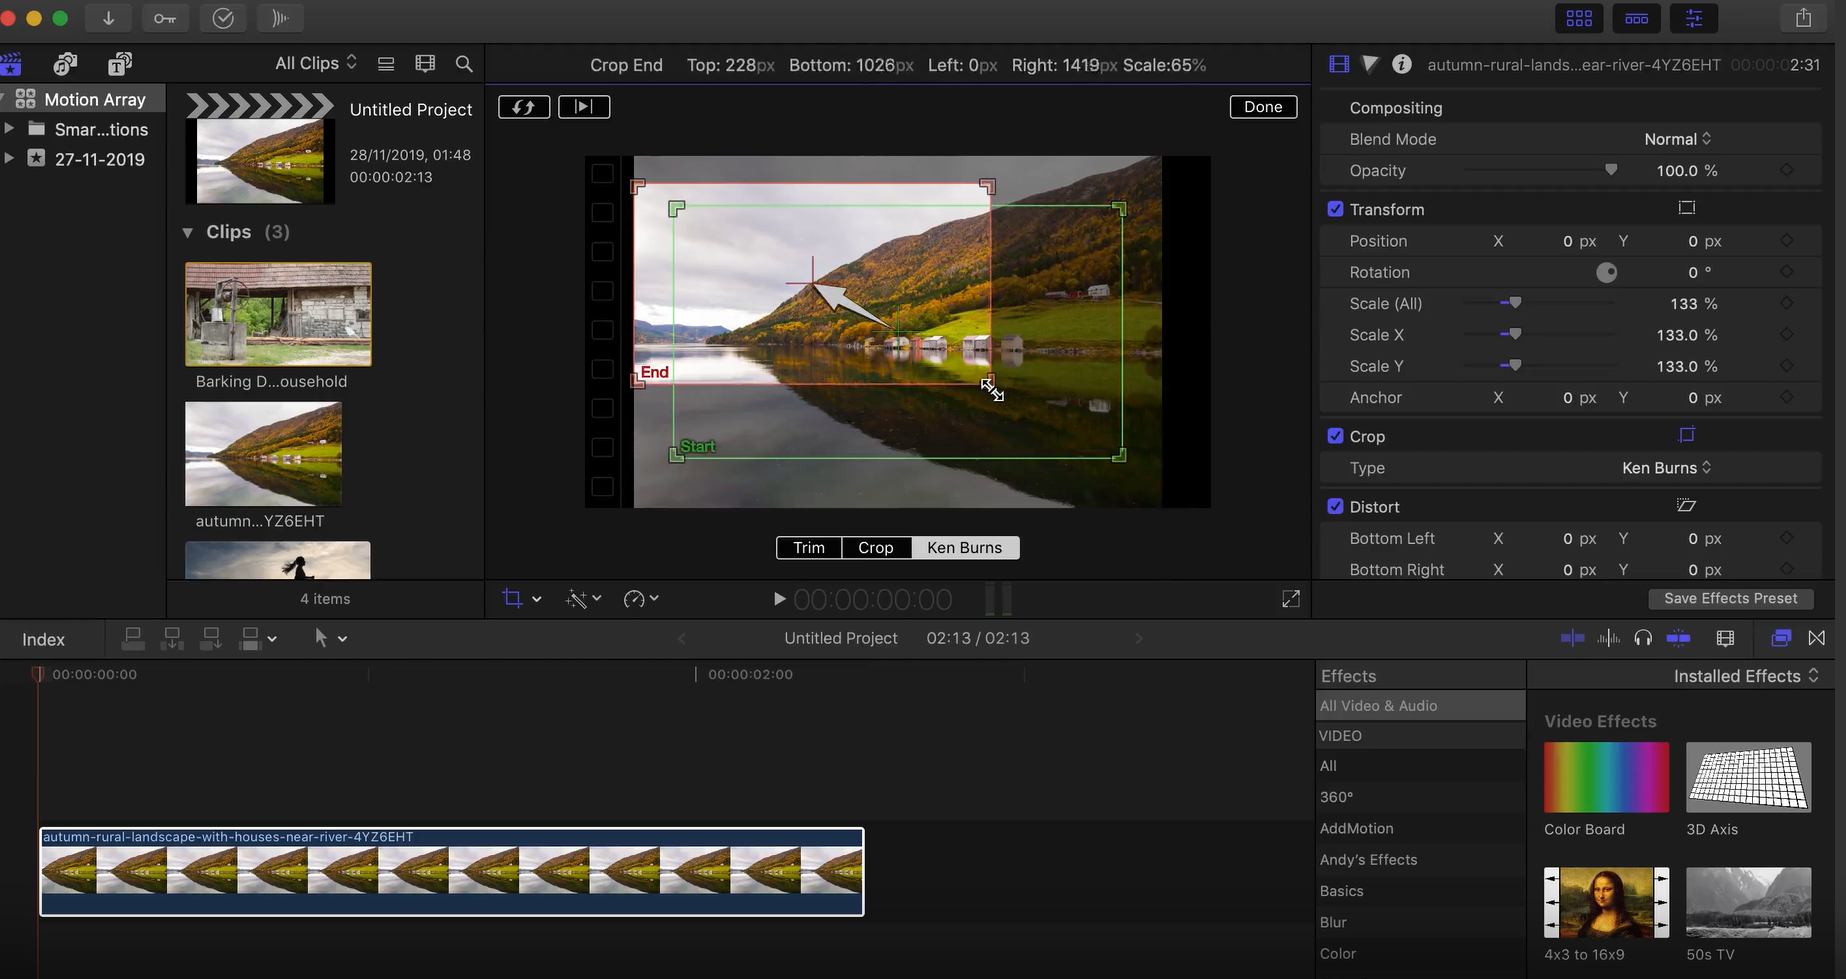
Now, apply the Ken Burns effect. Click on the image in the timeline, then hit the “Crop” button in the viewer. Choose “Ken Burns” from the options. You’ll see two boxes—a green one for the start and a red one for the end.
Move the green box to where you want the effect to begin. Say you want to start close on a face, put the green box there. Then move the red box to where you want to end, like zoomed out or panned to another area.
When you’re happy with it, play the timeline to see how it looks. Tweak the boxes until it’s just right.
How to Add Ken Burns Animation to an Image in FCPX
If you want to get creative, you can animate images with more than one movement. This is awesome for longer clips or when you want extra motion in a photo.
Start by making a copy of the image clip in the timeline. Click on the clip and press Command + D. Now you have a duplicate to work with.
With the copied clip selected, go back to the Ken Burns settings. Change the start and end points to make a different move. If the first clip zoomed in, make the second one pan across.
By mixing several clips with different Ken Burns effects, you can make a more detailed animation. This is great for telling a story with one image, guiding the viewer’s attention to various details over time.
Another neat trick in Final Cut Pro is copying and pasting the Ken Burns effect. If you have several images that need the same movement, apply it to one and then paste it to the rest. This saves time and keeps everything consistent.
To do this, select the image with the effect and press Command + C to copy. Then choose the other images, go to Edit > Paste Attributes, and pick “Crop”. The effect will now be on the new images.
Where to Use the Ken Burns Effect
The Ken Burns effect is super flexible and works in many kinds of videos. Here are some common places where it really shines.
In documentaries, the Ken Burns effect is often used to animate historical photos. It helps bring the past to life and makes the story more engaging. Instead of a still image, the movement adds feeling and depth.
For product videos, you can use the effect to highlight special features. Zoom in on details or pan over the design. This is much better than a still photo and makes the experience more immersive.
Slideshows are another great use. Whether it’s a wedding or travel video, adding motion to your photos makes them more interesting. It also gives your slideshow a pro touch.
You can even use the Ken Burns effect between scenes. A gentle zoom or pan can make a smooth, natural transition. This is especially good in story-based videos where you want a steady flow.
Music videos often use the effect on album covers or behind-the-scenes shots. It adds visual variety and can match the song’s rhythm.
The Easiest Way to Add Ken Burns: CapCut Desktop
Final Cut Pro is powerful, but it can be tricky for beginners. If you want a simpler way to add the Ken Burns effect, try CapCut desktop video editor.
CapCut is free editing software with a user-friendly interface. It’s made to be easy, so even if you’ve never edited before, you can learn fast. One of its best features is how simple it is to handle the Ken Burns effect.
With CapCut, adding a Ken Burns effect is as easy as adjusting a few settings. No need to stress about keyframes or complex controls. You can just focus on being creative.
CapCut — Your all-in-one video & photo editing powerhouse! Experience AI auto-editing, realistic effects, a huge template library, and AI audio transformation. Easily create professional masterpieces and social media viral hits. Available on Desktop, Web, and Mobile App.


Key Features of CapCut
CapCut has several features that make adding and customizing the Ken Burns effect a breeze. Here are some of the most useful ones.
You can change the zoom speed to fit your video’s mood. A slow zoom feels dramatic, while a faster one adds energy. This control lets you tailor the effect to your needs.
The software also has dynamic zoom-in and zoom-out effects. These are perfect for highlighting details or creating smooth scene changes.
If your footage isn’t great quality, CapCut’s AI video upscaler can help. It automatically makes your videos clearer and more professional-looking.
Another handy tool is one-click video stabilization. If your video is shaky, this smooths it out with just one click. Great for action shots or handheld videos.
For fancier edits, CapCut includes AI motion tracking. This lets you automatically add effects to moving subjects. For example, you can have a Ken Burns effect follow a person walking.
How to Easily Add Ken Burns to Videos with CapCut
Adding the Ken Burns effect in CapCut is straightforward. Here’s a step-by-step guide to help you out.
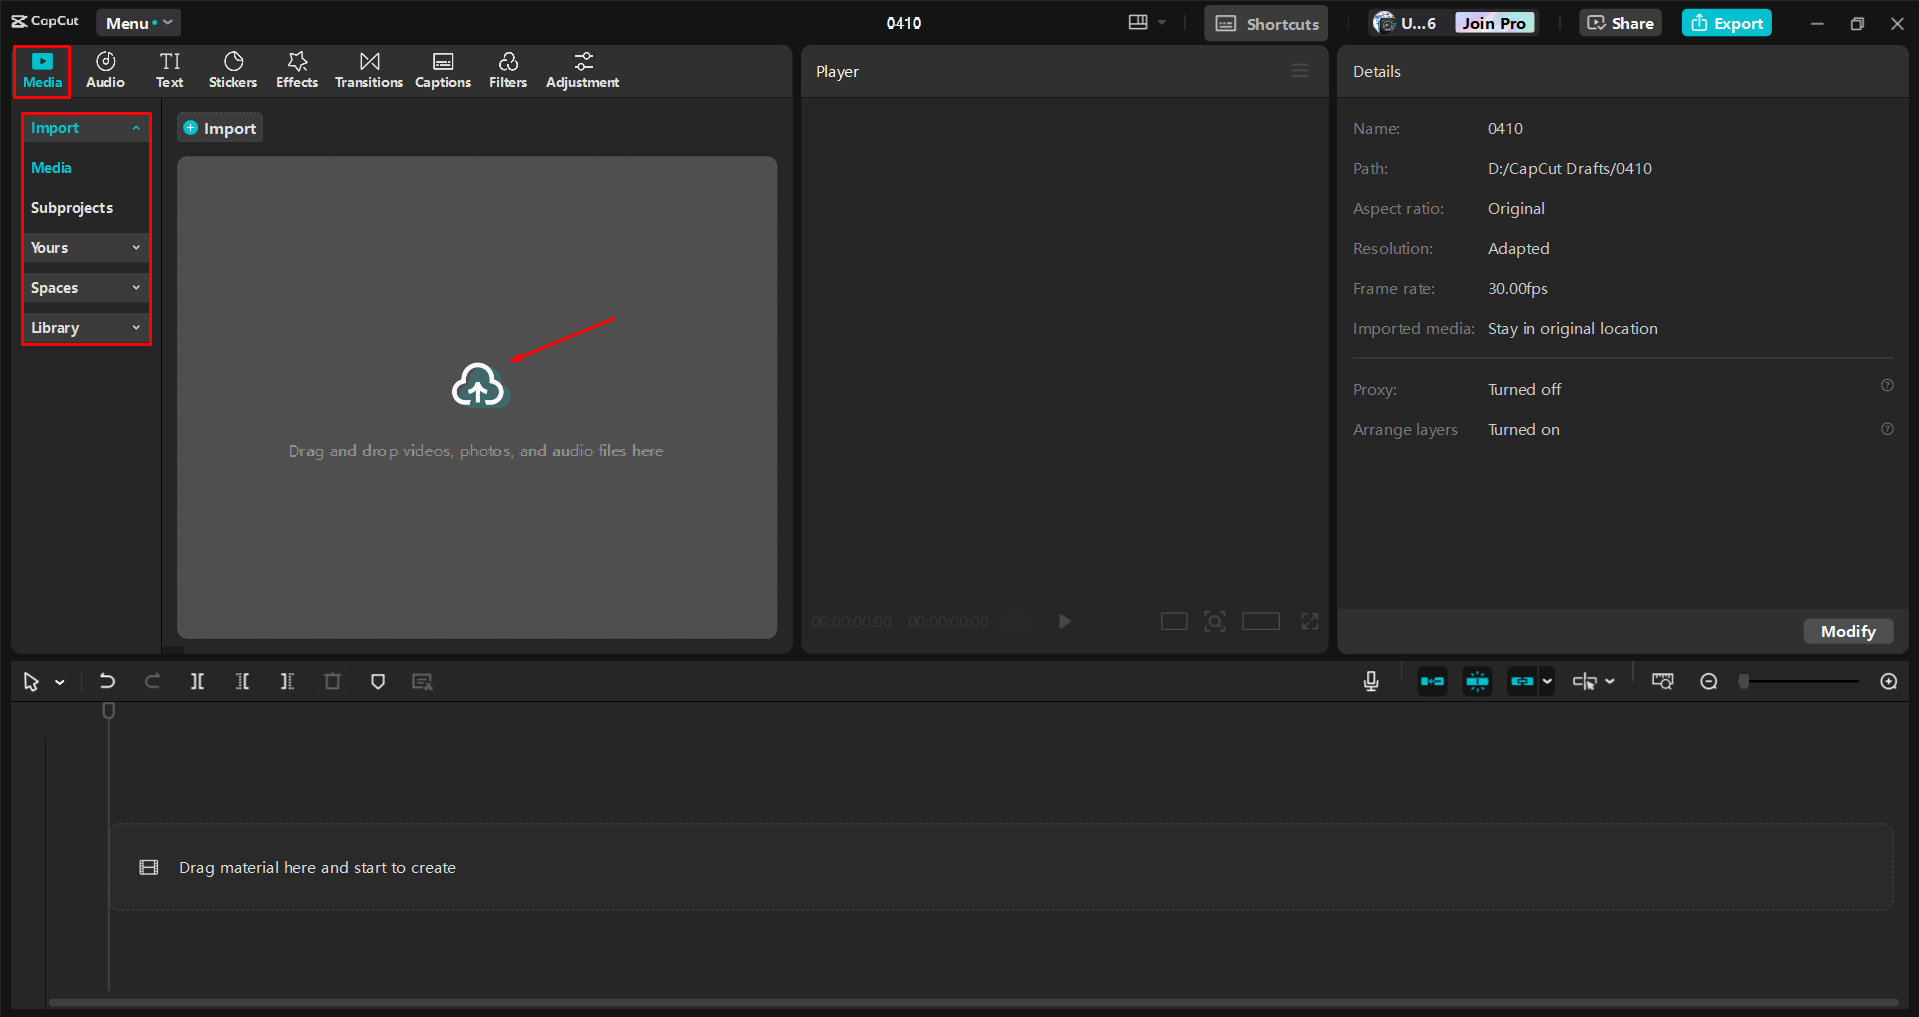
First, download and install CapCut desktop video editor. It’s free, and you can get it from the official site. Once it’s installed, open it and start a new project.
To import your video, click “Import” or drag your file into the workspace. After importing, drag the video from the media library to the editing track.
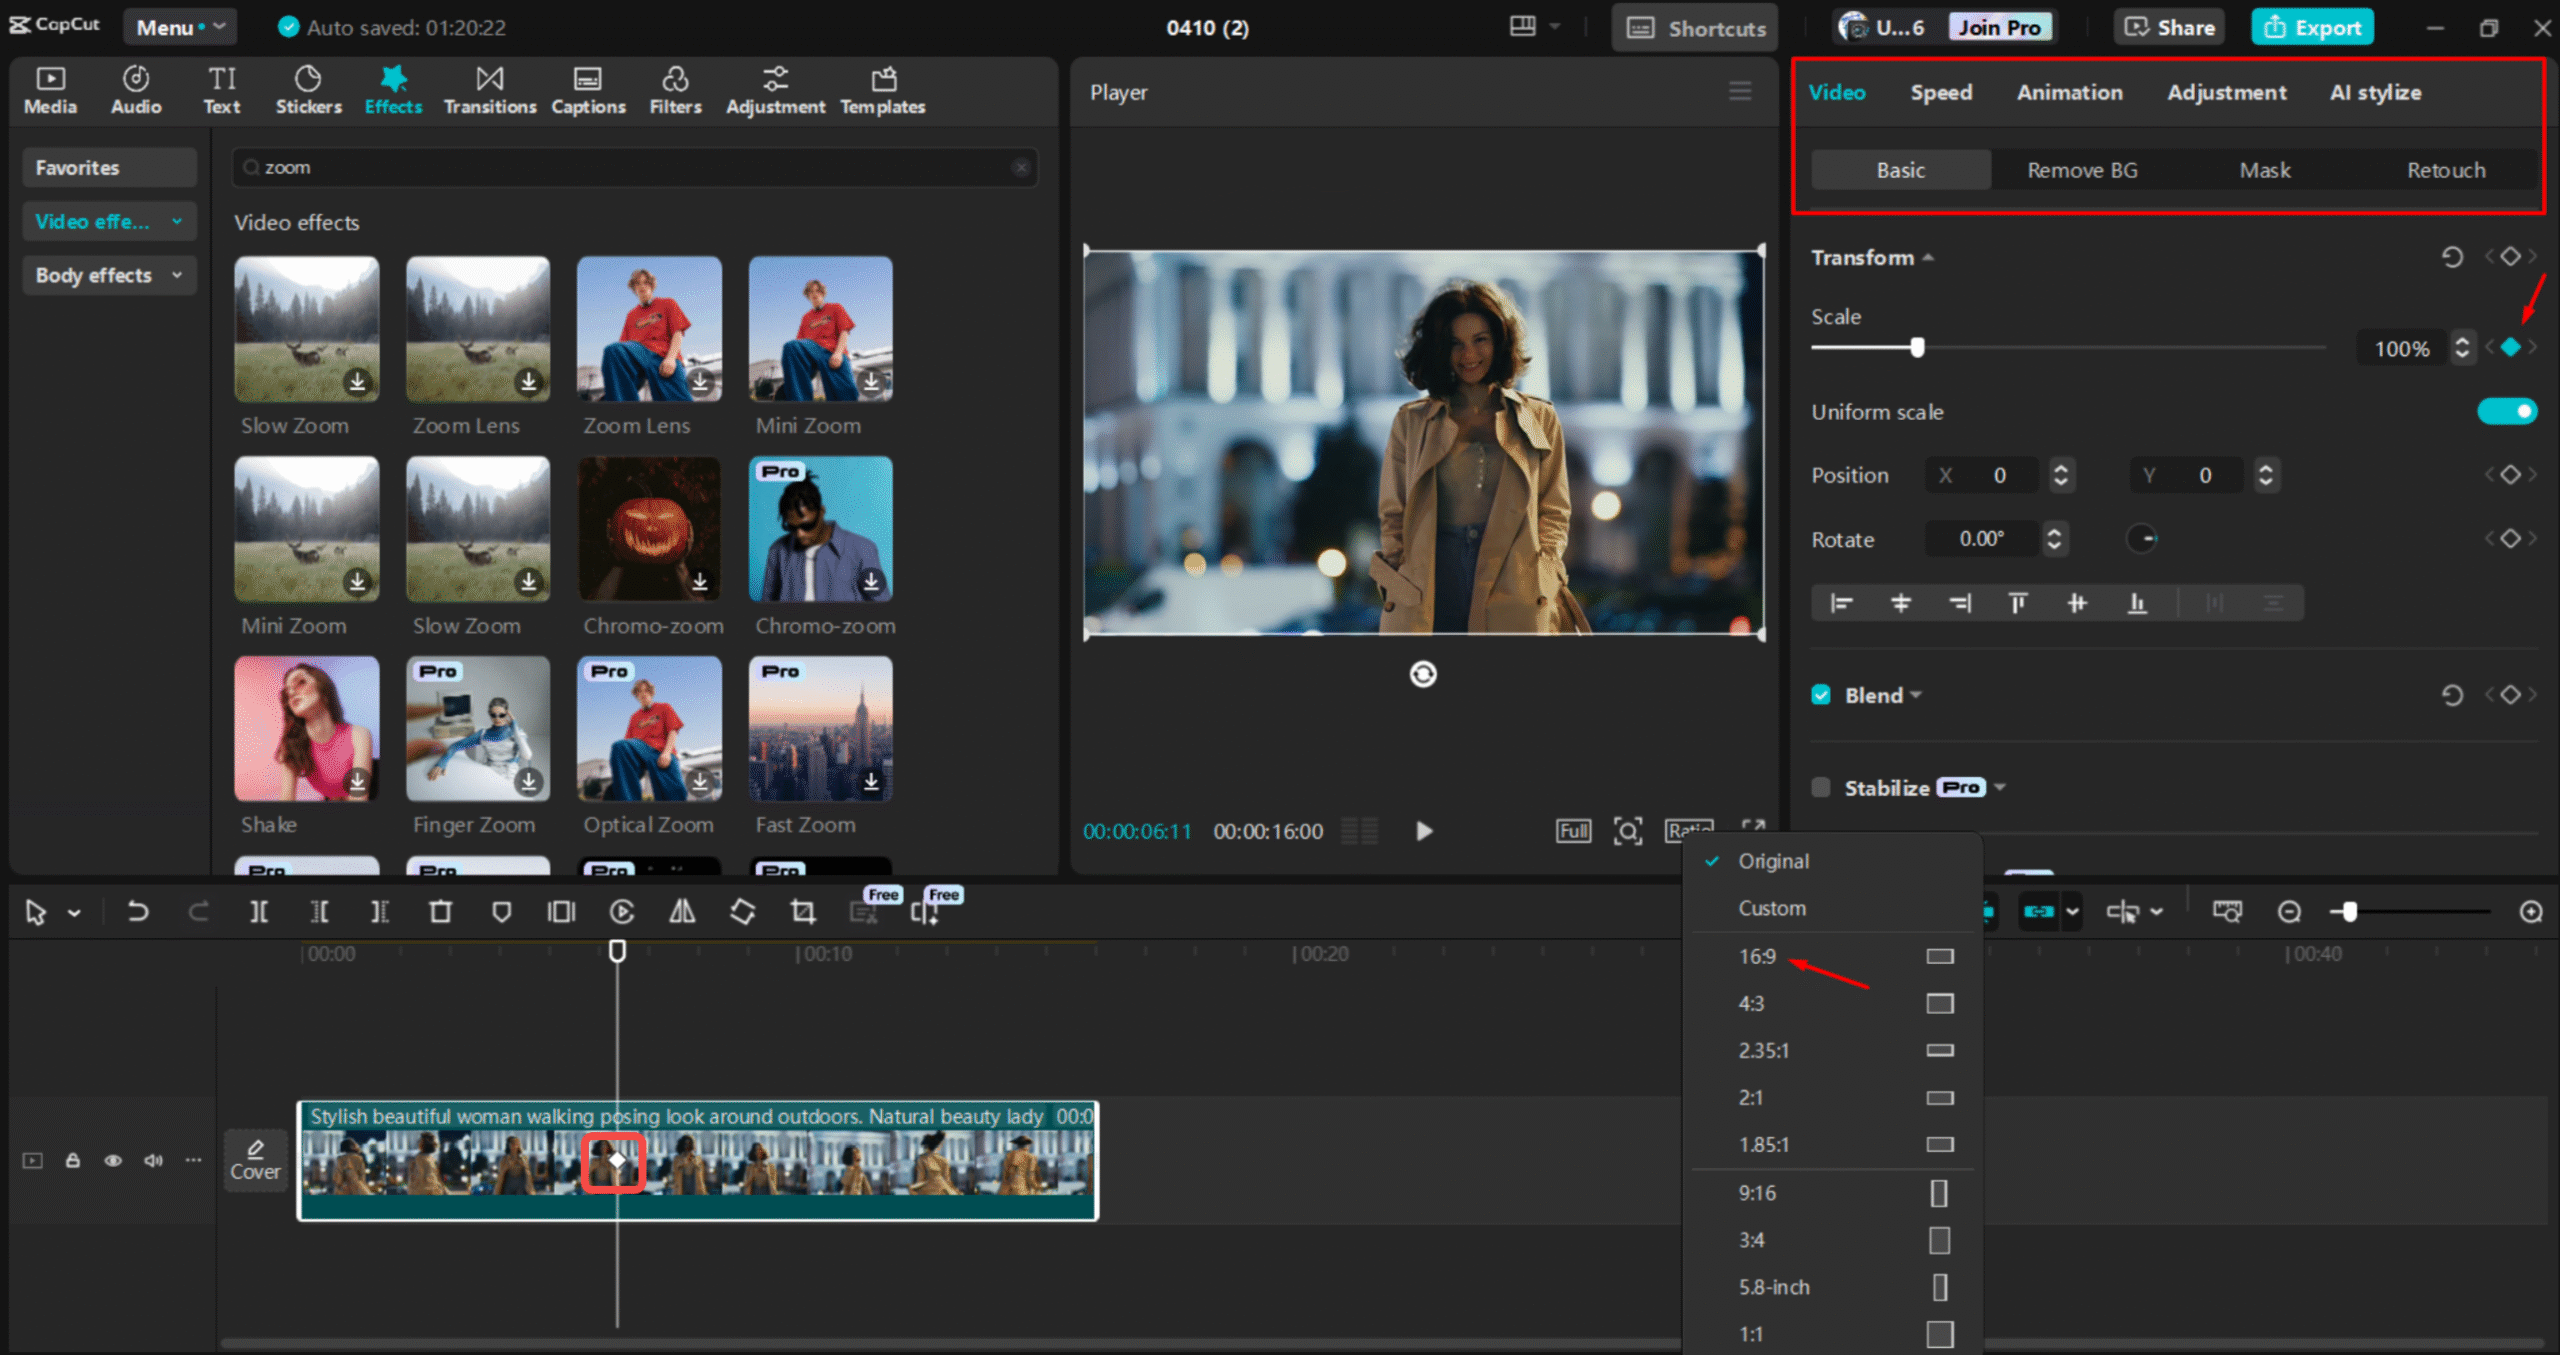
Now, add the Ken Burns effect. Select the clip in the timeline and go to the “Basic” editing tab. Here, you can adjust the scale and position.
To make a Ken Burns effect, you need to add keyframes. Click the diamond icon to add a keyframe at the clip’s start. Then move the playhead to the end and adjust the scale to zoom in or out. CapCut will add another keyframe, making a smooth zoom.
You can also pan by changing the position. For example, set the start on the left and end on the right to move across.
When you like how it looks, preview it to ensure it’s smooth. Adjust keyframes if needed for better timing.
CapCut — Your all-in-one video & photo editing powerhouse! Experience AI auto-editing, realistic effects, a huge template library, and AI audio transformation. Easily create professional masterpieces and social media viral hits. Available on Desktop, Web, and Mobile App.
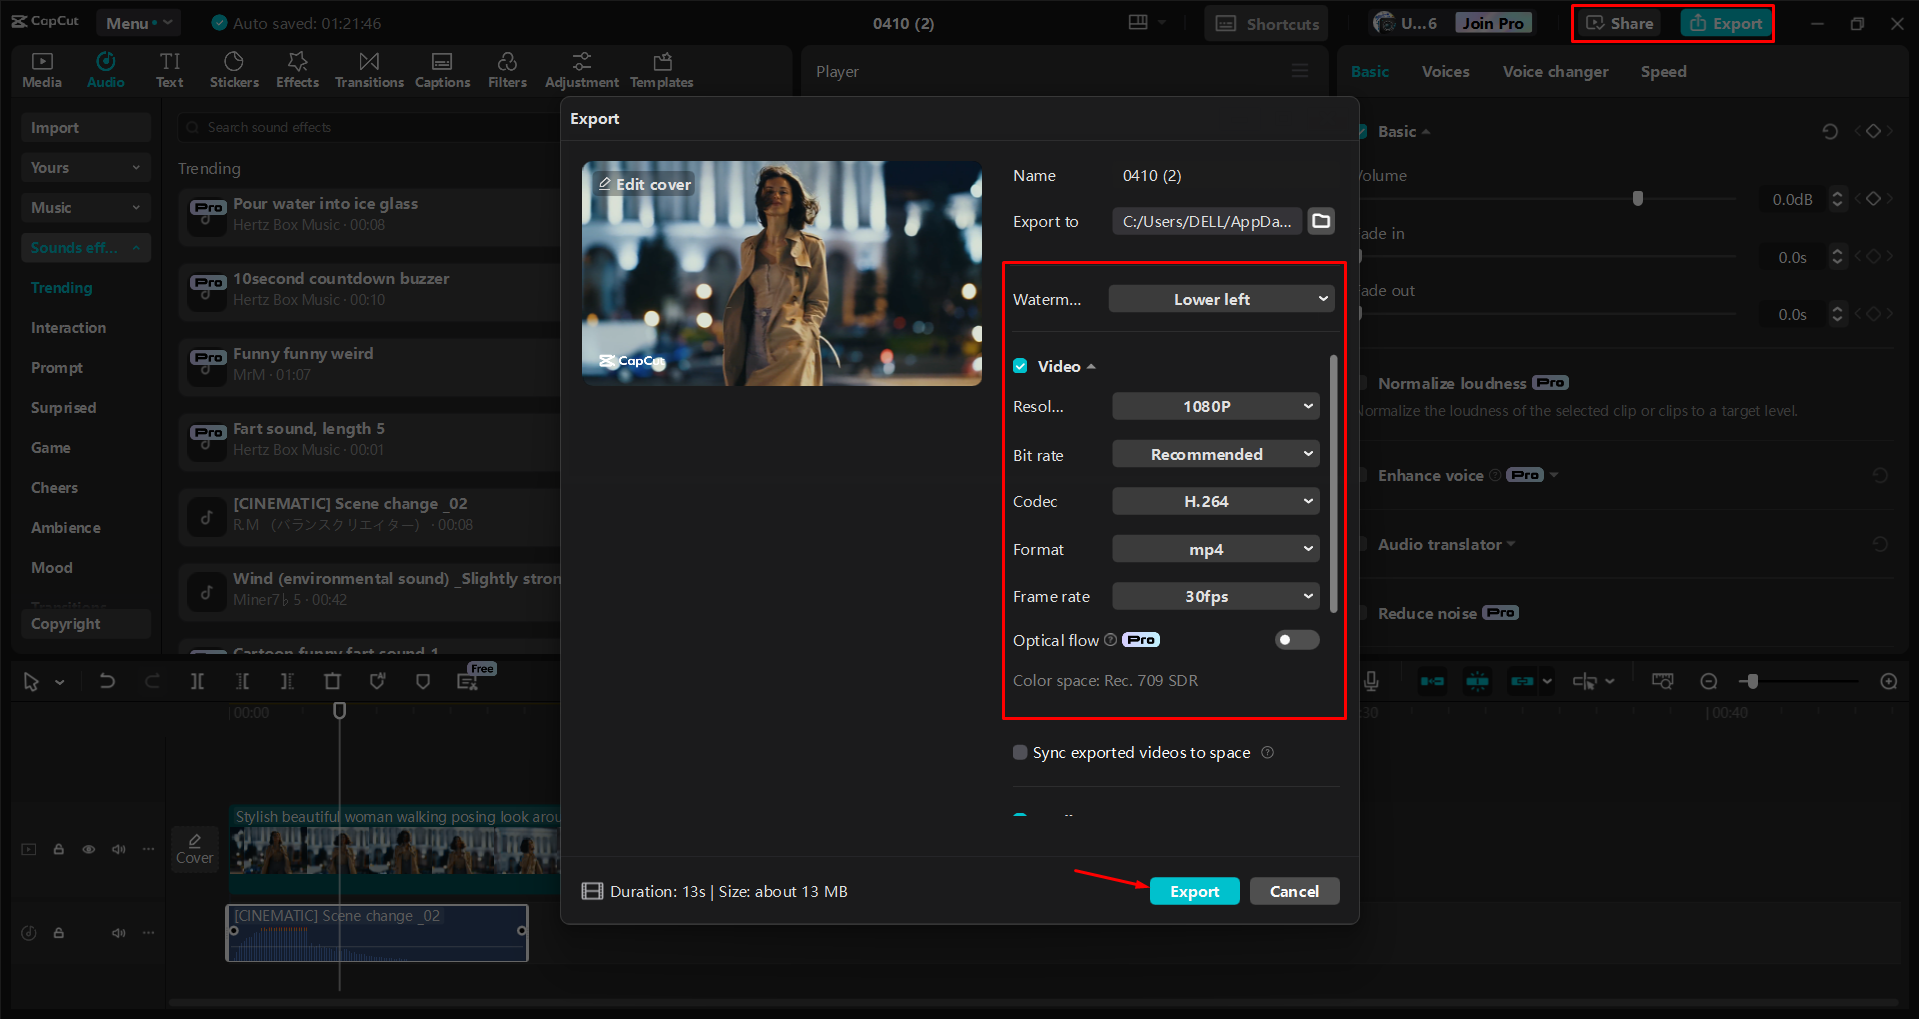
After editing, export your video. Click “Export” and choose your settings for resolution, format, and bitrate. Then hit “Export” again to save it to your computer. You can also share it straight to social media like TikTok or YouTube.
Wrapping Up
The Ken Burns effect is a powerful way to add motion to still images. Whether you use Final Cut Pro or CapCut, you can make videos that grab your audience’s attention.
Final Cut Pro has advanced features and lots of customization, ideal for pros. CapCut is simpler and more intuitive, perfect for beginners or quick edits.
No matter which you choose, learning the Ken Burns effect will level up your video projects. Why not try it? Download CapCut for free or check out Final Cut Pro to start making awesome videos today.
CapCut — Your all-in-one video & photo editing powerhouse! Experience AI auto-editing, realistic effects, a huge template library, and AI audio transformation. Easily create professional masterpieces and social media viral hits. Available on Desktop, Web, and Mobile App.
FAQs
How to customize start and end frames for the Ken Burns effect in Final Cut Pro X?
To customize start and end frames in Final Cut Pro X, select your clip and click the crop button in the viewer. Choose Ken Burns and adjust the green and red rectangles to set the movement. For an easier way, try CapCut’s desktop editor, where you can add keyframes and resize images simply.
Is there a shortcut to enable the Ken Burns effect in Final Cut Pro X?
Yes, press Shift + C after selecting your clip to enter crop mode. Then click Ken Burns to apply the effect. If you want something more user-friendly, CapCut’s desktop editor lets you adjust image motion with just a few clicks.
Can third-party plugins enhance the Ken Burns effect in Final Cut Pro X?
Third-party plugins can add more options, like smoother transitions and advanced controls. But if you want a straightforward fix, CapCut’s built-in tools make it easy to create dynamic animations without plugins.
Some images courtesy of CapCut.