TOOL HUNTER
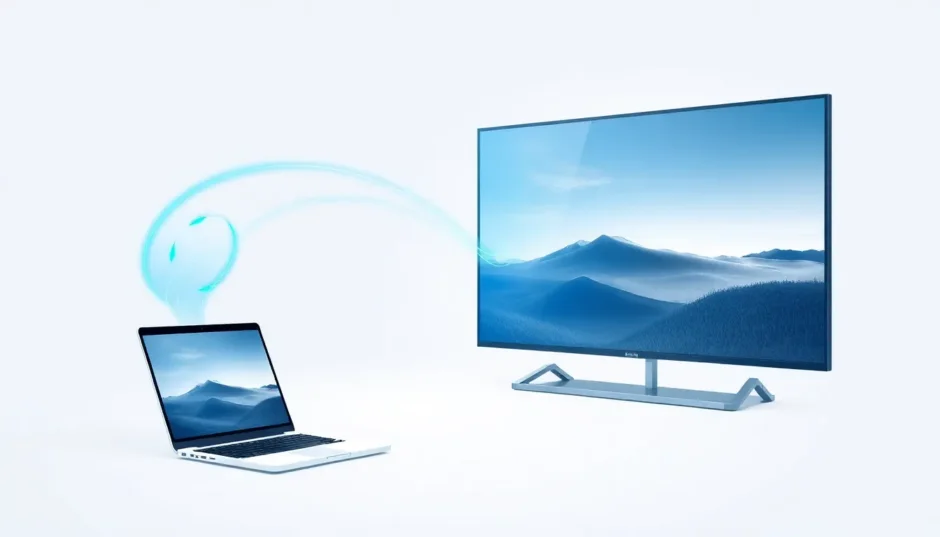

Ever been in a situation where you wanted to show a video from your phone to friends on a bigger screen, but couldn’t find the right cable? Or maybe you needed to present something from your laptop to a TV without dealing with messy wires? That’s where Miracast comes in handy.
Miracast is like magic for your screens – it lets you wirelessly share what’s on one device with another display. Think of it as an invisible HDMI cable that connects your devices through Wi-Fi. Whether you want to mirror your phone to your TV for movie night or display your laptop screen during a business presentation, Miracast makes it happen without any physical connections.
Table of Contents
- What Exactly is Miracast?
- Miracast Phone to Windows Solutions
- Setting Up Miracast on Modern Windows Systems
- Miracast Windows to TV and Projector Methods
- Checking Your Windows PC for Miracast Compatibility
- Troubleshooting Common Miracast Issues
- Frequently Asked Questions About Miracast for Windows
- Final Thoughts on Miracast Windows Solutions
What Exactly is Miracast?
Miracast is a wireless display standard that creates a direct connection between devices, allowing you to stream videos, photos, presentations, and even games from your computer or smartphone to a compatible TV, projector, or monitor. The best part? You don’t need internet connectivity – it creates its own direct Wi-Fi connection between devices.
It’s particularly useful for Windows users who want to mirror their screens to larger displays. Imagine being able to show your vacation photos on the big TV in your living room, or presenting a slideshow from your laptop to a conference room projector, all without worrying about cables or internet connections.
![]()
Key Benefits of Using Miracast for Windows
Screen mirroring is just the beginning. When you use Miracast on Windows devices, you get several advantages:
Complete wireless freedom – no more tripping over cables or searching for the right adapter Real-time sharing – perfect for presentations, demonstrations, or collaborative work High-quality video and audio streaming that keeps everything in sync Easy setup that usually takes just a few clicks Compatibility with various devices including smart TVs, projectors, and monitors
Miracast Phone to Windows Solutions
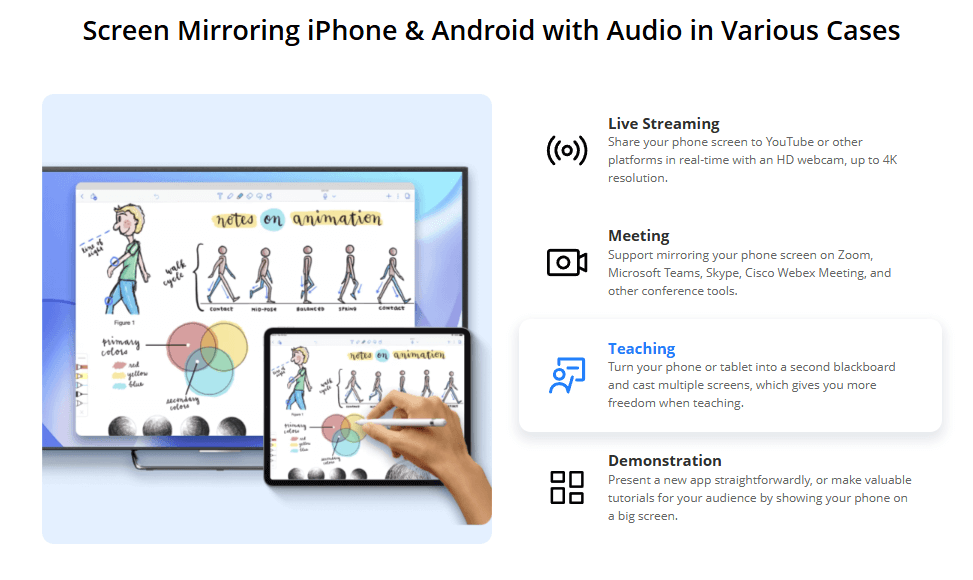
Now, what if you want to go the other way – mirroring your phone to your Windows computer? This can be super useful for app demonstrations, sharing mobile content, or even playing mobile games on a larger screen.
While Windows 7 doesn’t natively support Miracast, there are still ways to make it work. One of the most reliable solutions is using dedicated screen mirroring software that bridges the gap between your phone and computer.
iMyFone MirrorTo.Mirror and control your iPhone/iPad/Android on your PC to type, click, swipe, and scroll.Get 1080P screen recording and screenshots.Stream content from phone to YouTube, Twitch, Discord, Zoom, etc.Customizable keyboard mappings for moving, jumping, and shooting.Transfer files conveniently between Android and PC.
Check More Details | Download Now! | Check All Deals
This approach works particularly well because it doesn’t rely on your computer’s built-in Miracast support. Instead, it creates its own connection between your devices, making it compatible with various Windows versions including older systems.
Steps to Mirror Your Phone to Windows PC:
First, download and install the screen mirroring software on your Windows computer. Make sure you’re getting it from the official website to avoid any security issues.
Connect your phone to the computer. You can use a USB cable for the most stable connection, especially for the first setup. Wireless options are available too, but starting with USB is more reliable.
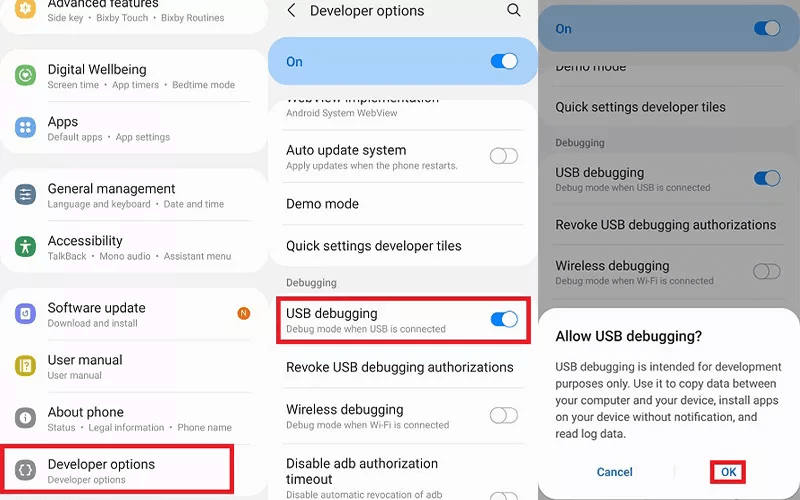
For Android users, you’ll need to enable Developer Options and then turn on USB debugging. This sounds technical, but it’s just a few taps in your settings. iPhone users have it easier – you just need to trust the computer when prompted.
Once connected, your phone’s screen will appear on your computer. You can now view everything, control your phone using your computer’s mouse and keyboard, and even record your screen if needed.
The beauty of this method is that it works regardless of your Windows version. Whether you’re using the latest Windows 11 or sticking with older versions, you can still enjoy seamless screen mirroring from your phone.
Setting Up Miracast on Modern Windows Systems
If you’re using Windows 8.1, 10, or 11, you’re in luck because these versions have Miracast built right in. You don’t need to download any extra software – the functionality is already there, waiting to be used.
Before you start connecting, it’s a good idea to make sure your system is ready. The most important step is keeping your drivers updated, especially your graphics drivers since they handle the display output.
Updating Your Drivers for Miracast Windows Compatibility:
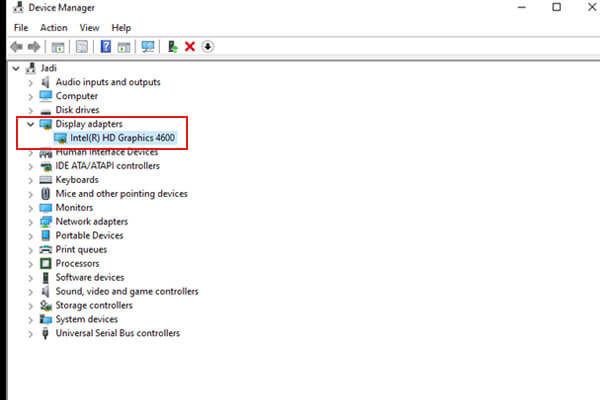
Press the Windows key + X on your keyboard to bring up the quick access menu, then select Device Manager from the list that appears.
In Device Manager, look for the Display adapters section and click the arrow next to it to expand the category.
Right-click on your graphics card (it might be Intel, NVIDIA, AMD, or something similar) and choose Update driver.
Select “Search automatically for updated driver software” and let Windows find and install any available updates.
This process ensures that your system has the latest compatibility improvements and bug fixes. Updated drivers can often resolve connection issues and improve performance when using Miracast for Windows.
Connecting via Miracast on Windows 10/11:
Make sure both your Windows computer and the display device (TV, projector, etc.) are connected to the same Wi-Fi network. Some devices might connect directly, but same network is the most reliable method.
Press the Windows key + P on your keyboard to open the Project panel. This is where you control how your display works with other screens.
Select “Connect to a wireless display” from the options. Your computer will start scanning for available devices.
Choose the Miracast-enabled display you want to connect to from the list that appears.
On the receiving device (your TV or projector), you might need to accept the connection request. Some devices do this automatically, while others might show a prompt asking for permission.
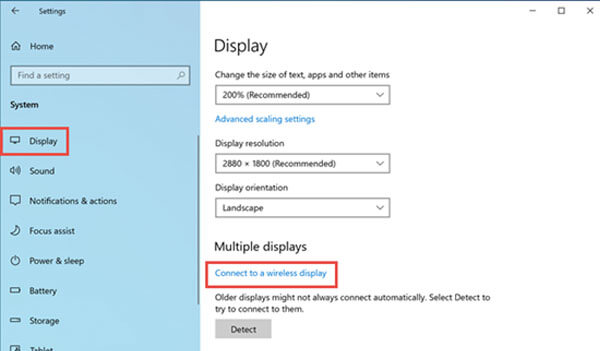
Once connected, you can adjust display settings by going to Settings > System > Display on your Windows PC. Here you can choose whether to duplicate your screen (show the same thing on both displays) or extend your display (use the second screen as additional workspace).
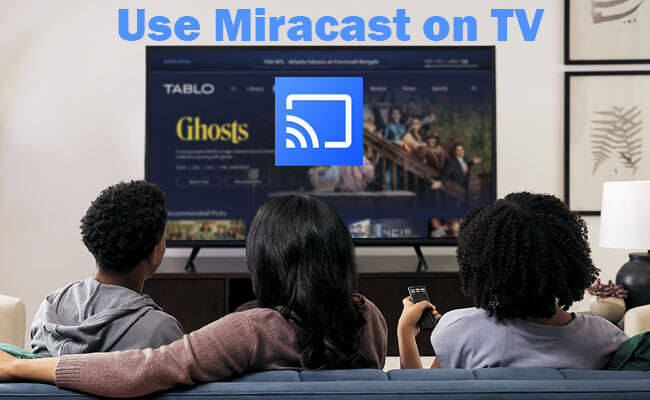
Miracast Windows to TV and Projector Methods
Now let’s talk about the most common use case – getting content from your Windows computer to a bigger screen like your TV or a projector. There are several ways to accomplish this, each with its own advantages.
Using Native Miracast Support
If you have a modern Windows laptop and a compatible TV, this is the simplest method. Most smart TVs manufactured in the last 5-7 years include Miracast support, though it might be called something like “Screen Share” or “Wireless Display” in your TV’s menu.
Steps for Miracast Windows to TV Connection:
Verify that your TV supports Miracast. Check your TV’s manual or look for options like “Screen Mirroring,” “Wireless Display,” or “Miracast” in the input or network settings.
On your Windows device, open Settings and navigate to Devices > Bluetooth & other devices > Add Bluetooth or other device.
Choose “Wireless display or dock” from the options. Your computer will search for available displays.
When your TV appears in the list, select it and click Connect.
Wait a few moments for the connection to establish. Your Windows screen should now appear on your TV.
This method works great for spontaneous sharing – maybe you’re at a friend’s house and want to show them a video, or you’re in a meeting room and need to present from your laptop without dealing with cables.
Miracast Adapters for Older Displays
What if your TV doesn’t have built-in Miracast support? No problem! You can add this functionality with a Miracast adapter. These are small devices that plug into your TV’s HDMI port and sometimes need USB power too.
Setting Up Miracast for Laptop with an Adapter:
Purchase a Miracast adapter. Popular options include the Microsoft Wireless Display Adapter or various third-party alternatives available online.
Connect the adapter to your TV’s HDMI port and plug in the USB power cable (usually to your TV’s USB port or a wall adapter).
Switch your TV to the correct HDMI input. You should see a waiting screen or instructions.
On your Windows computer, follow the same steps as above to connect to a wireless display. The adapter should appear in the list of available devices.
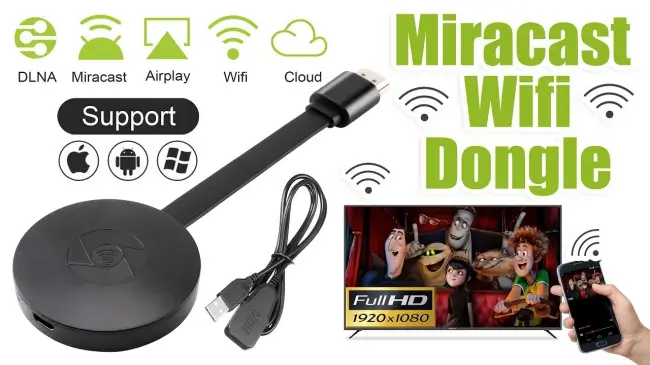
This approach is perfect for older TVs that lack smart features or built-in Miracast. The adapter essentially upgrades your TV to support wireless screen mirroring, making it compatible with Miracast Windows functionality.
Alternative Wireless Display Methods
While Miracast is fantastic, it’s not the only game in town. Several other technologies can achieve similar results, and they might work better depending on your specific setup and needs.
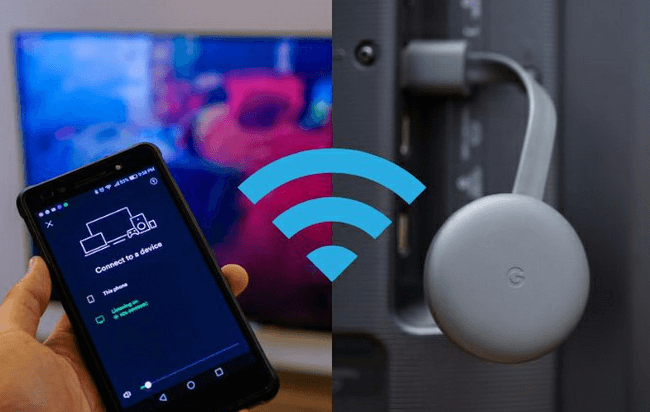
Google Chromecast
Chromecast devices are incredibly popular and offer seamless casting from various apps and browsers. While they work slightly differently from Miracast, they achieve similar screen mirroring results.
Setup involves plugging the Chromecast into your TV’s HDMI port, installing the Google Home app on your phone to configure it, and then using supported apps or browsers to cast content. The advantage is deep integration with popular services like YouTube, Netflix, and Google Chrome.
Wireless HDMI Systems
These systems work like traditional HDMI cables but without the wires. They typically consist of a transmitter that connects to your computer and a receiver that connects to your display. The quality is often excellent with minimal latency, making them great for gaming or video editing.
DLNA Media Streaming
If you mainly want to share photos, videos, or music rather than mirror your entire screen, DLNA might be the answer. This technology lets you browse and play media files from your computer on compatible TVs and media players.
Many modern smart TVs include DLNA support, and Windows has built-in media streaming capabilities. You can access this through Windows Media Player or various third-party applications.
Apple AirPlay
For those in the Apple ecosystem, AirPlay offers excellent screen mirroring between Apple devices. While native AirPlay support is limited to Apple products, several third-party applications can add AirPlay receiver functionality to Windows computers.
This is particularly useful if you frequently work with both Apple and Windows devices and want a consistent screen sharing experience across platforms.
Checking Your Windows PC for Miracast Compatibility
Before you get too excited about wireless screen mirroring, it’s important to check whether your specific Windows computer actually supports Miracast. Not all devices do, especially older models.
The requirements for Miracast support include both hardware and software components. Your computer needs a compatible Wi-Fi adapter that supports Wi-Fi Direct, appropriate graphics capabilities, and a supported Windows version (8.1 or newer for native support).
Method 1: Using Command Prompt
This method gives you a quick, technical answer about your system’s Miracast capabilities.
Press Windows key + R to open the Run dialog box.
Type “cmd” and press Enter to open Command Prompt.
In the Command Prompt window, type “netsh wlan show drivers” and press Enter.
Look through the results for “Wireless Display Support.” If it says “Yes,” your system supports Miracast. If it says “No,” you’ll need to consider alternative methods.
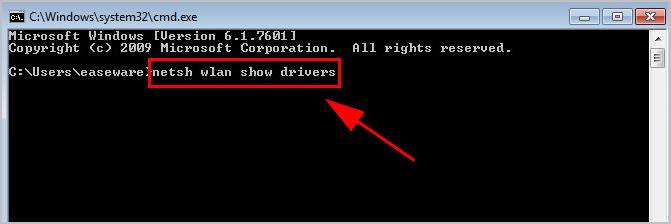
This command provides detailed information about your wireless adapter’s capabilities, including whether it supports the necessary technology for Miracast Windows functionality.
Method 2: Using the DirectX Diagnostic Tool
This approach gives you a more visual interface while still providing technical details about your system’s capabilities.
Click the Start button or press the Windows key, then type “dxdiag” and press Enter.
The DirectX Diagnostic Tool will open. Note the DirectX version listed on the System tab – newer versions generally indicate better compatibility.
Browse through the different tabs (especially Display) to check your graphics card information and driver versions.
Once you’ve gathered the information, click Exit to close the tool.
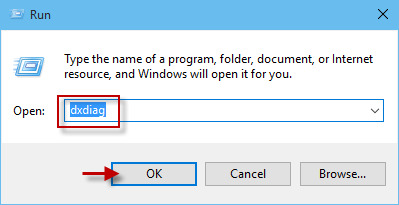
While this method doesn’t explicitly state Miracast compatibility, it helps you understand whether your system meets the general requirements for smooth wireless display functionality.
Troubleshooting Common Miracast Issues
Even when your devices technically support Miracast, you might encounter some hiccups. Here are solutions to the most common problems people face when trying to use Miracast on Windows.
Connection Problems
If your devices can’t find each other or fail to connect, start with the basics. Make sure both devices are on the same Wi-Fi network, as this is crucial for discovery. Restart both devices – sometimes a simple reboot resolves temporary glitches.
Check that wireless display functionality is enabled in your Windows settings. Go to Settings > System > Projecting to this PC to adjust these settings. Also ensure that your TV or projector is in the correct mode to receive connections.
Poor Performance or Lag
When your Miracast connection works but suffers from lag, stuttering, or poor quality, the issue is often related to network congestion or distance. Move your devices closer together to strengthen the wireless signal. Reduce interference by moving away from other electronics like microwaves or cordless phones.
If possible, connect your computer to your router via Ethernet while using Wi-Fi for the Miracast connection. This splits the network load and can improve performance. Lowering the display resolution in your Windows settings can also help with lag issues.
Audio Problems
Sometimes the video works perfectly but the audio doesn’t follow. Check that audio is set to play through the connected device in your Windows sound settings. Right-click the speaker icon in your system tray and select “Open Sound settings” to choose the output device.
iMyFone MirrorTo.Mirror and control your iPhone/iPad/Android on your PC to type, click, swipe, and scroll.Get 1080P screen recording and screenshots.Stream content from phone to YouTube, Twitch, Discord, Zoom, etc.Customizable keyboard mappings for moving, jumping, and shooting.Transfer files conveniently between Android and PC.
Check More Details | Download Now! | Check All Deals
Compatibility Issues
If you’ve verified that your hardware should support Miracast but it still won’t work, driver updates are your best friend. Visit your computer manufacturer’s website or your Wi-Fi adapter manufacturer’s site to download the latest drivers.
For graphics drivers, you can usually get them directly from NVIDIA, AMD, or Intel depending on your graphics card. Updated drivers often add compatibility and fix bugs that might prevent Miracast from working properly.
Frequently Asked Questions About Miracast for Windows
What exactly is Miracast technology?Miracast is a wireless display standard that creates a direct connection between devices, allowing you to mirror screens without cables or internet. It’s like having a virtual HDMI cable that works over Wi-Fi.
Does Windows 10 and 11 include Miracast support?Yes, both Windows 10 and Windows 11 have built-in Miracast functionality. You don’t need to install additional software – it’s part of the operating system, ready to use once you enable it in settings.
What hardware do I need for Miracast on Windows?You need a computer with a compatible Wi-Fi adapter that supports Wi-Fi Direct, adequate graphics capabilities, and Windows 8.1 or newer. The display device (TV, projector) also needs to support Miracast or you’ll need a Miracast adapter.
How can I verify Miracast support on my Windows computer?Use the Command Prompt method described earlier (netsh wlan show drivers) or check in Settings > System > Projecting to this PC. If you see wireless display options, your device likely supports Miracast.
What should I try if Miracast won’t connect?Start with basic troubleshooting: ensure both devices are on the same network, restart them, check for driver updates, and verify that wireless display functionality is enabled in settings. Sometimes simply trying again after a few minutes works.
Why doesn’t my PC support Miracast even though it’s relatively new?Some manufacturers disable Miracast support to reduce costs or due to driver limitations. Older Wi-Fi adapters might not support the necessary technology. Checking with your manufacturer’s specifications can provide clarity.
Final Thoughts on Miracast Windows Solutions
Miracast technology represents a significant step forward in how we share and display content between devices. The ability to wirelessly mirror screens from Windows computers to TVs, projectors, and other displays eliminates cable clutter and simplifies presentations, entertainment, and collaborative work.
While native Miracast support is excellent on modern Windows systems, it’s reassuring to know that solutions exist for older Windows versions and devices that lack built-in compatibility. Third-party software can bridge the gap, ensuring that virtually any Windows user can enjoy wireless screen mirroring capabilities.
The key to successful Miracast usage lies in understanding your specific setup – knowing what your devices support, keeping drivers updated, and being prepared with alternative methods when needed. Whether you’re using native Miracast functionality, a hardware adapter, or dedicated software, the result is the same: seamless wireless display sharing that makes your digital life more convenient and flexible.
As technology continues to evolve, wireless display standards like Miracast will only become more robust and widely supported. For now, it offers a glimpse into a future where cables are optional rather than essential for connecting our devices and sharing our content.
*Some images in this