TOOL HUNTER

Ever wondered how to get your iPhone screen to show up on your Windows computer? You’re not alone. Many people think AirPlay only works with Apple devices, but there are actually several ways to make AirPlay work with Windows PCs too.
Whether you want to stream videos, share photos, play music, or just mirror your entire iPhone screen to your Windows computer, this guide will show you exactly how to do it. We’ll cover everything from what AirPlay actually is to step-by-step instructions for different methods.
What Exactly is AirPlay and How Does It Work?
AirPlay is Apple’s wireless streaming technology that lets you share content between devices. Think of it as a magic bridge that connects your Apple devices together. It’s mainly used for two things: streaming content like videos and music, and mirroring your screen to another display.
Originally, AirPlay was designed just for Apple’s ecosystem – iPhones, iPads, Macs, and Apple TV. But over time, Apple has opened it up a bit. Now you can find AirPlay support on some smart TVs and even Windows PCs with the right software.
The way AirPlay works is pretty clever. When you want to stream something, your iPhone or iPad finds compatible devices on the same Wi-Fi network and establishes a direct connection. This lets you send video, audio, or your entire screen to that other device without any cables.
Can You Really Use AirPlay on Windows PC?
Yes, absolutely! While Windows computers don’t come with built-in AirPlay support like Apple devices do, you can still use AirPlay on Windows with third-party software solutions. These programs essentially trick your Apple devices into thinking your Windows PC is an AirPlay-compatible device.
People want AirPlay on Windows for all sorts of reasons. Maybe you want to watch videos from your iPhone on a bigger screen, listen to Apple Music through your computer speakers, or present something from your phone during a meeting. Whatever your reason, there are solutions available.
The key thing to understand is that AirPlay for Windows requires special software that can receive the AirPlay signal. Your Windows PC needs to act like an AirPlay receiver, and that’s where these third-party applications come in handy.
Top AirPlay Solutions for Windows Computers
Comparison of Different AirPlay Methods
| Feature | iMyFone MirrorTo | iTunes | AirServer | Reflector | LetsView | 3uTools |
|---|---|---|---|---|---|---|
| Platforms Supported | iOS, Android, Windows, Mac | iOS, Android, Windows, Mac, TV | iOS, Android, Windows, Mac, TV | iOS, Android, Windows, Mac, TV | iOS-PC, iOS-Mac, Android-PC, iOS-TV | iOS-PC, Android-PC, Android-TV |
| How Easy to Use | Very simple | Easy | Medium difficulty | Medium difficulty | Easy | Complicated |
| Quality of Mirroring | 1080P, 60 FPS | Good quality | High quality | High quality | Good quality | Good quality |
| Audio Support | Yes | Yes | Yes | Yes | Yes | Yes |
| What You Can AirPlay | Screen, photos, videos, music | Music only | Screen, photos, videos, music | Screen, photos, videos | Screen, photos, videos, music | Screen, photos, videos |
| Can Record Screen | Yes | No | Yes | Yes | Yes | No |
| Live Streaming | Yes | No | Yes | Yes | Yes | No |
| Cost | Subscription | Free | Paid | Paid | Paid | Paid |
Method 1: iMyFone MirrorTo – Best Overall Solution
If you’re looking for a reliable way to AirPlay your iPhone to Windows, iMyFone MirrorTo is probably your best bet. It’s specifically designed to make screen mirroring between different devices smooth and easy.
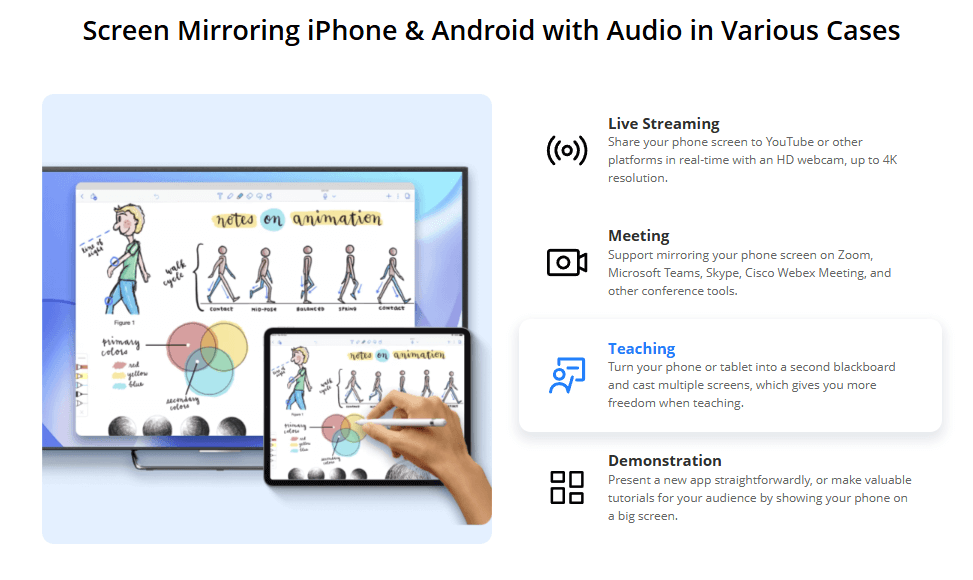
What makes MirrorTo stand out is that it doesn’t just show your iPhone screen on your Windows PC – it actually lets you control your iPhone from your computer. You can use your mouse to click, your keyboard to type, and even stream to platforms like YouTube or Zoom directly.
Key Features:
- Stream photos, movies, TV shows, Spotify, and Apple Music from iPhone/iPad to Windows
- Control your iPhone using your computer mouse
- Type on your iPhone using your computer keyboard
- High-quality 1080P resolution at 60 FPS
- Live stream to YouTube, Twitch, Discord, and other platforms
How to set up MirrorTo for AirPlay on Windows:
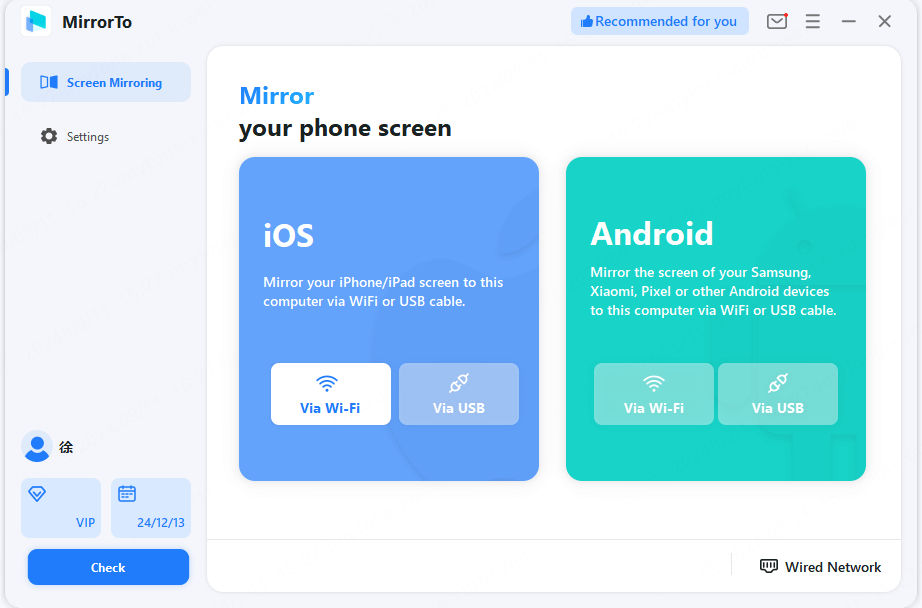
Step 1: Download and install iMyFone MirrorTo on your Windows computer. Launch the program once it’s installed.
Step 2: Connect your iPhone to your computer using a USB cable. You can also connect wirelessly if you prefer.
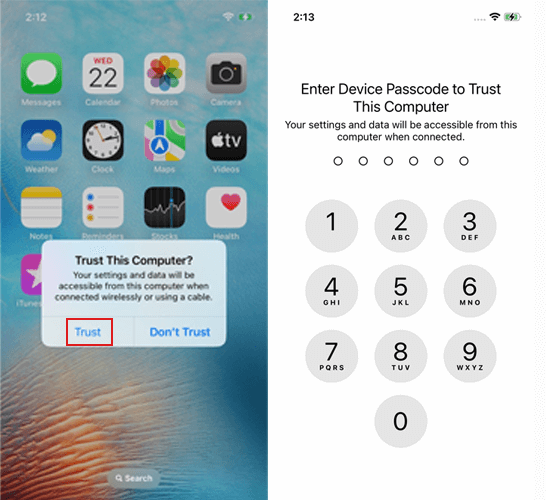
Step 3: On your iPhone, you’ll see a “Trust This Computer” prompt. Tap “Trust” and enter your passcode if required.
Step 4: That’s it! Your iPhone screen should now appear on your Windows computer. You can view multiple iPhone screens simultaneously if needed.

Step 5: From here, you can stream videos, view photos, play audio, or even broadcast your iPhone screen to streaming platforms.

iMyFone MirrorTo.Mirror and control your iPhone/iPad/Android on your PC to type, click, swipe, and scroll.Get 1080P screen recording and screenshots.Stream content from phone to YouTube, Twitch, Discord, Zoom, etc.Customizable keyboard mappings for moving, jumping, and shooting.Transfer files conveniently between Android and PC.
Method 2: iTunes – For Music Streaming
If you mainly want to stream music from your iPhone to your Windows computer, iTunes might be all you need. It’s been around forever and lots of people already have it installed.
The catch with iTunes is that it’s pretty limited – you can only stream audio files. If you want to mirror your screen or stream videos, you’ll need a different solution. But for music, it works just fine.
Setting up iTunes for AirPlay audio:
Step 1: Make sure you have iTunes installed on your Windows computer. If not, download it from Apple’s official website.
Step 2: Ensure both your Windows computer and your iPhone are connected to the same Wi-Fi network.
Step 3: Open iTunes and look for the playback controls at the top of the window.
Step 4: Find the AirPlay icon (it looks like a rectangle with a triangle at the bottom) and click on it.
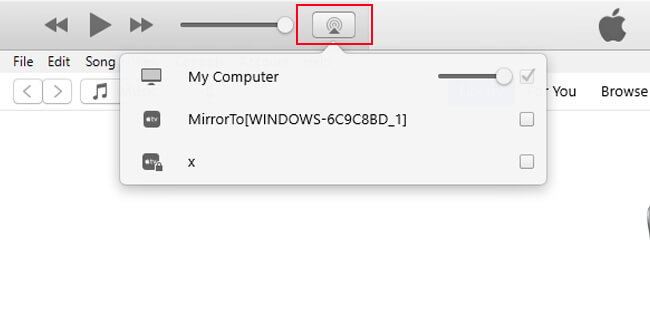
Step 5: Select your iPhone or other AirPlay-enabled device from the list that appears.
Step 6: Your audio should now stream from iTunes to your selected device.
Step 7: You can control playback (play, pause, volume) directly from iTunes on your Windows computer.
Important note: iTunes can’t handle all file types, and it definitely can’t mirror your screen. For anything beyond basic audio streaming, you’ll want to consider other options like MirrorTo.
Method 3: AirServer – Reliable Screen Mirroring
AirServer is another popular choice for turning your Windows PC into an AirPlay receiver. It’s been around for a while and has built a solid reputation for reliability.
What AirServer does is essentially make your computer appear as an Apple TV to your iOS devices. This means you can mirror your iPhone or iPad screen just like you would to an actual Apple TV.
Getting started with AirServer:
Step 1: Download and install AirServer from their official website onto your Windows PC.
Step 2: Launch the AirServer application on your computer.
Step 3: On your iPhone, open Control Center and tap “Screen Mirroring” or “AirPlay.”
Step 4: Select your Windows PC from the list of available devices.
Step 5: Your iOS device screen will start mirroring on your PC.

AirServer works well for basic screen mirroring, though it doesn’t offer the same level of control as MirrorTo. You can see your iPhone screen on your computer, but you can’t control it with your mouse and keyboard.
Method 4: Reflector – Simple Screen Sharing
Reflector is similar to AirServer in many ways. It’s another application that turns your Windows computer into an AirPlay receiver, allowing you to mirror iOS devices wirelessly.
One nice thing about Reflector is that it supports multiple devices simultaneously. You could have several iPhones or iPads mirrored to your computer at the same time, which could be useful in classroom or presentation settings.
Using Reflector for AirPlay on Windows:
Step 1: Download and install Reflector on your Windows PC or laptop.
Step 2: Make sure your iPhone and Windows computer are connected to the same Wi-Fi network.
Step 3: On your iPhone, go to Control Center and tap “Screen Mirroring.”
Step 4: Choose your computer from the list of available devices.
Step 5: You should now see your iPhone screen displayed on your Windows computer.
Reflector is straightforward to use, though like AirServer, it doesn’t offer device control features. It’s primarily for viewing your iOS screen on a larger display.
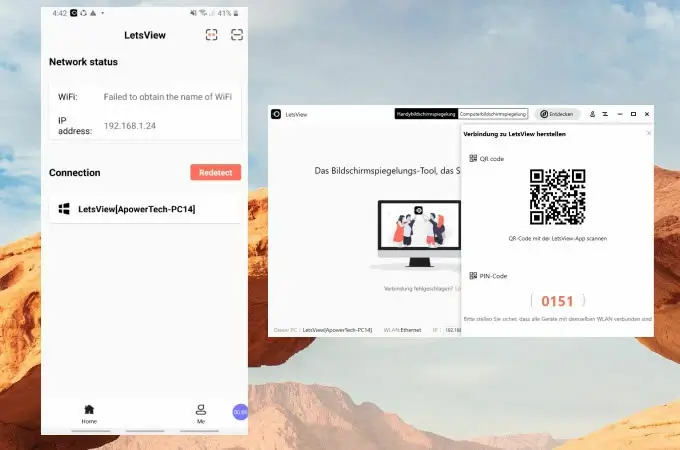
Method 5: LetsView – Free Alternative
LetsView is a free screen mirroring application that supports AirPlay functionality. It’s a good option if you’re on a budget and don’t need advanced features.
The setup process is a bit different from the other methods, as it typically involves scanning a QR code to establish the connection between your devices.
Mirroring with LetsView:
Step 1: Install LetsView on your Windows computer.
Step 2: Ensure both devices are on the same Wi-Fi network.
Step 3: Use your iPhone to scan the QR code displayed by LetsView on your computer.
Step 4: Your iPhone screen should now appear on your Windows PC.
While LetsView is free, it may not be as reliable or feature-rich as paid alternatives. The connection can sometimes be unstable, and there might be noticeable lag.
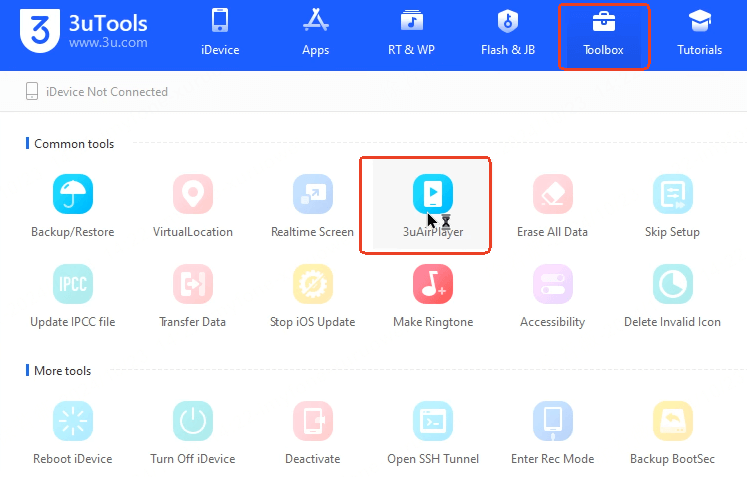
Method 6: 3uTools – For Advanced Users
3uTools is primarily a comprehensive iOS device management tool, but it includes a feature called 3uAirPlayer that supports iPhone screen mirroring.
This one is a bit more complex than the other options and is probably better suited for users who are comfortable with more technical software.
Using 3uTools for screen mirroring:
Step 1: Install 3uTools on your Windows 10 or 11 computer.
Step 2: Connect your iPhone to your computer using a USB cable.
Step 3: In 3uTools, click on “Toolbox” and select “3uAirPlayer.”
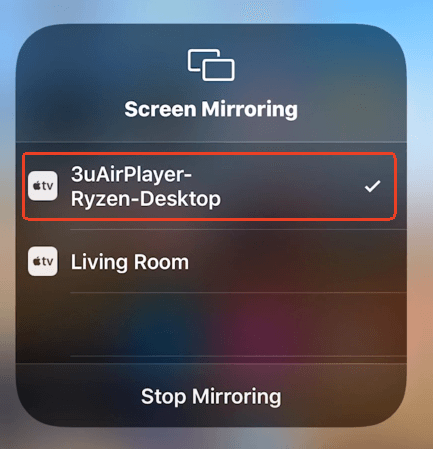
Step 4: On your iPhone, go to Screen Mirroring and choose “3uAirPlayer.”
Step 5: Your iPhone screen should now be visible on your Windows PC.
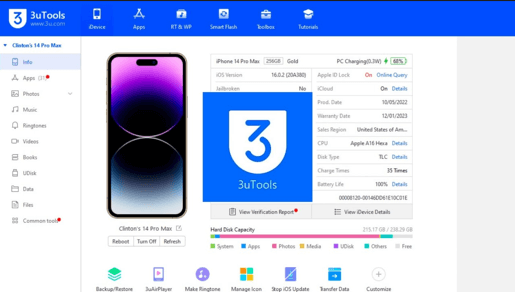
3uTools is powerful but can be overwhelming for casual users. If you just want simple screen mirroring, one of the other options might be better.
Streaming from Windows to Apple TV and Smart TVs
Sometimes you might want to go the other direction – streaming from your Windows computer to an Apple TV or compatible smart TV. While this isn’t traditional AirPlay (since Windows doesn’t natively support AirPlay sending), there are workarounds.
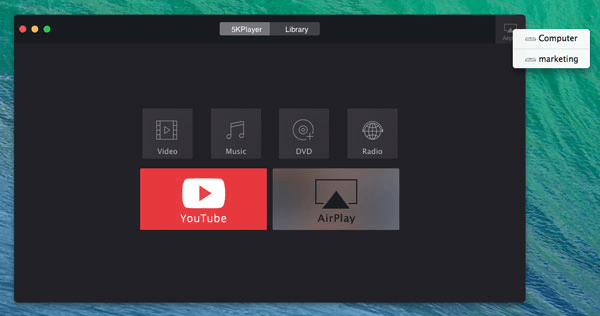
Using 5K Player
5K Player is a media player that can also function as an AirPlay sender from Windows to Apple TV. It’s primarily a video player, but it has this additional functionality built in.
To stream from Windows to Apple TV with 5K Player:
- Download and install 5K Player on your Windows PC
- Make sure your computer and Apple TV are on the same Wi-Fi network
- In 5K Player, click the AirPlay icon and select your Apple TV
- Your computer screen or media should now appear on your Apple TV
AirMyPC for Windows to Apple TV
AirMyPC is specifically designed to let you AirPlay content from your Windows computer to Apple TV or Chromecast devices.
Setting up AirMyPC:
- Download and install AirMyPC on your Windows computer
- Launch the application and look for the AirMyPC icon
- You should see a menu displaying all available Apple TVs on your network
- Select your Apple TV to begin mirroring


AirParrot for Screen Mirroring
AirParrot is another option for mirroring your Windows PC to Apple TV. It’s known for maintaining good video and audio quality during streaming.
How to use AirParrot:
- Download and install the Windows version of AirParrot
- Launch the application
- Select your Apple TV from the available devices
- Your PC screen should now be visible on your Apple TV

Airflow for Media Streaming
Airflow focuses specifically on streaming video content from your computer to Apple TV, Chromecast, and other AirPlay-compatible devices. It’s optimized for high-quality playback and supports various formats including 4K HDR.
Streaming with Airflow:
Step 1: Download and install Airflow on your Windows or Mac computer.
Step 2: Ensure your computer and TV are on the same Wi-Fi network.
Step 3: For streaming videos, open the app, tap the AirPlay icon and select your TV from the list.
Step 4: For screen mirroring, use the Screen Mirroring feature in Control Center.
How to AirPlay iPhone to Television
iPhone to Apple TV
If you have an Apple TV, the process for AirPlaying from your iPhone is straightforward since both devices are designed to work together seamlessly.
Steps to AirPlay iPhone to Apple TV:
Make sure your Apple TV and iPhone are connected to the same Wi-Fi network.
On your iPhone, open Control Center:
- On iPhones with Face ID: Swipe down from the upper-right corner
- On iPhones with Home button: Swipe up from the bottom
Tap “Screen Mirroring”
Select your Apple TV from the list of available devices
If prompted, enter the AirPlay passcode shown on your TV
Your iPhone screen will now appear on your TV
iPhone to Smart TV
Many modern smart TVs from brands like Samsung, LG, Sony, and Vizio now include AirPlay support. The process is similar to using Apple TV.
AirPlaying iPhone to Smart TV with AirScreen:
Ensure your smart TV and iPhone are on the same Wi-Fi network
Download the AirScreen app on your TV (if needed)
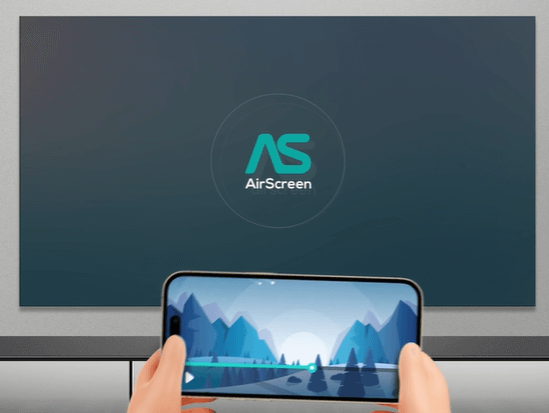
On your iPhone, open Control Center and tap “Screen Mirroring”
Your compatible smart TV should appear in the device list – select it
Enter the AirPlay passcode if prompted
Your iPhone screen will mirror to the TV
Turning Your Windows PC into a Wireless Display
Windows has its own screen mirroring technology called Miracast that lets you project to your PC from other devices. While it’s not AirPlay, it serves a similar purpose and works with Android devices and other Windows computers.
Setting Up Your PC as a Wireless Display
On the destination PC (the one you want to project to):
- Press the Windows key and open “Settings”
- Click on “System”
- Go to “Projecting to this PC”
- From the first dropdown, select “Always Off”
- From the second dropdown, select “Every time a connection is required”
- From the last dropdown, select “Never”
- Press Windows key again and search for “Connect”
- Open the Connect app and maximize the window
On the source device (what you want to project from):
- Click the “Action Center” icon in the bottom-right corner (or press Windows + A)
- Click “Connect”
- Wait for available devices to appear, then select your destination PC
- If you want to control both devices from either one, check “Allow mouse, keyboard, touch, and pen input from this device”
- The source device display should now appear on the destination PC