TOOL HUNTER

Ever been working on an Excel spreadsheet and suddenly found yourself unable to edit certain cells? That frustrating “locked cell” message can really disrupt your workflow. Whether you’re collaborating on a team project or trying to modify an old spreadsheet, knowing how to unlock Excel cells is an essential skill for any Excel user.
The good news is that Microsoft Excel provides several ways to manage cell protection, giving you flexibility in how you secure your data while still allowing necessary edits. From simple password removal to more advanced techniques for when you’ve forgotten your password, there’s always a solution to regain access to your locked cells.
Understanding Excel Cell Protection
Before we dive into the methods of how to unlock cells in Excel, it’s important to understand how Excel’s protection system works. When you protect a worksheet in Excel, all cells are locked by default. However, Excel allows you to customize which cells remain editable even when the sheet is protected.
This granular control is what makes Excel’s protection features so powerful. You can create templates where only specific input fields are editable, protect formulas from accidental modification, or set up collaborative sheets where different team members can only edit their assigned sections.
How to Unlock Cells in Excel When You Know the Password
Basic Methods to Unprotect an Entire Sheet
If you have the password and simply need to unlock the entire worksheet, you have two straightforward options available. Both methods will completely remove protection from all cells, allowing full editing capabilities.
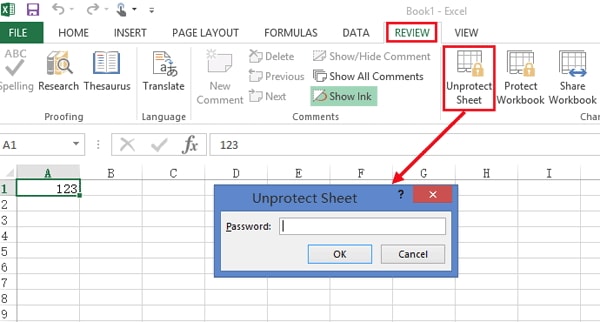
The first approach involves right-clicking on the sheet tab at the bottom of your Excel window. When the context menu appears, select “Unprotect Sheet” from the options. If a password was set, Excel will prompt you to enter it before removing the protection.
Alternatively, you can navigate to the Review tab in Excel’s ribbon interface. In the Changes group, you’ll find the “Unprotect Sheet” button. Clicking this button serves the same function as the right-click method, removing worksheet protection after password verification.
Both methods are equally effective for how to unlock Excel cells when you have the password. The choice between them often comes down to personal preference or which interface element is more convenient based on your current workflow.
Selective Cell Unlocking on Protected Sheets
Sometimes you don’t want to completely unprotect a worksheet—you just need certain cells to remain editable while keeping the rest locked. Excel provides two main approaches for this selective protection, allowing you to unprotect cells in Excel with precision.
Setting Permissions for Specific Users
For work environments with domain networks, Excel offers advanced permission settings that allow specific users to edit designated cell ranges. This method is particularly useful for collaborative worksheets where different team members need access to different sections.
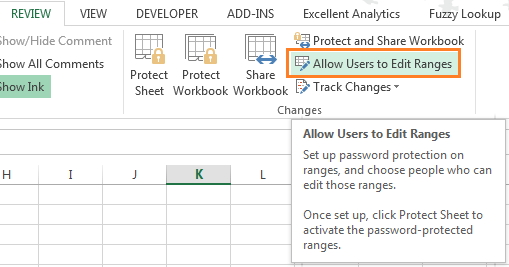
To set this up, first ensure your worksheet is unprotected. Select the cell range you want to make editable, then navigate to the Review tab and click “Allow Users to Edit Ranges.”
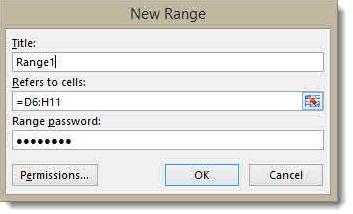
In the dialog box that appears, click “New” to create a new editable range. Give your range a descriptive title and verify the cell references. You can set an optional password for the range—if left blank, any user can edit these cells without a password.

Click “Permissions” to specify which domain users can edit this range. After adding users and confirming permissions, you’ll be prompted to protect the sheet with a password. This creates a setup where authorized users can edit their designated ranges while the rest of the sheet remains protected.
Using Format Cells to Unlock Specific Areas
A simpler method to unprotect cells in Excel involves using the Format Cells dialog. This approach doesn’t require domain setup and works well for most individual or small team scenarios.
Start by selecting the cells you want to keep editable. Right-click and choose “Format Cells,” or press Ctrl+1. Navigate to the Protection tab and uncheck the “Locked” option. This tells Excel that these cells should remain editable even when worksheet protection is enabled.
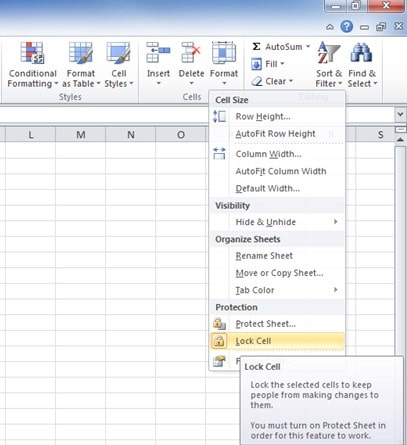
Once you’ve unlocked the desired cells, protect the worksheet by right-clicking the sheet tab and selecting “Protect Sheet.” Set a password if desired, and confirm. Now only the cells you specifically unlocked will be editable—perfect for creating templates or forms where you want to control what users can modify.
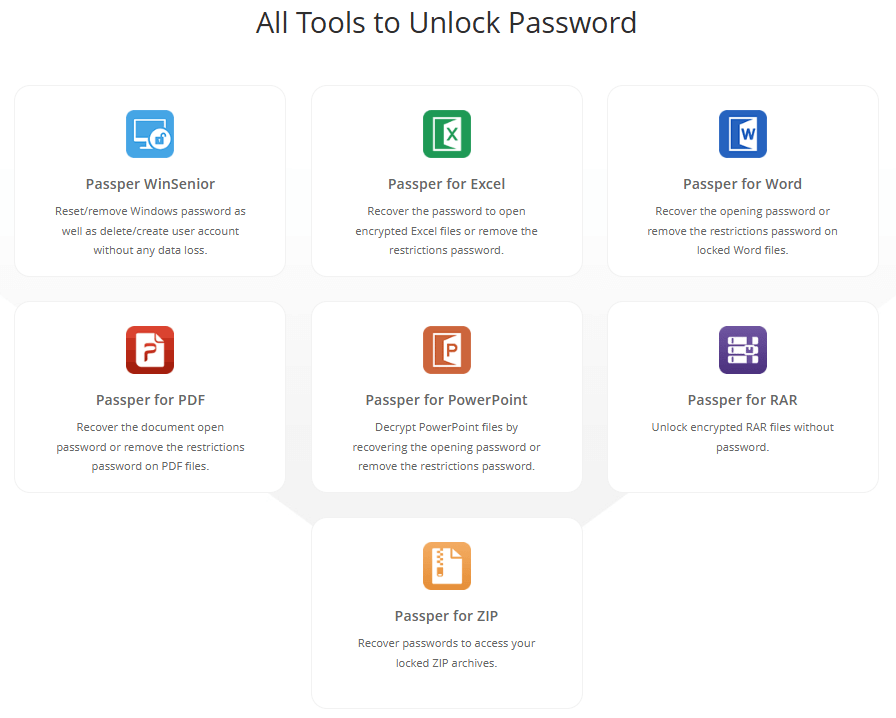
iMyFone Passper Pro.Ultimate 6-in-1 File Password Remover.1-click to remove Excel/Word/PDF/RAR/ZIP/PowerPoint passwords.Unlock file passwords to read, edit or print easily.Remove read-only file protection permanently.Break file locks with up to 99% sucessful rate.
How to Unlock Cells in Excel Without the Password
We’ve all been there—that moment when you realize you’ve forgotten the password to your own spreadsheet. Whether it’s an old file you haven’t touched in months or a sheet inherited from a former colleague, being locked out of your own data is incredibly frustrating. Fortunately, there are several methods to unlock cells Excel even when you don’t have the password.
Using Dedicated Excel Password Recovery Tools
When you need a reliable solution to unlock Excel cells without the original password, specialized software often provides the most straightforward approach. These tools are designed specifically for situations where you’ve legitimately forgotten passwords to your own files.
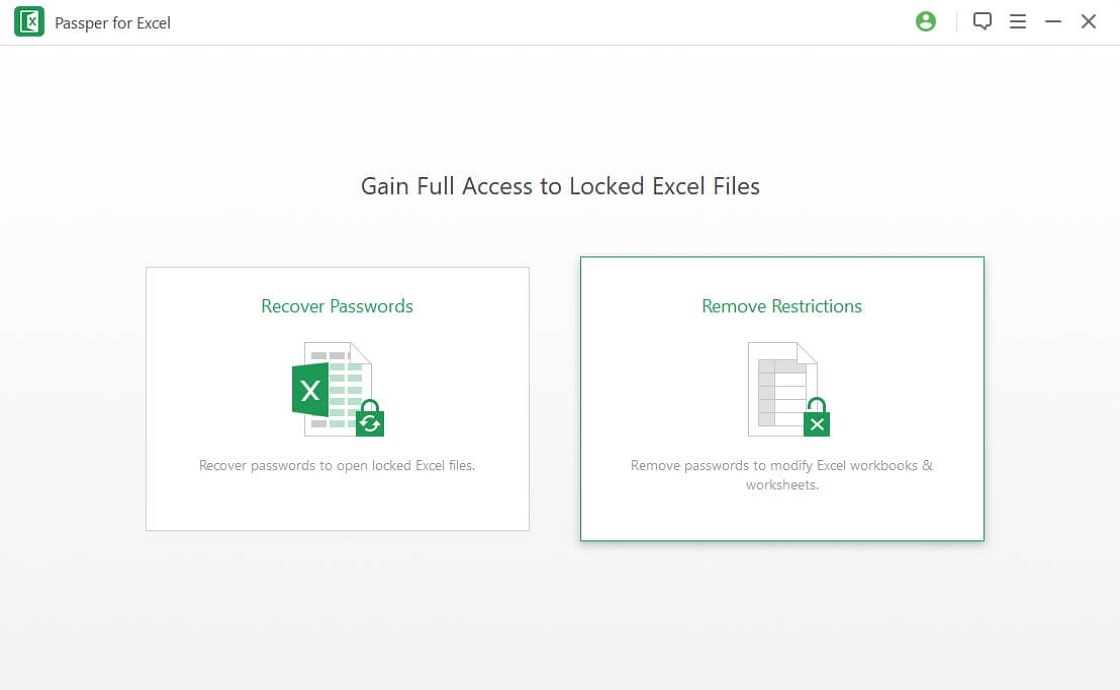
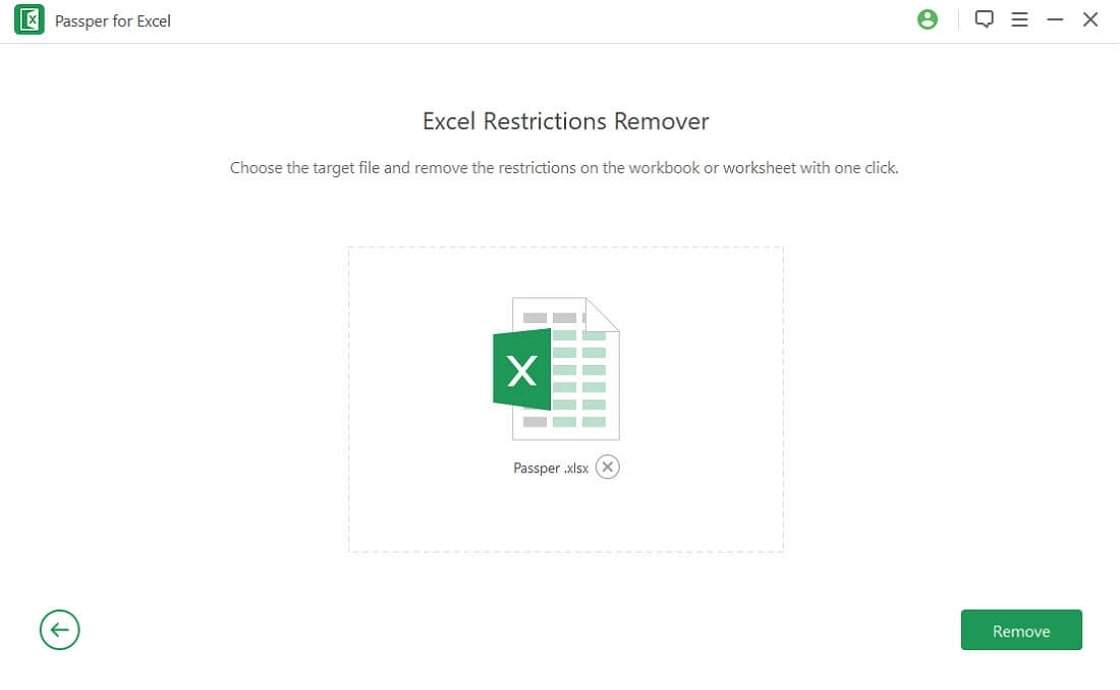
One such solution is Passper for Excel, which offers a user-friendly interface for removing worksheet protection. The process typically involves three simple steps: importing your protected file, selecting the removal option, and letting the software handle the rest.
The advantage of using dedicated recovery software is the balance of power and simplicity. These tools can handle various protection scenarios while maintaining the integrity of your data. They’re particularly useful when you need to quickly regain access to important spreadsheets without technical complications.
After the process completes, you’ll have full access to your spreadsheet with all protection removed. This method works regardless of the Excel version and doesn’t require advanced technical knowledge, making it accessible to users of all skill levels.

The ZIP Archive Method
For those who prefer a manual approach, the ZIP method provides a clever workaround to unprotect cells in Excel without the password. This technique takes advantage of Excel’s modern file structure, where .xlsx files are essentially compressed archives containing XML documents.
Begin by making a copy of your protected Excel file—it’s always good practice to work with copies when attempting file modifications. Change the file extension from .xlsx to .zip. If you’re using Windows, you might need to enable the option to show file extensions in Folder Options.
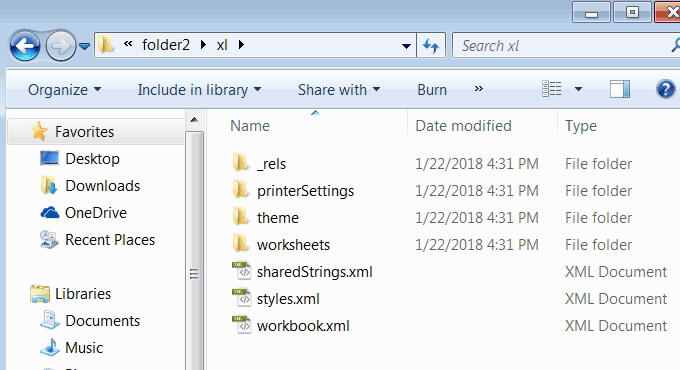
Open the newly created ZIP archive using compression software like 7-Zip or WinRAR. Navigate to the “xl” folder, then into the “worksheets” folder. Here you’ll find XML files representing each worksheet in your workbook (sheet1.xml, sheet2.xml, etc.).
Identify the worksheet containing the protection you want to remove, extract this XML file, and open it in a text editor like Notepad. Look for the sheetProtection tag—it will contain attributes related to the worksheet protection. Simply delete this entire tag from the XML document.
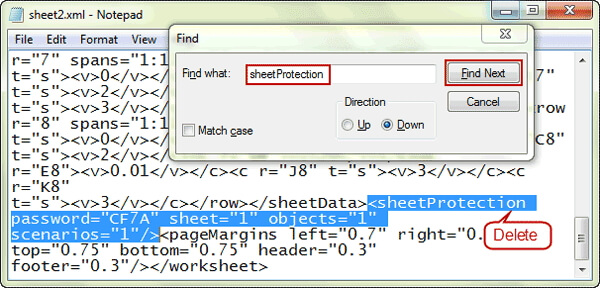
Save the modified XML file and update the ZIP archive with this changed file. Finally, change the file extension back from .zip to .xlsx. When you open the file in Excel, the worksheet protection should be gone, allowing you to unlock cells Excel without needing the original password.
Using VBA Code to Bypass Protection
For older Excel versions (2010 and earlier), Visual Basic for Applications (VBA) provides another method to unlock Excel cells when passwords are forgotten. This approach uses a macro that attempts various password combinations to break the protection.
Start by opening the password-protected workbook. Press Alt+F11 to open the VBA editor. In the Project Explorer pane, double-click the protected worksheet from the list of Microsoft Excel Objects.

Go to Insert > Module to create a new module, then paste the following code:
Sub PasswordBreaker()
'Breaks worksheet password protection.
Dim i As Integer, j As Integer, k As Integer
Dim l As Integer, m As Integer, n As Integer
Dim i1 As Integer, i2 As Integer, i3 As Integer
Dim i4 As Integer, i5 As Integer, i6 As Integer
On Error Resume Next
For i = 65 To 66: For j = 65 To 66: For k = 65 To 66
For l = 65 To 66: For m = 65 To 66: For i1 = 65 To 66
For i2 = 65 To 66: For i3 = 65 To 66: For i4 = 65 To 66
For i5 = 65 To 66: For i6 = 65 To 66: For n = 32 To 126
ActiveSheet.Unprotect Chr(i) & Chr(j) & Chr(k) & _
Chr(l) & Chr(m) & Chr(i1) & Chr(i2) & Chr(i3) & _
Chr(i4) & Chr(i5) & Chr(i6) & Chr(n)
If ActiveSheet.ProtectContents = False Then
MsgBox "One usable password is " & Chr(i) & Chr(j) & _
Chr(k) & Chr(l) & Chr(m) & Chr(i1) & Chr(i2) & _
Chr(i3) & Chr(i4) & Chr(i5) & Chr(i6) & Chr(n)
Exit Sub
End If
Next: Next: Next: Next: Next: Next
Next: Next: Next: Next: Next: Next
End Sub
Run the macro by pressing F5 or selecting Run from the menu. The code will attempt various password combinations and display a working password when successful. While this method doesn’t recover your original password, it provides an alternative that lets you unprotect cells in Excel and regain editing access.
It’s worth noting that this VBA approach primarily works with older Excel versions and may not be effective with more recent iterations that use stronger encryption. For Excel 2013 and later, the ZIP method or dedicated software tend to be more reliable options for how to unlock cells Excel without passwords.
Best Practices for Excel Cell Protection
Understanding how to unlock Excel cells is important, but equally valuable is knowing how to use protection effectively in the first place. Proper implementation can save you from needing recovery methods later.
When setting up worksheet protection, always consider who needs access to what data. Use the selective unlocking features to create intelligent protection schemes rather than blanket security. For collaborative workbooks, the “Allow Users to Edit Ranges” feature is particularly powerful when combined with domain permissions.
Always keep a record of important passwords in a secure location. While recovery methods exist, prevention is always preferable to cure. Consider using a password manager to store worksheet passwords alongside your other secure credentials.
For frequently used templates, establish a consistent protection strategy. You might create different protection levels for various user roles or set up specific input areas that remain unlocked while protecting formulas and structural elements.
iMyFone Passper Pro.Ultimate 6-in-1 File Password Remover.1-click to remove Excel/Word/PDF/RAR/ZIP/PowerPoint passwords.Unlock file passwords to read, edit or print easily.Remove read-only file protection permanently.Break file locks with up to 99% sucessful rate.
Troubleshooting Common Issues
Even when you know how to unprotect cells in Excel, you might encounter situations where standard methods don’t work as expected. Here are solutions to some common problems:
If the “Allow Users to Edit Ranges” button is grayed out, check if the worksheet is currently protected. This feature requires the sheet to be unprotected during setup. Unprotect the sheet first, configure your ranges, then reapply protection.
When working with very large files, the ZIP method might encounter performance issues. In these cases, dedicated recovery software often handles large files more efficiently.
For workbooks with multiple protected sheets, you’ll need to repeat the unprotection process for each individual sheet. Excel’s protection applies per worksheet, not per workbook.
If you encounter files with both workbook and worksheet protection, address worksheet protection first, as it typically prevents cell editing. Workbook protection usually relates to structure rather than individual cell access.
Advanced Protection Scenarios
As you become more comfortable with how to unlock cells in Excel, you might encounter more complex protection scenarios. Some organizations implement layered security with different passwords for different ranges, while others use VBA projects to create custom protection schemes.
In enterprise environments, Excel protection often integrates with broader security systems. Understanding how to unprotect cells Excel in these contexts might require coordination with IT departments, especially when domain permissions and group policies are involved.
For advanced users, Excel’s protection capabilities can be extended through VBA to create sophisticated security models. However, these custom solutions also require correspondingly advanced approaches when access recovery is needed.
Conclusion
Knowing how to unlock Excel cells is an essential skill for anyone who regularly works with spreadsheets. Whether you’re using basic password removal, selective cell unlocking, or advanced recovery methods for forgotten passwords, Excel provides multiple pathways to regain access to your data.
The method you choose depends on your specific situation—whether you have the password, need selective access, or require password recovery. For quick and reliable results, especially with forgotten passwords, dedicated tools like Passper for Excel often provide the most straightforward solution.
Remember that while protection is valuable for securing your data, being locked out of your own files can be equally problematic. Balance security with accessibility, keep secure records of important passwords, and understand the recovery options available for those inevitable situations when passwords are forgotten.
With these techniques in your Excel toolkit, you’ll be prepared to handle virtually any cell protection scenario, ensuring you always maintain access to your important spreadsheet data while appropriately securing sensitive information.
Some images in this article are sourced from iMyFone.