 TOOL HUNTER

Video editing might sound complicated, but what if I told you that you can easily trim videos using a tool you probably already have? That’s right—VLC Media Player isn’t just for watching movies. It also lets you cut and trim video clips quickly, and best of all, it’s totally free!
Whether you’re making videos for social media, school projects, or just for fun, learning how to trim video in VLC can help you remove unwanted parts, create cool highlights, or simply make your videos shorter and more engaging.
In this guide, we’ll walk through everything you need to know about cutting videos in VLC. We’ll also introduce you to another awesome tool—CapCut—which offers even more features to make your videos stand out. Let’s dive in!
What is VLC and Why Use It for Trimming?
VLC Media Player is one of the most popular media players out there. It’s free, open-source, and works on almost any device—Windows, Mac, Android, you name it. While most people use it to play videos and music, not everyone knows that you can also use VLC to trim and cut videos.
Yes, you can actually cut a video in VLC without installing any extra software. It’s perfect for quick edits, like removing awkward pauses, cutting out mistakes, or creating short clips from longer videos. You don’t need to be a tech expert to use it—VLC’s interface is simple and beginner-friendly.
So, if you’ve ever wondered how to trim video in VLC, you’re in the right place. Let’s get started!
How to Trim or Cut a Video in VLC
Trimming a video in VLC is easier than you might think. You don’t need any advanced editing skills—just follow these simple steps, and you’ll have a trimmed video in no time.
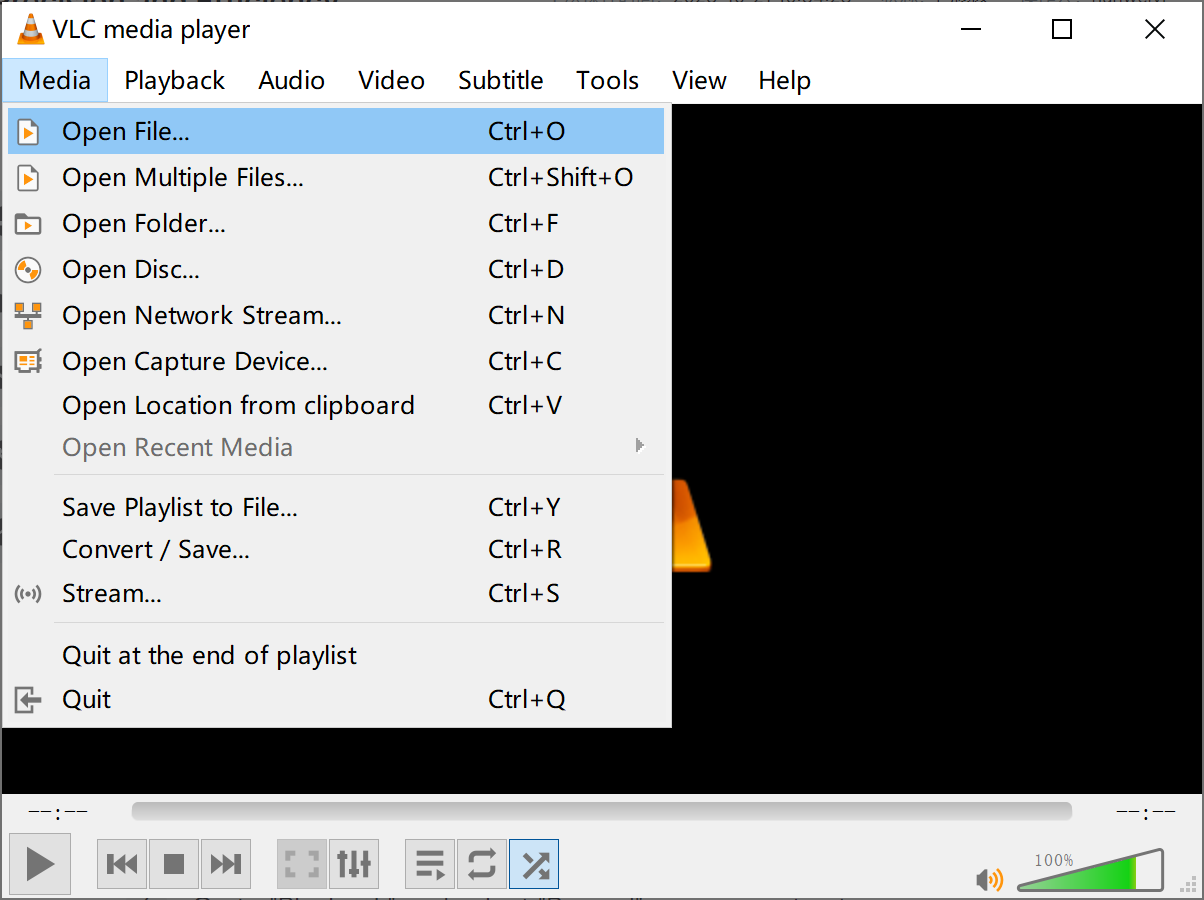
Step 1: Open Your Video in VLC
First, open VLC Media Player. Click on “Media” in the top left corner, then select “Open File” to choose the video you want to trim.
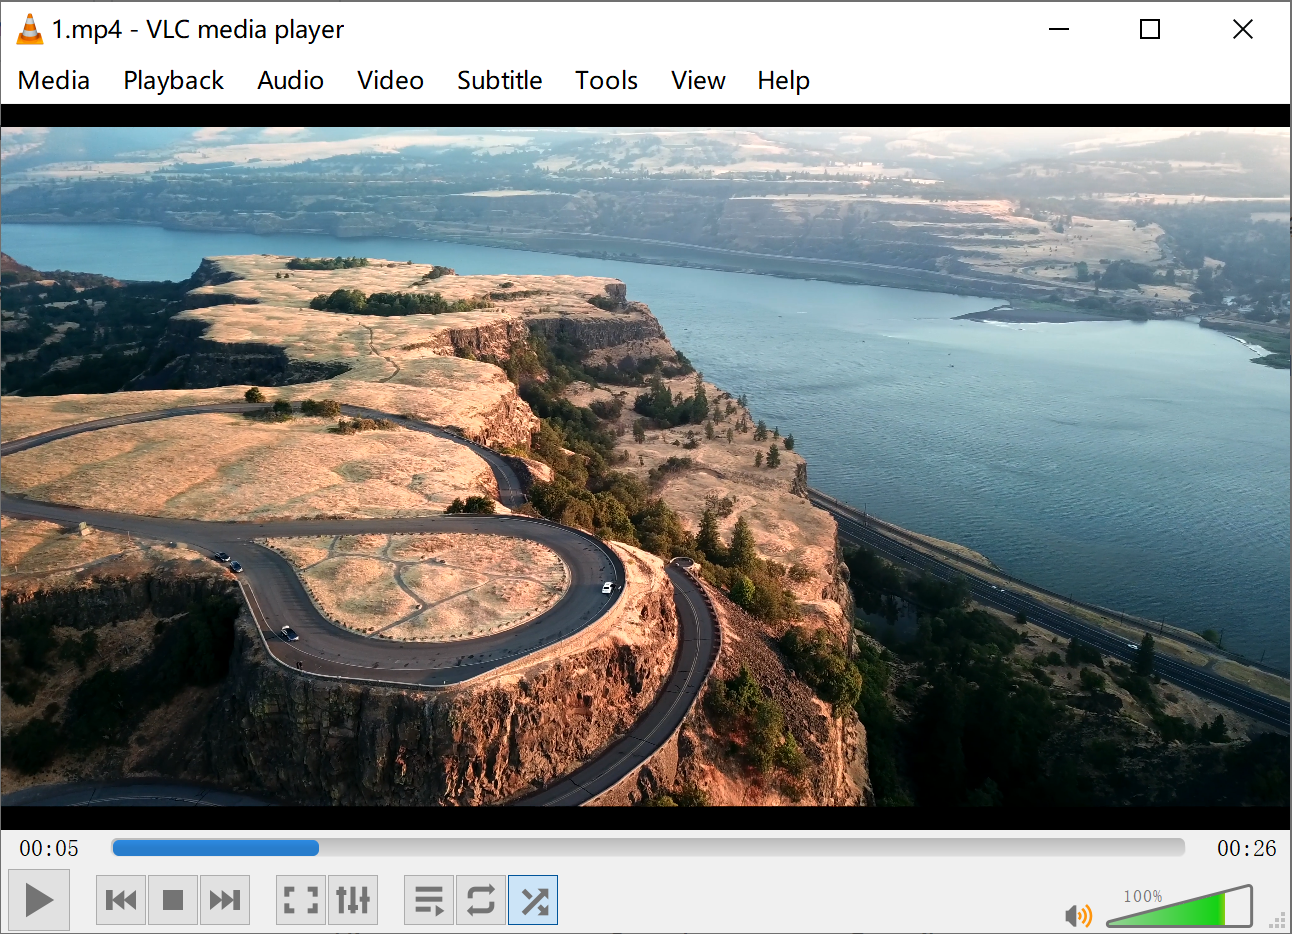
Step 2: Find Where You Want to Cut
Play your video and pause at the exact point where you want your trimmed clip to start. This is where you’ll begin recording the part you want to keep.
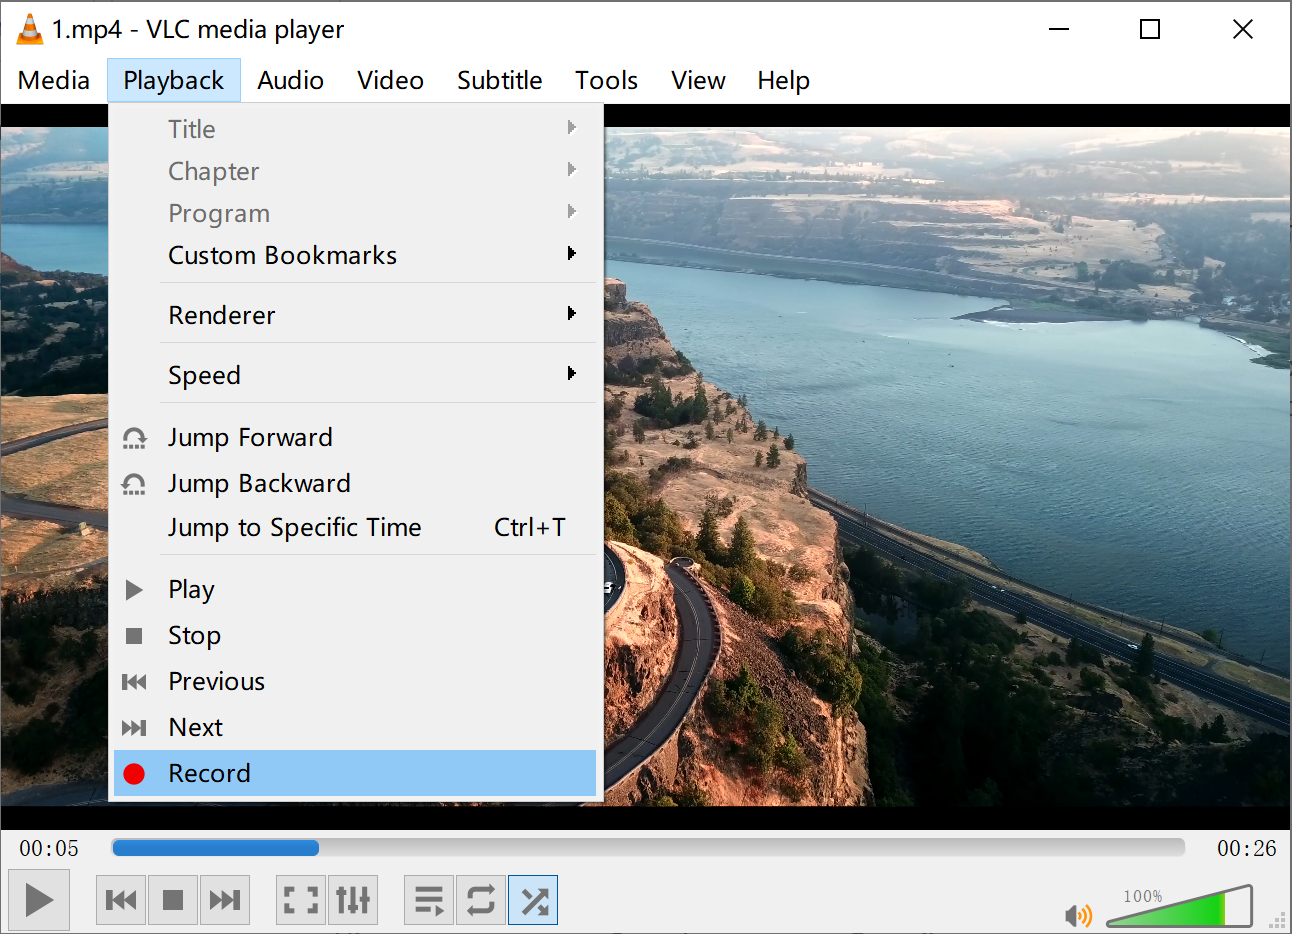
Step 3: Start Recording
Go to the “Playback” menu and click “Record.” This tells VLC to start saving the video from this point onward. Press play again and let the video run until you reach the end of the section you want to keep.
Step 4: Stop Recording
Once you’ve reached the end of the clip, go back to “Playback” and click “Record” again to stop. VLC will save the trimmed video to your computer. By default, it’s usually saved in your “Videos” folder.
Step 5: Repeat if Necessary
If you want to create multiple clips from one video, just repeat the process. Play, pause, record, stop—it’s that easy!
And that’s how you cut a video in VLC! Whether you’re looking to trim video in VLC for a school project or just for fun, these steps will help you get it done quickly.
Why Choose VLC for Video Trimming?
You might be wondering—why use VLC when there are so many other video editors out there? Well, here are some great reasons:
-
It’s Free and Always Will Be
Unlike many video editors, VLC is completely free. There are no hidden costs or premium versions—you get all its features without spending a dime. -
Super Easy to Use
You don’t need to be a professional video editor to use VLC. The interface is clean and simple, making it perfect for beginners. -
Works with Almost Any Video Format
VLC supports tons of video formats, so you don’t have to worry about converting your files before editing. -
No Installation of Extra Software Needed
Since VLC is primarily a media player, you likely already have it installed. That means you can start trimming videos right away without downloading anything new. -
Great for Quick Edits
If you just need to make simple cuts and don’t want to learn a complicated editing program, VLC is a perfect choice.
So, if you ever need to quickly trim video in VLC, you now know how easy it is!
But What If You Want to Do More?
While VLC is great for basic trimming, it does have its limits. If you want to add music, text, effects, or transitions, you might need a more advanced tool. That’s where CapCut comes in!
CapCut is a free, user-friendly video editor that lets you do way more than just trim videos. It’s perfect for creating professional-looking videos without any experience. Plus, it works on phones, tablets, and computers, so you can edit anywhere.
CapCut — Your all-in-one video & photo editing powerhouse! Experience AI auto-editing, realistic effects, a huge template library, and AI audio transformation. Easily create professional masterpieces and social media viral hits. Available on Desktop, Web, and Mobile App.

How to Trim Videos in CapCut
If you’re ready to take your video editing to the next level, CapCut is a fantastic choice. Here’s how you can trim videos using CapCut:
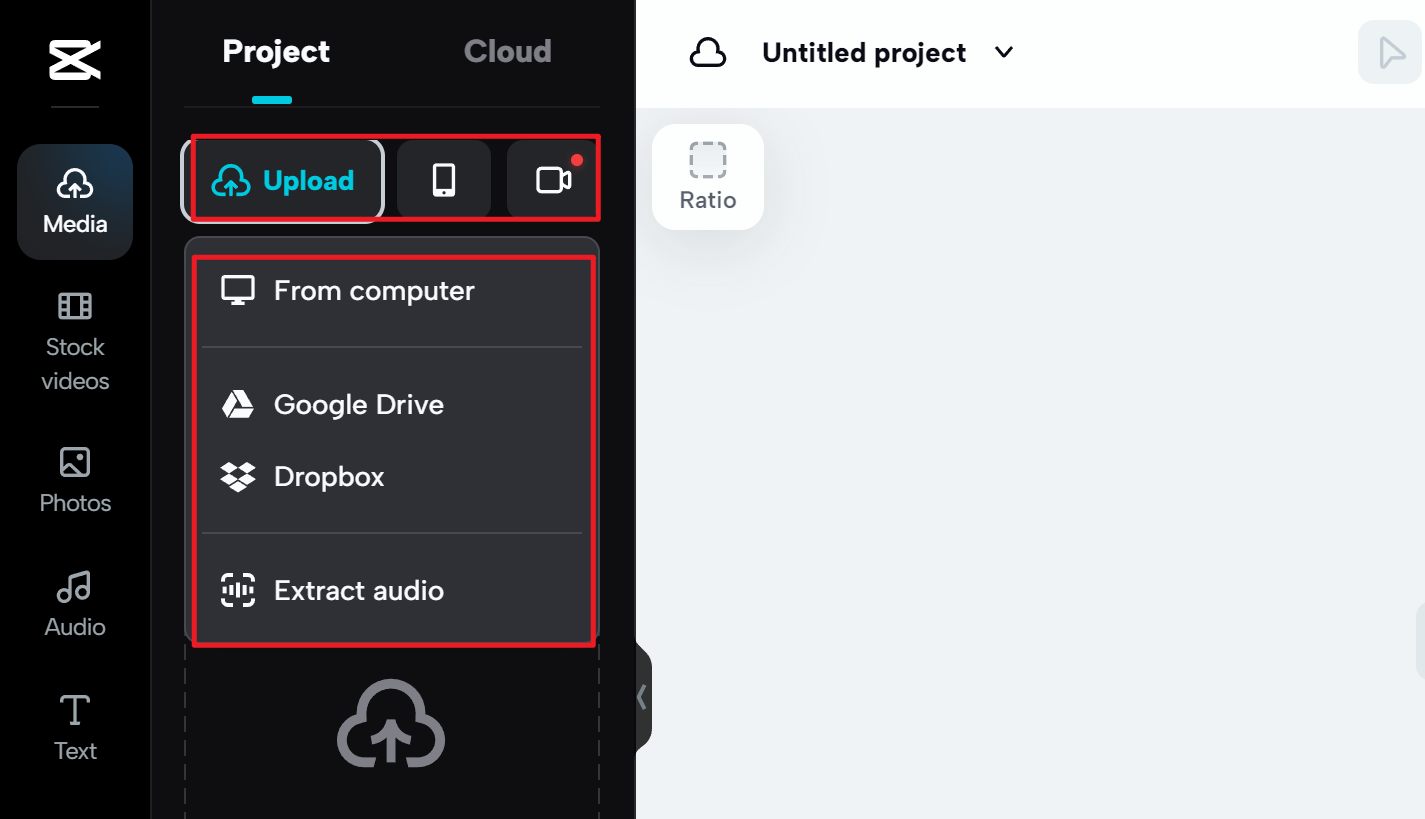
Step 1: Upload Your Video
Open CapCut and upload your video. You can import it from your device, Google Drive, Dropbox, or even use a QR code to transfer videos from your phone. You can also start from scratch with one of CapCut’s free templates.
Step 2: Trim and Edit
Drag your video into the timeline. Move the playhead to where you want to make a cut, then click the split icon. You can also add cool effects, transitions, and text to make your video more engaging.
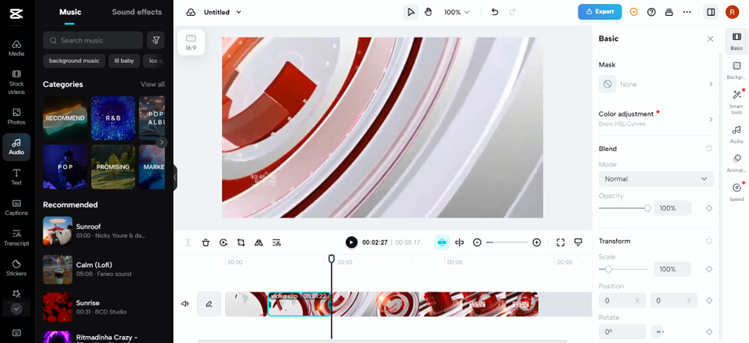
Step 3: Export and Share
Once you’re happy with your video, click export. You can download it or share it directly to social media platforms like TikTok and Instagram—with no watermarks!

Why CapCut is a Great Alternative to VLC
While VLC is awesome for quick trims, CapCut offers more advanced features for those who want to create truly stunning videos. Here’s why so many people love it:
- It’s free and easy to use, just like VLC.
- You can add music, text, effects, and transitions.
- There are tons of templates to help you get started quickly.
- You can edit on your phone, computer, or online.
- No watermarks on your final videos.
So, if you ever find yourself wanting to do more than just trim video in VLC, give CapCut a try!
CapCut — Your all-in-one video & photo editing powerhouse! Experience AI auto-editing, realistic effects, a huge template library, and AI audio transformation. Easily create professional masterpieces and social media viral hits. Available on Desktop, Web, and Mobile App.
Final Thoughts
Whether you choose to trim video in VLC or use a more advanced tool like CapCut, both are great options depending on your needs. VLC is perfect for quick, simple edits, while CapCut helps you create more polished and professional videos.
Remember, you don’t need expensive software to make great videos. With free tools like VLC and CapCut, anyone can become a video editing pro!
Frequently Asked Questions
Does VLC have a trim function?
Yes! You can trim video in VLC using the record feature. It’s not as advanced as dedicated editing software, but it works well for basic cuts.
Can I add effects or text to videos in VLC?
Unfortunately, no. VLC is mainly a media player, so its editing features are limited to trimming and cutting. If you want to add effects, text, or music, try using CapCut instead.
How do I trim a video in VLC on Windows 10?
The process is the same as described above. Open your video in VLC, use the record button in the Playback menu to start and stop recording, and save your trimmed clip.
Is CapCut really free?
Yes! CapCut is completely free to use, with no watermarks or hidden fees. You can download it or use it online without spending any money.
Can I use CapCut on my phone?
Absolutely! CapCut is available for iOS and Android, so you can edit videos on the go.
Some images in this article are sourced from CapCut.

