TOOL HUNTER

Learning how to cut a clip in iMovie is one of the most fundamental skills for anyone getting into video editing. Whether you’re working on a school project, creating content for social media, or just trimming home videos, knowing how to trim a video in iMovie can make your footage look much more professional. The good news is that iMovie makes it surprisingly simple to shorten video clips and remove unwanted sections.
Many people wonder exactly how to cut movie clips in iMovie without losing important content. The process is actually quite intuitive once you understand the basic tools available. In this comprehensive guide, I’ll walk you through everything you need to know about trimming videos in iMovie across different Apple devices, plus introduce you to a great alternative for Windows users.
Table of Contents
- Getting Started with iMovie Video Editing
- How to Trim Video in iMovie on Mac
- How to Trim Video in iMovie on iPhone or iPad
- Tips for Better iMovie Editing
- Common Challenges and Solutions
- Alternative: Trimming Videos on Windows with Filme
- Choosing the Right Tool for Your Needs
- Practice Makes Perfect
- Conclusion
Getting Started with iMovie Video Editing
Before we dive into the specific steps for how to cut a clip in iMovie, it’s helpful to understand what iMovie offers. iMovie is Apple’s free video editing software that comes pre-installed on Mac computers and is available as a free download for iPhones and iPads. It’s designed to be user-friendly while still offering powerful editing capabilities.
The ability to trim videos is essential because rarely do we record footage that’s perfect from start to finish. There might be shaky beginnings, unnecessary middle sections, or awkward endings that need removal. Learning how to shorten a video in iMovie will help you create tighter, more engaging content.
How to Trim Video in iMovie on Mac
If you’re using a Mac computer, iMovie provides several methods for trimming your videos. The process of how to trim a video in iMovie on Mac is straightforward, but there are different approaches depending on what exactly you want to accomplish.
Basic Video Trimming Method
The standard way to trim videos in iMovie involves setting specific start and end points for your clips. Here’s how to do it:
First, open iMovie on your Mac and create a new project or open an existing one. Import the video you want to edit if you haven’t already. You can do this by clicking the Import Media button or simply dragging and dropping your video file into the iMovie window.
Once your video appears in the timeline at the bottom of the screen, click on it to select it. You’ll notice a playhead (the vertical line) that shows your current position in the video. Play your video by pressing the spacebar or clicking the play button to identify where you want to make your cuts.
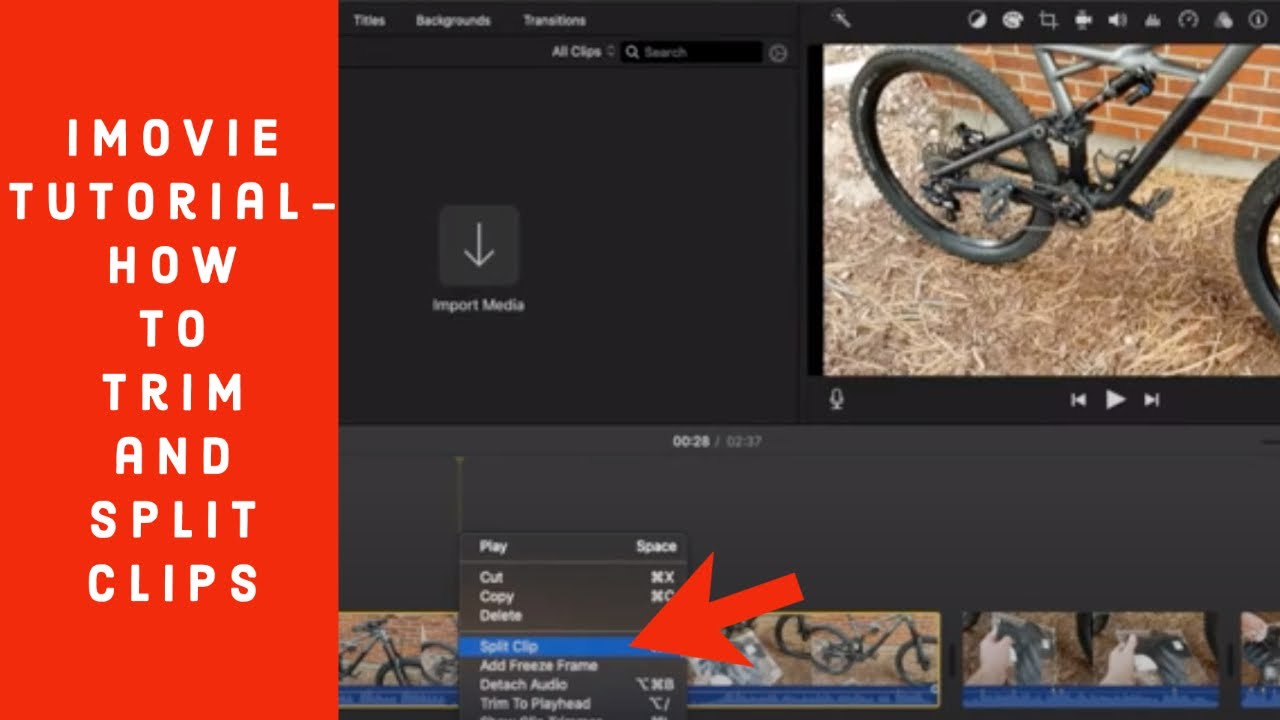
When you find a spot where you want to trim, pause the video and position the playhead exactly where you want to cut. To split the clip at this point, press Command+B on your keyboard. This will divide your single clip into two separate clips that you can now work with independently.
If you want to remove a section from the beginning or end of a clip, you can simply hover your cursor over the edge of the clip in the timeline until it changes to a two-sided arrow. Then click and drag inward to shorten the clip from either end. This method is perfect for when you need to quickly how to shorten video in iMovie by removing unwanted portions from the start or finish.
Extending or Shortening Clips
Sometimes you might realize that you’ve trimmed too much from a clip and want to bring back some of the footage. iMovie makes this easy too. The process for how to cut movie clips in iMovie includes the ability to restore previously trimmed sections.
To extend a clip, hover your cursor over the edge of the clip in the timeline until it becomes the resize arrow. Then click and drag outward. You’ll notice that iMovie shows you the additional frames you’re adding back into your clip. This is particularly useful when you need to fine-tune your edits and adjust the timing of your scenes.
Similarly, if you need to further shorten a clip, just drag the edges inward. This flexibility means you don’t have to worry about making perfect cuts on your first try. You can always adjust them later as you refine your video.
Working with the Clip Trimmer
For more precise control over how to trim a video in iMovie, you can use the Clip Trimmer. This tool gives you a detailed view of your entire clip and lets you set exact start and end points.
To access the Clip Trimmer, double-click on the clip in your timeline or right-click and select “Show Clip Trimmer.” A larger version of your clip will appear above the timeline, showing the complete original footage with the currently used section highlighted.
In the Clip Trimmer, you can drag the edges of the highlighted section to adjust what portion of the original clip appears in your project. This is especially helpful when you’re trying to how to shorten a video in iMovie with precision, as you can see exactly what you’re including and excluding.
Advanced Trimming Techniques
Once you’re comfortable with the basics of how to cut a clip in iMovie, you might want to explore some more advanced techniques. For instance, you can select multiple clips and trim them simultaneously by holding down the Shift key while clicking on each clip, then adjusting the edges.
Another useful technique is using the “Trim to Playhead” feature. Position the playhead where you want to trim, right-click on the clip, and select “Trim to Playhead.” This will cut the clip at the playhead position, creating two separate clips.
If you need to make a clip longer but have already used all the available footage, iMovie will display a warning. In such cases, you might need to consider other editing techniques like slowing down the clip or using different footage altogether.
Watch this video to see how to use iMovie to trim video on Mac:
How to Trim Video in iMovie on iPhone or iPad
Mobile editing has become incredibly popular, and iMovie for iOS offers robust editing capabilities right on your iPhone or iPad. The process for how to trim a video in iMovie on mobile devices is slightly different from the Mac version but just as effective.
Basic Trimming on iOS
To begin trimming on your iPhone or iPad, first open the iMovie app. If you don’t have it installed, you can download it for free from the App Store. Create a new project or open an existing one, then tap the “+” button to add your video to the timeline.
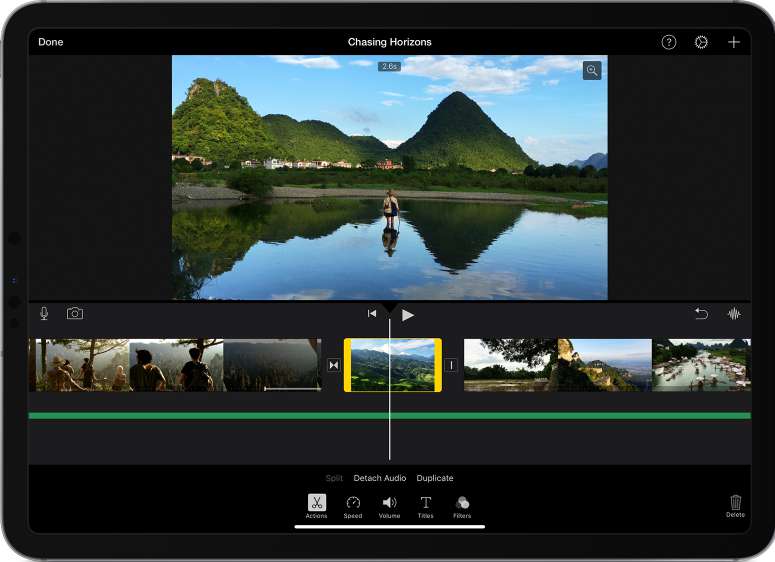
Once your video is in the timeline, tap on it to select it. You’ll see a yellow border appear around the clip, indicating that it’s selected. To trim the beginning or end of the clip, tap and hold on either edge of the yellow border until it activates, then drag inward to shorten the clip.
This method of how to shorten video in iMovie on iOS is perfect for quick adjustments. As you drag the edges, you’ll see the video preview update in real-time, showing you exactly what portion of the clip will remain.
Precision Trimming with the Split Function
For more precise edits, especially when you need to remove sections from the middle of a clip, you’ll want to use the Split function. This approach to how to cut movie clips in iMovie on mobile devices gives you maximum control.
First, scroll through your timeline to find the exact point where you want to make a cut. Tap on the clip to select it, then tap the actions button (usually represented by three dots or a scissor icon) and select “Split.” This will divide your clip into two separate segments at the playhead position.
Once split, you can select the middle section you want to remove and tap the delete button. Then you can bring the remaining clips together to create a seamless video. This technique is essential for how to shorten a video in iMovie by removing unwanted middle sections.
Additional Mobile Editing Features
The mobile version of iMovie includes several features that make learning how to cut a clip in iMovie on iOS particularly rewarding. For instance, you can pinch to zoom in the timeline for more precise control over where you make your cuts.
The app also supports drag-and-drop editing, allowing you to rearrange clips after you’ve trimmed them. This flexibility means you can experiment with different sequences until you find the perfect flow for your video.
Another useful feature is the ability to undo edits if you make a mistake. Simply shake your device and tap “Undo” to revert your last action. This safety net makes it less stressful to learn how to trim a video in iMovie on mobile devices.
Watch this video to learn using iMovie to trim video on iPhone:

Tips for Better iMovie Editing
Regardless of which device you’re using, these tips will help you get better results when learning how to cut a clip in iMovie and other editing techniques.
Planning Your Edits
Before you start trimming, it’s helpful to watch your entire video and make notes about where you want to make cuts. This planning phase can save you time and help you create a more coherent final product.
When deciding how to shorten video in iMovie, consider the story you’re trying to tell. Each cut should serve a purpose, whether it’s removing mistakes, improving pacing, or highlighting important moments.
Using Transitions Effectively
After you’ve trimmed your clips, you might notice jarring jumps between scenes. iMovie offers a variety of transitions that can make these jumps smoother. Cross dissolves, fades, and other transitions can help create a more professional-looking video.
However, use transitions sparingly. Too many fancy transitions can distract from your content. Simple cuts are often the most effective choice, especially when you’re learning how to cut movie clips in iMovie.
Maintaining Audio Consistency
When you trim video clips, pay attention to what happens to the audio. iMovie automatically links audio with video clips, but sometimes you may need to separate them to maintain consistent background music or narration.
To detach audio from a video clip, right-click on the clip (on Mac) or use the audio options (on iOS) and select “Detach Audio.” This creates a separate audio track that you can edit independently from the video.
Common Challenges and Solutions
As you practice how to trim a video in iMovie, you might encounter some common challenges. Here are solutions to a few frequent issues:
Dealing with Limited Storage
Video files can take up significant storage space, which might be a concern especially on mobile devices. Consider editing shorter segments or using lower resolution proxies if storage becomes an issue while learning how to shorten a video in iMovie.
Maintaining Video Quality
Some users worry that trimming videos might reduce quality. Fortunately, iMovie uses non-destructive editing, meaning your original files remain untouched. All edits are saved as instructions, not permanent changes to your footage.
Syncing Projects Across Devices
If you use iMovie on multiple Apple devices, you can sync your projects through iCloud. This allows you to start editing on one device and continue on another, which is particularly helpful when you’re working on longer projects that require multiple editing sessions.
Alternative: Trimming Videos on Windows with Filme
While iMovie is excellent for Apple users, Windows users need a different solution for video editing. This is where iMyFone Filme comes in as a powerful, user-friendly alternative that makes learning how to cut a clip in iMovie unnecessary for Windows users.
Filme – Best Video Editor for Beginners.Explore Your Creativity, Limitless

Check More Details | Download Now! | Check All Deals
Getting Started with Filme
Filme offers an intuitive interface that Windows users will find familiar and easy to navigate. The process for how to trim a video in iMovie has parallels in Filme, making transition between the two applications relatively seamless.
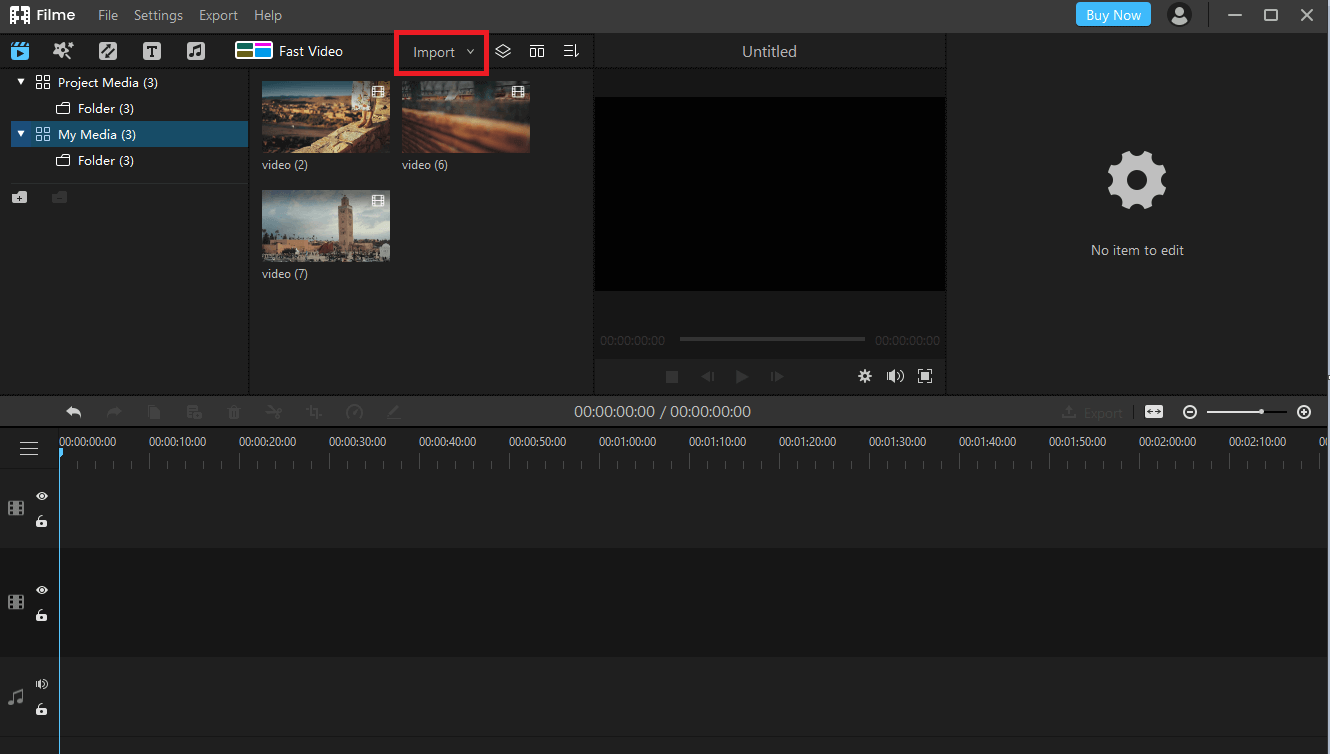
To begin trimming videos in Filme, first install and launch the application. The clean, organized interface presents your media library, preview window, and timeline in a logical layout that’s easy to understand even for beginners.
Basic Trimming in Filme
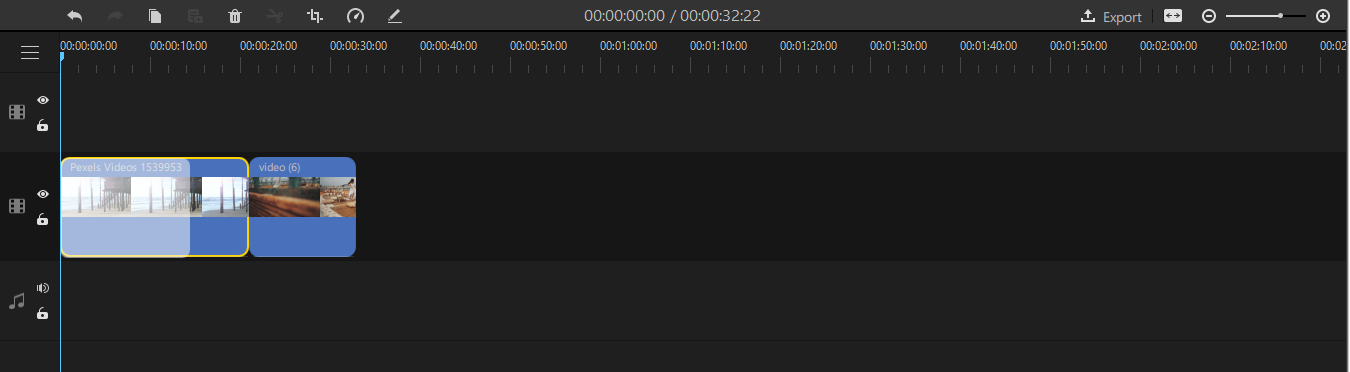
The fundamental approach to how to cut a clip in iMovie translates well to Filme. To trim a video, simply import your footage into the media library, then drag it to the timeline. Once your video is in the timeline, hovering over either end of the clip will reveal trimming handles.
Click and drag these handles inward to shorten your clip from either end. The real-time preview updates as you trim, showing exactly what portion of your video will remain. This method of how to shorten video in iMovie alternatives is both efficient and precise.
Advanced Editing Features
While learning how to cut movie clips in iMovie alternatives, you’ll appreciate Filme’s additional features. The software includes a comprehensive set of tools for splitting clips, adding transitions, incorporating text, and applying filters.
The splitting function in Filme works similarly to iMovie’s – simply position the playhead where you want to make a cut and click the split button. This approach to how to shorten a video in iMovie alternatives allows for removing unwanted middle sections with precision.
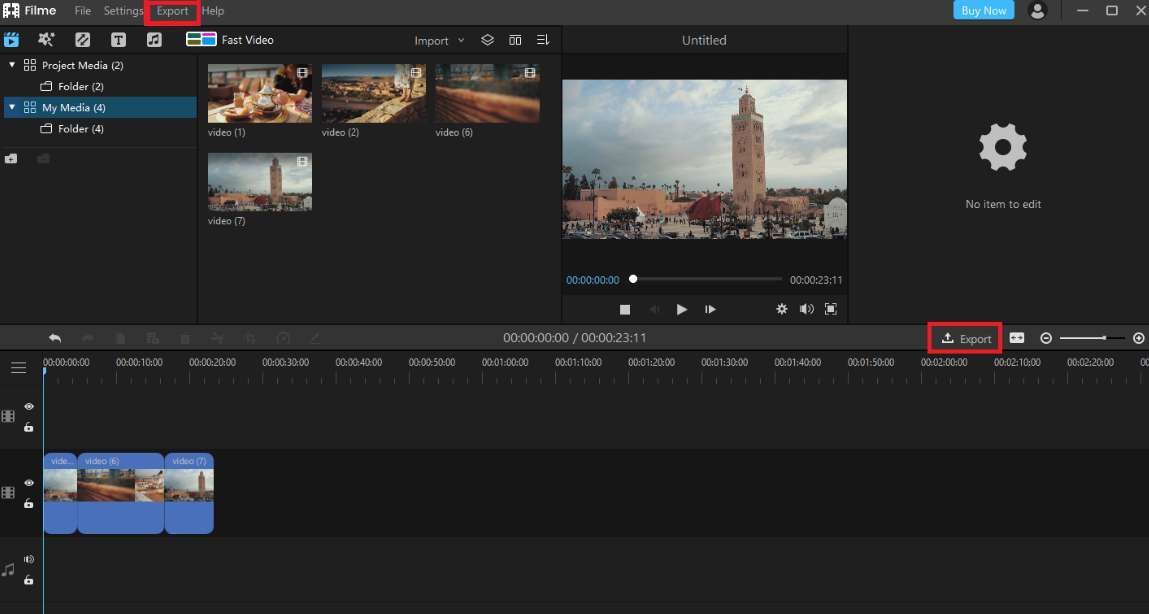
Exporting Your Edited Video
After you’ve finished trimming and editing your video in Filme, exporting is straightforward. Click the export button to access various output options, including different resolutions, formats, and quality settings tailored for specific platforms like YouTube, Instagram, or Vimeo.
The export process maintains the high quality of your original footage while applying all your edits. This attention to quality makes Filme an excellent choice for anyone looking for how to trim a video in iMovie alternatives on Windows.
Filme – Best Video Editor for Beginners.Explore Your Creativity, Limitless
Check More Details | Download Now! | Check All Deals
Watch this video to see how to use Filme to trim videos:

Choosing the Right Tool for Your Needs
When deciding between iMovie and alternatives like Filme, consider your specific situation. iMovie is an excellent choice if you’re already in the Apple ecosystem, as it’s free and seamlessly integrated with macOS and iOS.
For Windows users or those needing more advanced features, Filme offers a compelling alternative with its user-friendly interface and robust editing capabilities. The process for how to cut a clip in iMovie translates well to Filme, making it easy to switch between the two if needed.
Both applications make learning how to shorten video in iMovie or its alternatives accessible to beginners while providing enough depth for more experienced editors. The key is to choose the tool that fits your device, skill level, and editing needs.
Practice Makes Perfect
Like any skill, becoming proficient at video trimming takes practice. Don’t be discouraged if your first few attempts at how to cut movie clips in iMovie aren’t perfect. With each project, you’ll develop a better sense of timing, pacing, and storytelling.
Start with simple projects like trimming home videos or creating short clips for social media. As you become more comfortable with the basics of how to shorten a video in iMovie, challenge yourself with more complex edits involving multiple clips, transitions, and effects.
Remember that even professional editors constantly learn and refine their techniques. The more you practice how to trim a video in iMovie or its alternatives, the more intuitive the process will become.
Conclusion
Learning how to cut a clip in iMovie is an essential skill for anyone interested in video editing. Whether you’re using a Mac, iPhone, or iPad, iMovie provides intuitive tools for trimming your videos to perfection. The process for how to shorten video in iMovie is designed to be accessible to beginners while offering enough precision for more advanced edits.
For Windows users, iMyFone Filme presents a excellent alternative with similar functionality and an equally user-friendly interface. The techniques for how to cut movie clips in iMovie translate well to Filme, making it easy to achieve professional-looking results regardless of your operating system.
As you continue to practice how to shorten a video in iMovie or its alternatives, you’ll develop your own editing style and workflow. The key is to start with the basic trimming techniques and gradually incorporate more advanced features as you become comfortable with the software.
Whether you choose iMovie or Filme, mastering the art of video trimming will significantly enhance your video projects. With these tools and techniques, you’re well-equipped to create engaging, polished videos that effectively communicate your message and captivate your audience.
Some images courtesy of iMyFone