TOOL HUNTER

Why CapCut is Your Go-To Audio Editor
Getting started with video editing can be a bit overwhelming, especially when it comes to handling the audio part. You want every single element—dialogue, background scores, sound effects—to sync perfectly with your visuals. That’s where a powerful, user-friendly tool comes into play.
If you’ve been searching for a straightforward way to trim, cut, or enhance audio, CapCut offers a smooth and intuitive experience. It’s not just a basic audio cutter—it’s a full-featured platform packed with AI-enhanced tools that help you produce professional-level audio without the complexity.
Let’s explore what makes CapCut a top choice for content creators of all levels.
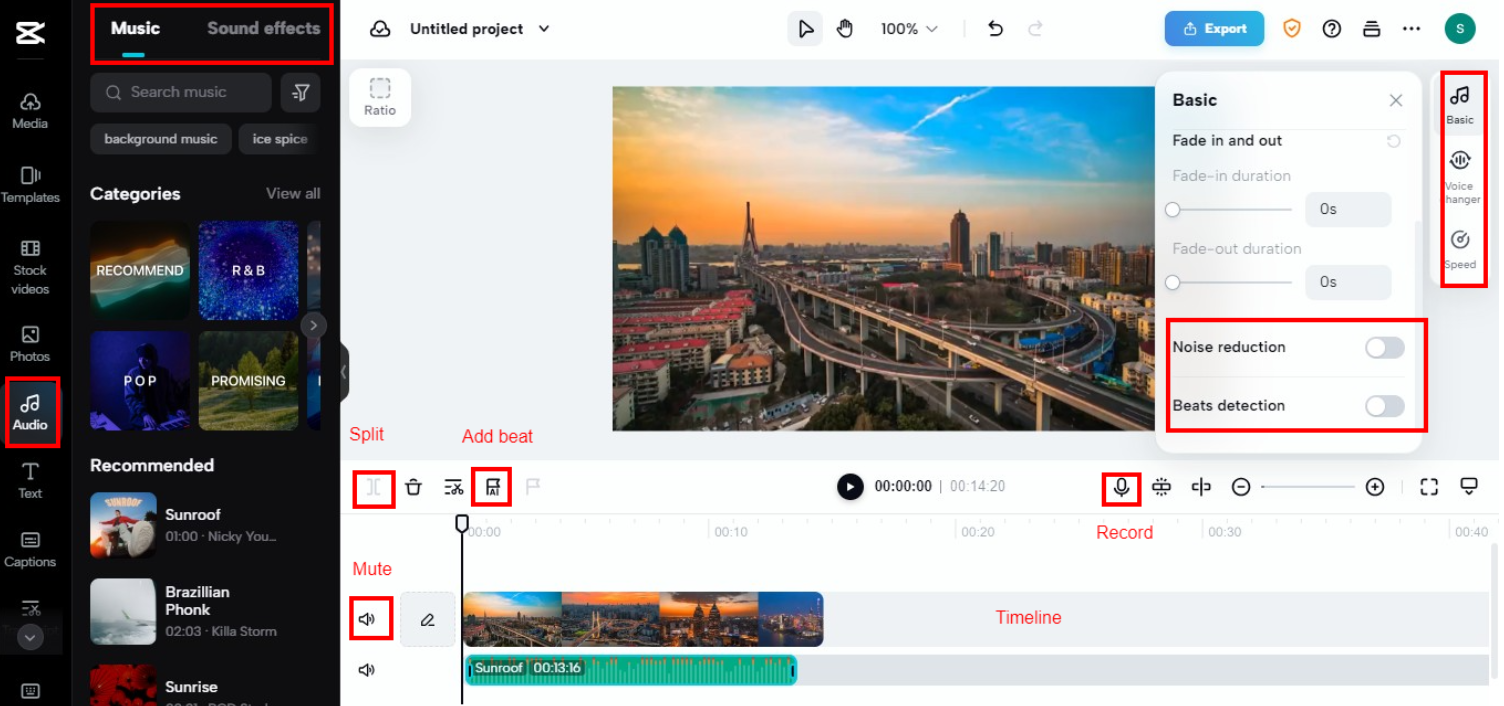
Clean Interface, High-Quality Results
One of CapCut’s biggest strengths is its clutter-free workspace. All editing tools are laid out logically, so you won’t waste time hunting for features. More importantly, the platform preserves audio quality throughout the editing process. Your final sound will be crisp, clear, and ready for publishing.
Split and Trim with Ease
A standout feature is the ability to split audio directly in your browser. This is super handy when you need to shorten a clip, remove errors, or rearrange sections. Just right-click on your video track and select “Separate Audio”—now you can edit the audio independently. It’s a fundamental part of learning how to trim audio in CapCut.
Rich Sound Library
CapCut comes loaded with a diverse collection of sound effects and background tracks. From subtle ambient noise to attention-grabbing SFX, you’ll find plenty of options to elevate your project. Great audio touches can make any video—whether it’s a vlog, tutorial, or short clip—feel more dynamic and engaging.
Built-in Voice Recorder
Need to record a voiceover? CapCut has you covered. Its integrated recording tool lets you capture narration without switching apps. You can even fine-tune volume and clarity using decibel adjustments, making it easy to get clean, professional-sounding voice tracks.
Advanced Tools for Fine-Tuning
Beyond simple cuts, CapCut offers tools like noise reduction, automatic beat matching, voice modulation, and speed control. These are perfect for cleaning up audio, syncing music to visuals, or adding creative vocal effects. Whether you’re editing a podcast or a short film, these features help you achieve a polished output.
So if you’re looking for a free, all-in-one platform to cut audio and much more, CapCut is a reliable choice. Ready to get started?
CapCut — Your all-in-one video & photo editing powerhouse! Experience AI auto-editing, realistic effects, a huge template library, and AI audio transformation. Easily create professional masterpieces and social media viral hits. Available on Desktop, Web, and Mobile App.

How to Edit Audio in CapCut: A Beginner-Friendly Walkthrough
New to CapCut? No problem. Here’s a simple, step-by-step breakdown to help you edit audio like a pro.
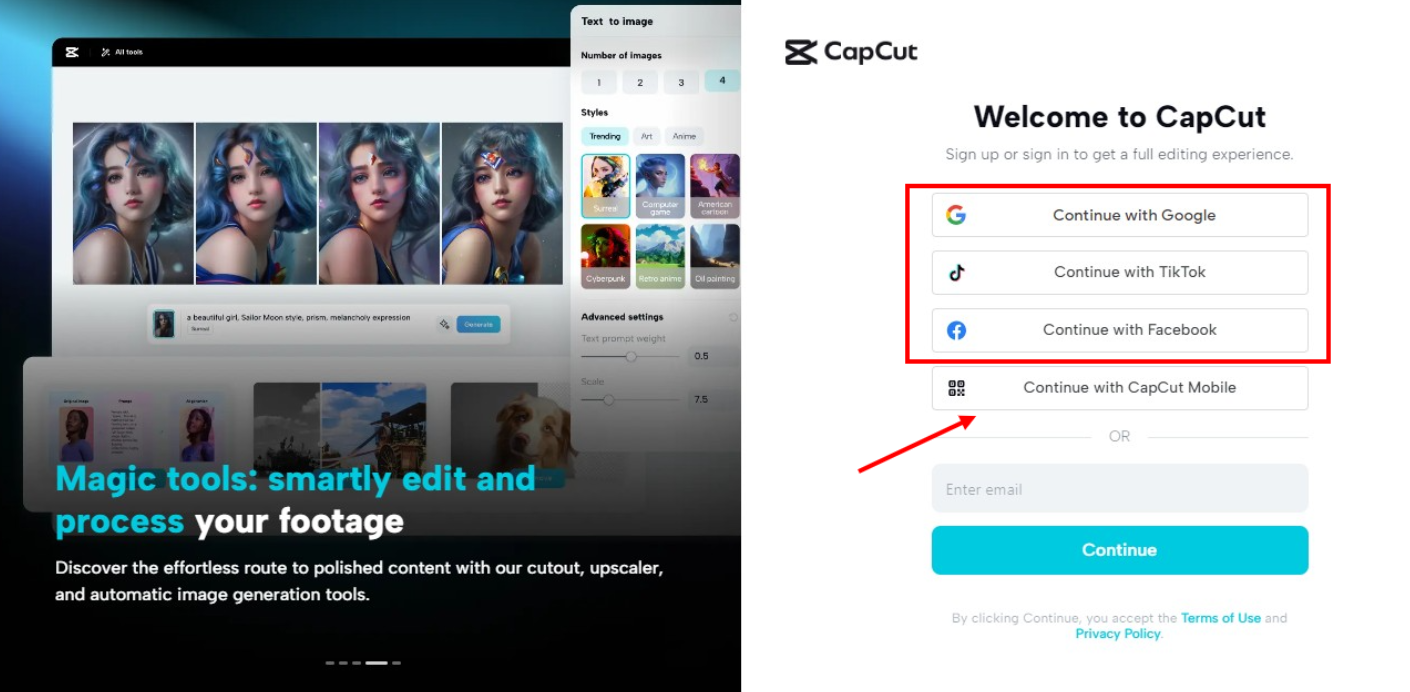
Step 1: Create an Account or Sign In
Head over to the CapCut website. You can quickly sign up using your Google, Facebook, TikTok, or Apple account. If you already have the mobile app, scan the QR code to log in—it only takes a moment.
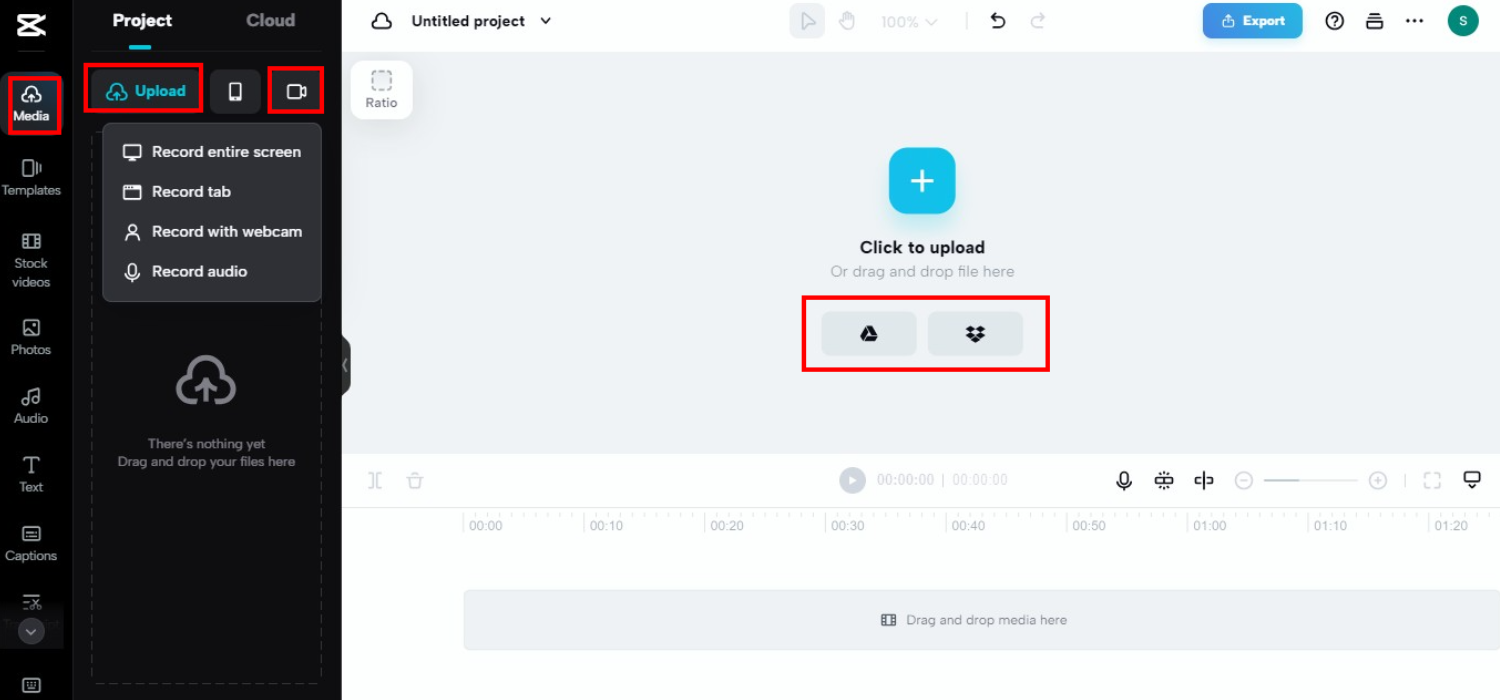
Step 2: Upload Your Media
Click the “Media” button located at the top left. From here, you can import files from your device, Google Drive, or Dropbox. Mobile users can use the QR code scanning option. There’s even a screen recorder built right in—ideal for capturing tutorials or gameplay footage.
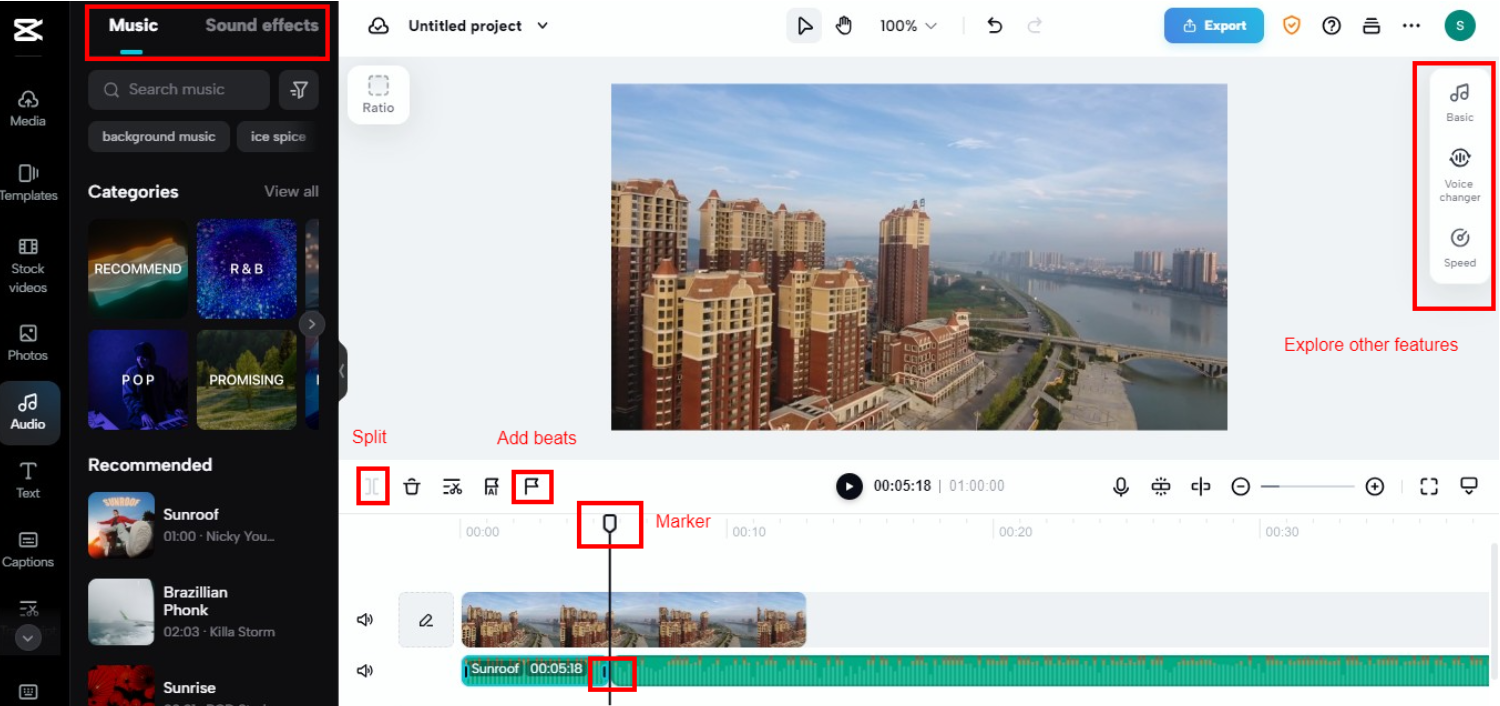
Step 3: Start Editing
This is where the real fun begins. To trim your audio, move the playhead to your desired cut point and click the “Split” icon (or press Ctrl+B). Remove unwanted segments or rearrange clips with drag-and-drop ease.
You can also use beat markers (the “Flag” icon) to align audio with visual cues. Experiment with voice changers for fun or functional adjustments—go robotic, deep, or something entirely unique. Don’t shy away from trying filters, text overlays, and sound effects to make your project stand out.
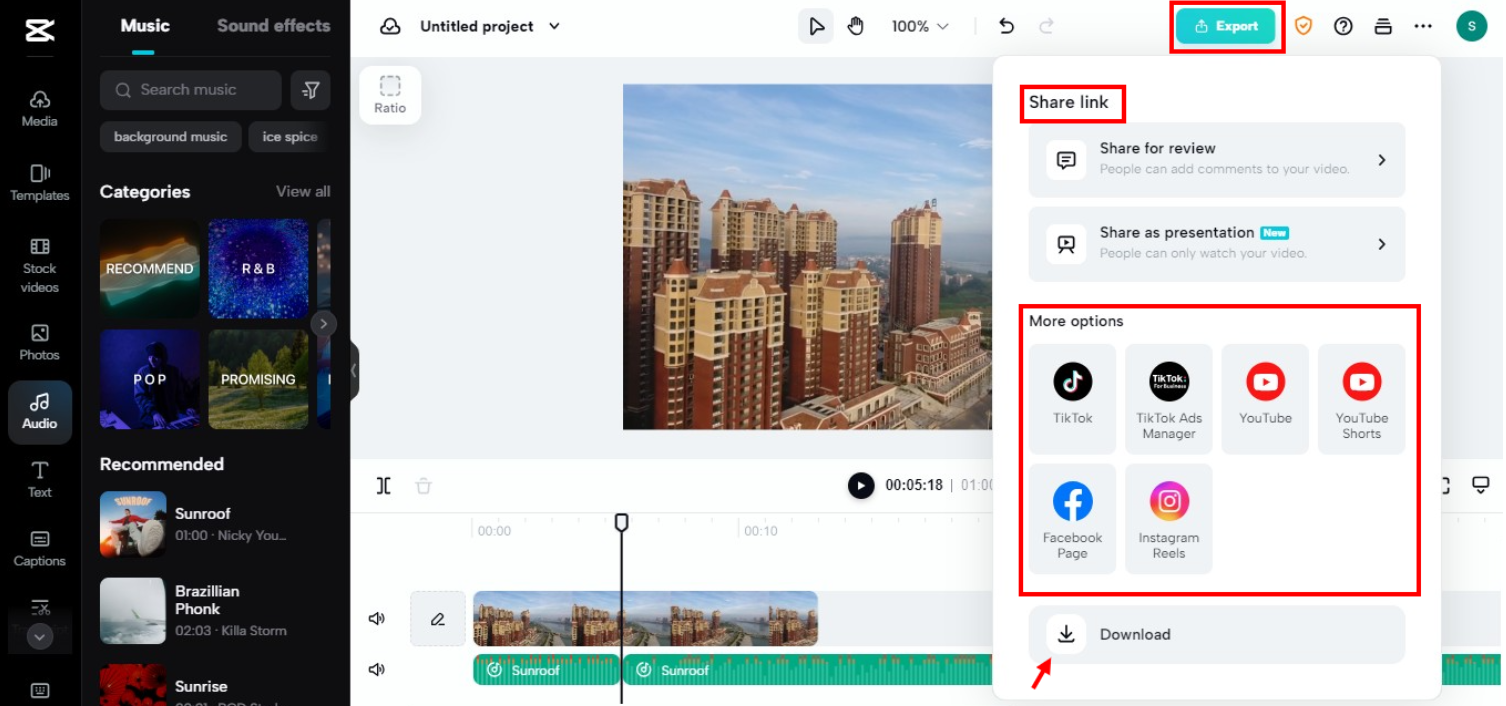
Step 4: Export and Share Your Work
Once you’re satisfied, use the preview feature to review your edit. You can even share a preview link with others for feedback. When everything looks and sounds perfect, export your video in your preferred resolution and format. CapCut lets you publish directly to platforms like TikTok, YouTube, Instagram, and more.
And that’s it! Whether you need to cut audio, enhance sound quality, or add creative effects, CapCut simplifies the process from start to finish.
CapCut — Your all-in-one video & photo editing powerhouse! Experience AI auto-editing, realistic effects, a huge template library, and AI audio transformation. Easily create professional masterpieces and social media viral hits. Available on Desktop, Web, and Mobile App.
Helpful Tips to Improve Your Audio Editing
Editing isn’t just about cutting—it’s also about making your audio sound its best. Keep these tips in mind as you work:
Balance Volume Levels
Make sure no element overpowers another. If your background music is too loud, it can drown out dialogue or narration. Use CapCut’s volume sliders to adjust each track until you achieve a clean, balanced mix.
Select Fitting Background Music
Music shapes the vibe of your video. Pick tracks that complement your content—upbeat tunes for energetic vlogs, calmer instrumentals for tutorials or documentaries. CapCut offers a built-in music library, or you can upload your own.
Experiment with Audio Effects
Small touches like reverb, echo, or fade-ins/outs can add depth and professionalism to your sound. Don’t hesitate to try different filters—sometimes a subtle effect makes a big difference.
Wrapping Up
CapCut is a robust, free, and accessible tool for all your audio editing needs. From trimming and splitting to enhancing and exporting, it offers a complete suite of features that work for beginners and experts alike.
Now that you know how to trim audio in CapCut and use its advanced tools, you’re all set to create videos that not only look great—but sound amazing, too.
Frequently Asked Questions
What are some free tools to trim audio files?
While there are many free options out there, CapCut stands out for being browser-based, easy to use, and feature-rich. It supports trimming, splitting, effect-adding, and more—all without downloading software.
Where can I find free music to use in my videos?
Platforms like YouTube Audio Library, SoundCloud, and Free Music Archive offer free tracks. Once you’ve downloaded them, you can use CapCut to edit and sync the music to your video.
How can I cut audio files on Windows?
CapCut’s online editor works on any Windows machine with a browser. It offers both simple cutting and advanced features like noise removal and beat matching—all for free.
Can I merge songs for free using CapCut?
Yes! Just import your songs into the timeline, split them where needed, and rearrange the segments. CapCut makes it easy to blend audio clips seamlessly.
We hope this guide helps you master audio editing in CapCut. Happy creating!
Some images courtesy of CapCut.