TOOL HUNTER

Summary: This guide provides a complete walkthrough on how to sync Google Drive to iPhone for photos. We cover several effective methods, including using the Google Drive and Google Photos apps, accessing Drive via your mobile browser, and transferring photos through a computer. You’ll learn how to save photos from Google Drive on iPhone and seamlessly get your pictures onto your device.
If you’re looking for ways to access your photo library stored in the cloud on your Apple device, you’ve come to the right place. Many iPhone users rely on Google Drive for photo backup but then struggle with the final step: getting those images back onto their phone’s camera roll. Whether you’ve accidentally deleted photos or simply want a local copy, syncing your Google Drive photos to your iPhone is a common need. Let’s dive into the various solutions available.
Table of Contents
- How to Sync Google Drive to iPhone Using the Official App
- Using Google Photos App to Sync and Save Pictures
- How to Access Google Drive for Photos iPhone via Mobile Browser
- Transferring Photos from Google Drive to iPhone Using a Computer
- Leveraging Share Features to Get Photos on Your iPhone
- Choosing the Best Method for You
How to Sync Google Drive to iPhone Using the Official App
The most straightforward method to get Google Drive photos on iPhone is by using the official Google Drive application. This app is designed to give you full access to your cloud storage directly from your iOS device. The process is intuitive and mirrors the experience you might have on a computer.
First, you’ll need to install the app. Head to the App Store on your iPhone and search for “Google Drive.” Download and install the free app. Once it’s on your home screen, open it and sign in with the same Google account you use for your Drive storage. This step links your cloud library to the app.
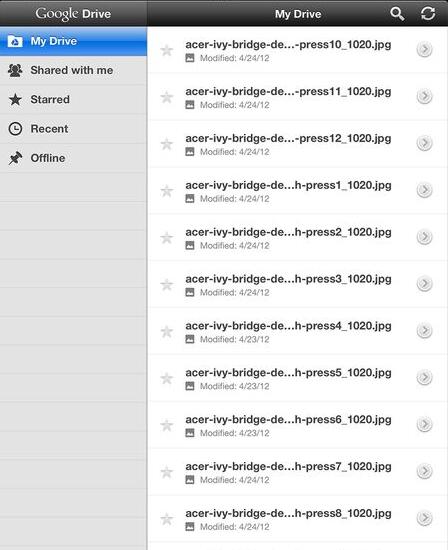
Inside the app, you’ll see your files and folders. Navigate to where your photos are stored, often in a folder named “Photos” or “Images.” You can browse “My Drive” to find them. To select a single photo, simply tap on it. If you want to save multiple photos from Google Drive on iPhone, tap the three dots (“More”) icon next to a file or use the select option (usually a checkmark or circle) to choose several items at once.
After selecting the photos, look for a download or save option. In the Google Drive app, this is often represented by a download arrow or a “Save” button. Tapping this will initiate the download. The app will typically ask where you want to save the images; choose “Save Image” to send them directly to your iPhone’s Photos app, in the Camera Roll album. This is a core part of learning how to sync Google Drive to iPhone for photos.
Once saved, you can open your iPhone’s native Photos app to find the newly transferred pictures. They will be integrated with your other photos and videos, ready to view, edit, or share. This method is perfect for quick, one-time transfers of specific albums or pictures.
Using Google Photos App to Sync and Save Pictures
Google Photos is another powerful tool from Google, and it’s deeply integrated with Google Drive. For many users, this is the preferred method for managing how to get Google Drive photos on iPhone because it’s built specifically for photos and offers excellent organization features. The key here is enabling sync between the two services.
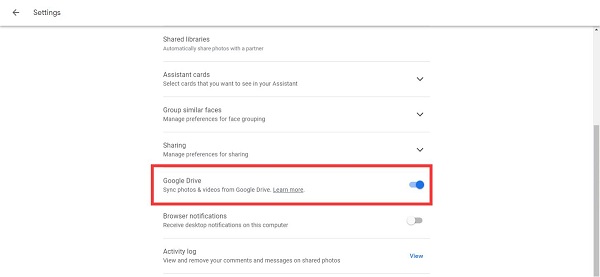
Open the Google Photos app on your iPhone (download it from the App Store if you haven’t already). Sign in with your Google account. To enable the crucial sync feature, tap on your profile picture or initial in the top right corner, then select “Photos settings.” Within settings, look for an option labeled “Google Drive.” You might find it under “Back up & sync” or a similar menu.
Here, you will see a toggle for “Sync photos & videos from Google Drive.” Make sure this is switched on. This setting tells Google Photos to automatically display any images and videos stored in specific folders in your Google Drive. It creates a unified gallery. This is the foundational step for using Google Drive for photos iPhone synchronization.
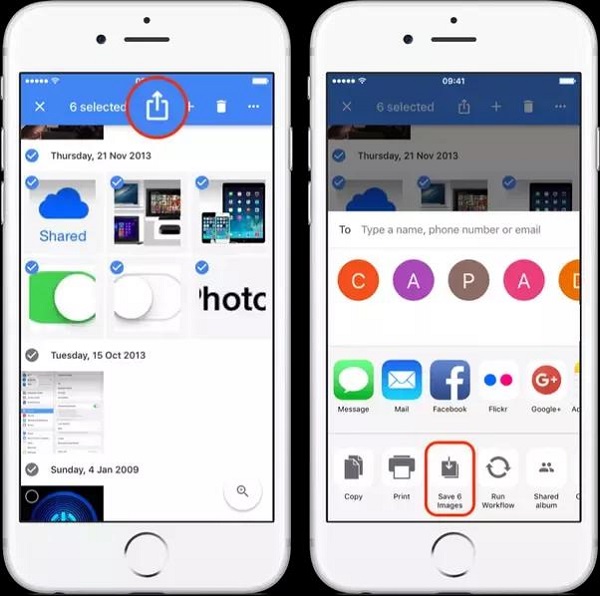
After syncing is enabled, the photos from your Drive will appear in the Google Photos app. To save them to your iPhone’s local storage, browse and select the photos you want. Tap the share icon (a square with an upward arrow) at the bottom of the screen. From the share sheet that appears, scroll and tap “Save to Photos” or “Save X Images.” The photos will then be exported to your iPhone’s Camera Roll. This process effectively solves how to save photos from Google Drive on iPhone through a dedicated photo management app.
The advantage of this method is the powerful search and organization within Google Photos. If you have thousands of pictures, finding the right ones to download becomes much easier. It also keeps a cloud backup while allowing you to have local copies on your device.
How to Access Google Drive for Photos iPhone via Mobile Browser
Maybe you don’t want to install another app, or you’re just doing a one-time download. You can absolutely access Google Drive and save photos directly through your iPhone’s web browser, like Safari or Chrome. This method is great for quick access without committing to an app installation.
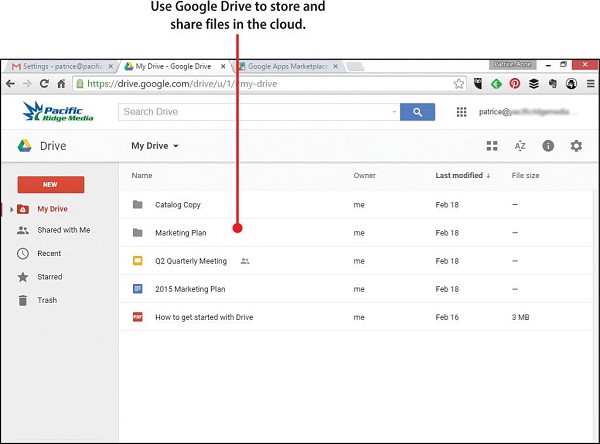
Open your browser and go to the Google Drive website: drive.google.com. Log in with your Google account credentials. The mobile version of the site is quite functional. Navigate to the folder containing your photos. To select a photo, tap and hold on its thumbnail. A context menu will pop up. Alternatively, some browser views have a select mode you can enter by tapping a checkmark icon.
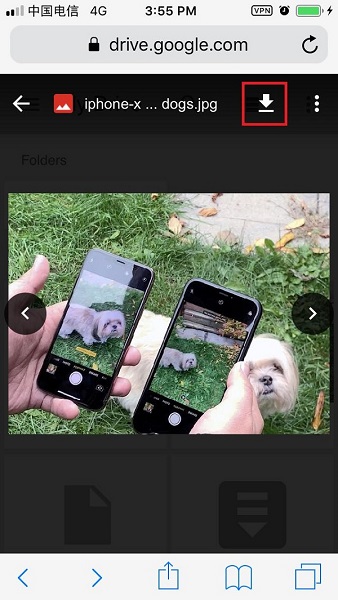
Once the photo is selected, options will appear. Look for a “Download” button or an option with a download arrow icon. Tapping it will download the image file directly to your iPhone. Your browser will usually ask for confirmation and then place the file in your “Downloads” location, from where it can be saved to Photos. This is a direct way to figure out how to get Google Drive photos on iPhone without extra software.
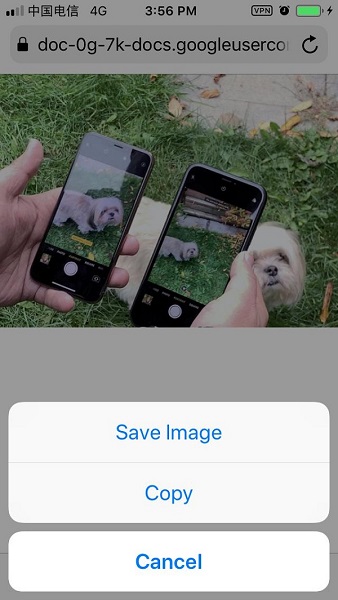
Another browser trick is to open the image preview. After tapping on a photo to open it in full-screen view within the browser, press and hold on the image itself. A standard iOS action menu will appear with the option “Save to Photos” or “Add to Photos.” Select this, and the image is saved directly to your Camera Roll. This method is incredibly simple for saving individual pictures.
While the browser method works well, it can be slightly less convenient for bulk downloads compared to the dedicated apps. However, for occasional use or when storage space is limited, it’s a perfect no-fuss solution.
Transferring Photos from Google Drive to iPhone Using a Computer
Sometimes, using a computer as a middleman is the most powerful and flexible option. This two-step process involves first downloading the photos from Google Drive to your Mac or Windows PC, and then transferring them from the computer to your iPhone. This method gives you more control over file organization and is ideal for moving large batches of photos.
Step 1: Download Photos from Google Drive to Your Computer
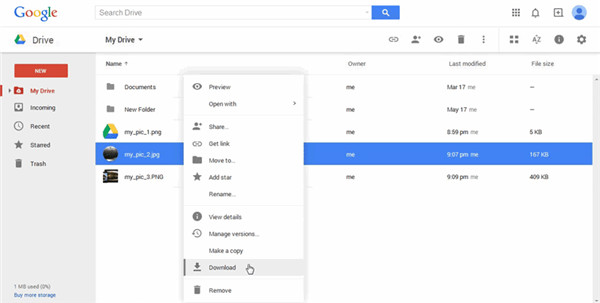
On your computer, open a web browser and go to drive.google.com. Sign in and locate your photos. You can select multiple photos or entire folders. To select multiple files, hold down the Ctrl key (or Command on Mac) and click on each photo. Once selected, right-click on one of the highlighted items and choose “Download.” Google Drive will compress the selected files into a single .zip folder for download.
After the download is complete, locate the .zip file on your computer (usually in the Downloads folder) and extract its contents to get the individual photo files. Now you have all your desired photos ready on your computer’s hard drive. This is the first half of solving how to sync Google Drive to iPhone for photos via a computer.

Step 2: Move Photos from Computer to iPhone
With the photos on your computer, you now need to get them onto your iPhone. There are several ways to do this:
- Using iTunes or Finder (Mac): Connect your iPhone to the computer via USB. On a Mac with macOS Catalina or later, open Finder, select your iPhone under Locations, and go to the “Photos” tab. Check “Sync photos to your device from” and choose the folder where you saved the downloaded Google Drive photos. Click “Apply” to sync. On Windows or older macOS, use iTunes in a similar way.
- Using iCloud Photos: You can add the downloaded photos to your iCloud Photos library on your computer. On a Mac, you can add them directly to the Photos app. On Windows, you can use iCloud for Windows and upload the photos to the iCloud Photos folder. Once uploaded, they will automatically appear on your iPhone if iCloud Photos is enabled.
- Using AirDrop (Mac): If you have a Mac, simply select the photos, right-click, choose “Share,” then “AirDrop,” and select your iPhone. This wirelessly transfers the photos directly.
- Using Email or Cloud Services: You can email the photos to yourself or upload them to another service like Dropbox, then open that email or app on your iPhone to download them. This is a more roundabout method but works in a pinch.
The computer method, while involving an extra step, is excellent for large-scale transfers and provides a good backup on your computer in the process. It’s a very reliable method for how to save photos from Google Drive on iPhone when dealing with hundreds or thousands of images.
Try Leawo iTransfer right now! 100% Safe and Reliable on Transferring Photos/Music/Contacts/SMS… between iOS Devices, iTunes, and Computer.
Get the Windows version | Get the Mac version | Use the time-limited promotional campaign

Leveraging Share Features to Get Photos on Your iPhone
Google Drive has built-in sharing features that can be creatively used to send photos to your iPhone. Essentially, you share the photos with yourself via another channel that is easily accessible on your phone.
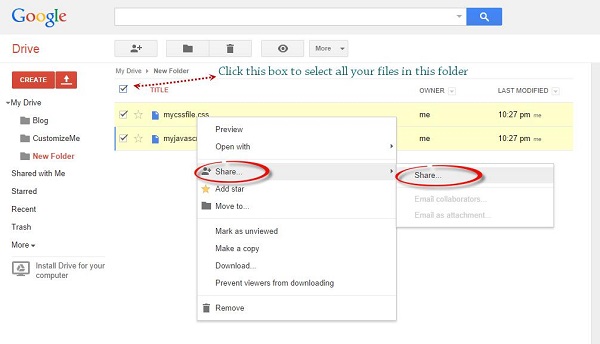
On your computer’s browser, go to Google Drive and select the photos you want. Click the “Share” button or right-click and select “Share.” In the sharing dialog, enter your own email address (the one associated with your iPhone). You can set the permission to “Viewer” or “Editor” as needed. Click “Send.”
Shortly after, you will receive an email on your iPhone with a link to the shared photos. Open the email using the Mail app or your preferred email client. Tap the link within the email; it will open the Google Drive app or website showing the shared photos. From there, you can use the “Save to Photos” method described earlier to download them. This workflow is another clever approach to learning how to get Google Drive photos on iPhone.

Alternatively, you can use the “Get link” feature in Google Drive to create a shareable link. Copy this link, send it to yourself via iMessage or a notes app, open it on your iPhone, and then save the photos. This method is particularly useful for quickly sharing a few photos between your own devices without formal email.
Choosing the Best Method for You
As you can see, there isn’t just one way to sync Google Drive to iPhone for photos. The best method depends on your specific situation:
- For regular, seamless syncing: Use the Google Photos app with sync enabled.
- For quick, one-off downloads: Use the Google Drive app or your mobile browser.
- For transferring large batches or entire libraries: Use the computer method for more control and speed.
- For simple sharing of a few files: Use the Share feature to email yourself a link.
No matter which method you choose, the result is the same: your precious memories and important images stored in Google Drive become readily available in your iPhone’s Photos app. By following these steps on how to save photos from Google Drive on iPhone, you ensure you always have access to your full picture library, blending the expansive storage of the cloud with the instant accessibility of your device.
Try Leawo iOS Data Recovery right now! 100% Recover Deleted or Lost Data from iTunes, iCloud and iOS Devices (iPhone, iPad, and iPod) Safely and Accurately!
Get the Windows version | Get the Mac version | Use the time-limited promotional campaign

Some images are sourced from the internet.