TOOL HUNTER

Video editing has become an essential skill in today’s digital world. With everyone sharing content on platforms like TikTok, Instagram, and YouTube, knowing how to edit videos properly can really make your content stand out. One of the most basic yet important editing tasks is splitting videos into smaller segments. Whether you want to remove awkward pauses, create shorter clips for social media, or simply organize your footage better, learning how to split a clip in CapCut is the perfect starting point for any beginner.
CapCut is a completely free video editing application that offers professional-level features without the complexity or cost. It’s designed to be user-friendly, making it accessible even if you’ve never edited videos before. In this comprehensive guide, we’ll walk you through everything you need to know about how to split video in CapCut, along with valuable tips to enhance your editing skills.
Why Choose CapCut for Video Splitting?
CapCut stands out as more than just a basic video cutter—it’s a complete editing suite that empowers creators with diverse tools. Here’s why it’s particularly excellent for learning how to split clips in CapCut:
The application is completely free with no hidden costs or watermarks. You get access to all features without any subscription requirements. The interface is intuitively designed, ensuring you won’t feel overwhelmed even on your first attempt at video editing.
CapCut supports virtually all video formats, whether you’re working with footage from your smartphone, digital camera, or downloaded content from the internet. This flexibility makes it incredibly versatile for various projects.
Beyond splitting capabilities, CapCut offers comprehensive editing tools including music integration, text overlays, transition effects, and color correction. This means you can complete your entire editing workflow within a single application without needing additional software.
For social media creators, CapCut simplifies the process of creating platform-specific content. Whether you need vertical videos for TikTok or Instagram Reels, or horizontal content for YouTube, learning how to split video in CapCut helps you tailor your content perfectly for each platform.
CapCut — Your all-in-one video & photo editing powerhouse! Experience AI auto-editing, realistic effects, a huge template library, and AI audio transformation. Easily create professional masterpieces and social media viral hits. Available on Desktop, Web, and Mobile App.

Step-by-Step Guide: How to Split Clips in CapCut
The process of splitting videos in CapCut is straightforward and user-friendly. Follow these detailed steps to master how to split a clip in CapCut efficiently.
Getting Started: Download and Installation
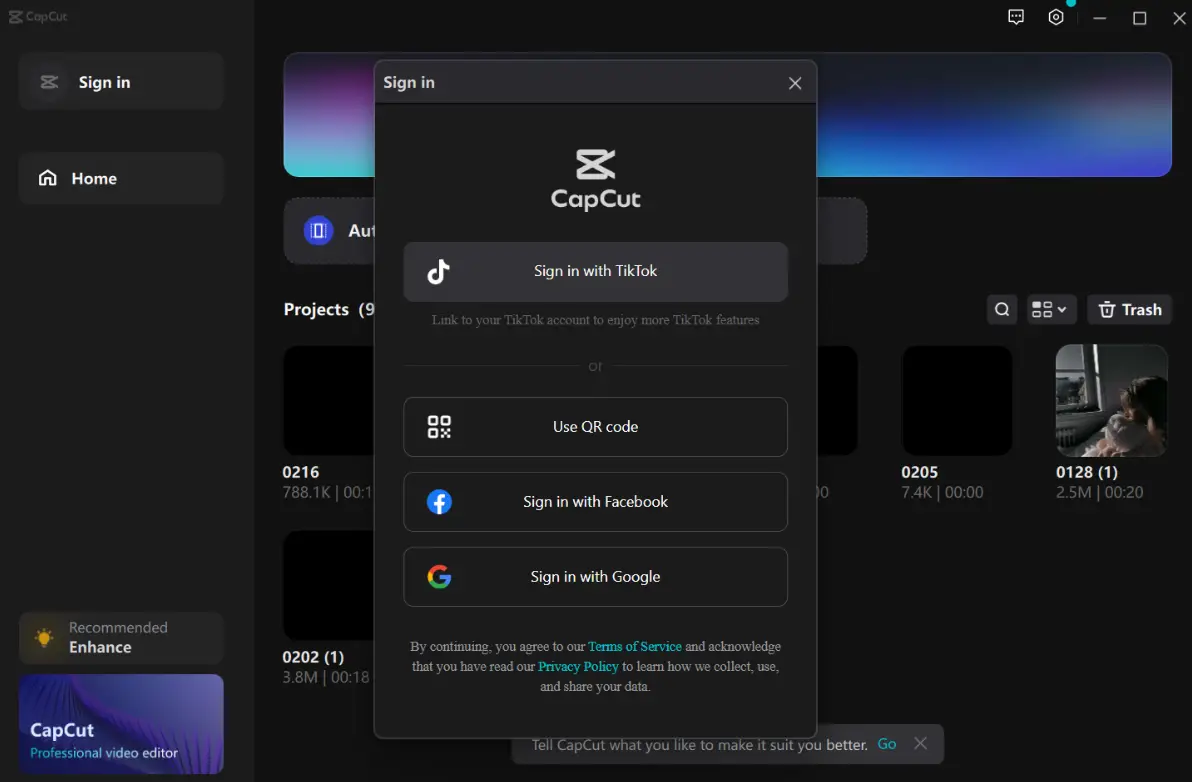
Begin by downloading CapCut from the official website or your device’s app store. The application is available for iOS, Android, Windows, and Mac systems, ensuring compatibility with most devices. After installation, launch the application and create an account using your Google, Facebook, or TikTok credentials. This account allows you to save projects online and access them across different devices.
Importing Your Footage
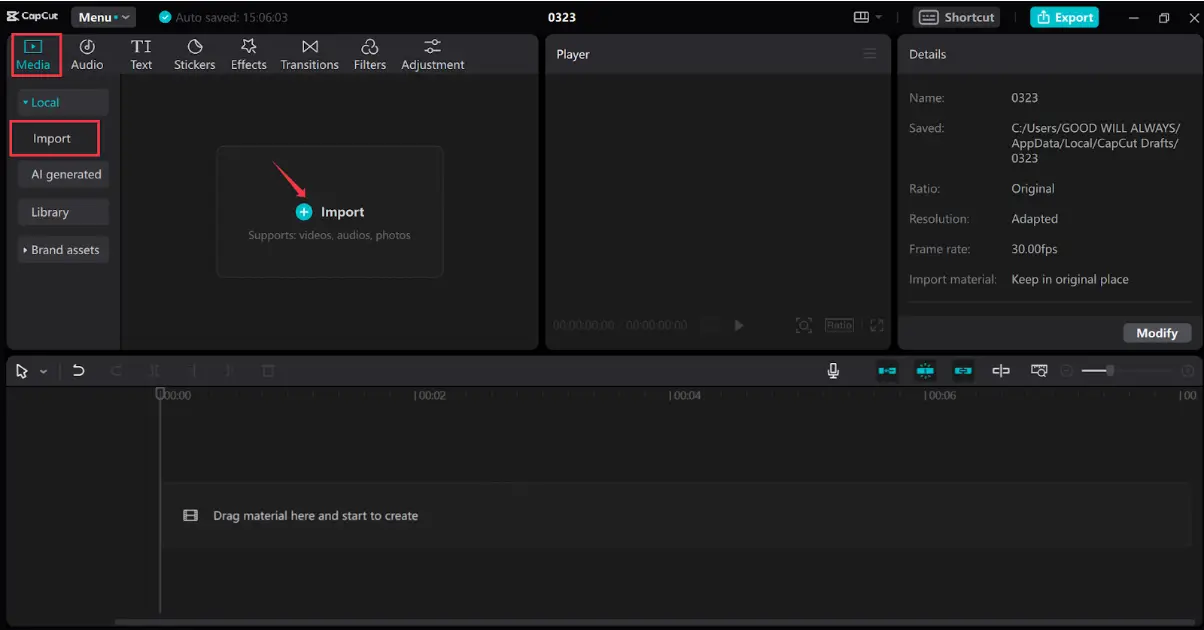
Once you’ve set up your account, start a new project by clicking the “Create project” button. Select the video file you want to edit from your device’s storage. CapCut allows you to import multiple videos simultaneously if you’re working on a more complex project. After selection, your video will appear in the timeline at the bottom of the screen—this is where all your editing magic happens.
The Splitting Process: How to Split Video in CapCut
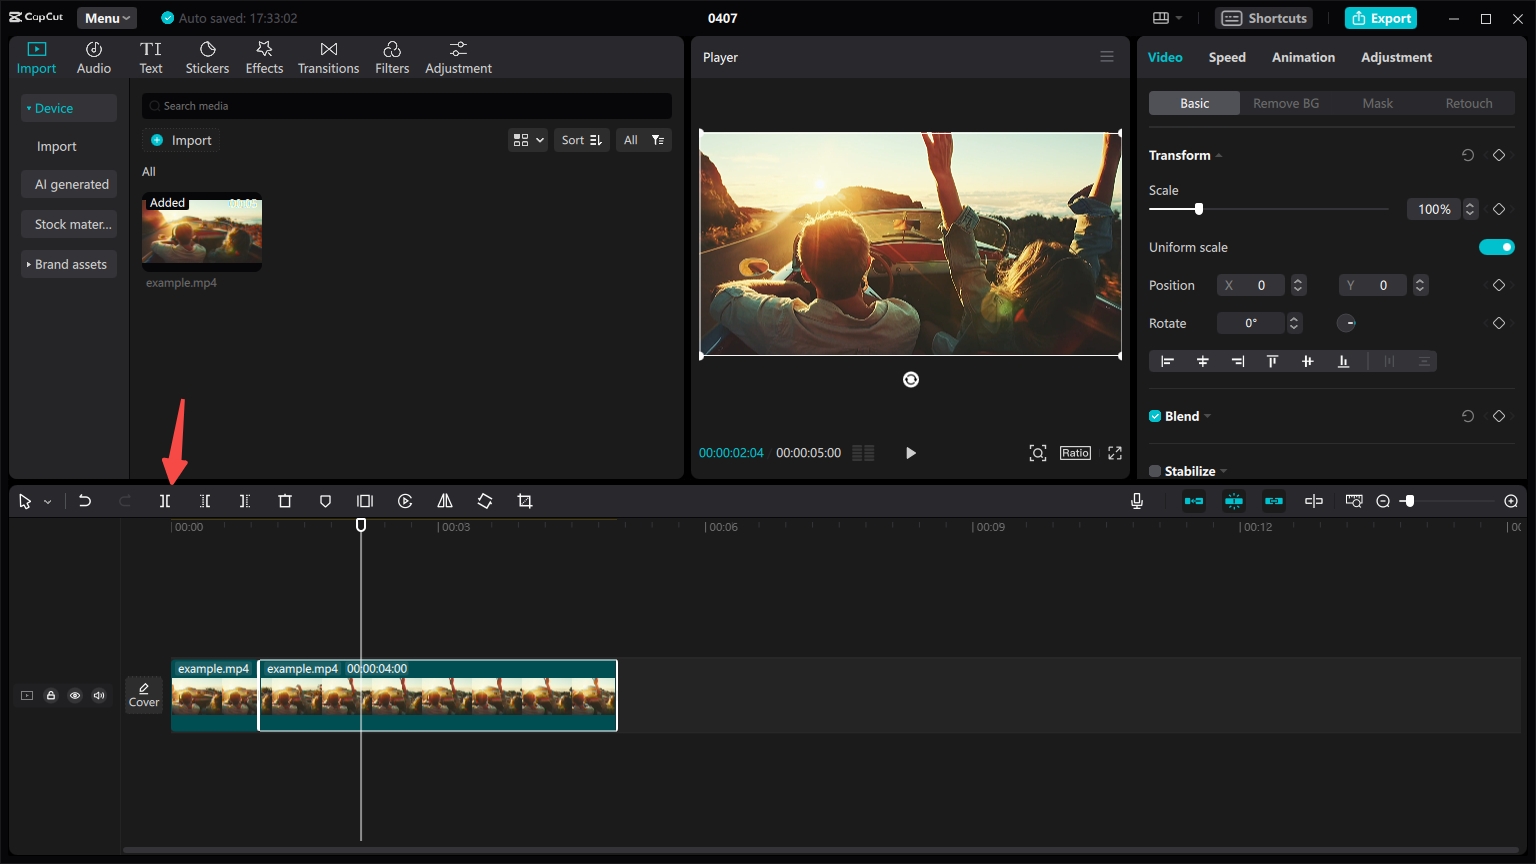
This is the core of learning how to split clips in CapCut. Navigate through your video using the playhead (the vertical line that indicates your current position in the timeline). Play your video and pause at the exact moment where you want to make a cut. Locate the split button, which typically resembles scissors or a razor blade icon. Click this button, and your video will separate into two distinct segments at that point.
You can repeat this process as many times as needed to create multiple segments. If you need to remove unwanted sections, simply select the segment you want to eliminate and press the delete key. This demonstrates how to cut out parts of a video on CapCut effectively.
Beyond basic splitting, CapCut offers additional editing capabilities. You can trim clips by dragging their edges in the timeline, add smooth transitions between segments, incorporate background music, and insert text overlays. These features allow you to create polished, professional-looking videos directly within the application.
Exporting Your Edited Video
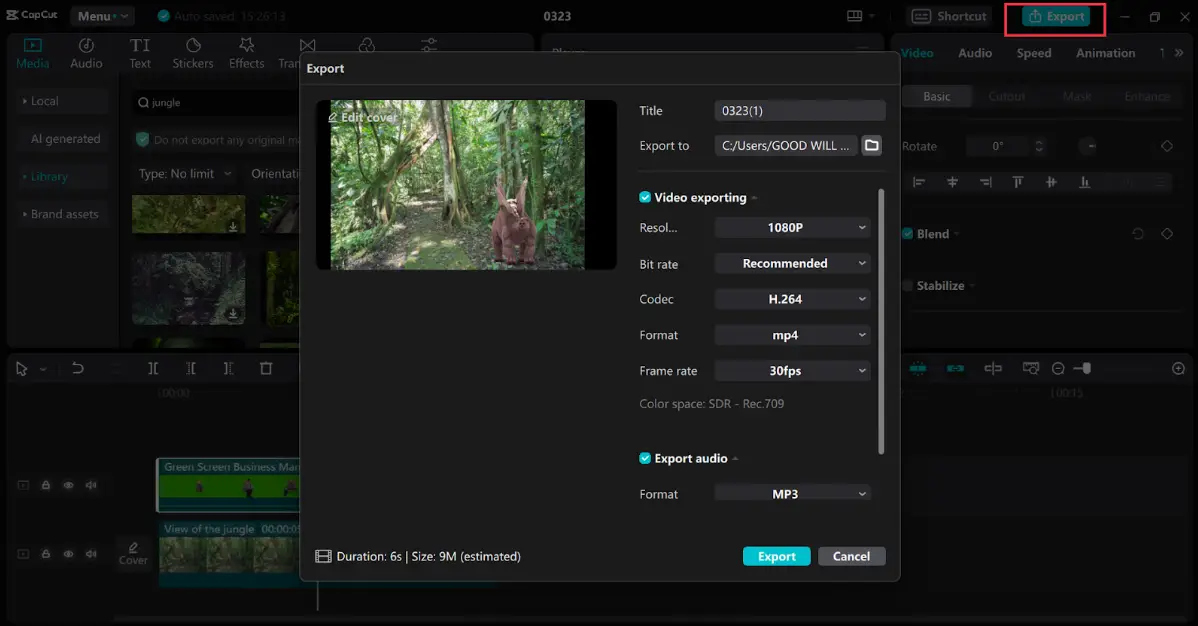
After completing your edits, it’s time to export your project. Click the export button and select your preferred quality settings, format, and resolution based on your needs. CapCut provides direct sharing options to social media platforms including YouTube, TikTok, and Instagram. Alternatively, you can save the video to your device for later use or further editing.
Congratulations! You’ve now mastered the fundamental process of how to split a clip in CapCut. The entire process is designed to be intuitive and accessible for editors of all skill levels.
Advanced Tips for Effective Video Splitting in CapCut
Now that you understand the basic mechanics of how to split video in CapCut, here are some professional tips to enhance your editing results:
Utilize the zoom function on your timeline for precision editing. When you need to make exact cuts, zooming in provides greater accuracy, which is particularly useful when learning how to split clips in CapCut at specific frames.
Incorporate transitions between your split segments. If you’ve divided your video into multiple parts, adding transitions like fades, wipes, or slides can create smoother visual flow and enhance viewer engagement.
Enhance your video with audio elements. CapCut includes an extensive library of royalty-free music and sound effects. You can adjust volume levels between your original audio and added music tracks to create the perfect audio balance.
Experiment with visual enhancements. Apply color filters, special effects, or stabilization tools to improve your video’s quality. These features are easily accessible and can significantly upgrade your content’s professional appearance.
Don’t overlook text and title options. If you’re creating tutorials, vlogs, or storytelling content, text overlays can provide context, emphasize points, or add narrative structure to your videos. CapCut offers various fonts, styles, and animation options for text elements.
Leverage AI-powered features. CapCut includes artificial intelligence tools that can automatically remove background noise, stabilize shaky footage, and even suggest editing improvements. These smart features save time while enhancing your final product.
Practice regularly with different types of content. The more you use CapCut, the more comfortable you’ll become with its features. Experiment with various video styles to discover all the capabilities available to you.
CapCut — Your all-in-one video & photo editing powerhouse! Experience AI auto-editing, realistic effects, a huge template library, and AI audio transformation. Easily create professional masterpieces and social media viral hits. Available on Desktop, Web, and Mobile App.
Why CapCut is Ideal for Video Splitting and Editing
CapCut represents the perfect balance between powerful functionality and user-friendly design. Whether you’re completely new to video editing or have some experience, CapCut makes the process of learning how to split a clip in CapCut straightforward and enjoyable.
The application is completely free without compromising on features, works across multiple devices and platforms, and provides all the tools necessary to create high-quality video content. Once you master how to split video in CapCut, you’ll discover a wide range of additional features that can elevate your editing skills further.
For your next video editing project, remember that CapCut offers a comprehensive solution that meets both basic and advanced editing needs while remaining accessible to beginners.
Frequently Asked Questions
How do I split a clip in CapCut?
To split a clip in CapCut, import your video into the timeline, position the playhead where you want the split to occur, and click the split button (scissors icon). This will divide your video into separate segments at that point.
Is CapCut completely free for splitting videos?
Yes, CapCut is completely free without any hidden costs. You can split videos and access all other features without paying anything, and there are no watermarks on exported videos.
How do I remove unwanted sections after splitting?
After learning how to split clips in CapCut, simply select the segments you want to remove and press the delete key. This will eliminate those sections from your final video.
Is CapCut suitable for beginners?
Absolutely. CapCut is specifically designed with beginners in mind. The interface is intuitive, and the learning curve for basic functions like how to split video in CapCut is very gentle.
Can I make additional edits after splitting my video?
Yes, each segment can be edited individually after splitting. You can trim, add effects, incorporate music, or insert text into each separate clip according to your needs.
What’s the best way to export my edited video?
Click the export button and choose your preferred quality settings. You can then save the video to your device or share it directly to social media platforms through CapCut’s integrated sharing options.
Does CapCut offer advanced features beyond basic splitting?
Yes, CapCut includes advanced features like keyframe animation, color grading tools, AI enhancements, and numerous special effects that allow for professional-level video editing.
We hope this guide has been helpful in teaching you how to split a clip in CapCut effectively. With practice, you’ll be creating beautifully edited videos in no time!
Some images courtesy of CapCut