 TOOL HUNTER

Have you ever found yourself in a situation where you needed to restore from iCloud backup but didn’t want to go through the hassle of resetting your device? You’re not alone. Many iPhone users face this exact dilemma when they need to recover lost data or transfer information to a new device. The thought of resetting your phone and potentially losing important data can be pretty scary.
The good news is that there are actually several ways to restore from iCloud backup without resetting your device. Whether you’re trying to recover deleted photos, important messages, or just want to transfer specific files, you have options that don’t involve wiping your device clean.
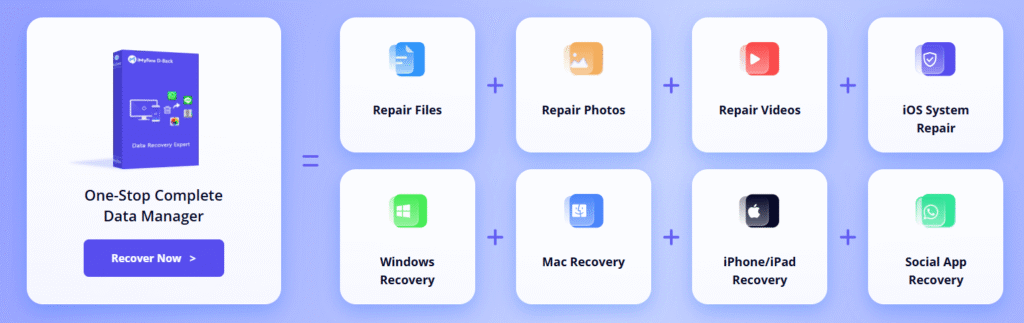
iMyFone D-Back.All-in-one Data Recovery Software: You can recover deleted, lost, formatted, or corrupted files from iOS/Android devices and PCs in one tool.1000+ Data Types Recovery: Restore photos, videos, messages, contacts, office documents, emails, audio, etc. without backup.Third-Party App Recovery: Retrieve messages and attachments directly from WhatsApp, LINE, Kik, WeChat, Skype and more.iOS Data Backup: Securely back up various data from your iOS device, reducing the risk of data loss.
Check More Details | Download Now! | Check All Deals
In this comprehensive guide, we’ll walk you through three different methods to help you restore iPhone from backup without erasing your current data. We’ll cover everything from the official Apple method to more flexible third-party solutions that give you greater control over what you recover.
Table of Contents
- Understanding iCloud Backup Restoration
- Method 1: Official iCloud Restore Process
- Method 2: Selective iCloud Restoration Without Reset
- Method 3: Accessing iCloud Data Through iCloud.com
- Comprehensive Guide to iCloud Backup
- Common iCloud Restoration Issues and Solutions
- Best Practices for iCloud Data Management
Understanding iCloud Backup Restoration
Before we dive into the specific methods, it’s helpful to understand what we mean when we talk about restoring from iCloud backup. Your iCloud backup is essentially a snapshot of your device’s data at a specific point in time. This includes your photos, messages, app data, device settings, and much more.
The traditional method of restoring from iCloud involves resetting your device completely and then loading the backup file. This process essentially replaces everything on your device with the data from your backup. While this method works, it’s not always ideal, especially if you only need to recover specific files or if you’ve created new data since your last backup that you don’t want to lose.
That’s where alternative methods come in handy. Being able to selectively restore from iCloud backup gives you much more flexibility and control over your data recovery process.
Method 1: Official iCloud Restore Process
Let’s start with the official method that Apple provides for restoring your device from an iCloud backup. This is the method that Apple recommends and supports, but it does require you to reset your device, which is exactly what we’re trying to avoid in most cases. Still, it’s important to understand how this works.
The standard process to restore from iCloud backup using Apple’s official method goes like this:
First, you need to make sure your device is updated to the latest iOS version. You can check this by going to Settings > General > Software Update. If there’s an update available, download and install it before proceeding.
Next, verify that you have a recent backup available. Go to Settings > [your name] > iCloud > Manage Storage > Backups to see your available backups and when they were created.
Now comes the part that makes most people nervous. You need to go to Settings > General > Reset and tap on “Erase All Content and Settings.” This will completely wipe your device, so make absolutely sure you have a recent backup before doing this.
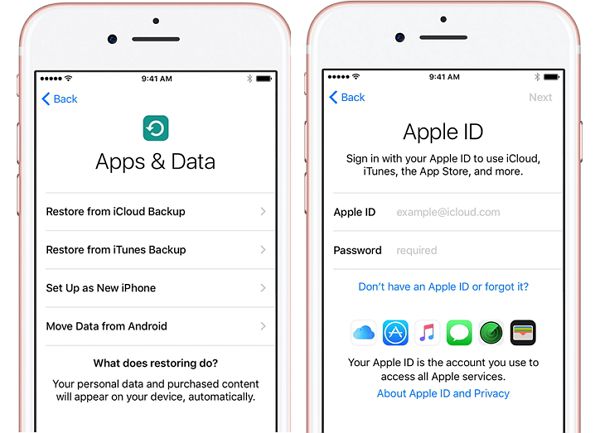
After your device restarts, you’ll see the setup screen. Follow the prompts until you reach the Apps & Data screen, where you’ll select “Restore from iCloud Backup.” You’ll need to sign in with your Apple ID, then choose from the list of available backups in iCloud.
Limitations of the Official Method
While this method does allow you to restore from iCloud backup, it has several significant drawbacks that make it less than ideal for many situations.
The biggest issue is that you will lose any data created since your last backup. If your most recent iCloud backup is from a week ago, you’ll lose everything you’ve done on your device in the past week. This includes new photos, messages, app data, and any changes to your settings.
Another major limitation is that you can’t preview what’s in the backup before restoring. You’re essentially committing to restoring the entire backup without knowing exactly what it contains. You might choose a backup that doesn’t have the specific files you need, only discovering this after the lengthy restoration process is complete.
The restoration process itself can be quite time-consuming, especially if you have a large backup file or a slow internet connection. There’s also the risk that your device might get stuck during the restore process, which can be frustrating to resolve.
These limitations are exactly why many people look for alternative ways to restore iPhone from backup without going through the reset process.
Method 2: Selective iCloud Restoration Without Reset
Now let’s talk about the solution that most people are actually looking for – how to restore from iCloud backup without resetting your device. This is where third-party tools come into play, and they offer a much more flexible approach to data recovery.
The big question many people have is: “Can you really restore from iCloud backup without reset?” The answer is a definite yes, thanks to specialized software designed specifically for this purpose.
iMyFone D-Back.All-in-one Data Recovery Software: You can recover deleted, lost, formatted, or corrupted files from iOS/Android devices and PCs in one tool.1000+ Data Types Recovery: Restore photos, videos, messages, contacts, office documents, emails, audio, etc. without backup.Third-Party App Recovery: Retrieve messages and attachments directly from WhatsApp, LINE, Kik, WeChat, Skype and more.iOS Data Backup: Securely back up various data from your iOS device, reducing the risk of data loss.
Check More Details | Download Now! | Check All Deals
One of the most popular and reliable tools for this purpose is iMyFone D-Back, which works with iOS 17 and earlier versions. This type of software acts as an iCloud data extractor, allowing you to access your iCloud backup files and extract only the data you need, without affecting the existing data on your device.
Key Benefits of Using Selective Restoration Tools
These specialized tools offer several advantages over the official restoration method:
They allow you to preview the contents of your backup before restoring anything. This means you can see exactly what files are available and choose only the ones you need to recover.
You can selectively restore specific file types or even individual files. Don’t need to recover all your photos? Just select the ones you want. Only need certain messages? No problem.
There’s no risk of data loss on your current device since you’re not resetting anything. Your existing data remains completely untouched throughout the process.
The restoration process is typically faster since you’re only downloading and restoring specific files rather than an entire backup.
These tools often support recovery from multiple sources, not just iCloud. You can also recover data from iTunes backups or directly from your iOS device if needed.
They work with a wide range of file types including contacts, photos, messages, WhatsApp conversations, notes, and much more.
How to Use Selective Restoration Software
The process for using these tools is generally straightforward. While the exact steps may vary slightly between different software, here’s what you can typically expect:
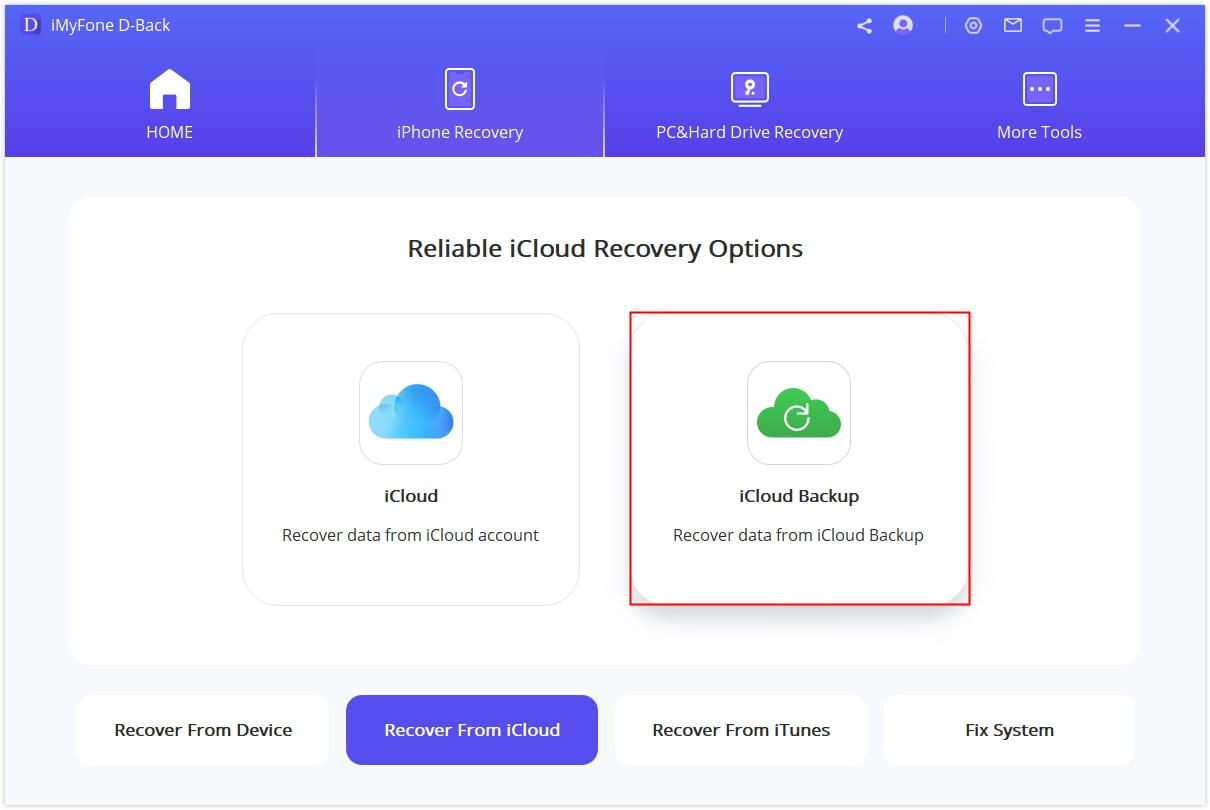
First, you’ll download and install the software on your computer. Once launched, you’ll select the “Recover from iCloud backup” option from the main menu.
The software will prompt you to sign in to your iCloud account. Don’t worry – reputable tools use secure encryption and don’t store your login information.
After signing in, you’ll see a list of available backups associated with your account. You can select the most recent backup or choose an older one if needed.
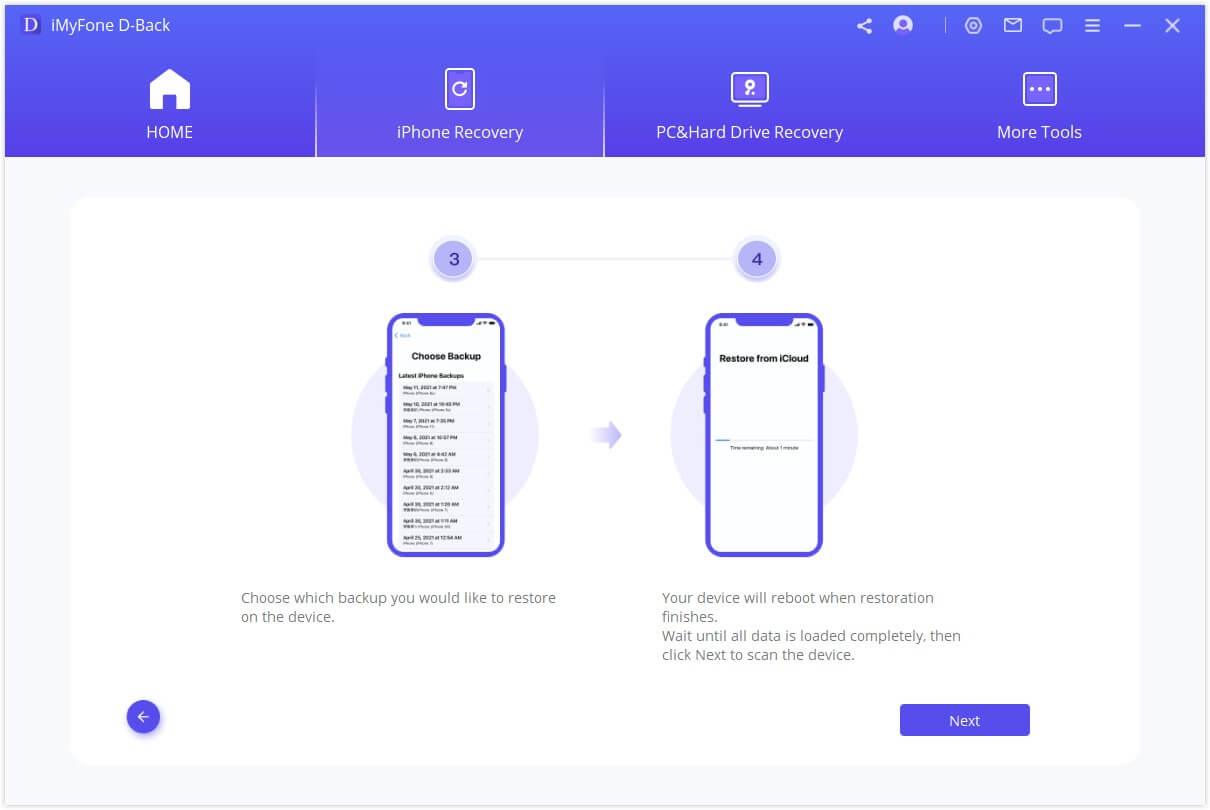
The software will then download and scan the backup file. This process might take some time depending on the size of your backup and your internet speed.
Once the scan is complete, you’ll be able to browse through all the recoverable files organized by category. You can preview photos, read messages, and check other file types to make sure they’re what you need.
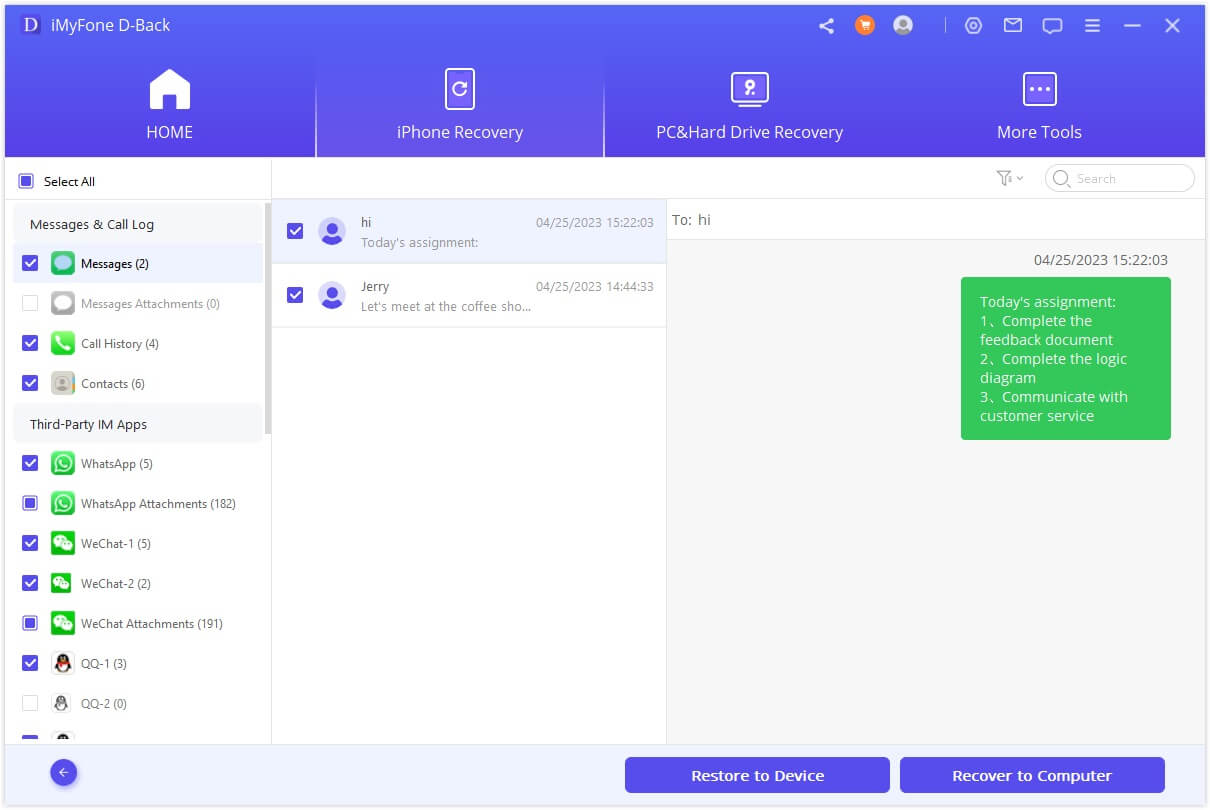
Finally, you select the specific files you want to restore and choose a location on your computer to save them. The software will then extract and save those files from the backup.
This method gives you complete control over the restoration process and allows you to recover backup from iCloud without any risk to your current device data.
Comparing Restoration Methods
When you’re trying to decide between the official restoration method and using selective restoration software, it helps to understand the key differences:
The official iCloud restore requires you to have a complete iCloud backup and involves resetting your device. With selective restoration tools, you can recover from iCloud, iTunes, or directly from your device without any reset required.
Selective restoration gives you the ability to choose specific files and data types to recover, while the official method is all-or-nothing – you either restore the entire backup or nothing at all.
The speed of restoration with official methods depends heavily on your internet connection and backup size, while selective tools are often faster since they’re working with smaller amounts of data.
Customization options are very limited with official restoration, but selective tools offer various recovery options and settings to fine-tune the process.
Most importantly, selective restoration tools have a much higher success rate for targeted data recovery and eliminate the risk of data loss that comes with device resetting.
Method 3: Accessing iCloud Data Through iCloud.com
Another way to recover some of your iCloud data without resetting your device is by using iCloud.com. This method won’t give you access to everything in your backup, but it can be useful for recovering certain types of data.
Here’s how to access your data through iCloud.com:
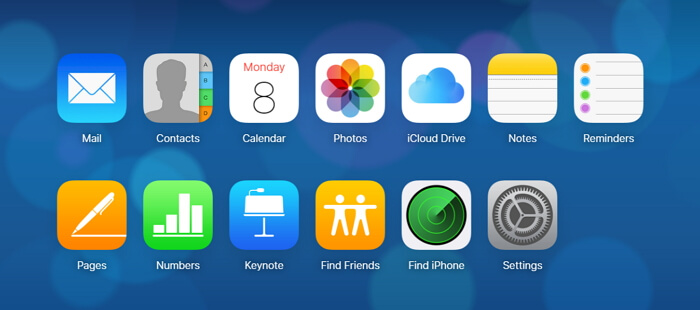
On your computer, open a web browser and go to icloud.com. Sign in with your Apple ID and password – the same one you use on your iPhone.
Once you’re logged in, you’ll see various icons representing different types of data that are synced with iCloud. These typically include Photos, Mail, Contacts, Calendar, Notes, and others depending on your iCloud settings.
You can click on any of these icons to access the corresponding data. For example, if you need to recover contacts, you can click on the Contacts app and export them to your computer.
Limitations of iCloud.com Access
While accessing iCloud.com is convenient for some types of data recovery, it has significant limitations:
You can only access data that’s actively syncing with iCloud, not necessarily everything that’s in your backup file. Some data types only sync when certain conditions are met.
Many important data types aren’t accessible through iCloud.com, including WhatsApp attachments, SMS and iMessage conversations, voice memos, and some app data.
You can’t restore this data directly to your iPhone – you can only view it online or download it to your computer, then manually transfer it back to your device if needed.
The interface is designed for viewing and managing synced data, not for comprehensive backup restoration.
Despite these limitations, iCloud.com can still be useful for quick access to certain types of data like contacts, notes, or photos that are syncing with iCloud.
Comprehensive Guide to iCloud Backup
To make the most of any restoration method, it helps to understand how iCloud backup works and how to manage it effectively.
Creating iCloud Backups
Before you can restore from iCloud backup, you need to have backups available. Here’s how to ensure your device is backing up properly:
Make sure your iPhone is connected to Wi-Fi, since iCloud backups require a wireless internet connection.
Open the Settings app on your iPhone and tap on your name at the top, then select iCloud. If you’re using an older iOS version, you might go directly to iCloud in Settings.
Tap on “iCloud Backup” – this might be called just “Backup” in some older iOS versions.
Toggle on “iCloud Backup” if it isn’t already enabled. With this turned on, your device will automatically back up when it’s connected to power, locked, and on Wi-Fi.
You can also manually trigger a backup by tapping “Back Up Now.” Make sure you stay connected to Wi-Fi until the process completes.
To verify your backup was successful, go to Settings > [your name] > iCloud > Manage Storage > Backups. Your device should be listed with the time and size of the most recent backup.
Managing iCloud Storage
One common issue people encounter when trying to backup or restore from iCloud is running out of storage space. iCloud gives you 5GB of free storage, which often isn’t enough for complete device backups.
You can check your iCloud storage by going to Settings > [your name] > iCloud. At the top, you’ll see a bar showing how much storage you’re using.
If you’re running low on space, you have a few options:
You can upgrade your storage plan by tapping “Manage Storage” then “Change Storage Plan.” Apple offers various paid tiers with more storage.
You can manage what’s being backed up by going to Settings > [your name] > iCloud > Manage Storage > Backups, then selecting your device. Here you can turn off backup for specific apps that you don’t need in your backup.
You can delete old backups you no longer need from the Manage Storage screen.
Regularly managing your iCloud storage ensures you’ll have space for new backups and can successfully restore from iCloud backup when needed.
Common iCloud Restoration Issues and Solutions
Even with the right tools and methods, you might encounter some challenges when trying to restore your data. Here are some common issues and how to address them.
Restoration Taking Too Long
One of the most frequent complaints about iCloud restoration is how long it can take. The time required to restore from an iCloud backup varies significantly depending on several factors.
The size of your backup is the biggest factor – larger backups naturally take longer to download and restore.
Your internet connection speed plays a huge role. A faster Wi-Fi connection will significantly reduce restoration time.
The amount of data being restored affects the duration. This is why selective restoration can be much faster than full device restoration.
Network congestion can sometimes slow things down, especially during peak usage times.
If restoration seems to be taking unusually long, make sure you have a stable internet connection and be patient. For selective restoration, the process is typically much quicker since you’re working with smaller amounts of data.
Interrupted Restoration Process
What happens if your restoration gets interrupted? This depends on which method you’re using.
With the official restoration method that involves resetting your device, an interruption usually means you’ll need to start the process over from the beginning. This is why it’s crucial to maintain a stable internet connection throughout the process and not restart your device or log out of your iCloud account during restoration.
With selective restoration tools, interruptions are less critical. Since you’re not resetting your device, you can typically resume the process or start over without any negative consequences to your device.
Stuck on “Estimating Time Remaining”
Sometimes during the official restoration process, your iPhone might get stuck on the “Estimating Time Remaining” screen. If this happens, there are several troubleshooting steps you can try:
Restart your iPhone and begin the restoration process again.
If possible, stop the restore backup process and try again later.
Make sure your device is updated to the latest iOS version.
Check your internet connection and try connecting to a different Wi-Fi network if possible.
Consider using a selective restoration tool instead, which often provides more reliable progress indicators.
iMyFone D-Back.All-in-one Data Recovery Software: You can recover deleted, lost, formatted, or corrupted files from iOS/Android devices and PCs in one tool.1000+ Data Types Recovery: Restore photos, videos, messages, contacts, office documents, emails, audio, etc. without backup.Third-Party App Recovery: Retrieve messages and attachments directly from WhatsApp, LINE, Kik, WeChat, Skype and more.iOS Data Backup: Securely back up various data from your iOS device, reducing the risk of data loss.
Check More Details | Download Now! | Check All Deals
Best Practices for iCloud Data Management
To make future restoration processes smoother, it’s helpful to follow some best practices for managing your iCloud data and backups.
Regular Backup Schedule
The most important practice is to maintain regular backups. While iCloud can automatically back up your device daily when connected to power and Wi-Fi, it’s a good idea to occasionally manually trigger a backup before making significant changes to your device or installing major updates.
You can manually back up by going to Settings > [your name] > iCloud > iCloud Backup > Back Up Now. Make sure you’re connected to Wi-Fi and stay connected until the process completes.
Verify Your Backups
Periodically check that your backups are completing successfully and contain the data you expect. Go to Settings > [your name] > iCloud > Manage Storage > Backups to see your available backups and their sizes.
If you notice that a backup is much smaller than expected, it might indicate that some data isn’t being included in the backup. Check your backup settings to make sure important apps are set to back up.
Understand What’s Included
It’s important to understand what iCloud backup actually includes and what it doesn’t. iCloud backup includes:
- Device settings and home screen layout
- App data for most apps
- Photos and videos in your Camera Roll
- Messages (iMessage, SMS, and MMS)
- Ringtones and visual voicemail
iCloud backup does not include:
- Data already stored in iCloud

