TOOL HUNTER

Have you ever found yourself staring at a password-protected Word document, completely unable to remember what password you set? Or maybe you’ve received a document from someone else that’s locked, and you need to edit it but can’t figure out how to remove the password protection? You’re definitely not alone in this frustrating situation.
Microsoft Word’s password protection feature is great for keeping sensitive information secure, but it can become a real headache when you need to access your own files and can’t remember the password. Whether it’s a document you protected years ago or one that someone else shared with you, being locked out of your own files is incredibly annoying.
The good news is that there are several ways to remove password from Word document, whether you’re dealing with a document that requires a password just to open it, or one that lets you view the content but prevents you from making changes. In this comprehensive guide, we’ll walk you through multiple methods to help you regain access to your documents.
Understanding Different Types of Word Document Protection
Before we dive into the solutions, it’s important to understand that Word offers different types of password protection. Knowing which type you’re dealing with will help you choose the right approach.
Some documents have an “open password” – this means you need to enter a password just to view the document contents. Other documents might be readable but have editing restrictions, requiring a password to make any changes. There’s also what’s called “restrict editing” protection, which limits what types of changes you can make to the document.
Each type of protection requires a slightly different approach when you need to remove password protection from Word. The methods we’ll cover address all these scenarios, so you’ll be prepared no matter what type of locked document you’re facing.
How to Remove Editing Restrictions from Word Documents
Let’s start with situations where you can open and read a Word document, but you can’t make changes to it. This is a common scenario when someone has shared a document with you but wants to prevent unauthorized edits.
Using Professional Password Removal Software
When you need a reliable solution to remove password from Word document, specialized software often provides the most straightforward approach. These tools are specifically designed to handle various types of Word document protection.
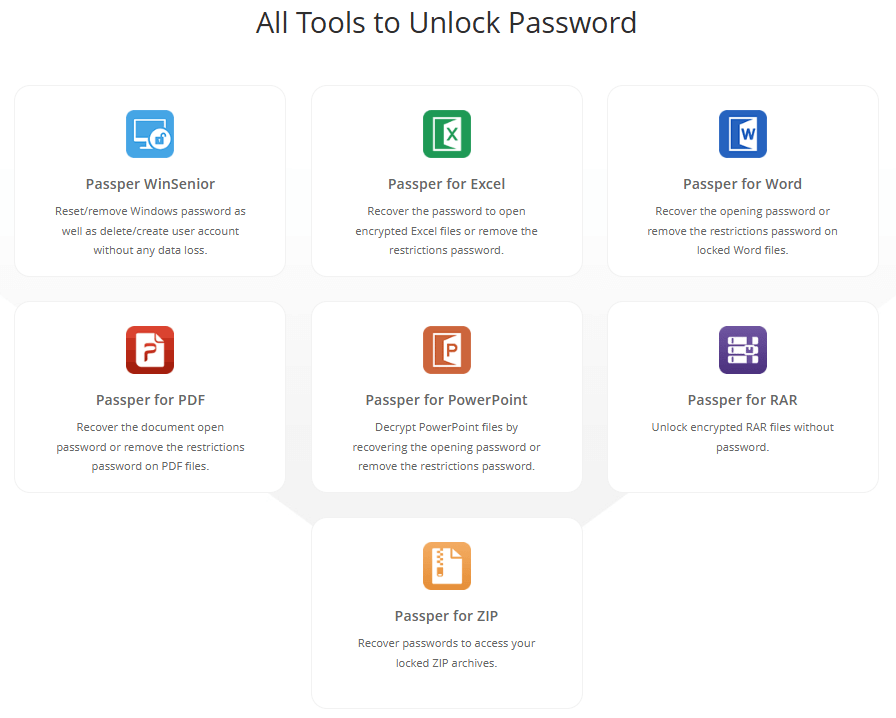
One such tool that has gained popularity for its effectiveness is iMyFone Passper for Word. This software serves as a comprehensive doc password remover that can handle both opening passwords and editing restrictions.
What makes professional tools like this stand out is their ability to remove password protection without damaging your document’s content. They’re designed to be user-friendly, so you don’t need technical expertise to use them effectively.
Here’s what you can typically expect from quality password removal software:
- Ability to remove edit restrictions quickly, often in just seconds
- Support for various Word file formats including .doc, .docx, and .docm
- Compatibility with different versions of Microsoft Word
- No risk of damaging your original document content
- User-friendly interface that guides you through the process
The process usually involves just a few simple steps: you install the software, select your protected document, choose the appropriate removal option, and let the program do its work. Within moments, you’ll have full editing access to your document.
iMyFone Passper Pro.Ultimate 6-in-1 File Password Remover.1-click to remove Excel/Word/PDF/RAR/ZIP/PowerPoint passwords.Unlock file passwords to read, edit or print easily.Remove read-only file protection permanently.Break file locks with up to 99% sucessful rate.
Step-by-Step Guide to Using Password Removal Software
If you decide to use dedicated software to remove docx password protection, the process is usually quite straightforward. Let’s walk through a typical workflow using iMyFone Passper as an example:
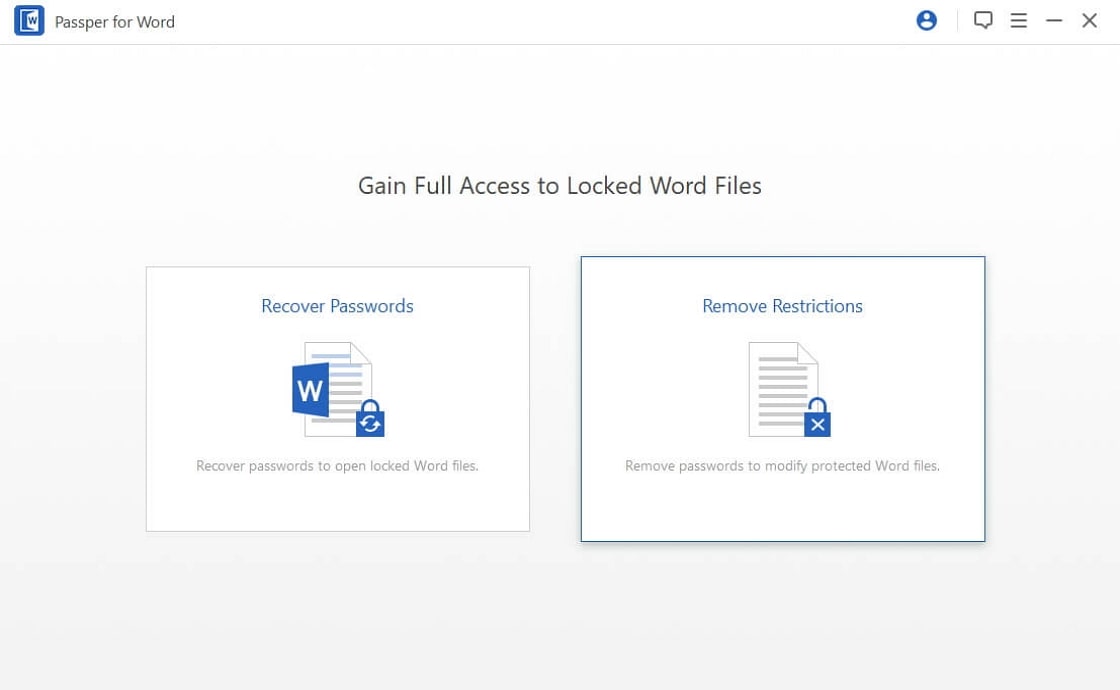
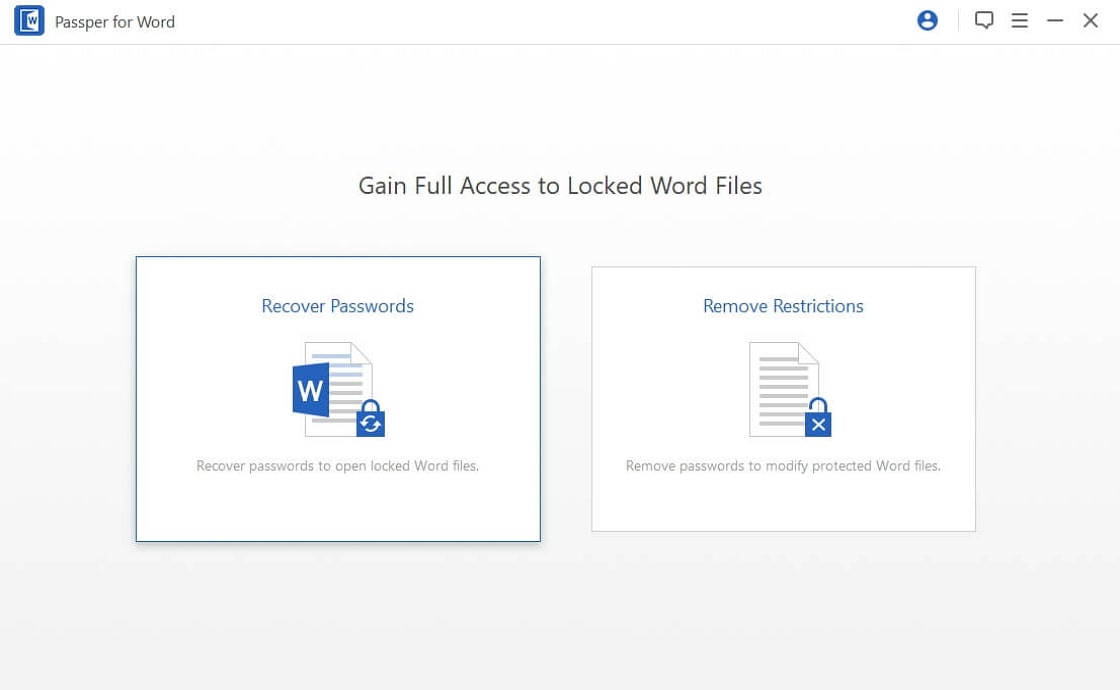
First, you’ll need to download and install the software on your computer. Once installed, launch the program and look for the option to remove restrictions – this is typically clearly labeled on the main interface.
Next, you’ll add your password-protected Word document to the program. This usually involves clicking an “Add” or “+” button and selecting the file from your computer.
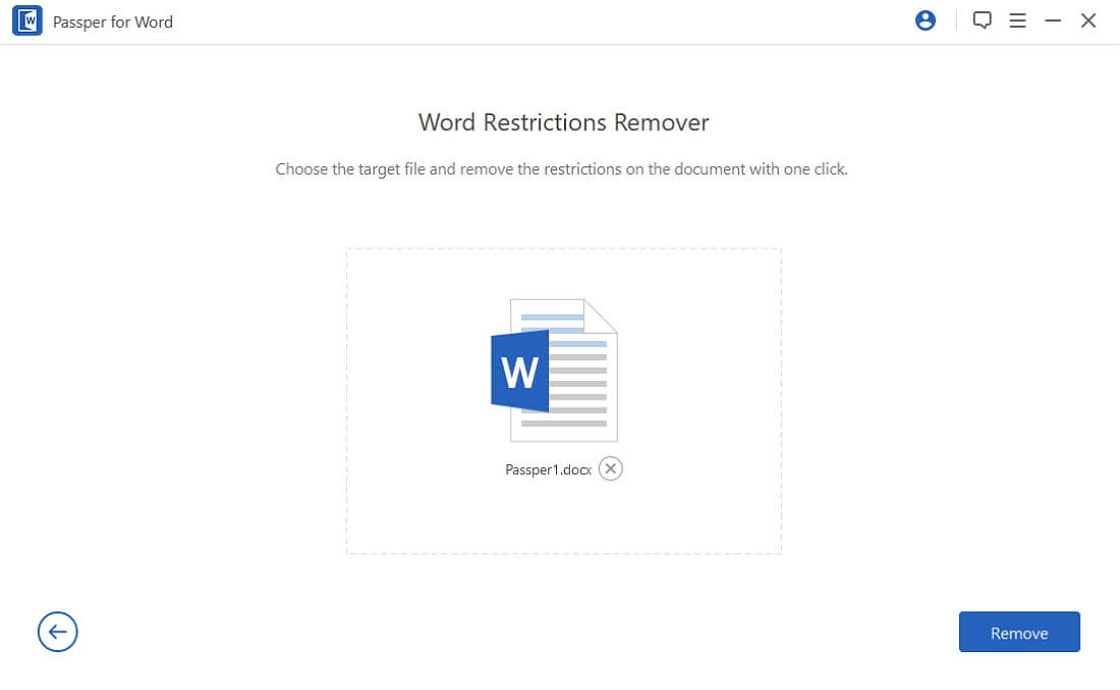
After your document is loaded, you’ll typically see a “Remove” or similar button. Clicking this initiates the password removal process. With many modern tools, this happens almost instantly – you might see the restrictions removed in just 3-5 seconds.
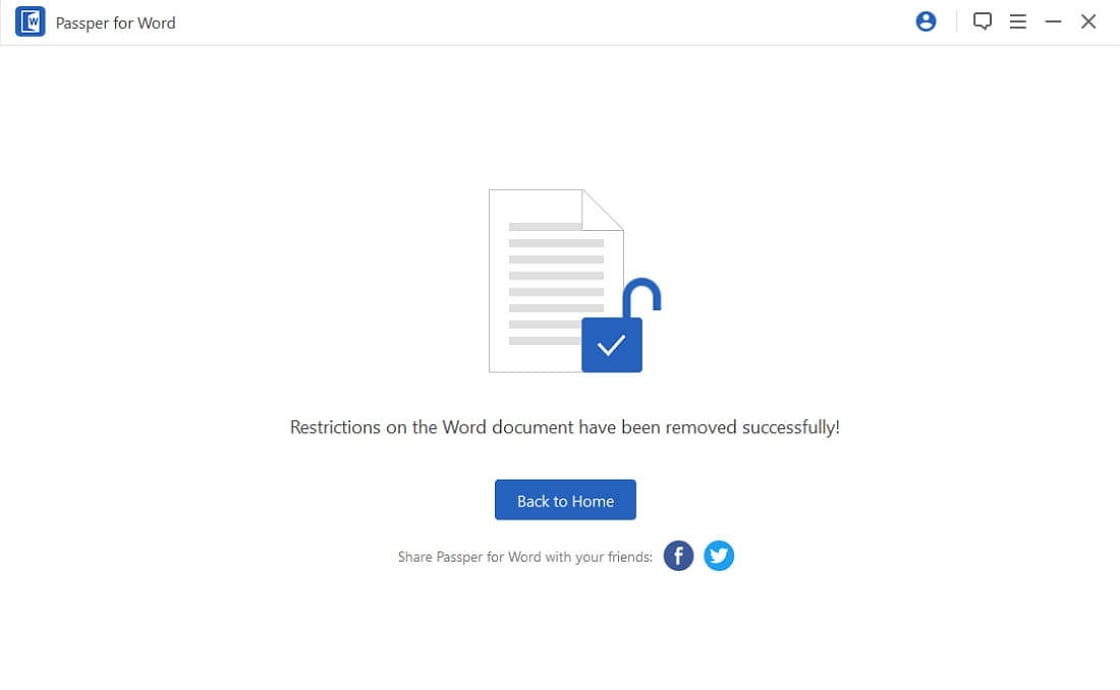
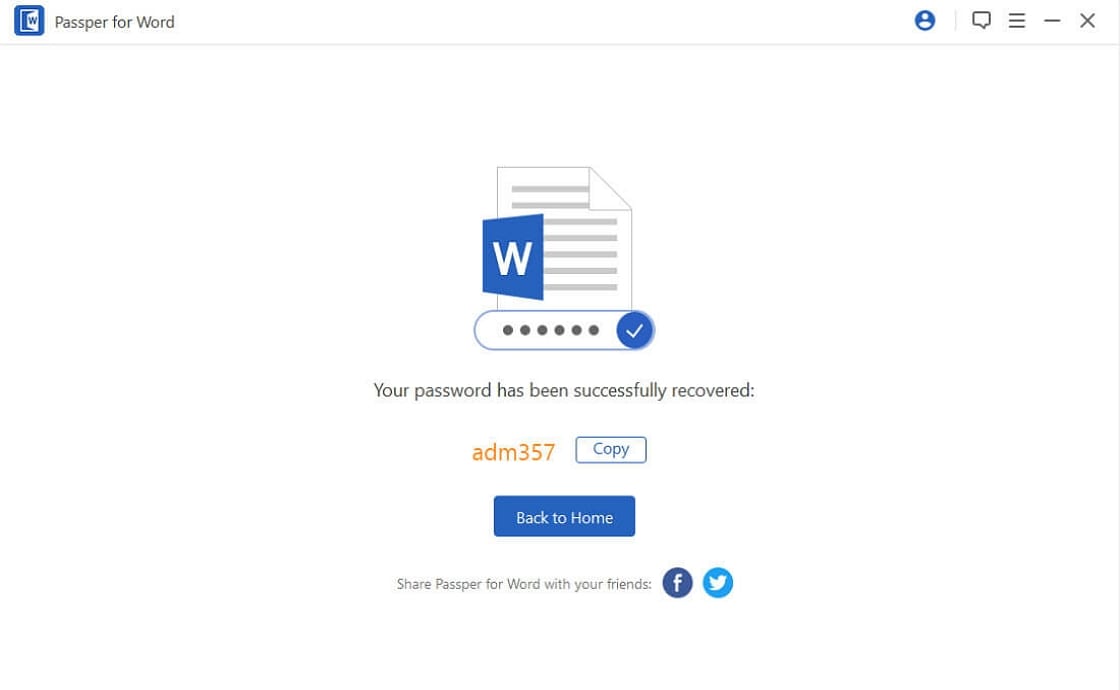
Once the process completes, you can open your Word document and enjoy full editing capabilities. The best part is that this method works even if you have no idea what the original password was.
File Extension Renaming Method
Another approach to remove password protect word document involves changing the file extension. This method takes advantage of how Word documents are structured internally, but it’s important to note that it can be somewhat technical and might not work in all situations.
Here’s how this method generally works:
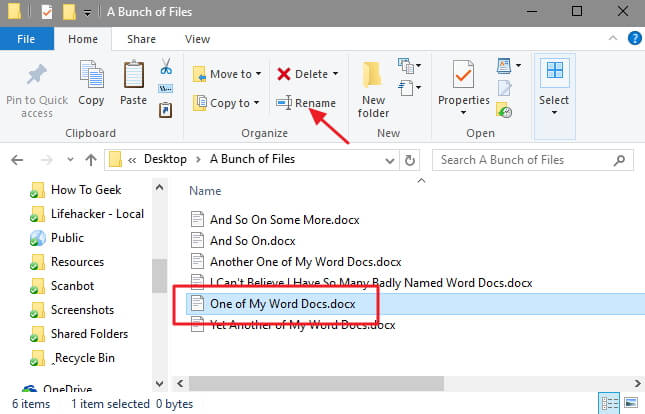
Start by making a copy of your protected Word document – it’s always good to have a backup when trying these methods. Then, you’ll change the file extension from .doc or .docx to .zip. Your computer will probably warn you about changing file extensions, but you can proceed with this change.
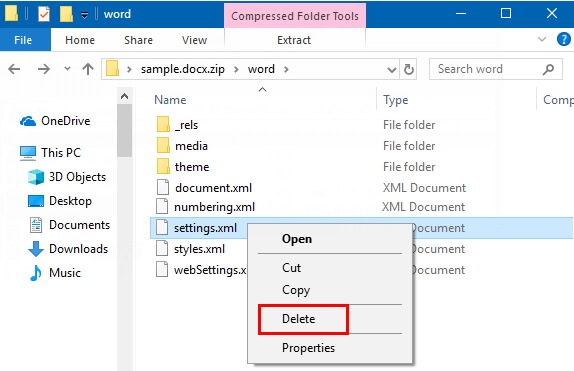
Once you have a .zip file, you can open it using Windows Explorer or any zip utility. Inside, you’ll find several folders and files that make up your Word document. Navigate to the “word” folder and look for a file called “settings.xml.”
The theory behind this method is that deleting or modifying this settings file might remove the password protection. After making changes to the zip file contents, you’d change the extension back to .doc or .docx and try opening the document.
While some users report success with this method, it’s worth noting that it doesn’t always work, particularly with newer versions of Word or stronger encryption methods. There’s also a risk of corrupting your document if you’re not careful about which files you modify.
Rich Text Format Conversion Approach
Another technique that sometimes works to remove password from Word document involves converting the file to Rich Text Format (RTF) and then back to Word format. This method can be effective for certain types of editing restrictions.
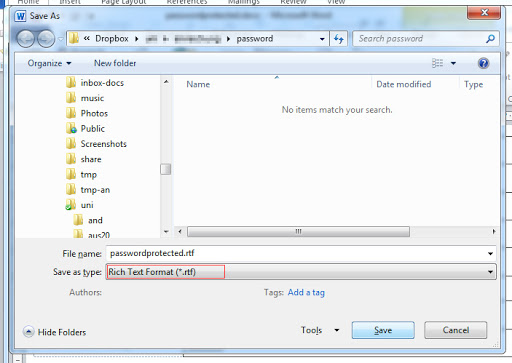
The process typically goes like this: First, open your password-protected Word document (you’ll need the password to open it, but not necessarily to remove editing restrictions). Then, instead of saving it as a regular Word document, you’d use the “Save As” function and choose “Rich Text Format (*.rtf)” as the file type.
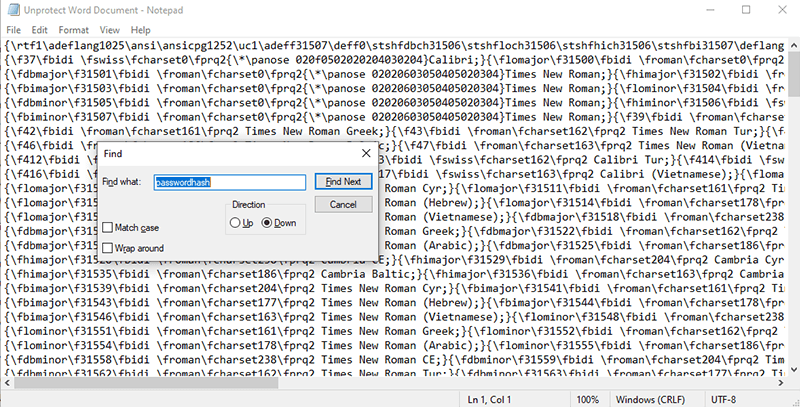
Once you have the RTF file, you’d close Word and open the RTF file using a text editor like Notepad. This might sound strange, but RTF files are actually readable as text, unlike regular Word documents.
In the text editor, you’d use the search function (Ctrl+F) to look for specific terms related to password protection. Some users report success by searching for “passwordhash” and replacing it with different values.
After making changes in the text editor, you’d save the file and then open it again in Word. From there, you might find that the protection has been removed, or you might need to go to the Review tab and click “Stop Protection” to fully remove the restrictions.
It’s worth noting that this method seems to work best with specific versions of Microsoft Office, particularly older ones. Your mileage may vary depending on your Word version and the type of protection applied to the document.
Removing Editing Restrictions When You Know the Password
If you actually know the password that’s protecting the document, removing the protection becomes much simpler. This is the scenario everyone hopes for – when you set a password yourself and actually remember it!
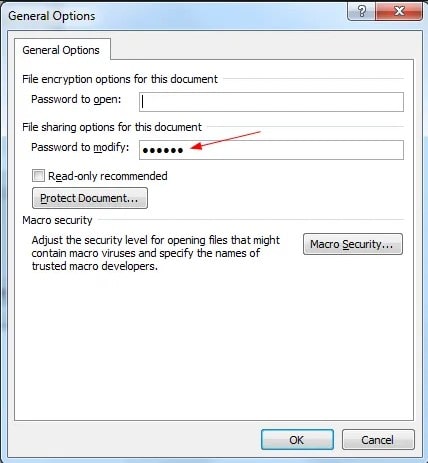
For documents with a “Password to Modify” restriction, the process is straightforward. Open the document, and when prompted, enter the password that allows modifications. Once the document is open, go to the File menu, choose “Save As,” and then look for “Tools” or “More options” depending on your Word version. From there, select “General Options” or “Security Options,” and you’ll see a box where you can delete the “Password to Modify.” Simply clear this field, click OK, and save your document.
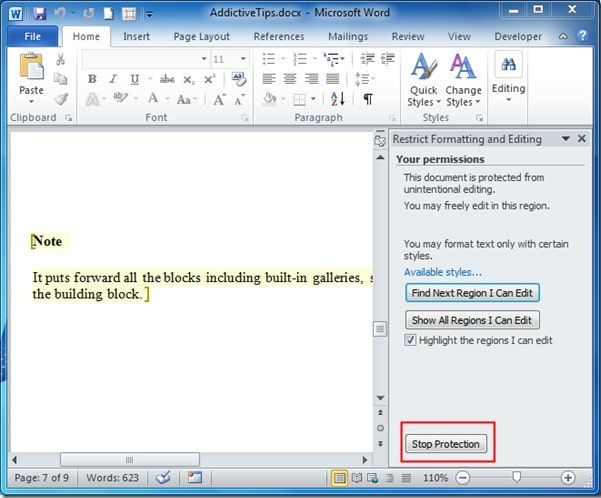
For documents with “Restrict Editing” protection, the process is even easier. Open the document (you won’t need a password just to open it, since this type only restricts editing). Go to the Review tab in Word’s ribbon, and click on “Restrict Editing.” In the panel that appears, you should see a “Stop Protection” button. Click this, enter the password when prompted, and the restrictions will be removed immediately.

The nice thing about knowing the password is that you can quickly remove password protection from Word without any third-party tools or complicated procedures. It’s a good reminder to store your passwords somewhere safe – password managers can be really helpful for this purpose.
How to Remove Opening Passwords from Word Documents
Now let’s tackle the more challenging scenario: when you can’t even open the Word document because it has an “open password.” This is definitely more frustrating because you can’t even see what’s in the document until you remove or recover the password.
Recovering Lost Opening Passwords
When you’re completely locked out of a Word document because you’ve forgotten the opening password, your best bet is often to use specialized recovery software. These tools are designed to figure out what your password was through various methods.
The process typically involves what are called “attack methods” – these are different approaches the software uses to guess your password. Understanding these can help you choose the right approach for your situation.
Dictionary attacks use a predefined list of common passwords and words to try to guess your password. This method works surprisingly well because many people use common words or simple variations as passwords.
Combination attacks let you specify certain characters or words you think might be in the password, and the software tries different combinations of these elements. This is useful if you remember parts of your password but not the exact sequence.
Mask attacks are helpful when you remember certain characteristics about your password, like it started with a capital letter, ended with numbers, or had a specific length. By providing these clues, you can significantly speed up the recovery process.
Brute force attacks try every possible combination of characters until they find the right password. This is the most comprehensive method but can take a long time for complex passwords.
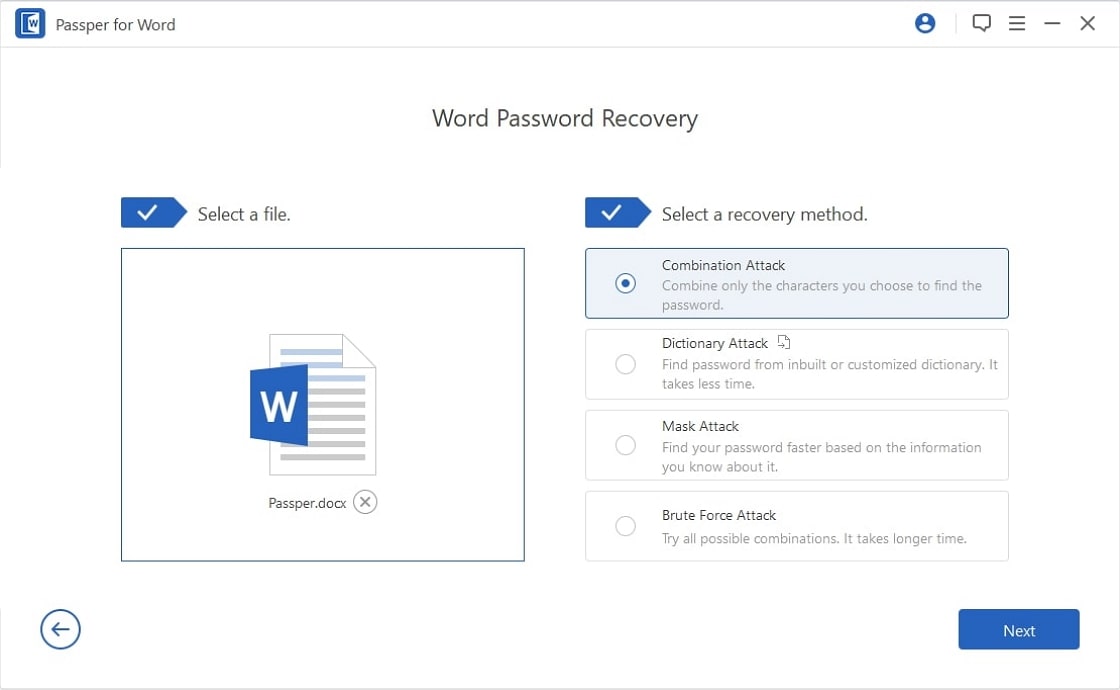
Using password recovery software typically follows a similar pattern across different tools. You install the program, select your locked Word document, choose an attack method based on what you remember about the password, and let the software work its magic.
The time this takes can vary dramatically – from seconds to days – depending on your password’s complexity and which attack method you’re using. Simple passwords might be recovered almost instantly, while complex ones with many characters could take much longer.
Once the software successfully recovers your password, you can use it to open the document, and then permanently remove the password protection so you don’t face this problem again.
iMyFone Passper Pro.Ultimate 6-in-1 File Password Remover.1-click to remove Excel/Word/PDF/RAR/ZIP/PowerPoint passwords.Unlock file passwords to read, edit or print easily.Remove read-only file protection permanently.Break file locks with up to 99% sucessful rate.
Removing Opening Passwords When You Know Them
If you do remember the password needed to open the Word document, removing it is a simple process that varies slightly depending on which version of Word you’re using.
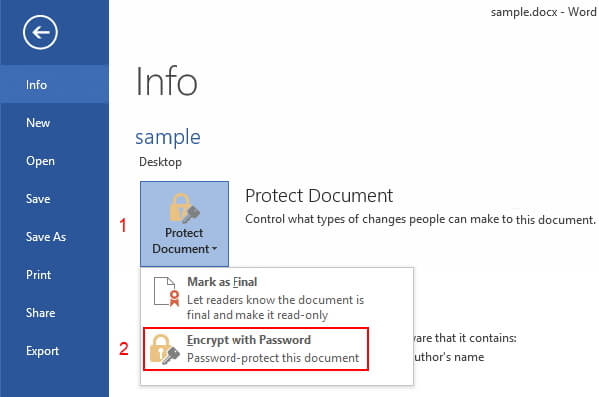
For Word 2010, 2013, 2016, and newer versions, the process is quite similar. Open the document using the password, then click on File in the top-left corner. From there, select “Protect Document” and then “Encrypt with Password.” You’ll see a dialog box showing the current password – simply delete the password from this box and click OK. The next time you save the document, it will no longer require a password to open.
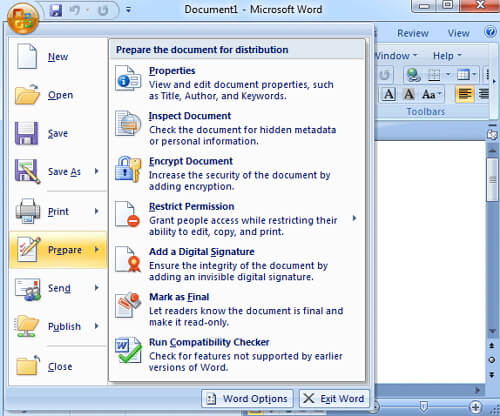
For Word 2007, the process is a bit different but still straightforward. After opening the document with the password, click the Office button in the top-left corner. Select “Prepare” and then “Encrypt Document.” Again, you’ll see the current password – just delete it and click OK.
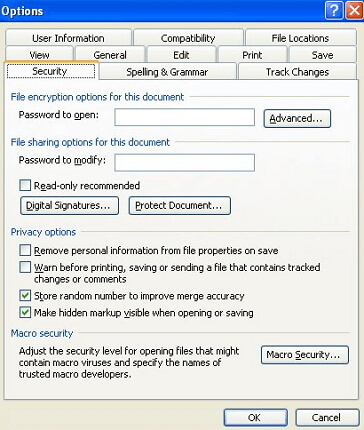
If you’re using the older Word 2003, the steps are slightly different but achieve the same result. Open the document with the password, then go to File > Save As. In the Save As dialog box, click on “Tools” and then select “Security Options.” Here you’ll find the “Password to open” field – clear this field and click OK, then save your document.
The key thing to remember is that you need the current password to remove password protection from Word when dealing with opening restrictions. If you’ve forgotten it, you’ll need to use recovery methods first.
Choosing the Right Method for Your Situation
With all these different approaches available, how do you choose the right one for your specific situation? Here are some guidelines to help you decide:
If you know the password, always use the built-in Word features to remove the protection. This is the simplest and most reliable method.
If you don’t know the password but need to remove editing restrictions, dedicated password removal software is usually your best bet. It’s fast, reliable, and doesn’t require technical expertise.
If you’re dealing with an opening password you’ve forgotten, recovery software with multiple attack methods gives you the best chance of success.
The file extension and RTF methods can be worth trying if you’re comfortable with technical approaches and want to avoid using third-party software, but be aware that they don’t always work and carry some risk of file corruption.
Preventing Future Password Problems
Once you’ve successfully managed to remove password from Word document, it’s worth thinking about how to avoid similar situations in the future. Here are some tips:
Consider whether password protection is really necessary for your documents. For many personal documents, it might be unnecessary overhead.
If you do need to protect sensitive documents, use a password manager to keep track of your passwords. This prevents the frustration of forgotten passwords.
Make backup copies of important documents without password protection, stored in a secure location.
If you’re collaborating with others, consider using different methods to control access, such as password-protected zip files or cloud storage with sharing permissions, rather than relying solely on Word’s built-in protection.
Document your passwords securely if you must use them. At the very least, keep a record of which documents have passwords and what those passwords are.
Final Thoughts
Being locked out of your own Word documents is frustrating, but as we’ve seen, there are multiple ways to remove password from Word document regardless of your situation. Whether you’re dealing with editing restrictions or complete lockdown with an opening password, solutions exist to help you regain access to your files.
The method you choose will depend on your specific circumstances – whether you know the password, what type of protection is applied, and how comfortable you are with technical solutions. For most people, dedicated password recovery and removal tools offer the best balance of effectiveness and ease of use.
Remember that prevention is always better than cure when it comes to password issues. Once you’ve recovered access to your document, consider whether you really need password protection, and if you do, make sure you have a reliable system for remembering or storing those passwords.
We hope this guide has given you the knowledge and confidence to tackle any password-protected Word document situation you encounter. With these tools and techniques at your disposal, you’ll never have to worry about being permanently locked out of your important documents again.
Some images in this article are sourced from iMyFone.