TOOL HUNTER

Summary: If your iPhone’s text feels too large and is cramping your screen, you can easily reduce text size on iPhone through a few built-in settings. This guide covers the three main methods—using Display & Brightness, Accessibility options, and Display Zoom—to help you shrink the font for a cleaner look. We’ll also touch on adjusting fonts specifically within the Mail app for a fully customized experience.
Ever picked up your iPhone and felt like the words were shouting at you from the screen? Maybe you accidentally enlarged the text, or perhaps the default size just doesn’t fit your preferred browsing style. Having text that’s too large can make reading awkward, hide less content on the screen, and generally feel clunky. The good news is that Apple provides several straightforward ways to dial down the font dimensions. Whether you want a subtle reduction or a significant shrink, learning how to change font size for iPhone is a simple process that takes just a minute. Let’s dive into the different paths you can take to regain control over your screen’s readability.
Way #1: Reduce iPhone Font Size via Display & Brightness Settings
The most direct route to change iPhone font size is tucked inside the standard Display settings. This method adjusts what’s called “Dynamic Type,” which means it affects not only Apple’s own apps but also any third-party apps that support this feature. It’s perfect for a quick, universal tweak.

Start by opening the Settings app on your iPhone—it’s the one with the gear icon. Once inside, scroll down a bit and tap on “Display & Brightness.” This section controls how your screen looks and feels. Here, you’ll see options for appearance, brightness, and, crucially, text.
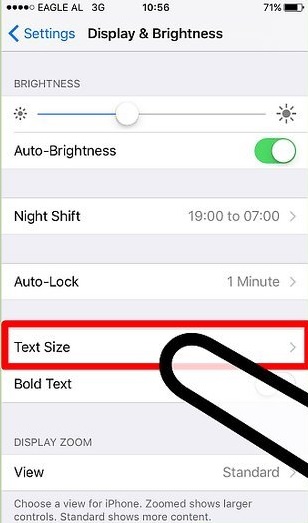
Look for the row labeled “Text Size.” Give that a tap. You’ll be taken to a new screen that’s dominated by a horizontal slider. At the top, there’s a helpful note explaining that “Apps that Support Dynamic Type will adjust to your preferred reading size below.” This is your control panel.
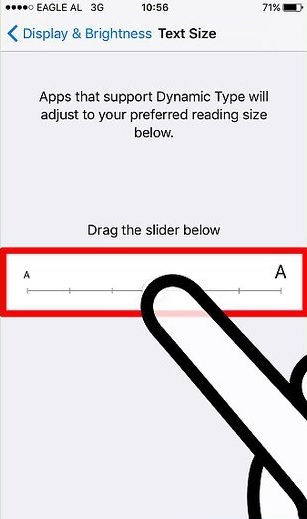
Now, to reduce text size on iPhone, you simply need to drag the slider’s knob towards the left side. As you drag it left, you’ll see a sample text above the slider get smaller. Drag it all the way to the left for the smallest available standard size. If you change your mind and want to see what larger text looks like, just drag it back to the right. You can play with this slider until you find a size that’s comfortable for your eyes without taking up too much screen real estate.
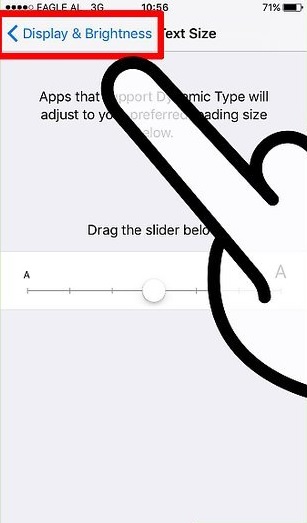
Once you’re happy with your selection, there’s no separate “Save” button to press. Just tap the “< Display & Brightness” back button in the top-left corner of your screen. Your changes are applied instantly. Go back to your Home Screen or open an app like Messages or Mail to see the new, smaller text in action. Remember, if an app doesn’t support Dynamic Type, its text won’t change, so don’t be surprised if some apps look the same as before.
Way #2: Using Accessibility Settings for More Font Control
What if you want even smaller text than the standard slider allows? Or maybe you need finer control for specific needs? That’s where the Accessibility menu comes in. It’s designed to make the iPhone usable for everyone, and part of that includes offering an extended range for text sizing. This is a powerful method to change font size for iPhone beyond the usual limits.
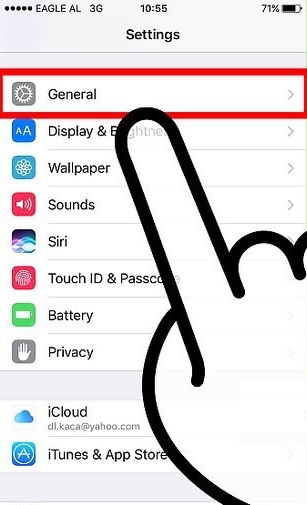
Head back to your main Settings app. This time, scroll down and tap on “General.” It’s the section that houses all the fundamental controls for your device’s operation.
Inside General, look for “Accessibility.” This is a treasure trove of tools that enhance visibility, interaction, and hearing. Tap to enter. Among the many options here, you’ll find one related to text.
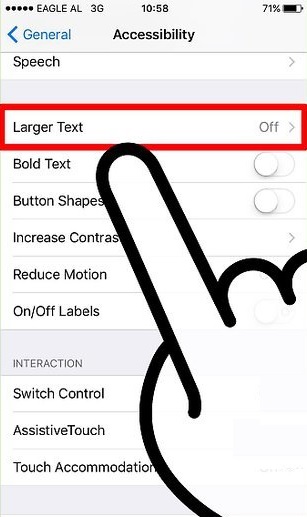
Scroll down in the Accessibility menu until you see “Larger Text.” Tap on it. By default, you might see a slider similar to the one in Display & Brightness, but it’s often limited to the standard range.

The key to unlocking smaller (and larger) sizes is the switch at the top labeled “Larger Accessibility Sizes.” Flip this switch to the ON position (it will turn green). Like magic, the slider below will expand, showing a much wider range of sizes. The left end of this expanded slider now offers a font size that is significantly smaller than the standard minimum.
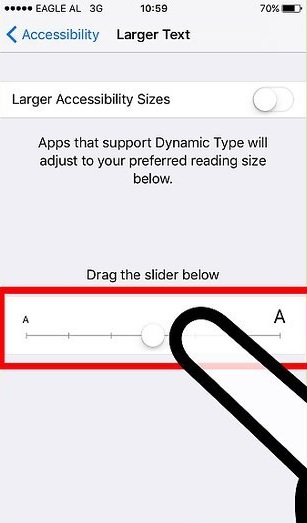
To reduce text size on iPhone using this method, drag the slider knob all the way to the left. You’ll see the preview text shrink dramatically. This setting is fantastic if you have sharp eyesight and want to fit more information on your screen, or if you simply prefer a very compact, dense text layout. As with the first method, this change applies system-wide to apps that support dynamic fonts and this specific accessibility feature. When you’re done, just exit Settings. Your iPhone will remember your preference.
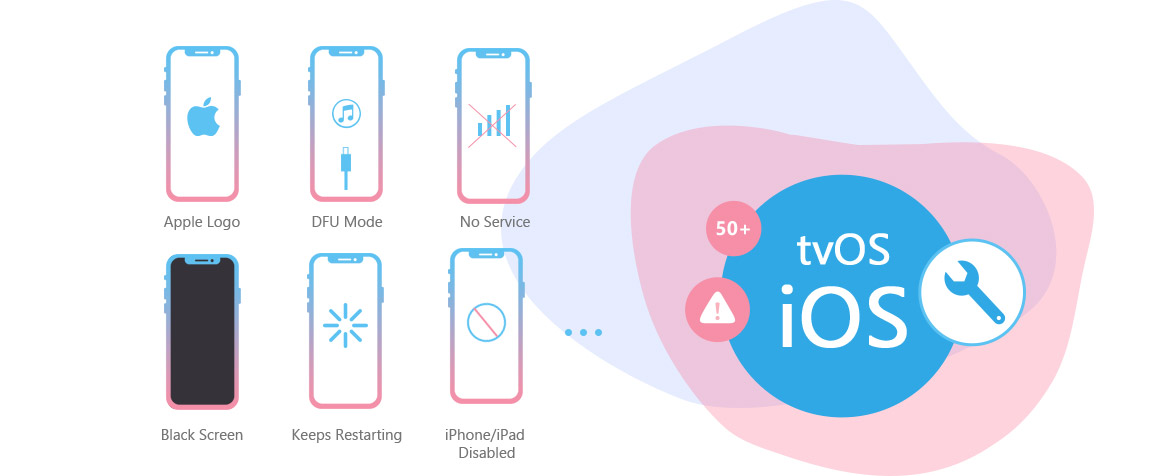
Try Leawo iOSFix right now! Fix over 50 iOS and tvOS issues on iPhone, iPad, iPod, or Apple TV, such as Apple logo, black screen, or stuck in recovery mode, easily and safely without data loss in standard mode.
Get the Windows version | Get the Mac version | Use the time-limited promotional campaign
Way #3: Adjust Overall Scale with Display Zoom
Sometimes, the issue isn’t just the text—it’s that everything on the screen feels too big. Icons, menus, buttons, and text all seem enlarged. If you’re looking to make everything more compact, not just the font, then the Display Zoom feature is your best friend. It’s particularly handy on newer iPhone models with larger screens, where you might want to see more content at once. This is a different approach to changing font size iPhone users might overlook.
Navigate to Settings > Display & Brightness again. Scroll all the way to the bottom of this menu. You should see a section called “Display Zoom.” Tap on it.
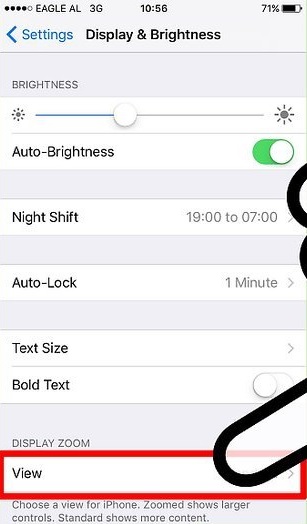
You’ll be taken to a screen titled “View.” Here, you have two visual options presented as big, interactive thumbnails. The first is “Standard.” This is the default view—it shows more content on the screen with smaller user interface elements.
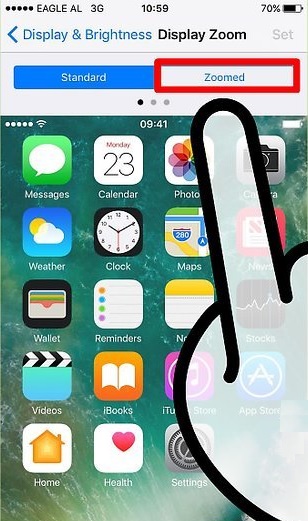
The second option is “Zoomed.” Tap on this one. Your screen will show a preview of what the Home Screen looks like in this mode. In the Zoomed view, everything is magnified—icons are bigger, text is bigger, and you see less overall content per screen. But for our goal of reducing size, you want to ensure “Standard” is selected. The Standard view is actually the more compact one.
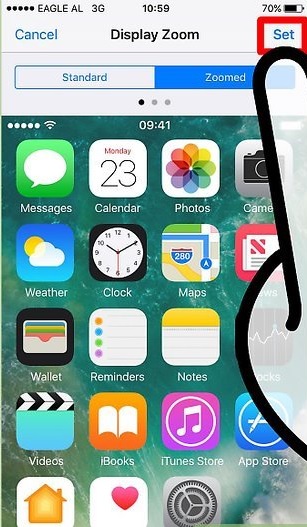
If your phone is already on Zoomed and things feel too big, simply tap on “Standard.” Look at the preview to confirm it’s the more compact layout you want. Then, tap the blue “Set” button in the top-right corner. Your iPhone will ask for confirmation and may need to restart to apply the change. After it reboots, you’ll find not only the text but all interface elements are smaller, giving you a denser, more information-rich display. It’s a global scaling solution.
Bonus: Customizing Font Style in the Mail App
While the above methods control size, you might also be curious about style. Can you change iPhone font to something more personal, like in your emails? Absolutely. Starting with iOS 13, the Mail app allows you to select different font types when composing messages. This doesn’t change the system font everywhere, but it lets your outgoing emails stand out with a unique personality.
The process is simple. Open the Mail app and start composing a new email. Tap into the body text area to bring up the keyboard. Look above the keyboard for a toolbar. If you see a right-facing arrow (or sometimes a left-facing triangle), tap it to expand more formatting options.
Among the icons, look for one that looks like a capital “A” next to a smaller “a”. This is the font selector. Tap it.
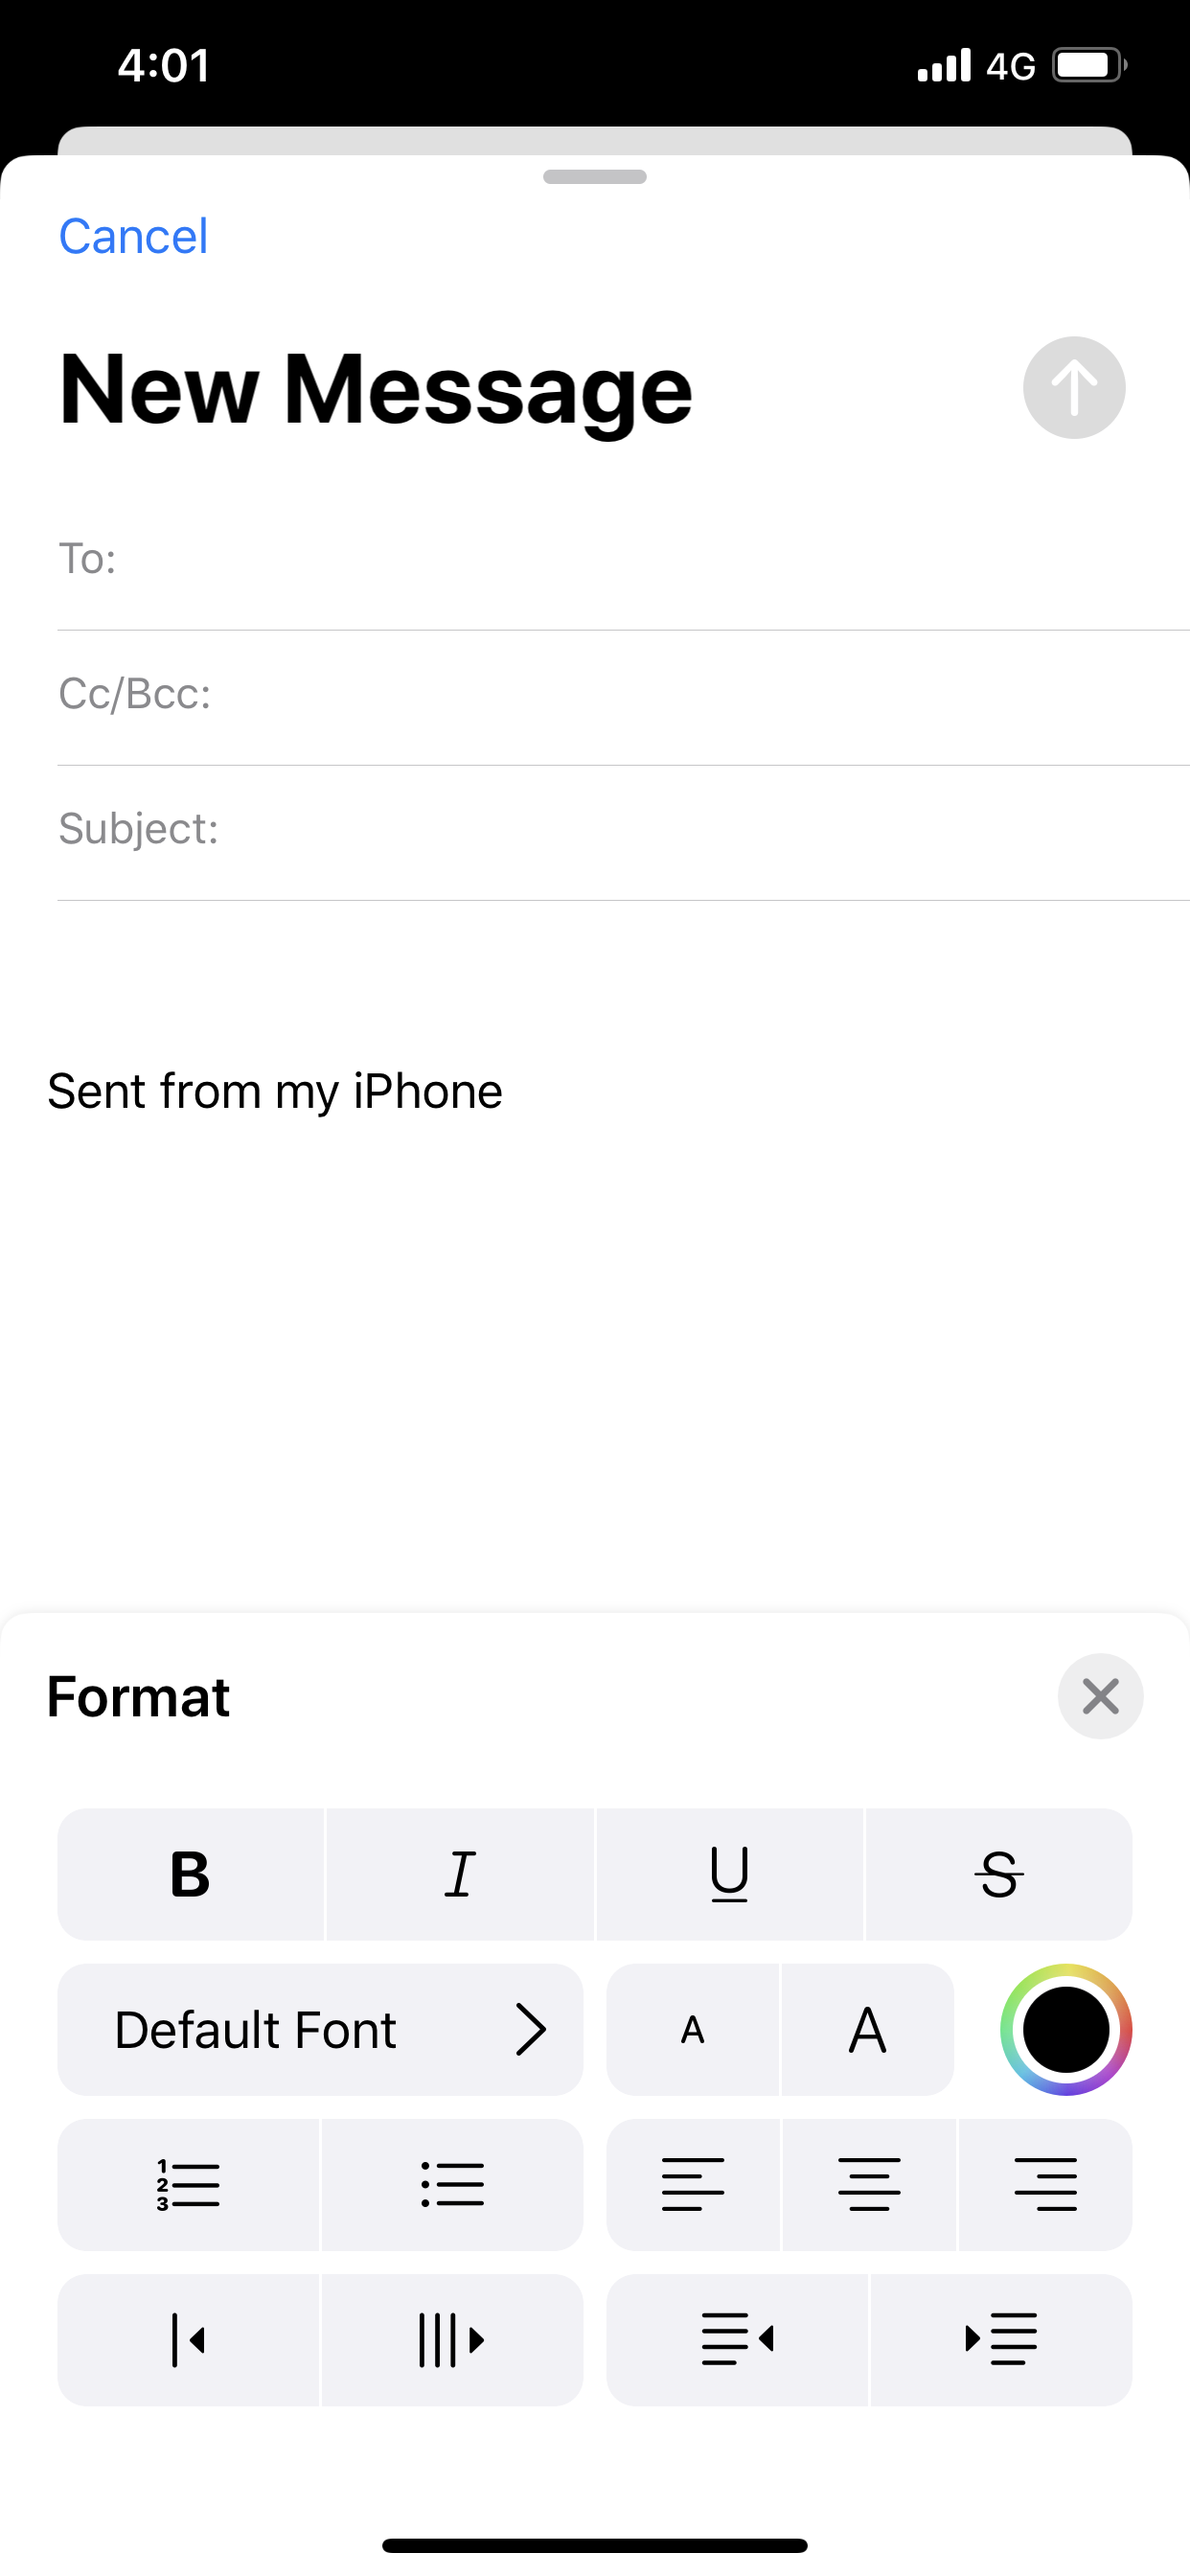
A menu will pop up. Tap on “Default Font.” This opens a list of all available typefaces installed on your iPhone, from classic serif fonts like Georgia to modern sans-serif options like Avenir. Scroll through and tap on any font name to select it. The text in your email composition window will immediately change to reflect your new choice. Now you can write your email in a font that matches your mood or the message’s tone. It’s a fun way to add a splash of customization without affecting the rest of your device.
Mastering these settings means you’ll never be stuck with text that’s too large or a display that feels bloated again. Whether you use the quick slider in Display settings, the expanded range in Accessibility, or the global scaling of Display Zoom, you have full power to reduce text size on iPhone to match your perfect visual comfort. Try each method and see which combination works best for your daily use. A small adjustment can make a huge difference in how you interact with your device all day long.
Try Leawo iOS Data Recovery right now! 100% Recover Deleted or Lost Data from iTunes, iCloud and iOS Devices (iPhone, iPad, and iPod) Safely and Accurately!
Get the Windows version | Get the Mac version | Use the time-limited promotional campaign

Some images are sourced from the internet.