TOOL HUNTER

Ever found yourself with a bunch of video clips that you wish could become one smooth, continuous video? Whether it’s footage from a birthday party, a travel vlog, or multiple takes for a social media post, merging clips is something almost every video creator needs to do at some point. The good news is, you don’t need to be a professional editor to do it—CapCut makes combining videos simple, fun, and accessible no matter what device you’re using.
In this guide, I’ll walk you through how to merge clips in CapCut on desktop, online, and mobile. I’ll also share practical tips to help your final video look clean and professional, even if you’re just getting started with editing.
CapCut — Your all-in-one video & photo editing powerhouse! Experience AI auto-editing, realistic effects, a huge template library, and AI audio transformation. Easily create professional masterpieces and social media viral hits. Available on Desktop, Web, and Mobile App.

Before You Start: What to Keep in Mind
Before jumping into the actual steps for how to merge clips in CapCut, it’s helpful to think about a few things that can make a big difference in how polished your final video looks.
Try to use clips that have the same or similar resolution. If one video is in 4K and another is much lower quality, the shift can be distracting. While CapCut does include AI enhancement tools, starting with evenly matched clips gives you better results.
Color tone matters more than you might think. If one clip has warm, sunset-like colors and the next is cool and blue, the transition might feel abrupt. You can adjust colors within CapCut to help your clips flow together naturally.
Transitions are your best friend. A hard cut from one scene to the next can feel jarring. Using even a simple fade or dissolve can make the shift feel intentional and smooth.
Don’t forget the audio! Background music can help tie different clips together and set the mood. Also, make sure the volume levels are consistent unless you’re intentionally creating contrast.
Playback speed is another thing to watch. If one clip is in slow motion and the next is at regular speed, it might feel uneven unless you’re doing it for creative effect.
Lastly, check the lighting. If one clip is very bright and the next is dark, viewers might find it awkward. A quick brightness adjustment can help maintain a consistent look.
Keeping these points in mind will help you understand not just how to merge clips in CapCut, but how to do it well.
How to Merge Clips in CapCut on Desktop
If you’re working on a Windows or Mac computer, the CapCut desktop app is a great option. It’s packed with features but remains user-friendly—perfect for both beginners and more experienced editors.
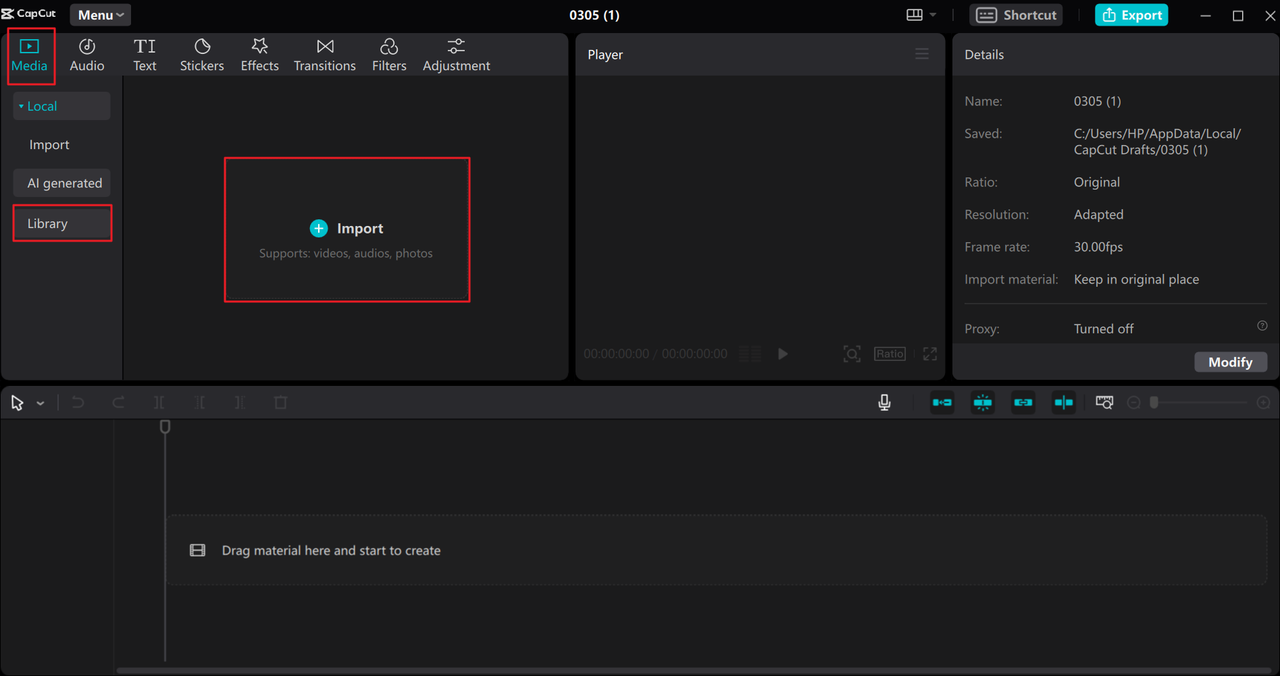
Start by downloading and installing CapCut on your computer. It’s free to use for basic features. Open the app and click “New Project” to begin.
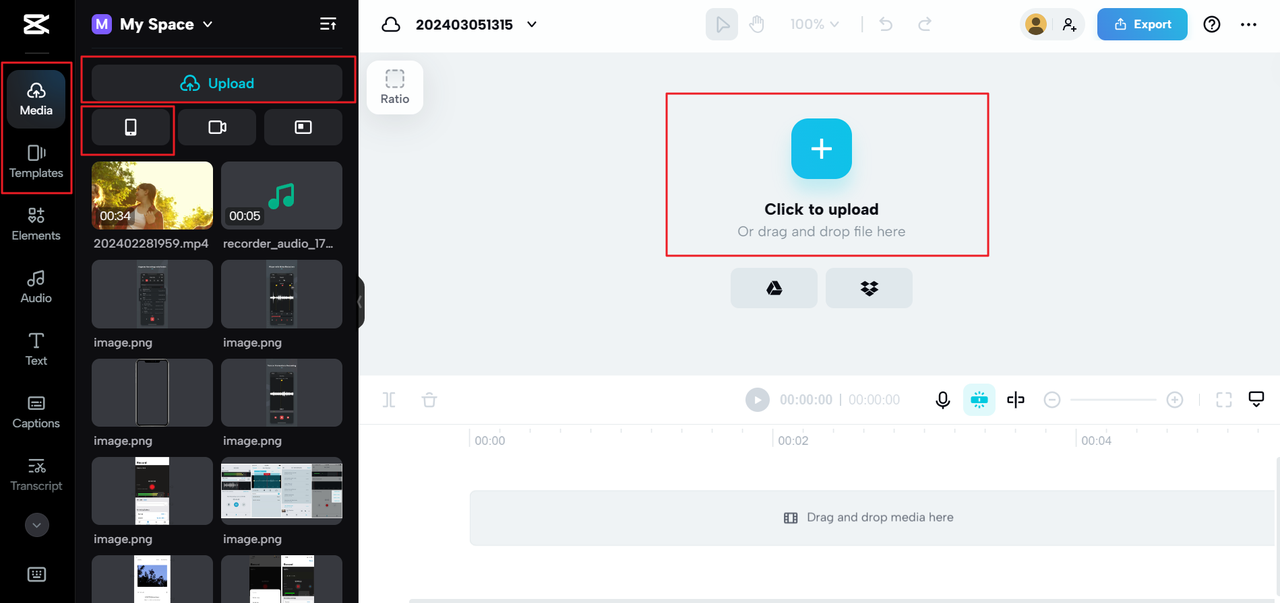
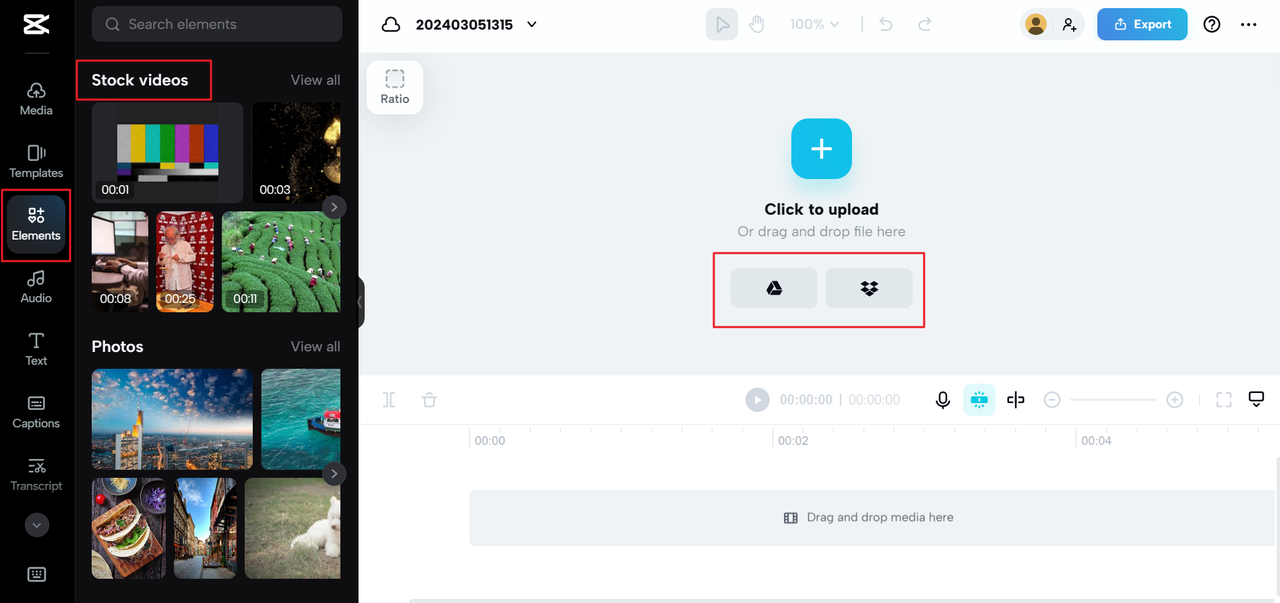
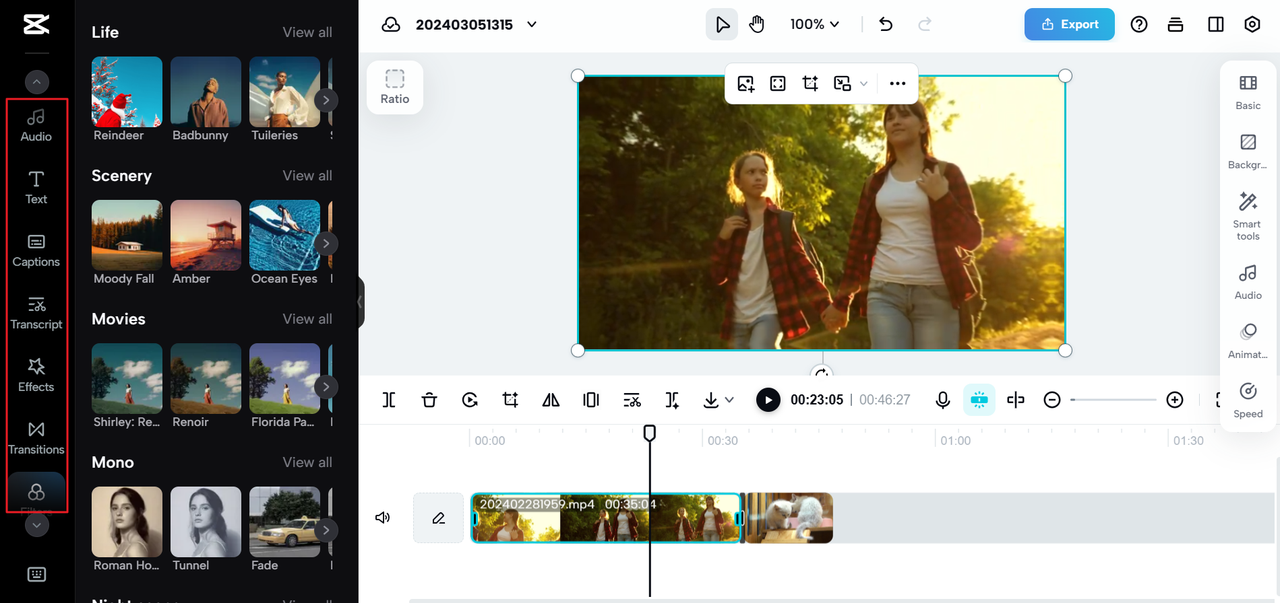
To import your videos, you can drag and drop them directly into the media area or click the “Import” button to browse your files. Once your clips are imported, drag them down to the timeline at the bottom. You can place them in whatever order you like.
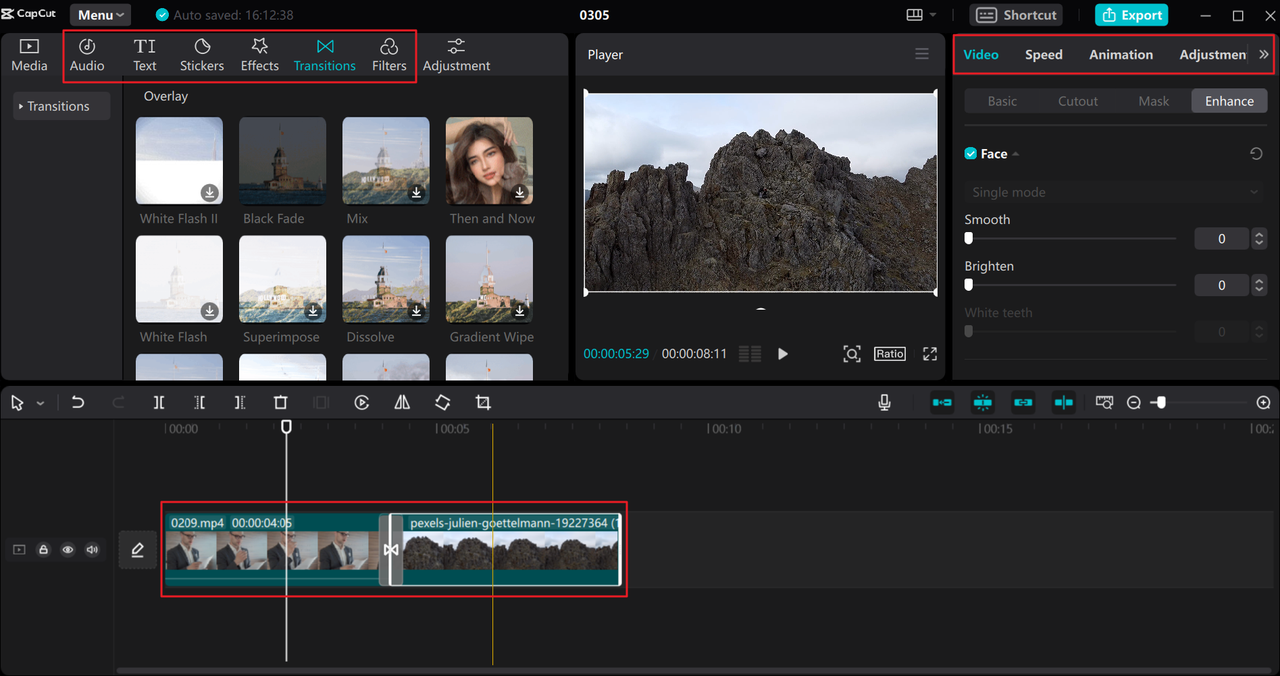
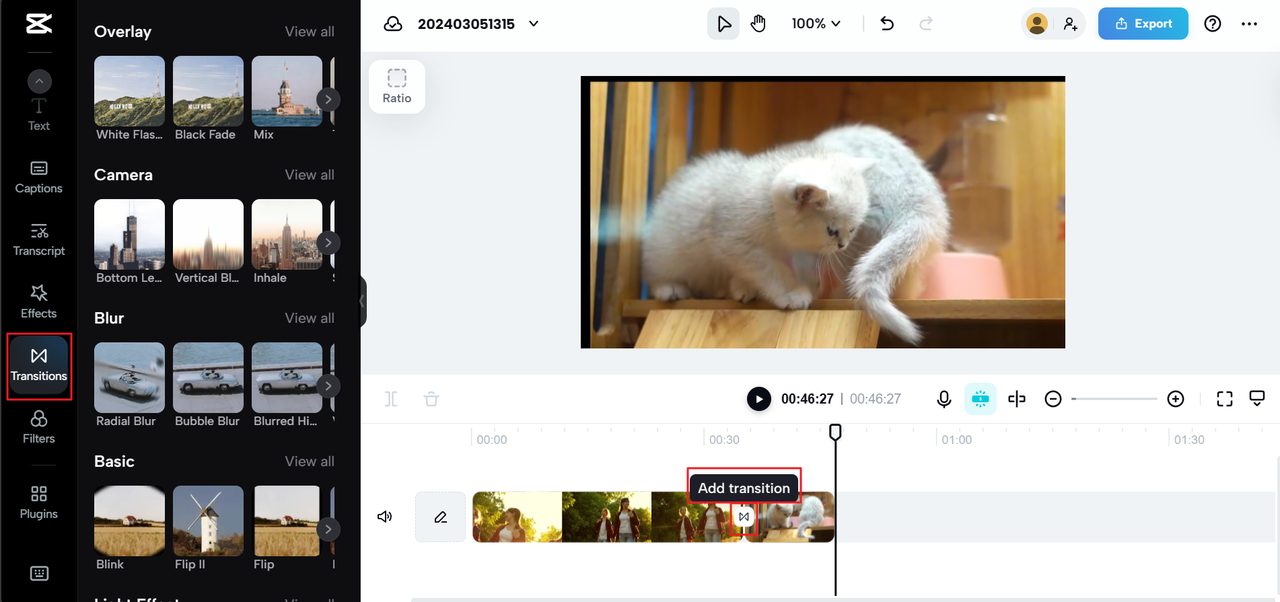
This is where the real magic happens. To smooth the jump between clips, click the “Transitions” tab at the top. Pick an effect you like—it will automatically slot between your clips. You can change how long the transition lasts by clicking on it and adjusting the duration.
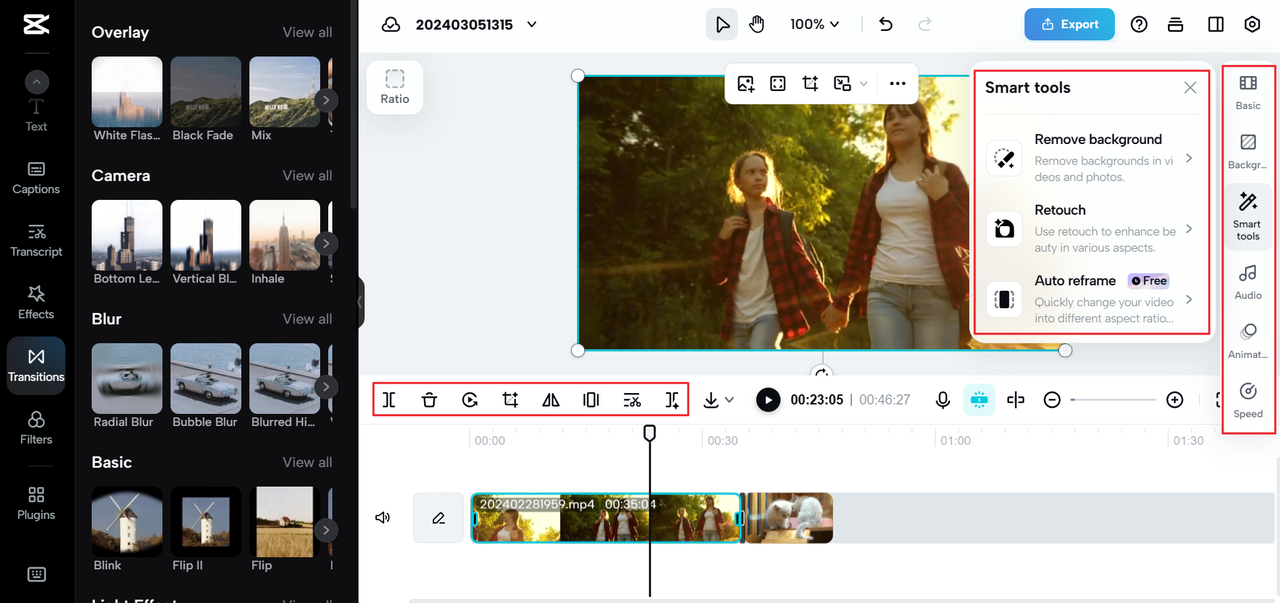
CapCut also lets you do way more than just merge clips. You can add filters, text, animations, and adjust playback speed. The audio tab allows you to layer music or sound effects. If you want to get creative, try using keyframes to design your own custom transitions.
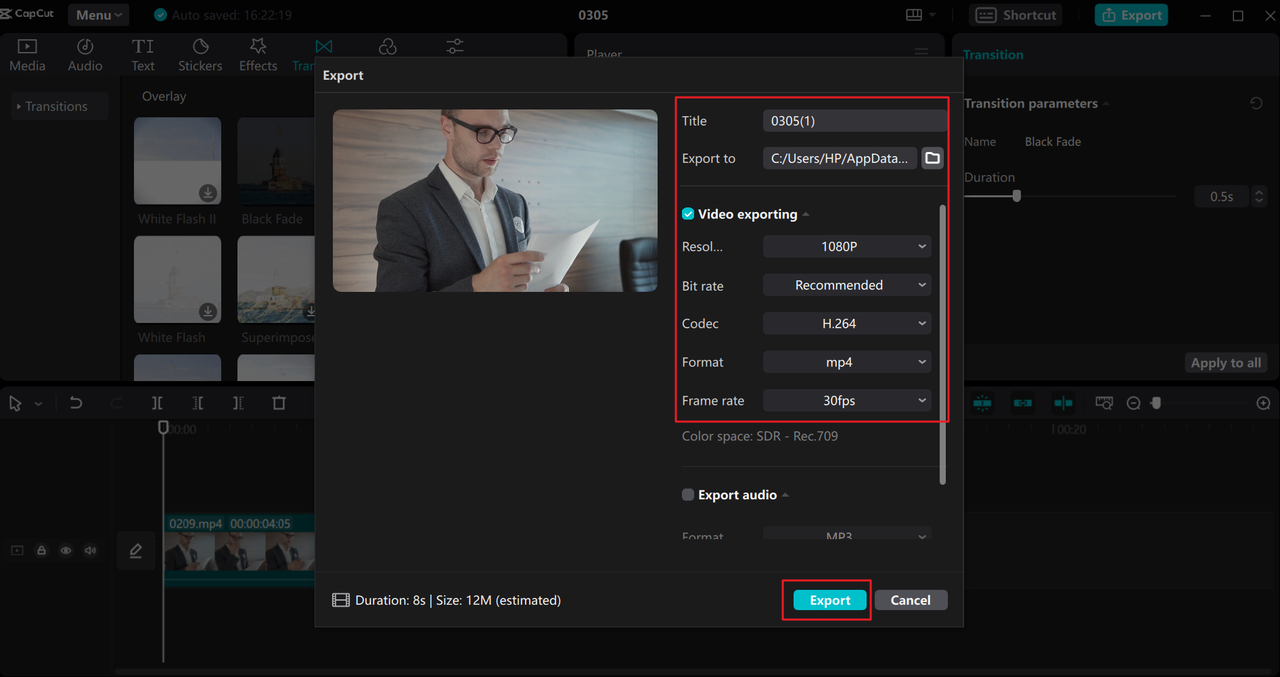
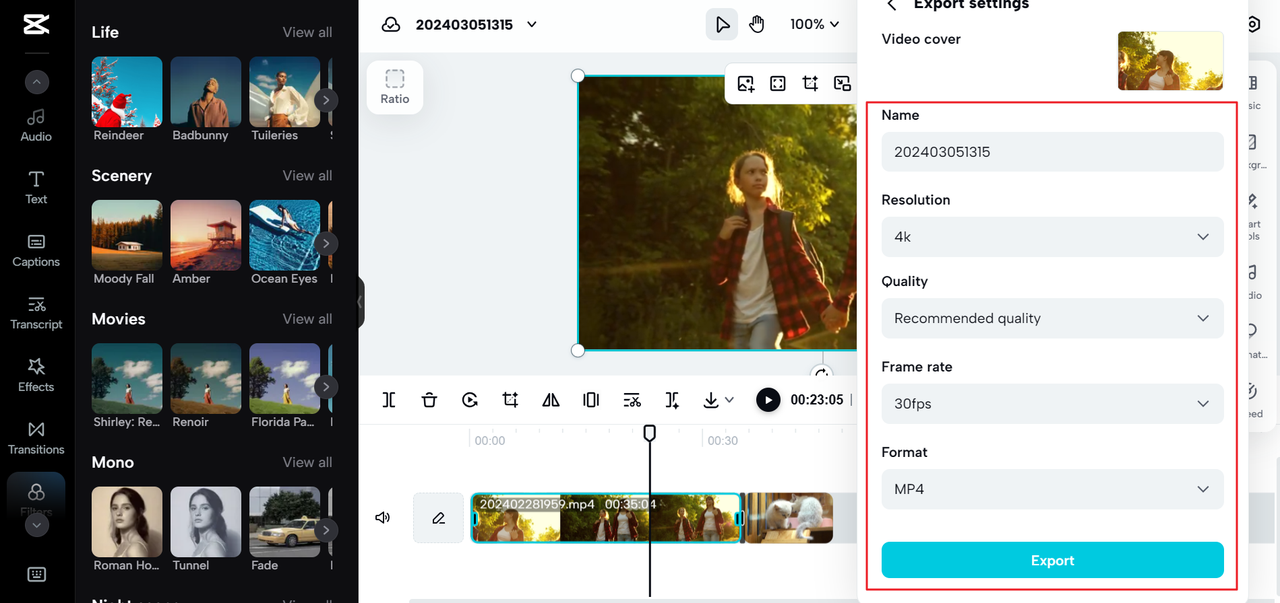
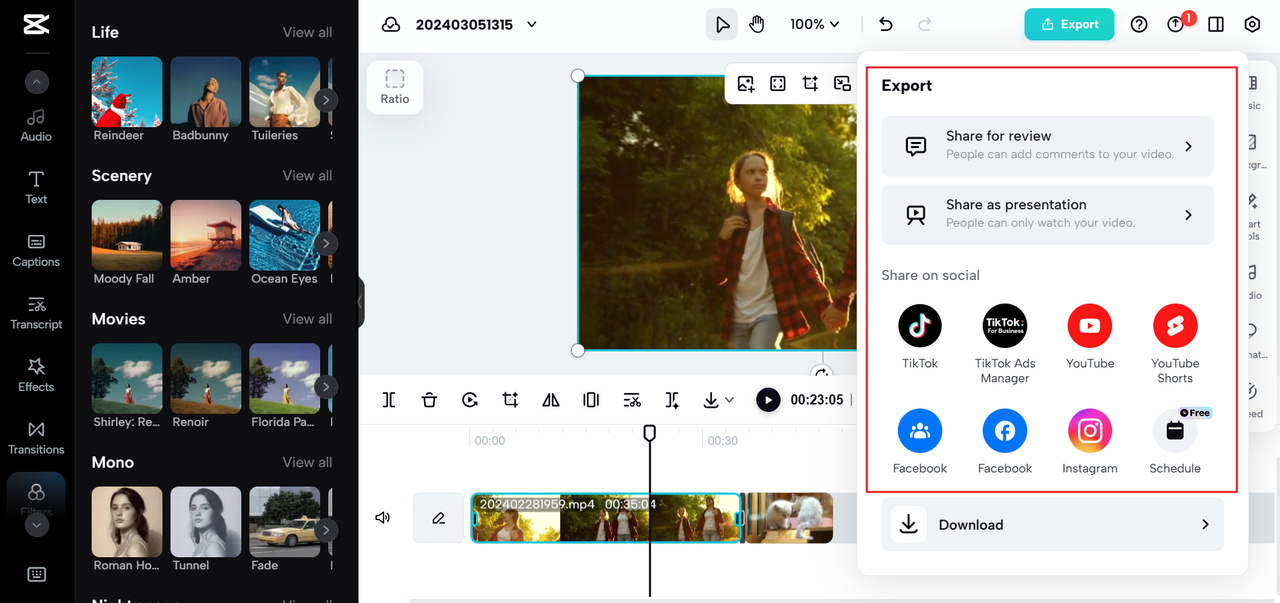
When you’re happy with your video, hit the “Export” button. You can choose your preferred resolution (up to 4K), format (like MP4 or MOV), and frame rate (up to 60fps). You also have the option to directly share your video to TikTok or YouTube without leaving the app.
The desktop version is especially powerful thanks to its AI tools—auto captions, video stabilization, quality enhancement, and background removal are just some of the features that can help your merged video look pro-level.
How to Merge Video on CapCut Online
Don’t want to download software? No problem. CapCut’s online video editor works right in your browser—whether you’re on Chrome, Firefox, Safari, or Edge. It’s perfect if you’re using a shared computer or just prefer not to install anything.
You’ll need to sign up for a free account. Once you do, you can start a new project directly from the website.
Upload is simple: drag and drop your video files into the editor. If your clips are on your phone, click the phone icon to generate a QR code. Scan it with your mobile device to transfer videos directly. You can also import from cloud storage like Google Drive or Dropbox.
A really handy feature is the templates section. CapCut offers pre-designed video templates that come with transitions and effects built-in—great if you want to save time or need inspiration.
Once your clips are in, arrange them on the timeline. To add a transition, hover between two clips and click “Add transition.” You can choose from effects like blur, slide, glow, and more.
On the right, you’ll find tools to adjust color, apply effects, remove backgrounds, and even auto-generate subtitles. The audio library is stocked with music and sound effects, and you can easily trim or fade audio in and out.
You can also use text animations, stickers, and filters to give your video more personality—all without leaving your browser.
When you’re done, click “Export.” You can download the video in up to 4K and 60fps, or share it directly to social platforms. You can even invite others to review and comment—super useful for team projects.
CapCut — Your all-in-one video & photo editing powerhouse! Experience AI auto-editing, realistic effects, a huge template library, and AI audio transformation. Easily create professional masterpieces and social media viral hits. Available on Desktop, Web, and Mobile App.
How to Merge Clips in CapCut Mobile
Editing on your phone? CapCut’s mobile app makes it easy to merge clips on the go. It’s free, lightweight, and available for both iOS and Android.
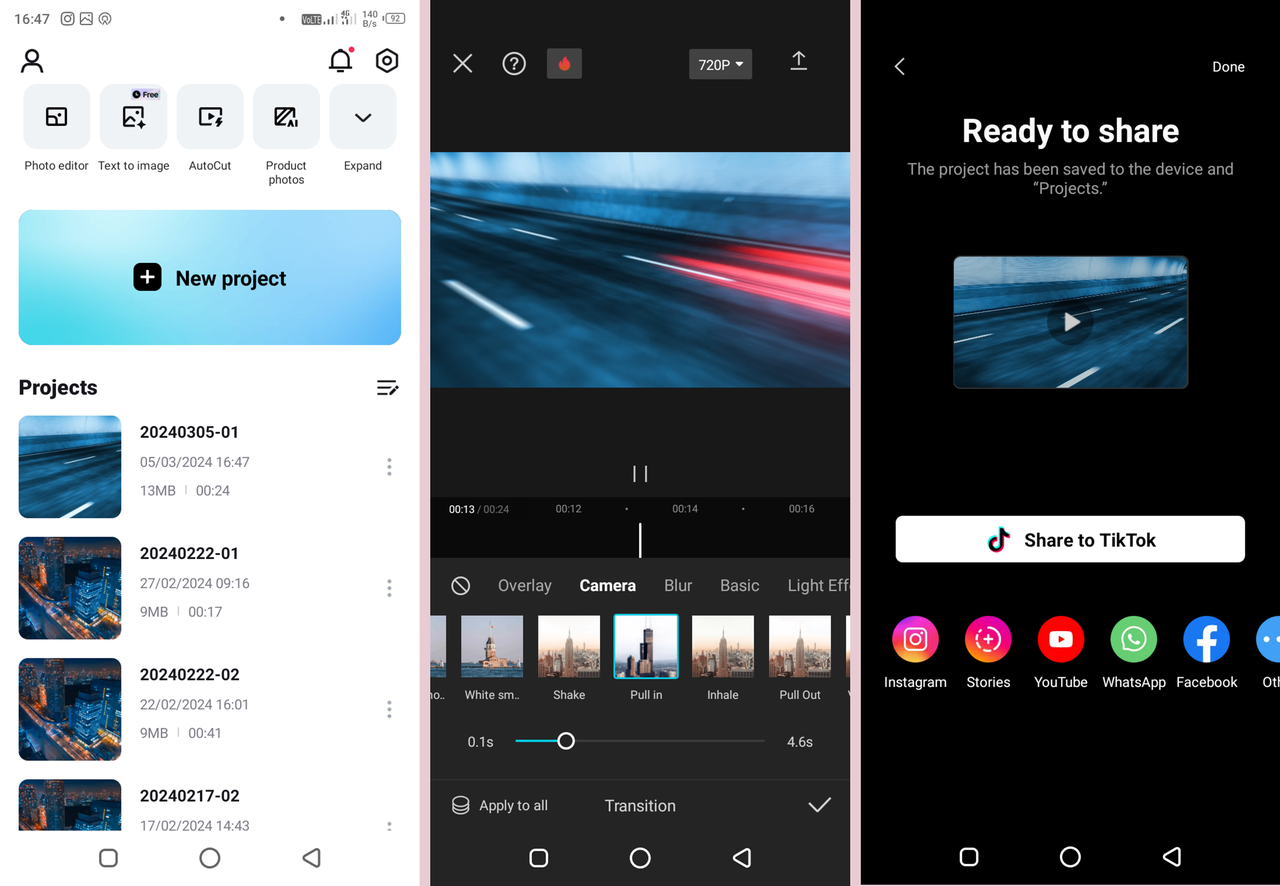
Open the app and tap “New Project.” Select the videos from your camera roll—you can choose more than one. Tap “Add” to place them on the timeline.
You can rearrange clips by tapping, holding, and dragging. To add a transition, tap where two videos meet. A menu will pop up with options like fade, swipe, blur, and zoom. Adjust the length of the transition with a simple slider.
Beyond merging, you can trim clips, add music, apply filters, change speed, and more—all from your phone. The mobile app is surprisingly powerful.
When you’re finished, tap the export button. You can choose the quality (up to 1080p and 60fps) and then save to your device or share directly to TikTok, Instagram, YouTube, and other platforms.
Learning how to merge clips in CapCut mobile is a game-changer for quick, social-ready edits.
Extra Tips When You Merge Videos on CapCut
You now know the basics of how to merge videos on CapCut, but here are a few extra ideas to make your content stand out.
If you want to show two videos side by side in one frame, you can do that in CapCut too. Place clips on different tracks but starting at the same time, then resize each in the preview window. There are also templates made specifically for this layout.
Audio is just as important as video. You can detach original audio, remove it, or lower its volume. Then add background music from CapCut’s library or your own files. You can even use multiple audio tracks—like music + voiceover + sound effects—for more depth.
If you’re uploading to YouTube, use the direct export feature available in all versions of CapCut. It’ll save you time and hassle.
And remember those pre-production tips—consistent quality, color, transitions, audio, speed, and lighting. A little attention to these details makes a huge difference.
Don’t be shy about experimenting. Try different transitions, play with speed ramping, add text overlays or fun effects. CapCut is built for creativity.
Wrapping Up
Learning how to merge clips in CapCut is a useful skill whether you’re making videos for fun, work, or social media. It’s not just about sticking clips together—it’s about creating a seamless, engaging viewing experience.
CapCut makes it easy across all devices. The desktop app is full-featured, the online editor is convenient and collaborative, and the mobile app is perfect for editing anywhere.
So next time you have multiple clips to combine, open CapCut and give it a try. With a bit of practice, you’ll be merging videos like a pro.
CapCut — Your all-in-one video & photo editing powerhouse! Experience AI auto-editing, realistic effects, a huge template library, and AI audio transformation. Easily create professional masterpieces and social media viral hits. Available on Desktop, Web, and Mobile App.
Frequently Asked Questions
How do I place two videos side by side in one frame?You can do this in CapCut by placing videos on separate tracks that start at the same time, then resizing each in the preview window. There are also pre-made templates for side-by-screen layout.
Can I keep the original audio from my clips when merging?Yes. You can keep, detach, delete, or adjust the volume of original audio. You can also add new background music or voiceover.
Is CapCut completely free?Yes, the basic version is free and includes plenty of features for merging and editing videos. There’s a Pro version with advanced tools, but for most people, the free edition is more than enough.
Can I use CapCut on any device?Absolutely. CapCut is available for desktop (Windows and Mac), as a web app (through browsers like Chrome and Safari), and as a mobile app (iOS and Android).
How long does it take to merge videos?The editing process itself is fast—usually just a few minutes once you know how. Export time depends on the length and quality of your video.
Some images used in this article are courtesy of CapCut.