TOOL HUNTER

Ever found yourself staring at a photo that just doesn’t look as sharp as you’d like? You’re not alone. Many of us have faced the frustration of wanting to improve resolution of image files but not knowing where to start. Whether it’s an old family photo that’s gotten a bit fuzzy over time, or a picture you took on your phone that didn’t quite capture the details you wanted, there are solutions available that can help bring your images back to life.
In this guide, we’ll explore various methods to increase the resolution of an image, from simple one-click solutions to more advanced techniques. You don’t need to be a professional photographer or a tech expert to follow along – we’ve made sure everything is explained in simple, easy-to-understand language. So let’s dive in and discover how you can transform your photos from blurry to brilliant!
Table of Contents
- Understanding Image Resolution and Why It Matters
- Simple Solutions: Using CapCut for Quick Resolution Enhancement
- Helpful Tips for Better Image Enhancement Results
- Advanced Techniques for Specific Situations
- Putting It All Together: Choosing the Right Method for Your Needs
- Conclusion: Transforming Your Images with Confidence
Understanding Image Resolution and Why It Matters
Before we get into the how-to part, it’s important to understand what we mean when we talk about image resolution. Think of resolution as the amount of detail packed into your photo. Higher resolution means more detail, which translates to clearer, sharper images. When you’re looking to photo resolution increase, you’re essentially trying to add more detail to your image without losing quality.
Low-resolution images can cause several problems that might not be immediately obvious. First, they often appear blurry or fuzzy, especially when you try to zoom in or view them on larger screens. This lack of clarity can be frustrating when you’re trying to see fine details or when the image is important for a project or presentation.
Another common issue with low-resolution images is something called pixelation. This happens when you try to enlarge an image beyond what its current resolution can handle. The image becomes blocky and jagged, with visible squares (pixels) that make it look unprofessional and sometimes difficult to understand. It’s like trying to stretch a small rubber band too far – it just doesn’t work well.
If you ever need to print your images, low resolution becomes an even bigger problem. Printed materials require higher resolution than digital displays, and low-resolution images often print poorly with visible artifacts or a generally fuzzy appearance. This can ruin professional materials like brochures, flyers, or posters where image quality really matters.
Perhaps most importantly, low-resolution images often lose important details. Imagine a group photo where everyone’s faces are blurry, or a landscape shot where you can’t make out the distant mountains. These missing details can completely change the story your image is trying to tell.
The good news is that learning how do you increase picture resolution is easier than you might think, and there are tools available that can help you overcome these challenges effectively.
Simple Solutions: Using CapCut for Quick Resolution Enhancement
When you need to increase the resolution of an image quickly and easily, CapCut offers an excellent solution. This free online tool is designed with simplicity in mind, making it perfect for beginners while still offering enough features to satisfy more experienced users. The best part? You don’t need to download anything or pay any fees – it’s completely accessible from any device with an internet connection.
CapCut — Your all-inone video & photo editing powerhouse! Experience AI auto-editing, realistic effects, a huge template library, and AI audio transformation. Easily create professional masterpieces and social media viral hits. Available on Desktop, Web, and Mobile App.

Download App | Sign Up for Free
What makes CapCut particularly useful for image resolution increase is its automatic enhancement feature. The tool does most of the technical work for you, allowing you to focus on the creative aspects of your project. It supports various image formats and provides intuitive controls that make the process straightforward and user-friendly.
Let’s walk through the simple process of using CapCut to enhance your images:
Step 1: Upload Your Image
Getting started with CapCut is incredibly easy. First, you’ll need to upload the image you want to enhance. The platform offers multiple upload options to suit your preferences. You can select a file directly from your device’s storage, or if your image is stored in the cloud, you can access it through Google Drive or Dropbox integration. This flexibility means you can work with your images no matter where they’re stored.
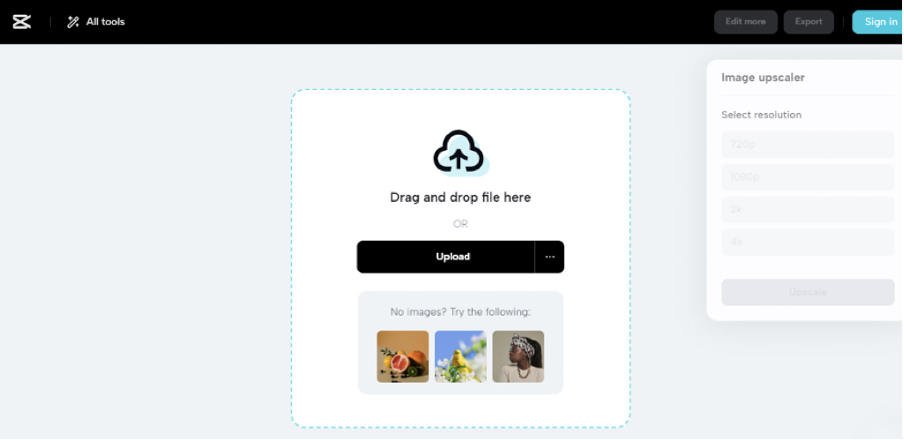
The upload process is designed to be smooth and hassle-free. Once you select your image, it quickly appears in the editing interface, ready for the next steps. The platform supports most common image formats, so you don’t have to worry about compatibility issues.
Step 2: Choose Your Desired Resolution
After your image is uploaded, you’ll see various options for resolution enhancement. CapCut provides several preset resolution options including 720p, 1080p, 2K, and 4K. These options cater to different needs – whether you’re preparing images for social media, professional printing, or personal archives.
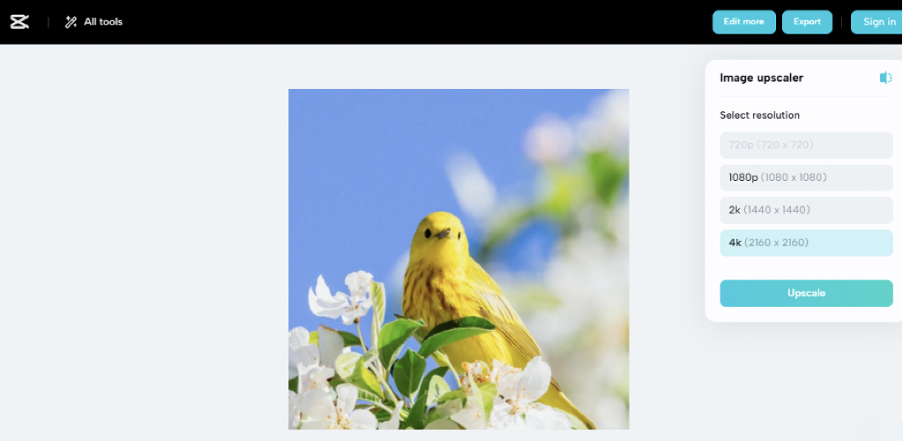
If you want to do more than just increase resolution, CapCut offers additional editing features. By clicking the “Edit more” button in the top right corner, you can access a full suite of editing tools that let you adjust various aspects of your image beyond just resolution.
Step 3: Export Your Enhanced Image
Once you’re satisfied with how your image looks, the final step is to export it. Clicking the “Export” button processes your image with the enhancements you’ve selected and prepares it for download. The process is quick and efficient, preserving the quality of your enhanced image.
CapCut offers more than just basic upscaling tools. By exploring the “All tools” option in the top left corner, you can discover a range of features that can help you with various aspects of image editing and enhancement.
The entire process from upload to export typically takes just a few minutes, making CapCut an excellent choice when you need to improve resolution of image quickly without compromising on quality.
Helpful Tips for Better Image Enhancement Results
Getting the most out of your image enhancement efforts involves more than just clicking a few buttons. While tools like CapCut make the technical process straightforward, understanding some basic principles can help you achieve even better results. Here are some practical tips that can help you when you’re working to increase the resolution of an image.
Pay attention to color balance and lighting conditions in your original image. When you improve resolution of image quality, maintaining natural-looking colors and well-balanced lighting is crucial for achieving professional-looking results. Sometimes, enhancing resolution can make existing color issues more noticeable, so it’s worth taking a moment to ensure these elements are working in your favor.
Consider the original quality of your image before enhancement. Different images respond differently to resolution enhancement techniques. A slightly blurry but otherwise well-exposed photo will typically yield better results than a very noisy or poorly exposed image. Understanding the limitations of your source material can help you set realistic expectations for the enhancement process.
Don’t be afraid to experiment with different enhancement settings. Most good editing tools, including CapCut, offer various options and filters that can complement your resolution enhancement efforts. Adjusting contrast, brightness, or applying subtle filters can sometimes make a significant difference in the final outcome.
Remember that the goal of image enhancement is to make your photo look its best while maintaining its original character. Over-editing can sometimes make images look artificial or processed. The best enhancements are often subtle improvements that preserve the authentic feel of the original image while addressing specific quality issues.
If you’re working with multiple images that need similar enhancements, consider processing them in batches if your chosen tool supports this feature. This can save you time and ensure consistency across your image collection.
Keep your intended use in mind when deciding how much to enhance your images. Social media posts might require different resolution standards than professional printing projects. Understanding where and how your image will be used can help you make better decisions about the enhancement process.
Finally, don’t forget to save your original files before making enhancements. This gives you the flexibility to start over if you’re not happy with the results, or to try different enhancement approaches without losing your source material.
Advanced Techniques for Specific Situations
While CapCut offers a fantastic quick solution for most image enhancement needs, there are situations where you might want more control over the process or need to use different tools. Here are some advanced methods for specific scenarios where you might need to increase the resolution of an image.
Enhancing Images on Your iPhone
Many of us take photos primarily on our smartphones, and being able to enhance those images directly on the device can be incredibly convenient. Fortunately, modern iPhones come with built-in editing capabilities that allow you to perform basic resolution adjustments without needing additional apps or software.
The process to improve resolution of image on iPhone is straightforward and can be done in just a few steps:
Step 1: Begin by opening the Photos app and selecting the image you want to enhance. The Photos app on iPhone is where all your images are stored, making it easy to find and work with your pictures.

Step 2: Once you’ve selected your image, tap the “Edit” button in the top right corner. This will open iPhone’s built-in editing tools, which include various options for enhancing your photos.

Step 3: While iPhone’s native editing tools don’t have a dedicated “resolution” slider, you can use the size adjustment tools to effectively increase the resolution of your image. Look for options that allow you to adjust dimensions or quality settings. Once you’ve made your adjustments, save the enhanced image.
This method is particularly useful for quick edits when you don’t have access to a computer or prefer to work directly on your mobile device. The changes are non-destructive, meaning you can always revert to your original image if you’re not happy with the results.
Professional Editing with Photoshop
For those working on professional projects or needing maximum control over the enhancement process, Adobe Photoshop remains the industry standard. Photoshop offers sophisticated tools for image resolution increase that provide precision and customization options beyond what simpler tools can offer.
The process to increase the resolution of an image in Photoshop involves these steps:
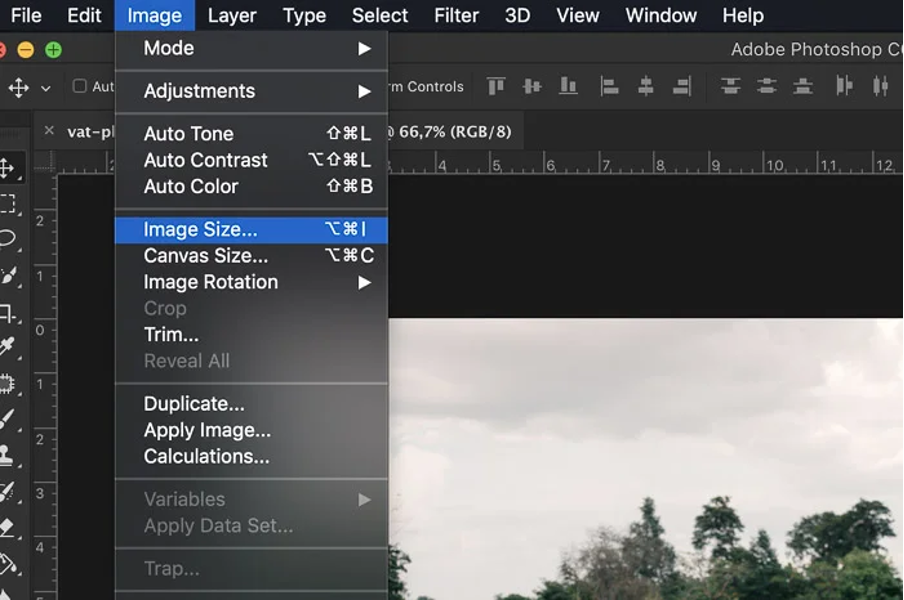
Step 1: Open your image in Photoshop. You can do this by launching the application and using the File > Open menu to select your image file. Photoshop supports a wide range of image formats, making it compatible with most types of image files.
Step 2: Navigate to the Image menu and select “Image Size.” This will open a dialog box that shows your image’s current dimensions and resolution. Here you can input your desired resolution values. It’s important to maintain the same physical dimensions to avoid distorting your image.
Step 3: Ensure the “Resample” option is checked, and select an appropriate resampling method. For most photo resolution increase tasks, “Bicubic Smoother” is the recommended option as it’s specifically designed for enlargement tasks. Click “OK” to apply your changes.
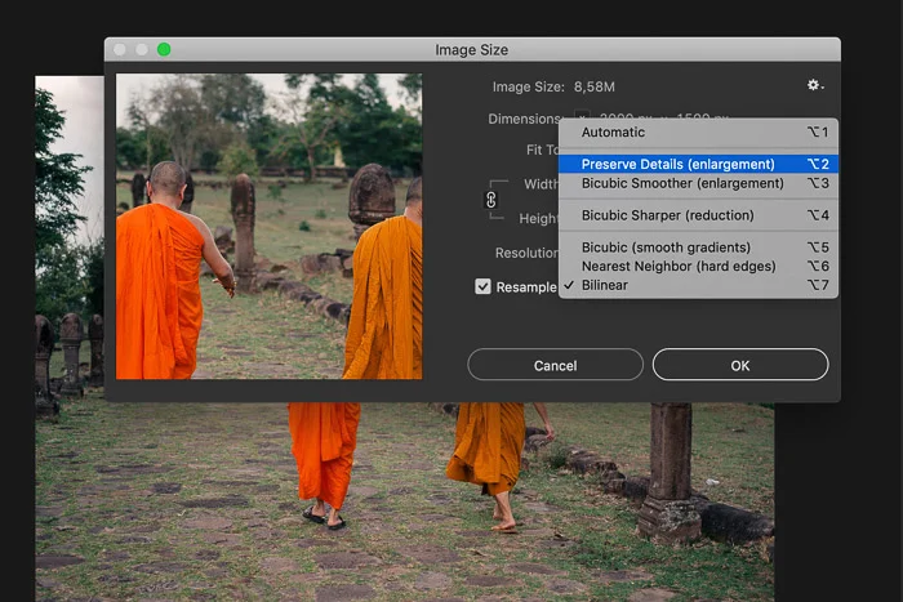
Photoshop’s advanced algorithms do an excellent job of adding detail during the enlargement process, though the results can vary depending on the original image quality and how much you’re trying to enlarge it. For best results, work with the highest quality original you have access to and make incremental adjustments rather than extreme enlargements in a single step.
CapCut — Your all-inone video & photo editing powerhouse! Experience AI auto-editing, realistic effects, a huge template library, and AI audio transformation. Easily create professional masterpieces and social media viral hits. Available on Desktop, Web, and Mobile App.
Download App | Sign Up for Free
Putting It All Together: Choosing the Right Method for Your Needs
Now that you’re familiar with different approaches to image enhancement, how do you decide which method is right for your specific situation? The answer depends on several factors including your technical comfort level, the importance of the image, the tools you have available, and how much time you want to invest in the process.
For quick enhancements of personal photos or social media content, CapCut offers an excellent balance of simplicity and effectiveness. Its one-click approach makes it accessible to everyone, while still producing quality results that will satisfy most casual users. The fact that it’s free and web-based means you can use it anywhere without committing to software downloads or subscriptions.
If you’re working directly from your iPhone and need to make quick adjustments, the built-in editing tools provide a convenient solution that doesn’t require any additional apps or learning curve. This is perfect for on-the-go enhancements when you want to quickly improve a photo before sharing it.
For professional work, or when you need maximum control over the enhancement process, Photoshop remains the gold standard. Its sophisticated tools and precise controls allow for custom adjustments that can yield exceptional results, though they require more time and expertise to use effectively.
Remember that sometimes the best approach might involve using multiple methods. You might start with a quick enhancement in CapCut, then make finer adjustments in another tool if needed. Or you might use Photoshop for critical professional work while relying on simpler tools for everyday enhancements.
Regardless of which method you choose, the most important thing is that you now have options. You’re no longer stuck with low-quality images because you didn’t know how do you increase picture resolution. With the knowledge you’ve gained from this guide, you can approach image enhancement with confidence, knowing you have multiple strategies at your disposal.
Conclusion: Transforming Your Images with Confidence
Learning how to increase resolution of image is a valuable skill that can significantly improve your photos and digital content. Whether you’re working with personal memories, professional projects, or social media content, the ability to enhance image quality opens up new possibilities for making your visuals look their best.
We’ve explored several approaches to image enhancement, from the simplicity of CapCut’s one-click solution to the precision of professional tools like Photoshop. Each method has its strengths and is suited to different situations and user preferences. The key is understanding what each approach offers and choosing the one that best matches your specific needs and comfort level.
Remember that successful image enhancement is part technical process and part artistic judgment. While the tools can handle the technical aspects of adding detail and improving sharpness, your eye for what looks natural and appealing is equally important. The best enhancements are those that improve the image without making it look artificial or over-processed.
Don’t be afraid to experiment with different approaches and settings. Like any skill, image enhancement improves with practice. The more you work with different images and tools, the better you’ll become at recognizing what approaches work best in different situations.
Most importantly, have fun with the process! Image enhancement should be an enjoyable creative activity, not a frustrating technical challenge. With the right tools and knowledge, you can transform lackluster images into vibrant, sharp visuals that truly capture the moments and subjects you want to preserve.
So go ahead – dig up those old blurry photos, revisit images that didn’t quite turn out as you hoped, and discover how modern enhancement tools can help you bring out their best qualities. Your enhanced images are waiting to be created!
Some images courtesy of CapCut