 TOOL HUNTER

Ever been watching a video and suddenly the music cuts off in a jarring way? Or maybe it starts too abruptly? That’s where audio fading comes in – it’s that smooth, gradual transition that makes your audio feel polished and professional. If you’re using iMovie, you’re in luck because it has some pretty straightforward tools to help you master the art of audio fading.
Whether you’re working on a school project, a personal vlog, or just having fun with video editing, learning how to fade audio in iMovie can seriously level up your content. The good news is that you don’t need to be a tech wizard to make it happen. iMovie’s interface is designed to be user-friendly, and with a little guidance, you’ll be creating smooth audio transitions in no time.
Table of Contents
- Understanding Audio Fading in iMovie
- How to Fade Audio in iMovie on Mac
- How to Fade Audio in iMovie on iPhone
- How to Remove Automatic Audio Fade in iMovie
- An Easier Alternative for Audio Fading
- Tips for Perfect Audio Fading
- Common Fading Scenarios and Solutions
- Troubleshooting Fade Issues
- Expanding Beyond Basic Fades
- Wrapping Up
Understanding Audio Fading in iMovie
Before we jump into the step-by-step instructions, let’s talk about what audio fading actually does. When you apply a fade in effect, your audio gradually increases from silence to full volume. This is perfect for the beginning of a scene or when you’re introducing background music. On the flip side, a fade out effect gradually decreases the volume until it reaches silence, which works great for ending scenes or concluding a musical piece.
The beauty of iMovie fade audio features is that they give you control over how quickly or slowly these transitions happen. You can make a subtle two-second fade or a more dramatic ten-second transition – it all depends on the mood you’re trying to create. Learning how to fade out sound in iMovie effectively can make the difference between an amateur-looking project and something that feels truly professional.
How to Fade Audio in iMovie on Mac
If you’re working on a Mac, you’ve got a couple of different methods to choose from when it comes to applying fade effects. Both are relatively simple, but they offer slightly different approaches to controlling your audio transitions.
Getting Started: Importing Your Audio
Before you can work any magic with fade effects, you need to get your audio into iMovie. Here’s how:
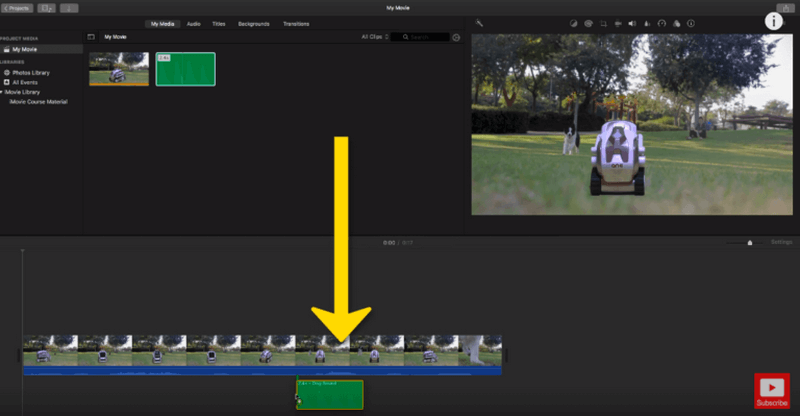
Step 1 Open iMovie on your Mac and look for the import button – it’s that downward arrow icon you’ll find in the toolbar. Click it to browse for your audio files.
Step 2 Once you’ve located your audio file, simply drag it from the media browser and drop it into your project timeline. Now you’re ready to start working with fade in audio in iMovie.
Method 1: Using Fade Handlers for Quick Adjustments
This is probably the most intuitive way to handle your iMovie fade audio needs. The fade handlers give you visual control right in the timeline.
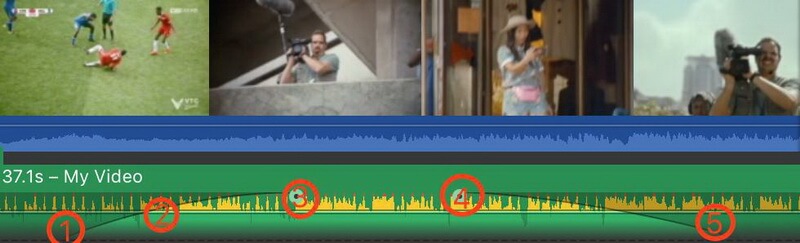
Step 1 First, you’ll want to make sure you can see your audio waveforms. Click on the Settings menu (it looks like a little gear icon) and check the box that says “Show Waveforms” at the bottom of the Project panel.
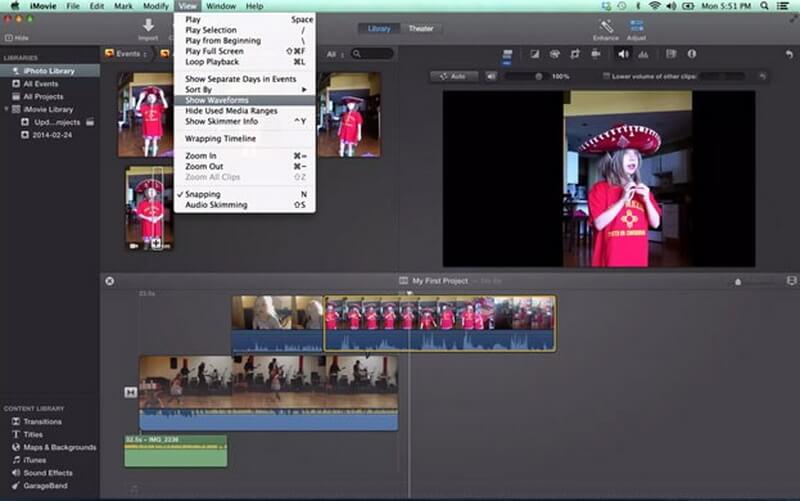
Step 2 Once you’ve enabled waveforms, you’ll notice small gray handles at both ends of your audio clip in the timeline. These are your fade handles, and they’re your ticket to controlling how to fade out sound in iMovie.
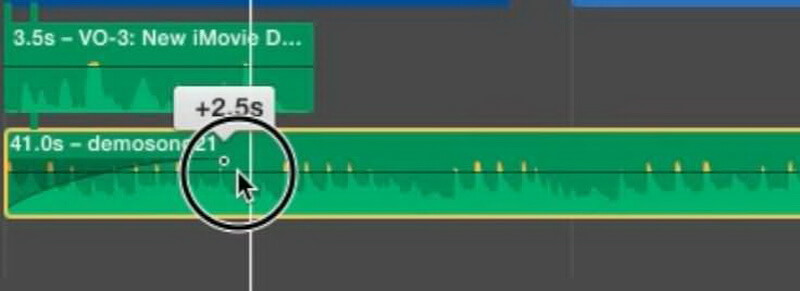
Step 3 Now for the fun part! Click and drag the left fade handle to the right to create a fade-in effect. The further you drag, the longer your fade-in will be. For a fade out, drag the right handle toward the left. This is how you create that smooth iMovie fade out audio effect that sounds so professional.
Step 4 Always preview your work! Move the playhead (that red vertical line) to a point before your fade and hit the spacebar to listen to how your adjustments sound.
Step 5 If you’re happy with your fade settings, you can go back to Settings and uncheck “Show Waveforms” to clean up your workspace.
Method 2: Using Audio Inspector for Precise Control
If you want more numerical precision for your fade in audio in iMovie adjustments, the Audio Inspector method might be your better bet.
Step 1 Double-click on your audio clip in the timeline and select “Clip Adjustment” from the menu that appears. This will bring up the Inspector panel.
Step 2 Click on the Audio tab where you’ll find various editing options, including sliders for both Fade In and Fade Out effects.
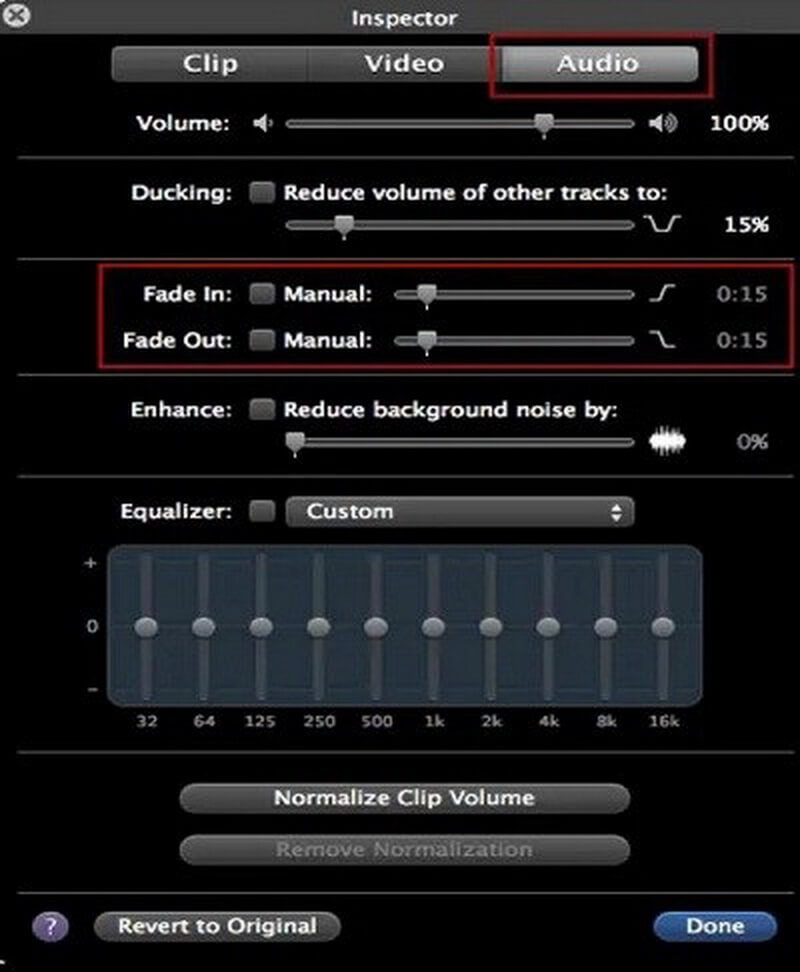
Step 3 Adjust the sliders to set the exact duration for your fades. The great thing about this method is that you can type in specific values if you want precise control over how to fade out audio in iMovie. Once you’re satisfied with your settings, click Done to apply them.

How to Fade Audio in iMovie on iPhone
For those times when you’re editing on the go, iMovie for iPhone offers a surprisingly robust set of tools for audio fading. The process is touch-based and quite intuitive once you get the hang of it.
First things first – if you don’t already have iMovie on your iPhone, you’ll need to download it from the App Store. It’s free, which is pretty awesome considering how much functionality you get.
Step-by-Step Guide for iPhone Fading
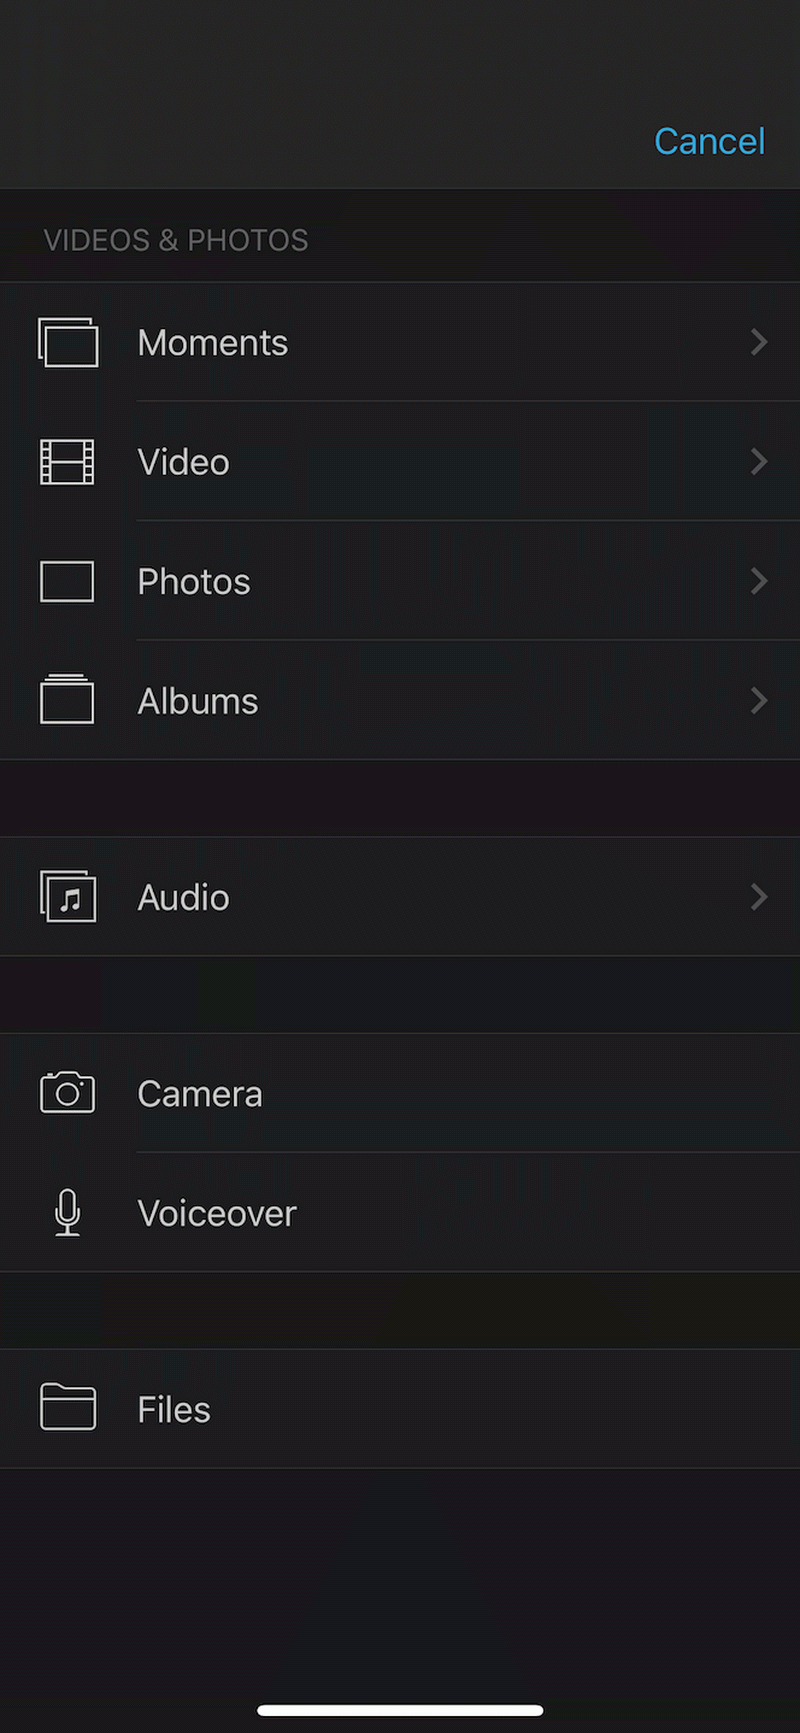
Step 1 After installing iMovie, open the app and tap the + icon to start a new project. To add your audio, tap on Audio > My Music to browse the songs available in your Music app.

Step 2 You can also import video from your Photos library and then separate the audio from it if that’s what you’re working with. Once your audio is in the timeline, you’re ready to start fading.
Step 3 Tap on the audio clip in your timeline, and a set of options will appear at the bottom of your screen. Look for the Audio icon (it looks like a little speaker) and tap it.
Step 4 Now tap on “Fade” and you’ll see yellow sliders appear at the ends of your audio clip. These work similarly to the fade handles on the Mac version. Drag them to adjust the duration of your fade in and fade out effects.
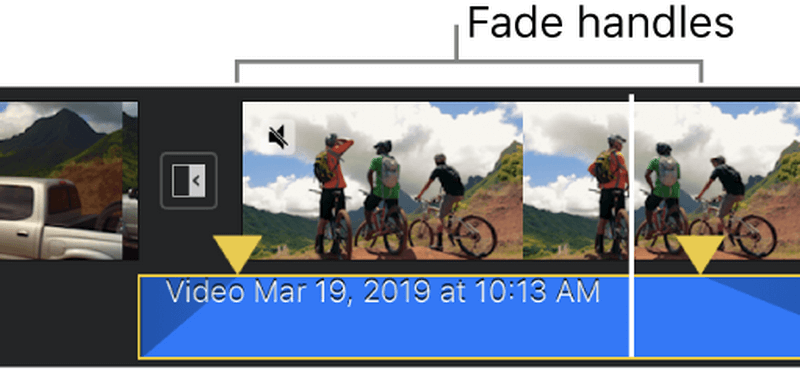
The process for how to fade out audio in iMovie on iPhone is really that simple. The touch interface makes it feel natural, and you can quickly audition different fade lengths by dragging the handles and then playing back your clip.
How to Remove Automatic Audio Fade in iMovie
Here’s something not everyone realizes – iMovie actually applies automatic fade effects to audio clips by default. While this can be helpful in some situations, there are times when you might want your audio to start or end at full volume without any fading.
If you find the automatic fading annoying, here’s how to turn it off:
Step 1 After importing your audio clip into iMovie, drag it to the timeline as you normally would.
Step 2 Double-click on the clip and select “Clip Adjustment” to open the Inspector panel.
Step 3 Click on the Audio option and look for the Fade In and Fade Out sections. You’ll notice that by default, these are set to automatic values.
Step 4 To remove the automatic iMovie fade audio effects, simply drag the sliders for both Fade In and Fade Out all the way to the left until they read “0”. Then click Done to save your changes.
And just like that, you’ve learned how to get rid of those automatic fades! This is particularly useful for audio that needs to maintain consistent volume throughout, like voiceovers or dialogue scenes.
An Easier Alternative for Audio Fading
While iMovie is a solid choice for basic video and audio editing, some users find its interface a bit limiting or confusing, especially when it comes to more advanced audio features. If you’re looking for a more intuitive way to handle audio fading (along with a bunch of other cool editing features), there’s an excellent alternative worth considering.
Filme – Best Video Editor for Beginners.Explore Your Creativity, Limitless

Check More Details | Download Now! | Check All Deals
This user-friendly editing software takes the complexity out of audio editing while still delivering professional results. Whether you’re trying to figure out how to fade out sound in iMovie or looking for more advanced audio features, this tool makes the process incredibly straightforward.
One of the standout features is how it handles fade in audio in iMovie-style transitions but with even more control and precision. The interface is designed to be welcoming for beginners while still packing enough power to satisfy more experienced editors.
Key Features That Make It Shine
What really sets this editor apart are the thoughtful features that make audio editing both easy and powerful:
- Intuitive fade-in and fade-out controls that are even more straightforward than iMovie’s
- Advanced audio recording capabilities that work with both built-in and external microphones
- Real-time voice changing effects that can add fun or professional touches to your audio
- Extensive library of audio effects and background music options
- Visual feedback that makes it easy to see exactly what your audio is doing
The best part is that you don’t need any prior editing experience to get great results. The learning curve is gentle, and you can achieve professional-sounding audio fades in just a few clicks.
How to Fade Audio with This Alternative Editor
If you’re curious about how this compares to the iMovie fade audio process, here’s a quick rundown:
Step 1 Download and install the software from the official website, then launch it to get started.
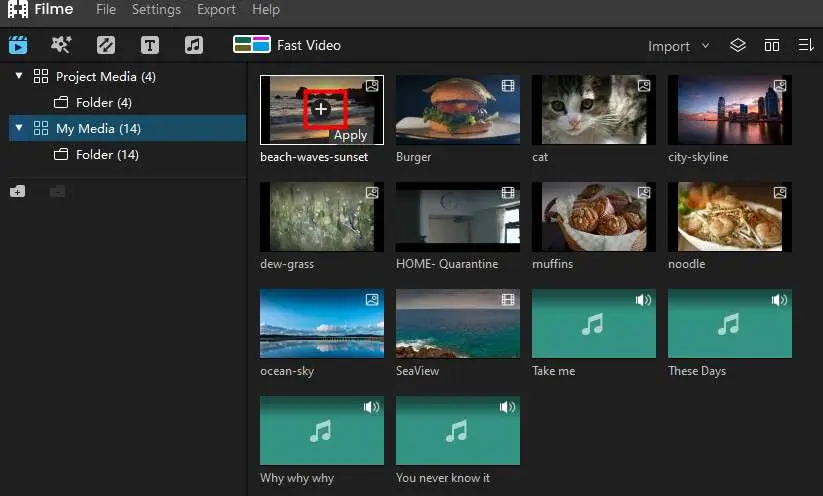
Step 2 On the home screen, click the “+” icon to import your audio file. Once it appears in your media library, drag it down to the timeline.
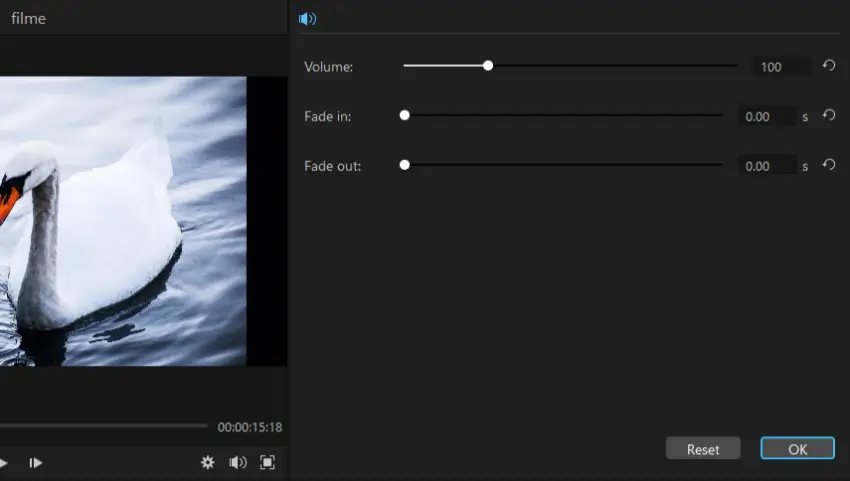
Step 3 Double-click the audio clip in the timeline to open the editing panel. Here you’ll find dedicated sliders for fade-in and fade-out effects. The process for how to fade out audio is as simple as moving a slider – no hidden menus or complicated steps.
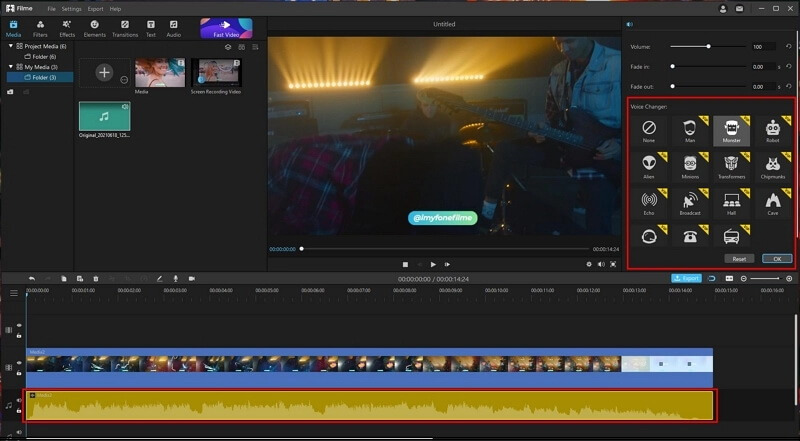
Step 4 If you want to get creative, you can also explore the voice-changing effects that appear below the fading options. Click on any theme to preview it, then hit OK to apply it to your audio.
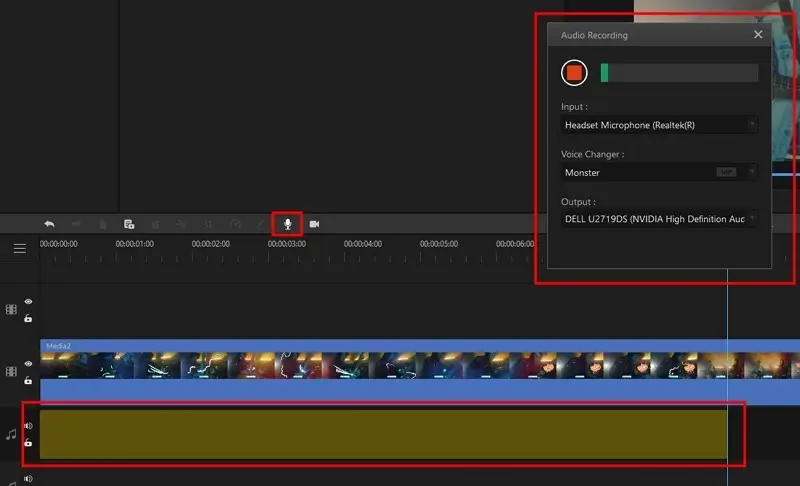
Step 5 For real-time voice modification, move the playhead to an empty spot in the timeline and click the microphone icon. Choose your input device and voice effect, then start speaking to record with the effect applied instantly.
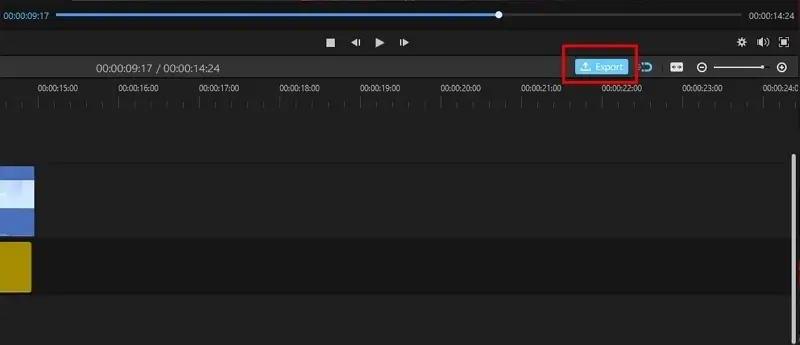
Step 6 When you’re happy with your audio, click Export to save your project in your preferred format.
Filme – Best Video Editor for Beginners.Explore Your Creativity, Limitless
Check More Details | Download Now! | Check All Deals
Tips for Perfect Audio Fading
No matter which tool you use, there are some universal tips that can help you achieve better fade results:
Consider the Context – The length of your fade should match what’s happening visually. A quick scene change might call for a shorter fade, while a slow, emotional ending might benefit from a longer, more gradual fade out.
Use Your Ears – Always listen to your fades multiple times. What looks good on the waveform might not sound natural to the ear. Make adjustments until it feels right.
Don’t Overdo It – Sometimes subtlety is key. A fade that’s too long can feel drawn out, while one that’s too short might not achieve the smooth transition you’re looking for.
Experiment with Timing – Try starting your fade out a few seconds before the visual transition, or ending your fade in a moment after the scene begins. These slight timing variations can create different emotional impacts.
Watch Your Levels – Make sure your audio isn’t peaking (getting too loud) before or after your fades. Consistent volume levels will make your fades sound more professional.
Common Fading Scenarios and Solutions
As you work more with audio fading, you’ll encounter different situations that call for specific approaches:
Background Music – This is where fades are most commonly used. For background music, longer fades (3-5 seconds) often work well as they’re less noticeable and create a gentle atmosphere.
Dialogue – Be very careful with fades on dialogue. Usually, you’ll want dialogue to be clear and consistent, so fades should be used sparingly and kept very short if used at all.
Sound Effects – Short, sharp sound effects typically don’t need fades. However, ambient sounds (like rain or crowd noise) can benefit from gentle fades to make them feel more natural.
Multiple Audio Tracks – When you have several audio tracks playing simultaneously, consider staggering your fades rather than having them all fade at the same time. This creates a more layered, professional sound.
Troubleshooting Fade Issues
Sometimes, despite your best efforts, your fades might not turn out quite right. Here are some common issues and how to fix them:
Fades Sound Choppy – If your fade sounds uneven or choppy, try increasing the fade duration. Very short fades can sometimes expose the digital nature of the audio in an unflattering way.
Volume Drops Too Quickly – This usually means your fade is too steep. Extend the fade duration to create a more gradual descent in volume.
Can’t Achieve Smooth Transition – If you’re struggling to get a smooth fade no matter what you try, the issue might be with the audio file itself. Try using a different audio file or applying a very gentle compression effect before fading.
Fade Handles Not Visible – If you can’t see the fade handles in iMovie, make sure you’ve enabled “Show Waveforms” in the settings menu. Without waveforms visible, the fade handles remain hidden.
Expanding Beyond Basic Fades
Once you’ve mastered the basics of how to fade out audio in iMovie, you might want to explore more advanced audio techniques. While iMovie has its limitations in this area, understanding what’s possible can help you decide when you might need more powerful tools.
Crossfading – This is when you fade out one audio track while simultaneously fading in another. It’s great for seamless music transitions. While iMovie doesn’t offer true crossfading, you can approximate it by overlapping two clips and applying fades to both.
Keyframing – More advanced editors allow you to set keyframes – specific points where you can change volume levels. This lets you create custom fade curves rather than simple linear fades.
EQ and Effects – Sometimes, the perfect fade involves more than just volume adjustment. Applying equalization (EQ) or other effects during a fade can create more sophisticated audio transitions.
Wrapping Up
Learning how to fade audio in iMovie is one of those skills that seems small but can dramatically improve the quality of your videos. Whether you’re creating a fade in audio in iMovie for the beginning of your project or learning how to fade out sound in iMovie for the perfect ending, these techniques help your content feel more polished and intentional.
The great thing about iMovie fade audio features is that they’re accessible to everyone – you don’t need to be a professional audio engineer to get good results. With the methods we’ve covered for both Mac and iPhone, you have everything you need to start creating smoother, more professional audio transitions.
That said, if you find yourself wanting even more control or a simpler interface, remember that there are excellent alternatives available that can make the process even more intuitive. The goal is to find the tools that work best for your specific needs and skill level.
Filme – Best Video Editor for Beginners.Explore Your Creativity, Limitless
Check More Details | Download Now! | Check All Deals
At the end of the day, whether you stick with iMovie or explore other options, the important thing is that you’re taking the time to care about your audio quality. In a world where everyone is watching videos on their phones, tablets, and computers, good audio can be what sets your content apart from the rest.
So go ahead – open up iMovie and experiment with those fade handles. Try different fade durations, play with different types of audio, and most importantly, have fun with the process. The more you practice, the more instinctive it will become, until creating perfect audio fades is just second nature.
Some images courtesy of iMyFone

