TOOL HUNTER

Have you ever downloaded an Excel file only to find yourself unable to make any changes? That frustrating “read-only” message can really disrupt your workflow, especially when you need to update data or modify formulas. Learning how to enable editing in Excel is essential for anyone who regularly works with spreadsheets from various sources.
Whether you’re dealing with files marked as final, password-protected documents, or those annoying protected views, there are multiple ways to regain editing capabilities. This comprehensive guide will walk you through every possible scenario and provide step-by-step solutions to help you enable edit in Excel regardless of the protection type.
Table of Contents
- Understanding Why Excel Files Become Read-Only
- Method 1: Disable Protected View to Enable Editing in Excel
- Method 2: Enable Editing for Files Marked as Final
- Method 3: Handle Read-Only Recommended Files
- Method 4: Manage Files Protected with Modify Password
- Method 5: Handle Worksheet Protection with Password
- Advanced Solution: Using Password Recovery Tools
- Additional Tips for Managing Excel File Protection
- Preventing Future Editing Issues
- Version-Specific Considerations
- When to Seek Professional Help
- Conclusion
Understanding Why Excel Files Become Read-Only
Before diving into the solutions, it’s helpful to understand why Excel files sometimes open in read-only mode. There are several common reasons:
- The file was downloaded from the internet or email attachment
- The original author marked the document as final
- Password protection was applied to the workbook or worksheet
- The file is stored in a protected location
- The “read-only recommended” setting was enabled
Knowing the specific cause will help you choose the most appropriate method to enable editing in Excel.
Method 1: Disable Protected View to Enable Editing in Excel
When you download Excel files from the internet or receive them as email attachments, they often open in Protected View. This security feature prevents potential malware from affecting your computer but also blocks editing capabilities. Here’s how to disable Protected View and permanently enable editing in Excel:
Step 1: Launch Microsoft Excel and click on “File” in the top-left corner. From the menu that appears, select “Options” at the bottom of the list.
Step 2: In the Excel Options window, choose “Trust Center” from the left-hand panel, then click on “Trust Center Settings.”
Step 3: Navigate to the “Protected View” tab in the Trust Center dialog box. You’ll see several checkboxes related to different Protected View scenarios. Uncheck all the boxes to disable Protected View entirely, or selectively disable the options based on your needs. Click “OK” to save your changes.
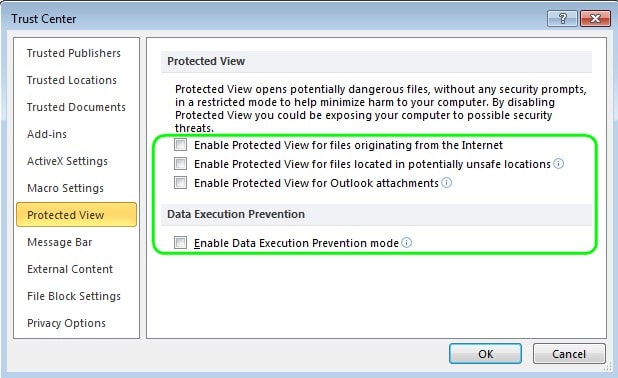
This method will prevent Excel from automatically opening files in Protected View, allowing you to enable edit in Excel files immediately upon opening them.
iMyFone Passper Pro.Ultimate 6-in-1 File Password Remover.1-click to remove Excel/Word/PDF/RAR/ZIP/PowerPoint passwords.Unlock file passwords to read, edit or print easily.Remove read-only file protection permanently.Break file locks with up to 99% sucessful rate.

Method 2: Enable Editing for Files Marked as Final
Sometimes document authors mark Excel files as “Final” to indicate that the content shouldn’t be modified. When you open such a file, you’ll see a yellow message bar below the ribbon stating “MARKED AS FINAL” along with an “Edit Anyway” button.
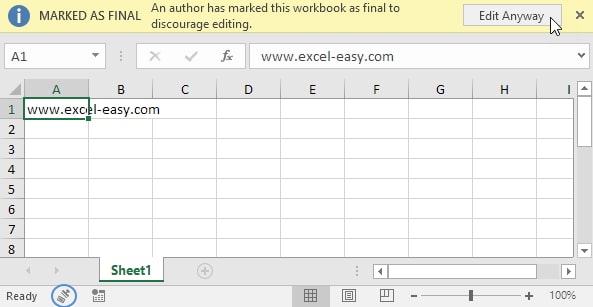
To enable editing in Excel files marked as final, simply click the “Edit Anyway” button in the message bar. The document will immediately switch to editable mode, allowing you to make any necessary changes.
It’s important to note that marking a document as final is not a security feature—it’s more of a notification system. The original author isn’t preventing editing through this method, just indicating that the document shouldn’t be modified.
Method 3: Handle Read-Only Recommended Files
Some Excel files are set to open with a “read-only recommended” prompt. When you open these files, Excel displays a dialog box suggesting you open the file in read-only mode unless you need to make changes.
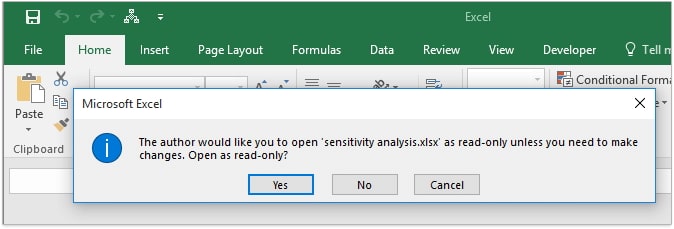
If you want to enable editing in Excel files with this setting, simply click “No” when prompted to open as read-only. The file will open in fully editable mode.
To permanently remove the read-only recommendation and always enable edit in Excel for these files:
Step 1: Open the Excel file and select “No” when the read-only prompt appears.
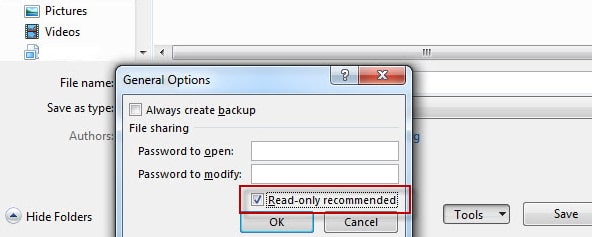
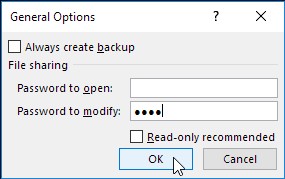
Step 2: Click “File” then choose “Save As.” In the Save As dialog, click the “Tools” dropdown menu and select “General Options.”
Step 3: In the General Options dialog, locate and uncheck the “Read-only recommended” checkbox. Click “OK” and save the file.
This will remove the read-only recommendation, allowing you to enable editing in Excel without seeing the prompt in the future.
Method 4: Manage Files Protected with Modify Password
Some Excel files are protected with a password that’s required for modification. When you open these files, you’ll see a password prompt. If you know the password, simply enter it to enable editing in Excel.
If you have the correct password and want to remove this protection permanently:
Step 1: Open the file using the password, then go to “File” > “Save As.”
Step 2: Click “Tools” and select “General Options.”
Step 3: Delete the contents of the “Password to modify” field and click “OK.” Save the file to remove the modification password requirement.
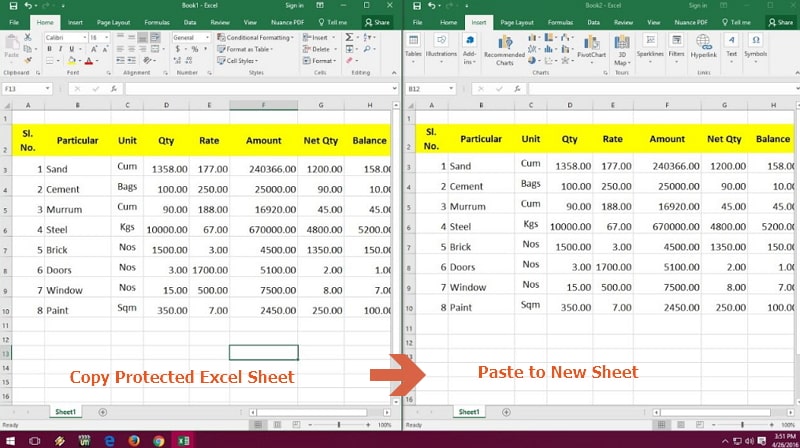
If you don’t know the password, you can still access the content by opening the file in read-only mode. Once open, you can copy the content to a new Excel file:
Step 1: Open the password-protected file in read-only mode by clicking “Read Only” when prompted for the password.
Step 2: Press Ctrl+A to select all content, then Ctrl+C to copy.
Step 3: Create a new Excel workbook and press Ctrl+V to paste the content. Save the new file, and you’ll have an editable version.
This method works well when you need to quickly enable edit in Excel files without the modification password, though formatting might need some adjustments.
iMyFone Passper Pro.Ultimate 6-in-1 File Password Remover.1-click to remove Excel/Word/PDF/RAR/ZIP/PowerPoint passwords.Unlock file passwords to read, edit or print easily.Remove read-only file protection permanently.Break file locks with up to 99% sucessful rate.
Method 5: Handle Worksheet Protection with Password
Worksheet protection is different from workbook protection. When a specific worksheet is password-protected, you can open the file but can’t modify the protected sheet until you unprotect it. If you know the password:
Step 1: Open the Excel file and navigate to the protected worksheet.
Step 2: Go to the “Review” tab and click “Unprotect Sheet.”
Step 3: Enter the password when prompted.
If you don’t know the password, the situation becomes more challenging. Standard Excel doesn’t provide a way to bypass worksheet protection without the password. This is where specialized tools become necessary to enable editing in Excel.
Advanced Solution: Using Password Recovery Tools
When you encounter password-protected Excel files and don’t have the password, professional password recovery tools offer the most reliable solution. These tools are specifically designed to help you enable edit in Excel files regardless of the protection type.
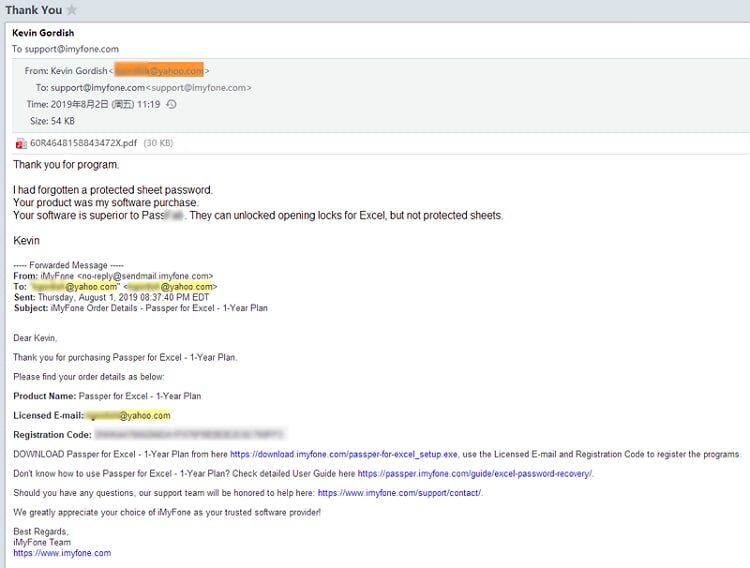
One highly recommended option is Passper for Excel, which provides a comprehensive solution for removing various types of Excel protection:
Key Features:
- Removes worksheet and workbook protection
- Recovers forgotten passwords
- Handles all Excel versions (2021, 2019, 2017, 2016, 2013, 2010, 2007)
- User-friendly interface with high success rates

The tool has received positive feedback from users and has been featured on reputable technology websites, confirming its effectiveness and reliability.
How to Use Password Recovery Tools to Enable Editing in Excel
Using specialized software to enable editing in Excel is straightforward:
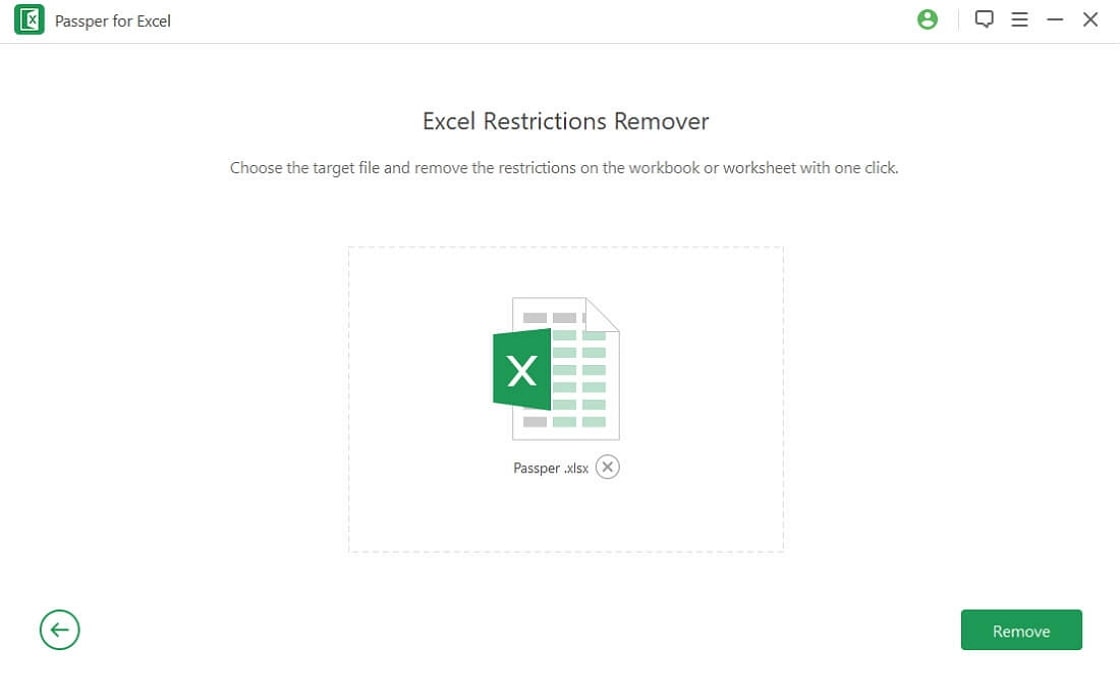
Step 1: Download and install the password recovery tool. Launch the program and select the “Remove Restrictions” option.
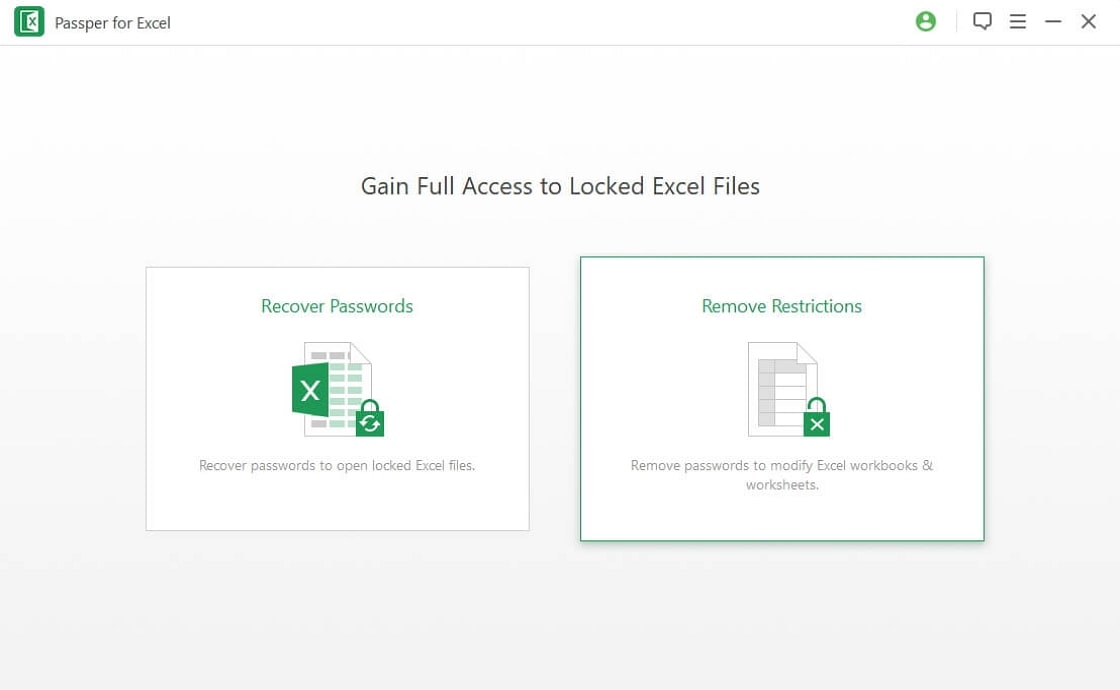
Step 2: Import the password-protected Excel file by clicking “Select a File.” Once the file is loaded, click “Remove” to start the restriction removal process.
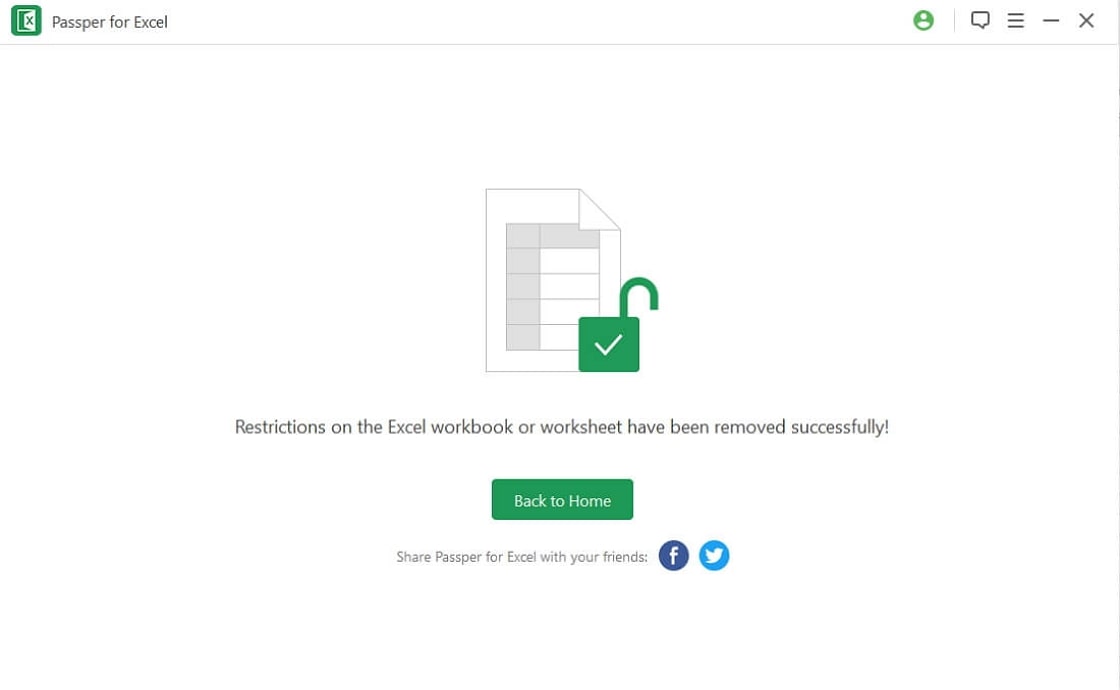
Step 3: The process typically completes within seconds. Once finished, you’ll receive a confirmation message, and your Excel file will be completely editable.
This method is particularly useful when you need to enable edit in Excel files with strong password protection or when other methods have failed.
Additional Tips for Managing Excel File Protection
Beyond the methods mentioned above, here are some additional strategies to handle Excel file protection:
Check File Properties: Sometimes, the read-only attribute is set at the file system level. Right-click the file, select “Properties,” and ensure the “Read-only” attribute isn’t checked.
Use Open and Repair: If the file is corrupted, Excel’s built-in “Open and Repair” feature might help. Go to File > Open, select the file, click the arrow next to the Open button, and choose “Open and Repair.”
Copy to New Location: If the file is stored in a protected network location or cloud storage with restricted permissions, try saving a copy to your local drive.
Temporary Edit Workaround: For files with simple sheet protection (where you can select cells but not edit them), you can sometimes copy the content to a new worksheet as described earlier.
Preventing Future Editing Issues
To avoid frequently needing to enable editing in Excel, consider these preventive measures:
- When sending files to others, be clear about whether they should enable editing capabilities
- Avoid using “Mark as Final” for collaboration documents
- Keep a record of passwords used for Excel file protection
- Store important files in accessible locations without restrictive permissions
- Regularly update your Excel application to ensure all features work correctly
Version-Specific Considerations
The methods described generally work across different Excel versions, but there might be slight variations:
- Excel 2021/2019/2016: These versions have similar interfaces and security features
- Excel 2013/2010: Older but still widely used, with slightly different menu locations
- Excel 2007: The interface differs significantly, but the core functionality remains
Regardless of your Excel version, the fundamental principles to enable edit in Excel remain consistent. The key is identifying the type of protection and applying the appropriate solution.
When to Seek Professional Help
While most Excel editing issues can be resolved using the methods above, there are situations where professional assistance might be necessary:
- Files with advanced encryption and strong passwords
- Corrupted files that won’t open properly
- Complex protection schemes with multiple layers
- Enterprise environments with additional security measures
In these cases, specialized software tools typically offer the most efficient solution to enable editing in Excel.
Conclusion
Being unable to edit an Excel file can be frustrating, but as we’ve seen, there are multiple ways to enable editing in Excel regardless of the protection type. From simple settings adjustments to using specialized software, you now have a comprehensive toolkit to handle any read-only Excel scenario.
Remember that the appropriate method depends on the specific type of protection applied to your file. For quick fixes, disabling Protected View or clicking “Edit Anyway” often does the trick. For more stubborn password protection, dedicated tools provide the most reliable solution.
With these techniques at your disposal, you’ll never have to worry about read-only Excel files disrupting your workflow again. Whether you’re working with simple spreadsheets or complex financial models, you can confidently enable edit in Excel and maintain productivity.
Some images in this article are sourced from iMyFone.