TOOL HUNTER

Have you ever been in the middle of an important video call or recording when suddenly things start to look fuzzy? It’s frustrating when your Discord video gets blurry as time goes on, especially during those marathon gaming sessions or lengthy screen shares. Maybe you’ve captured some great footage only to realize there’s something in the background you’d rather not show, or perhaps you need to protect someone’s privacy by hiding their face. Whatever your situation might be, learning how to properly blur videos can save your content and make it look much more polished.
The good news is that CapCut’s desktop video editor offers an incredible range of blurring options that can handle all these situations and more. Whether you’re dealing with a Discord video that becomes blurry as time goes on during long recordings, or you need to selectively hide certain elements while keeping others clear, this guide will walk you through everything you need to know. From basic full-screen blurring to advanced techniques for moving objects, you’ll discover how to transform your videos from amateur to professional quality.
Table of Contents
- Understanding When to Use Video Blur Effects
- Applying Full Video Blur in CapCut
- Selective Blurring Techniques for Specific Areas
- Background Blurring for Professional-Looking Videos
- Handling Aspect Ratio Changes with Side Blurring
- Advanced Techniques for Moving Object Blurring
- Why CapCut Stands Out for Video Blurring Tasks
- Conclusion
- Frequently Asked Questions
Understanding When to Use Video Blur Effects
There are so many situations where knowing how to apply blur effects can really save your video content. It’s not just about fixing problems – sometimes blurring can actually enhance your storytelling or creative vision.
If you’ve experienced that annoying moment when your Discord video turns blurry as time goes on during crucial gameplay moments, you know how distracting that can be for your viewers. Strategic blurring can help guide your audience’s attention to what really matters in your video. Think about those times when you’re showing text on screen – by blurring certain parts, you can make the important words pop out more effectively.
Privacy protection is probably one of the most common reasons people reach for blur tools. Whether you’re hiding faces, license plates, home addresses, or other sensitive information, blurring helps you share content without compromising personal privacy. This becomes especially important when you’re posting videos publicly where lots of people might see them. In some cases, blurring isn’t just a good practice – it’s actually legally required to avoid potential issues.
Then there are those unexpected moments when something unwanted appears in your footage. Maybe someone photobombed your perfect shot, or there’s a distracting object in the background that you didn’t notice while recording. Instead of scrapping the whole video, blurring lets you clean up these imperfections while maintaining the overall quality of your content.
Creative applications of blur effects can really elevate your video projects. You can create dreamy sequences, smooth transitions between scenes, or emphasize specific elements by blurring everything else. If you’ve noticed your Discord video appearing blurry as time goes on during certain effects, you can actually use similar techniques intentionally to achieve specific artistic results.
Applying Full Video Blur in CapCut
Starting with a full video blur is probably the easiest way to get familiar with CapCut’s blurring capabilities. The process is straightforward enough that even complete beginners can achieve great results.
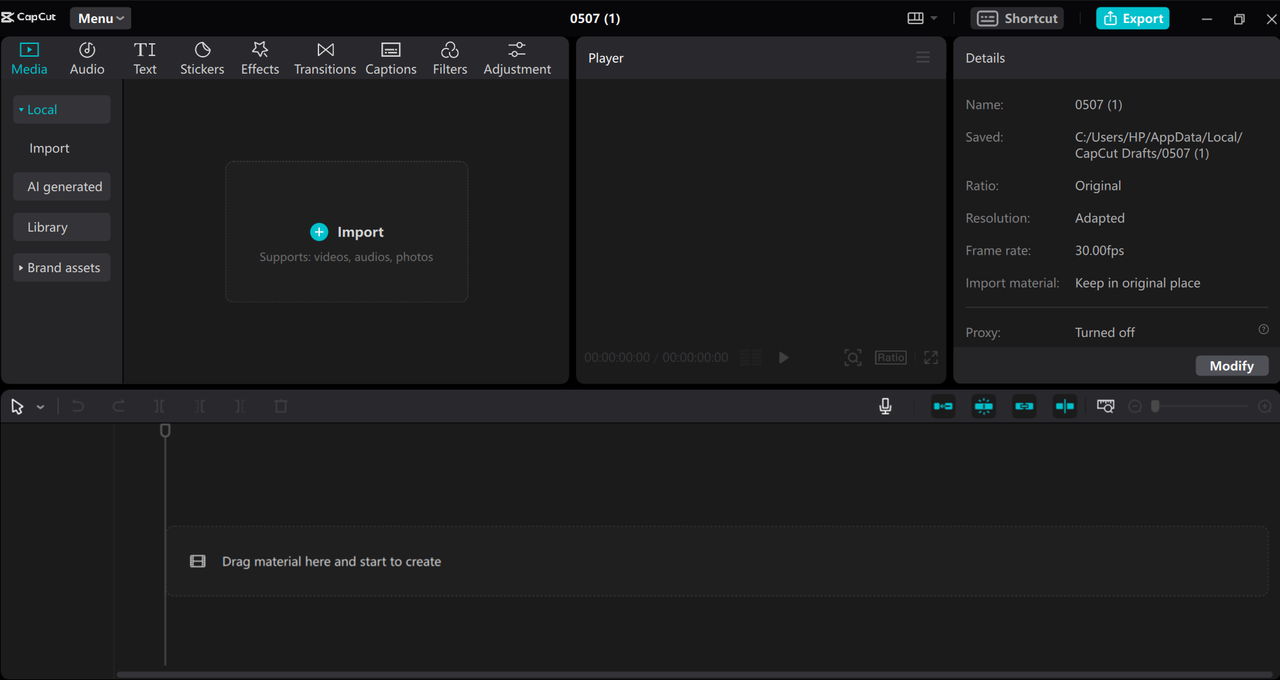
First things first – you’ll need to get CapCut installed on your computer. The desktop version is free to download, and you’ll want to create an account to access all the features. Once you’re set up, open the program and click that “New project” button to get started.
Getting your video into the editor is simple – you can drag and drop files directly into the timeline area, use the import button to browse your files, or access videos you’ve already stored in your CapCut cloud space. There’s even a library section with stock footage if you need additional material.
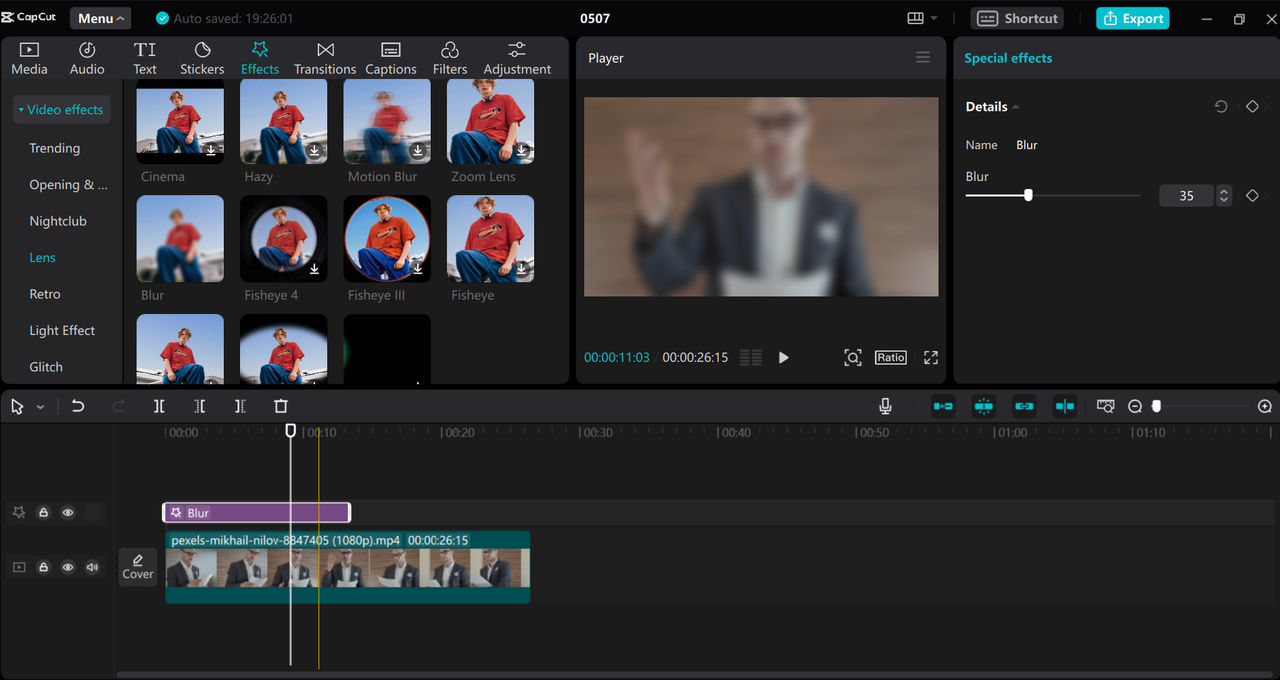
Now for the actual blurring part. Select your video clip in the timeline, then navigate to the “Effect” tab in the top left corner. Look for the “Lens” category and find the “Blur” effect – you might need to download it first if this is your initial use. Click the plus icon to apply it to your video.
You’ll notice the blur effect appears on its own track in your timeline. You can adjust how long the effect lasts by dragging its edges, and control the intensity using the slider in the right-hand panel. While you’re at it, don’t forget to explore CapCut’s other editing features like color correction, audio enhancement, and various visual effects that can complement your blur application.
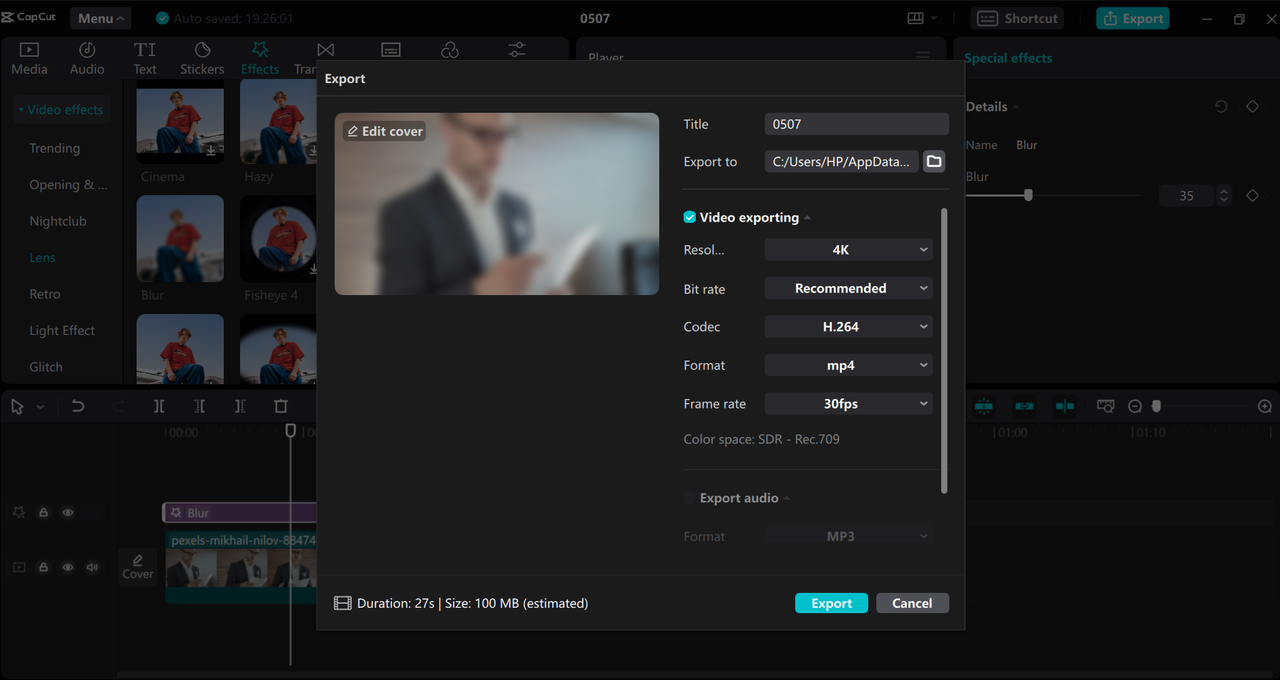
When you’re satisfied with your edits, exporting is just a click away. The export settings let you choose resolution (up to 4K), file format, frame rate, and other technical details. You can even share directly to platforms like TikTok and YouTube without ever leaving CapCut.
CapCut — Your all-in-one video & photo editing powerhouse! Experience AI auto-editing, realistic effects, a huge template library, and AI audio transformation. Easily create professional masterpieces and social media viral hits. Available on Desktop, Web, and Mobile App.

Selective Blurring Techniques for Specific Areas
Sometimes you don’t want to blur everything – just particular parts of your video. This selective approach is perfect for those situations where most of your footage looks great, but there are specific elements that need hiding. If you’ve dealt with Discord video that appears blurry as time goes on in certain spots but not others, this method will feel familiar but with more control.
The process begins similarly to full video blurring – create your project and import your footage. This time, you’ll right-click your video in the timeline and choose “Copy,” then paste to create a duplicate track. Apply the blur effect to your original (bottom) track as before.

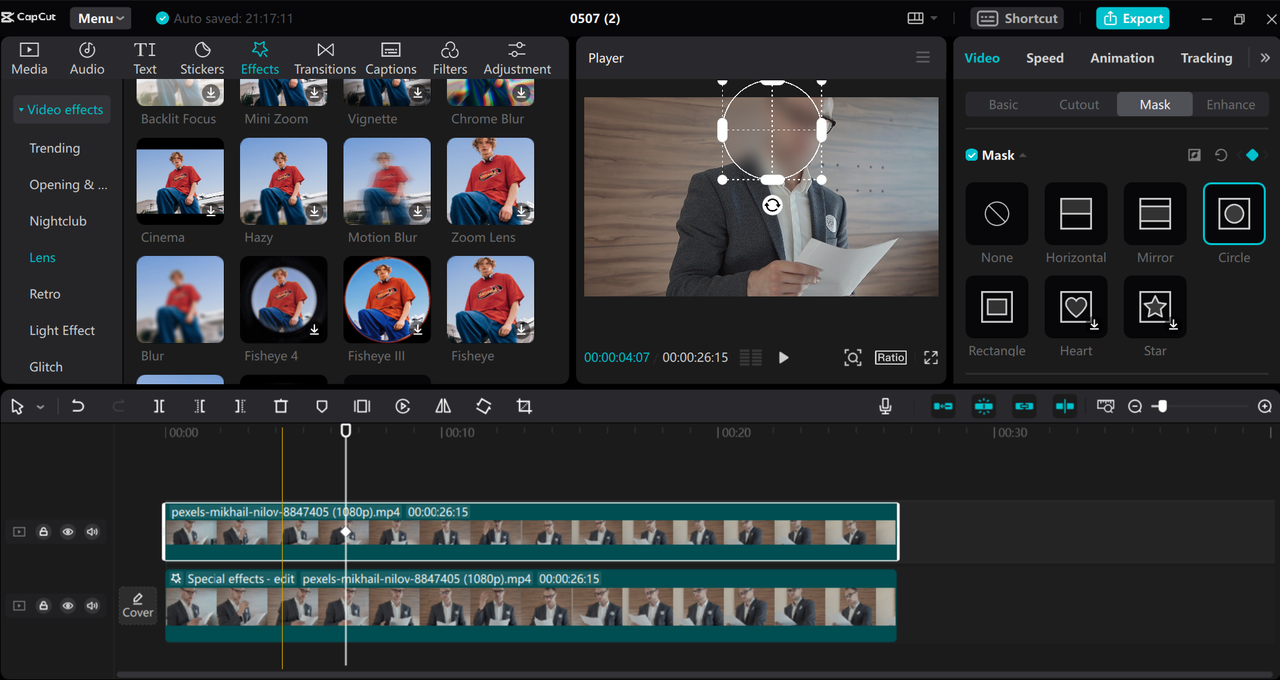
Here’s where things get interesting. Select your top video track and look for the “Mask” option under the “Video” tab in the right panel. Choose a shape that matches what you want to blur – rectangle and circle are good starting points. Position this mask over the area you want to remain clear, then click the “Reverse” button. This clever trick makes everything outside your mask blurred while keeping the masked area sharp.
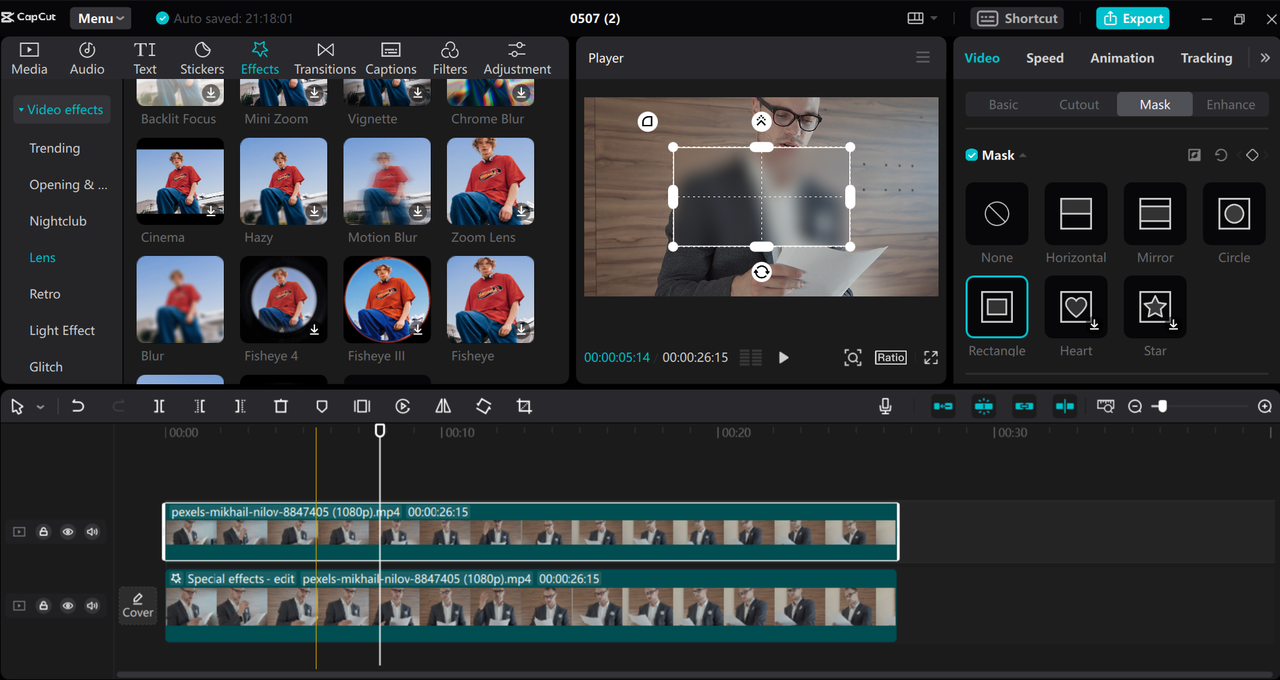
This technique works wonderfully for stationary objects like text overlays, logos, or background elements that need hiding. It’s much more precise than full blurring and maintains clarity where you need it most.
Background Blurring for Professional-Looking Videos
Nothing makes your main subject stand out quite like a nicely blurred background. This technique is especially useful when your backdrop is cluttered or distracting, or when you want to create that professional shallow depth-of-field look. It’s also great for addressing issues where your Discord video becomes blurry as time goes on in background areas during extended recordings.
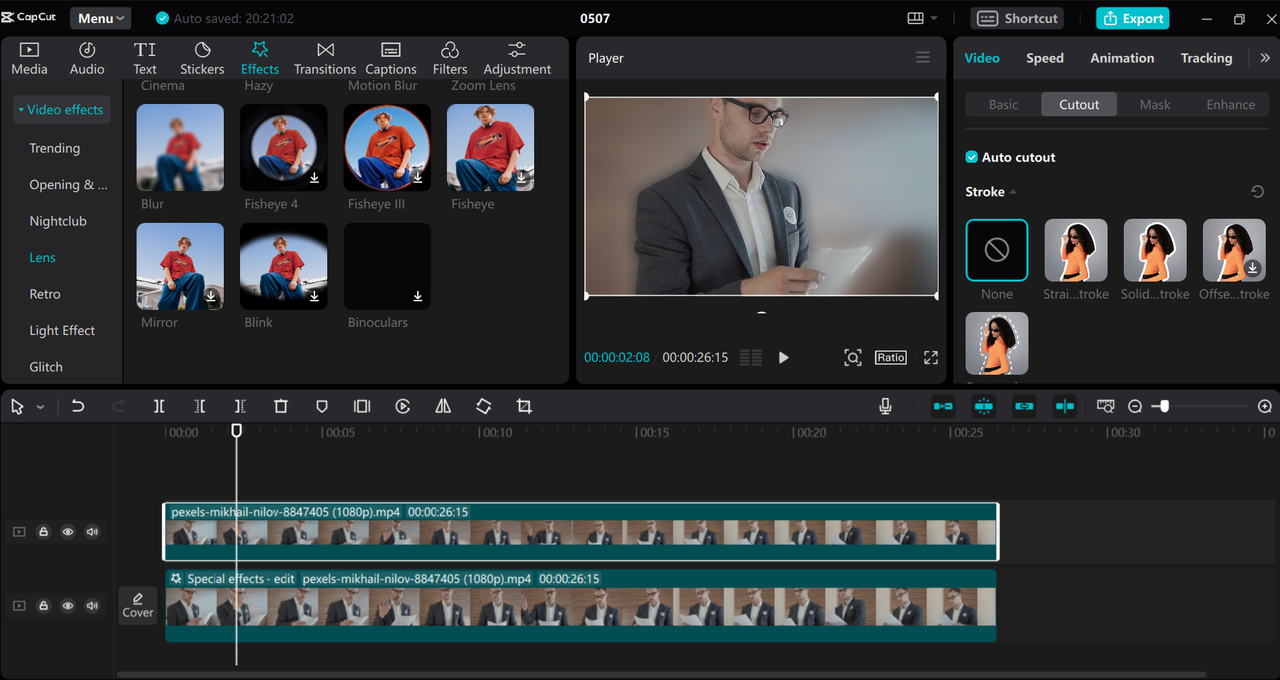
Start by adding your video to the timeline and creating a duplicate track, just like with selective blurring. Apply your blur effect to the bottom track and adjust the intensity to your liking. Now select your top track and navigate to the “Cutout” option under the “Video” settings.
Choose “Auto cutout” and watch as CapCut intelligently identifies your main subject and keeps it sharp while blurring the background. Currently, this feature works best with human figures, making it perfect for vlogs, interviews, or any video featuring people.
The automatic background blur feature is a huge time-saver compared to manual masking, especially when working with complex backgrounds or footage that has inconsistent quality, like when Discord video gets blurry as time goes on during long recording sessions.
Handling Aspect Ratio Changes with Side Blurring
Changing your video’s aspect ratio can sometimes leave you with awkward empty spaces on the sides of your frame. These blank areas can look unprofessional and distract from your content. Fortunately, CapCut offers an elegant solution with its side blurring capability.
After placing your video in the timeline, click the “Ratio” button beneath the preview window and select your desired aspect ratio. Common choices include 9:16 for vertical mobile viewing, 1:1 for square formats, or other ratios depending on where you plan to share your content.
Now head to the “Video” section in the right panel, select “Basic,” and scroll down until you find the “Canvas” option. Check this box, then choose “Blur” from the dropdown menu. Adjust the intensity slider until you’re happy with how the blurred sides complement your main content.
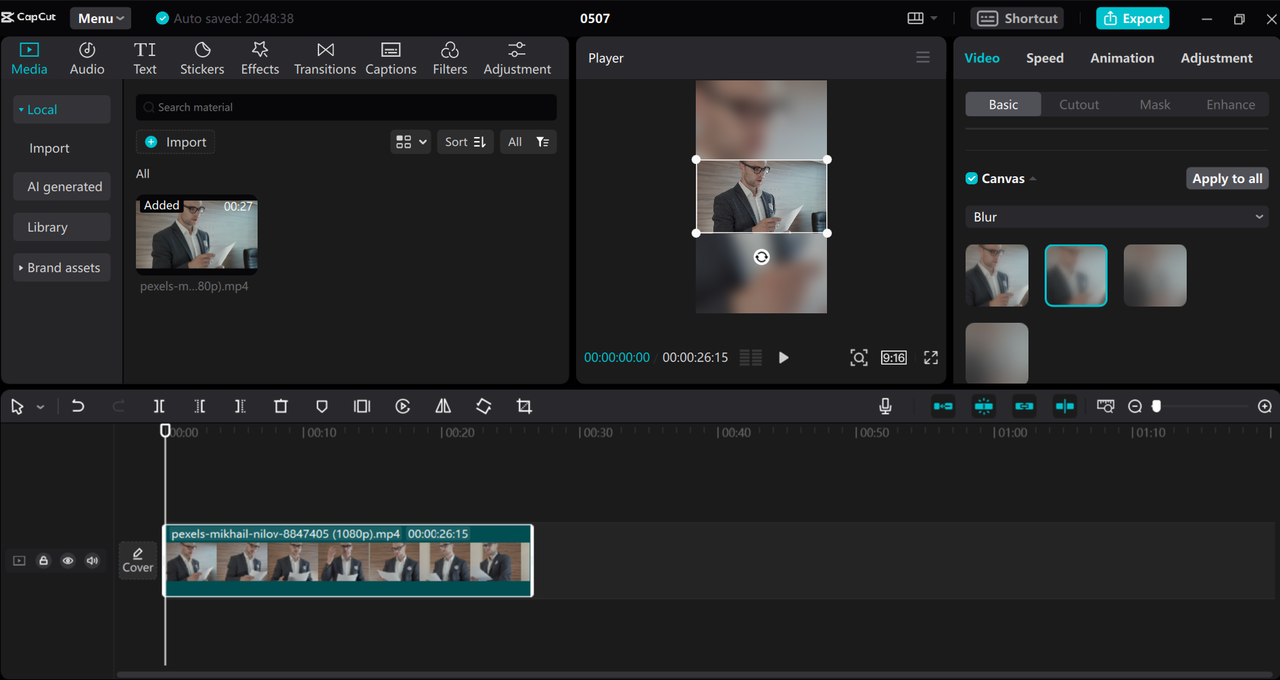
This technique is incredibly useful for maintaining a professional appearance across different platforms and formats. It also helps with those situations where the edges of your video appear blurry as time goes on during playback due to compression or format conversion issues.
Advanced Techniques for Moving Object Blurring
Blurring objects that move throughout your video represents the most advanced application of CapCut’s blur tools, but the results are worth the effort. This is essential for hiding faces that move around the frame, obscuring license plates on moving vehicles, or tracking any object that doesn’t stay in one place. If you’ve ever had a Discord video where someone’s face becomes blurry as time goes on during movement, you’ll appreciate having control over this process.
Begin by creating that familiar duplicate track setup – original video on bottom with blur effect applied, copied video on top. Select your top track and access the “Mask” feature once again, choosing a shape that matches your target object.
Position this mask over the object you want to keep clear at the beginning of your clip. Now for the magic part: click the “Add keyframe” button in the mask panel. Move your playhead forward a bit, adjust the mask’s position and shape to follow the moving object, then add another keyframe. Repeat this process throughout your video, creating a smooth tracking effect.
Once you’ve completed your keyframing, click the “Reverse” button so your mask reveals the clear video while the blur effect covers everything else. This technique requires patience and attention to detail, but it’s incredibly effective for professional-looking results.
Why CapCut Stands Out for Video Blurring Tasks
CapCut’s desktop video editor brings professional-grade blurring capabilities to everyone, regardless of experience level. Available for both Mac and Windows, it works perfectly even without an internet connection, making it reliable for all your editing needs.
The variety of blur effects alone makes CapCut worth exploring. Beyond basic blur, you’ll find motion blur for creating natural-looking movement, surface blur for subtle effects, and several other specialized options. You can even combine multiple blur effects in a single project for complex visual treatments, with each effect fully customizable to achieve exactly the look you want.
Masking capabilities in CapCut provide incredible precision for selective blurring. With shapes including horizontal, mirror, circle, and rectangle masks, you can tackle everything from aspect ratio adjustments to specific object obscuring. The keyframing system for moving masks feels intuitive once you get the hang of it, letting you track objects smoothly across your footage.
Beyond blurring, CapCut packs plenty of other useful features. The automatic filler word removal helps clean up interviews and presentations, while the AI-powered caption generator supports over 20 languages for accessibility. The relight feature can salvage poorly lit footage, and all the standard editing tools you’d expect are present and well-implemented.
When your project is complete, CapCut lets you export directly to social platforms without switching applications. The TikTok integration is particularly smooth, allowing you to set captions, control commenting permissions, and manage other platform-specific settings right from the editor.
CapCut — Your all-in-one video & photo editing powerhouse! Experience AI auto-editing, realistic effects, a huge template library, and AI audio transformation. Easily create professional masterpieces and social media viral hits. Available on Desktop, Web, and Mobile App.
Conclusion
Now you’ve got a complete understanding of how to blur videos in CapCut like a professional editor. Those clips you thought were ruined by unexpected photobombers, distracting backgrounds, or privacy concerns can now be rescued with just a few clicks. Whether you need full-screen blurring, selective area obscuring, background effects, or advanced motion tracking, CapCut’s desktop video editor provides all the tools you need.
The software’s intuitive design makes it accessible even if you’ve never edited videos before, while its powerful features satisfy more advanced needs. If you’ve struggled with Discord video that appears blurry as time goes on during important moments, you now have the knowledge to either fix those issues or apply similar effects intentionally for creative purposes.
There’s never been a better time to download CapCut and start transforming your video content. With these blurring techniques in your toolkit, you’re ready to create professional-looking videos that engage your audience while protecting privacy and maintaining focus on what really matters.
Frequently Asked Questions
Can I create motion blur effects in CapCut? Yes, CapCut includes a dedicated motion blur feature that helps moving objects appear more natural in your videos. You can adjust the amount of blurring, control how elements blend together, and even change the direction of the blur effect. When applied, motion blur creates those characteristic streaks behind moving objects that enhance realism in your footage.
What’s the process for removing blur effects? Removing blur effects is surprisingly simple. Just select the timeline that contains the blur effect you want to remove, click on the “Special effects” button at the beginning of that timeline, and press the Delete key when the effect is highlighted. This makes it easy to experiment with different blur settings without worrying about making permanent changes to your project.
Is it possible to use multiple blur effects on one video? Absolutely! CapCut lets you layer multiple blur effects on a single video clip. Just navigate to the “Effects” section, choose your desired blur effect, and drag it onto your clip. Repeat this process for each additional effect you want to apply. You can then adjust the timing and intensity of each effect individually using the timeline and effect settings panel.
How can I save my favorite blur effects for quick access? CapCut allows you to bookmark frequently used effects for easier access. Simply go to the “Effects” tab, find the blur effect you want to save, hover your cursor over it, and click the star icon that appears. The software will automatically create a “Favorites” category and add your selected effect to it, streamlining your workflow for future projects.
Some images courtesy of CapCut