TOOL HUNTER
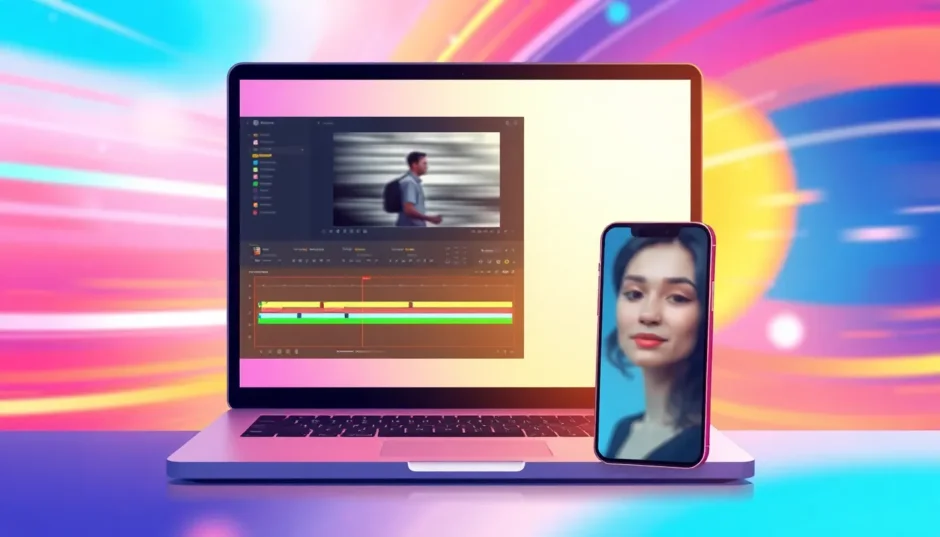

Ever wondered how to blur in Canva to make your videos look more professional or hide sensitive content? You’re not alone! Many content creators search for ways to blur video Canva style because it’s such a popular and accessible platform. Whether you’re trying to figure out how to blur a video in Canva for privacy reasons or creative effects, this guide will walk you through everything you need to know. Plus, we’ll introduce you to an amazing offline alternative that takes video blurring to the next level!
Table of Contents
- Why Video Blurring Matters More Than You Think
- Complete Guide: How to Blur Video Canva Style
- How to Blur Specific Areas Like Faces in Canva
- Advanced Video Blurring With CapCut’s Offline Solution
- Understanding Different Blur Types and Their Visual Impact
- Making the Right Choice for Your Video Blurring Needs
- Frequently Asked Questions About Video Blurring
Why Video Blurring Matters More Than You Think
Video blurring might seem like a small detail, but it can completely transform your content. People choose to blur their videos for several important reasons that you might not have considered.
Privacy protection is probably the most common reason. Imagine you’re filming in a public space and accidentally capture someone’s license plate or personal information. Knowing how to blur in Canva allows you to hide these details while still sharing your content with the world. It’s about being respectful and responsible with your footage.
Attention direction is another huge benefit. Have you ever watched a video where the background was so busy it distracted from the main subject? Learning how to blur background in Canva can help solve this problem. By softening or completely blurring distracting elements, you guide your viewer’s eye to what really matters in your video.
Creative expression through blurring can elevate your content dramatically. Different blur effects can create various moods and styles – from dreamy soft-focus backgrounds to dynamic motion effects that make action sequences pop. When you master how to blur a video on Canva, you unlock new creative possibilities.
Smooth transitions between scenes represent another smart use of blur effects. Instead of jarring cuts between different shots, a well-placed blur can create seamless transitions that feel professional and polished.
Now that you understand why blurring matters, let’s dive into the practical steps for how to blur video Canva offers through its platform.
Complete Guide: How to Blur Video Canva Style
Canva has become everyone’s favorite design tool for its simplicity and versatility. When it comes to video editing, many users want to know how to blur a video in Canva specifically because of the platform’s user-friendly interface. The process is surprisingly straightforward once you know where to look.
Getting Your Video Ready in Canva
The first step in learning how to blur in Canva is importing your footage. Open Canva and select the “Video” template option to create a new project. Look to the left panel and click on the “Upload” button. From here, you can select “Choose files” to pick the video you want to edit from your computer. Once uploaded, simply drag and drop your video onto the canvas area. This prepares your video for the blurring process.

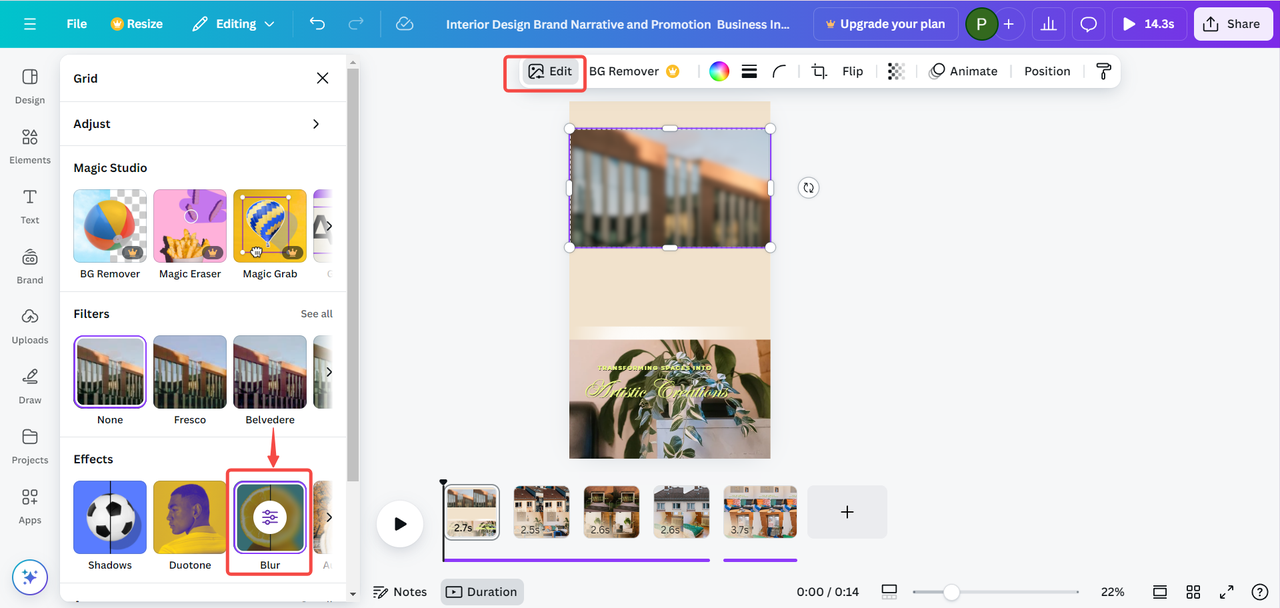
Applying Blur Effects to Your Footage
Now for the fun part – actually applying the blur! Click on your video to select it, then click the “Edit” button that appears. This opens up various editing options. Look for the “Effects” section and select “Blur” from the available choices. If you want to blur the entire video uniformly, choose the “Whole image” option. A slider will appear allowing you to control the intensity of the blur effect. This represents the basic method for how to blur a video on Canva when you want consistent blurring throughout your footage.
Saving and Exporting Your Blurred Video
Once you’re satisfied with how your blurred video looks, it’s time to export it. Click the “Share” button in the top right corner of your screen. You’ll have options to either copy a link to share directly with others or download the video to your device. If downloading, select your preferred format and quality settings, then click “Download” to save your newly blurred video. This completes the process of how to blur video Canva enables through its online platform.

How to Blur Specific Areas Like Faces in Canva
Sometimes you don’t need to blur the entire video – just specific parts like faces, license plates, or other sensitive information. Fortunately, Canva offers tools for precise blurring too when you need to know how to blur a video in Canva with more control.
Preparing Your Video for Selective Blurring
Start the same way as before by opening Canva and creating a new video project. Upload your video file by clicking “Upload” and selecting your footage from your computer. Drag the video onto your canvas to begin editing. The process for how to blur background in Canva specifically or other selective areas begins the same way as full video blurring.

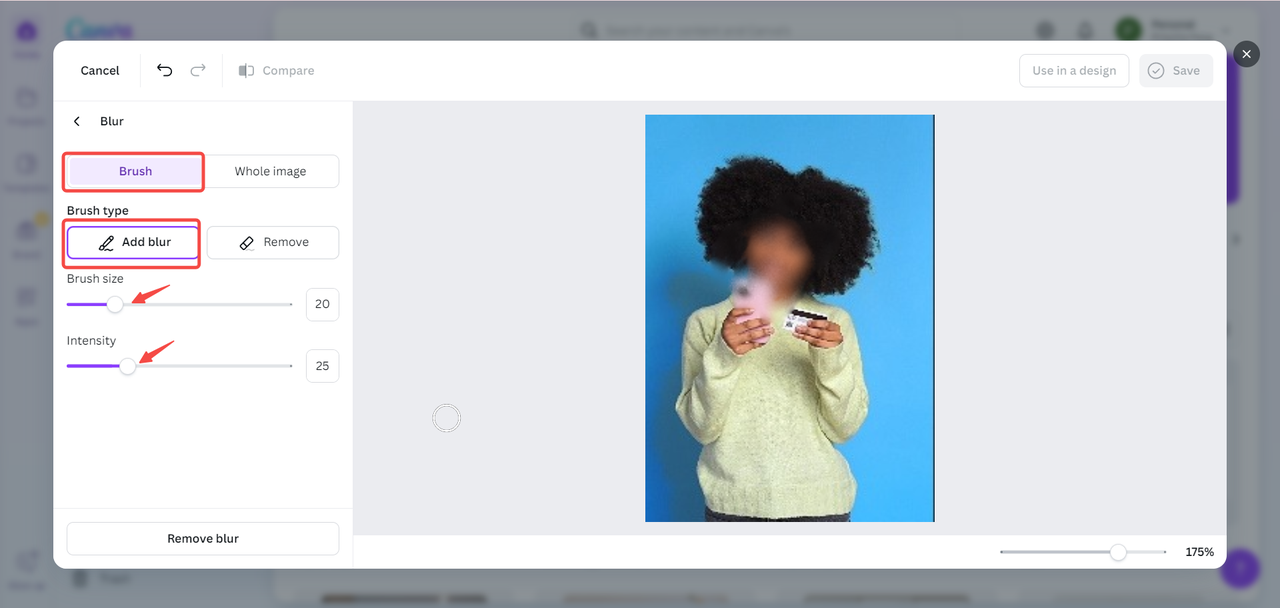
Precisely Targeting Areas for Blurring
Here’s where the selective magic happens. Click on your video and select “Edit” to access the editing options. Choose the “Blur” effect under the Effects section, but this time instead of “Whole image,” select the “Brush” option. Adjust your brush size to match the area you want to blur – smaller for precise details like eyes or mouths, larger for bigger areas. Carefully paint over the areas you want to conceal. You can adjust the intensity to make the blur more or less noticeable based on your needs. This technique for how to blur a video on Canva specifically answers the need for targeted privacy protection.
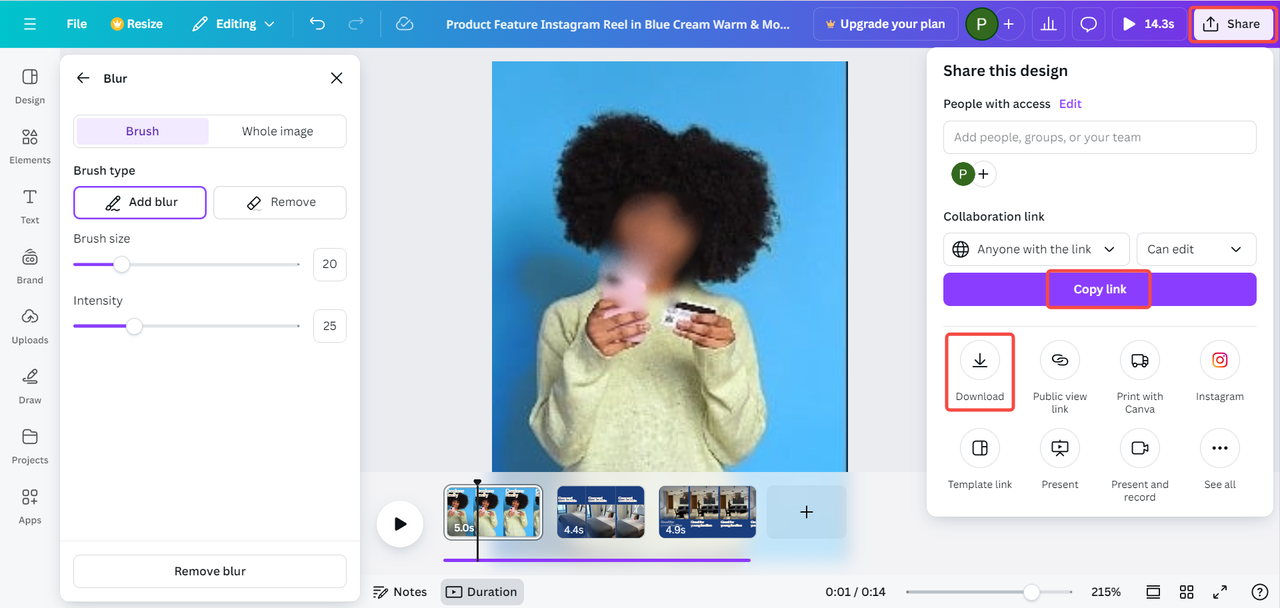
Finalizing Your Selectively Blurred Video
When you’re happy with your selective blurring, click the “Share” button and choose whether to share via link or download. Select your preferred video format and click “Download” to save your video with the strategically blurred areas. This approach to how to blur video Canva style for specific elements gives you much more control over what remains visible in your final product.
Now you understand how to blur in Canva for both full videos and specific areas. While Canva offers convenient blurring tools, it does have limitations. Being an online platform, it requires internet access, and its blurring capabilities are somewhat basic compared to dedicated video editors. If you need more advanced features or want to work offline, there’s an excellent alternative worth exploring.
CapCut — Your all-in-one video & photo editing powerhouse! Experience AI auto-editing, realistic effects, a huge template library, and AI audio transformation. Easily create professional masterpieces and social media viral hits. Available on Desktop, Web, and Mobile App.

Advanced Video Blurring With CapCut’s Offline Solution
For those who need more robust blurring capabilities, CapCut presents an excellent offline alternative. This versatile video editing software provides professional-grade tools that work without internet connection, making it perfect for when you need to know how to blur a video in Canva alternatives that offer more precision and control.
Getting Started With CapCut Video Blurring
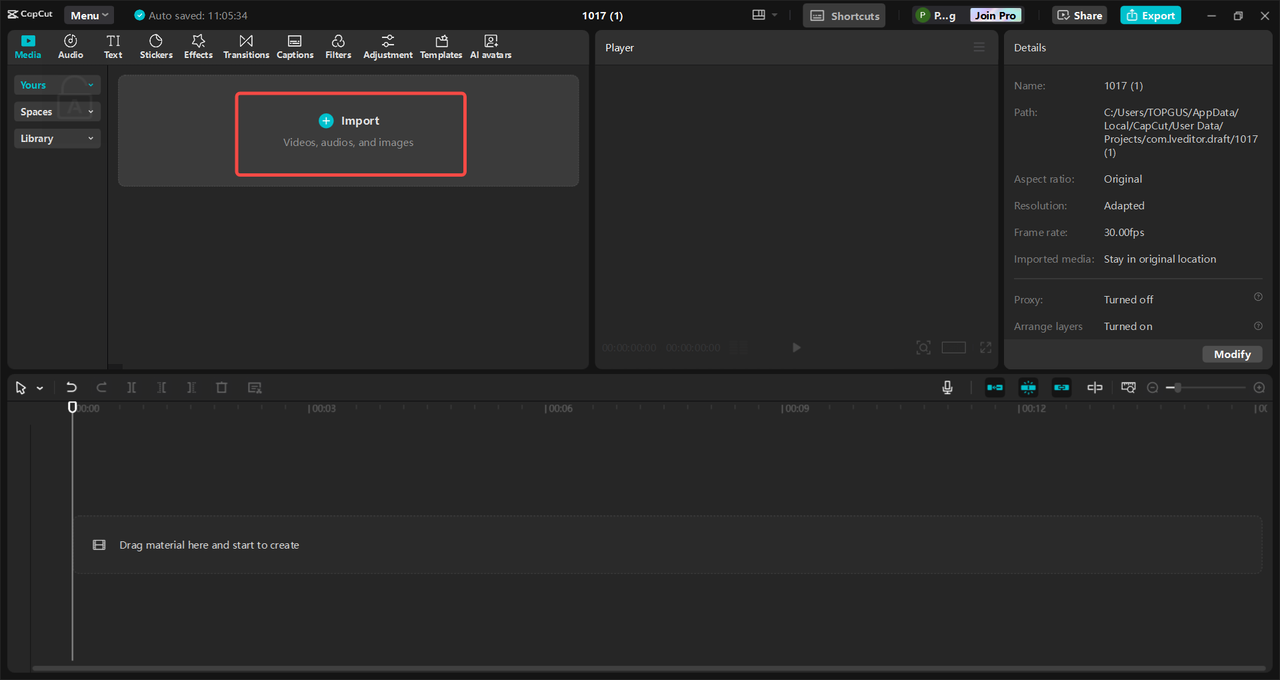
The process begins by opening CapCut and creating a new project. Click on “Import” to select your video file from your computer, or simply drag and drop it directly onto the timeline. If you’ve used CapCut before, you might find your media readily available in “My Spaces.” This initial step mirrors the import process when learning how to blur video Canva style, but with the added benefit of offline functionality.
Applying Advanced Blur Effects in CapCut
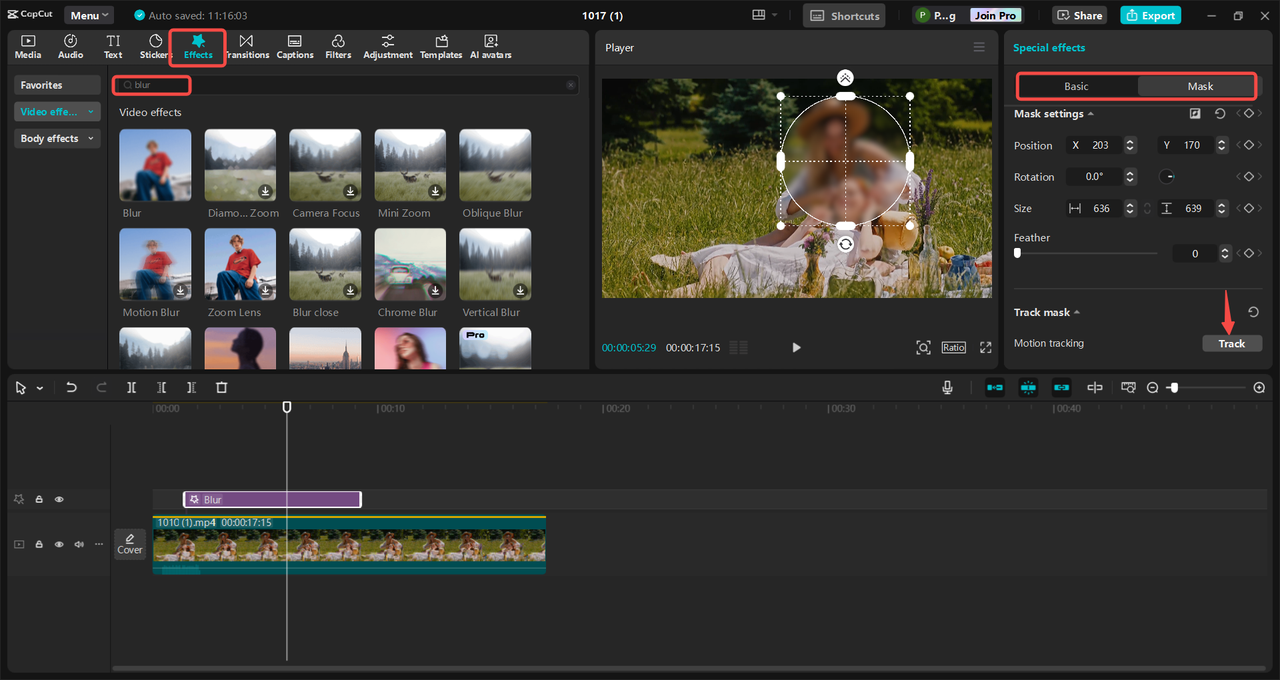
Navigate to the “Effects” tab in CapCut’s toolbar and search for “Blur” in the effects library. You’ll discover multiple blur options beyond what’s available when learning how to blur a video on Canva. Choose the effect that best suits your vision – motion blur for action shots, Gaussian blur for soft focus, or other specialized blur types. Use the adjustment slider to control intensity precisely. For targeted blurring similar to how to blur background in Canva but with more precision, utilize the “Mask” tool combined with “Motion tracking” to automatically follow moving objects throughout your footage.
Exporting Your Professionally Blurred Video
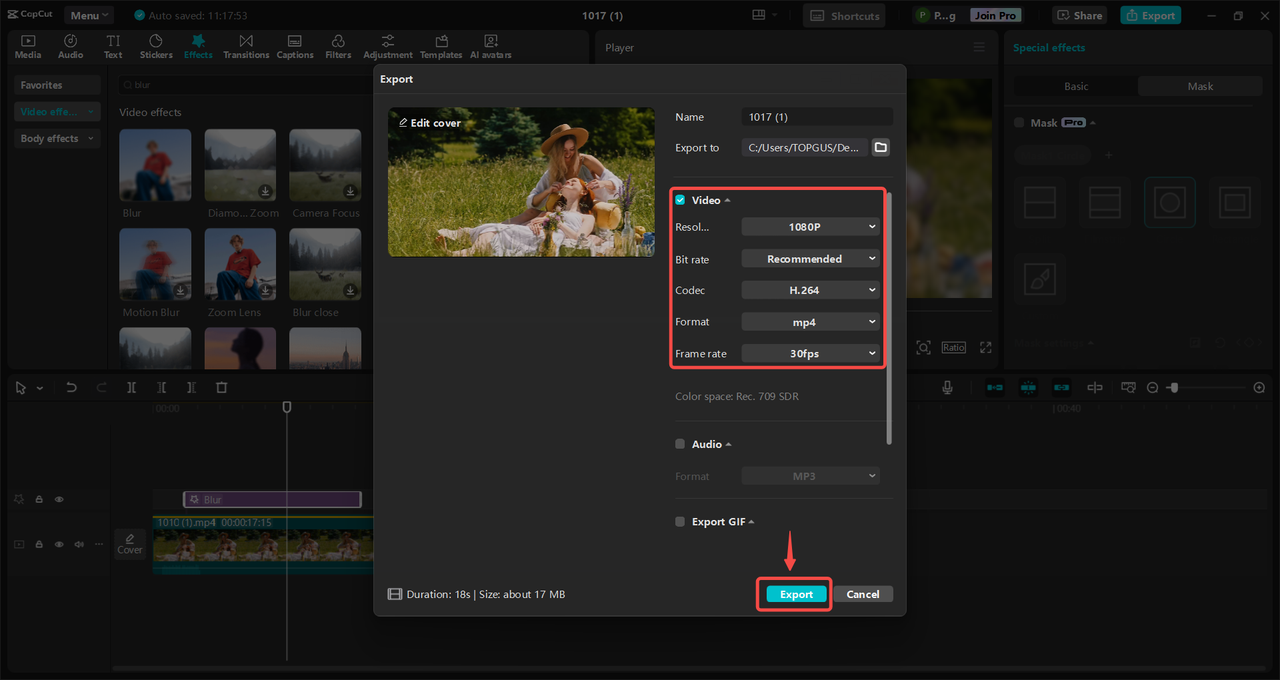
Once satisfied with your blur effects, click “Export” in the top right corner. Select your preferred format and resolution settings, then click “Export” to save the video to your computer. CapCut also offers direct sharing to platforms like TikTok and YouTube, streamlining your workflow beyond what’s possible when figuring out how to blur video Canva provides through its online platform.
Why CapCut Stands Out for Video Blurring
CapCut distinguishes itself with features that address limitations you might encounter when learning how to blur a video in Canva. The software offers multiple blur effects including motion blur, oblique blur, and chrome blur, providing creative options beyond basic blurring. adjustable intensity controls allow fine-tuning that surpasses the basic sliders available when discovering how to blur a video on Canva. Most impressively, CapCut’s selective blurring capabilities with motion tracking enable precise concealment of moving objects – something particularly challenging with standard approaches to how to blur video Canva supports.
CapCut — Your all-in-one video & photo editing powerhouse! Experience AI auto-editing, realistic effects, a huge template library, and AI audio transformation. Easily create professional masterpieces and social media viral hits. Available on Desktop, Web, and Mobile App.
Understanding Different Blur Types and Their Visual Impact
Not all blur effects are created equal. Different types of blur create distinct visual impacts that can dramatically affect how viewers perceive your content. Understanding these differences will help you make better choices whether you’re learning how to blur in Canva or using more advanced tools.
Gaussian blur represents the most common blur type, creating a soft, even effect by averaging pixels throughout the affected area. This is typically what people think of when learning how to blur a video in Canva for basic privacy protection or subtle background softening.
Lens blur mimics how professional cameras create beautiful bokeh effects – those dreamy, out-of-focus background lights that make subjects pop. This effect elevates content beyond basic how to blur video Canva techniques, adding cinematic quality that enhances production value.
Motion blur specifically addresses moving objects, creating streaks that convey speed and dynamism. This effect solves a common challenge faced when learning how to blur a video on Canva – effectively blurring objects that move across the frame without appearing jarring or artificial.
Depth of field blur focuses attention by keeping subjects sharp while softening backgrounds and foregrounds. This sophisticated approach to how to blur background in Canva alternatives represents professional-grade selective focus that guides viewer attention precisely.
Each blur type serves different creative purposes, and understanding these options helps you choose the right effect for your specific needs, whether you’re using Canva’s straightforward tools or CapCut’s advanced features.
Making the Right Choice for Your Video Blurring Needs
Now that you’ve learned multiple approaches to video blurring, from basic how to blur in Canva techniques to advanced CapCut methods, you can make informed decisions based on your specific projects.
For quick, simple blurring needs where internet access is available, understanding how to blur a video in Canva provides a perfectly adequate solution. The platform’s intuitive interface makes it accessible even for beginners, and for many basic privacy protection and aesthetic enhancement needs, it gets the job done efficiently.
When your projects require more precision, especially with moving subjects, or when you need to work offline, CapCut’s advanced features offer significant advantages. The motion tracking capabilities alone address the most challenging aspect of how to blur a video on Canva when dealing with moving elements within your footage.
Consider your specific needs: Are you mostly doing simple background blurring? Learning how to blur video Canva style might be sufficient. Do you frequently need to track moving objects or require more creative control? Investing time in learning CapCut’s more sophisticated tools might serve you better long-term.
Remember that many creators use both tools – Canva for quick, simple projects and CapCut for more demanding editing work. There’s no rule that says you must choose exclusively between understanding how to blur background in Canva versus mastering advanced techniques in other software.
Frequently Asked Questions About Video Blurring
What’s the maximum video length for blurring in Canva?
The maximum video length when using how to blur a video in Canva techniques is typically 60 minutes, though this can vary based on your subscription plan. Free users often face more restrictions, while Premium subscribers usually enjoy longer limits. Remember that longer videos require more processing time regardless of which method you use for how to blur video Canva supports.
What should I consider when blurring video backgrounds?
When applying how to blur a video on Canva techniques to backgrounds, ensure the effect enhances rather than distracts from your main content. Avoid excessive intensity that might make backgrounds look unnatural. Always preview your results before finalizing, and consider that Canva’s tools may struggle with fast-moving background elements – in such cases, CapCut’s motion tracking might serve you better.
How many blur effects does Canva actually offer?
While learning how to blur in Canva, you’ll primarily work with one core blur effect, though its intensity can be adjusted. This differs from specialized video editors that offer multiple blur types. However, creative use of this single effect combined with other Canva features can still produce varied results for most basic how to blur a video in Canva needs.
Can I blur moving objects effectively in Canva?
This represents the biggest challenge when using how to blur video Canva techniques. The platform doesn’t offer automatic motion tracking, so blurring moving objects requires manually adjusting the blur position frame by frame – a time-consuming process. For moving subjects, CapCut’s automatic motion tracking provides a significantly more efficient solution.
Is professional-quality blurring possible with these tools?
Absolutely! Both learning how to blur a video on Canva and mastering CapCut’s features can produce professional results when applied appropriately. Canva works well for static blurring needs, while CapCut excels at more complex scenarios involving movement and precise control over how to blur background in Canva alternative approaches.
CapCut — Your all-in-one video & photo editing powerhouse! Experience AI auto-editing, realistic effects, a huge template library, and AI audio transformation. Easily create professional masterpieces and social media viral hits. Available on Desktop, Web, and Mobile App.
*Some images courtesy of CapCut