TOOL HUNTER

If you’re looking to create professional-looking videos with smooth animations and effects, learning how to manually add a keyframe in CapCut PC is an essential skill to master. Keyframes serve as the building blocks for animation, allowing you to create movement, transitions, and effects that can transform ordinary videos into captivating visual stories.
The beauty of CapCut lies in its user-friendly approach to what might otherwise seem like a complex feature. Whether you’re creating content for social media, educational purposes, or professional projects, understanding keyframes will significantly enhance your video editing capabilities. This guide will walk you through everything from the basics to advanced techniques.
Table of Contents
Understanding Keyframes in Video Editing
So what exactly are keyframes? In simple terms, keyframes are markers that define specific points in time where changes occur in your video. Think of them as signposts along your timeline that tell CapCut exactly how you want elements to transform at particular moments.
When you set multiple keyframes for a single property—like position, scale, or opacity—CapCut automatically creates smooth transitions between these points. This is how you achieve those professional-looking animations where text slides smoothly across the screen, images zoom in gradually, or elements fade in and out seamlessly.
The real power of keyframes lies in their versatility. You’re not limited to just one type of change; you can combine multiple keyframe animations to create complex movements and effects that would be difficult to achieve otherwise.
Why CapCut Stands Out for Keyframe Animation
CapCut has gained popularity among video editors for several reasons, especially when it comes to working with keyframes. The platform’s intuitive design makes the process of learning how to manually add a keyframe much less daunting than in some professional editing software.
One of the most appreciated features is the ability to add keyframe notes directly within your project. This is particularly useful when working on complex animations with multiple moving parts, as it helps you keep track of what each keyframe is supposed to accomplish.
The software also excels in its handling of multiple animation parameters simultaneously. You can have objects moving across the screen while simultaneously changing size and transparency, all controlled through carefully placed keyframes.
Another advantage is the smooth interpolation between keyframes. CapCut calculates the transitions between your defined points, ensuring that movements flow naturally rather than appearing jerky or abrupt.
Exploring Different Keyframe Types in CapCut
CapCut PC offers several types of keyframes, each serving a specific purpose in your animation toolkit. Understanding these different types will help you determine the best approach when learning how to manually add a keyframe for your particular needs.
Position Keyframes for Movement
Position keyframes allow you to move elements around your screen with precision. By setting a starting position keyframe and an ending position keyframe, you can make objects slide, bounce, or follow custom paths across your video frame.
This type of keyframe is perfect for creating animated text that enters from off-screen, moving graphics that follow a specific trajectory, or any element that needs to change its on-screen location over time.
Scale Keyframes for Zoom Effects
Scale keyframes control the size of your elements. Want to create a dramatic zoom-in on a important detail? Or perhaps a slow zoom-out to reveal more of the scene? Learning how to do key frame zoom with shot cut techniques using scale keyframes is fundamental to professional editing.
These keyframes are indispensable for creating emphasis, directing viewer attention, or simply adding dynamic movement to static elements. The smooth scaling possible with well-placed keyframes can make even simple videos feel more cinematic.
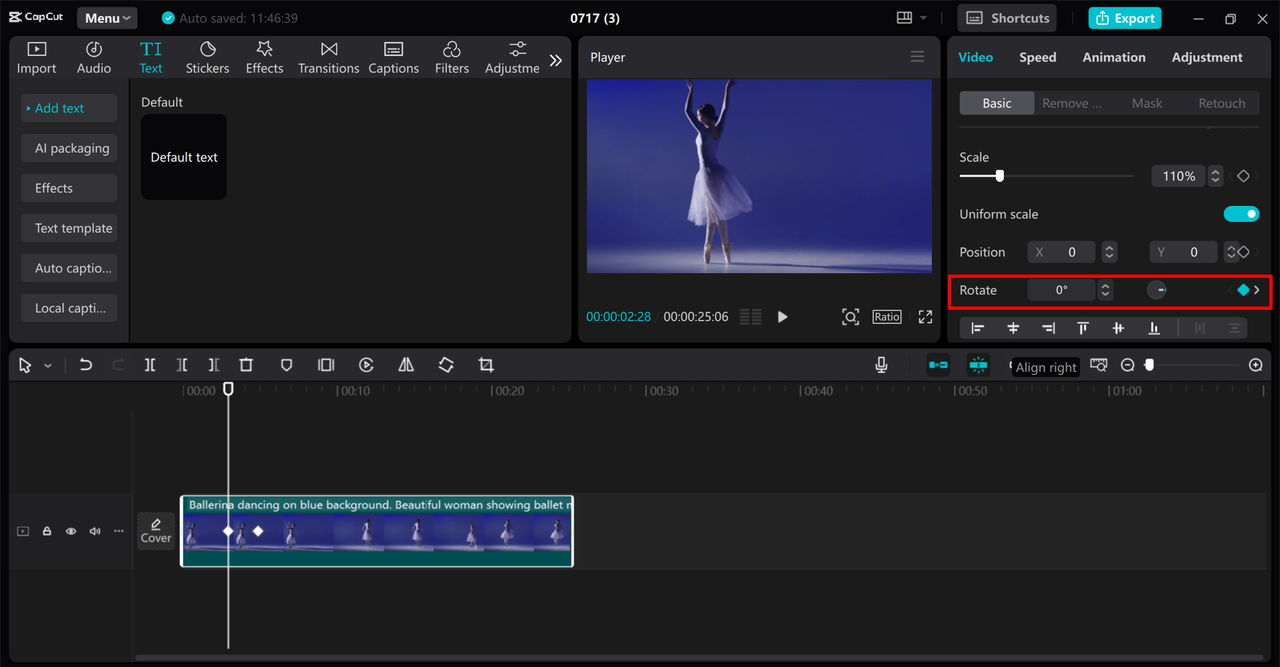
Rotation Keyframes for Spinning Effects
Rotation keyframes let you add spinning, flipping, or tilting motions to your elements. From subtle angle adjustments to full 360-degree rotations, these keyframes add energy and dynamism to your compositions.
This type of animation is particularly effective for highlighting important information, creating transition effects, or simply adding visual interest to otherwise static elements.
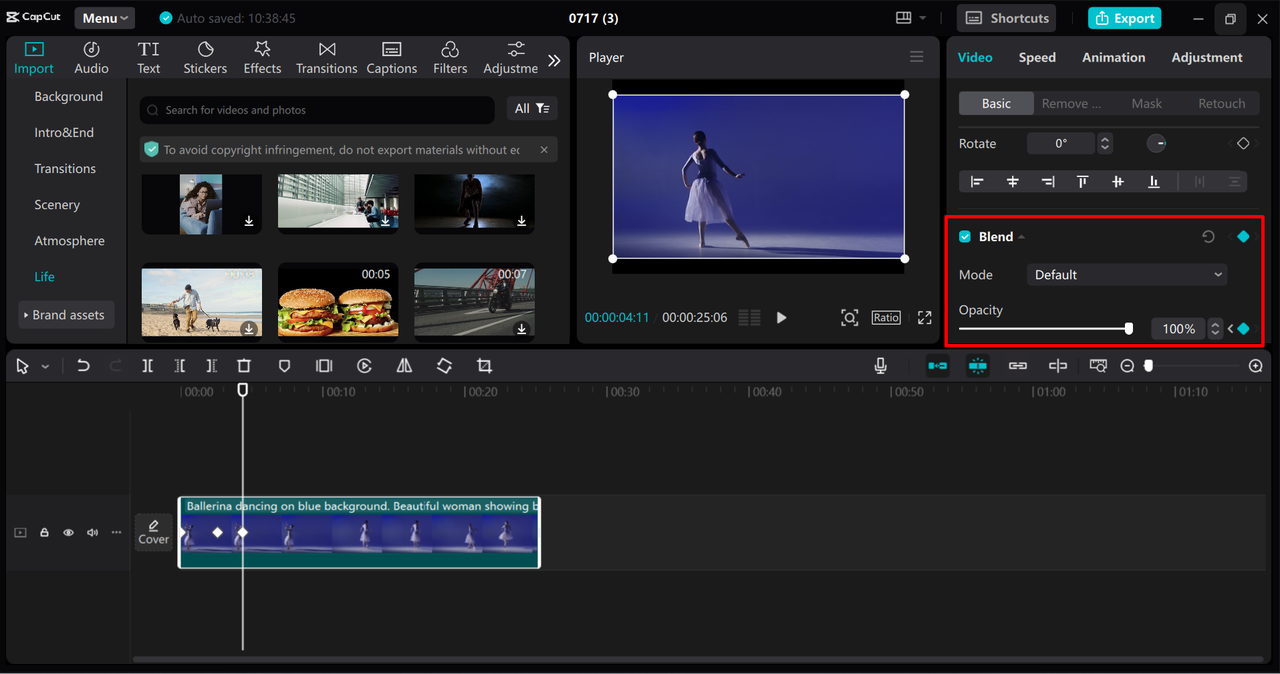
Opacity Keyframes for Fading Transitions
Opacity keyframes control how transparent or visible your elements appear. These are essential for creating smooth fade-ins, fade-outs, and cross-dissolve transitions between scenes or elements.
By adjusting opacity over time, you can create sophisticated layered effects where multiple elements blend together seamlessly, or where elements ghost through each other for creative compositions.
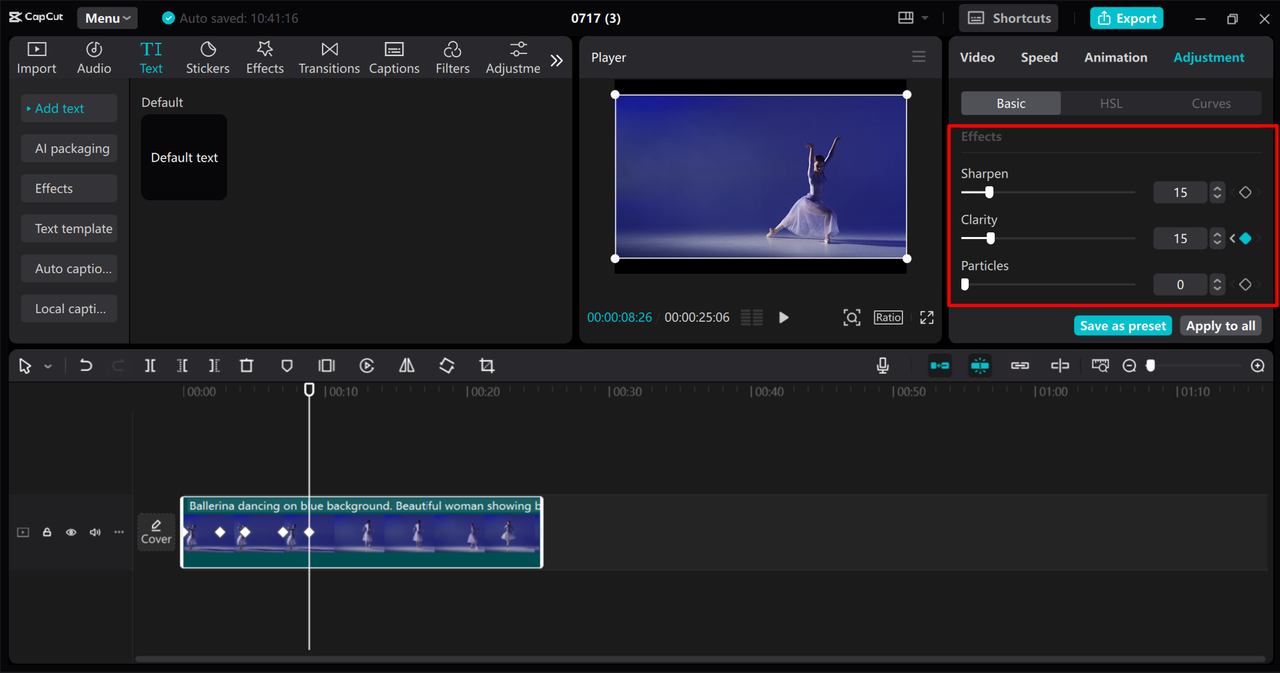
Effect Keyframes for Changing Filters
Effect keyframes allow you to animate the properties of any effects you’ve applied to your clips. This means you can gradually change color grading, increase or decrease blur intensity, or transition between different filter looks over time.
This powerful feature enables you to create mood shifts within a single clip, simulate day-to-night transitions, or creatively emphasize certain moments through evolving visual treatments.
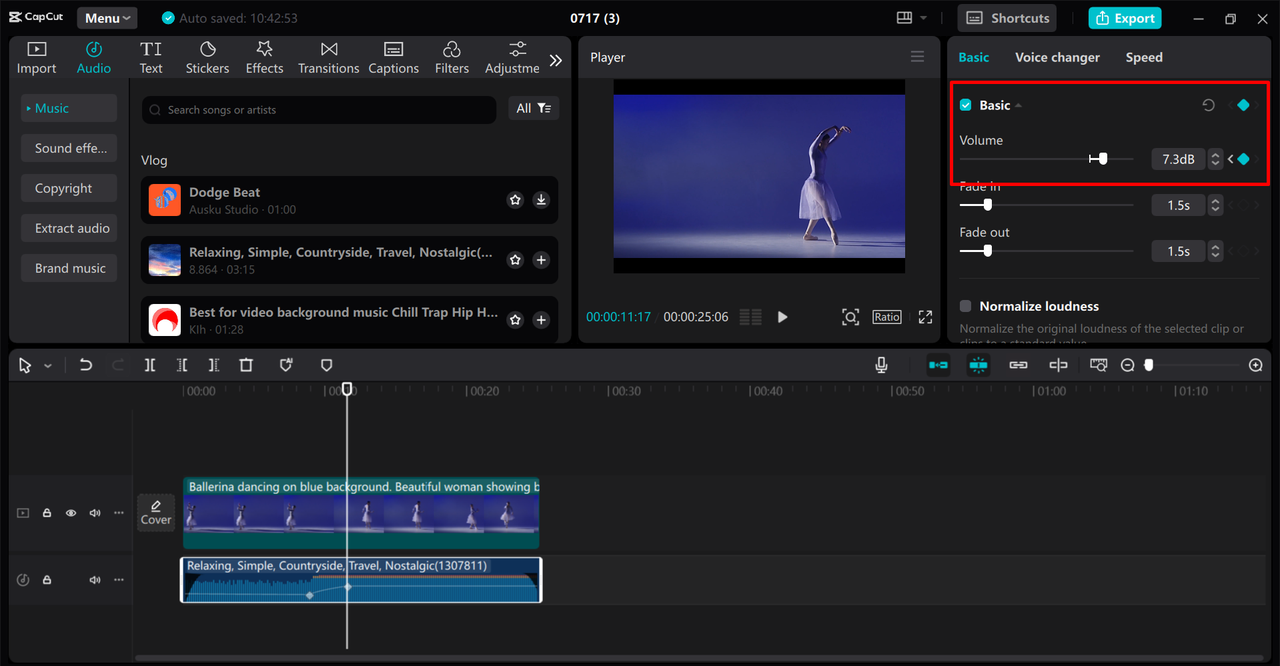
Audio Keyframes for Sound Design
Don’t overlook audio keyframes, which allow you to control volume levels and other audio properties over time. These are crucial for professional sound design, letting you smoothly lower background music when dialogue appears, create gradual fade-ins for atmospheric sounds, or build dramatic audio swells.
Proper use of audio keyframes can significantly enhance the professional quality of your videos, ensuring that your sound design supports rather than distracts from your visual content.
CapCut — Your all-in-one video & photo editing powerhouse! Experience AI auto-editing, realistic effects, a huge template library, and AI audio transformation. Easily create professional masterpieces and social media viral hits. Available on Desktop, Web, and Mobile App.

Step-by-Step Guide to Adding Keyframes in CapCut PC
Now let’s get into the practical steps of how to manually add a keyframe in CapCut. The process is straightforward once you understand the basic workflow, and with practice, it will become second nature.
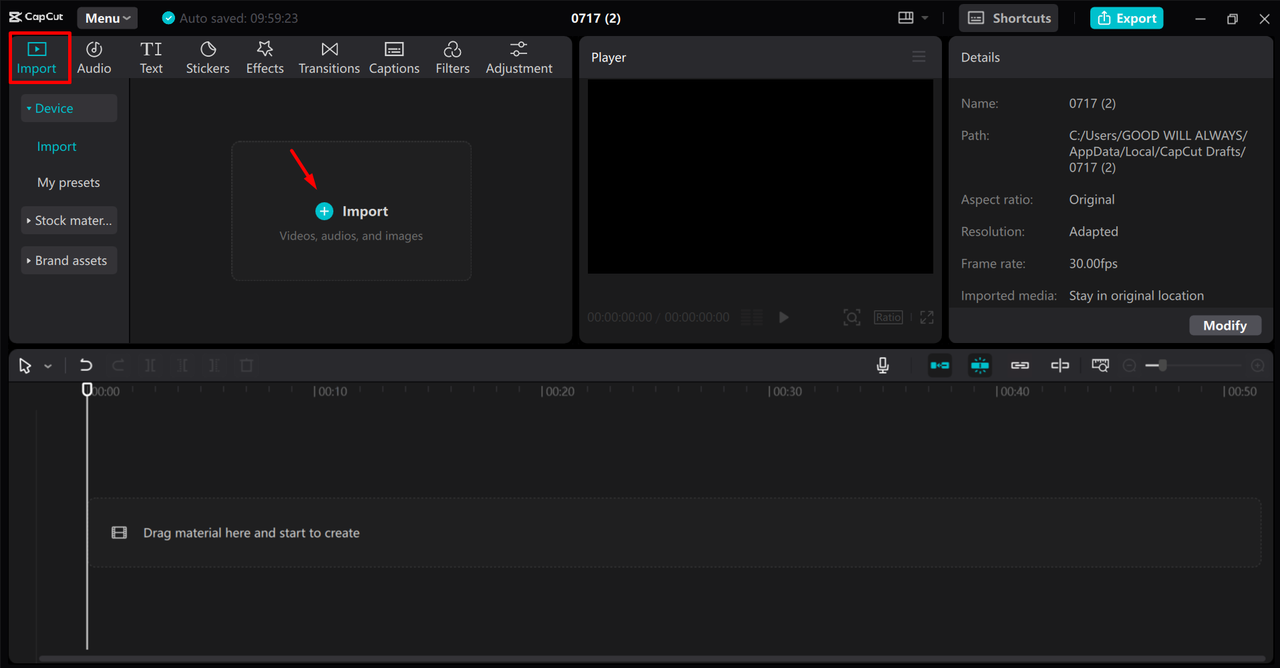
Preparing Your Project and Media
Begin by opening CapCut and creating a new project. Import your media files—videos, images, and audio—by clicking the Import button or simply dragging files directly into the media bin. Once imported, drag your primary clip to the timeline where you’ll be working.
Organization is key when working with keyframes, so take a moment to name your clips meaningfully if you’re working with multiple elements. This will save time and confusion later when you’re deep into the animation process.
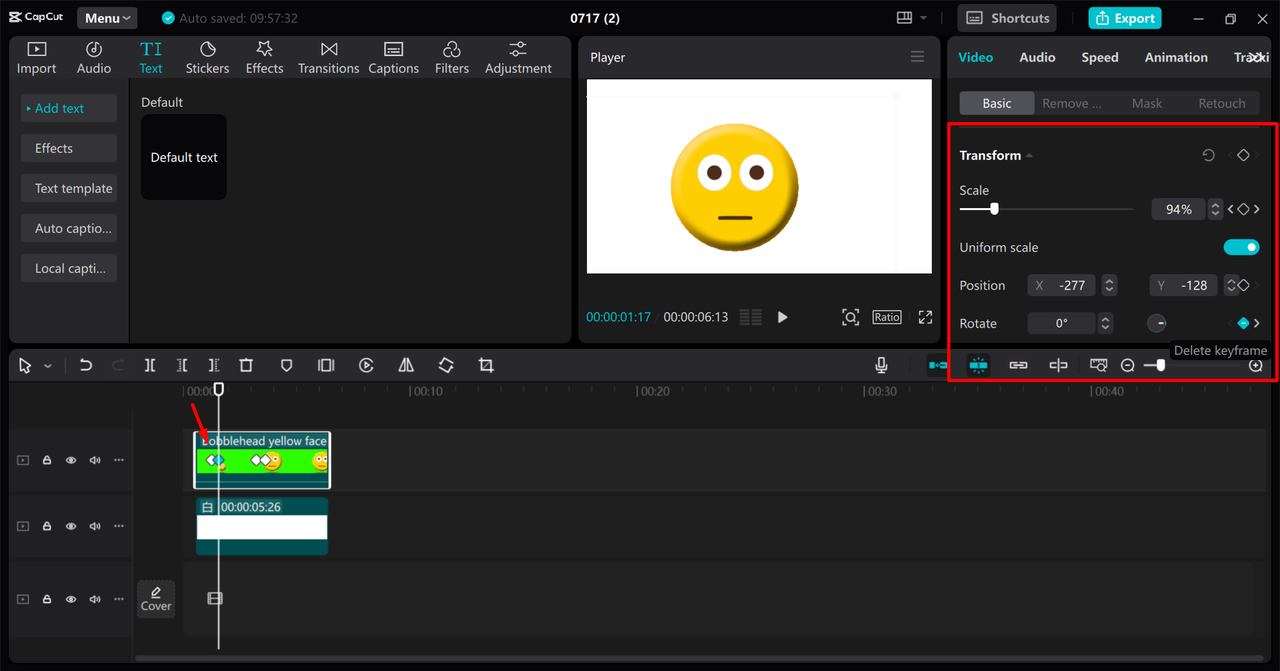
The Keyframe Creation Process
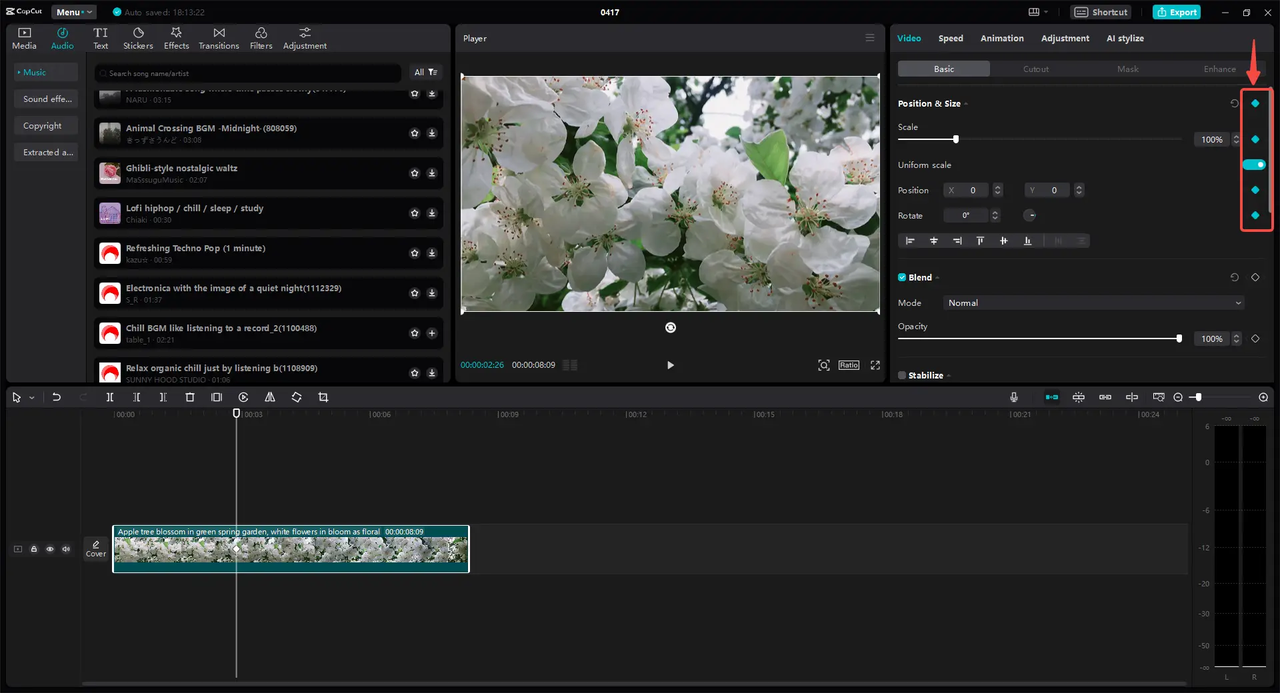
Select the clip in your timeline that you want to animate. On the right-side panel, you’ll see various adjustment options with diamond-shaped icons next to them—these are your keyframe buttons.
Here’s the detailed process for how to manually add a keyframe:
Position your playhead (the vertical line that shows your current position in the timeline) at the exact point where you want your animation to begin.
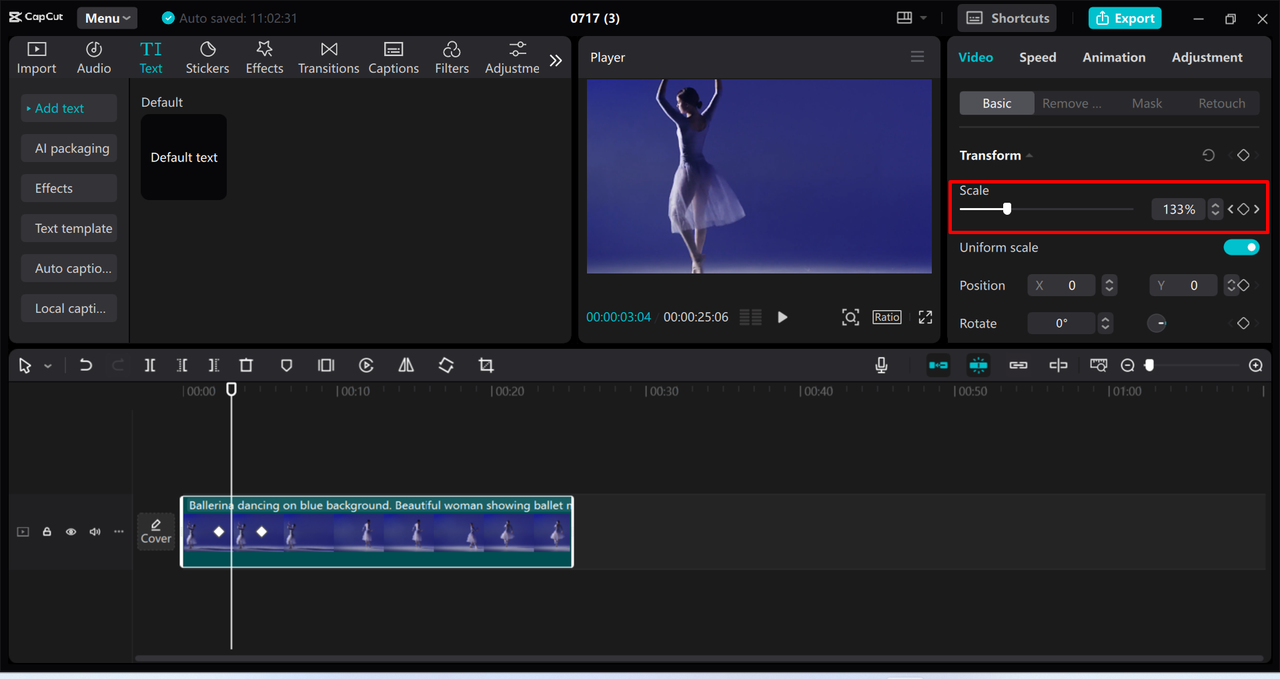
Click the diamond icon next to the property you want to animate—let’s say you choose Scale for this example. This places your first keyframe, marking the starting point of your animation.
Now move the playhead to where you want the animation to end. Adjust the property value—if you’re working with Scale, drag the slider to increase or decrease the size. CapCut automatically creates a second keyframe at this new position with the adjusted values.
You’ve now created a basic animation! The software will smoothly transition between these two keyframes. You can add as many intermediate keyframes as needed to create more complex movements.
Efficiency Tips: Keyboard Shortcuts
For faster workflow, familiarize yourself with keyboard shortcuts. Pressing Alt + K brings up the keyframe panel quickly, and using Shift + Click allows you to add keyframes efficiently without navigating through multiple menus.
Many editors wonder: do key frames disappear when you change video type? Generally, they remain intact since they’re tied to specific clip properties rather than project settings. However, it’s always wise to save your project before making significant changes.
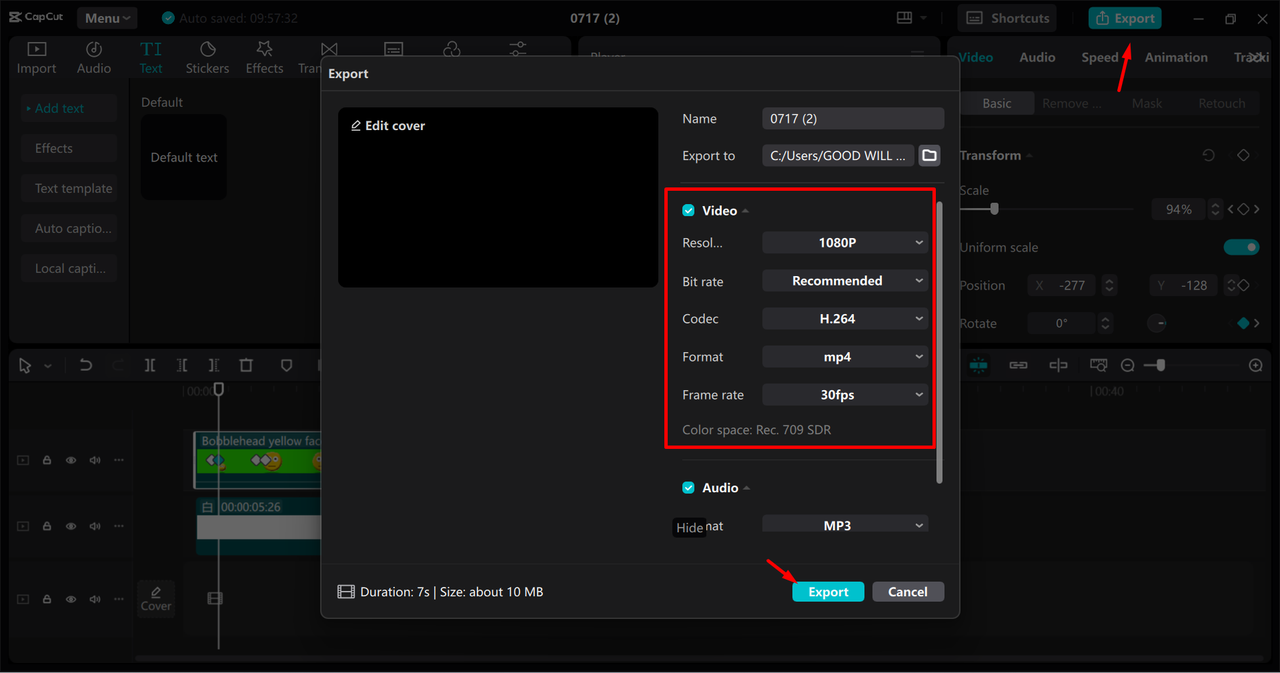
Finalizing and Exporting Your Project
Once you’re satisfied with your animations, it’s time to export your project. Click the Export button in the upper right corner, choose your desired quality settings, format, and destination folder, and let CapCut process your video.
The platform offers various export options optimized for different platforms like YouTube, TikTok, and Instagram, ensuring your video looks its best wherever it’s shared.
Creative Applications for Keyframes in Your Projects
Understanding how to manually add a keyframe opens up numerous creative possibilities. Here are some practical applications that can enhance your video projects significantly.
Dynamic Text and Title Animations
Bring your text to life with animated titles that slide, scale, or fade into position. Instead of static text, create engaging introductions where words assemble themselves on screen or emphasize important points with subtle movements that draw viewer attention.
Smooth Transition Effects
Move beyond basic cuts and fades by creating custom transitions using keyframes. You can make one clip transform into another, create whip pan effects, or design unique transitions that match your video’s style and mood.
Product Highlighting in Reviews and Demos
If you create product review or demonstration videos, keyframes are invaluable for highlighting specific features. Zoom in on important details, circle key components with animated graphics, or create comparison shots that smoothly transition between different product angles.
Educational Content Enhancement
For educational creators, keyframes can help illustrate complex concepts. Animate diagrams to build themselves as you explain each component, create moving arrows that point to important information, or use subtle movements to maintain viewer engagement during longer explanations.
CapCut — Your all-in-one video & photo editing powerhouse! Experience AI auto-editing, realistic effects, a huge template library, and AI audio transformation. Easily create professional masterpieces and social media viral hits. Available on Desktop, Web, and Mobile App.
Advanced Keyframe Techniques
Once you’ve mastered the basics of how to manually add a keyframe, you can explore more advanced techniques that add professional polish to your animations.
Bezier Curves for Natural Movement
CapCut allows you to adjust the interpolation between keyframes using Bezier curves. This advanced feature lets you create movements that start slow and accelerate, or movements that ease naturally into their end position rather than stopping abruptly.
Combining Multiple Transformations
The most engaging animations often combine multiple types of transformations. Try making an element that rotates while moving across the screen and simultaneously changes size. These complex animations can make your videos feel much more dynamic and professional.
Using Keyframes with Effects and Filters
Don’t limit yourself to basic transformations—apply the same keyframe principles to effects and filters. Gradually intensify a color grade, slowly bring a blur effect into focus, or transition between different visual styles over time.
Troubleshooting Common Keyframe Issues
Even when you know how to manually add a keyframe, you might encounter some common issues. Here’s how to address them.
Keyframes Not Working as Expected
If your keyframes aren’t creating the animation you intended, double-check that you’ve selected the correct property and that your keyframes are placed in the right order along the timeline. Sometimes simply moving a keyframe slightly can resolve unexpected behavior.
Managing Complex Animations
For projects with numerous keyframes, use the ability to add keyframe notes to keep track of what each keyframe is supposed to accomplish. This is especially helpful when working on complex animations that you might need to adjust later.
Smoothing Jarring Movements
If your animations appear too abrupt or robotic, add more keyframes to create smoother transitions. Sometimes the solution to a jarring movement is simply adding an intermediate keyframe to ease the transition between two extreme values.
Conclusion
Learning how to manually add a keyframe in CapCut PC opens up a world of creative possibilities for your video projects. From simple text animations to complex motion graphics, keyframes give you precise control over how elements move and transform in your videos.
Remember that mastery comes with practice. Start with simple animations—perhaps just making text slide in from off-screen—and gradually work your way up to more complex multi-property animations. Don’t be afraid to experiment; some of the most creative uses of keyframes come from happy accidents and experimentation.
The journey to becoming proficient with keyframes might seem challenging at first, but with CapCut’s intuitive interface and the step-by-step process outlined in this guide, you’ll soon be creating professional-looking animations that elevate your video content above the competition.
Frequently Asked Questions
How do I add an overlay in CapCut PC?Adding an overlay is straightforward. Import both your main video and your overlay clip. Place your primary video on the bottom track of your timeline, then drag your overlay to a higher video track. Select the overlay clip and use the adjustment controls to position, scale, and blend it with your main footage as needed.
What’s the keyboard shortcut key frame method in CapCut?For faster keyframe creation, use the keyboard shortcut key frame approach by pressing Alt + K to open the keyframe panel quickly. Once open, you can use Shift + Click to add keyframes at your playhead position without navigating through mouse clicks.
Do key frames disappear when you change video type or settings?This is a common concern, but generally, your keyframes remain intact when changing project settings. Since keyframes are attached to individual clips and their properties rather than project-wide settings, they typically persist through changes. However, it’s always wise to save your project before making significant alterations.
How do I add borders or frames to my video in CapCut?To add a border or frame effect, navigate to the Canvas option in the Basic tab of your adjustment panel. Select your desired border color, then adjust your video’s scale parameter to reduce its size slightly, revealing the colored background that acts as a frame around your content.
Some images courtesy of CapCut