TOOL HUNTER

When you’re working with Microsoft Word, you might not immediately think about how to add tick boxes in word documents. But these little interactive elements can actually be super helpful, especially when you’re creating forms, checklists, or surveys. Learning how to put a checkbox in word can make your documents more professional and user-friendly.
Whether you’re making a to-do list, a registration form, or any kind of document where people need to make selections, knowing how to add a checkbox in word is a valuable skill. The good news is that Microsoft Word provides several straightforward methods to accomplish this.
In this comprehensive guide, we’ll walk through the different approaches to word add checkbox functionality, including both interactive checkboxes that users can click and static ones for printed documents. We’ll also cover some bonus tips for dealing with common Word issues you might encounter along the way.
Table of Contents
- Understanding When You Need Checkboxes in Word
- How to Add Interactive Checkboxes Using Developer Tools
- How to Create Checkboxes Using Bullet Points
- Comparing the Two Checkbox Methods
- Advanced Checkbox Customization
- Common Checkbox Issues and Solutions
- Bonus: Dealing with Word Document Protection
- Creating Professional Documents with Checkboxes
- Troubleshooting Checkbox Problems
- Best Practices for Using Checkboxes
- When to Use Each Checkbox Method
- Enhancing Your Word Skills Beyond Checkboxes
- Conclusion
Understanding When You Need Checkboxes in Word
Before we dive into the technical steps of how to insert check box on word documents, it’s worth considering why you might need this feature. Checkboxes serve different purposes depending on your document type.
For digital forms that people will fill out on their computers, interactive checkboxes are ideal. Users can simply click to select or deselect options. For printed documents, you might want checkboxes that people can physically mark with a pen or pencil.
The method you choose for how to add tick boxes in word will depend on how your document will be used. If you’re creating something that will primarily be viewed and filled out digitally, you’ll want the interactive approach. If it’s going to be printed, the simpler symbol-based method might be sufficient.
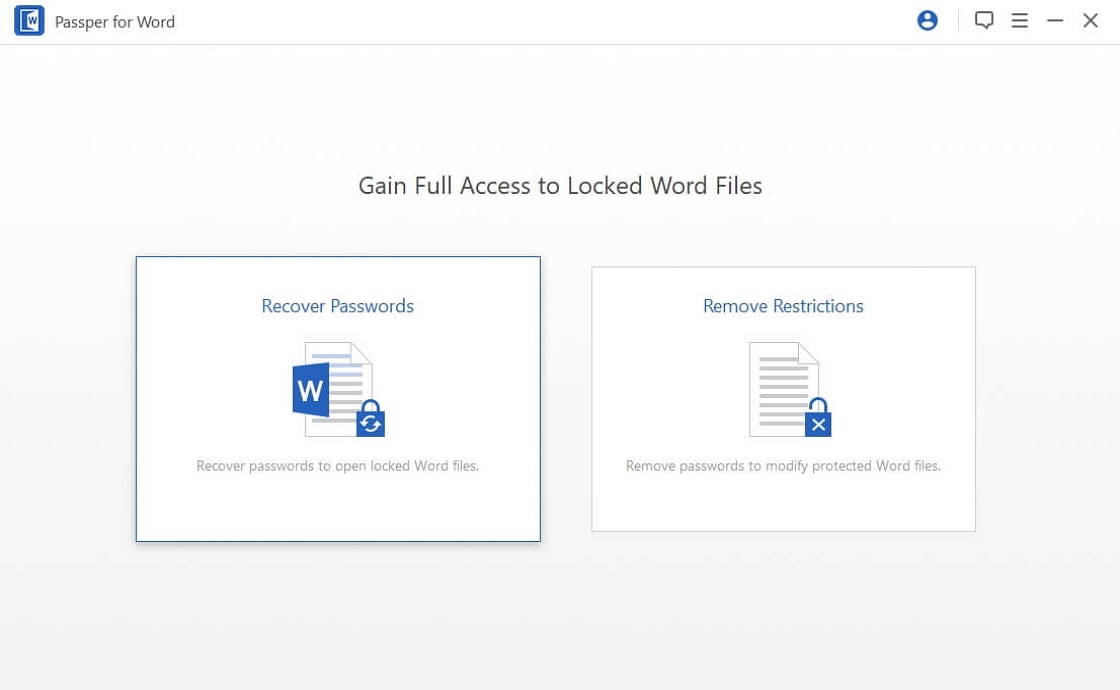
How to Add Interactive Checkboxes Using Developer Tools
If you need clickable checkboxes that users can interact with directly in the Word document, the Developer tab method is your best bet. This approach lets you how to put a checkbox in word that people can actually check and uncheck with a simple click.
Many Word users don’t realize that the Developer tab isn’t visible by default. You’ll need to enable it first before you can word add checkbox elements to your documents.
Step 1: Enable the Developer Tab
The first step in learning how to add a checkbox in word using the Developer method is to make sure the Developer tab is visible on your ribbon. Here’s how to do that:
Open Microsoft Word and click on “File” in the top-left corner. Select “Options” from the menu that appears. This will open the Word Options dialog box. Click on “Customize Ribbon” in the left-hand menu. On the right side, under “Customize the Ribbon,” make sure “Main Tabs” is selected. Look through the list and check the box next to “Developer.” Click “OK” to save your changes.
Now you should see the Developer tab in your Word ribbon alongside Home, Insert, Design, and the other standard tabs.
Step 2: Insert the Checkbox
With the Developer tab now visible, you’re ready to learn how to insert check box on word documents as interactive elements. Here’s the process:
Click on the Developer tab to access its options. Place your cursor in the document where you want the checkbox to appear. In the Controls group, click on the “Check Box Content Control” button (it looks like a checkbox with a small “ab” next to it).
And that’s it! You’ve just learned how to add tick boxes in word as interactive elements. The checkbox will appear in your document, and you can click it to check or uncheck it. You can copy and paste this checkbox to create multiple checkboxes throughout your document.
This method for how to put a checkbox in word creates a truly interactive element that users can toggle on and off. It’s perfect for digital forms, surveys, or any document that will be completed on a computer rather than printed out.
How to Create Checkboxes Using Bullet Points
If you don’t need interactive checkboxes and just want the visual appearance of checkboxes for a printed document, the bullet point method is simpler. This approach shows you how to add a checkbox in word that looks right but isn’t clickable.
This method is particularly useful when you’re creating documents like printed checklists, worksheets, or forms that will be filled out by hand. Here’s how to word add checkbox symbols using this technique:
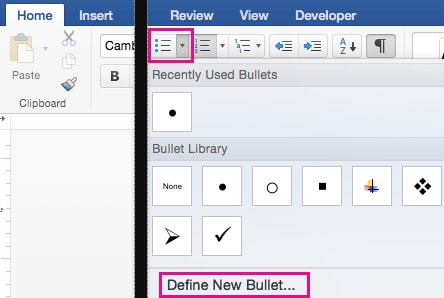
Step 1: Access Bullet Options
Place your cursor where you want your checklist to begin. Go to the Home tab and locate the Paragraph section. Click the small arrow next to the Bullets button to open the bullet library. At the bottom of the menu, select “Define New Bullet.”
Step 2: Choose a Checkbox Symbol
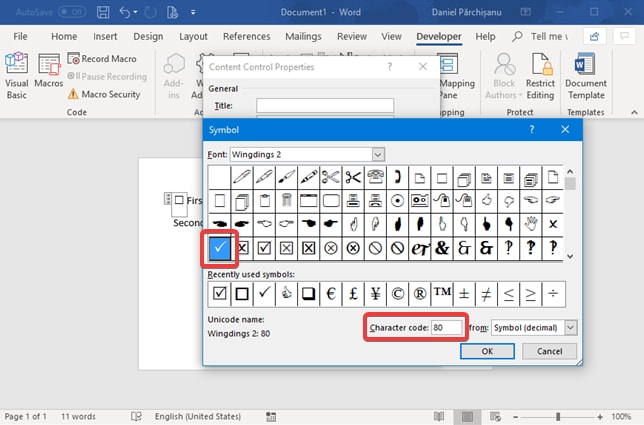
In the Define New Bullet dialog box, click the “Symbol” button. This will open the Symbol dialog box where you can choose from various characters. In the Font dropdown, select “Wingdings 2.”
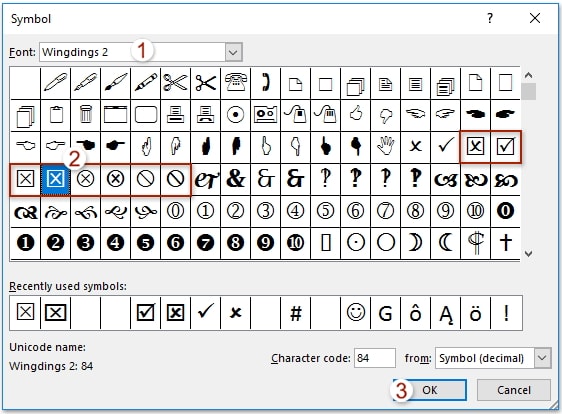
Scroll through the symbols until you find one that looks like a checkbox (typically an empty square). You might also see checked box symbols if you want to create a pre-checked option. Select your preferred checkbox symbol and click “OK.”
Step 3: Apply Your New Bullet Style
Back in the Define New Bullet dialog box, you’ll see a preview of your selected symbol. Click “OK” to confirm your choice. Now, whenever you use bullets in your document, they’ll appear as checkboxes instead of the standard bullet points.
This method for how to insert check box on word documents is quick and creates a consistent look throughout your document. However, remember that these checkboxes are just symbols – users can’t click them to check or uncheck them in the digital document.
Comparing the Two Checkbox Methods
Now that we’ve covered both approaches to how to add tick boxes in word, let’s compare them to help you decide which method is right for your specific needs.
The Developer method creates interactive checkboxes that users can click to check and uncheck. This is ideal for digital forms, surveys, or any document that will be filled out on a computer. The checkboxes maintain their state (checked or unchecked) when the document is saved and reopened.
The bullet point method creates static checkbox symbols that can’t be interacted with digitally. These are perfect for documents that will be printed, as they provide a clean, consistent appearance that people can mark with a pen or pencil. This method is generally quicker to set up, especially if you need multiple checkboxes.
When deciding how to put a checkbox in word, consider your audience and how they’ll be using the document. If they’ll be working with it digitally, go with the Developer method. If it’s primarily for print, the bullet method is probably sufficient.
Advanced Checkbox Customization
Once you’ve mastered the basics of how to add a checkbox in word, you might want to explore some customization options to make your checkboxes work exactly how you need them to.
For interactive checkboxes created through the Developer tab, you can access additional properties by right-clicking the checkbox and selecting “Properties.” Here, you can change the checkbox symbol, set a default state (checked or unchecked), and even lock the checkbox to prevent changes.
For bullet-style checkboxes, you can format them just like any other text. Change the size, color, or apply other formatting to make them stand out or match your document’s design scheme. You can also create multiple bullet styles with different checkbox states if you need both checked and unchecked options in your document.
Learning these advanced techniques takes your knowledge of how to insert check box on word documents to the next level, allowing you to create more sophisticated and functional documents.
Common Checkbox Issues and Solutions
As you work with checkboxes in Word, you might encounter some common issues. Here are solutions to problems you might face when trying to word add checkbox elements to your documents.
If the Developer tab isn’t appearing after you’ve enabled it, try closing and reopening Word. Sometimes the application needs to restart for ribbon changes to take effect. If you’re having trouble with interactive checkboxes not working properly, make sure the document isn’t protected or restricted. Protected documents may prevent users from interacting with form fields.
For bullet-style checkboxes that aren’t appearing correctly, double-check that you’ve selected the correct symbol from the Wingdings 2 font. Other fonts might have similar-looking symbols that don’t quite work as well for checkboxes.
If you’re collaborating on a document and others can’t use the checkboxes, they might need to enable editing or the document might be in a compatibility mode that limits functionality. Saving in the latest Word format usually resolves these issues.
Bonus: Dealing with Word Document Protection
Sometimes when you’re trying to how to add tick boxes in word documents, you might run into another common Word issue: password protection. It’s frustrating when you need to edit a document but can’t because it’s password-protected.
Microsoft Word offers excellent security features, including the ability to password-protect documents. This is great for privacy but problematic when you forget or lose the password. Unfortunately, Word doesn’t provide a built-in password recovery option, which can leave you locked out of your own documents.
If you find yourself in this situation, don’t panic. There are solutions available that can help you recover lost Word passwords and regain access to your documents.
iMyFone Passper Pro.Ultimate 6-in-1 File Password Remover.1-click to remove Excel/Word/PDF/RAR/ZIP/PowerPoint passwords.Unlock file passwords to read, edit or print easily.Remove read-only file protection permanently.Break file locks with up to 99% sucessful rate.
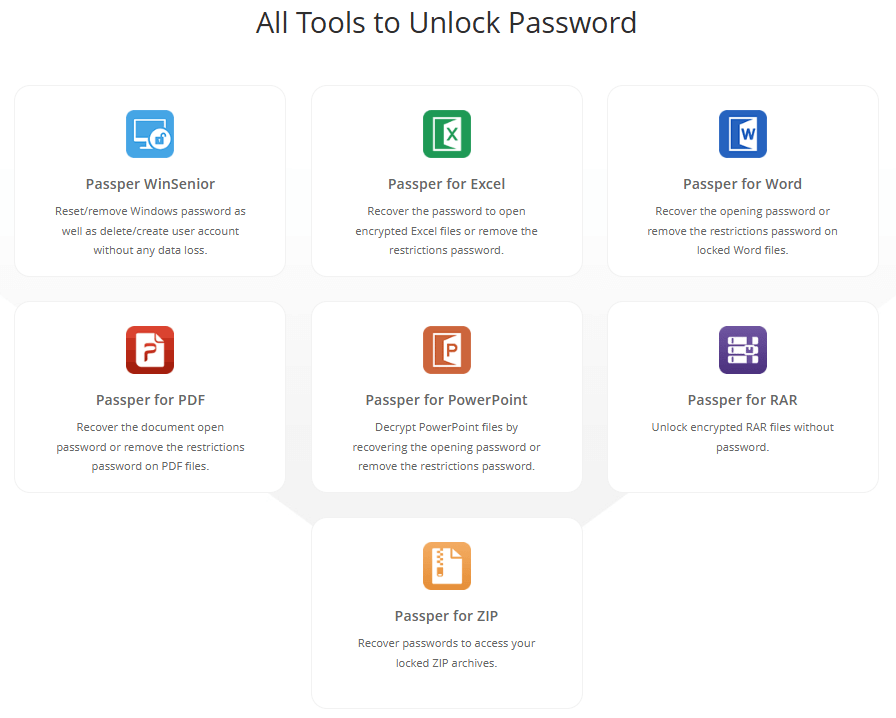
This powerful tool is specifically designed to handle exactly these types of situations. It can recover passwords for various file types, including Word documents, and remove editing restrictions that might be preventing you from learning how to put a checkbox in word or making other changes to your document.
The software stands out for several reasons. It offers incredibly fast password recovery speeds, checking millions of password combinations per second. It uses multiple attack methods to increase the chances of successful recovery. It’s compatible with all versions of Word, including the latest releases. The interface is user-friendly, making the recovery process straightforward even for less technical users.
Beyond just password recovery, this tool can also remove various document restrictions. If you’ve ever encountered a Word document that allows you to view content but not edit it, this software can typically remove those limitations with just a few clicks.
Knowing how to add a checkbox in word is valuable, but it’s not much help if you can’t access or edit the document in the first place. Having a reliable password recovery tool in your toolkit ensures that you can always access your important documents when you need them.
Creating Professional Documents with Checkboxes
Now that you know how to insert check box on word documents using multiple methods, let’s talk about how to use them effectively in your documents.
Checkboxes work best when they’re part of a well-organized layout. Group related options together, use clear labels, and consider using tables to align checkboxes neatly. Proper spacing and alignment make your documents look more professional and easier to use.
For longer documents with multiple sections of checkboxes, consider using different styles or formatting to distinguish between sections. You might use bold labels for section headings or slightly different sizing for checkboxes in different parts of the document.
Remember that the goal of using checkboxes is to make your document more functional and user-friendly. Whether you’re creating a simple shopping list or a complex multi-page form, thoughtful design enhances the utility of the checkboxes you’ve learned to add.
Troubleshooting Checkbox Problems
Even after you’ve mastered how to word add checkbox elements to your documents, you might occasionally run into issues. Here are some additional troubleshooting tips for common checkbox problems.
If your interactive checkboxes aren’t working in a document you’ve shared with others, they might need to enable editing when they open the file. Word often opens documents in Protected View by default, which disables active content like form fields.
If checkboxes created with the Developer method are printing with an “X” instead of a checkmark, this is normal behavior. The display on screen and what prints can differ slightly. If this is problematic for your use case, you might need to adjust the checkbox properties or use the symbol method instead.
For documents that will be used across different versions of Word or on different operating systems, test your checkboxes thoroughly. There can be slight variations in how different versions handle form fields and symbols.
Best Practices for Using Checkboxes
As you become more comfortable with how to add tick boxes in word documents, keep these best practices in mind to ensure the best experience for anyone using your documents.
Always label your checkboxes clearly. Users should understand exactly what each checkbox represents without confusion. Use consistent spacing and alignment throughout your document – inconsistent formatting looks unprofessional and can be confusing.
Consider the logical order of checkbox options. Group related items together and order them in a way that makes sense for the task at hand. For example, in a registration form, you might group all contact method preferences together.
If you’re using interactive checkboxes, test them thoroughly before distributing your document. Make sure they work as expected and that the document saves the checkbox states properly.
When to Use Each Checkbox Method
To summarize when to use each method for how to put a checkbox in word:
Use the Developer tab method when creating digital forms, surveys, or any document that will be filled out on a computer. The interactive nature of these checkboxes makes them ideal for digital use.
Use the bullet point method when creating documents that will be printed, when you need a quick visual indicator, or when working with simpler documents where interactivity isn’t necessary.
In some cases, you might even use both methods in the same document – interactive checkboxes for sections that will be completed digitally and symbol checkboxes for sections that will be printed and filled out manually.
Enhancing Your Word Skills Beyond Checkboxes
Learning how to add a checkbox in word is just one of many skills that can help you create more professional and functional documents. As you become more comfortable with Word’s features, consider exploring other form elements like text fields, drop-down lists, and date pickers.
These additional form controls, also accessible through the Developer tab, can help you create comprehensive digital forms that are easy for users to complete. Combining checkboxes with these other elements allows you to create sophisticated documents for various purposes.
Remember that practice is key to mastering these skills. The more you work with Word’s form controls and formatting options, the more natural they’ll become. Don’t be afraid to experiment with different approaches to find what works best for your specific needs.
iMyFone Passper Pro.Ultimate 6-in-1 File Password Remover.1-click to remove Excel/Word/PDF/RAR/ZIP/PowerPoint passwords.Unlock file passwords to read, edit or print easily.Remove read-only file protection permanently.Break file locks with up to 99% sucessful rate.
Conclusion
Knowing how to insert check box on word documents is a valuable skill that enhances your ability to create functional, professional-looking documents. Whether you choose interactive checkboxes for digital forms or symbolic ones for printed materials, you now have the knowledge to implement both approaches effectively.
The Developer method provides fully interactive checkboxes perfect for digital use, while the bullet method offers a quick way to add checkbox symbols for printed documents. Each has its place depending on your specific needs.
Remember that sometimes the challenge isn’t just knowing how to word add checkbox elements, but being able to access and edit documents in the first place. When password issues arise, having a reliable recovery tool can save you time and frustration.
With practice, you’ll find that adding checkboxes becomes second nature, allowing you to create more engaging and functional documents for any purpose. Whether you’re making simple checklists or complex forms, these skills will serve you well in your Word document creation efforts.
Some images in this article are sourced from iMyFone.