TOOL HUNTER

Are you running a small business and searching for an affordable way to reach more customers? Flyers might be just what you need! A flyer is a small piece of paper that shares information about your business. It usually has attractive content on both sides so people can quickly learn about what you offer. Flyers are great because you can share them with many people in a short amount of time.
Studies show that flyers have about a 3.5% response rate. Some companies mail them to potential customers, while others hand them out in person. Having a well-designed flyer is super important to get your brand noticed. You could pay a professional designer, but that can be expensive, especially when you’re just starting out. The good news is, there are tools available that let you create nice-looking flyers without spending a lot of money.
In this guide, we’ll explore two popular options: Adobe Photoshop and CapCut Online. Both can help you design a flyer with the proper flyer size in Photoshop. We’ll discuss how to pick the best dimensions for flyer Photoshop, how to adjust them, and why you might want to consider an alternative tool for your designs.
Why Choosing the Correct Flyer Size in Photoshop Is Important
When asked about flyers, over 62% of people said they’d be willing to buy from a brand that uses them. This shows that even in our digital age, flyers still work well for marketing.
But it’s not just about having a pretty design. Selecting the right flyer size in Photoshop is equally crucial. Flyers come in different sizes, from small handouts to large posters. The size you pick should match what you plan to do with your flyer. Common standard sizes are A4, A5, letter size, and tabloid. The exact size might vary a bit depending on your location and how you plan to print it.
The most standard flyer Photoshop size is 8.5 by 11 inches. Choosing the correct dimensions is super important. You need to consider where the flyer will be displayed or distributed, who you want to see it, and what message you want to share. All these factors help determine the best size for your flyer. If you carefully think about these dimensions for flyer Photoshop and make a good choice, your flyer will have better visibility and make a stronger impact.
Adjusting Your Photoshop Flyer Dimensions
Adobe Photoshop was created around 30 years ago and completely changed how we edit images. Whether you’re a designer or photographer, Photoshop offers tons of tools for editing images with layers, working with text, drawing, and adding special effects. It’s an essential tool for creative people.
Photoshop regularly gets updates that add new features like AI assistance and support for new file types. It keeps improving, making difficult tasks easier and offering the latest features. The most common small flyer size in Photoshop is 148 by 218 mm.
Now, let’s learn how you can create a flyer with the proper size in Photoshop.
Step-by-Step Guide to Modify Flyer Dimensions in Photoshop
You can adjust your Photoshop flyer dimensions by following these simple steps:
First, open Photoshop on your computer. Wait for it to load completely so you’re ready to start working.
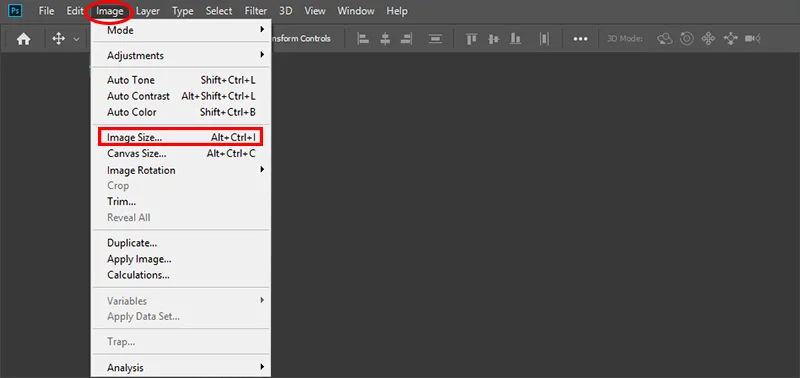
Next, upload the image you want to use for your flyer. To begin changing the flyer size in Photoshop, go to the top menu and click on “Image” and then “Image Size”.
A small window will appear. Here, you can adjust your flyer’s size. You can enter the width and height you want. You can also set the resolution based on your needs. This is where you set the dimensions for flyer Photoshop.
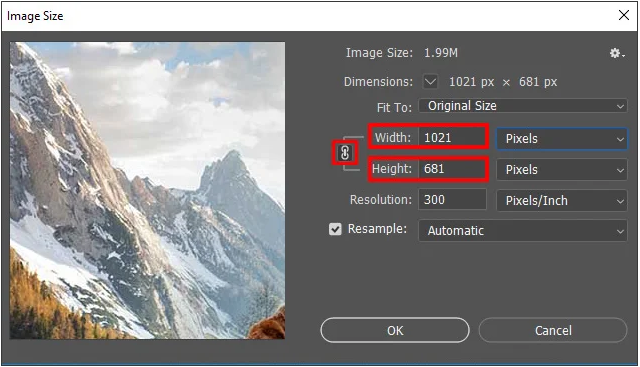
Make sure to click on the “Resample image” option. This will help adjust the number of pixels in your image so it looks good at the new size.

When you’re happy with your changes, save the flyer file to your computer. You can choose the format you need for printing or sharing online.
The Advantages and Disadvantages of Using Photoshop
Photoshop has many excellent features for editing and enhancing photos. It has a well-designed user interface with plenty of instructions to help you. It also includes tools for designing websites and mobile apps. There’s a wide range of drawing and font creation tools available too.
However, there are some challenges. It can be difficult to find the best price for Photoshop online, and there’s no option to buy it permanently—you usually have to pay regularly through a subscription. It takes significant time to learn how to use all its features properly. Also, it can run processes in the background that might slow down your computer.
CapCut — Your all-in-one video & photo editing powerhouse! Experience AI auto-editing, realistic effects, a huge template library, and AI audio transformation. Easily create professional masterpieces and social media viral hits. Available on Desktop, Web, and Mobile App.

CapCut Online: An Excellent Alternative for Flyer Size on Photoshop
If you’re looking for a tool that’s easier to use and doesn’t cost money, you might want to try CapCut Online. CapCut is an excellent alternative to Photoshop because it offers many features but is less complicated. It improves the user experience with its simple interface and numerous advanced editing tools.
You can perform basic tasks like cropping and resizing, plus more advanced functions like adding filters, effects, and overlays. CapCut Online lets people be creative without feeling overwhelmed.
One of the best things about CapCut Online is how accessible it is. Unlike Photoshop, which requires installation and has a steep learning curve, CapCut Online is web-based and user-friendly for everyone, regardless of their skill level.
How to Modify Flyer Size on Photoshop Alternative: CapCut Online
Now that you know how to change leaflet dimensions in Photoshop, let’s see how to do it in CapCut Online.
First, visit the CapCut website and log in. If you don’t have an account, you can sign up for free using your Google, TikTok, or Facebook account.
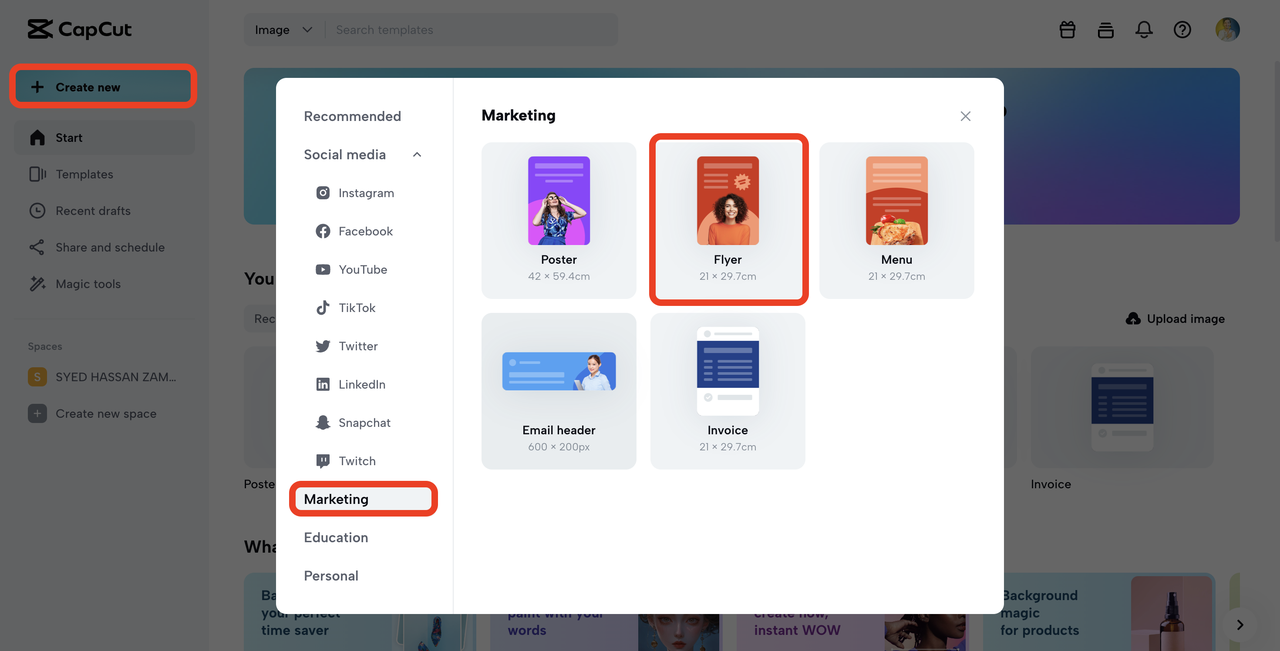
Then, choose your canvas size. Click on “Create new” and then “More”. Here, you can input the exact dimensions you want for your flyer. This is how you set the right flyer size on Photoshop alternative tool.
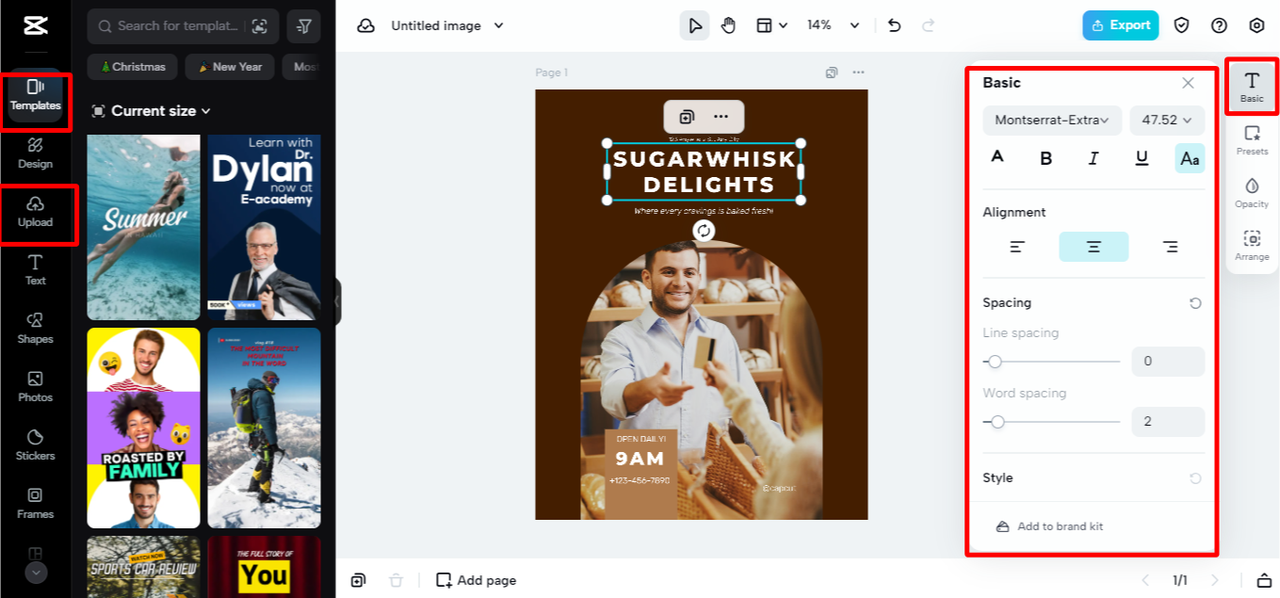
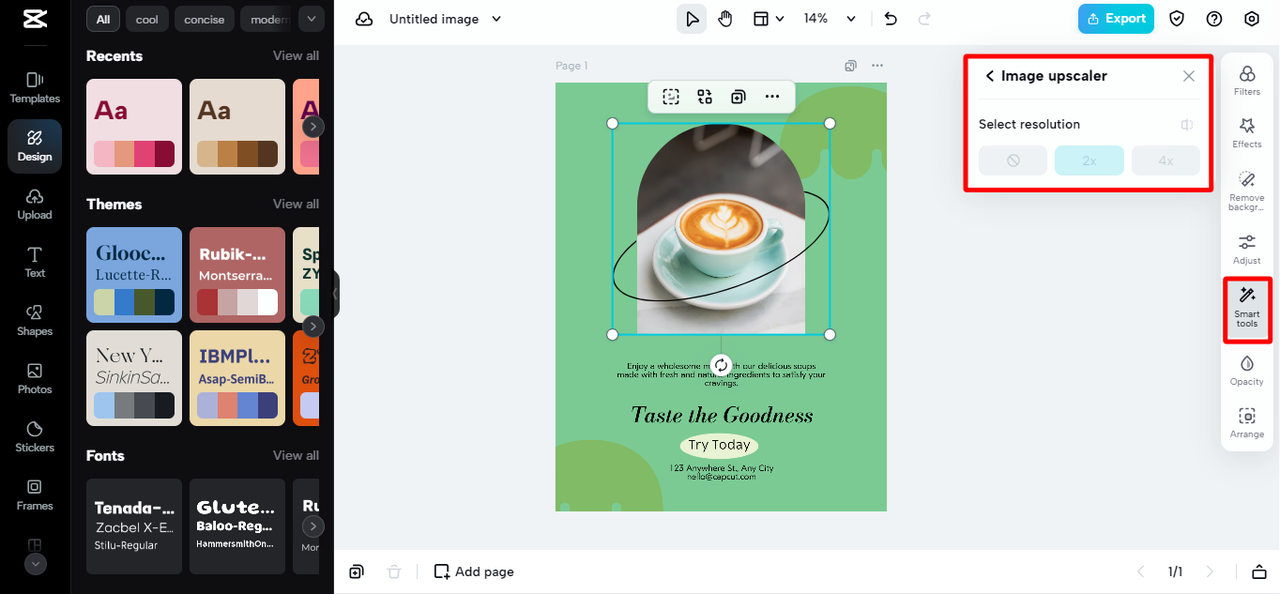
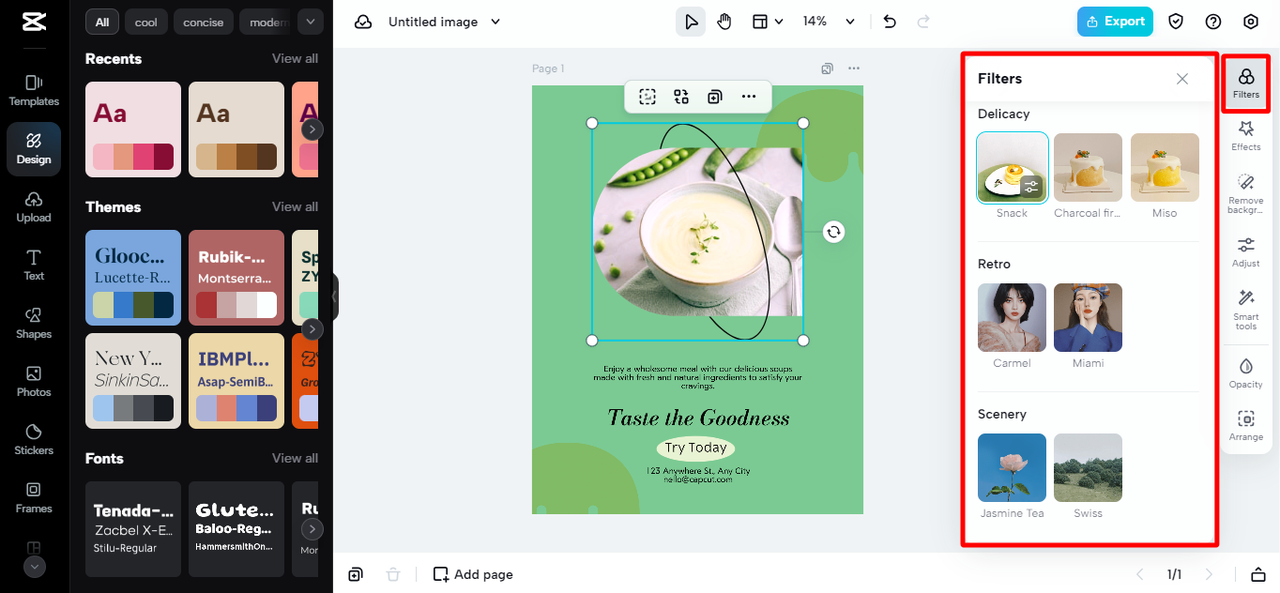
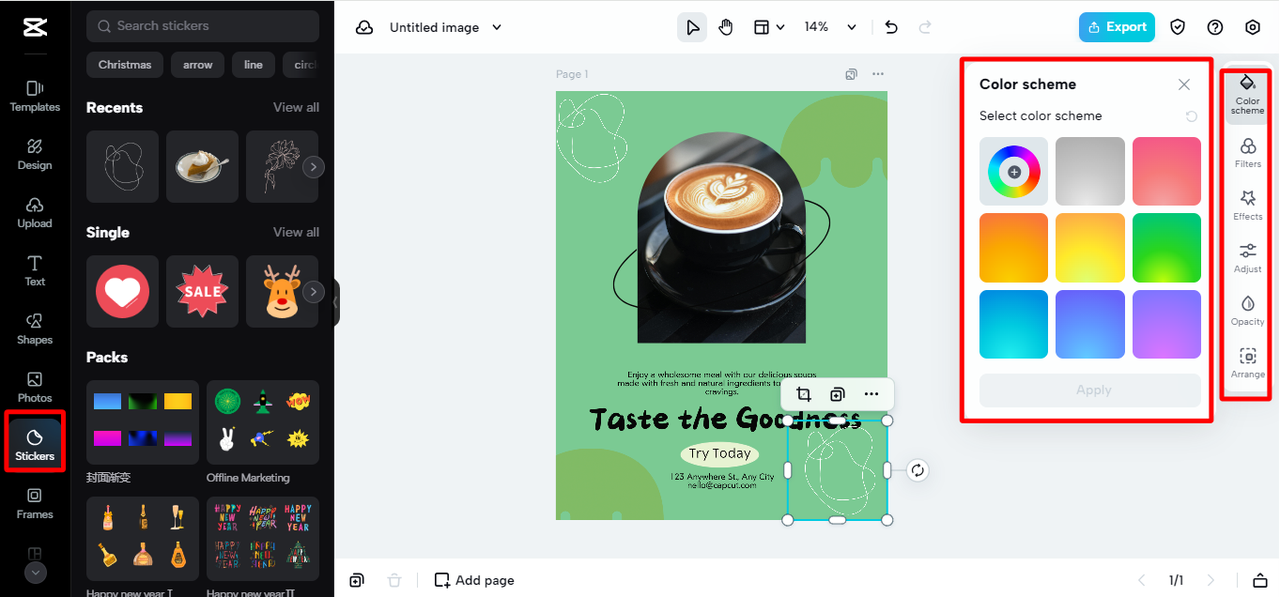
You can select a template from the available options or upload your own photo. There are numerous editing tools you can use to enhance your flyer. On the right side, you’ll find options like filters, effects, background removal, and image upscaling.
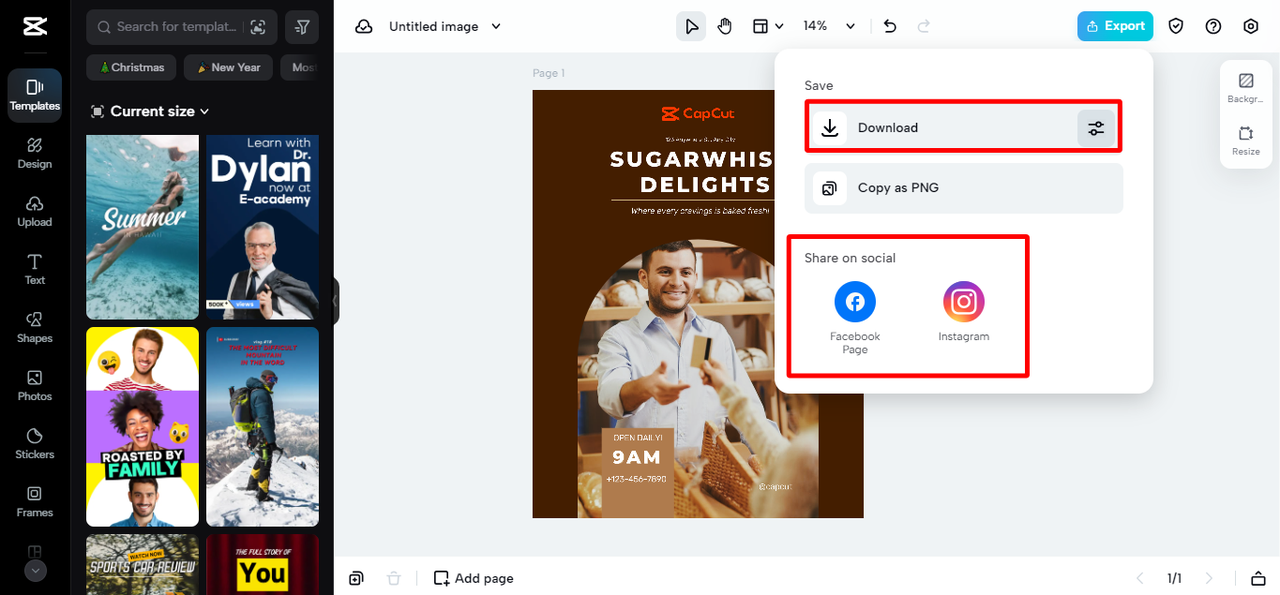
When you’re finished and satisfied with your creation, you can save it to your computer for free. CapCut also allows you to share your flyer directly on social media platforms if you wish.
Awesome Features in CapCut Online for Better Flyers
CapCut Online includes additional features that can make your flyer look amazing quickly.
The image upscaler tool lets you increase your images’ resolution. This means your pictures will appear sharper and clearer on your flyer. If you have a low-quality image that needs to be enlarged without becoming blurry, this tool is perfect. It can make your images look professional and clear, with improvements of up to 400 times!
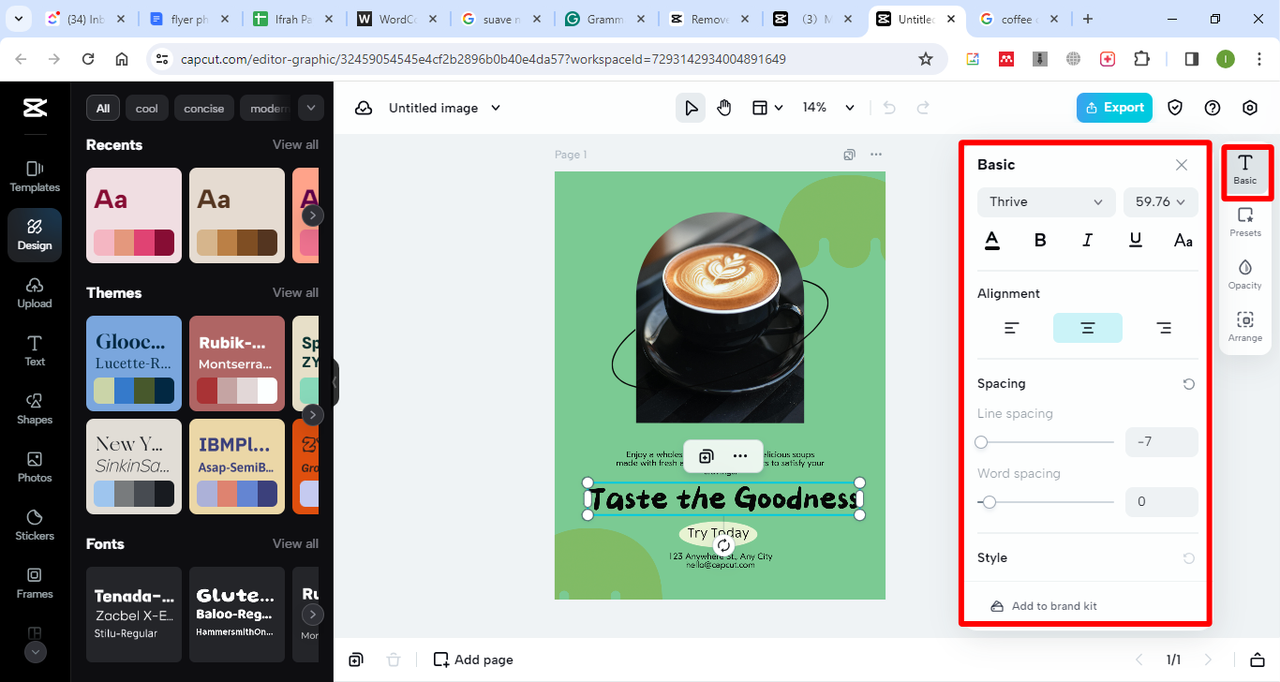
With the text tools, you can experiment with various fonts, sizes, and colors. This helps your message stand out on the flyer. You can create a modern, clean look or something more fun and creative, depending on your brand’s needs. The text tools give you the freedom to make your text match your design style perfectly.
CapCut Online offers a variety of artistic filters and effects. These can add more depth and style to your flyer design. You can choose from vintage-inspired filters or modern and abstract effects. Applying these to your images can help you create a flyer that really grabs attention and makes people remember your brand.
Stickers and icons are a fun way to add a personal and creative touch to your design. You can include decorative elements, icons that represent your brand, or cool graphics to make your design pop. This feature helps ensure your flyer is unique and attractive.
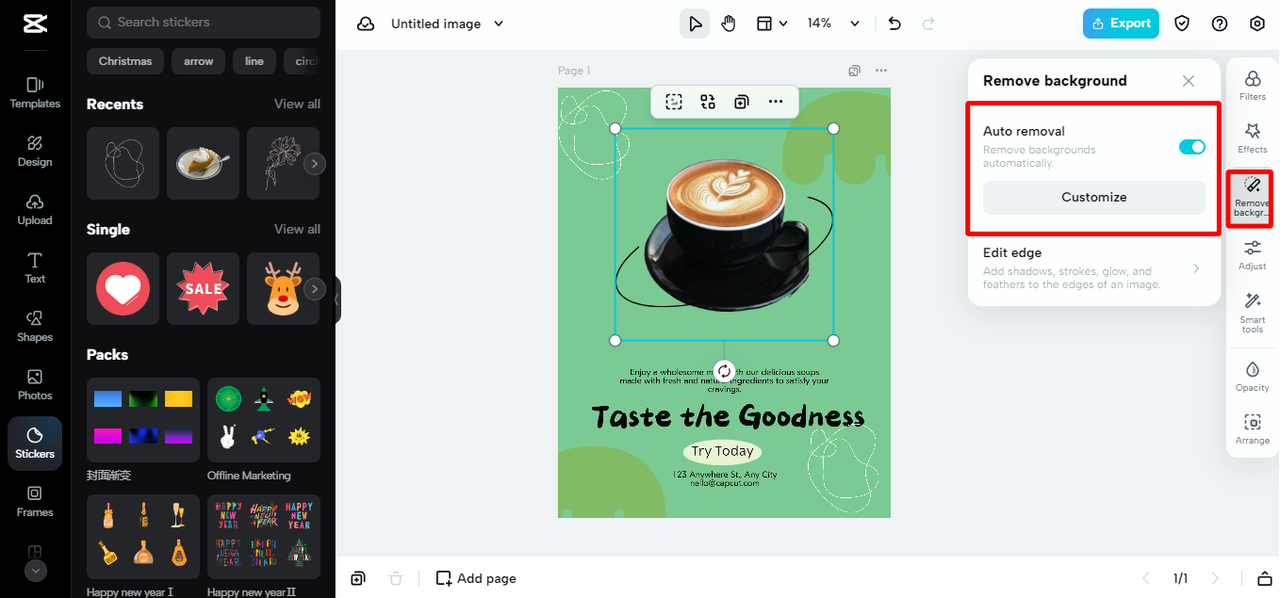
The background remover tool is extremely useful. It allows you to remove or change backgrounds easily. This helps you maintain focus on your main message and ensures your flyer looks clean and uncluttered. Whether you need to place text over a new background or remove distracting elements from a photo, this tool makes it simple to achieve professional-looking results.
CapCut — Your all-in-one video & photo editing powerhouse! Experience AI auto-editing, realistic effects, a huge template library, and AI audio transformation. Easily create professional masterpieces and social media viral hits. Available on Desktop, Web, and Mobile App.
Frequently Asked Questions About Flyer Size in Photoshop
People often have questions when working with flyer dimensions in Photoshop. Here are answers to some common questions.
What are the standard flyer sizes in Photoshop for printing and digital use? Standard sizes vary based on your needs. For printing, common sizes include A4 (8.27 x 11.69 inches), A5 (5.83 x 8.27 inches), letter size (8.5 x 11 inches), and tabloid (11 x 17 inches). For digital flyers, sizes can vary, but they’re often smaller for social media or larger for email campaigns.
How can I ensure my flyer design looks good regardless of size? To achieve this, use high-quality images and graphics that can be scaled up or down effectively. Avoid using low-resolution images as they will appear pixelated when enlarged. Also, maintain good spacing, use clear fonts, and create a balanced layout. This helps your flyer look attractive and remain readable at any size.
Can I change the flyer size after I’ve started designing in CapCut Online? Yes, you can. CapCut Online allows you to modify the size of your flyer even after you’ve begun working on it. You can also adjust other elements as needed. Simply use the resizing options within the platform to set your desired dimensions.
What file types should I use for printing and sharing my flyer online? For printing, it’s best to use high-resolution files like PDF or JPEG. These formats maintain image clarity and color accuracy when printed. For online sharing, common formats include JPEG, PNG, or PDF, depending on platform requirements and your balance between quality and file size. You might also want to create a web-optimized version that loads quickly online.
Final Thoughts on Flyer Size in Photoshop
Selecting the appropriate flyer size in Photoshop is a crucial step in creating effective, professional-looking flyers. While Photoshop is a powerful tool, it can be complex and expensive. CapCut Online provides an excellent alternative that’s easier to use and free. It offers modern features and a simple interface, making it a top choice for businesses and individuals who want to create impressive flyers that attract attention and deliver results.
Whether you choose to use Photoshop or try CapCut Online, remember that your flyer’s size is just as important as its design. Take time to consider your audience and how your flyer will be used. This will help you select the best dimensions for your needs. With the right tools and careful planning, you can create flyers that truly represent your brand and connect with people.
Some images courtesy of CapCut