TOOL HUNTER

Ever looked at a photo and thought it needed a little extra something to make it stand out? Maybe you’ve seen those cool images where the center seems to pop out and the edges curve in a fun way. That’s the fisheye effect, and it’s one of the most popular creative tools for photographers and designers. This effect gives your photos that distinctive wide-angle look where the center appears larger and the edges bend outward, just like what you’d see through an actual fisheye lens. The best part? You don’t need special equipment to achieve this look—Photoshop makes it accessible to everyone.
In this guide, I’m going to walk you through everything about the fisheye effect in Photoshop. You’ll learn why it’s such a fun tool to use, how to apply it step-by-step, and even how to correct it if you change your mind later. Whether you’re just starting out with photo editing or have been at it for years, the fisheye effect can bring a fresh, creative twist to your images.
Table of Contents
Why you should try the fisheye filter in Photoshop
You might be wondering—why should I bother with the fisheye filter? It’s not just about making your photos look quirky or unusual. The fisheye lens effect in Photoshop can transform an ordinary image into something artistic and attention-grabbing. Here’s why it’s worth experimenting with.
First, the fisheye effect creates a strong visual impact. By making the center of your image appear larger and bending the edges outward, it immediately draws the viewer’s eye. This is perfect if you want your photo to stand out on social media, in a project, or even just in your personal collection. The fisheye effect Photoshop technique is especially great for adding drama to an otherwise simple shot.
Another big advantage is that it lets you simulate an actual fisheye lens without having to buy one. Not everyone has access to specialized camera equipment, but with Photoshop, you can recreate that distinctive wide-angle, curved look with just a few clicks. It’s an affordable way to play around with different styles and expand your creative toolkit.
Using the fisheye filter also encourages you to think differently about your compositions. It pushes you to experiment with angles and perspectives you might not have considered before. You can take a basic photo and turn it into something playful, dynamic, and totally unique. Landscapes, in particular, can benefit from this effect—it makes the horizon appear wider and adds a sense of depth that can make the scene feel more immersive.
And let’s not forget about social media. Posts with eye-catching visuals tend to perform better, and the fisheye effect gives your photos a distinctive look that can help you attract more engagement. Whether you’re sharing on Instagram, Facebook, or TikTok, this effect can make your content more memorable and shareable.
How to create a fisheye effect in Photoshop
Now for the hands-on part—creating the fisheye effect yourself. Don’t worry if you’re new to Photoshop; the process is straightforward once you get the hang of it. Here’s how you can apply a fisheye effect in Photoshop to your images.
Start by opening your image in Photoshop. Once it’s loaded, go to the “Select” menu and choose “All,” or simply press Ctrl+A (Cmd+A on Mac) to select the entire image. This ensures that any changes you make will apply to the whole photo.
Next, navigate to the “Edit” menu, select “Transform,” and then click on “Warp.” This will overlay a grid on your image, which you can manipulate to create the distortion typical of a fisheye effect.
Now, click and drag the grid’s edges outward. You’ll see the image begin to curve and bend. For a more pronounced fisheye look, try pulling opposite sides in different directions. Keep adjusting until you achieve the level of distortion you’re happy with.
Once you’re satisfied with how it looks, click “OK” to confirm the changes. Remember to save your image so you don’t lose your work—and that’s it! You’ve successfully created a fisheye effect in Photoshop.
How to correct fisheye distortion in Photoshop
Sometimes, you might apply the fisheye effect and realize it’s too intense for your liking. Or maybe you’re working with a photo that already has natural fisheye distortion from a wide-angle lens, and you want to tone it down. Fortunately, Photoshop also offers tools to correct fisheye distortion.
Begin by opening your image in Photoshop. It’s always a good idea to duplicate the layer before making any adjustments. That way, you can always revert to the original if needed. To duplicate the layer, right-click on it in the Layers panel and select “Duplicate Layer.”
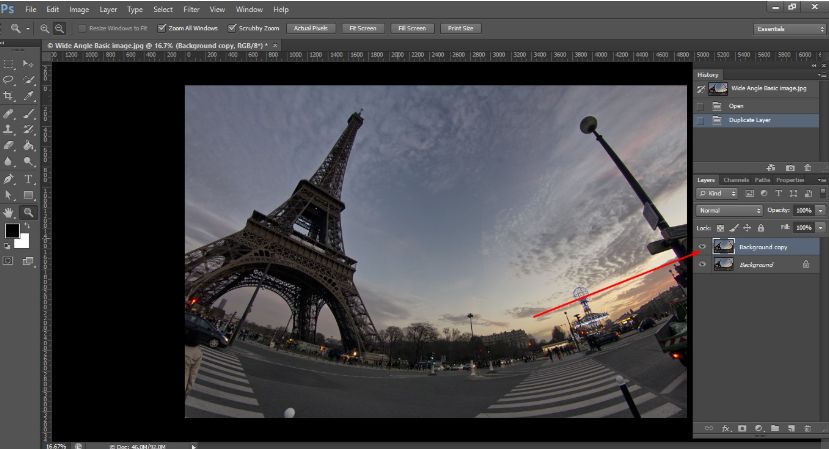
Next, go to the “Filter” menu and choose “Adaptive Wide Angle.” This tool is incredibly useful for straightening curved lines. Use the constraint tool to draw lines along the edges that are bent or distorted. Photoshop will use these guides to correct the fisheye effect.
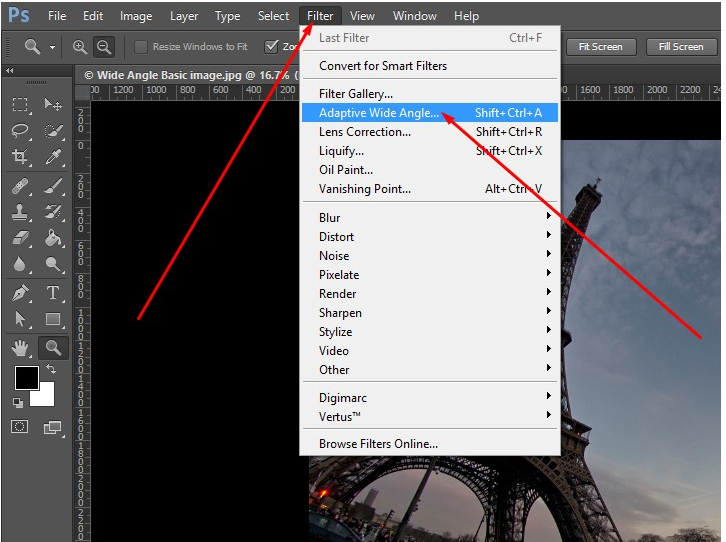
After drawing your lines, click “OK” to apply the changes. You might notice some empty spaces around the edges where the image was straightened. You can crop the photo or use the “Content-Aware Fill” tool to seamlessly fill in those gaps.
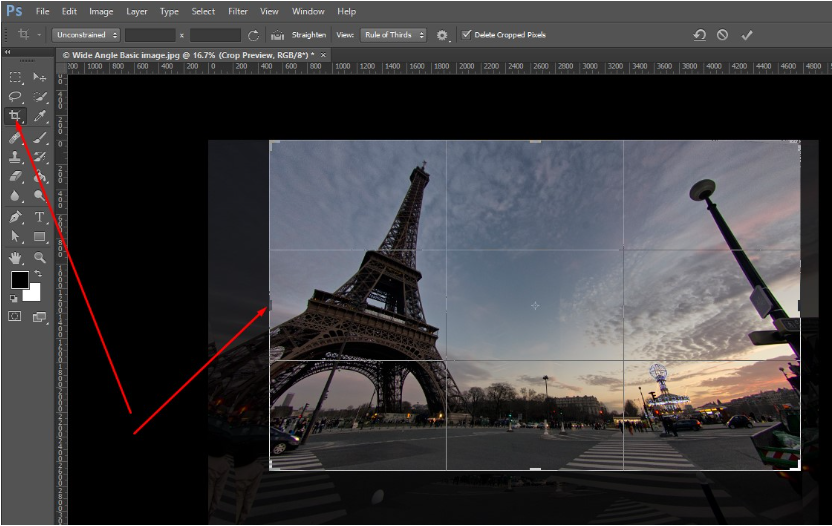
And there you have it—your image should now look more natural while retaining most of its original detail.
Best practices for using the fisheye Photoshop effect
Using the fisheye effect can be a lot of fun, but to get the best results, it helps to keep a few tips in mind. Here are some best practices for making the most of the fisheye Photoshop effect.
Start by choosing the right image. Photos with a clear focal point in the center tend to work best with the fisheye effect. Landscapes, portraits, and urban scenes are great candidates because the distortion can add drama and depth. Avoid images with too much detail near the edges, as these areas can become overly distorted and messy.
When applying the effect, pay attention to the level of distortion. Too much can make the image look unnatural and hard to recognize, while too little might not give you the fisheye look you’re after. Experiment with the settings until you find a balance that enhances the photo without overwhelming it.
It’s also important to keep your subject in focus. The fisheye effect naturally draws attention to the center of the image, so make sure your main subject is positioned there or slightly off-center. This helps maintain balance and ensures the effect adds to the story you’re trying to tell.
Don’t hesitate to combine the fisheye effect with other editing tools. For example, adding a vignette or adjusting the colors can make the distortion stand out even more. Layering effects can give your photo a unique style that sets it apart from others.
Finally, experiment with different angles. Try shooting from a low or high perspective before applying the effect. This can make the curvature more dramatic and interesting. The more you play around, the more creative and exciting your results will be.
CapCut — Your all-in-one video & photo editing powerhouse! Experience AI auto-editing, realistic effects, a huge template library, and AI audio transformation. Easily create professional masterpieces and social media viral hits. Available on Desktop, Web, and Mobile App.

Easily apply fisheye effects with CapCut desktop
If you’re looking for a quicker and more straightforward way to apply fisheye effects, you might want to check out CapCut’s desktop video editor. While it’s known for video editing, CapCut also lets you edit images with ease. It offers a user-friendly way to add fisheye distortion with just a few clicks, making it a great alternative to Photoshop for beginners or anyone short on time.
CapCut’s interface is intuitive and easy to navigate, so you don’t need to be an expert to get started. Whether you’re working on a personal project or creating content for social media, CapCut helps you achieve that fisheye look without any hassle.
Key features of CapCut
CapCut comes packed with features that make editing both fun and efficient. Here are some of the highlights.
First, it offers a range of fisheye effects. You can choose from different styles and intensities to get exactly the look you want. Whether you prefer a subtle curve or an extreme distortion, CapCut has options to suit your needs.
It also allows you to apply dynamic transitions between clips if you’re working on a video. This helps your edits flow smoothly and keeps viewers engaged from start to finish.
Another handy feature is the ability to remove or replace backgrounds. This is super useful for creating clean, professional-looking images without needing advanced editing skills.
CapCut also includes AI-powered tools for skin smoothing and face retouching. These features help enhance portraits by giving skin a smooth, natural appearance without requiring manual touch-ups.
How to add fisheye effects in CapCut
Adding a fisheye effect in CapCut is incredibly easy. First, download and install the CapCut desktop editor. Once it’s installed, open the program, and you’re ready to go.
Start by uploading your image. You can do this by clicking the “Import” button or simply dragging and dropping your file into the editor.

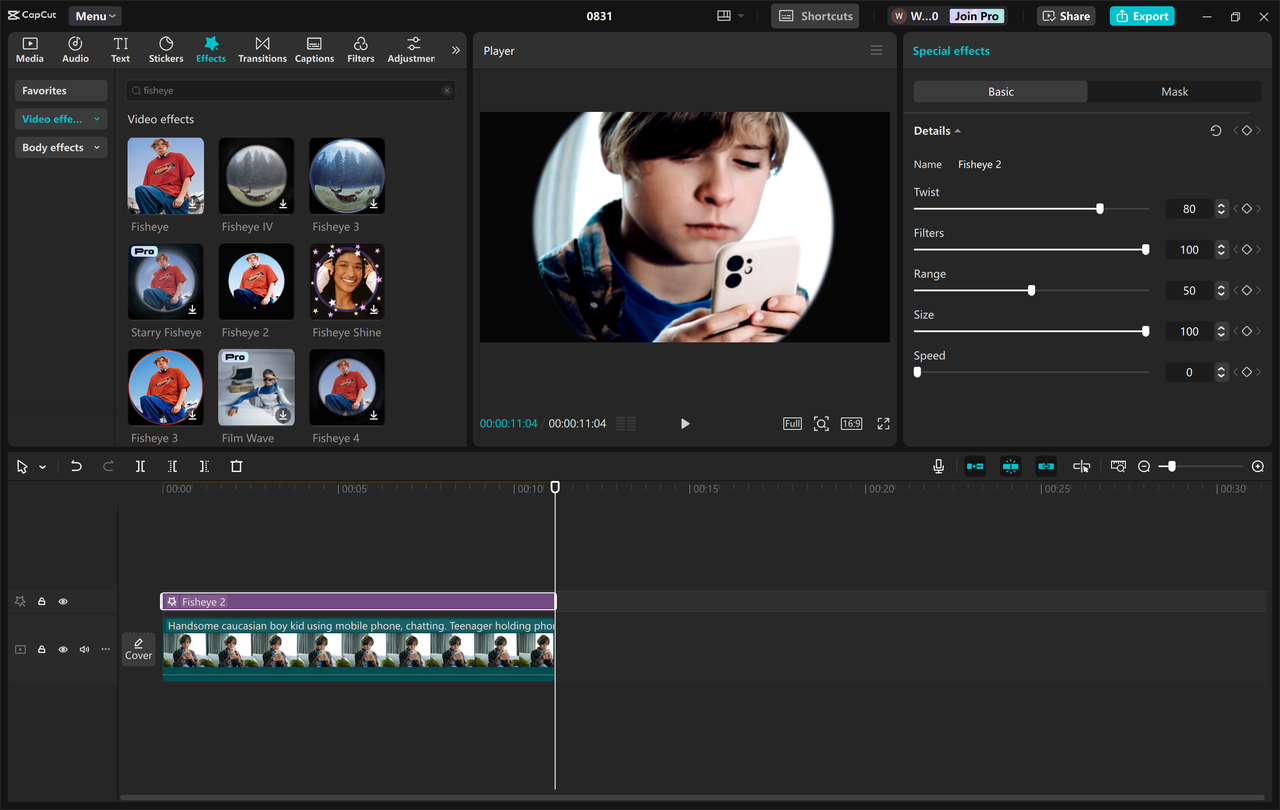
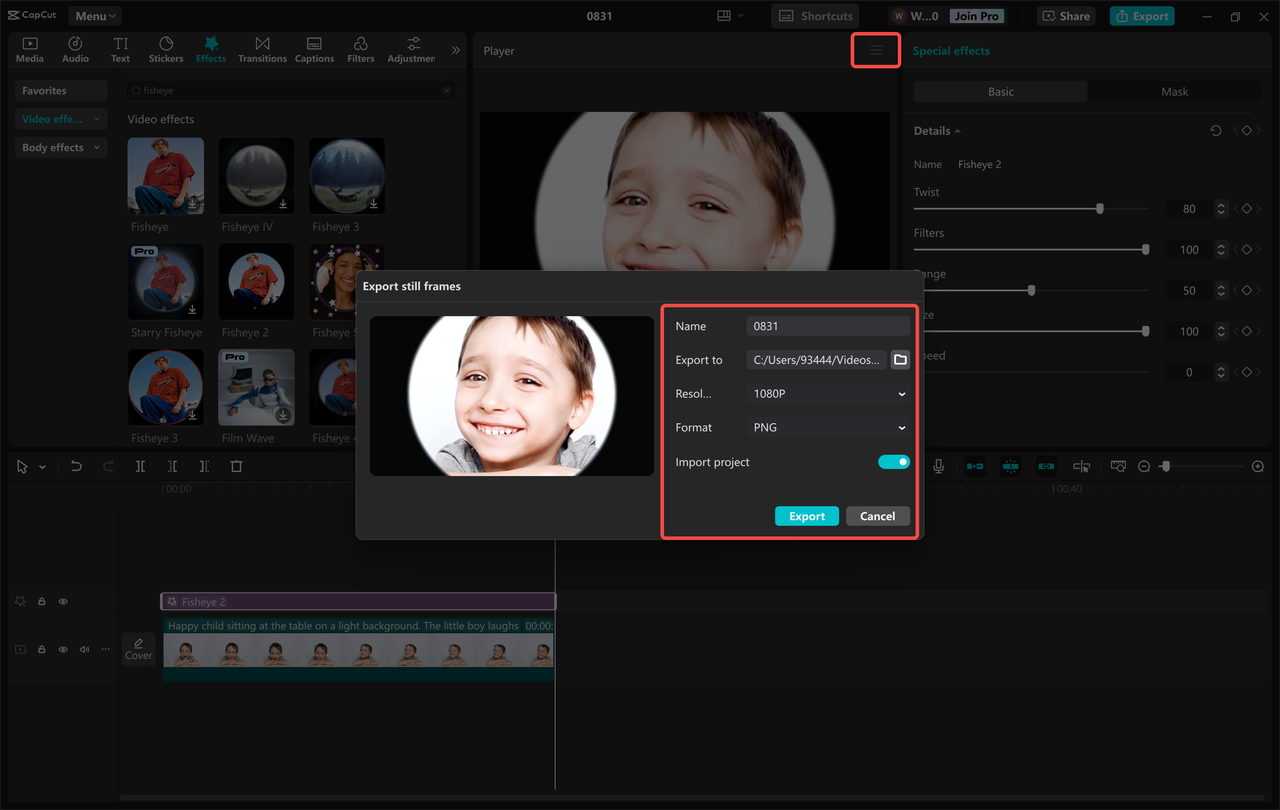
Next, go to the “Effects” section and look for “Video effects.” Search for “fisheye effect” and choose the style you like. Click the add button to apply it to your image. You can then adjust the strength and size of the effect to fine-tune the look.
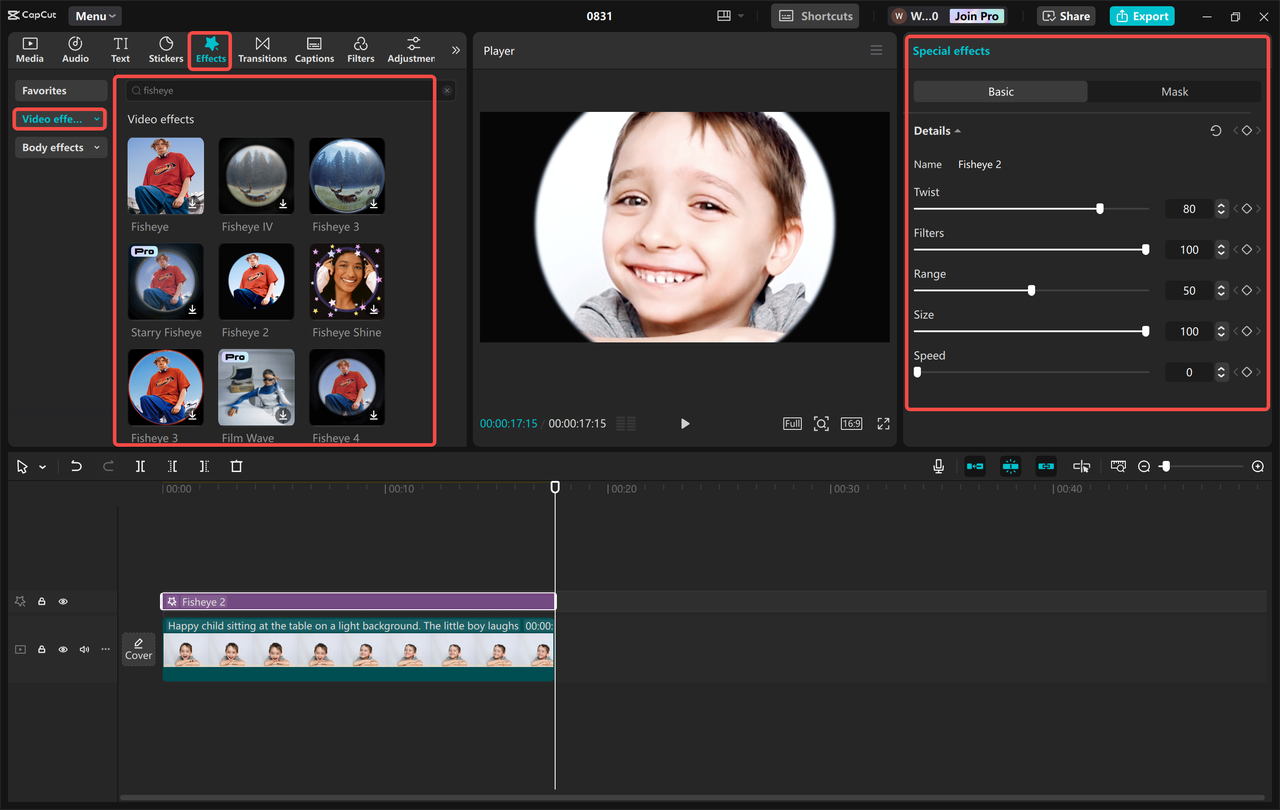
If you want, you can also add filters, text, or stickers to make your image even more unique. Once you’re happy with the result, export it by clicking the icon in the upper right corner and selecting “Export still frames.” This will save your edited image to your computer.
And that’s all there is to it! With CapCut, adding a fisheye effect is quick, easy, and enjoyable.
CapCut — Your all-in-one video & photo editing powerhouse! Experience AI auto-editing, realistic effects, a huge template library, and AI audio transformation. Easily create professional masterpieces and social media viral hits. Available on Desktop, Web, and Mobile App.
Wrapping up
So, there you have it—a complete guide to using the fisheye effect in Photoshop and CapCut. Whether you’re looking to add creative flair to your photos or correct unwanted distortion, these tools have you covered. The fisheye effect is a fantastic way to make your images stand out, and with a bit of practice, you’ll be able to master it in no time.
Remember, the key is to experiment and have fun with it. Try different images, play around with settings, and don’t be afraid to make mistakes. That’s how you learn and discover new styles that work for you.
If you’re ever in a hurry or want a simpler option, CapCut is an excellent alternative that gets the job done quickly. No matter which tool you choose, adding a fisheye effect can bring a whole new level of creativity to your work.
Frequently asked questions
How can I use masking to create a fisheye filter in Photoshop?
You can use layer masking to control where the fisheye effect is applied. First, duplicate your image layer and apply the “Spherize” filter. Then, add a layer mask and use a brush to hide the effect in areas where you want to preserve the original look. This gives you more precision and a smoother result.
Can I create a realistic fisheye lens distortion in Photoshop?
Absolutely! By using the “Spherize” filter, you can mimic the wide-angle curvature of a real fisheye lens. Adjusting the canvas size and feathering the edges can make the effect look more natural. For even faster results, you might want to try tools like CapCut, which offer similar distortion effects with less effort.
How does the Photoshop fisheye effect change how an image is perceived?
The fisheye effect alters an image by stretching the center and bending the edges, creating a wide, panoramic view that exaggerates depth. This can make subjects appear larger or more dramatic, adding a surreal, eye-catching twist to your photos.
Some images courtesy of CapCut.