TOOL HUNTER

Ever find yourself stuck with a massive video file that’s just too big to share? Maybe you’ve recorded a long presentation for work, or captured some precious family moments in high resolution, only to realize the file size is eating up all your storage space. Don’t worry – you’re definitely not alone in this struggle!
We all love taking videos these days. Our phones make it so easy to record everything from birthday parties to beautiful sunsets. But then comes the problem: these video files can get really huge. When you try to send them to friends or upload them somewhere, you might get error messages saying the file is too large. That’s why learning how to make video file smaller has become such an important skill for pretty much everyone.
The good news is that making videos smaller isn’t as complicated as it might seem. You don’t need to be a tech expert or buy expensive software. In fact, there are plenty of free tools and simple techniques that can help you reduce video sizes on whatever device you’re using – whether it’s an iPhone, Android phone, Windows computer, or Mac.
CapCut — Your all-in-one video & photo editing powerhouse! Experience AI auto-editing, realistic effects, a huge template library, and AI audio transformation. Easily create professional masterpieces and social media viral hits. Available on Desktop, Web, and Mobile App.

How to make video files smaller for free
When you’re looking to make a video file smaller without spending money, you’ll be happy to know there are several excellent free options available. One of the best tools out there is CapCut, which offers a complete set of editing features without any cost.
CapCut isn’t just a basic video editor – it actually lets you work with audio and images too. The interface is designed to be super user-friendly, so even if you’ve never edited videos before, you’ll find it easy to navigate. Some of its cool features include free cloud storage for your projects, lots of media resources like stock footage and music, various editing tools, and even AI helpers that can make the editing process smarter.
What makes CapCut particularly useful for reducing video sizes is its dedicated resize video tool. This feature is perfect for content creators who regularly need to adjust their videos for different platforms, or even just for casual users who occasionally need to edit videos. With this tool, you can take a large video file and make it significantly smaller very quickly, without ruining the quality of your video.
The process of how to make video size smaller with CapCut is really straightforward. You don’t need any technical knowledge or previous experience with video editing software.
Key features of CapCut
- Completely free: You can compress videos without paying anything, and you don’t need to download any additional apps or plugins
- Multiple canvas sizes for social media: It offers different aspect ratio presets so you can easily create videos optimized for YouTube, Facebook, TikTok, and Instagram
- Precision trim tool: You can cut out parts of your video with great accuracy using a timeline that lets you select exact moments down to the second
- Additional editing capabilities: Beyond basic trimming, you can also edit based on transcripts, remove silent parts automatically, and split scenes to delete specific clips
Steps to make videos smaller using CapCut
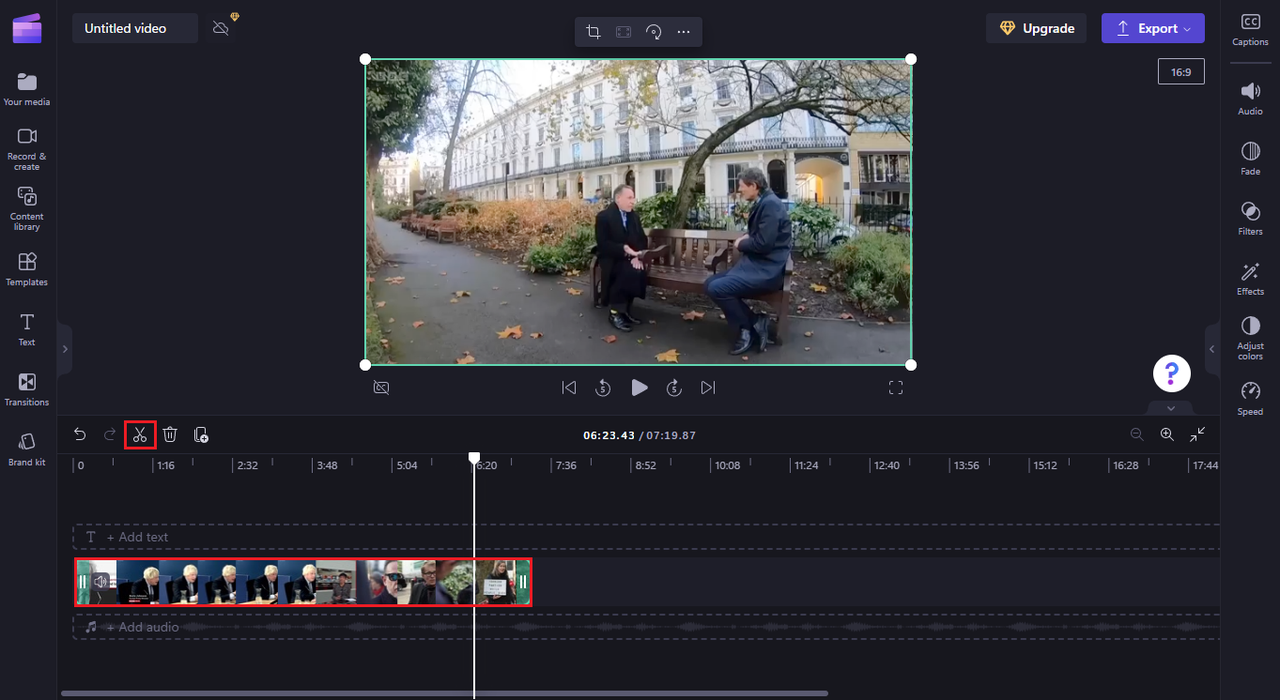
If you’re wondering how can I make a video file smaller with CapCut, here’s a simple step-by-step guide:
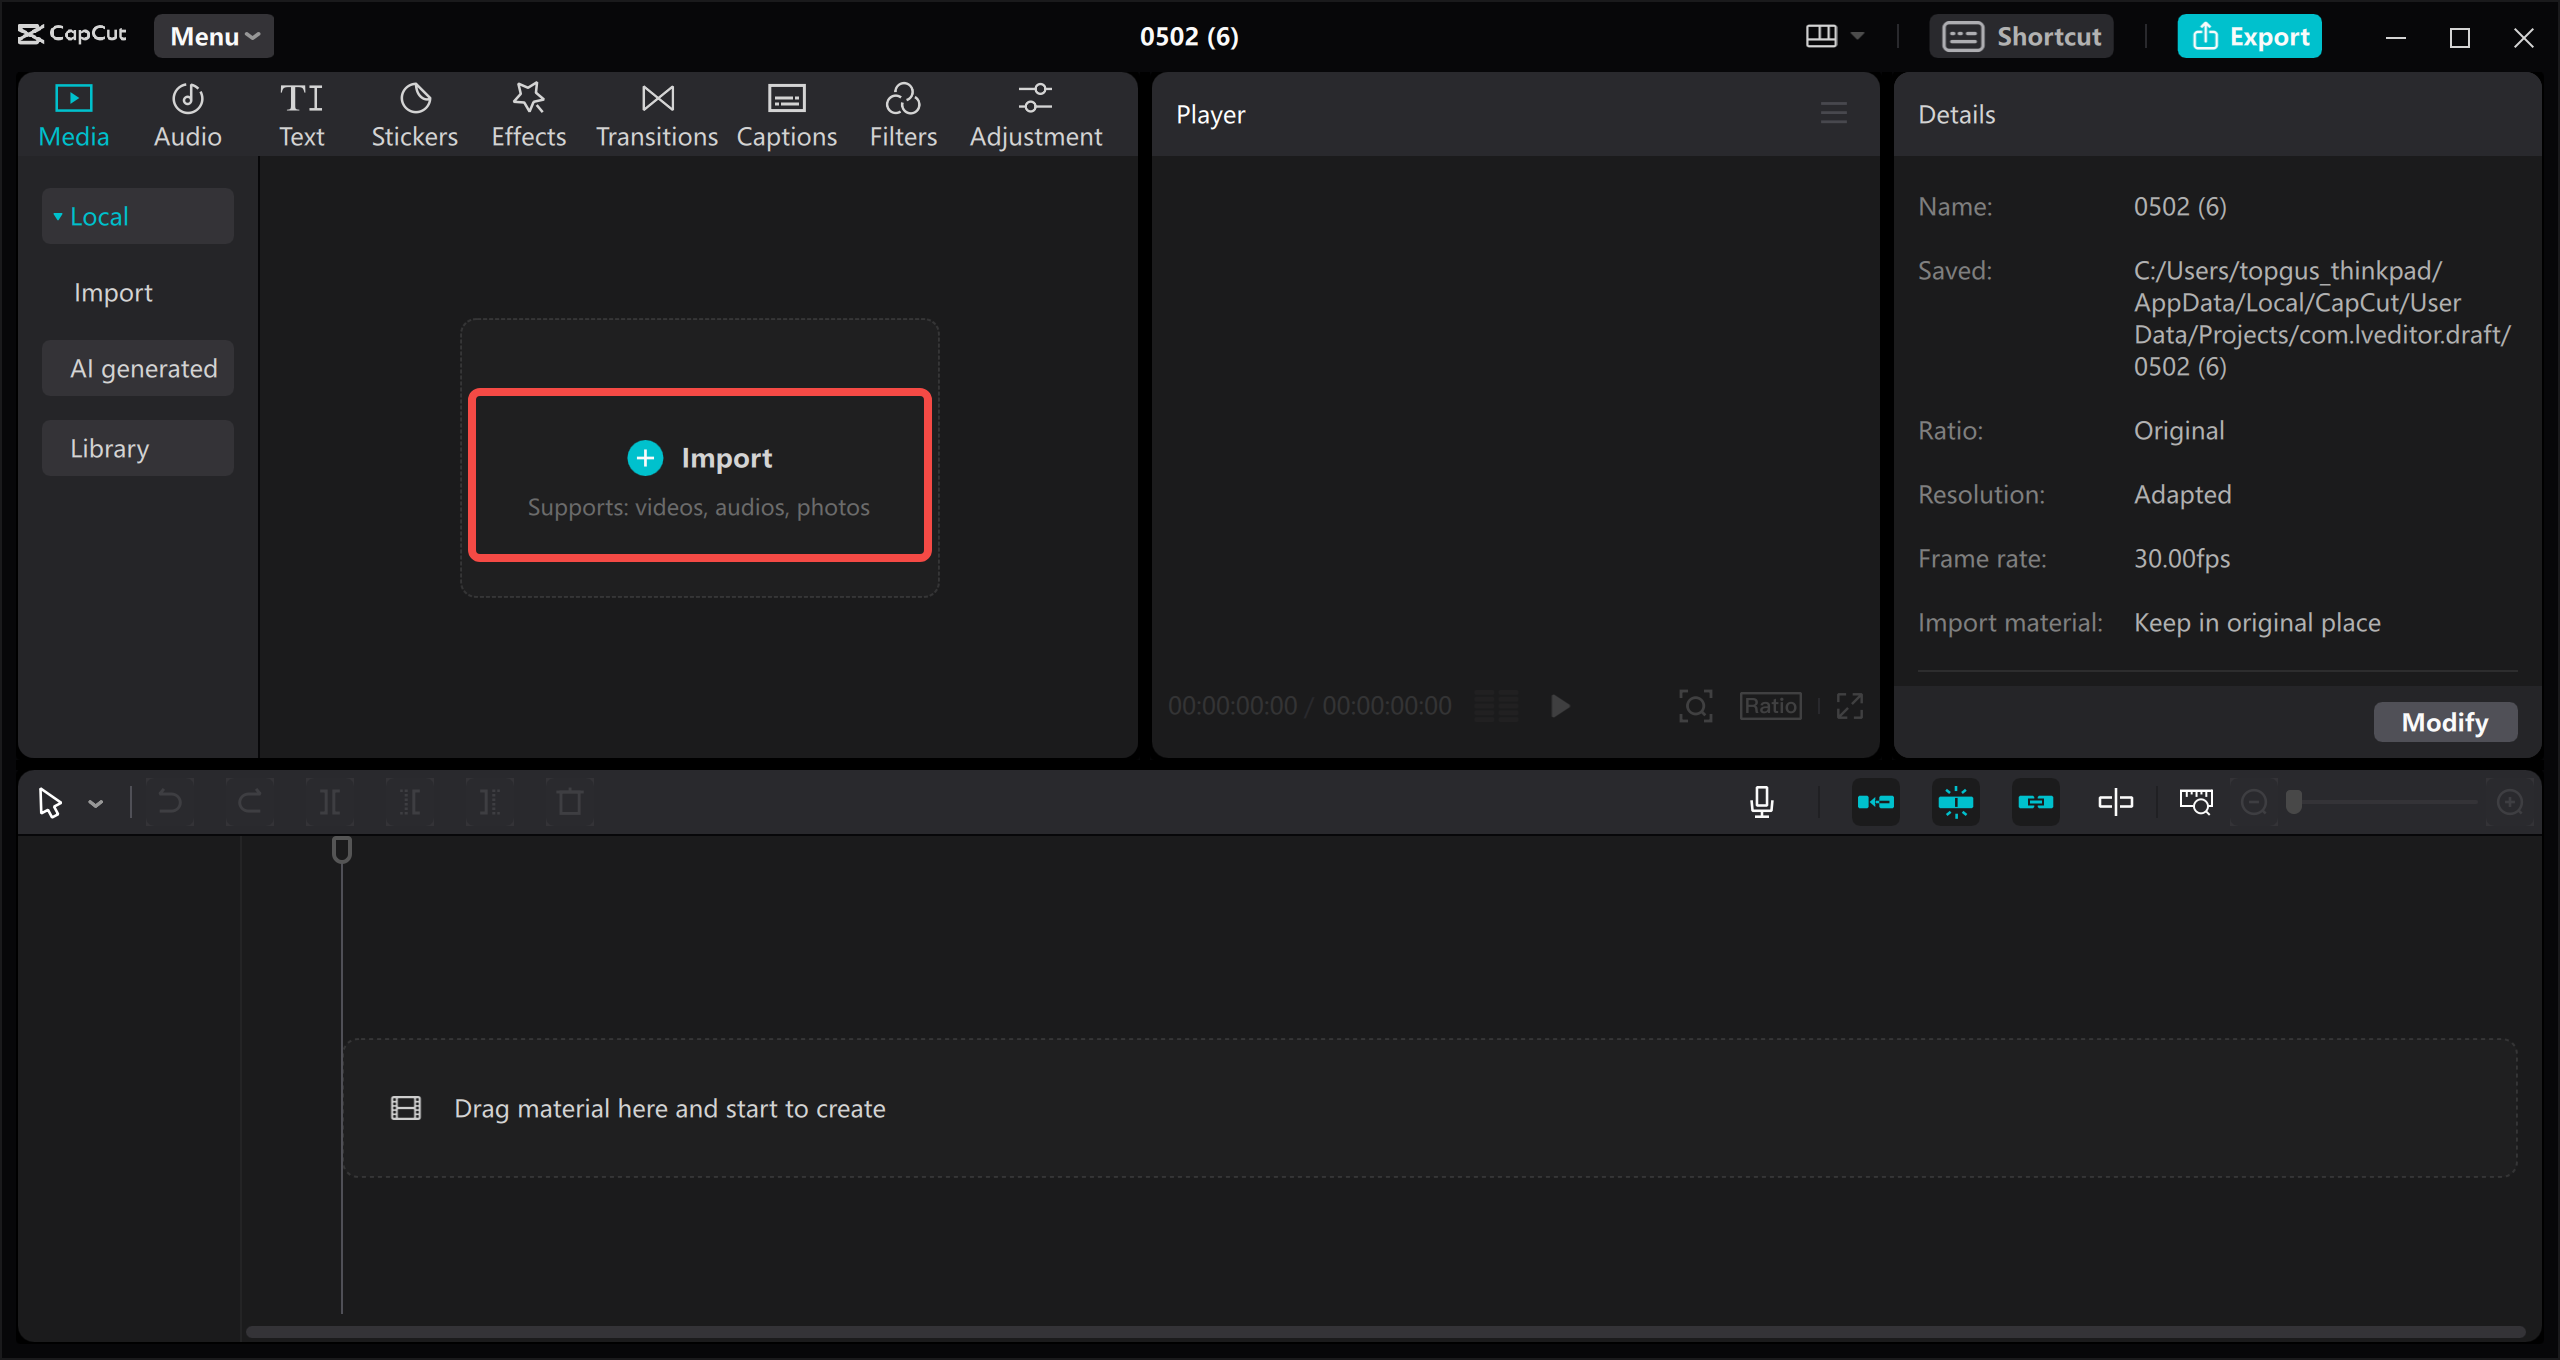
- Upload your video Start by uploading your video file directly from your computer’s local storage. If you’ve used CapCut before, you can also access videos from your CapCut cloud space.
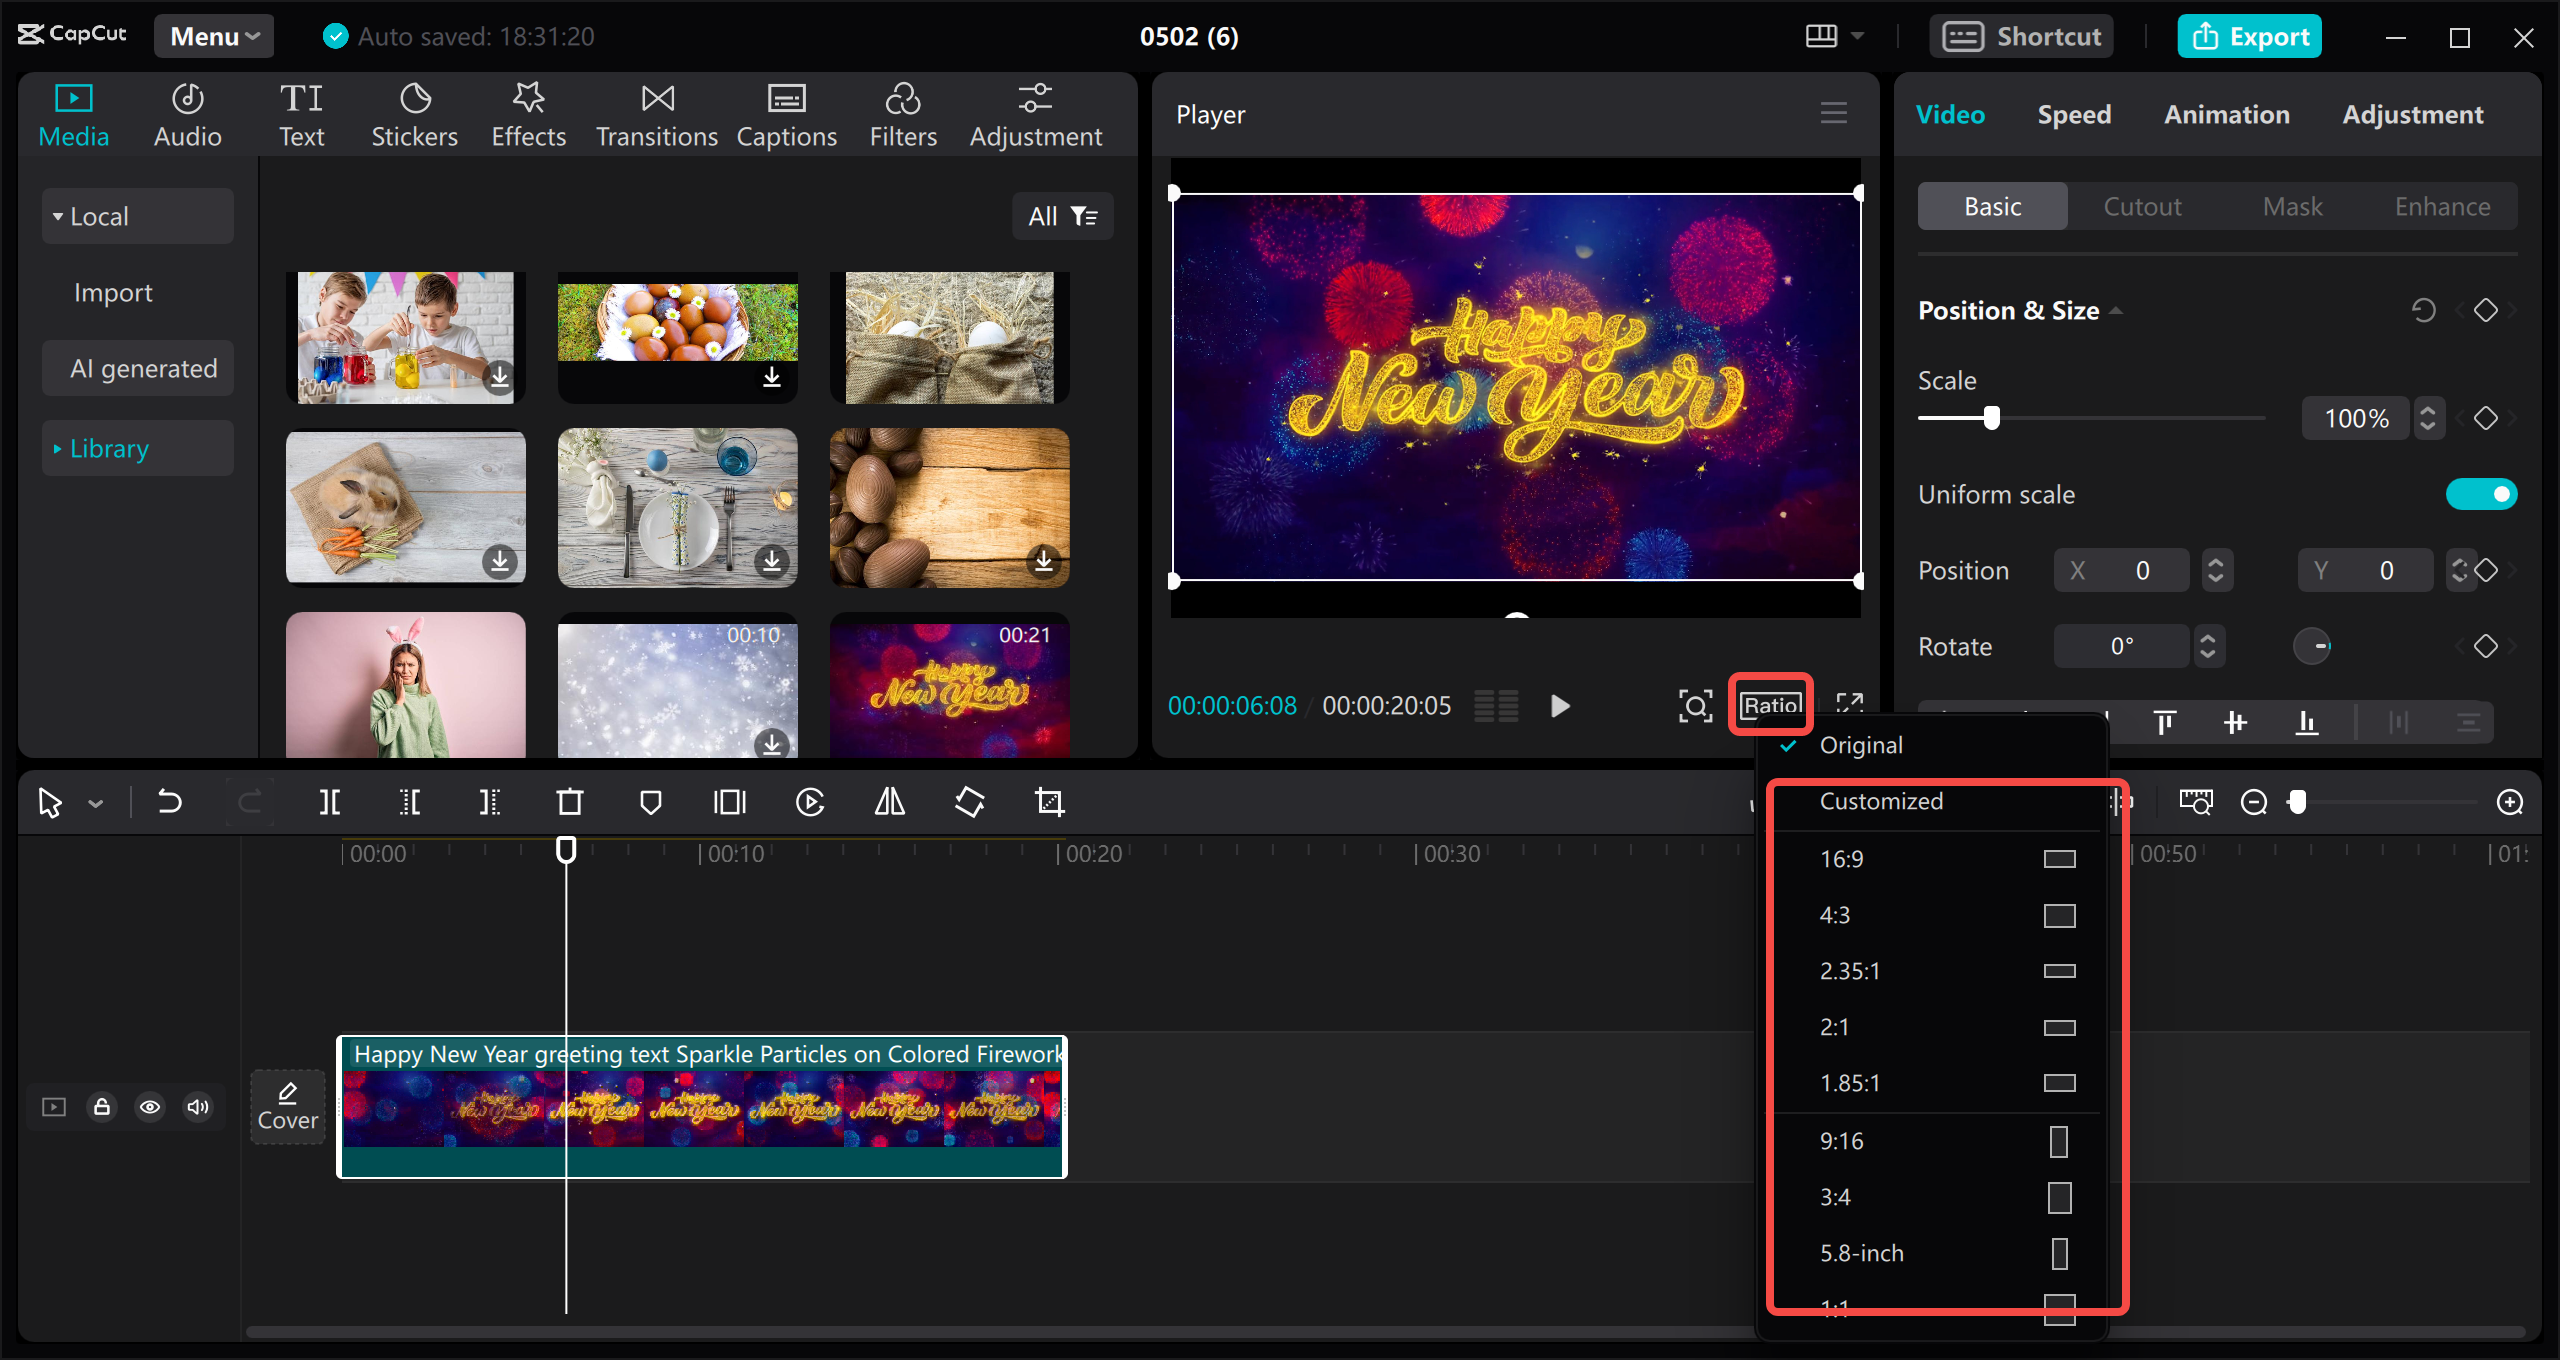
- Edit your video Choose the aspect ratio that fits your needs. You can also customize the background color using the toolbar on the right side of the interface.
You can also trim your video to remove unnecessary parts, which naturally helps reduce the file size.

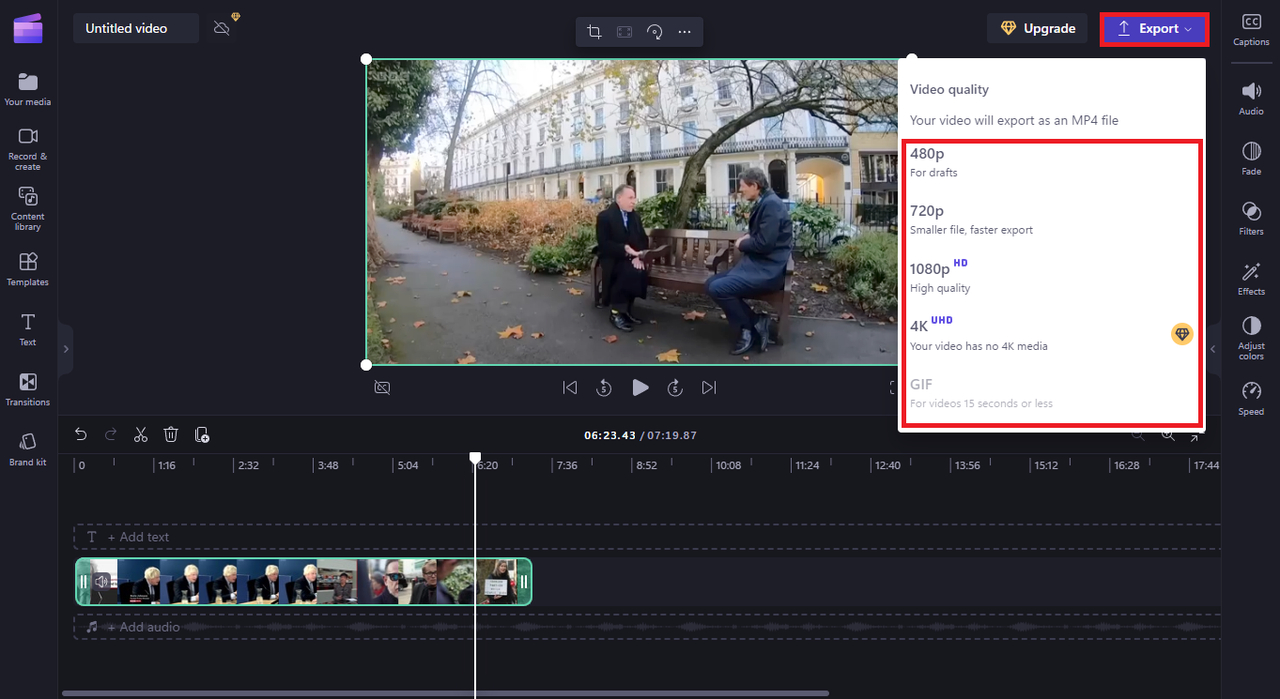
- Export your video Click the “Export” button located at the top right corner. Here you can adjust various settings including quality, frame rate, and output format. To make the file smaller, choose “Fast exporting” from the quality options menu. Setting the frame rate to 30fps can also help reduce size. Finally, select your desired resolution and click “Export.”

Besides CapCut, there are other free tools available depending on your specific device and needs. Many platforms actually have built-in editors that can help you compress videos without installing additional software.
CapCut — Your all-in-one video & photo editing powerhouse! Experience AI auto-editing, realistic effects, a huge template library, and AI audio transformation. Easily create professional masterpieces and social media viral hits. Available on Desktop, Web, and Mobile App.
How to make video smaller in size on Apple devices
If you’re using Apple devices like an iPhone, iPad, or Mac, you’re in luck when it comes to reducing video sizes. Apple includes some really powerful video editing tools right within their operating systems, so you often don’t need to download extra apps or software. Two of the most useful built-in options are iMovie and QuickTime Player.
Using iMovie to make video file smaller
iMovie is Apple’s own video editing application, and it’s surprisingly capable for a free program included with Apple devices. It can help you transform large video files into smaller versions without significantly affecting quality. Beyond just compression, iMovie also lets you split long videos into shorter clips and remove parts you don’t want to keep.
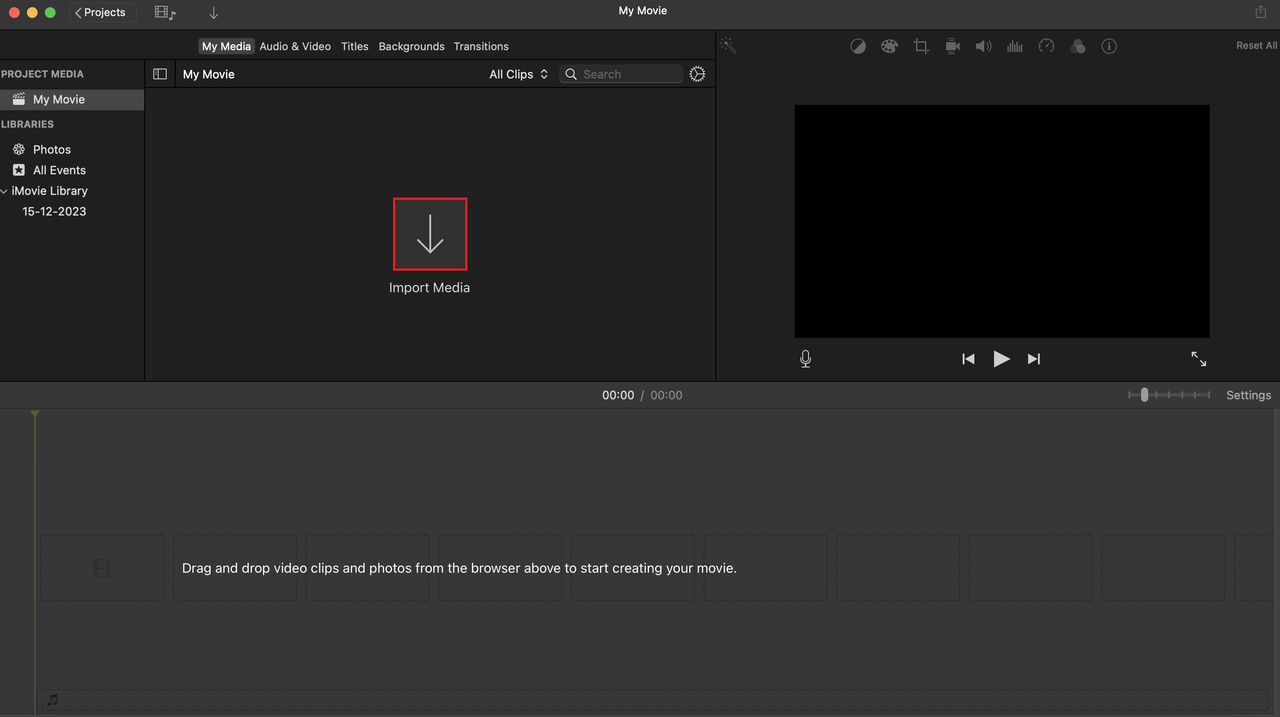
- Upload your video Open iMovie and click on “Import media” to bring your video into a new project.
Select the video footage you want to work with and simply drag it down to the editing area at the bottom of the screen.
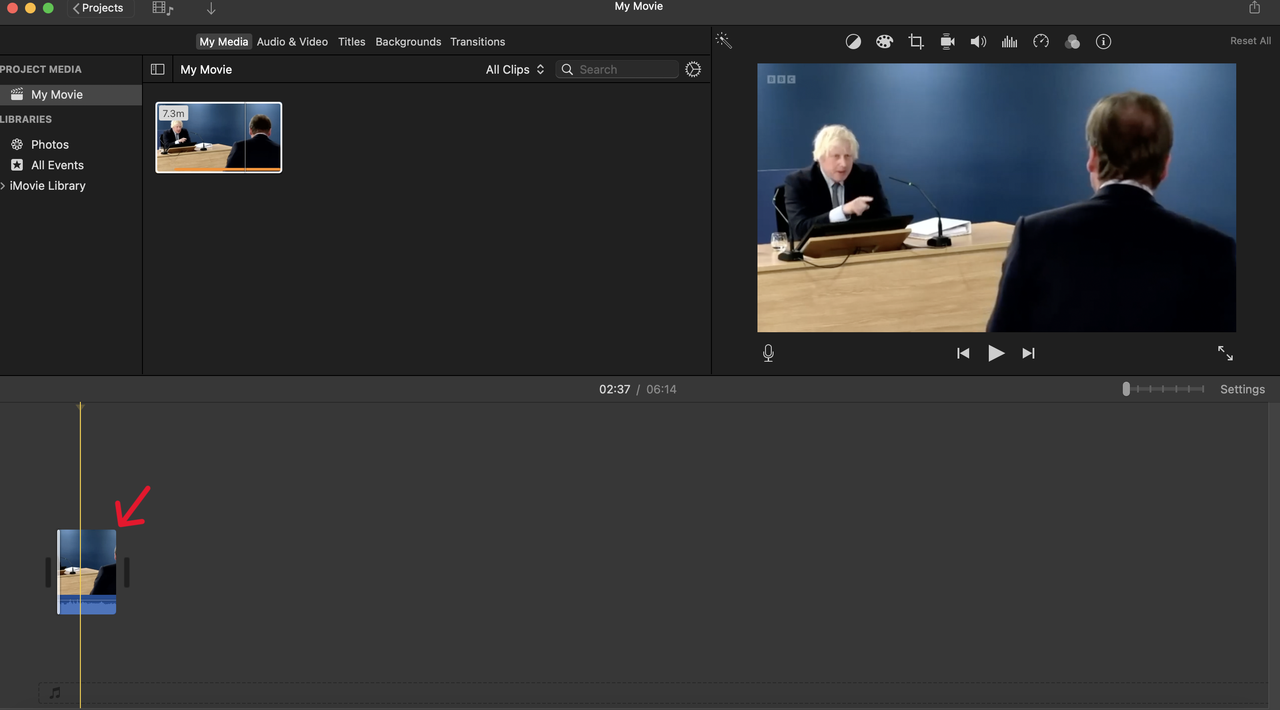
- Split or cut your video If there are sections you don’t need, you can trim them out using the editing slider that appears. If you want to keep the entire video intact, you can skip this step entirely.

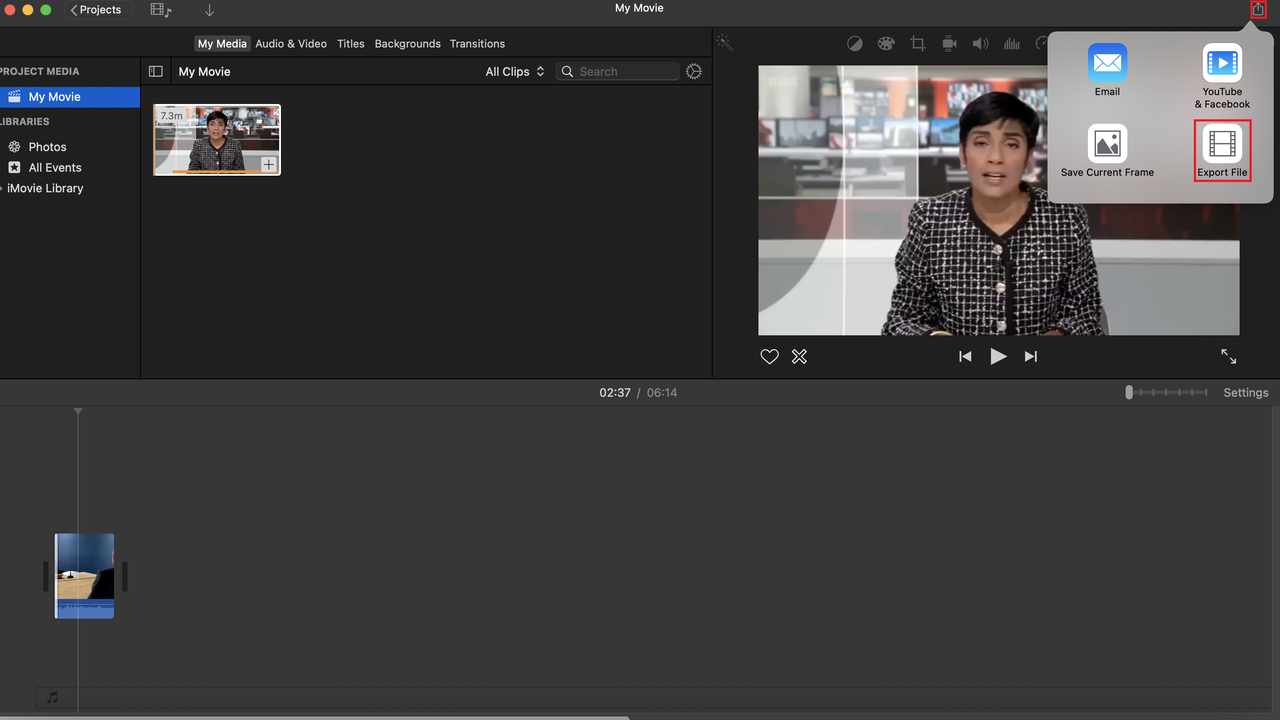
- Change export settings Click on the “Share” icon in the top right corner and select “Export File” from the dropdown menu.
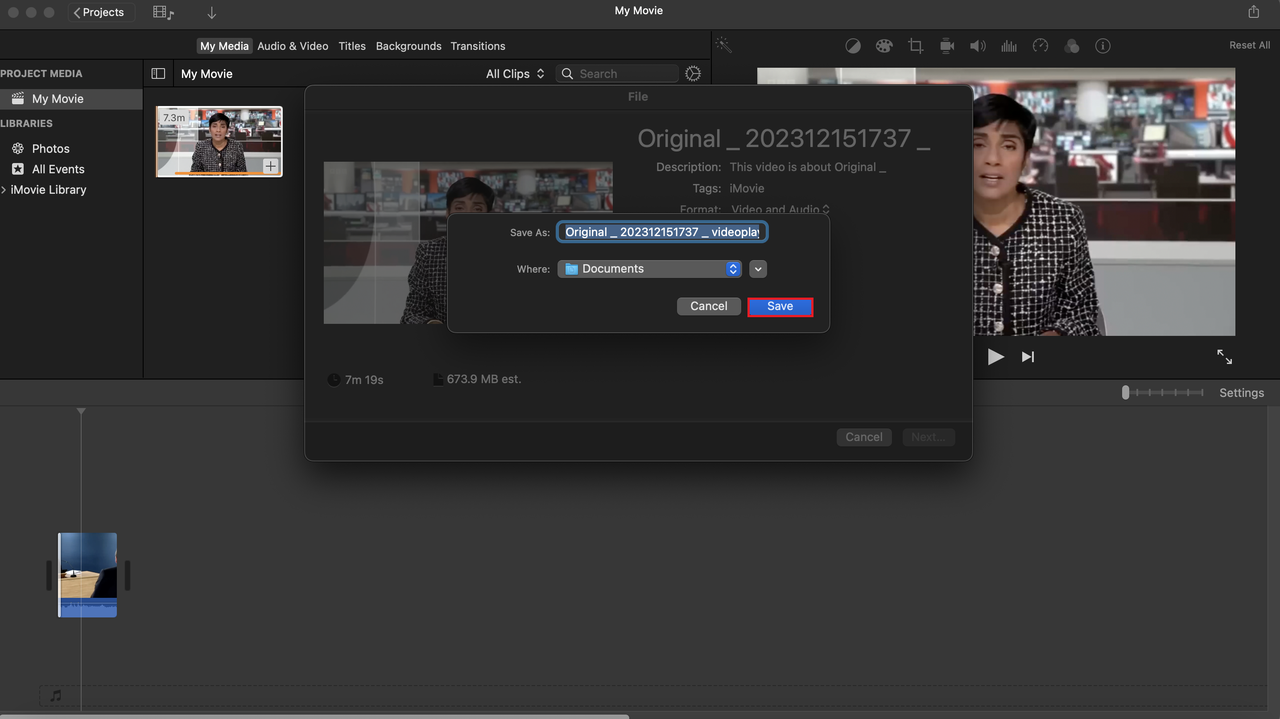
Now you can adjust the video resolution, quality settings, and compression type to reduce the file size. For maximum size reduction, choose “Faster” under the compression options. Then click “Next” to continue.

Choose where you want to save your newly compressed video and press “Save” to complete the process.
Using QuickTime to make a video file smaller
QuickTime Player comes pre-installed on all Apple devices and serves as the default video player. While primarily known for playback, it actually includes some basic editing features that can help you reduce video sizes by trimming out unwanted sections.
-
Open your video in QuickTime Simply drag and drop your video file into the QuickTime Player window, or use the File > Open menu to select your video.
-
Edit and trim From the “Edit” menu in the top toolbar, select the “Trim” option.
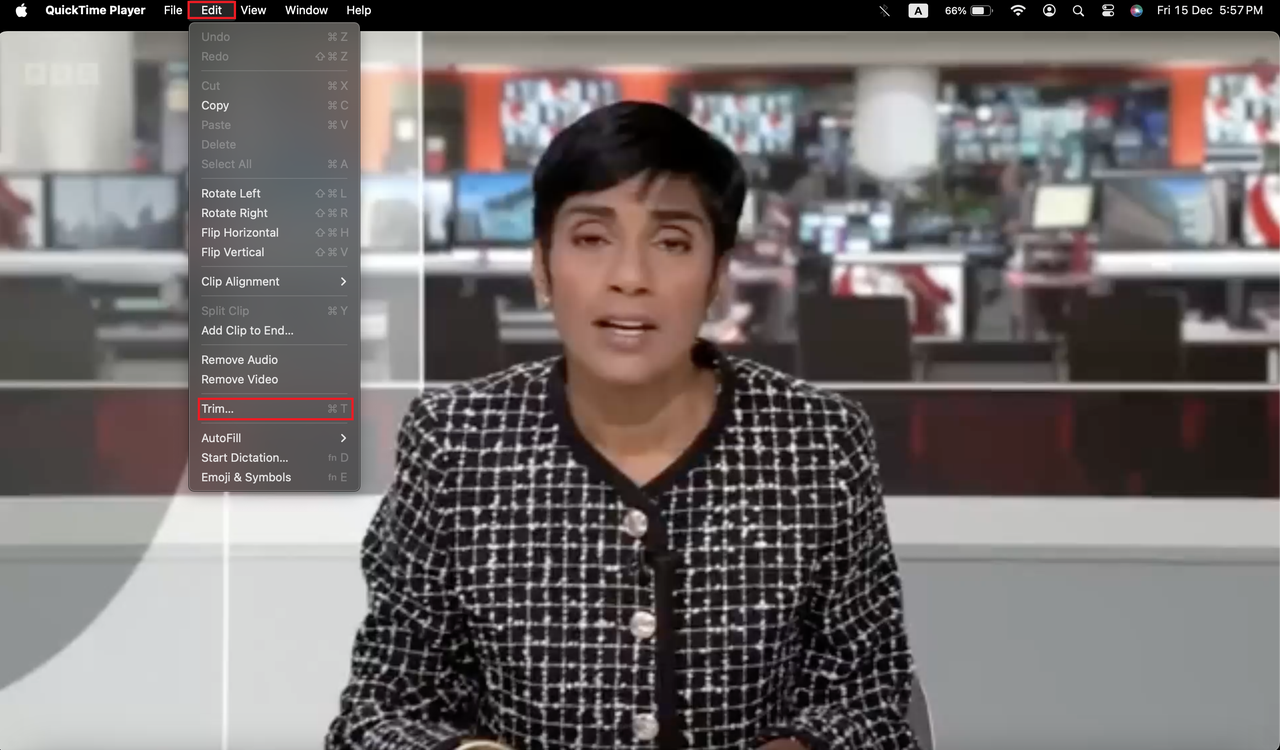
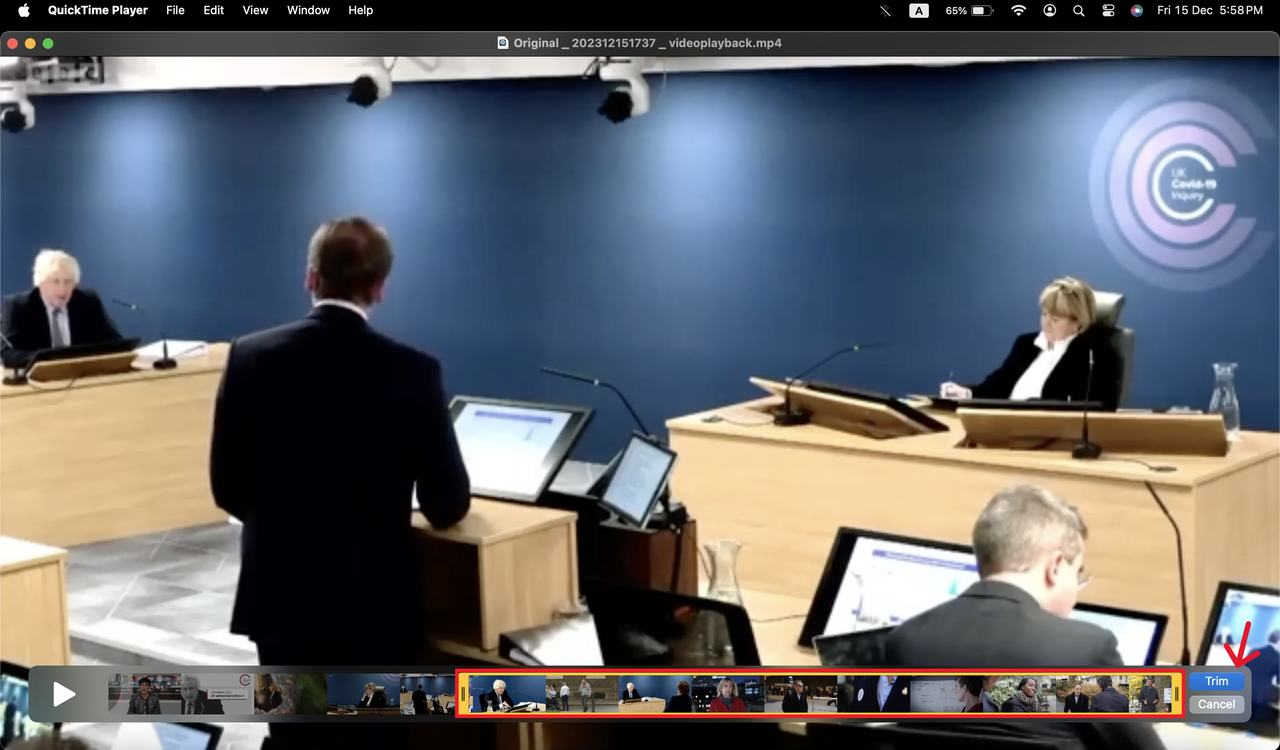
A yellow timeline slider will appear at the bottom of the window. Drag the handles on either end to select only the portion of the video you want to keep, then click the “Trim” button to confirm your selection.
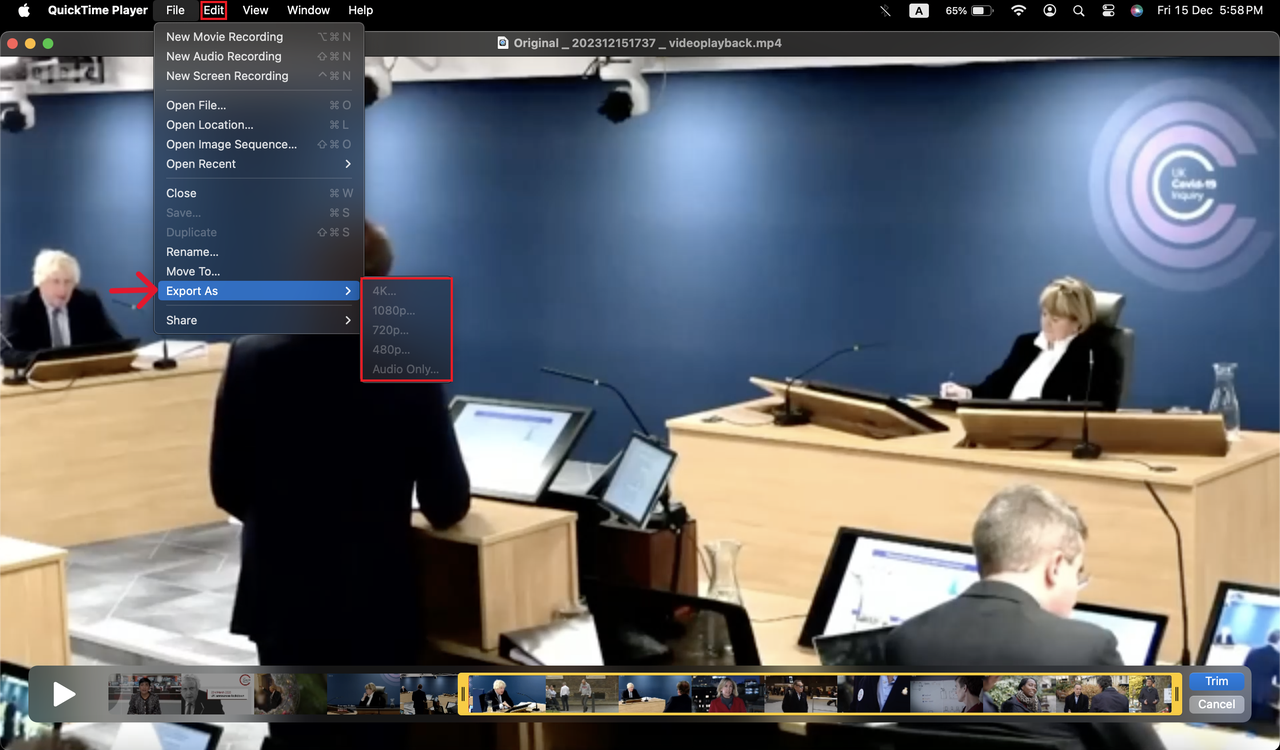
- Select export quality Go to the “File” menu and choose “Export As.” From here, you can select from different quality presets. Choosing a lower quality setting will result in a smaller file size.
How to make smaller videos on Windows
Windows users have several excellent options when it comes to reducing video sizes. Whether you’re using Windows 10 or Windows 11, there are built-in tools and free software available that can help you make video file smaller without compromising too much on quality.
Using VLC to make video file smaller
VLC Media Player is one of the most popular media players in the world, and it’s been around for decades for good reason. It’s lightweight, completely free, and can play almost any video format you throw at it. But many people don’t realize that VLC can also convert videos to smaller sizes through its conversion features.
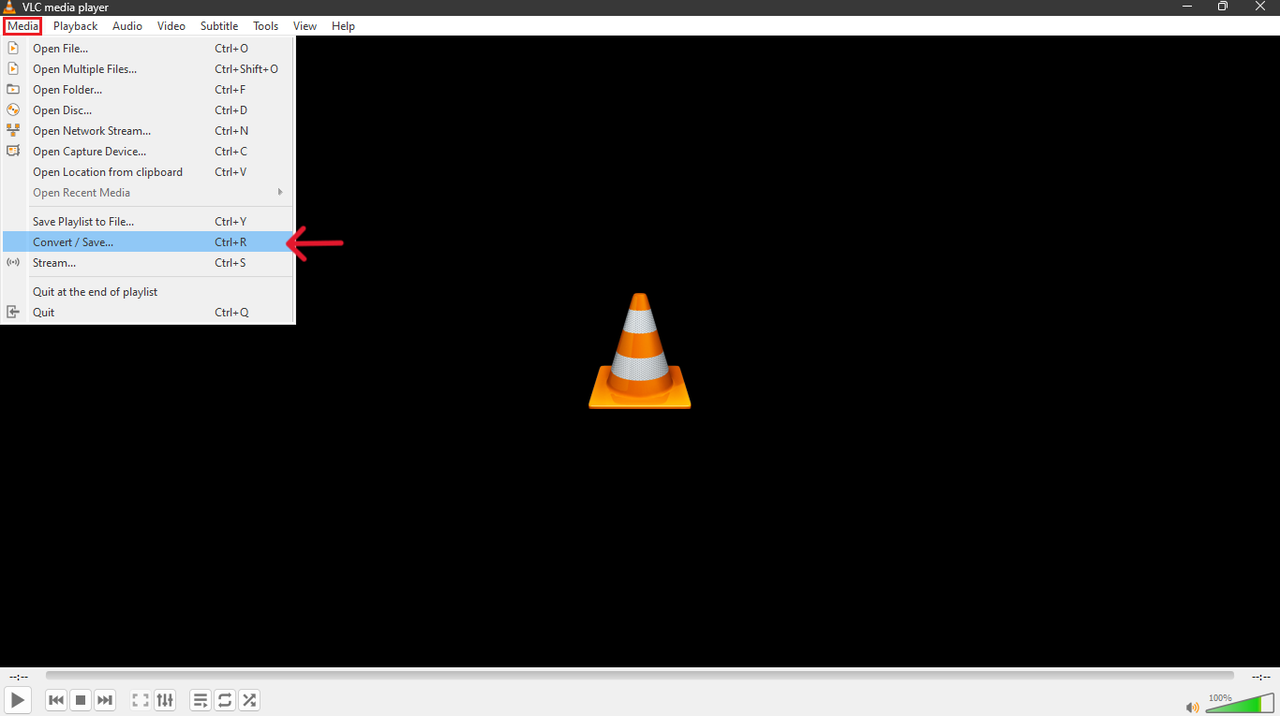
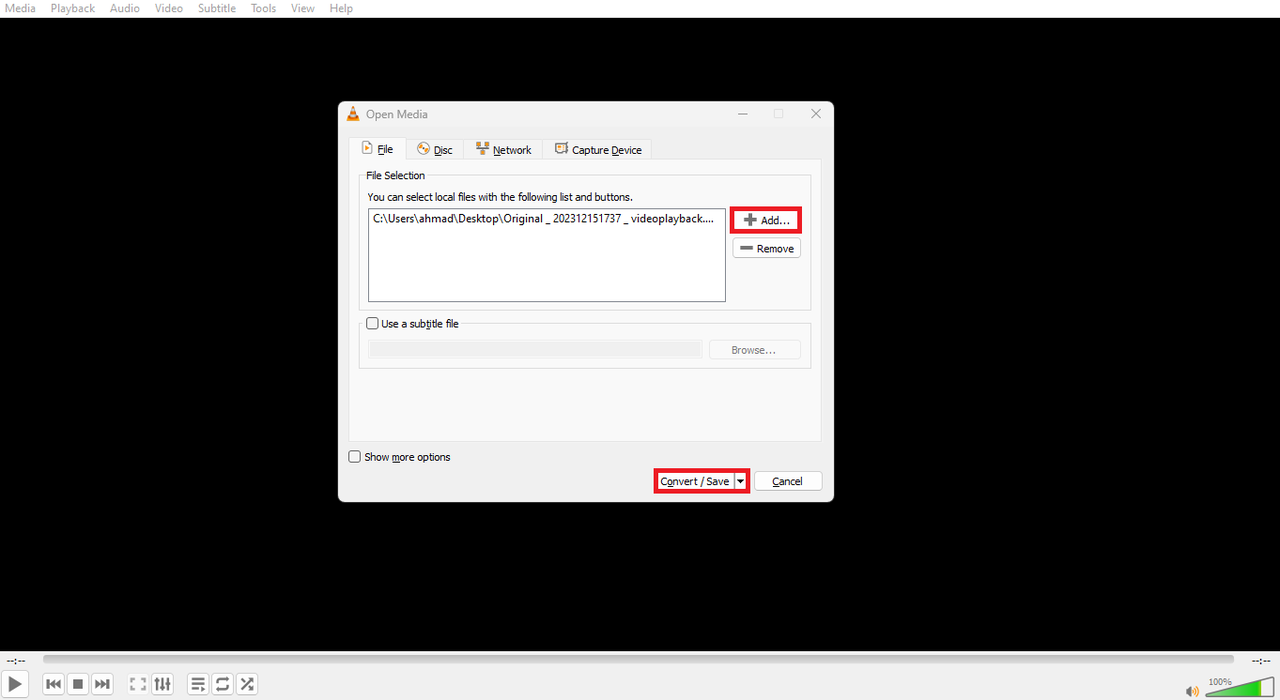
- Import video Open VLC and click on “Media” in the top left corner, then select “Convert/Save” from the dropdown menu.
- Add video In the new window that appears, click the “Add” button to select the video you want to compress. Then press “Convert/Save” again to continue.
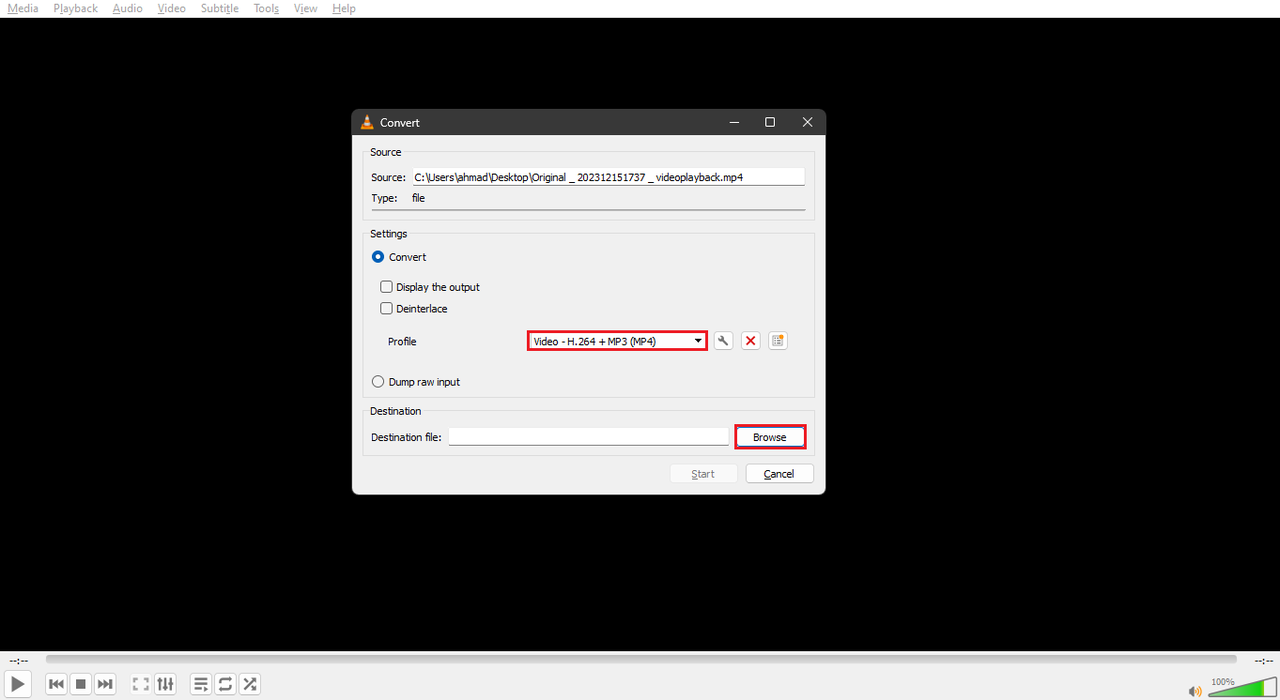
- Change output format Select a different output format from the profile dropdown menu to reduce the file size. Click the “Browse” button to choose where you want to save the compressed video.
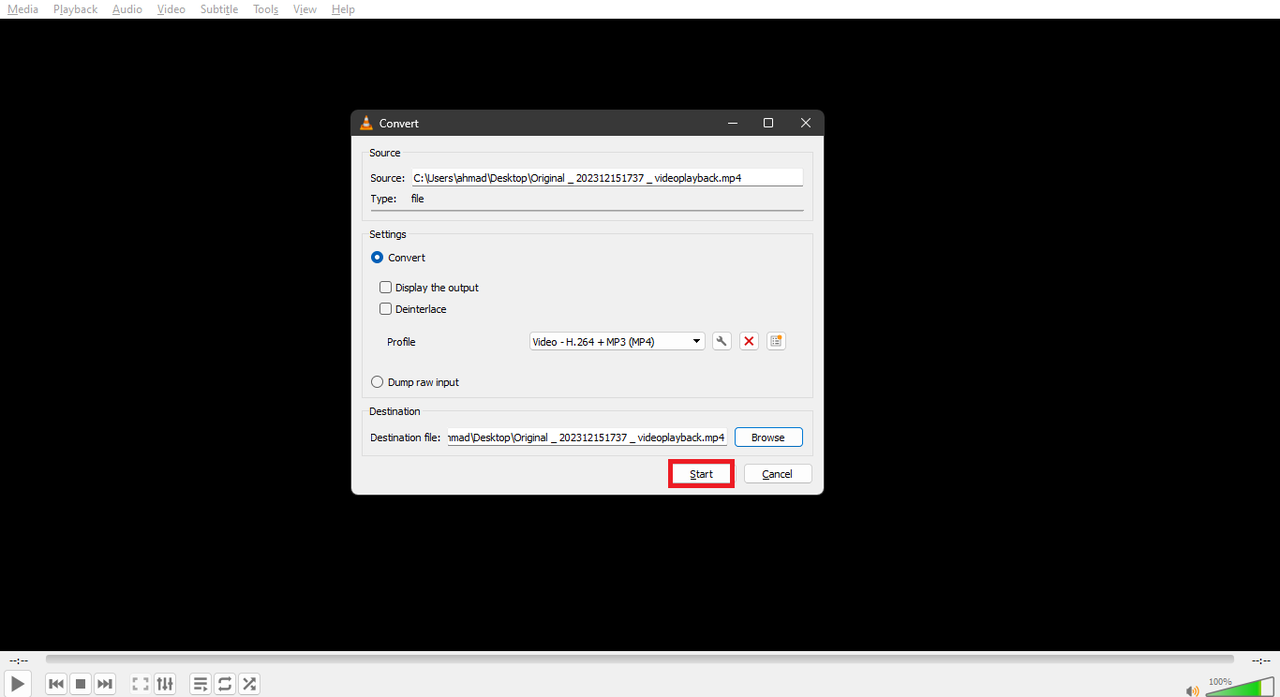
- Start conversion Press the “Start” button to begin the conversion process. VLC will create a smaller version of your video using the settings you’ve chosen.
Using Clipchamp to make a video file smaller
Clipchamp comes pre-installed with Windows 11, so if you’re using Microsoft’s latest operating system, you might already have this tool available. It allows you to edit and compress videos for free, with features that let you trim, cut, and crop unwanted portions to reduce overall file size.
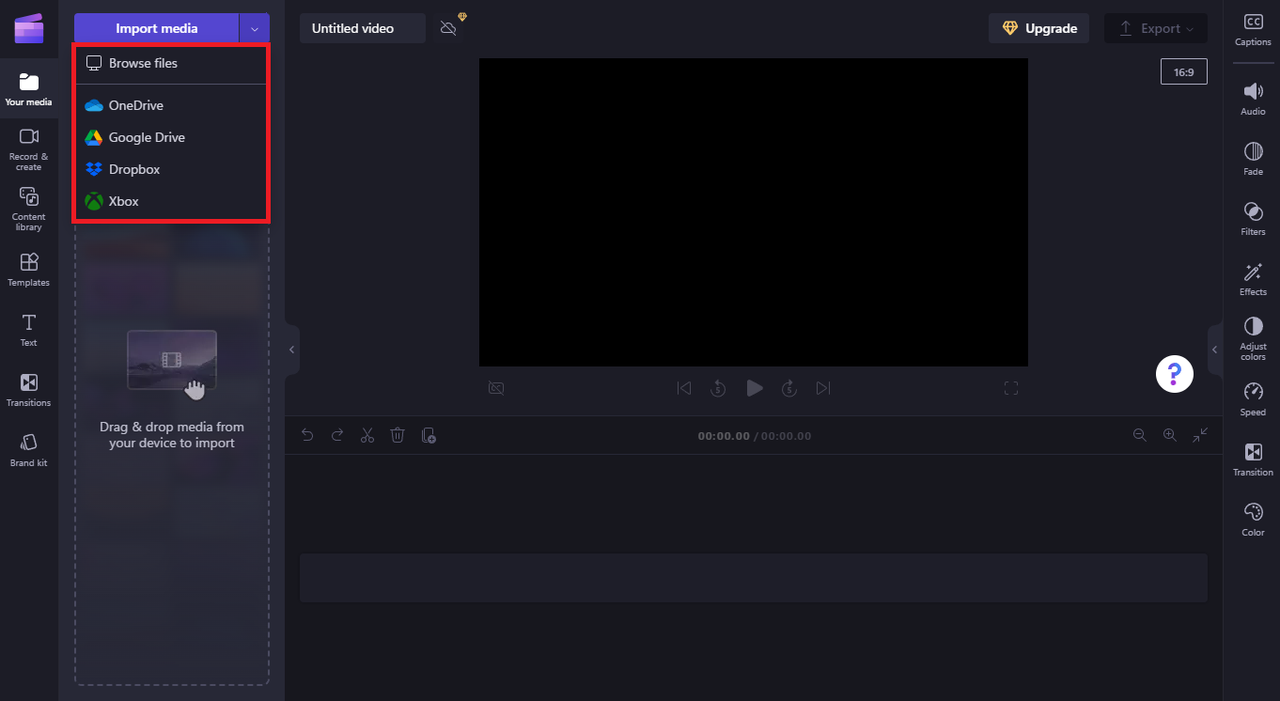
- Upload your video Open Clipchamp and upload your video from your computer’s local storage, or simply drag and drop the file into the interface. You can also import videos directly from cloud storage services like Google Drive, OneDrive, or Dropbox.
- Edit your video Once your video is uploaded, you can trim it to remove unwanted sections. Use the “Split” feature to divide your video into multiple clips that you can delete individually. Adjust the green sliders on the editing timeline to make your video shorter.
- Export your video Click the “Export” button in the top right corner and choose your preferred video quality setting. Lower quality options will result in smaller file sizes.
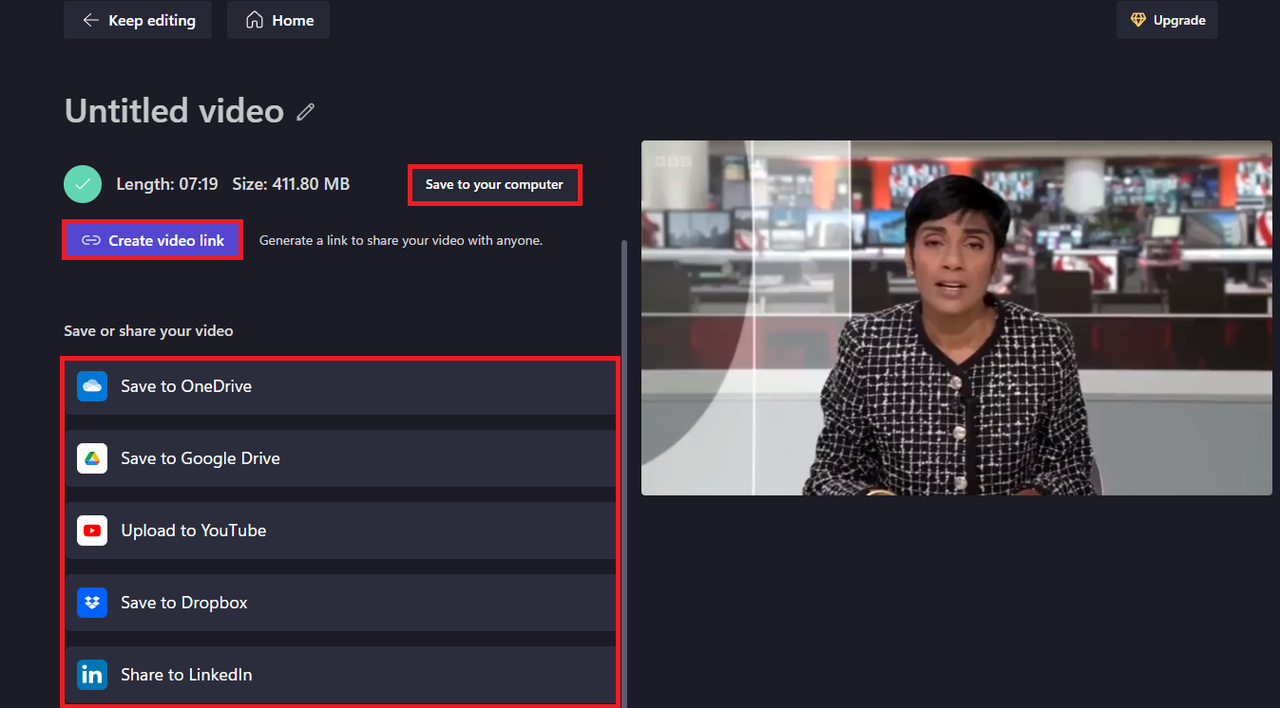
You can save the compressed video directly to your computer, or export it to cloud storage services. Clipchamp also offers options to share your video on social media platforms or generate a shareable link.
How to make the video size smaller on Android devices
Modern Android phones have become incredibly powerful, capable of recording high-resolution videos that look stunningly clear and detailed. However, this increased quality comes with a trade-off: these video files can take up substantial storage space, making them difficult to share through messaging apps or email. Fortunately, there are ways to compress videos on Android devices without completely sacrificing quality.
Using Google Photos to make video file smaller
Google Photos comes pre-installed on most Android devices and serves as the default gallery app for many users. While primarily designed for photo management and organization, it also handles videos quite well and includes features that can help you reduce file sizes.
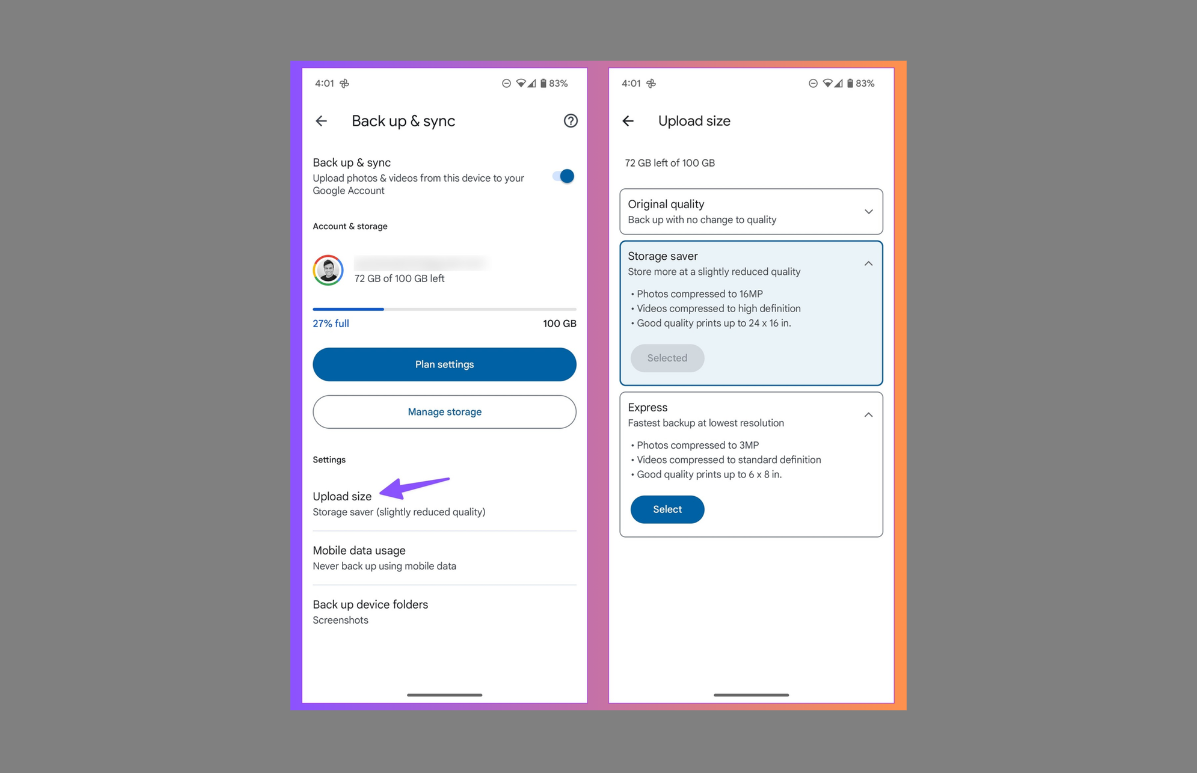
- Change backup settings Open the Google Photos app and tap on your account picture in the top right corner. Select “Photo Settings” from the menu, then choose “Back up & sync.”
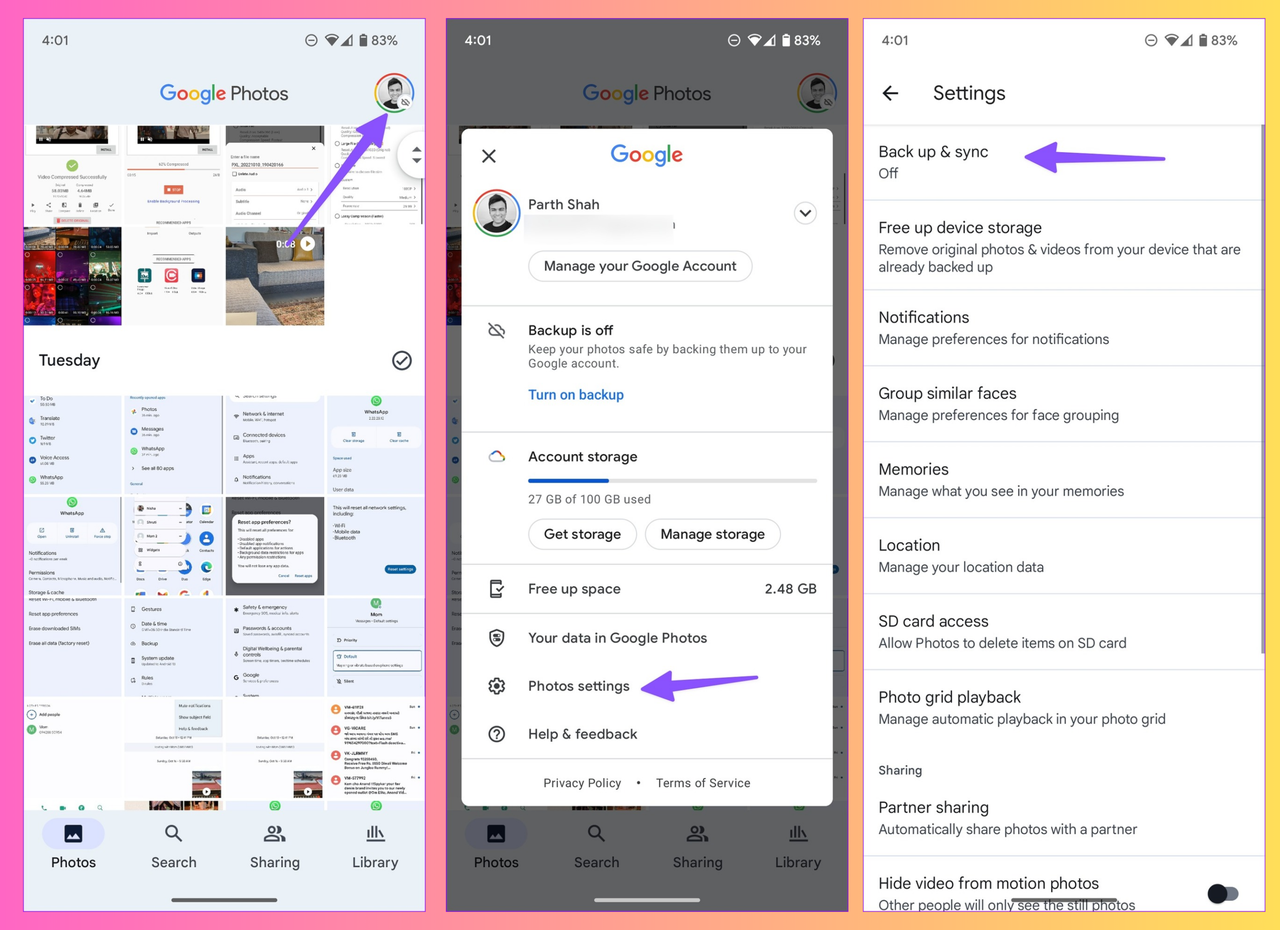
- Choose upload size Under the “Settings” tab, select “Upload size.” Then choose “Storage saver” instead of original quality. This will upload your videos in compressed, smaller file sizes.
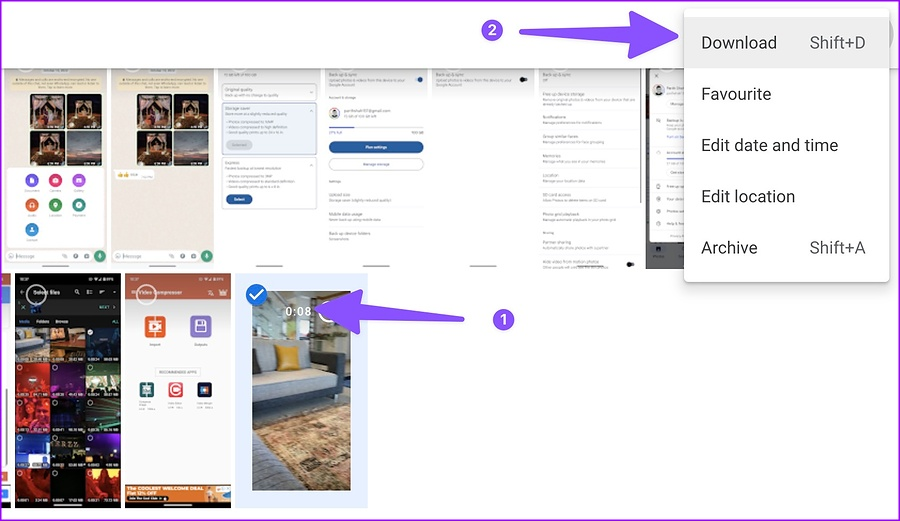
- Download compressed video After your video has finished uploading, you can access Google Photos through a web browser on your computer and download the compressed version.
CapCut — Your all-in-one video & photo editing powerhouse! Experience AI auto-editing, realistic effects, a huge template library, and AI audio transformation. Easily create professional masterpieces and social media viral hits. Available on Desktop, Web, and Mobile App.
Conclusion
Videos have become one of the primary ways we communicate ideas, share memories, and document important moments in our lives. However, the large file sizes that come with high-quality videos can create significant challenges when it comes to storage and sharing. Learning how to make a video size smaller is an incredibly useful skill in today’s digital world.
The good news is that you can reduce video sizes on virtually any device you own, whether it’s a smartphone, tablet, or computer.