TOOL HUNTER
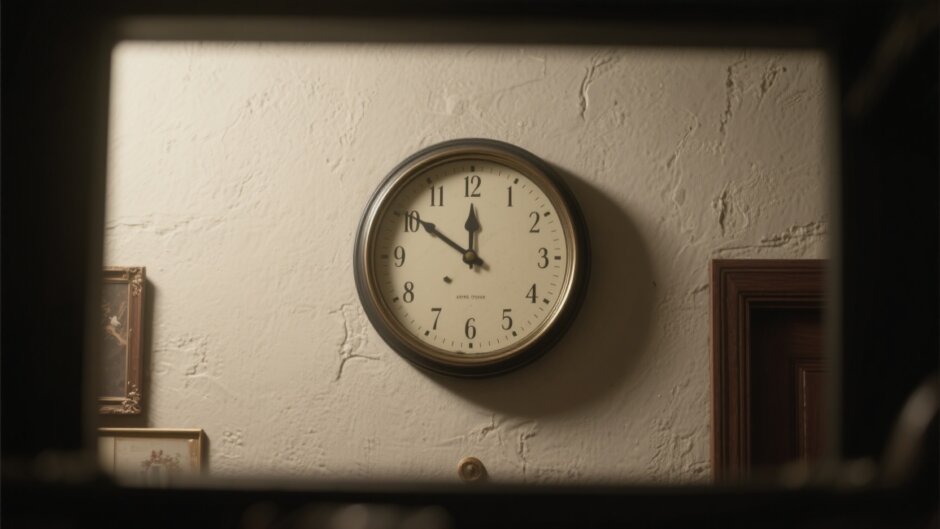

Hey everyone! Are you looking to make your videos more professional and tell stories in a better way? One of the coolest and most effective tricks to do that is by using cutaway shots. Even if you’re just starting out with video making, don’t worry—cutaway shots are actually pretty simple once you get the idea. In this article, I’ll walk you through what cutaway shots are, why they matter so much, and how you can easily use them in your own projects starting today!
Table of Contents
- What is a Cutaway Shot?
- Main Shot vs. Cutaway Shot: How Are They Different?
- Why Cutaway Shots Matter in Filmmaking
- Three Great Examples of Cutaway Shots
- How to Use Cutaway Shots Like a Pro
- Making Awesome Cutaway Shots with CapCut Desktop Video Editor
- Wrapping It Up: The Power of Cutaway Shots
- Frequently Asked Questions
What is a Cutaway Shot?
Let’s begin with the basic cutaway shot definition. A cutaway shot is a short video clip that briefly pauses the main action to show something related—like an object, a small detail, or something going on in the background. Think of it as a mini visual break that gives your audience extra clues or context, without pulling them away from the story.
For example, imagine a scene where two people are having a conversation. A cutaway might quickly show a clock on the wall, a photo on the table, or another person’s reaction from a distance. These little glimpses make the scene richer and more interesting, while still keeping the focus on what’s important.
What’s really neat about cutaway shots is how they help keep your video flowing smoothly. They maintain what filmmakers call “continuity,” and they also add visual variety so your audience stays engaged.
Main Shot vs. Cutaway Shot: How Are They Different?
Now that you understand the basic idea behind a cutaway film definition, it’s useful to know how cutaway shots differ from main shots. This will help you use both more effectively.
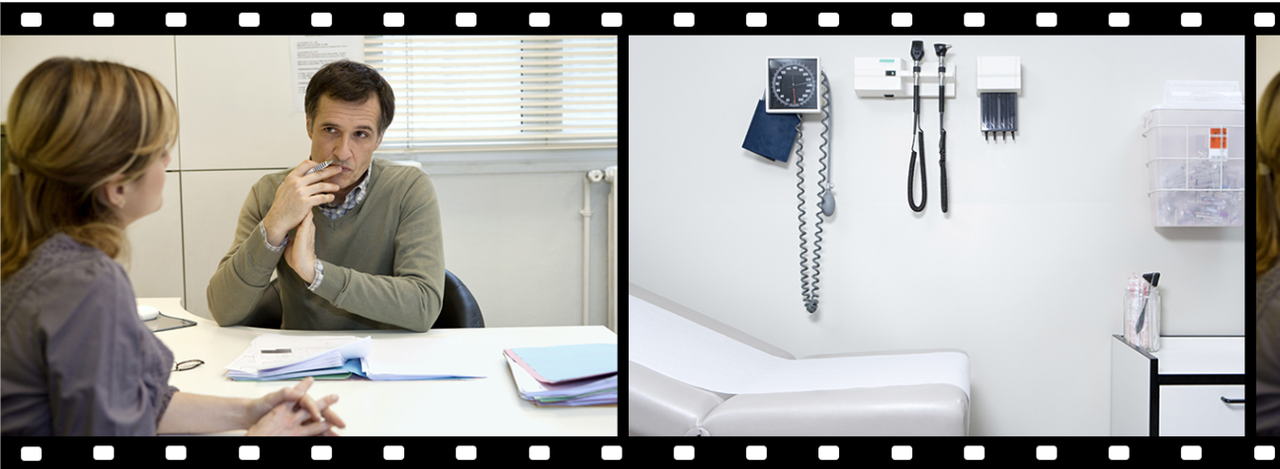
The main shot is exactly what it sounds like—it’s the primary view that focuses on the most important action or subject in the scene. If you’re recording two friends chatting, the main shot would be the one showing both of them talking. Main shots drive the story forward and help the audience stay connected to the main events.
A cutaway shot, on the other hand, briefly moves away from that main action. It might show a character’s facial expression, an object in the room, or something happening nearby. While main shots push the narrative forward, cutaway shots add layers and meaning. They also help make your film more visually interesting by breaking up longer scenes.
Knowing when to use a main shot and when to use a cutaway is a big part of becoming a better filmmaker. It’s not about picking one over the other—it’s about using them together to tell a stronger story.
Why Cutaway Shots Matter in Filmmaking
You might be asking yourself—why do filmmakers even use cutaway shots? Can’t you just tell the whole story with the main shots? Well, cutaway movie shots actually serve several important purposes that go beyond just looking nice.
First, they make your storytelling deeper. Cutaway shots add extra visual hints that support the story. This helps the audience feel the emotions and themes more strongly than if they only saw the main action.
Second, cutaway shots help smooth transitions. Ever watched a video where the scene suddenly changes and it feels jumpy or awkward? Cutaway shots can act like a bridge between scenes, making those shifts feel natural.
Third, they’re great for building tension. By focusing on smaller details, cutaway shots can create suspense and keep the audience curious. This works especially well in thrillers or horror films.
Fourth, cutaway shots highlight important details. Sometimes there’s a small object or moment that the viewer really needs to notice, but it could be missed if it’s only part of the main shot. A quick cutaway makes sure the audience sees it.
Finally, they help with pacing. Cutaway shots act like little pauses in the action, helping to control the speed and rhythm of your film. This keeps the story from feeling too fast or too slow.
Three Great Examples of Cutaway Shots
Sometimes it’s easier to understand something by seeing examples. Here are three common ways cutaway shots are used to create stronger connections in films.
Example 1: Switching between a character and an object
Imagine a character looking up again and again with an excited face. The main shot shows the character, then we cut away to a ticking clock on the wall. When we return to the character, we understand they’re excited because something is about to happen—related to that clock. This kind of cutaway editing lets us peek into the character’s feelings without any dialogue.
Example 2: Showing time passing
If you need to show that time has passed between two scenes, cutaway shots are super helpful. For instance, you might show a character going to sleep and then waking up. Cutting straight between those might feel sudden. But if you add a cutaway shot of the moon moving or a clock’s hands turning, it softly tells the audience that time has moved forward.
Example 3: Moving from a character to a location
This is a classic way to build tension, especially in scary movies. Picture a character who hears a weird noise and looks scared. Instead of staying on the character, we cut away to a dark, empty alley. This makes the audience nervous about what’s in the alley and builds excitement for when we return to the character. The cut away shot makes the whole moment more intense.
How to Use Cutaway Shots Like a Pro
Okay, now you know what cutaway shots are and why they’re useful. But how do you actually use them well in your videos? Here are some practical tips.
Do some research before you film. During the planning stage, watch some films you like and notice how they use cutaway shots. Take notes or even sketch a simple storyboard to plan where you want to place cutaways. This will help you and anyone you’re working with stay organized.
Always shoot extra B-roll footage. B-roll is supplemental footage that often becomes cutaway shots. While filming your main scenes, take some time to also record close-ups of objects, reactions, or details around you. The more B-roll you have, the more choices you’ll have when editing.
Use cutaways to show what a character is thinking or feeling. This is sometimes called “character interiority.” A well-timed cutaway can show a memory, a daydream, or a subtle emotion without any words. It helps the audience connect with the character on a deeper level.
Use cutaways to show time passing or location changes. If your story jumps ahead in time or moves to a new place, a cutaway can make that transition feel smooth. It helps avoid confusing the audience.
After filming, review your footage and look for places where the flow feels rough or jumpy. Often, adding a cutaway shot can help fill those gaps and keep the story moving smoothly.
Don’t be afraid to try new things! Some of the best cutaway shots in movie history were discovered by accident during editing. Play around with your footage—you might find a creative way to use a cutaway that you hadn’t planned.
CapCut — Your all-in-one video & photo editing powerhouse! Experience AI auto-editing, realistic effects, a huge template library, and AI audio transformation. Easily create professional masterpieces and social media viral hits. Available on Desktop, Web, and Mobile App.

Making Awesome Cutaway Shots with CapCut Desktop Video Editor
Now that you get the idea behind cutaway shots, you might be wondering how to actually make them. This is where good editing software comes in, and one excellent option is the CapCut desktop video editor.
CapCut is a user-friendly tool that helps you create pro-level cutaway shots, even if you’re new to editing. It has everything you need to smoothly add cutaways into your videos and make them look like they were made by an expert.
And the best part? CapCut is completely free to download and use. That’s perfect if you’re just getting started or working with a tight budget.
Cool Features in CapCut for Cutaway Shots
CapCut comes with several features that are super handy for creating cutaway shots:
The split and cut tool lets you break your video into smaller parts. This makes it easy to drop in cutaways and keep your footage organized. You can choose exactly where to make your cuts for smooth transitions.
You can trim your clips very precisely. This is important because cutaway shots need to be just the right length—long enough to be understood, but short enough not to distract. CapCut lets you adjust the timing perfectly.
CapCut offers lots of video transitions. These help you blend your main shots and cutaway shots together smoothly, so the cutaway feels like a natural part of the scene.
You can layer multiple videos on top of each other. This is useful for more complex sequences where you want to show several angles or details at once.
CapCut gives you templates that you can customize. You can pick one that matches your style and then adjust it to include cutaway shots exactly where you want them.
Step-by-Step: Creating Cutaway Footage in CapCut
Ready to give it a try? Here’s how you can create your own cutaway shots using CapCut desktop video editor.
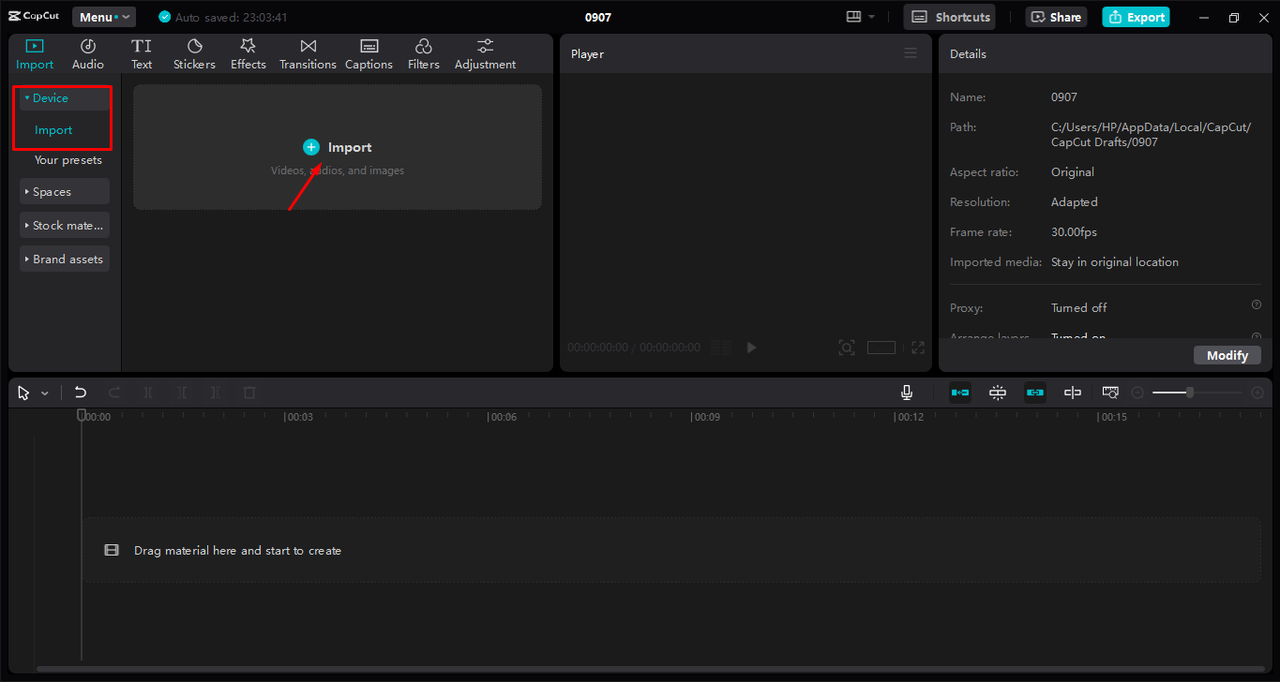
First, upload your video. Open CapCut and start a new project. Click the “Import” button to bring in your video files from your computer. Make sure you have both your main footage and any B-roll you want to use for cutaways.
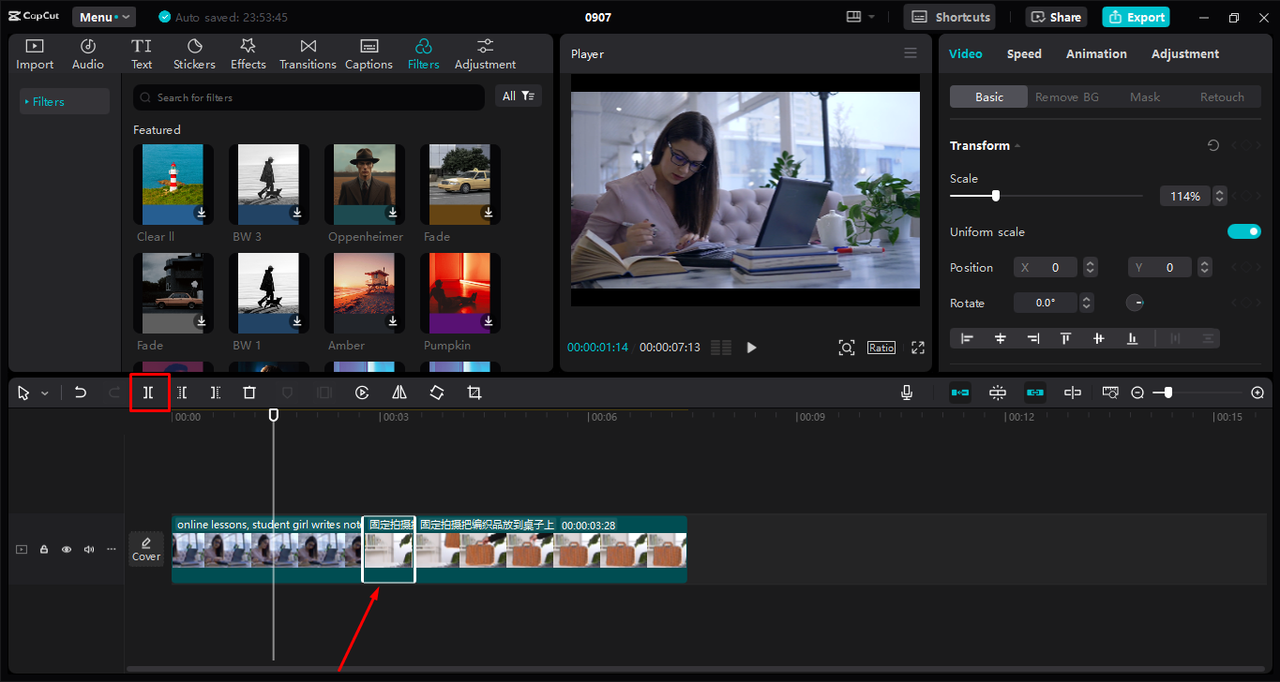
Next, build your cutaway scene. After uploading, drag your videos into the timeline. Use the split tool to cut your main video where you want to add a cutaway. Trim any extra parts from your cutaway clip. Then, rearrange the segments so your cutaway fits right where you want it.
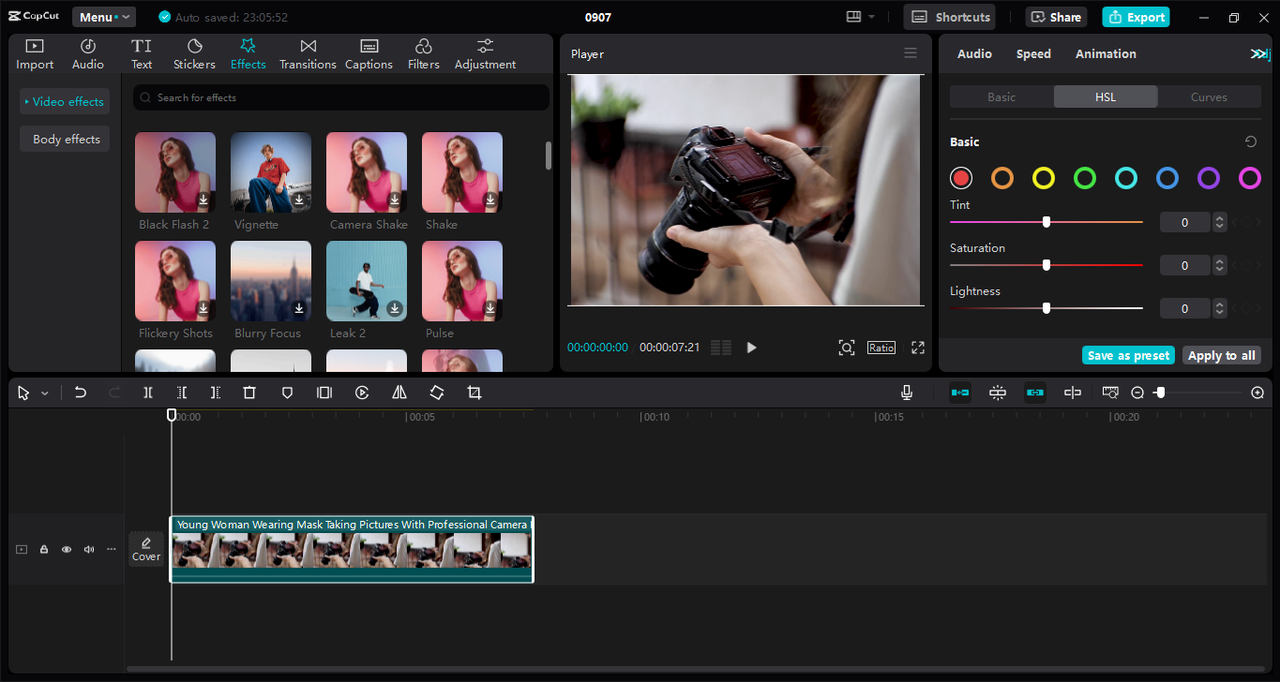
Once your cutaway is in place, you can use other tools in CapCut to polish your video. Add transitions between clips to make everything flow. Play with filters to change the mood. Adjust the audio so it sounds clear. CapCut gives you all these advanced options to make your video look and sound great.
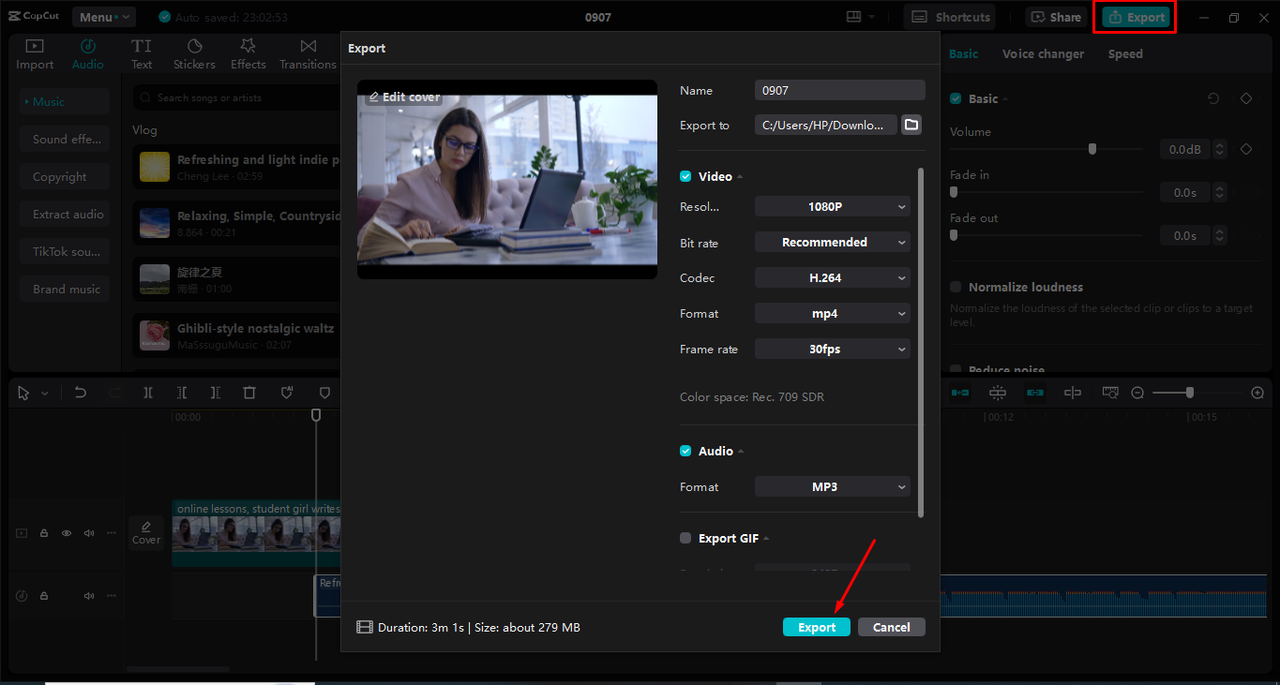
Finally, export and share your video. When you’re happy with your cutaway shots, hit the “Export” button. You can choose settings like resolution and frame rate depending on where you’ll share the video. Then, just click export to save it. You can even share directly to platforms like TikTok or YouTube from CapCut.
Wrapping It Up: The Power of Cutaway Shots
So there you have it—a full guide to cutaway shots! As you can see, learning how to use cutaway techniques can really level up your video projects by adding depth and nuance to your storytelling.
When you use cutaways well, you can guide your audience’s attention, make transitions smoother, and create a more engaging flow. Whether you’re making short films, YouTube videos, or even home movies, knowing how to use cutaway shots will make your work stand out.
Remember, cutaway shots aren’t just flashy tricks. They’re powerful tools that help you tell stories more effectively. They can show emotions, highlight details, control pacing, and build tension—all without a single word of dialogue.
If you’re excited to start using cutaway shots in your videos, I highly recommend trying the CapCut desktop video editor. Its tools for splitting, trimming, and adding transitions make it easy to create professional-looking cutaways, even if you’re a beginner.
CapCut — Your all-in-one video & photo editing powerhouse! Experience AI auto-editing, realistic effects, a huge template library, and AI audio transformation. Easily create professional masterpieces and social media viral hits. Available on Desktop, Web, and Mobile App.
The best way to improve is to practice. Try out different types of cutaways, watch how filmmakers you admire use them, and don’t be scared to experiment. Over time, you’ll develop a sense of when and how to use cutaway shots to make your videos more compelling and professional.
Frequently Asked Questions
Let’s wrap up with answers to some common questions about cutaway shots.
Is a cross-cut the same as a cutaway shot?
No, they’re different. A cross-cut switches between scenes happening at the same time in different places. A cutaway shot stays within the same scene but shifts focus to something else for context. If you want to make precise cutaway shots, tools like CapCut desktop video editor can help with splitting and trimming clips.
Where should I use cutaway shots in films?
Cutaway shots are great for showing character emotions, adding context, or making transitions smoother. They make the story richer and highlight important elements. If you want to add cutaways to your videos, CapCut desktop video editor makes it easy with clip trimming, transitions, and overlay features.
What does a cutaway shot look like?
A cutaway shot usually shows something related to the main action, like an object or a reaction. It gives the audience extra info without stealing focus from the primary scene. You can easily create these in CapCut using its video splitting and layering tools.
I hope this guide has made cutaway shots clearer and given you the confidence to use them in your own videos. Filmmaking is all about trying new things and learning, so have fun experimenting!
Some images courtesy of CapCut.