TOOL HUNTER

Did you know that every single day, people share more than 3 billion photos online? That’s a whole lot of pictures! If you want your photos to get noticed, one of the simplest things you can do is crop them well. Cropping means cutting out parts of the photo you don’t want, so the important part stands out. If you use a Mac, you’re in luck—it’s really easy to crop a picture in Mac. You don’t need to be a professional photographer or designer to learn this. Whether you’re posting on Instagram, updating your blog, or just making memories look nicer, knowing how to crop a picture in Mac is super helpful.
In this guide, I’ll walk you through several ways to crop your photos on a Mac. We’ll start with the built-in apps that come with your computer—Preview and Photos. These are great because you don’t need to install anything new. Then, I’ll show you a free online tool called CapCut that lets you do even more fun stuff with your images. Each method has its own strengths, and by the end, you’ll know which one works best for you.
I’ll explain everything step by step, and I’ve included pictures to make it extra clear. You’ll also learn what to do before you start cropping, so your original photos stay safe and your final image turns out just how you want it.
Table of Contents
Why it’s helpful to learn how to crop a picture in Mac
Cropping isn’t just about removing unwanted stuff from your photos. It’s about making the main subject pop. Maybe there’s someone in the background you don’t want, or you took a wide shot but only care about one part. Sometimes, you need your image to be a specific shape, like a square for Instagram or a wide rectangle for a desktop wallpaper.
When you crop a picture in Mac, you decide what people see. It’s a small change that can make a big difference. A nicely cropped photo looks more polished and interesting. And since Macs have good tools already installed, it’s something everyone can do. You really don’t need any special skills to learn how to crop image in Mac.
What to do before you crop a picture in Mac
Before you start snipping away at your photos, there are a few things you should do to make sure everything goes smoothly. Think of it like gathering your ingredients before you start cooking—it just makes the whole process easier.
Make a copy of your original photo
This is the number one rule. Once you crop a picture, you usually can’t undo it completely unless you have a backup. So, before doing anything, duplicate your photo.
On a Mac, it’s super simple. Find your image in Finder, click on it once, and press Command + D on your keyboard. This will instantly make a copy with “copy” added to the filename. Now you can experiment with the copy, and if you don’t like how it turns out, your original is still there, untouched. It’s a good habit to always do this before you crop image in Mac.
Tweak your photo before cropping
Sometimes a photo is too dark, too bright, or the colors are off. It’s usually better to fix those things first, before you decide what part to crop.
You can use Mac’s built-in tools like Preview or Photos to adjust brightness, contrast, and colors. For example, if a photo is too dark, brighten it up so you can see all the details. If the colors look dull, make them more vibrant. When the overall photo looks better, it’s easier to pick the best part to keep. So spend a little time on these adjustments before you crop a picture in Mac.
Try other edits first
Cropping is often one of the final steps in photo editing. Before you crop, you might want to try other things like adding a filter, adjusting the saturation, or even putting text or stickers on your image.
Doing these edits before you crop image in Mac is smart because you’re working with the full image. After you crop, you’re only dealing with a smaller section. So if you think you might want to add a funny caption or a vintage filter, do that first. Then, crop it to finish everything off.
How to crop a picture in Mac using Preview
Preview is an app that comes with every Mac. Most people use it to view images and PDFs, but it also has some basic editing tools—including cropping. It’s a really quick and easy way to crop picture on Mac without any extra software.
Preview is perfect when you need to do a simple crop fast. Since it’s already on your Mac, you don’t need to open another program. You can select any part of your image and remove the rest. You can even crop in different shapes, like a rectangle or circle. If you just need something straightforward, learning how to crop image in Mac with Preview is your best bet.
Steps to crop image in Mac with Preview
Here’s how to do it, one step at a time.
- Open your image in Preview: Find the photo you want to edit on your Mac. Double-click the file—it will probably open in Preview automatically.

- Click the Markup Toolbar button: At the top of the Preview window, you’ll see a small icon that looks like a pen tip inside a circle. That’s the Markup Toolbar button—click it.
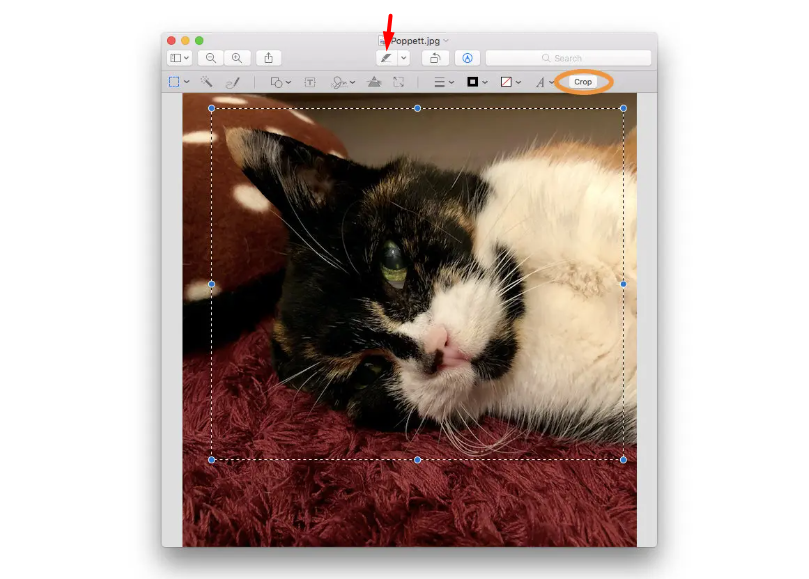
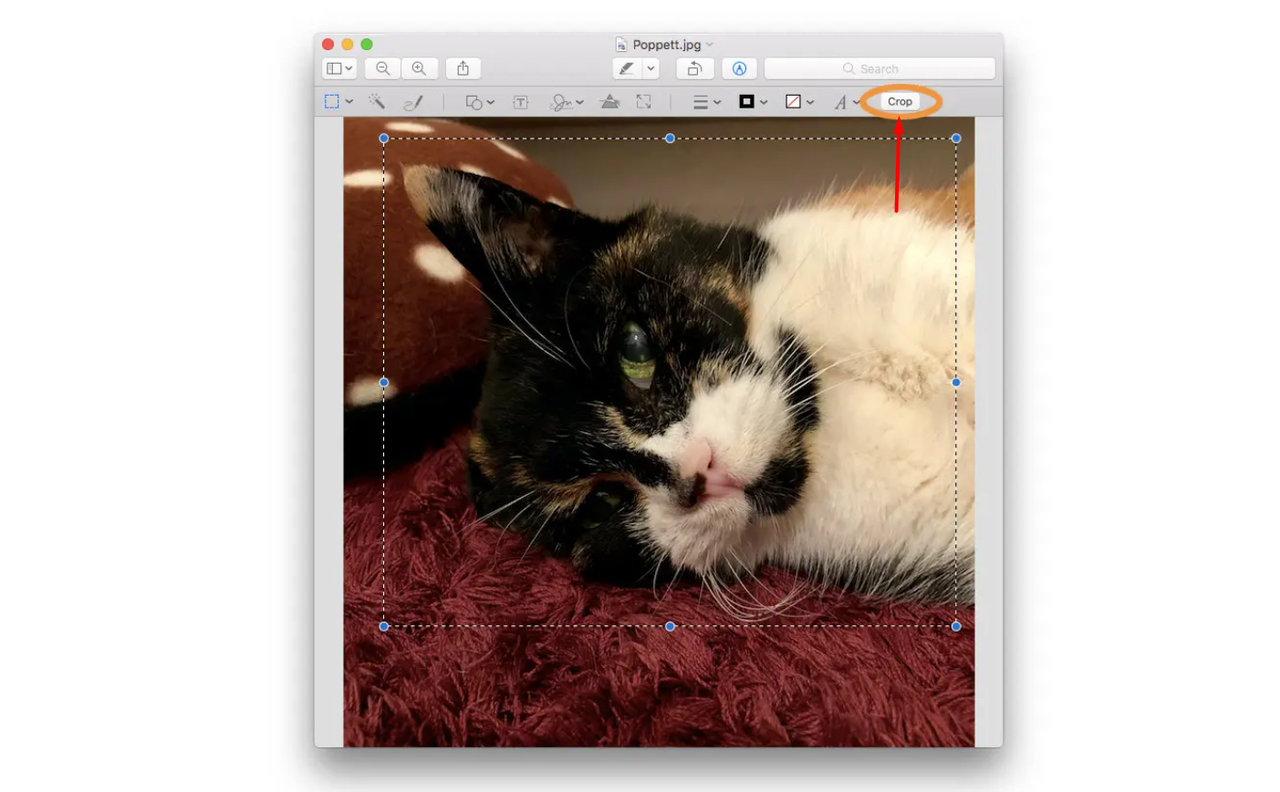
- Pick a shape for cropping: Once the toolbar appears, click the icon that looks like a dotted square. This lets you choose a shape—rectangle, circle, or you can even draw your own custom shape with your mouse to select what you want to keep.
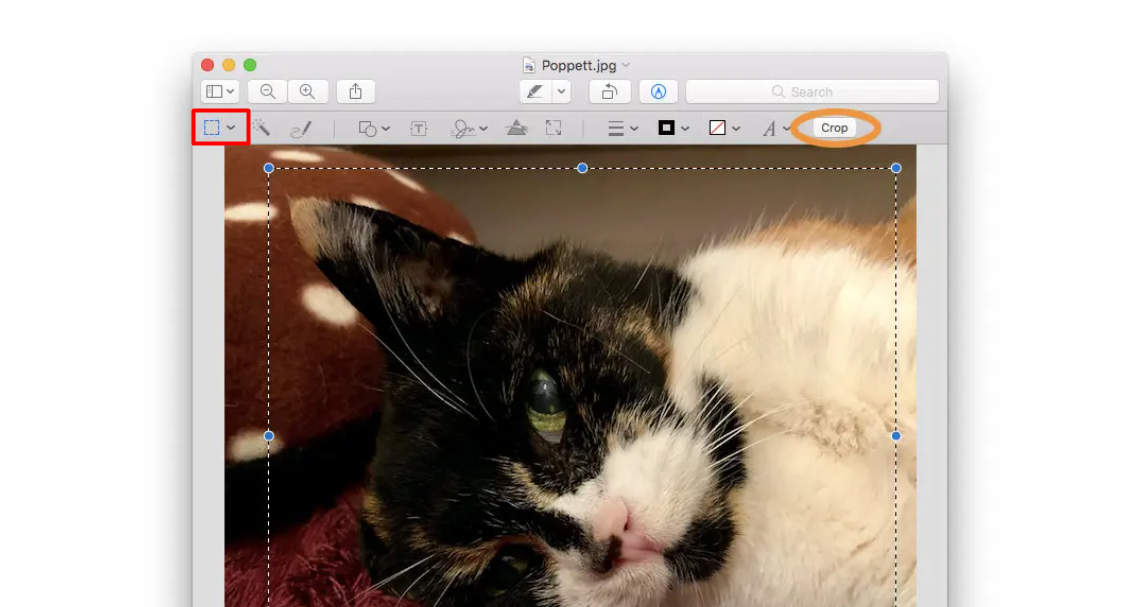
- Drag to select the area: Click and drag over your image to create a selection box. Everything inside this box will stay after cropping. You can move the box or resize it by dragging the corners until it’s just right.
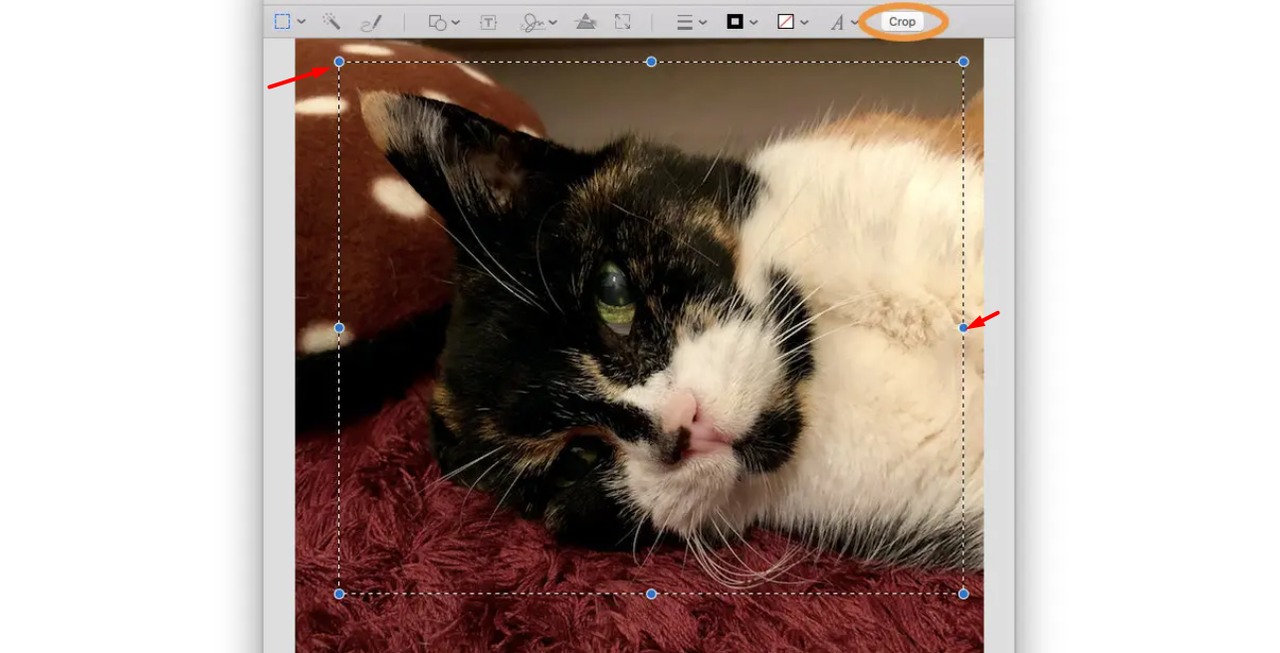
- Click the Crop button: When you’re happy with your selection, find the crop button in the toolbar (it looks like a square with a dark corner). Click it, and your image will be cropped right away.
That’s all there is to it! Now you know how to crop a picture in Mac using Preview. Don’t forget to save your new image.
What’s good and not so good about Preview
Preview is awesome for quick edits, but it might not be enough for everything.
The good stuff:
- It’s already on your Mac—no download needed.
- The interface is simple and easy for beginners.
- You can crop in different shapes, which is fun.
The not-so-good stuff:
- It only has basic editing features. You can’t add filters or text.
- It might not support every image format perfectly.
So if you need a fast, no-fuss crop, using Preview to crop picture on Mac is a great choice.
How to crop image in Mac with the Photos app
The Photos app is another tool that comes with your Mac. If you have an iPhone or other Apple devices, you might already use it to store your pictures. But it’s not just for storage—it’s also a pretty good photo editor. It has more features than Preview, making it a good middle ground if you want to do a bit more than just crop.
The Photos app is perfect for people who keep their photos organized in one place. It syncs with iCloud, so if you crop a photo on your Mac, it updates on your iPhone too. It has tools for adjusting color, light, and applying filters. So if you want to crop a photo on MacBook and also improve how it looks, the Photos app is a solid option.
Steps to crop a photo on a MacBook with Photos
Here’s how to crop your images using the Photos app.
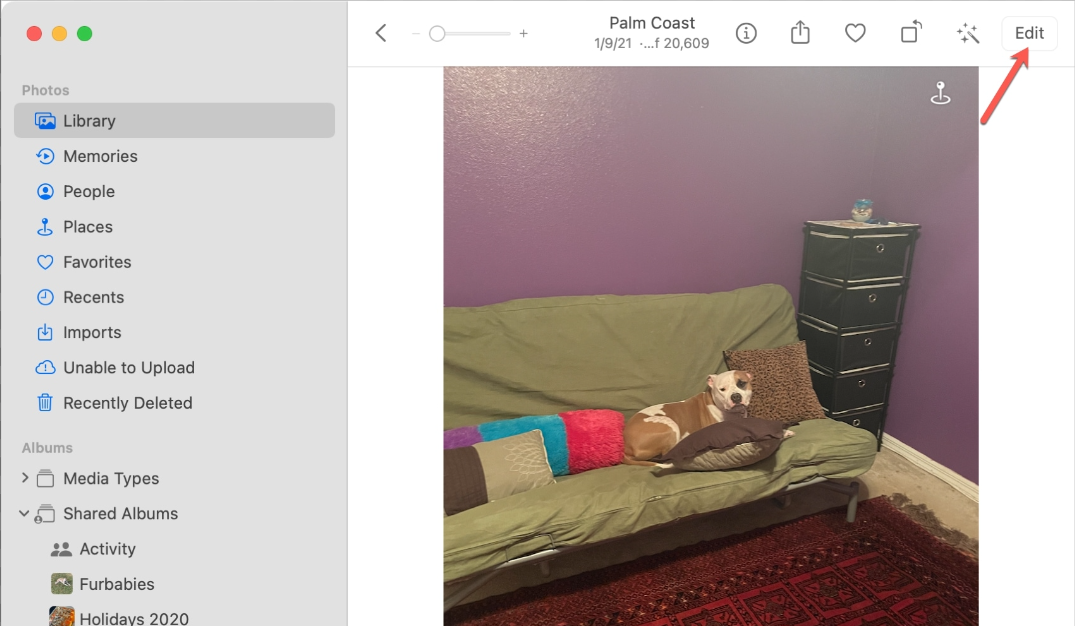
- Open your photo in the Photos app: Open the Photos app from your Applications folder or by searching with Spotlight. Find the photo you want to edit, double-click to open it, and then click the “Edit” button in the top right.
- Select the Crop tool: In editing mode, you’ll see several options. Click the icon that looks like a square with two arrows around it—that’s the crop tool.
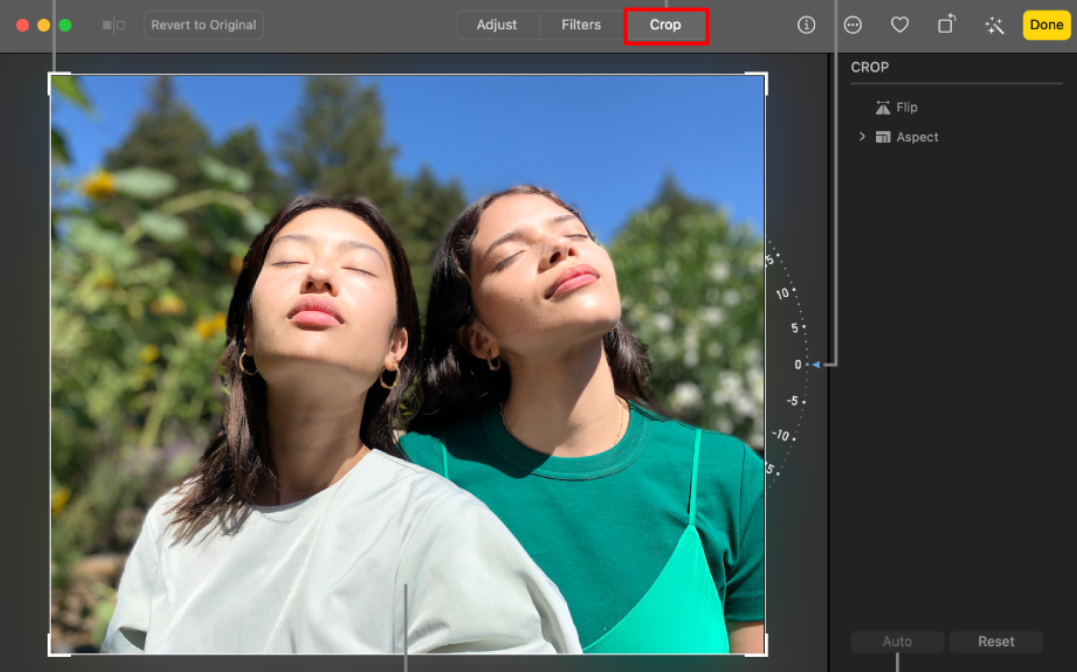
- Adjust the crop area: A grid will appear over your photo. Click and drag the corners or edges to change what’s included. You can also straighten the photo if it’s crooked using the dial below.
- Save your changes: When you’re happy with the crop, click “Done.” Photos will save your changes automatically. The best part is, it keeps the original too. If you change your mind later, you can always revert to the original.

Learning how to crop image in Mac with Photos is really handy for managing your personal photo collection.
What’s good and not so good about Photos
The Photos app is more powerful than Preview but still easy to use.
The good stuff:
- Syncs with iCloud, so edits appear on all your Apple devices.
- Has more editing features like filters, light adjustments, and color correction.
- Designed to be user-friendly for everyone.
The not-so-good stuff:
- Meant more for personal photos than professional design work.
- You can only edit photos that are in your Photos library, not any random image on your desktop.
For most people looking to crop a photo on MacBook and do light editing, the Photos app is a great tool.
CapCut — Your all-in-one video & photo editing powerhouse! Experience AI auto-editing, realistic effects, a huge template library, and AI audio transformation. Easily create professional masterpieces and social media viral hits. Available on Desktop, Web, and Mobile App.

Using the free online tool CapCut to crop images in Mac
Sometimes the built-in Mac tools aren’t enough. Maybe you want to add text, fun stickers, or use cool filters after cropping. That’s where online tools like CapCut come in. CapCut is a free website where you can edit both photos and videos. You don’t need to download anything—just a web browser and internet connection.
CapCut is awesome because it has tons of features. It started as a video editor but now does photos too. You can use it to crop image in Mac, but also way more. It’s perfect for creating social media content, like Instagram stories or YouTube thumbnails. Since it’s online, you can use it on any computer, not just Macs.
How to crop picture in Mac with CapCut
Using CapCut is simple. Here’s how to crop a picture.
Open CapCut and log in: Go to the CapCut website in your browser (like Safari or Chrome). You’ll need to sign in with an account—you can sign up with email or use an existing account.
Upload your image: Once logged in, click the “Upload” button and select the image file from your Mac that you want to crop.
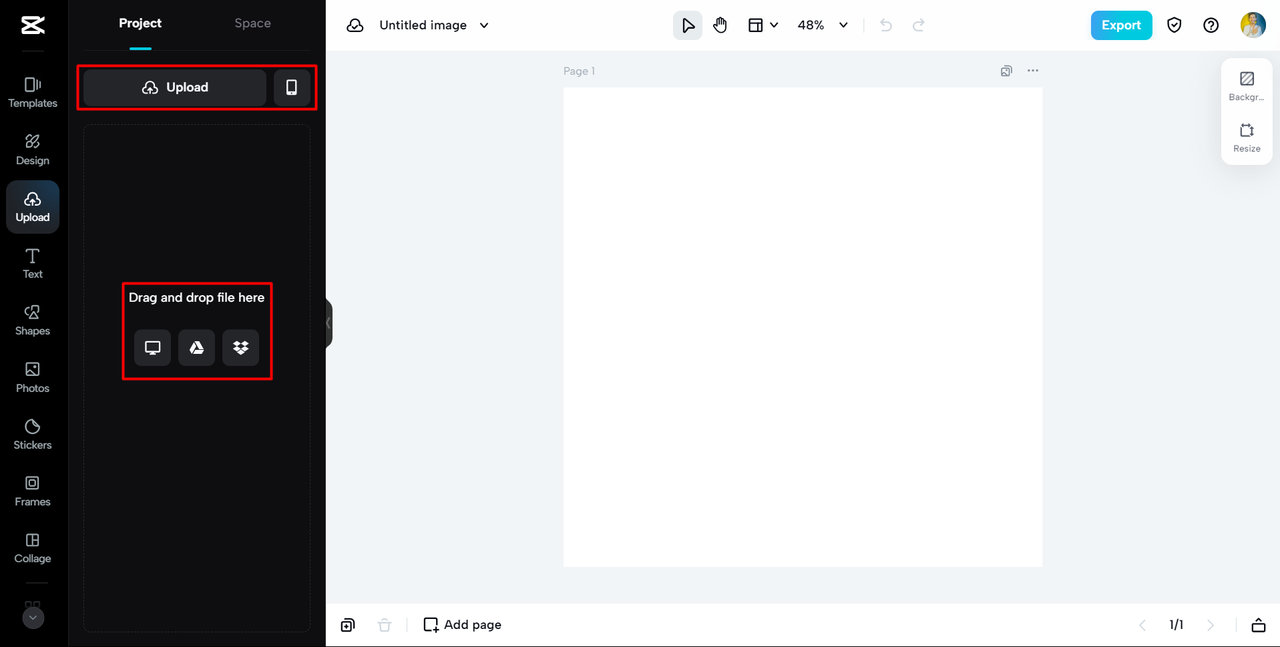
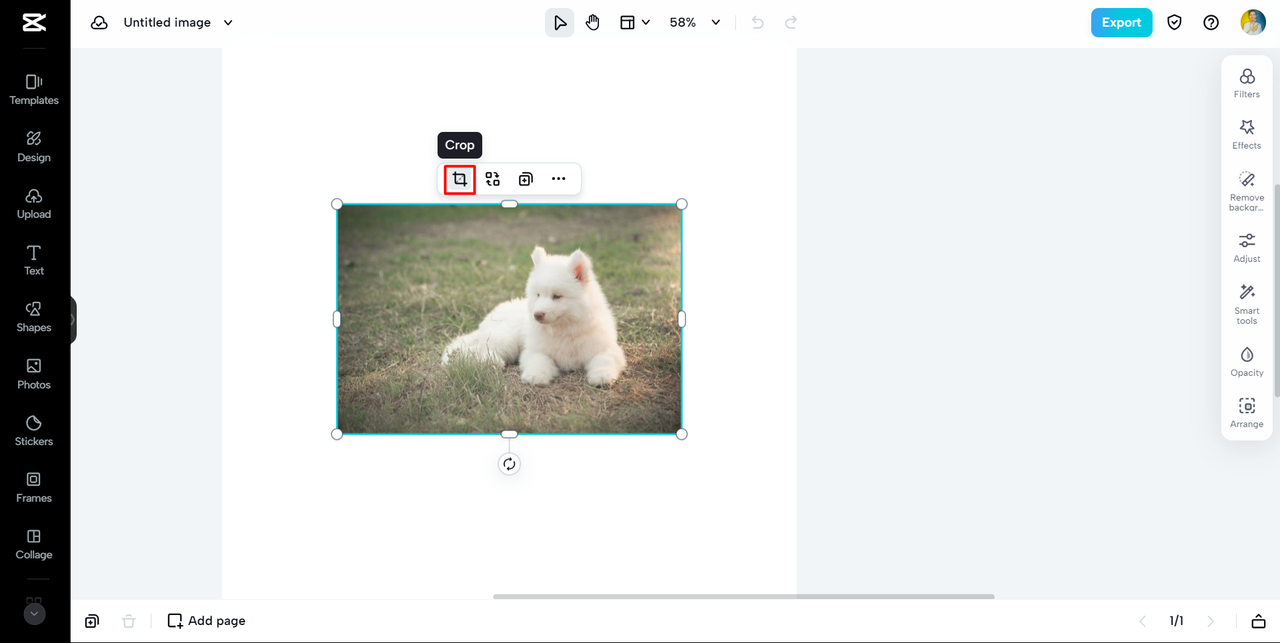
- Crop your image: After uploading, your image opens in CapCut’s editor. Find the crop tool in the menu—it’s usually easy to spot. Click it, then drag the corners to select the area you want to keep. Some tools even let you pick a specific ratio, like a square for Instagram.
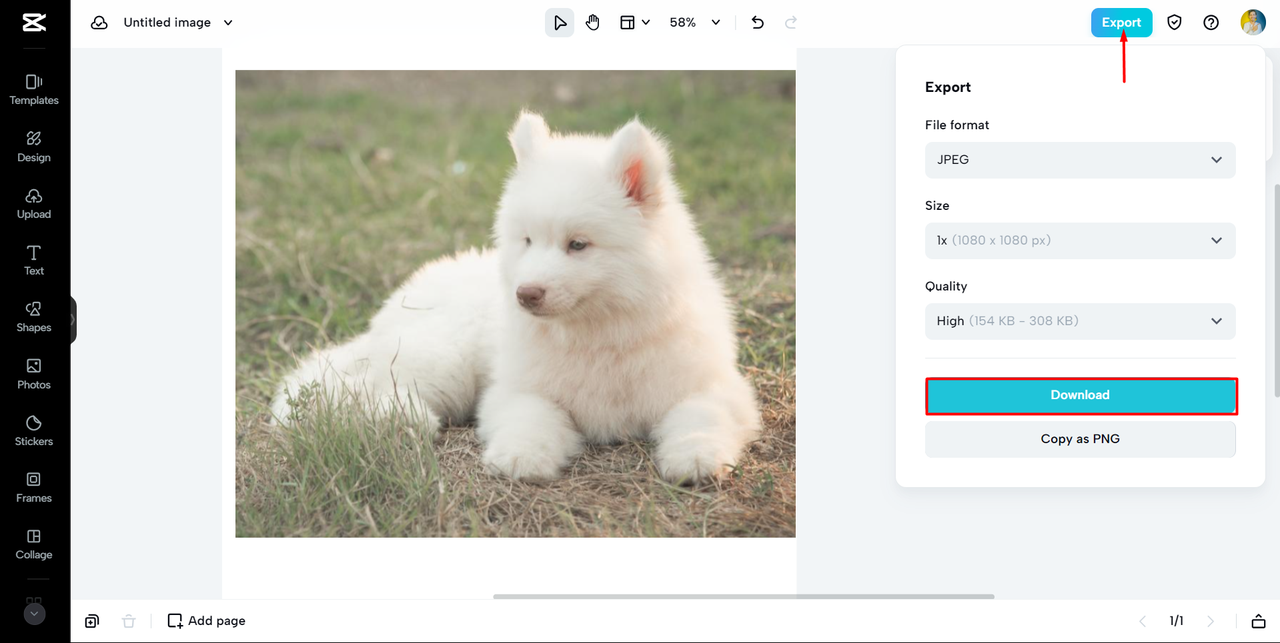
- Export your image: When you’re done cropping (and maybe trying other edits!), click “Export” or “Download.” Choose your preferred format and quality, and save the image back to your Mac.
That’s how you use an online tool to crop picture on Mac with extra options.
Other cool things you can do with CapCut
Cropping is just the start with CapCut. After you learn how to crop image in Mac with this tool, try its other features to make your pictures even better.
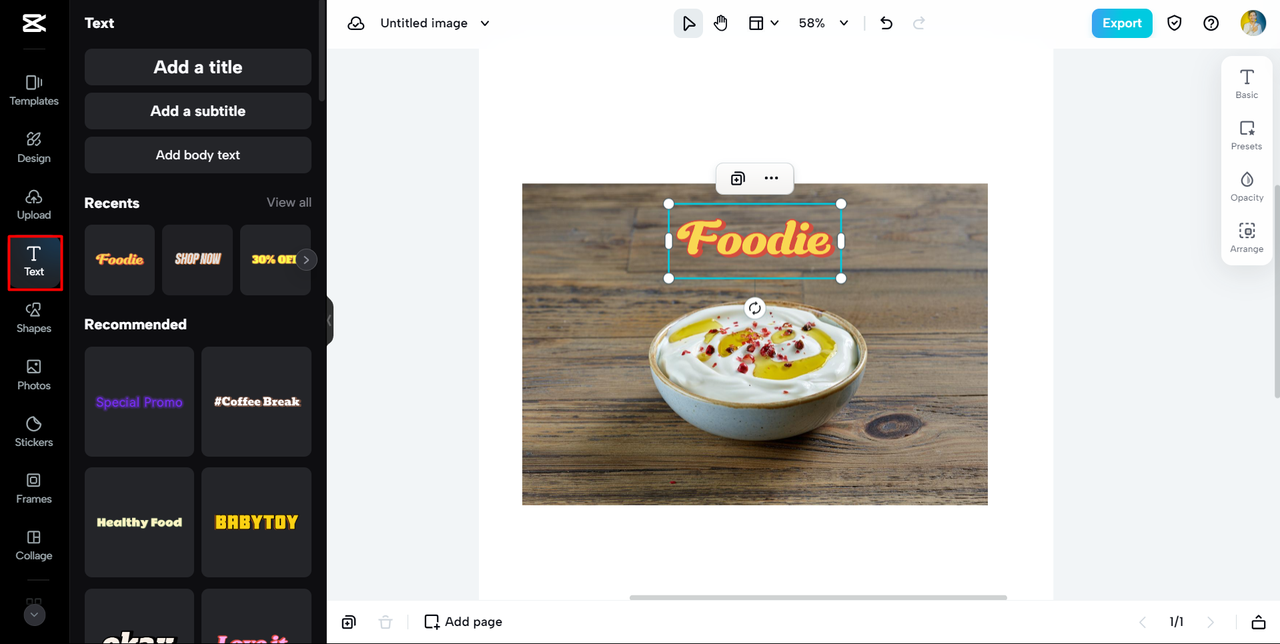
- Add text to pictures: You can write on your images. CapCut has lots of fonts and styles—great for memes, captions, or posters.
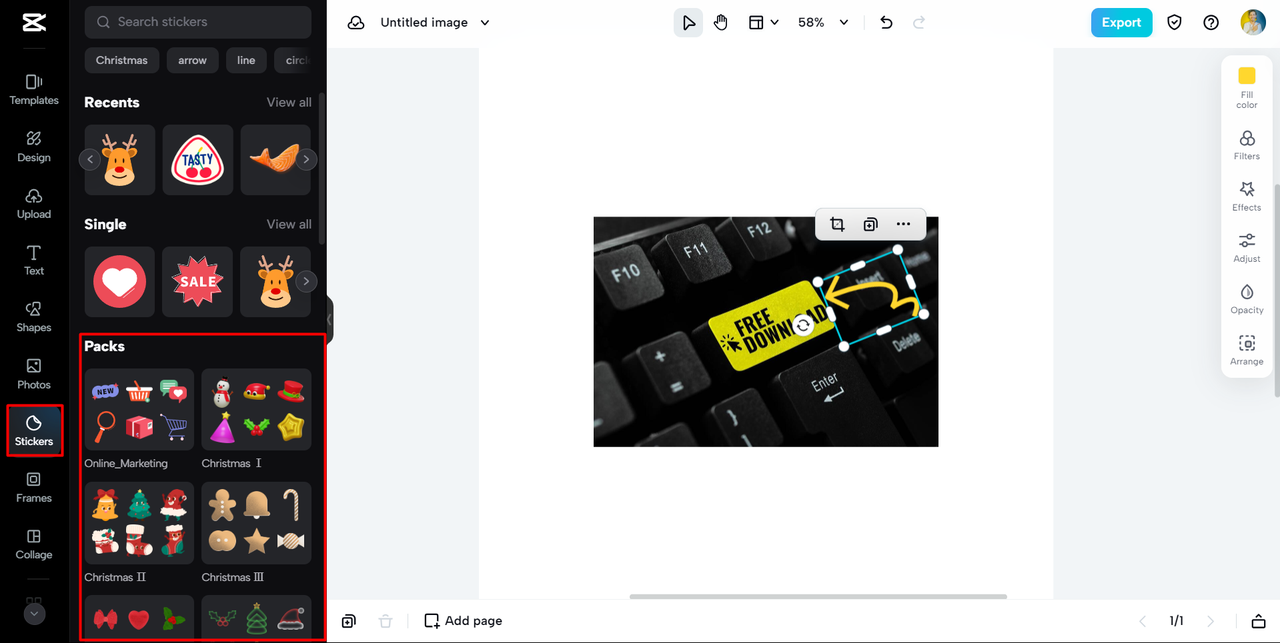
- Add stickers to pictures: CapCut has a huge sticker library. Add fun, cute, or cool stickers to express yourself.
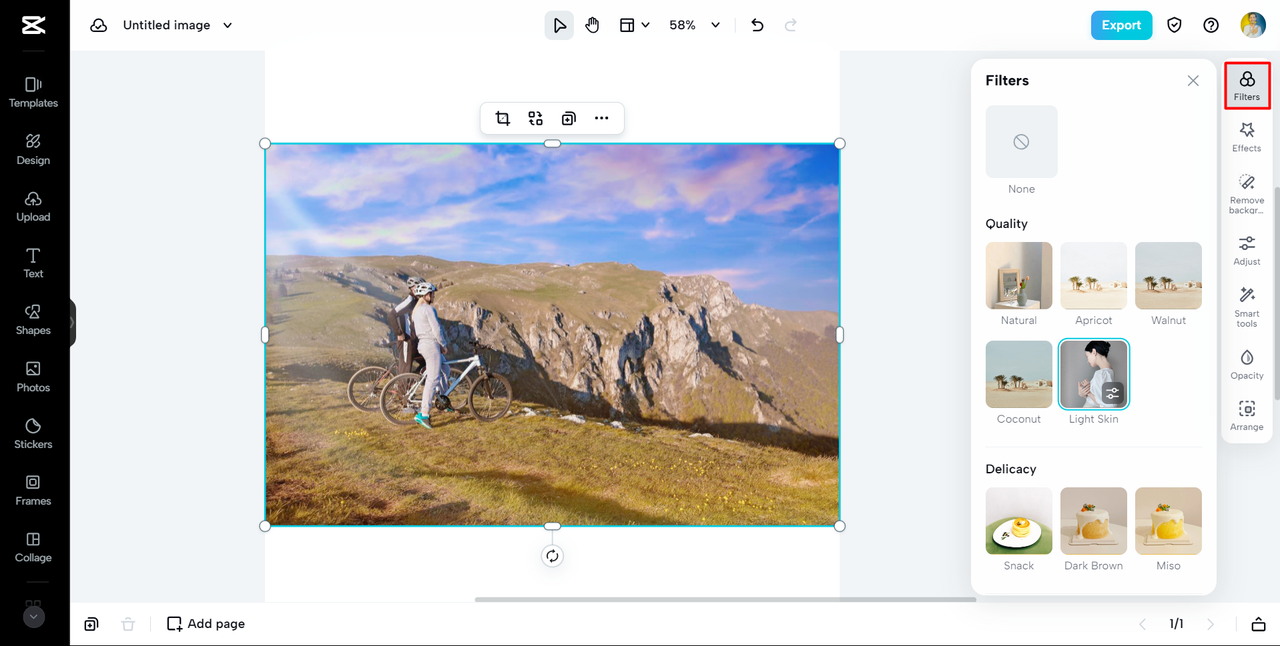
- Add filters to pictures: Filters change the mood of your photo. Make it vintage, bright, or black and white—CapCut has many to choose from.
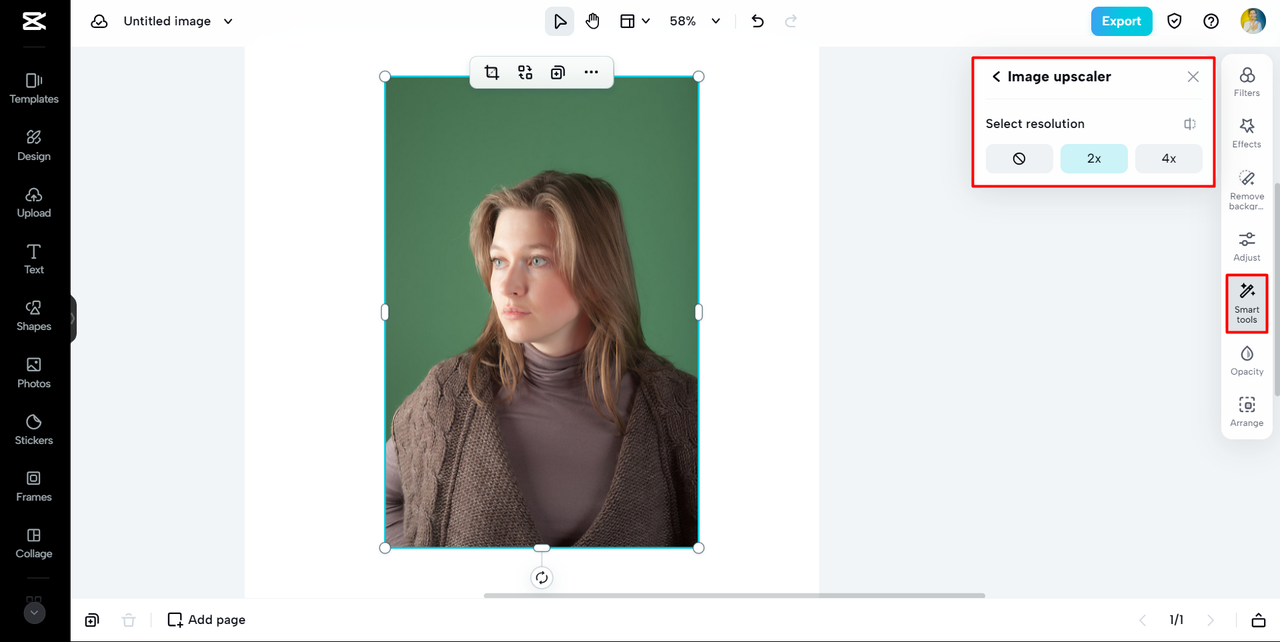
- Improve picture quality: If you have an old or blurry photo, CapCut can help. Its upscaling feature makes low-quality images sharper and clearer.
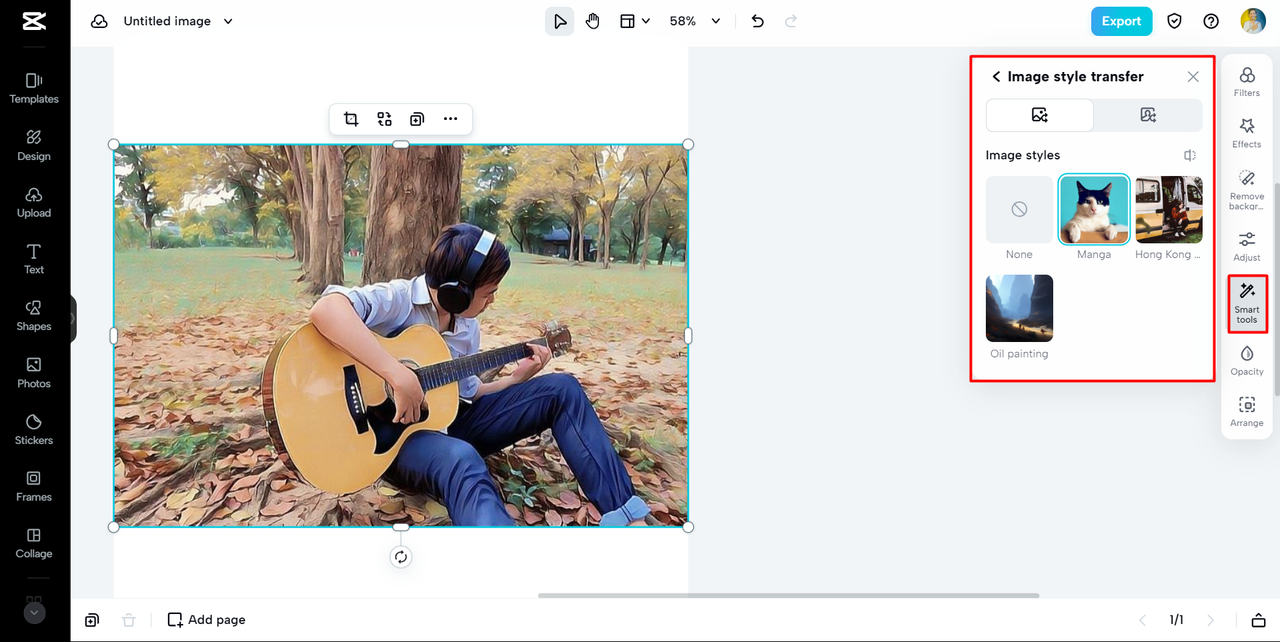
- Change picture style: This fun feature can make your photo look like a painting by Van Gogh or another artist. It’s a creative way to make your images unique.
What’s good and not so good about CapCut
CapCut is powerful, but it’s not perfect for every situation.
The good stuff:
- Tons of editing features, not just cropping.
- The website is easy to use.
- Completely free—no software to install.
The not-so-good stuff:
- You need an internet connection to use it—no offline editing.
- Since it’s a website, not a Mac app, it might feel different to use.
For people who want to get creative and do more than just crop a picture in Mac, CapCut is a fantastic free option.
CapCut — Your all-in-one video & photo editing powerhouse! Experience AI auto-editing, realistic effects, a huge template library, and AI audio transformation. Easily create professional masterpieces and social media viral hits. Available on Desktop, Web, and Mobile App.
Which method is best for cropping a picture in Mac?
So now you know three ways to crop your photos. But which one is best? Well, it really depends on what you need.
If you need a quick, simple crop and nothing else, Preview is probably your best choice. It’s fast, easy, and already on your Mac. It