TOOL HUNTER

Ever watched a video where the action suddenly slows down right at the most exciting part, making everything look super dramatic? Or maybe you’ve seen those funny clips where things speed up just before the punchline, making the joke even funnier? That’s what we call video velocity, and it’s one of the coolest tricks you can use to make your videos stand out. The best part? You don’t need to be a professional editor to do it. With CapCut, anyone can create these awesome effects, whether you’re using a computer, your phone, or just working online.
What Exactly is Video Velocity?
Video velocity is all about changing how fast your video plays at different points. Instead of having your whole video play at the same speed, you can make some parts faster and some parts slower. This helps you create more exciting and emotional videos that really grab people’s attention.
People use video velocity in lots of different ways. In action videos, slowing down at the most important moments makes everything feel more intense. For comedy videos, speeding up before a funny part can make the joke work even better. Travel videos often use video velocity to skip through boring parts quickly and then slow down to show beautiful scenery. It’s also great for moving smoothly between different scenes or making emotional moments feel more cinematic.
The good news is that CapCut makes video velocity editing really easy to learn. No matter what kind of device you’re using, you can start creating these cool effects right away. Let’s look at the different ways you can work with video velocity in CapCut.
Three Easy Ways to Work With Video Velocity in CapCut
CapCut has tools for video velocity editing on all platforms. Whether you prefer working on a computer, online, or on your phone, there’s a method that will work for you. Here are the three main ways to use video velocity in CapCut.
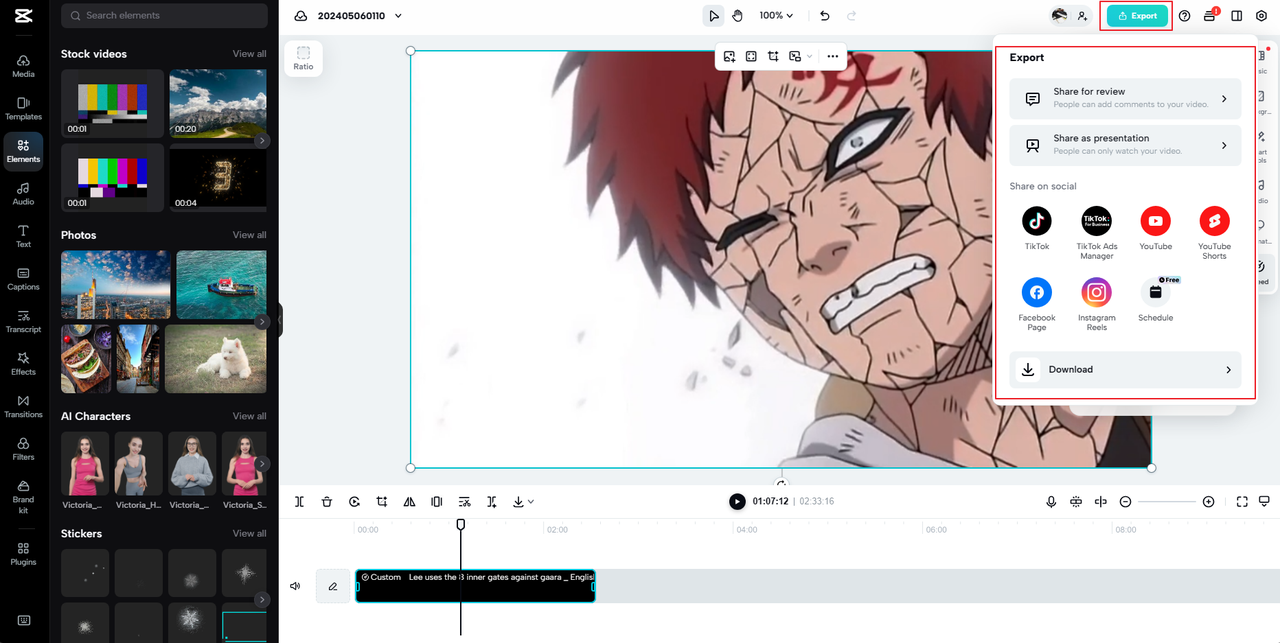
Using CapCut Desktop for Complete Control
If you want the most control over your video velocity effects, the CapCut desktop app is definitely the way to go. It’s a professional-level editor that’s completely free, and it works on both Windows and Mac computers. Here you get both preset speed options and full manual control over your video velocity.
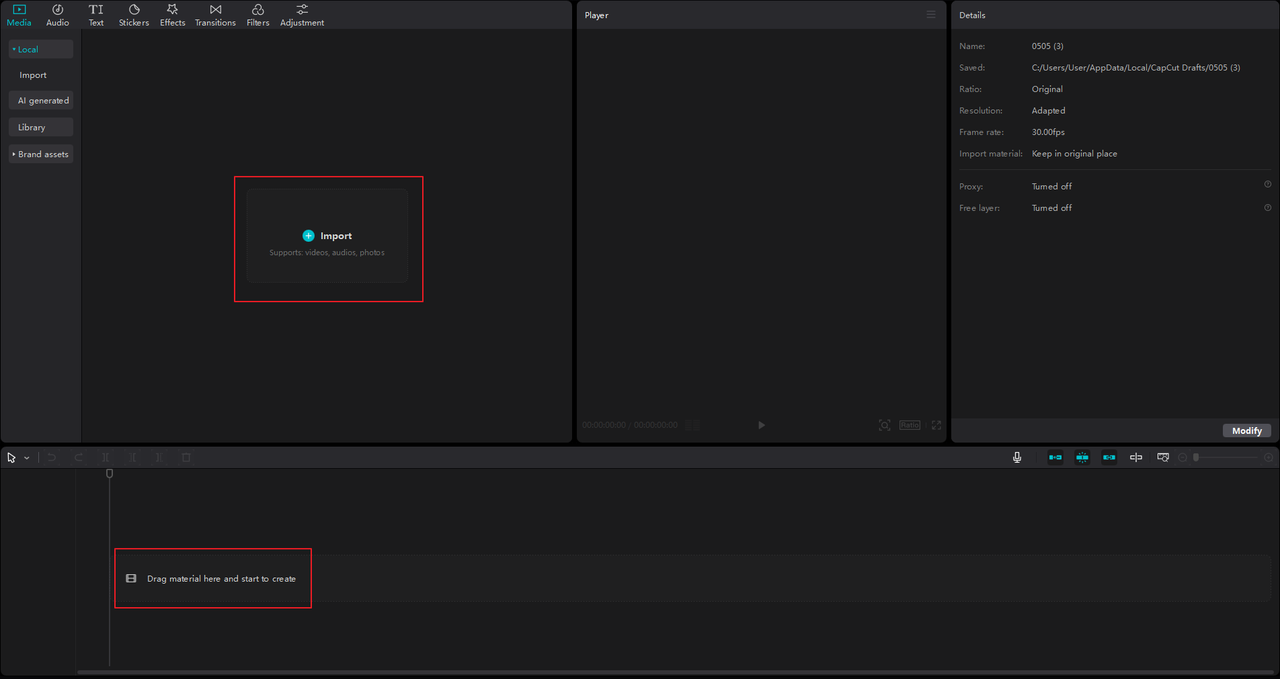
To get started, you’ll need to download and install the CapCut desktop video editor. Once it’s installed, open it up and create a new project. You can bring your video into the editor by dragging it right into the timeline or clicking the “Import” button to find it on your computer. If you use CapCut’s cloud storage, you can also import videos directly from your CapCut Space.
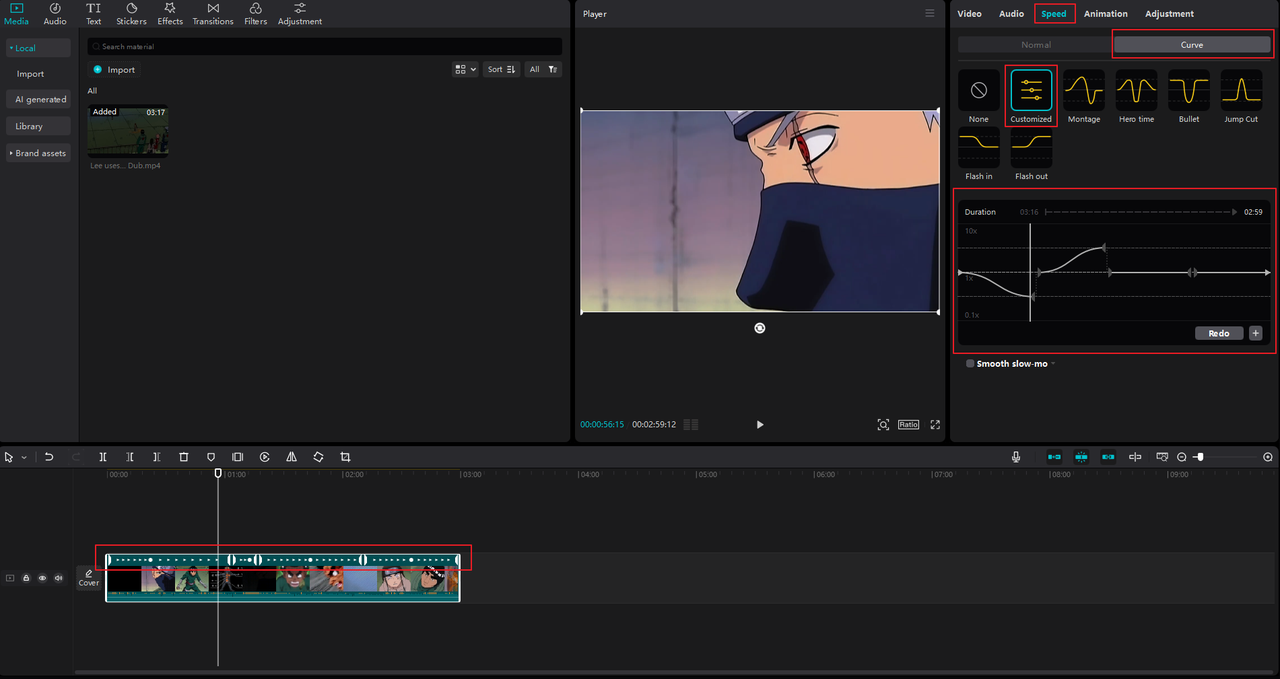
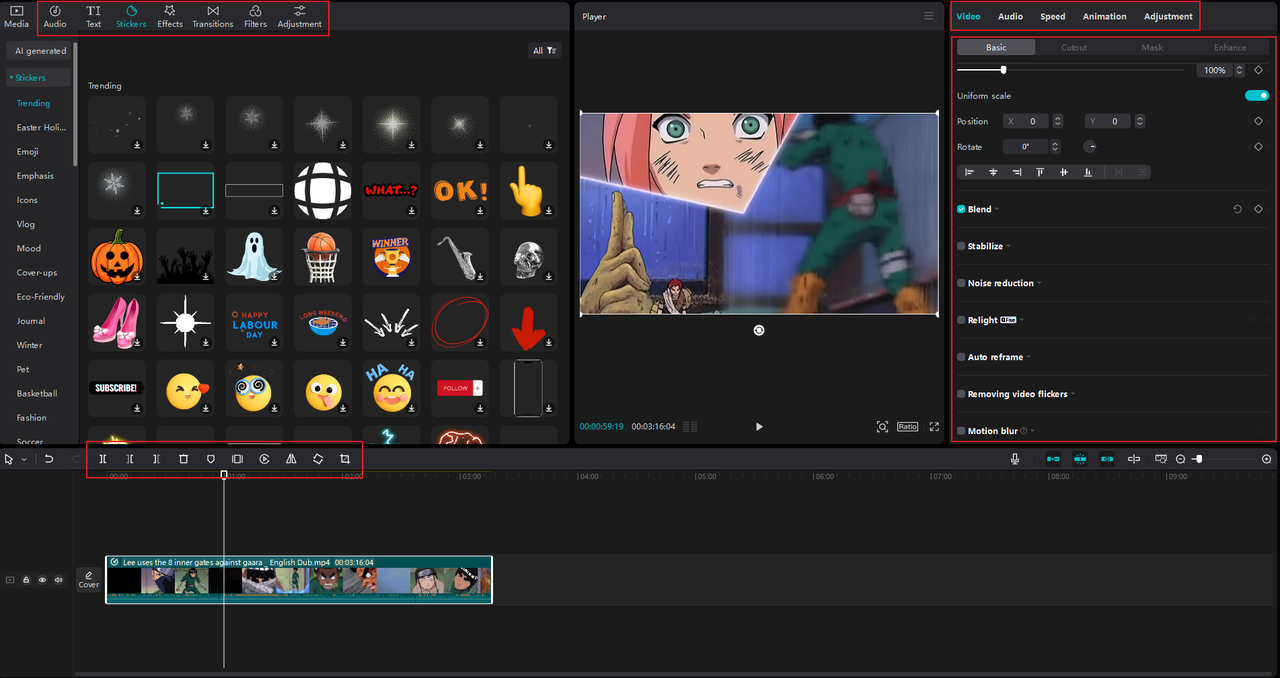
After your video is in the timeline, click on it to see the editing options. On the right side, you’ll notice a “Speed” tab—click that, and then choose “Curve.” Here, you can select from preset speed curves or choose “Customized” to create your own. When you pick “Customized,” a new window opens where you can adjust the video velocity in detail.
Move the playhead to where you want the speed change to happen. In the velocity settings, dragging the pointer left or right controls how long the effect lasts. Dragging it up or down changes the speed—you can make it up to 10 times faster or slow it down to 0.1 times the original speed. If you want an extra-smooth slow-motion effect, just check the “Smooth slow mo” box.
But the CapCut desktop editor isn’t just about video velocity. It has tons of other tools too. You can trim, crop, reverse, or freeze frames, and there are advanced features like keyframe animation, color grading, and masking. Plus, there are AI tools that can help you turn long videos into short clips, generate text, track motion, clean up audio, and more. It’s a complete package for making your videos look professional.
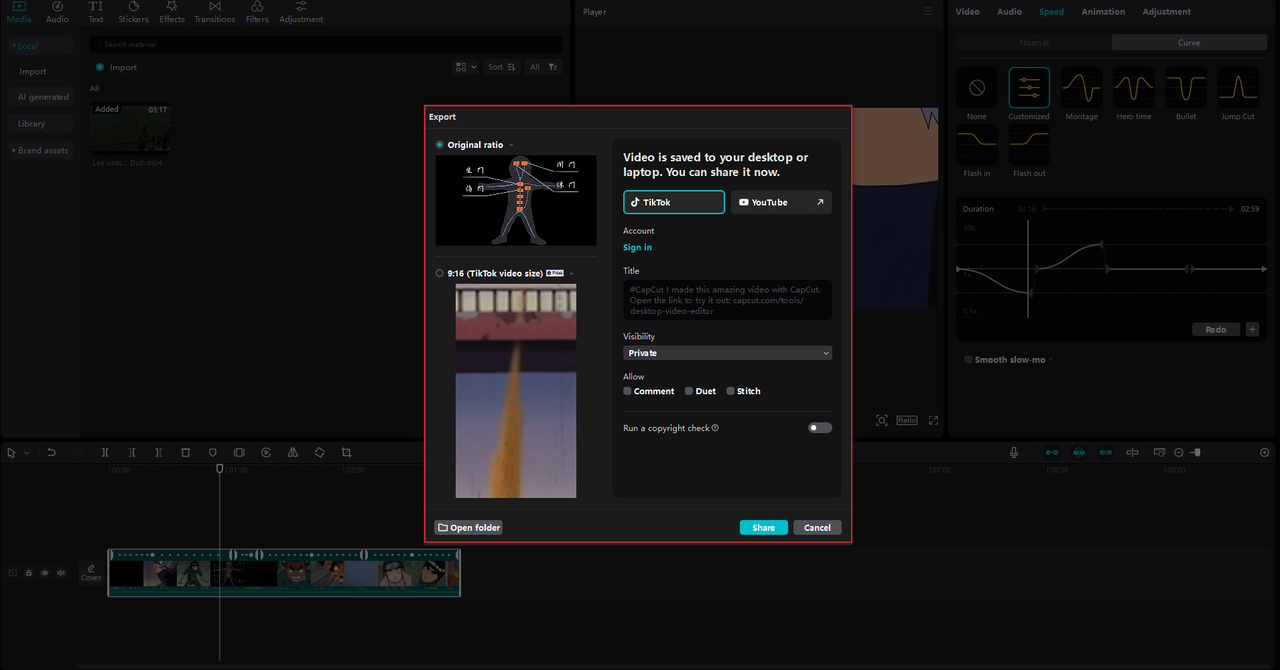
When you’re finished editing, click “Export.” You can choose the resolution (up to 4K), format, frame rate, and more. After exporting, you can save the video to your computer or share it directly to TikTok or YouTube without leaving the app. There’s even a copyright check feature to help you avoid any issues.
CapCut — Your all-in-one video & photo editing powerhouse! Experience AI auto-editing, realistic effects, a huge template library, and AI audio transformation. Easily create professional masterpieces and social media viral hits. Available on Desktop, Web, and Mobile App.

Editing Video Velocity With CapCut Online
Don’t want to download any software? No problem! CapCut’s online video editor lets you adjust video velocity right in your web browser. It’s free, easy to use, and has some powerful features, including speed curves and custom velocity controls.
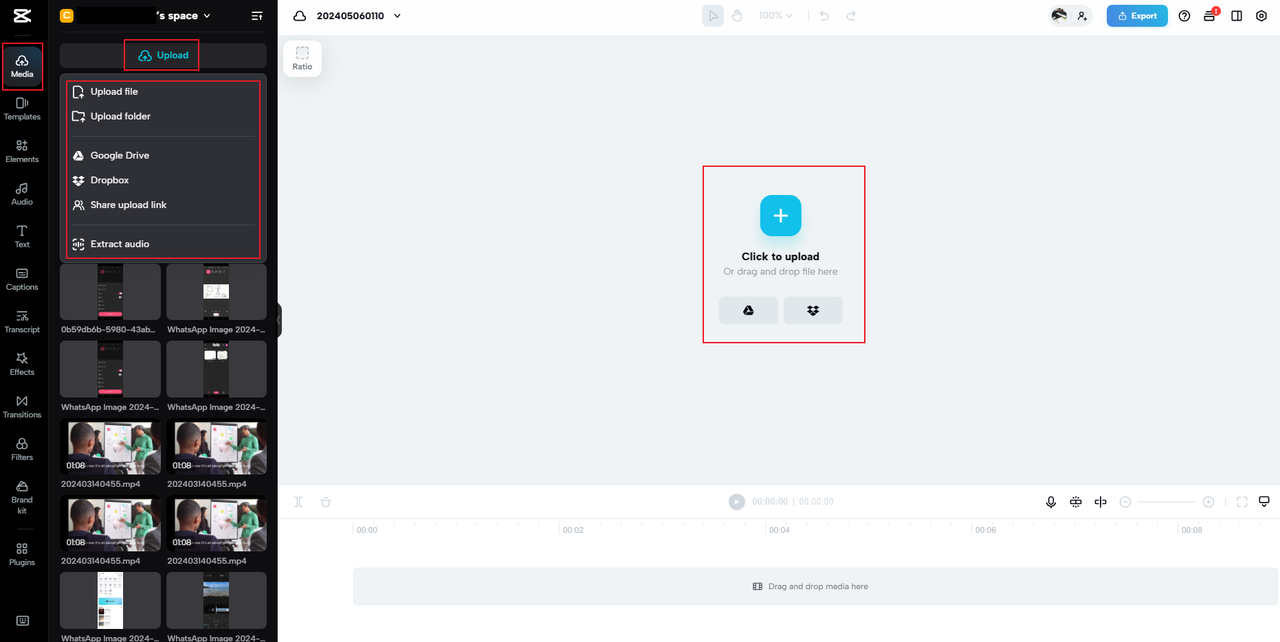
To begin, go to the CapCut website and open the online editor. Click “Click to upload” to choose a video from your computer, or simply drag and drop it into the timeline. You can also import from cloud storage like Google Drive or Dropbox, or even upload from your phone by scanning a QR code.
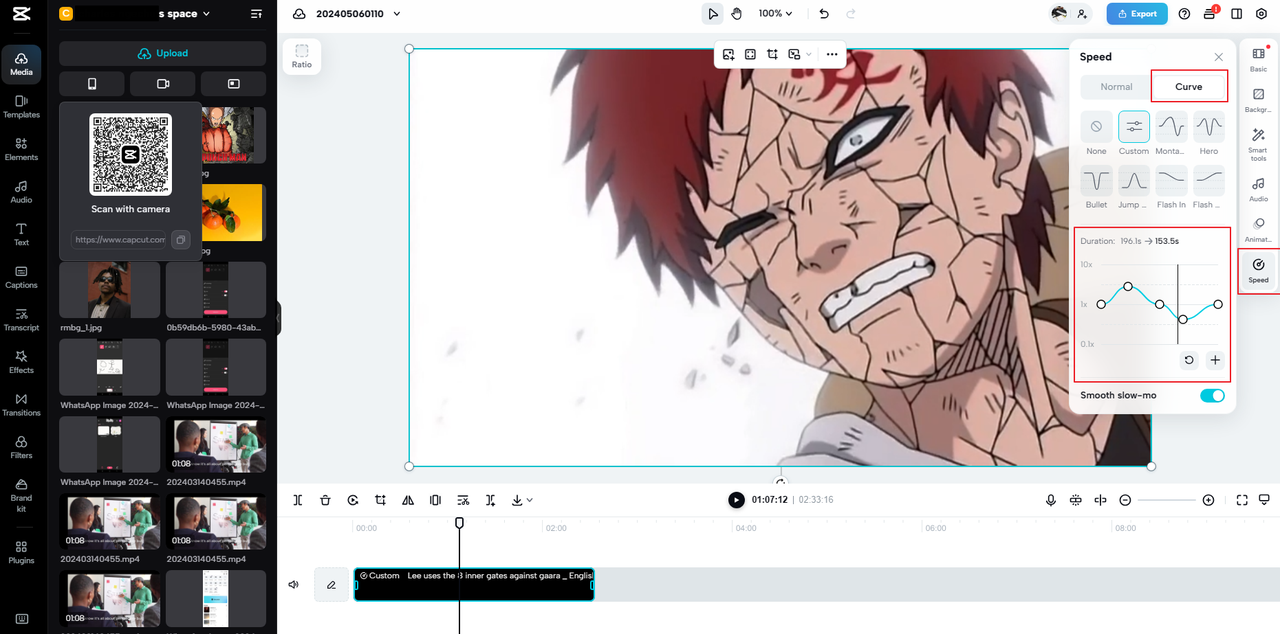
With your video in the timeline, go to the “Speed” tab on the right and click “Curve.” Select “Custom” to open the velocity editing window. Here, you can click on the graph to add points where you want speed changes. Drag points upward to speed up the video or downward to slow it down. You can also adjust how long each speed change lasts. It’s a simple way to create professional-looking video velocity effects without any downloads.
Once you’re happy with your edits, click “Export.” You can download the video to your device or share it directly. CapCut online lets you share for feedback, schedule posts for later, or publish immediately to platforms like TikTok, Instagram, YouTube, and Facebook—all from your browser.
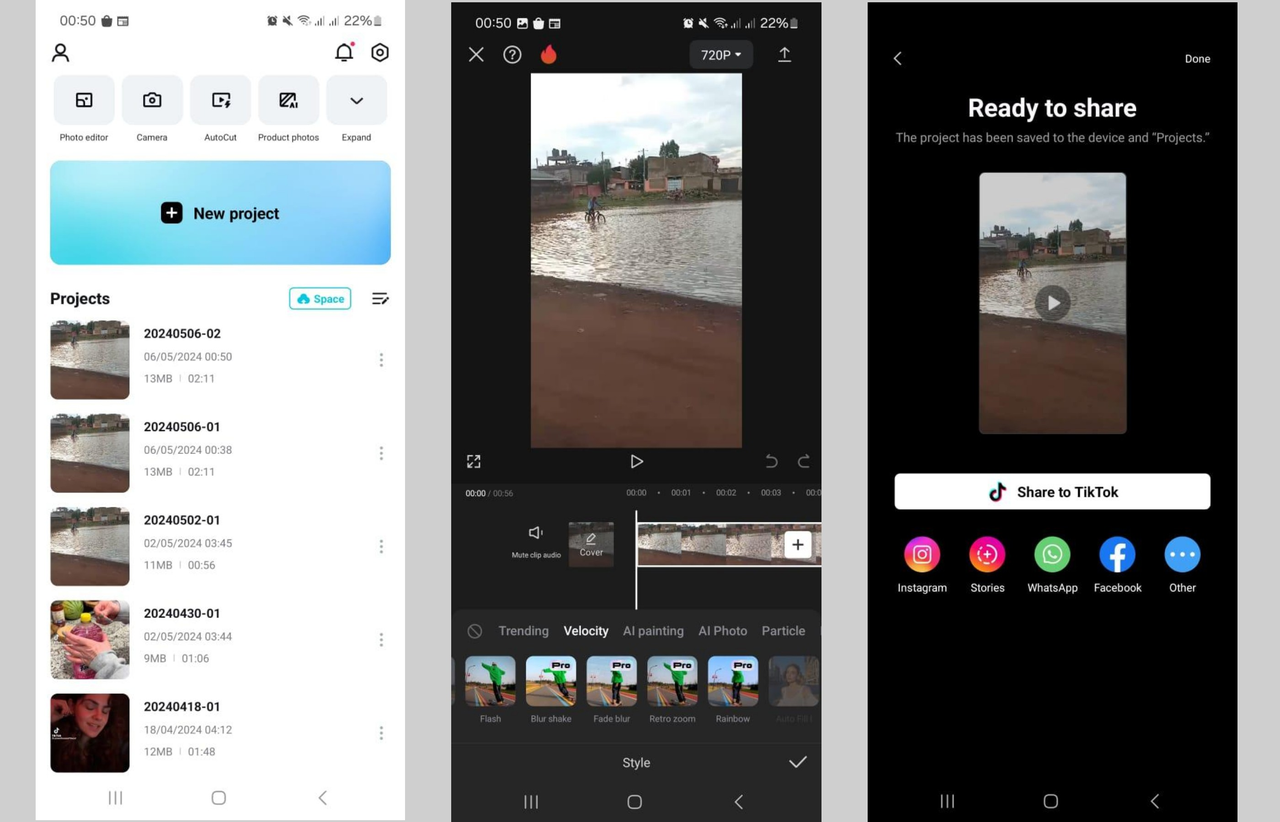
Using the CapCut Mobile App for Video Velocity
For editing while you’re on the move, the CapCut mobile app is an excellent choice. It’s packed with features, including auto velocity presets that make it quick and simple to add stylish speed effects. You can choose from effects like flash, retro zoom, fade blur, and more—some are free, while others are paid.
First, install the CapCut app on your phone and open it. Start a new project and select the video you want to edit. You can also use stock videos if you don’t have your own footage ready.
To apply auto velocity, tap “Edit” at the bottom, then go to “Style” and select the “Velocity” tab. Browse the effects and tap one to apply it. The app will automatically detect music in your video to help sync the effect. Add sounds if needed, then confirm with the checkmark button.
If you prefer manual control, you can use custom speed curves. Tap “Edit,” then “Speed,” then “Curve,” and choose “Custom.” This lets you add and adjust points on a graph to create your own video velocity changes. You can preview as you go, delete points, and even enable smooth slow-motion. It’s a powerful way to customize your video’s pace right from your phone.
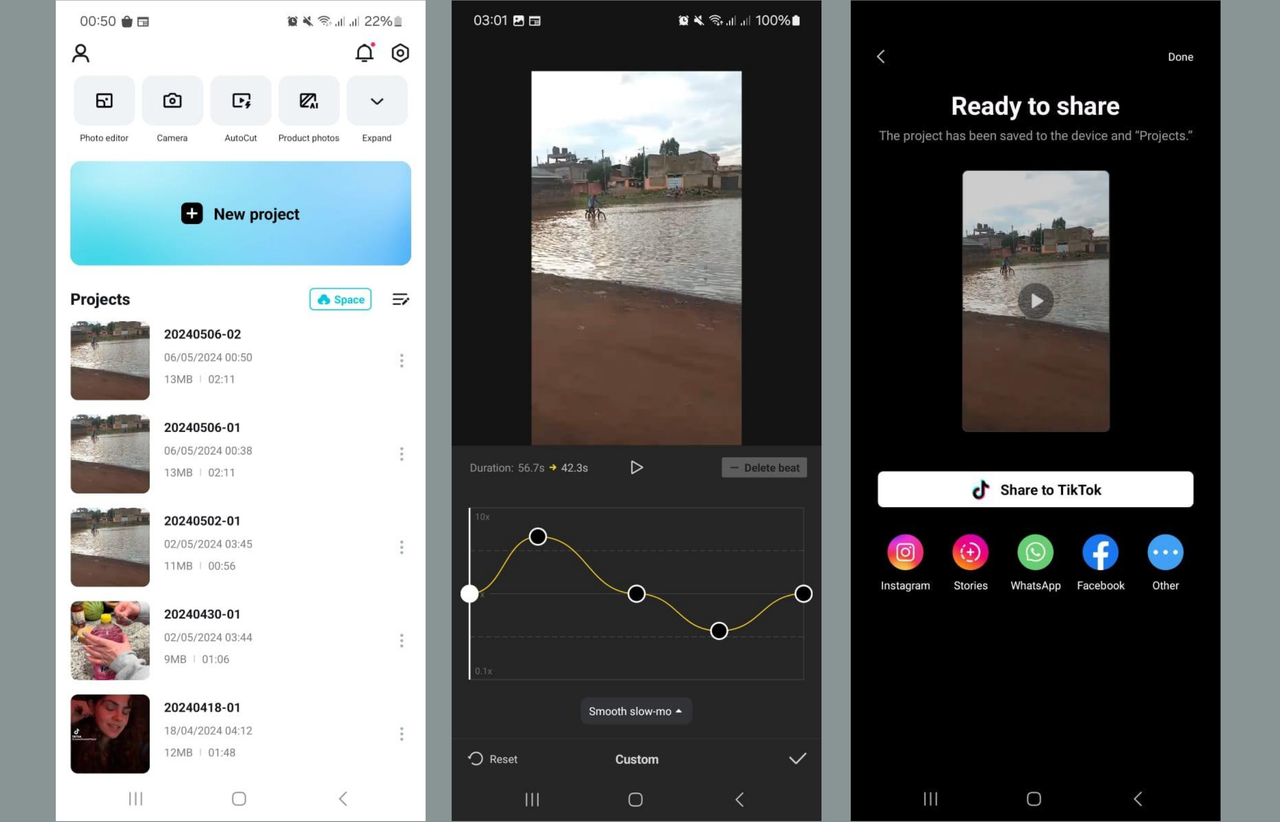
When you’re done, tap the download icon to save your video. You can then share it directly to social media platforms like Instagram, WhatsApp, Facebook, or TikTok, all without leaving the app.
Why the Desktop Version is Best for Video Velocity
So why should you choose the desktop version over the others? While all CapCut platforms support video velocity, the desktop editor gives you the most power and precision. Here’s what makes it special.
First, you get detailed speed curve customization. You have complete control over how fast or slow your video plays at every single moment, which is perfect for syncing with music or creating complex effects.
Second, the desktop version includes a full set of professional editing tools. Beyond video velocity, you can crop, split, rotate, use keyframes, correct colors, apply masks, and more. There are also AI features like auto reframe, flicker removal, and voice enhancement.
Third, CapCut desktop offers AI audio tools that can isolate voices, remove background noise, and improve sound quality. This is great for music videos, podcasts, or any project where clear audio is important.
Fourth, you get access to a huge library of media resources—music, sound effects, stickers, filters, transitions, and even AI-generated characters. These can help make your videos more engaging and fun.
Fifth, sharing is super easy. You can export videos in high quality and share them directly to TikTok or YouTube, which speeds up your workflow.
Finally, CapCut desktop is designed to be user-friendly. Even if you’re new to video editing, the interface is intuitive and easy to learn. You don’t need any previous experience to start creating great videos with video velocity effects.
CapCut — Your all-in-one video & photo editing powerhouse! Experience AI auto-editing, realistic effects, a huge template library, and AI audio transformation. Easily create professional masterpieces and social media viral hits. Available on Desktop, Web, and Mobile App.
Wrapping Up
Now you know how to use video velocity in CapCut to make your videos more dynamic and engaging. Whether you’re on desktop, online, or mobile, CapCut gives you the tools to experiment with speed changes and discover new creative possibilities. Don’t be afraid to try different effects—slow motion for drama, speed ramps for excitement, or smooth transitions for style. With CapCut, it’s all free and easy to use. So why not download CapCut today and start turning your everyday videos into something extraordinary!
Common Questions About Video Velocity
How do I match video velocity edits with music in CapCut?
Matching video velocity with music is simpler than you might think. First, add your music track to the timeline. Then, select the video clip and open the “Speed” option. Choose “Curve” and customize the speed changes. Place markers on the speed curve where you want the velocity to change, lining them up with beats or highlights in the music. This way, the video’s pace matches the audio, creating a smooth and professional result. Try it yourself with the CapCut desktop video editor!
Why do my video velocity edits look choppy, and how can I fix this?
If your video velocity edits look choppy, there are a few things you can try. First, adjust the smoothness settings to make speed transitions more gradual. Adding more keyframes can also give you better control. Experiment with different curve presets, like “ease-in” or “ease-out,” for smoother changes. Finally, make sure you’re exporting your video in a high resolution and frame rate to maintain quality. The CapCut desktop editor is great for fixing these issues.
Can I add multiple video velocity points to one clip in CapCut?
Definitely! CapCut lets you add as many velocity points as you want to a single clip. Just select the clip, go to “Speed,” then “Curve,” and choose “Custom.” Click on the graph line to add a new point each time. Drag points up to speed up or down to slow down that section. You can create complex, dynamic speed changes within one clip—perfect for highlighting multiple moments or building rhythm.
Some images courtesy of CapCut