TOOL HUNTER
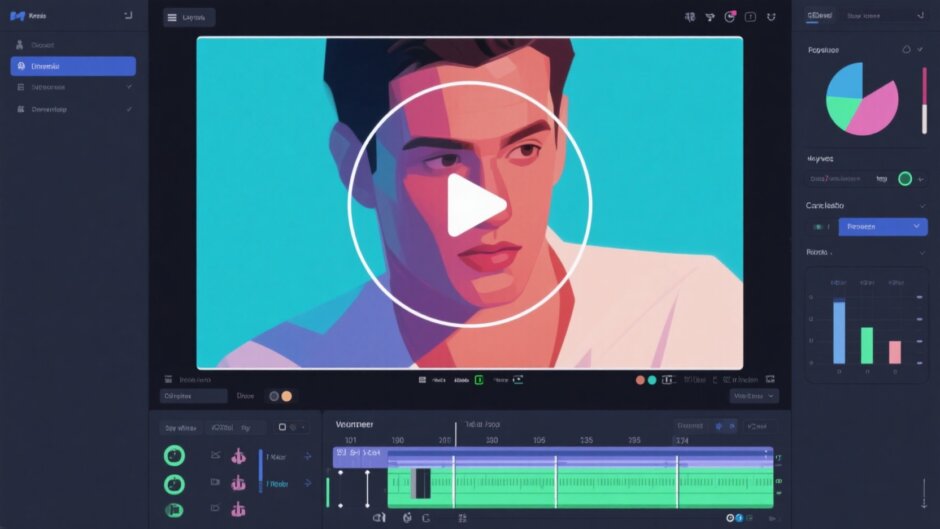

Ever seen those cool videos where just one part of the screen is blurred, glowing, or has some amazing effect? That’s the magic of masking. It’s like having a digital stencil—you choose an area to edit and leave the rest untouched. Sounds fancy, right? But guess what—it’s not as hard as it looks.
A lot of folks think you need pro-level software like Adobe Premiere Pro to pull this off. Well, not anymore. There’s this awesome, totally free tool called CapCut that lets you do masking easily and impressively. In this guide, we’ll walk through everything about masking and how you can master it using CapCut.
What Exactly is Video Masking?
Okay, so what is masking really? Imagine placing a piece of paper with a hole over a photo. You only see what’s inside the hole. Now imagine you can move that paper, reshape the hole, and even add cool effects only to that visible part. That’s video masking.
It’s a technique that isolates a part of your video clip. Once isolated, you can tweak just that portion—blur it, color-correct it, brighten it, or pretty much anything you like. It’s perfect for hiding stuff (like a license plate) or highlighting something you want viewers to notice.
Types of Masks You Should Know
Masking isn’t one-size-fits-all. Most editors offer different shapes and tools to help you select exactly what you need. Picking the right one makes your work way smoother.
Round or ellipse masks are super common. Great for anything circular—like making the moon brighter in a night shot or highlighting a watch on someone’s wrist.
Then there are rectangle masks. Perfect for anything with straight edges—a phone screen, a painting, or a window.
For trickier shapes, you might use a polygon mask. This one lets you create multi-sided shapes, ideal for buildings or unusual signs.
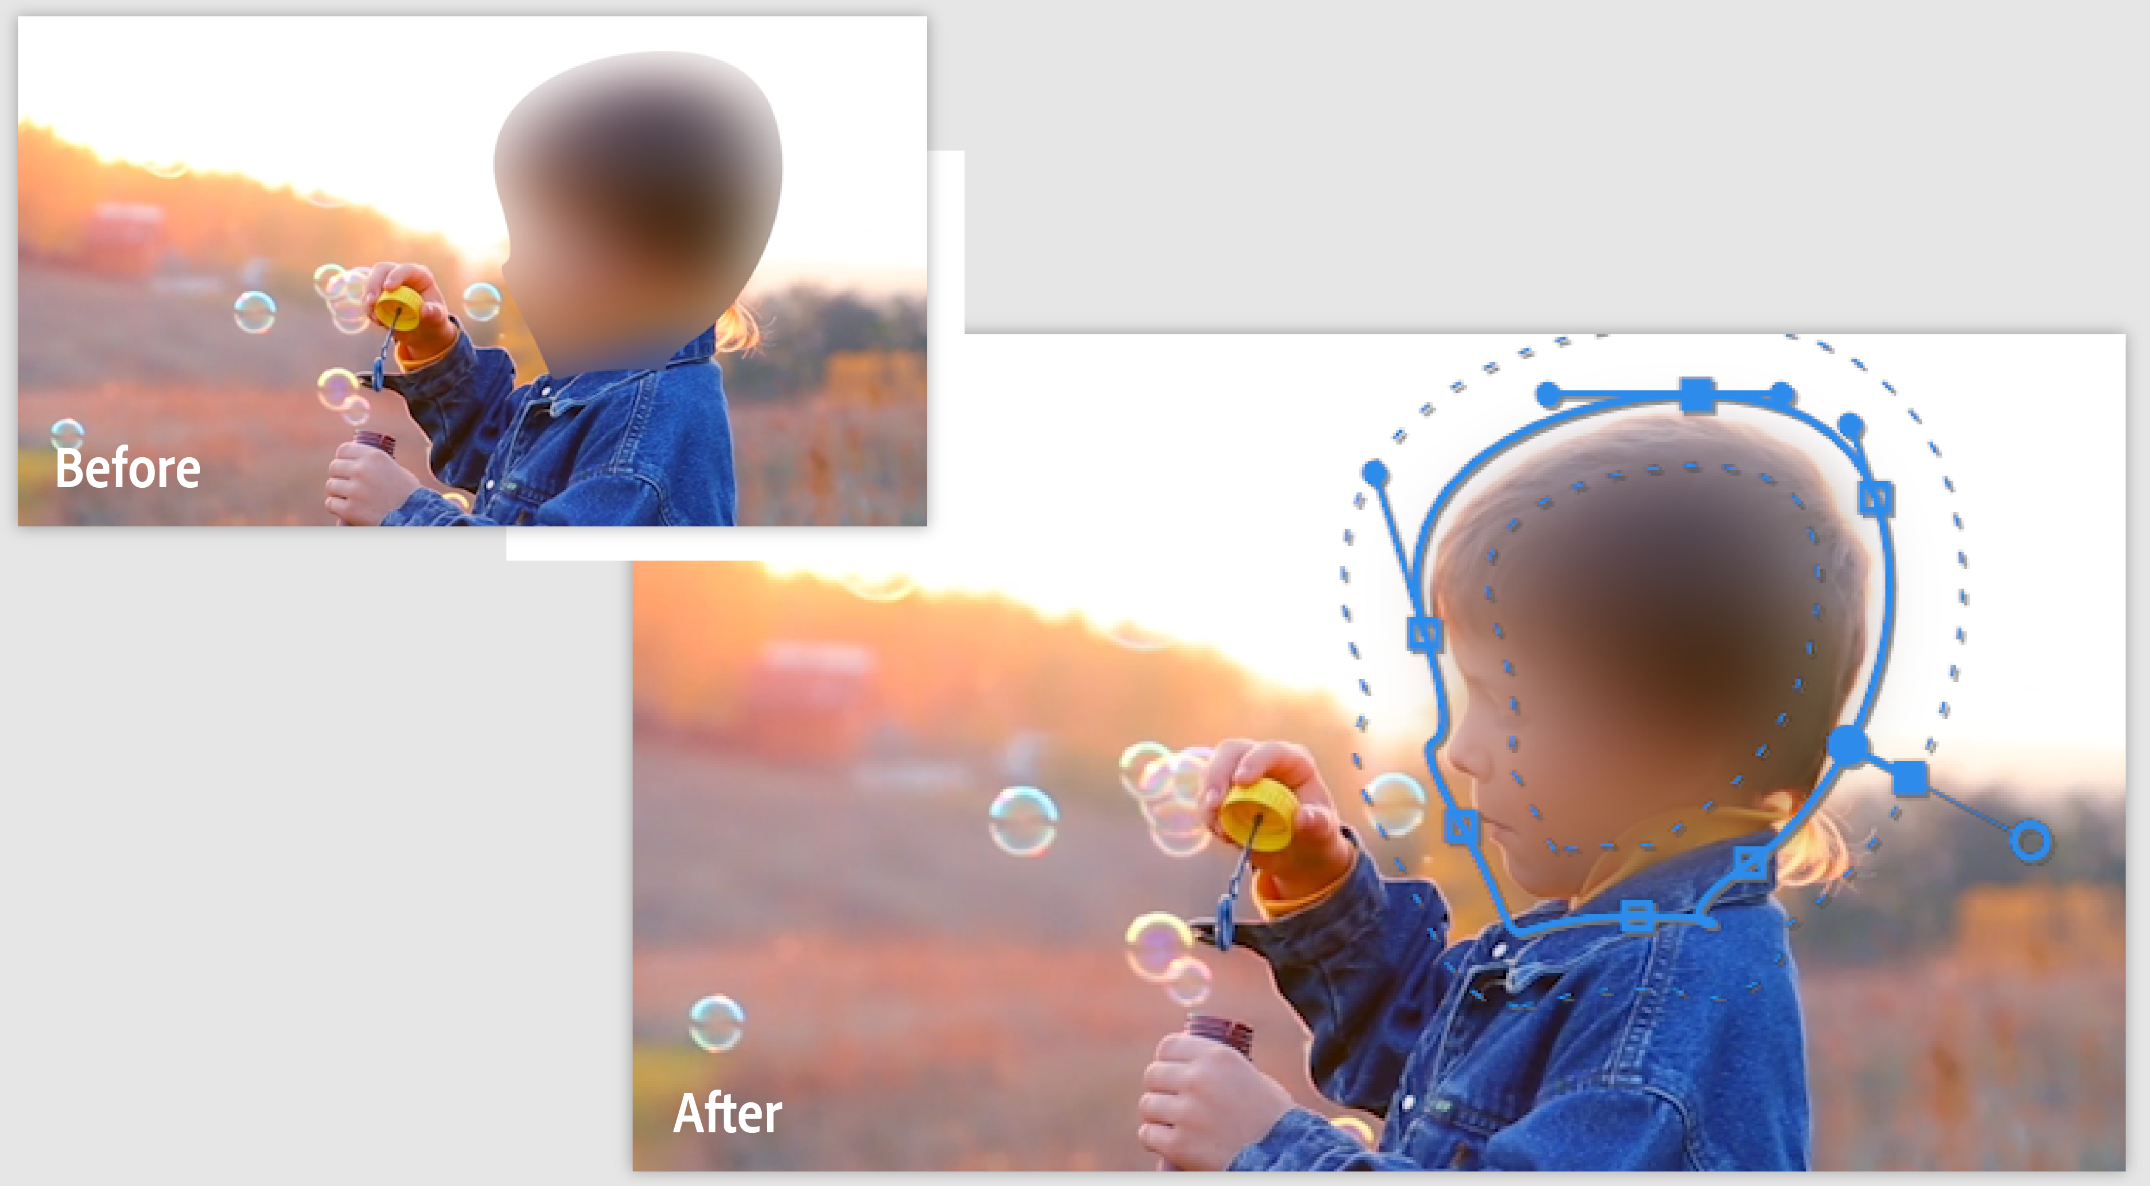
The most flexible option is the freehand pen tool. You can draw any shape you want—trace a face, a car, or something irregular. It gives you the most control for complex tasks.
How Masking Generally Works in Video Editors
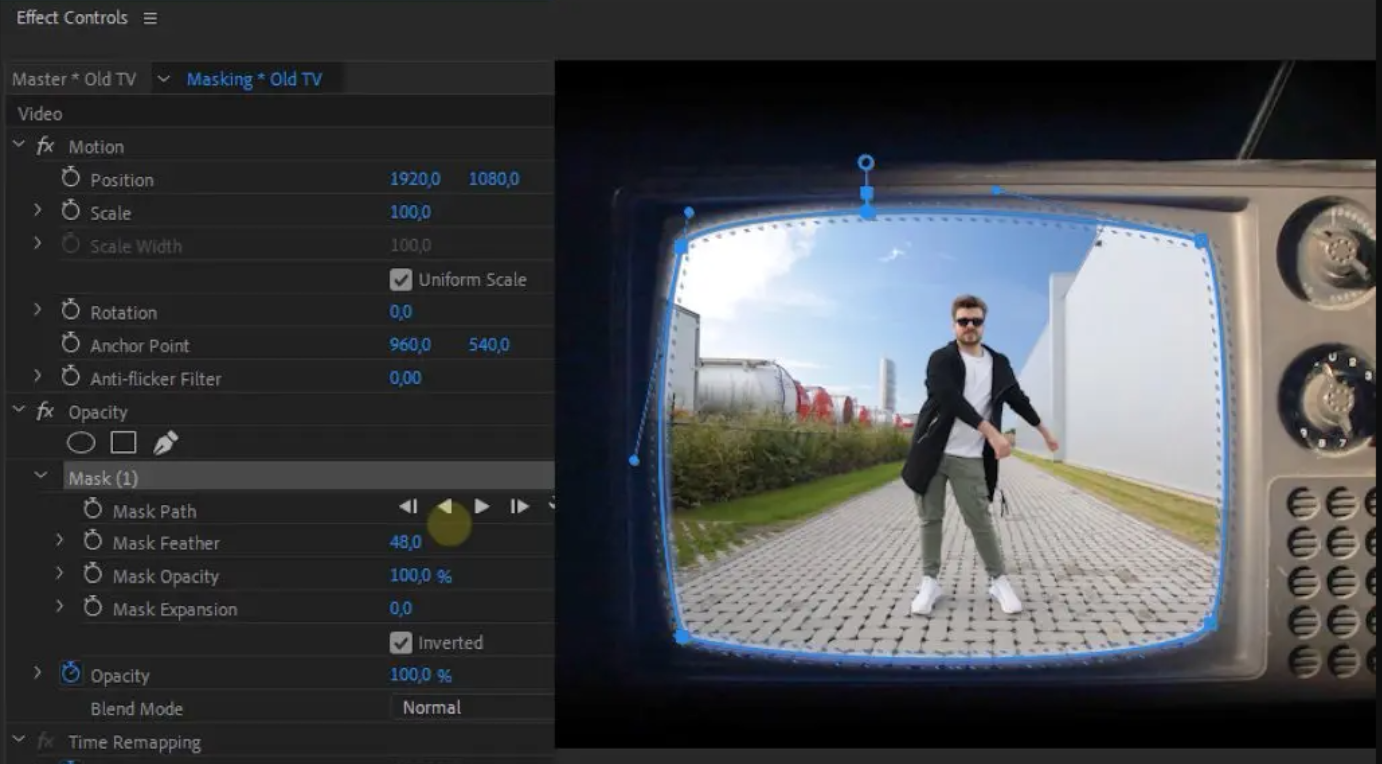
The basic idea of masking is similar across most software. Let’s quickly see how it’s done in a pro editor like Premiere Pro to get the concept.
First, you pick your video clip and place it on the timeline. Then, you find an effect—like a blur or color shift—that you want to apply to just one area.
In the effect’s settings, you’ll find masking tools. Choose a shape—say, a circle or rectangle—and drag it over the spot you want to change.
You can resize the mask or soften its edges. The real fun begins when your subject moves. You use keyframes—setting the mask’s position at different times—and the software moves it for you automatically.
It’s a powerful method, but it can feel overwhelming if you’re new. That’s why a simpler tool can be a game-changer.
Why Use CapCut for Masking?
So why are we talking about CapCut? Because it does all the cool masking stuff but in a much simpler way. And yes, it’s completely free. No subscriptions, no sneaky trials.
CapCut is a full video editor with a really smart masking tool built right in. The interface is clean—no hunting for hidden buttons. Whether you’re a beginner or just in a hurry, CapCut makes masking straightforward and stress-free.
Best part? The quality is just as good as paid software. You get pro-level results without the pro-level price or complexity.
What’s So Great About CapCut’s Masking?
Let’s break down why CapCut’s masking stands out.
First, precision. Ever struggled to edit a tiny detail? CapCut’s mask tool lets you zero in on exact areas. Perfect for making small objects pop or fixing little mistakes.
Then, creative effects. Masking isn’t just for hiding—it’s for making things awesome. Blur the background to make your subject stand out, color-grade just the sky, or add sparkle to jewelry. The options are endless.
Selective focus is another win. Our eyes naturally go to the sharpest part of an image. Use masking to guide your viewer’s gaze. Like blurring a busy scene except the main character. It makes your video feel more cinematic.
Lastly, dynamic storytelling. Masks can create transitions—like wiping to a new scene in a custom shape. Or use split-screen to compare two things. It’s a creative boost for your videos.
Other Cool Features in CapCut
Masking is just one part of CapCut. The whole editor is packed with features that make video creation fun and easy.
Collaboration is a breeze. Work on the same project with friends or teammates, no matter where they are. Everyone can edit their part, and it all syncs up smoothly. Great for school projects, team work, or just making videos together.
Running out of storage? CapCut offers free cloud storage. Keep all your projects and assets online. Sharing files with collaborators is easy—no more emailing huge videos.
Editing goes beyond simple cuts. You get pro-level color correction tools. Adjust brightness, contrast, saturation, and more with a few clicks. Plus, there are tons of transitions, filters, and overlays to give your video a polished look.
CapCut also has smart AI tools. Background noise? Use one-click noise reduction. Need subtitles? Automatically transcribe your video with great accuracy. There’s even translation and voice change features. These save tons of time and effort.
CapCut — Your all-in-one video & photo editing powerhouse! Experience AI auto-editing, realistic effects, a huge template library, and AI audio transformation. Easily create professional masterpieces and social media viral hits. Available on Desktop, Web, and Mobile App.

How to Mask in CapCut: Step-by-Step Guide
Alright, here’s the part you’ve been waiting for—how to mask in CapCut. We’ll go through it step by step. You’ll see that learning how to mask in CapCut is simple and something anyone can do.
Step 1: Start Your Project
First, download and install CapCut on your computer. It’s free and quick. Open it up and create a new project.
Import your video by clicking “Import” or dragging your file into the window. You can also use CapCut’s cloud storage or its library of stock footage and music if you like.
Step 2: Create Your Mask
This is where the real capcut masking begins. Drag your video from the media library to the timeline at the bottom.
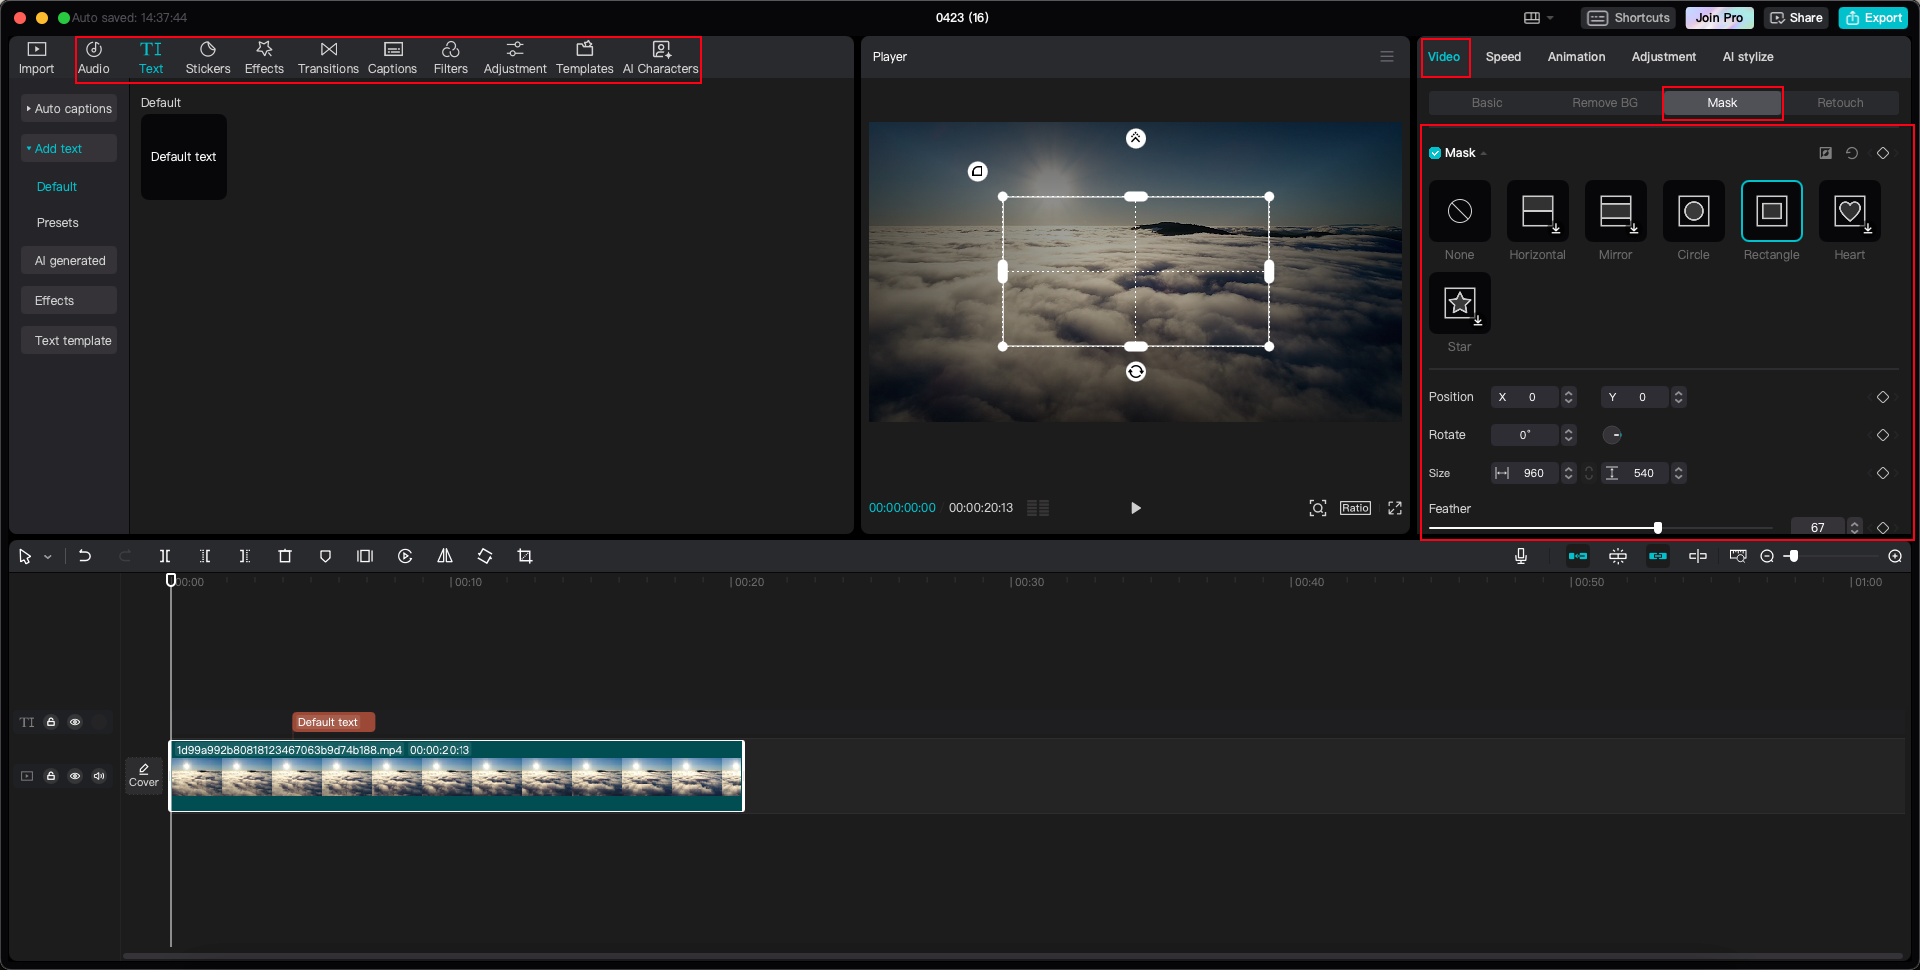
Click the clip to select it. On the right, you’ll see an editing panel. Go to the “Video” tab and find “Mask.” Click it.
You’ll see mask shapes like circle, rectangle, heart, and a freehand pen tool. Pick one that fits your object—circle for a face, rectangle for a screen.
Once selected, the shape appears on your video. Drag it into place, resize it by the corners, and adjust feathering to soften edges.
Play your video to check the mask. If your subject moves, use keyframes. Move the playhead, adjust the mask’s position, and CapCut adds a keyframe automatically. It’ll smoothly follow the movement.
This capcut mask process is visual and intuitive—you see exactly what you’re doing, which makes learning easy.
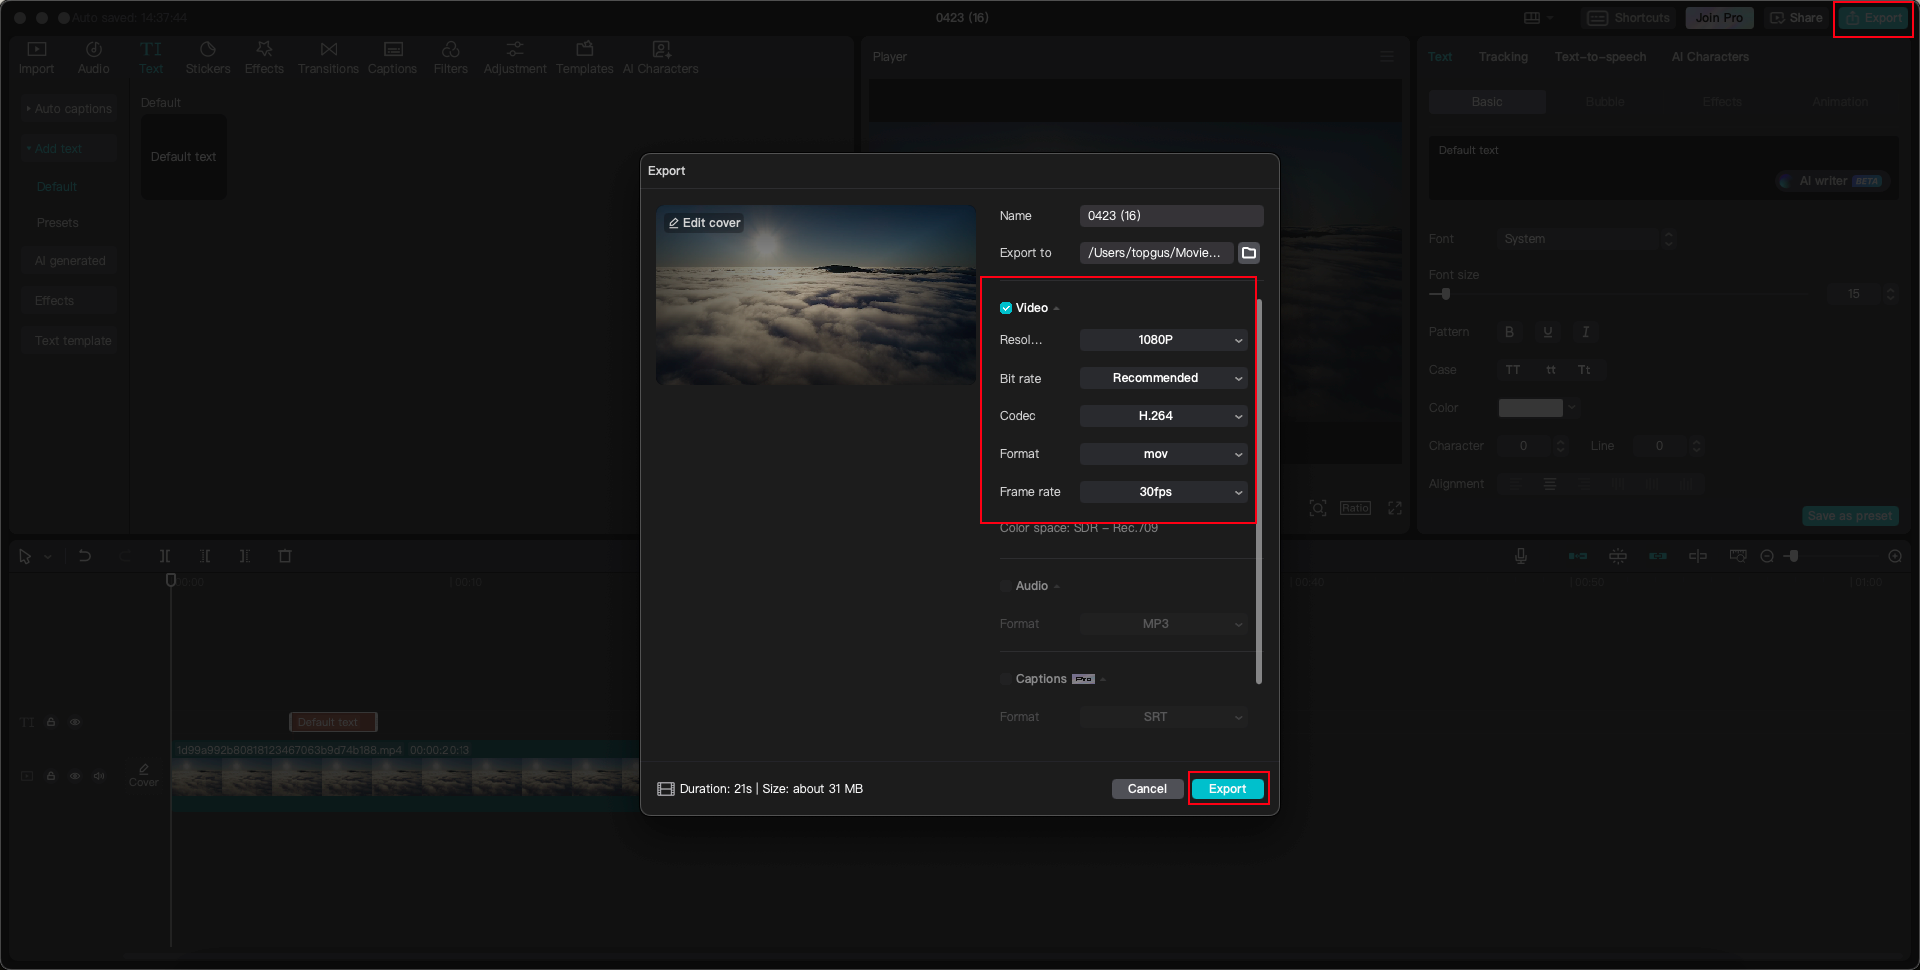
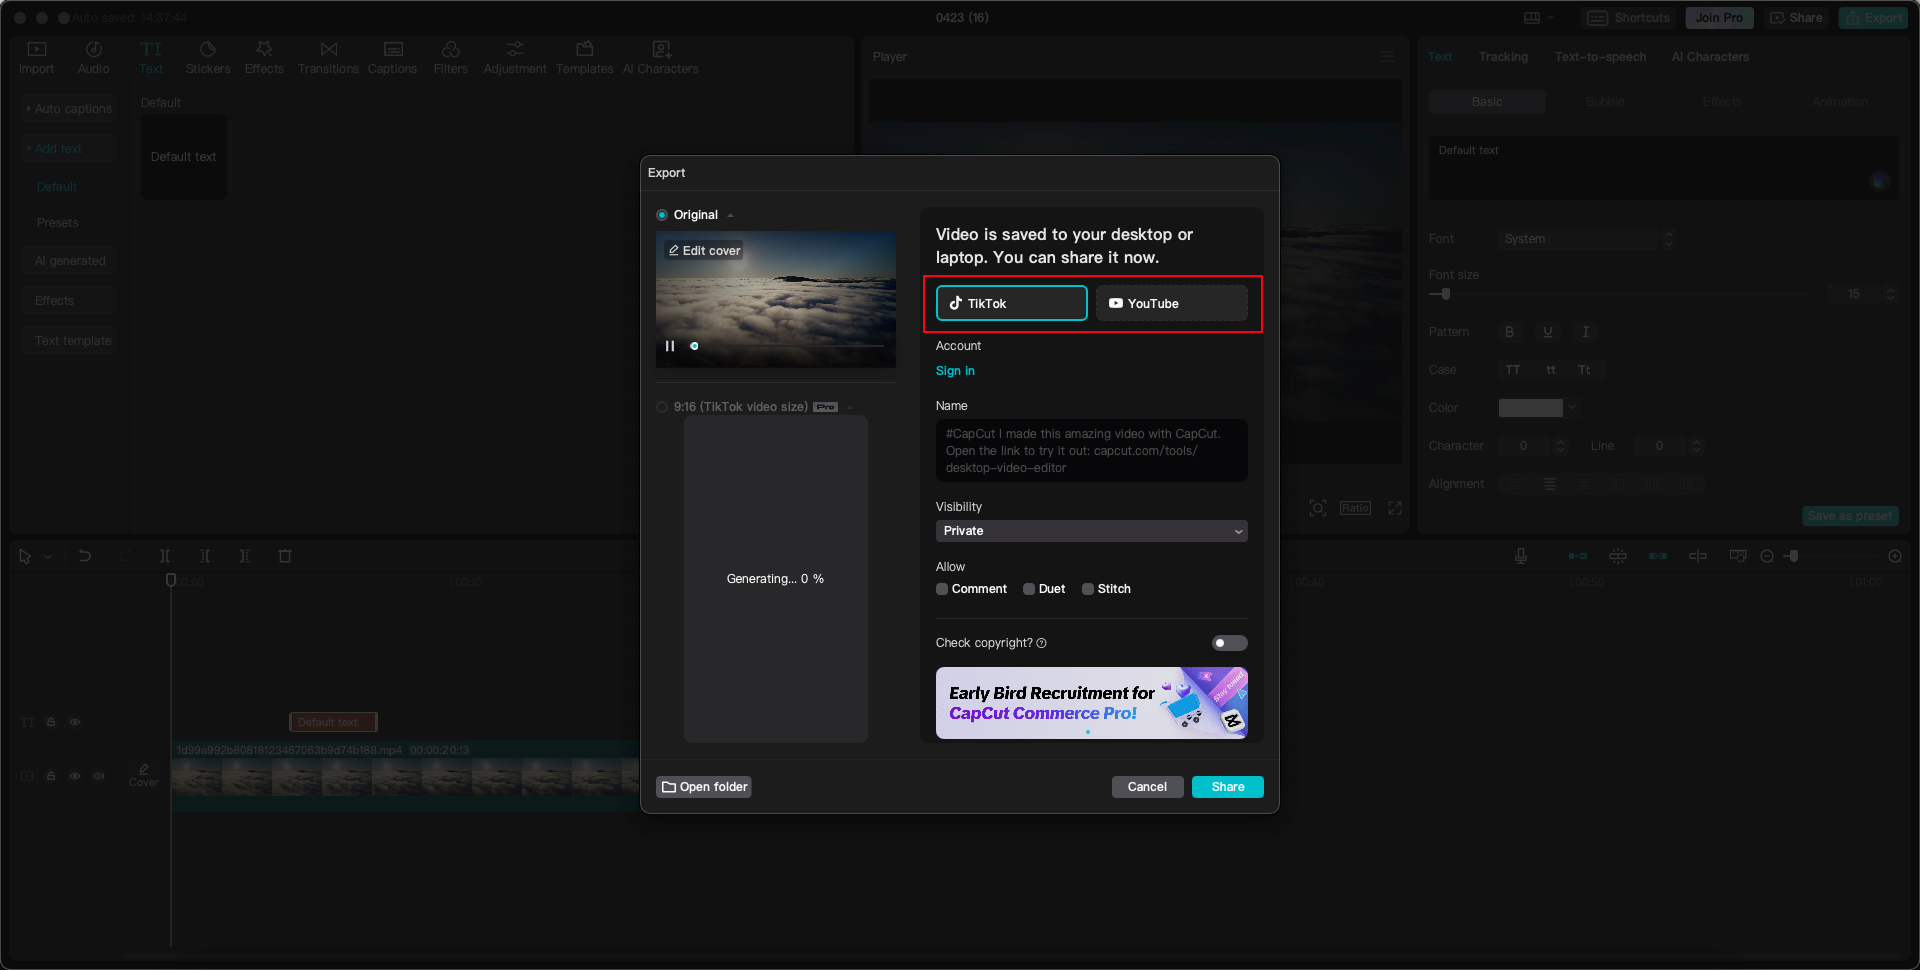
Step 3: Export and Share
Once you’re done masking in CapCut, it’s time to share your work. Click “Export” in the top right.
Choose your video’s quality and format—high res for YouTube, smaller for Instagram. Export and save to your computer or CapCut’s cloud.
You can even share directly to TikTok or YouTube from CapCut. Makes the whole process fast and easy.
CapCut — Your all-in-one video & photo editing powerhouse! Experience AI auto-editing, realistic effects, a huge template library, and AI audio transformation. Easily create professional masterpieces and social media viral hits. Available on Desktop, Web, and Mobile App.
Wrapping Up
So there you have it—you don’t need expensive or complicated software for pro-level masking. Learning how to mask in CapCut is easy, free, and delivers amazing results.
The masking CapCut tool is powerful yet simple. It unlocks your creativity and makes your videos look pro-edited. With extra features like cloud storage, collaboration, and AI tools, CapCut is a top choice for all your video editing. Why pay when you can get the same quality for free?
Frequently Asked Questions
What is a mask in video editing?A mask lets you select a specific part of a video. Any changes you make affect only that area, not the whole clip. It’s used for highlighting, hiding, or creative edits.
How can I mask a moving object effectively?Use keyframes. Place a mask over the object at the start and set a keyframe. Move forward in time, reposition the mask, and set another keyframe. The software moves it for you. Masking CapCut moving objects is easy with its keyframing tools.
Is CapCut good for beginners?Definitely! CapCut is user-friendly. The interface is clean, and tools like masking are simple to use. It’s great for beginners because it has both basic and advanced features. Following a tutorial on how to mask in CapCut is a perfect way to start.
Some images sourced from CapCut.