TOOL HUNTER

If you’re into making videos, there’s a good chance you’ve come across CapCut. It’s this really cool video editing software that doesn’t cost a thing and comes loaded with tons of features. A lot of folks are searching for a simple way to get CapCut on their computers, particularly if they’re running Windows 10. The great news is, it’s actually pretty straightforward! In this guide, I’m going to show you all the steps you need to download, install, and begin using CapCut on your PC.
No matter if you’re editing just for fun, for a school assignment, or even for your YouTube channel, CapCut is a solid pick. It’s easy to use and comes with handy tools like removing backgrounds, editing audio, and heaps of free music and effects. And yes, you can use it without any annoying watermarks on your final videos.
I’ll also cover the online version of CapCut, which is perfect if you want to test it out before committing to a download. By the time you finish reading, you’ll know exactly how to get going with CapCut on your Windows 10 machine.
Table of Contents
- Understanding CapCut and Its Benefits on PC
- Things to Consider Before You Download CapCut for PC on Windows 10
- Steps to Download and Install CapCut for PC on Windows 10
- Is CapCut Really Free on PC?
- Trying CapCut Online Video Editor Without Downloading
- How to Use the CapCut Online Video Editor
- Getting the Most Out of CapCut on Your PC
- Wrapping Up
- Frequently Asked Questions
Understanding CapCut and Its Benefits on PC
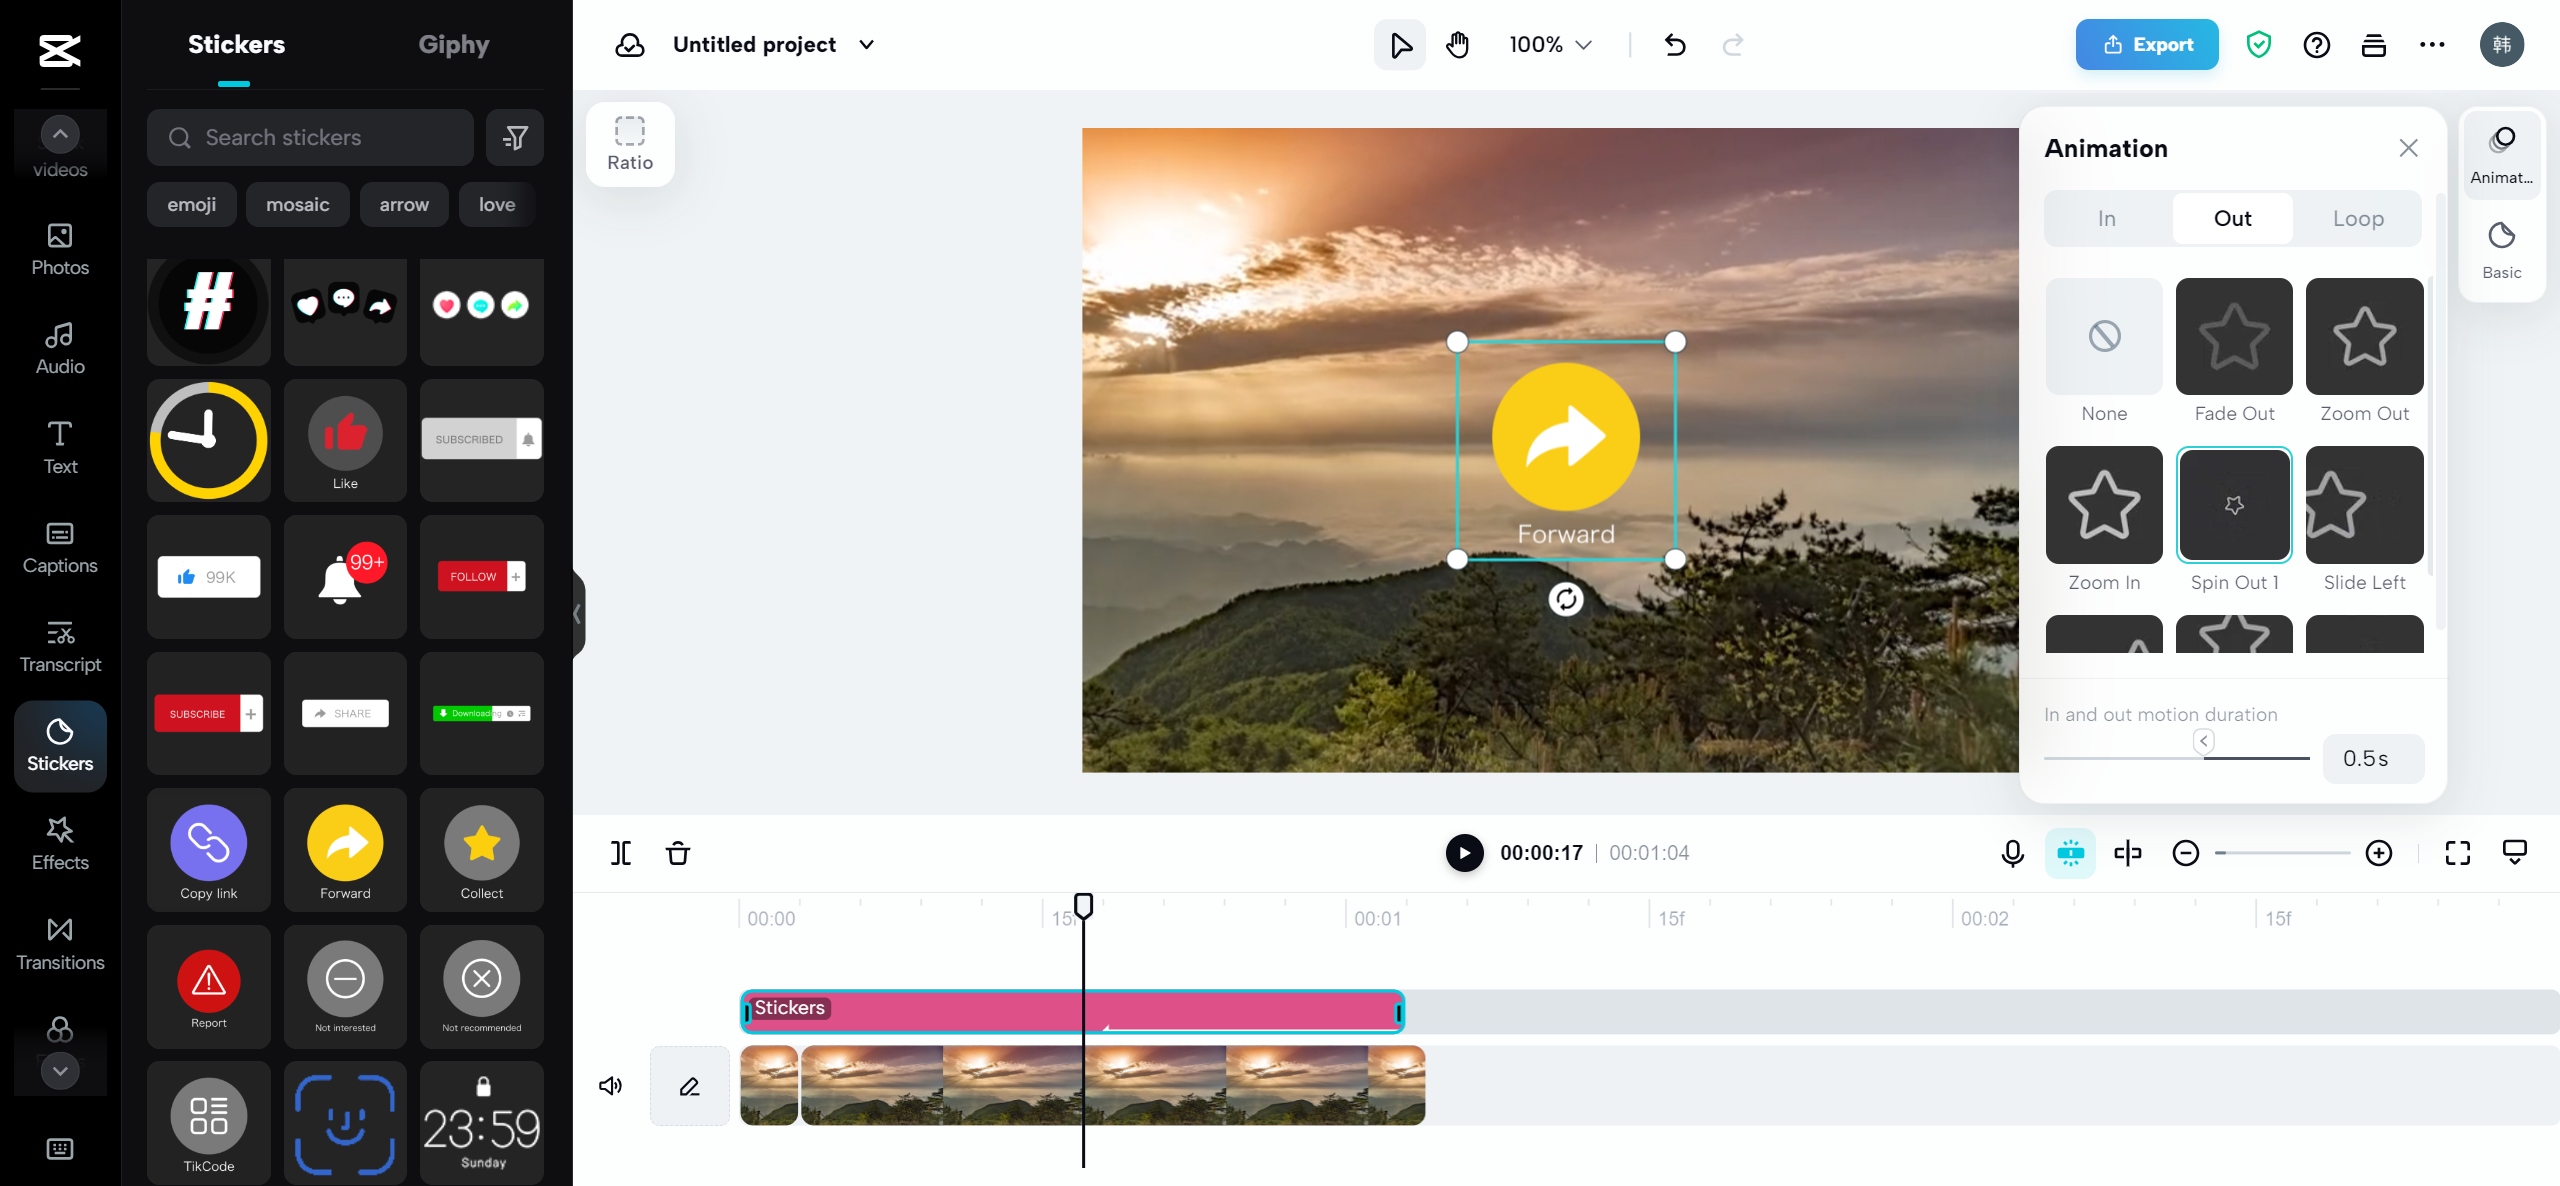
CapCut is a free video editing application created by ByteDance, the folks behind TikTok. Originally, it was just for mobile, but now there’s a full desktop version available. This means you get to work on a bigger screen, with more precision, and generally better performance when you’re editing on a computer.
And the best part? CapCut is totally free. Unlike some other editors out there, it doesn’t slap an ugly watermark on your videos when you export them. That’s a huge plus if you want your content to look professional.
With CapCut, you can trim and cut clips, add music and text, use transitions, and apply special effects. The desktop version also lets you export in higher resolutions, which is awesome for projects meant for social media or other platforms.
More and more people are looking up “capcut for pc download windows 10” because they want a powerful editing tool that’s also free. And honestly, CapCut really delivers on that front.
Things to Consider Before You Download CapCut for PC on Windows 10
Before you jump into the download, there are a few things you should think about. These tips will help ensure everything goes smoothly and you get the most out of the software.
First off, check that your computer meets the system requirements. CapCut isn’t extremely heavy, but it runs best if you have a decent graphics card. That’s because the software uses your GPU to speed up rendering effects and previews. If your PC is a bit older or has basic specs, it might not run as smoothly.
You don’t need a top-of-the-line gaming PC, but having a dedicated graphics card will make your editing experience a lot better. Also, make sure you have enough storage space for both the app and your video files.
Another tip: if you’re not sure whether you’ll like CapCut, try the online version first. It’s called CapCut Online Video Editor, and it lets you do basic edits right in your web browser—no installation required! This is a great way to test out some features and see if you’re comfortable with the interface.
Lastly, keep in mind that CapCut offers free templates for platforms like TikTok, Instagram, and YouTube. These can save you a ton of time. Once you finish your capcut download for pc, be sure to check out those templates to make your videos more engaging without starting from zero.
Steps to Download and Install CapCut for PC on Windows 10
Now, let’s get into the main event: how to actually download and install CapCut on your Windows 10 computer. It’s a simple process, and I’ll walk you through each step.
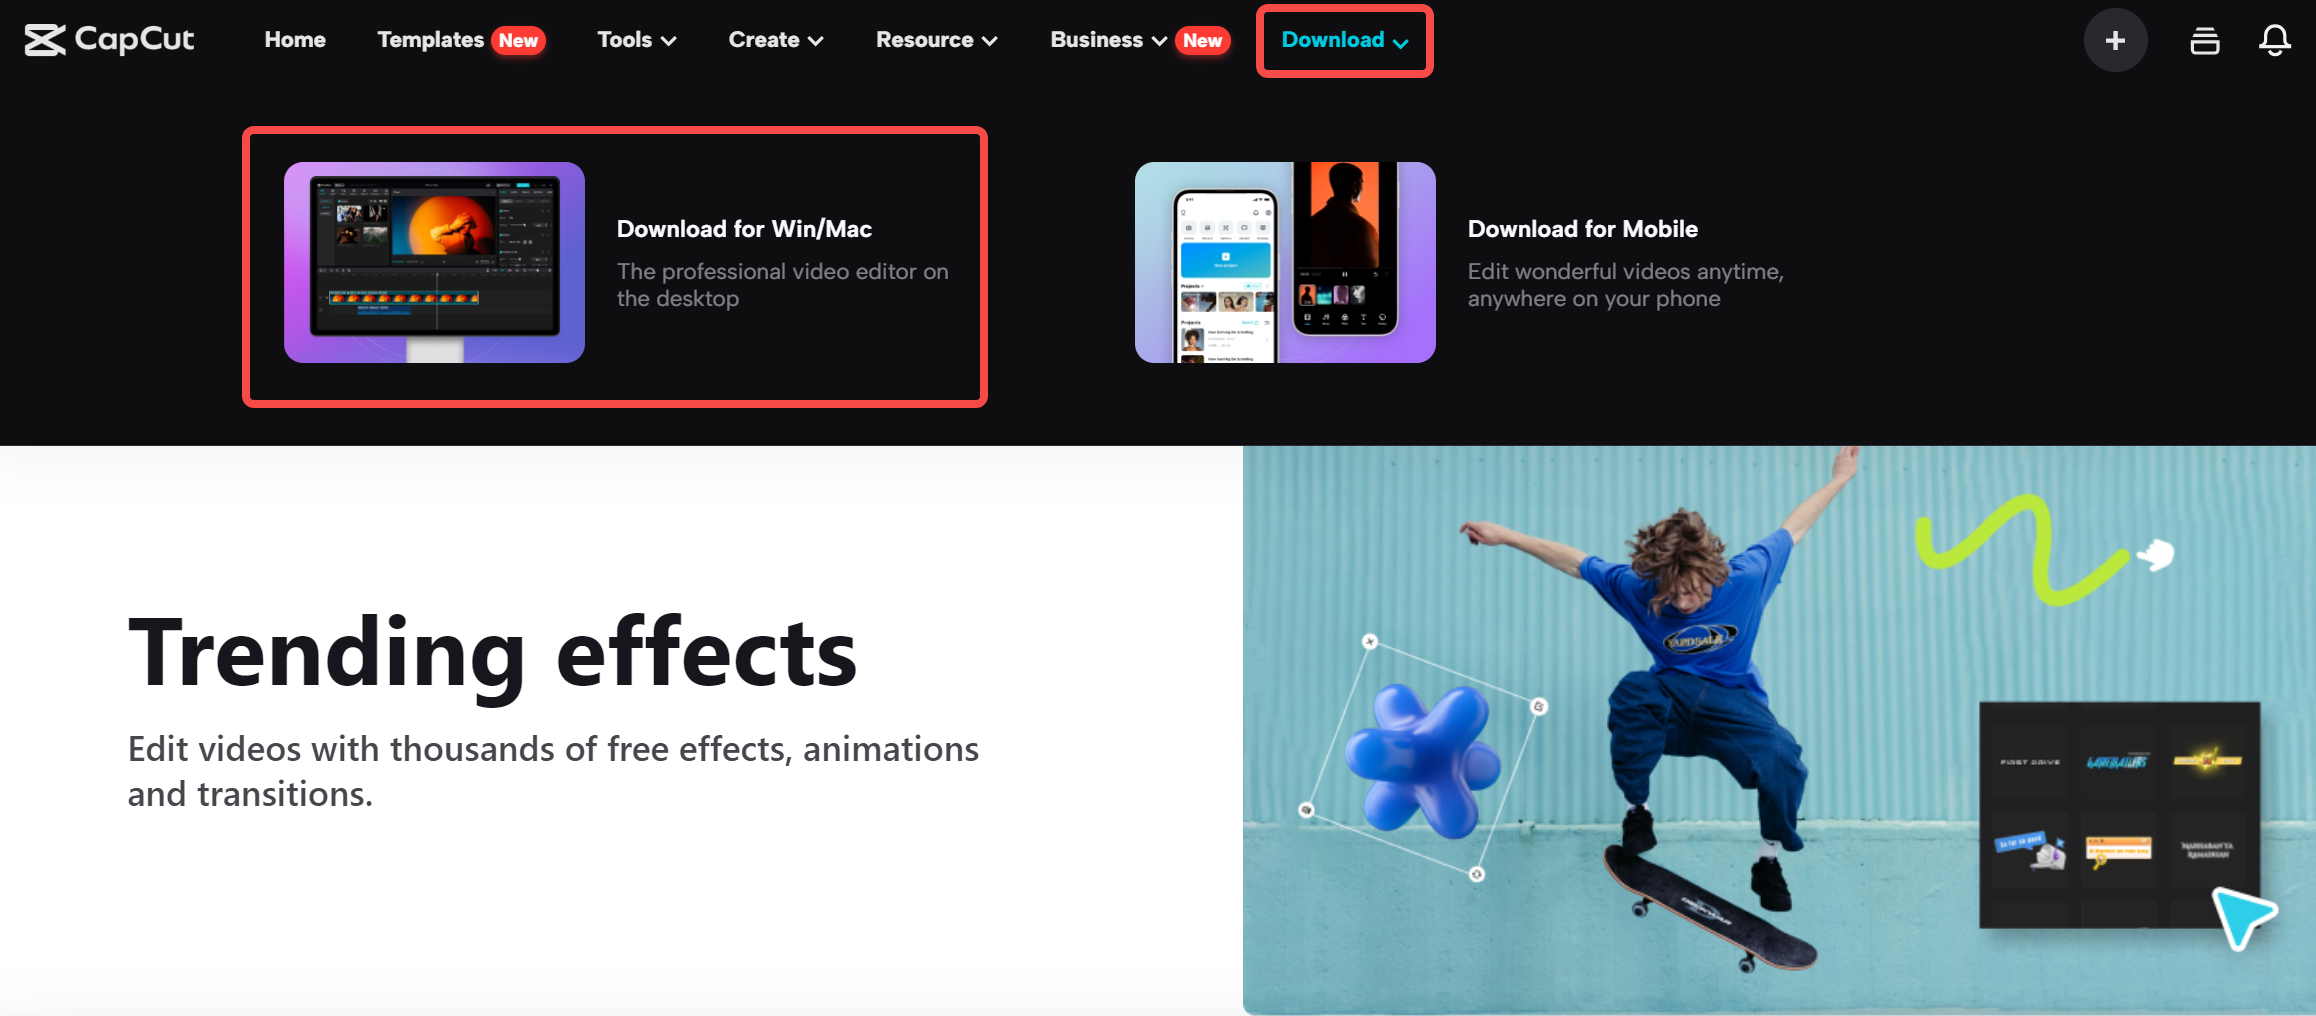
First, open your web browser and head to the official CapCut website. You can search for “CapCut official website” on Google or type in the URL directly if you know it. Just be careful to avoid third-party sites to make sure you’re getting the safe, official version.
Once you’re on the website, look for the download section. There should be an option to download for Windows or Mac. Since you’re on Windows 10, click on the Windows version.
After you click the download button, the installer file will start downloading. It’s usually named something like “CapCutSetup.exe”. The file isn’t too large, so it shouldn’t take long.
When the download is done, find the file in your Downloads folder and double-click to run it. Your computer might ask for permission to make changes—just go ahead and click Yes.
Next, the installation wizard will pop up. Follow the instructions on the screen. You can choose where to install CapCut, but the default location is usually fine. The whole process only takes a minute or two.
Once the installation is complete, you can open CapCut from your Start Menu or Desktop. The first time you launch it, you might need to sign in. If you already have a CapCut account (like from the mobile app), you can use those details. If not, you can create a new account quickly.
And that’s it! You’re all set to start editing. The interface is clean and easy to navigate, so don’t be shy about exploring.
Is CapCut Really Free on PC?
A lot of people wonder: is CapCut free on PC? The answer is yes! CapCut is completely free, both the desktop and online versions. There are no hidden charges or subscriptions.
Even better, there’s no watermark. When you finish editing and export your video, it’ll look clean and professional. This is one of the biggest advantages over many other free editors out there.
You get access to almost all the features without spending a dime. That includes advanced tools like keyframing, color correction, speed adjustment, and even some AI-powered effects.
So if you were worried about the cost, don’t be. CapCut is genuinely free, and it’s one of the best options available for both beginners and intermediate users.
Trying CapCut Online Video Editor Without Downloading
Maybe you’re not ready to download software, or you just need to make a quick edit on someone else’s computer. That’s where the CapCut Online Video Editor comes in handy.
The online version is fantastic because you can use it directly in your browser. It’s also free, and you don’t even need to create an account to start using it (though signing up unlocks more features).
One really cool thing about the online editor is that it supports cloud storage. This means you can save your projects online and access them from any device. It also allows you to collaborate with others—perfect for team projects or school assignments.
You still get plenty of editing tools: trimming, cutting, adding text, music, and even some nice transitions. It’s not as powerful as the desktop version, but it’s ideal for simpler projects or when you’re in a rush.
Plus, if you’re new to video editing, the online editor is a great place to start. You can learn the basics without installing anything.
How to Use the CapCut Online Video Editor
Using the online version is pretty straightforward. Here’s a quick rundown of how it works.
First, go to the CapCut website and find the online editor. Click on “Edit Online” or a similar option.
You’ll see a button that says “Create New” or “New Project”. Click that.
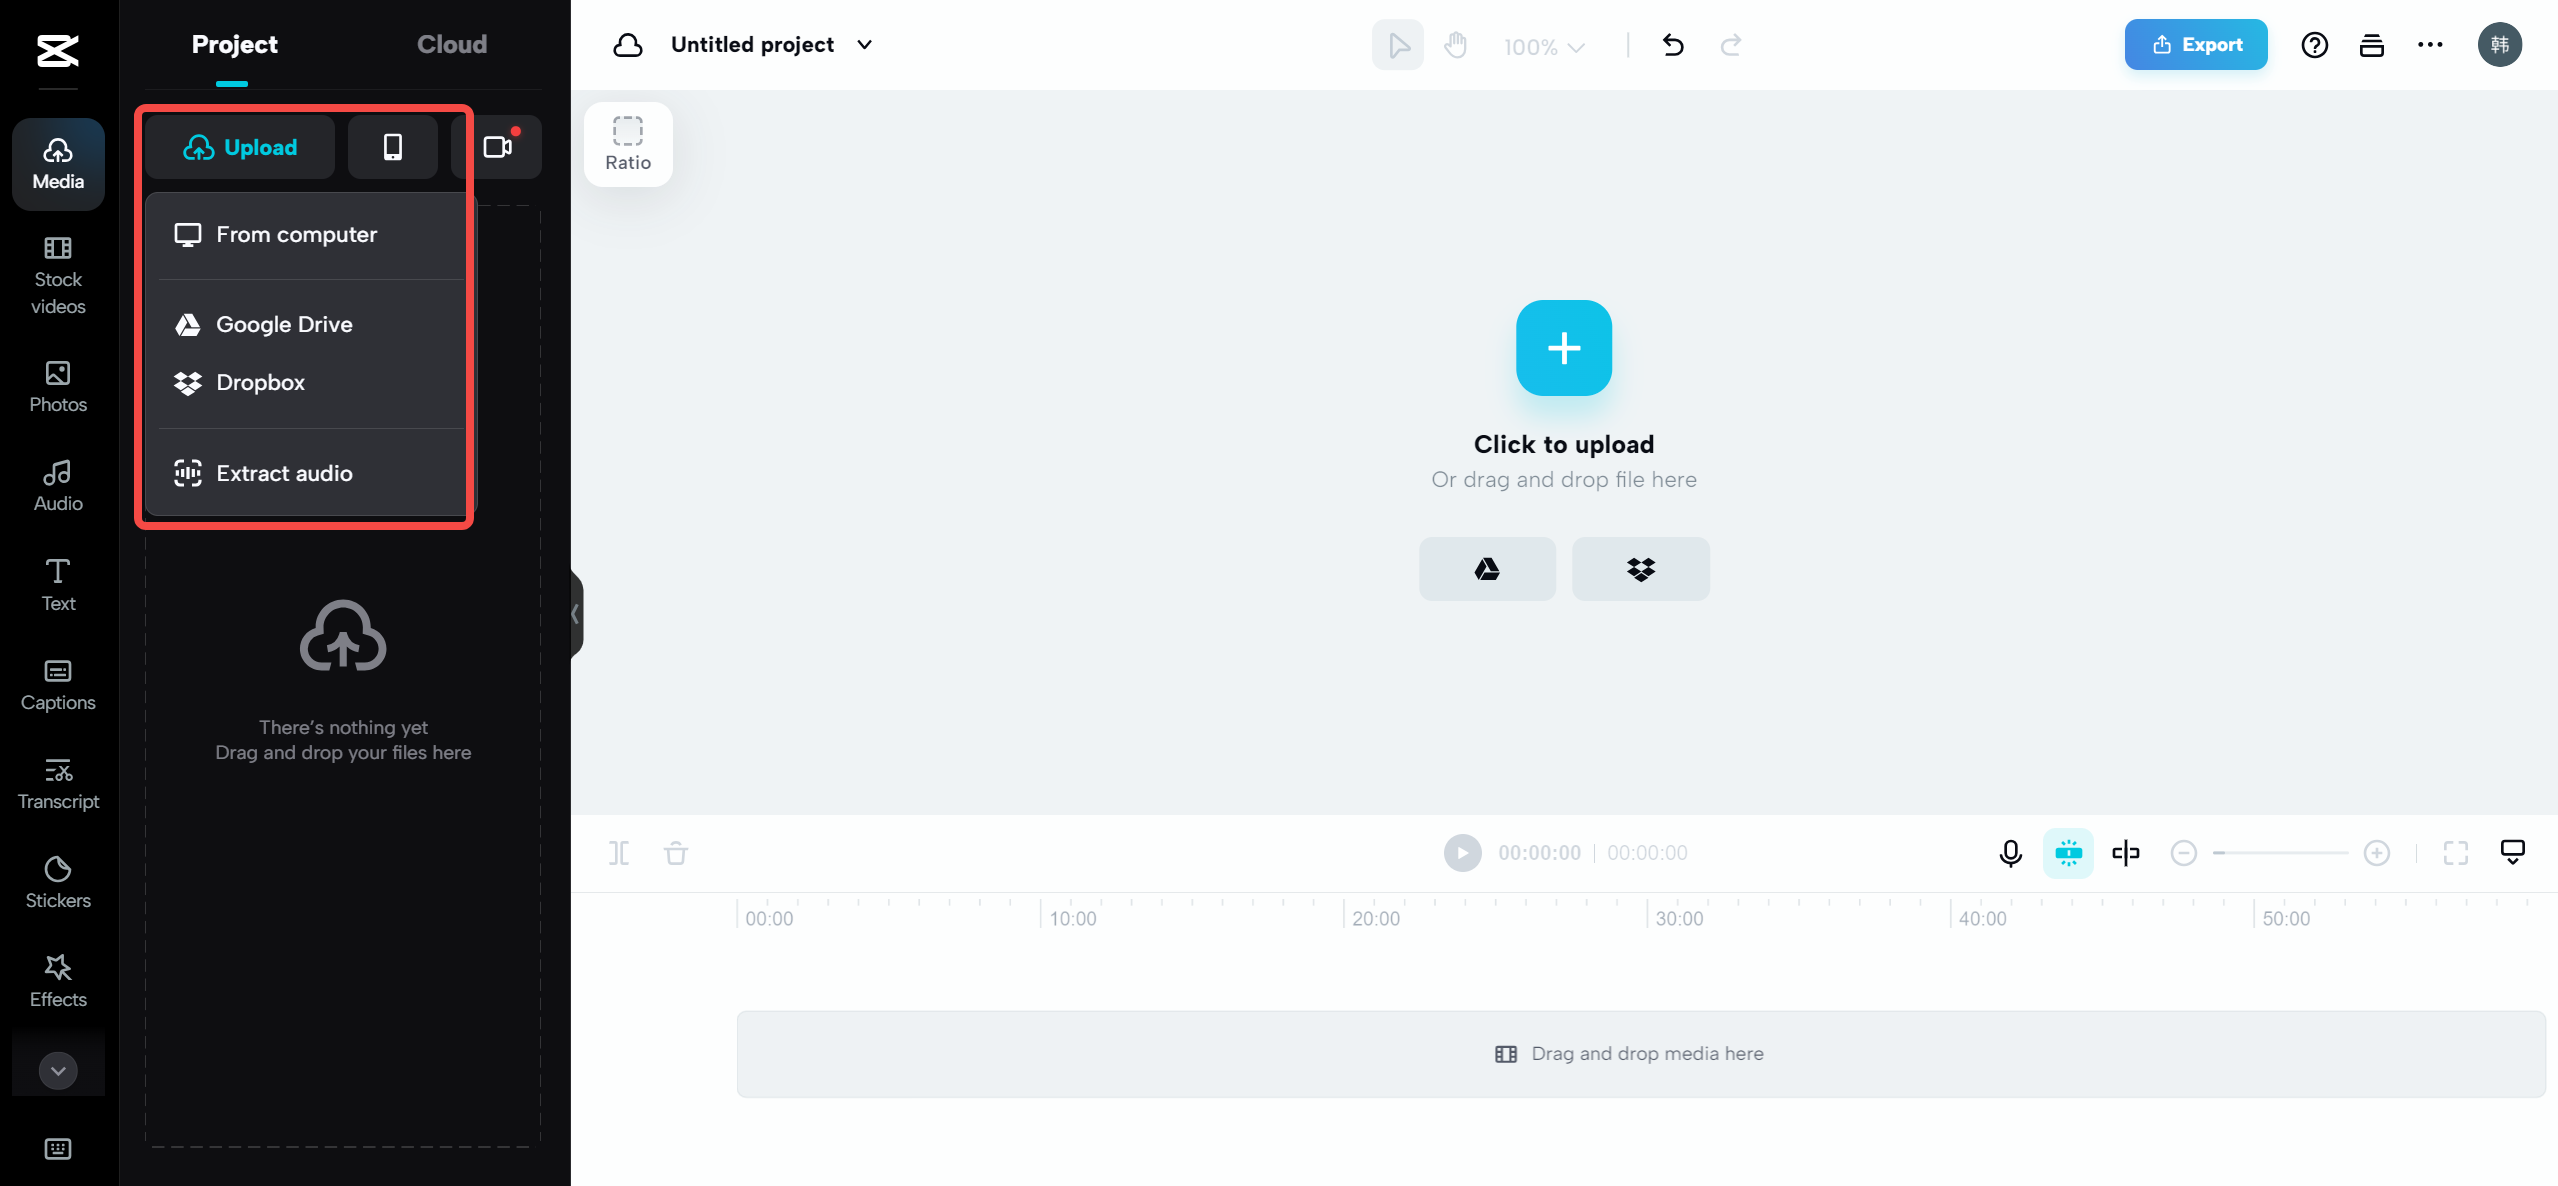
Now, you need to upload your video clips. You can import from your computer, your phone (using a QR code), or even from cloud storage like Google Drive or Dropbox.
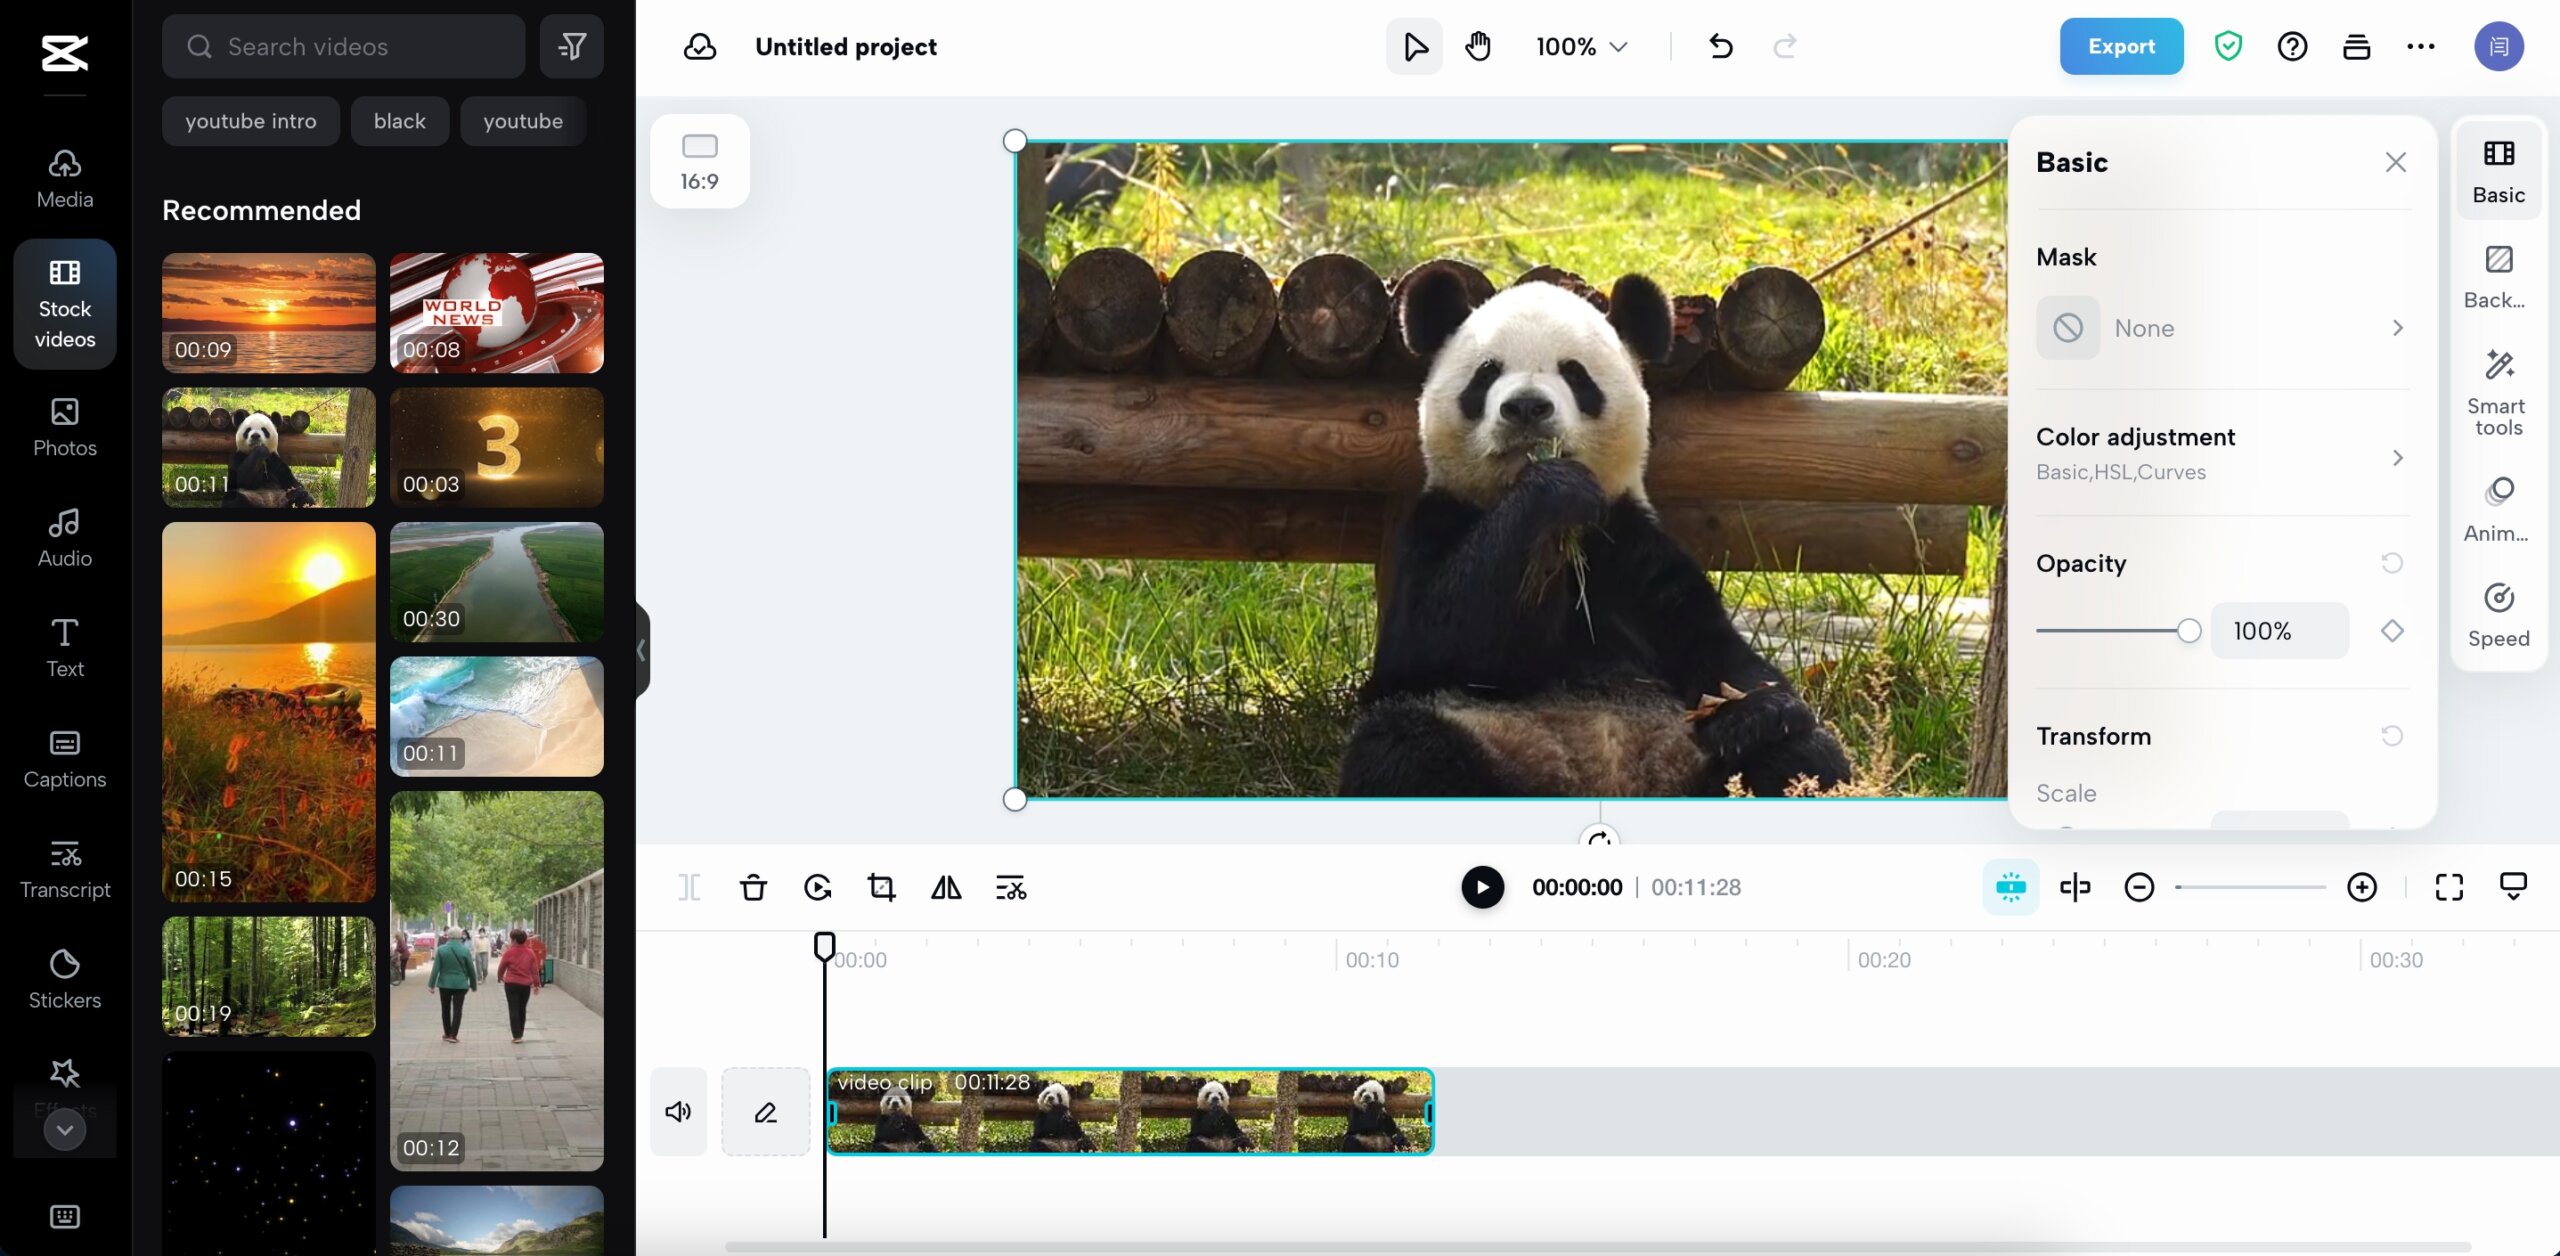
Once your media is uploaded, you can drag and drop clips into the timeline. From there, you can cut, trim, add text, music, stickers, and more.
There’s also a neat feature called “AI Text to Voice” that can automatically create voiceovers from your text. This is great for tutorials or storytelling videos!
When you’re done, you can export the video in various qualities. You can save it to your device or share it directly on social media.

Getting the Most Out of CapCut on Your PC
Once you have CapCut installed, there’s so much you can do. Here are some ideas to help you get started.
Try using the preset templates. These are designed for different social media platforms and can make your videos look polished with minimal effort.
Experiment with the speed controls. You can create slow-motion videos or speed up boring parts easily.
Don’t forget about the audio tools. You can add background music, voiceovers, and even adjust the volume of different clips.
If you’re feeling creative, play around with the effects and filters. CapCut has a lot of them, and they’re really fun to use.
Remember, the more you use CapCut, the more comfortable you’ll become. So don’t hesitate to try new things.
Wrapping Up
So there you have it—a complete guide on how to get CapCut for your Windows 10 PC. Whether you opt for the desktop version or the online editor, you’re getting a powerful, free tool that can help you create amazing videos.
The process for capcut download windows is simple and safe if you follow the steps above. And since it’s free without watermarks, there’s really no reason not to give it a try.
I hope this article was helpful. Happy editing!
Frequently Asked Questions
How do I download CapCut for Windows 10?
Just go to the official CapCut website, find the download section, and choose the Windows version. Follow the installation steps, and you’re all set!
Is CapCut available for PC?
Yes! CapCut is available for PC. You can download it for Windows 10 and use it just like the mobile app, but with more features.
Is CapCut free on PC without a watermark?
Absolutely. CapCut is completely free, and it doesn’t add any watermark to your exported videos. You can use all the features without paying anything.
Some images courtesy of CapCut.