TOOL HUNTER

Ever notice how some videos just look more polished and professional than others? A big part of that comes down to color. Whether you’re editing travel vlogs, short films, or social media clips, understanding how to work with color can completely transform your footage. But here’s the thing—a lot of people mix up two key processes: color correction and color grading. They sound similar, but they’re actually totally different steps in the editing workflow.
In this guide, we’re going to break down exactly what each one means, when to use them, and how you can do both using CapCut—a free, user-friendly desktop video editor that’s perfect for beginners and pros alike. So let’s dive in!
Table of Contents
What Exactly is Color Correction and Color Grading?
If you’re new to video editing, it’s easy to get confused between these two terms. Don’t worry—you’re definitely not alone. Lots of beginners use them interchangeably, but they serve completely different purposes. Let’s clear things up.
So, What is Color Correction Anyway?
Think of color correction as the “fix-it” stage of editing. It’s all about making your footage look natural and consistent. When you shoot video, sometimes the lighting isn’t perfect, or your camera settings might be off. This can result in footage that’s too dark, too bright, or has weird color tints (like when everything looks slightly blue because you filmed under fluorescent lights).
Color correction involves adjusting basic elements like exposure, contrast, and white balance to make your video look the way our eyes see things in real life. It’s like preparing a canvas before you start painting—you want a clean, neutral base before adding any creative touches. That’s why color correction always comes first.
When Should You Actually Use Color Correction?
You’ll want to use color correction in several situations:
- When your footage is too dark or too bright
- When colors look unnatural due to lighting conditions
- When you’re combining clips from different cameras or shot at different times
- Before you start any color grading work
It’s super helpful for making all your clips match so your final video looks smooth and consistent.
Okay, Then What’s Color Grading?
Once your footage is corrected and looking natural, it’s time for color grading—the fun, creative part! Color grading isn’t about fixing problems; it’s about setting a specific mood or style for your video. This is where you can make a scene look warm and sunny, cold and gloomy, vintage, futuristic—pretty much anything you want.
Filmmakers and content creators use color grading to make their work stand out and to help tell their story by influencing how viewers feel. And with tools like CapCut, color grading has become accessible to everyone, not just Hollywood professionals.
When Should You Use Color Grading?
Use color grading when you want to:
- Give your video a specific emotional feel or style
- Create consistency across different scenes
- Highlight certain elements (like making skies bluer or clothing pop)
- Make your project look more cinematic or artistic
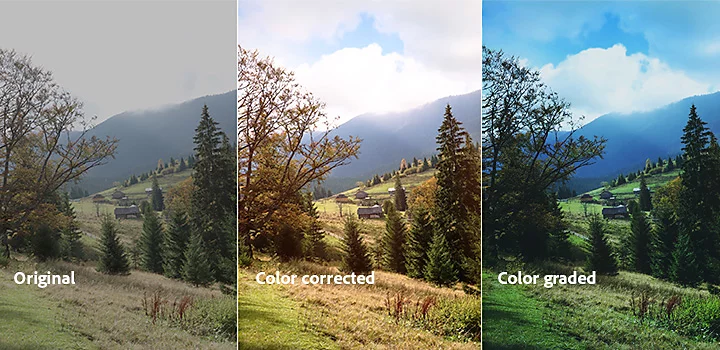
Seeing is Believing: Before and After Examples
Sometimes it’s easier to understand these concepts when you can see them in action. Let’s look at some real examples of what color correction and color grading can do for your footage.
Color Correction Before and After
Imagine you have a photo or video clip where the colors just don’t look right. Maybe everything has a slight yellow tint, or the image looks flat and dull. This is where color correction comes to the rescue.
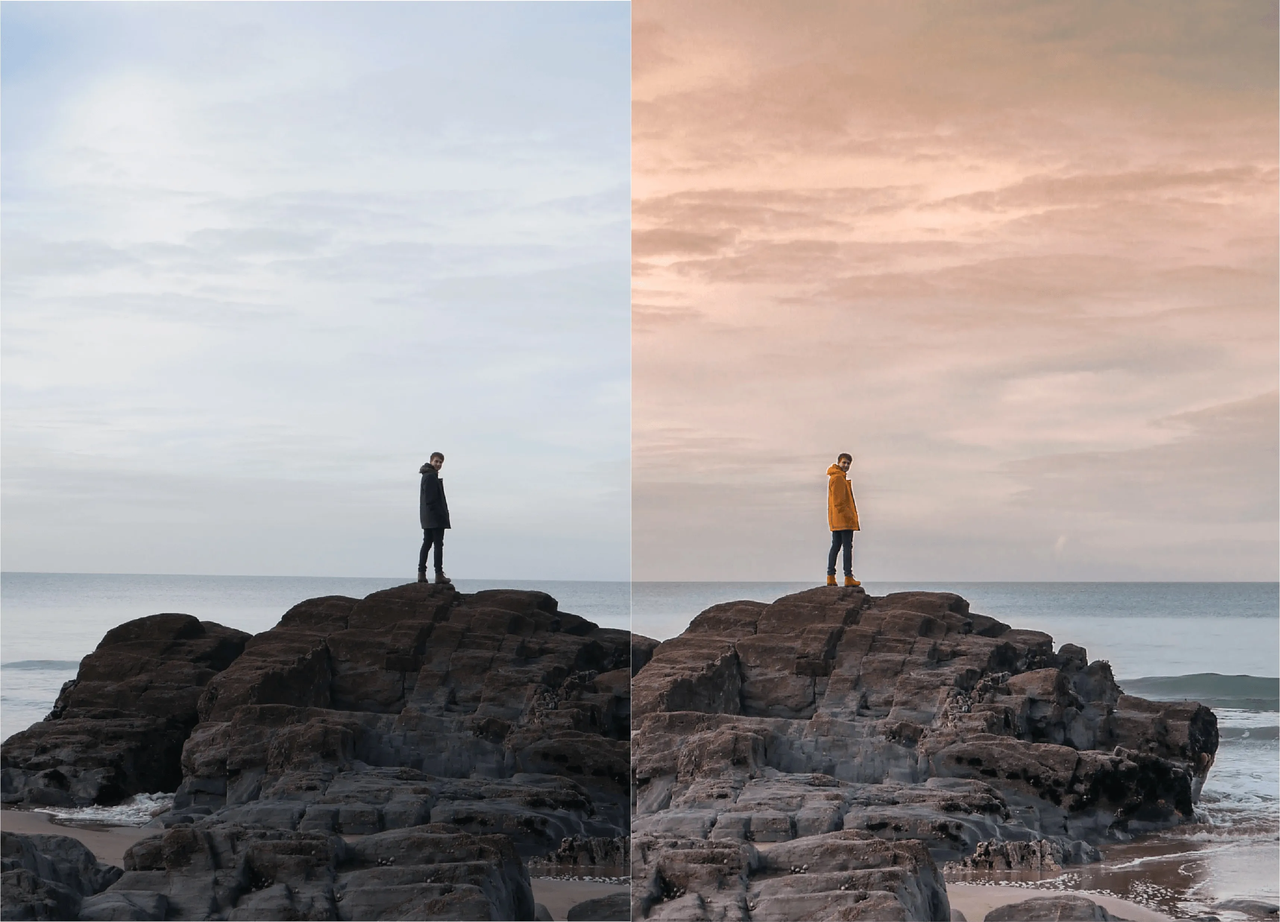
In the “Before” image below, you can see the colors aren’t as vibrant as they could be. The overall tone feels unbalanced, and the image doesn’t look very natural.
Now check out the “After” image. After color correction, the colors are much more balanced. Whites look whiter, blacks look deeper, and everything appears clearer and more natural. It’s like the difference between looking through a dirty window and a clean one—suddenly everything looks how it’s supposed to.
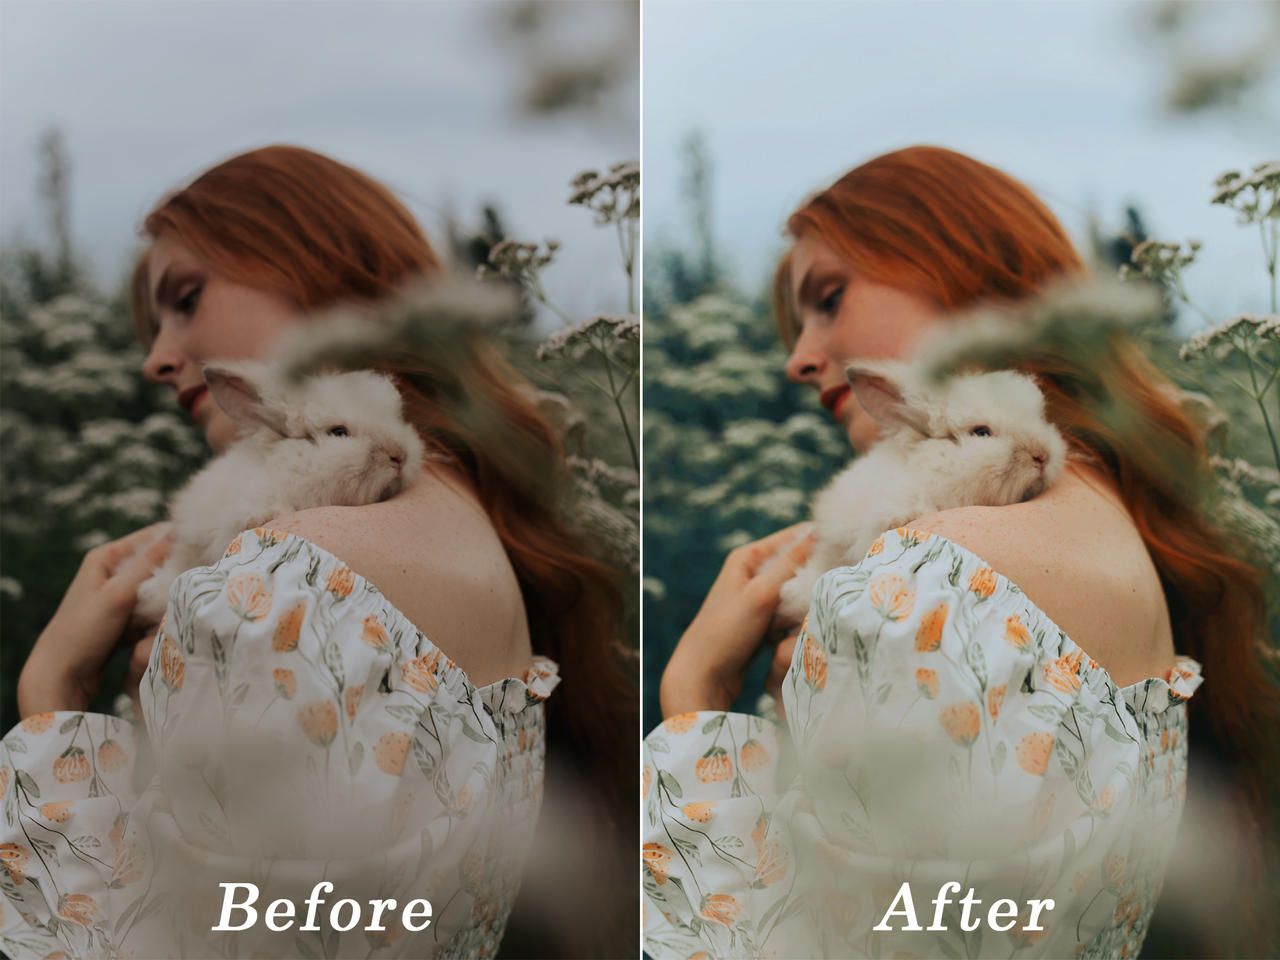
Color Grading Before and After
Now let’s look at color grading. After color correction, your footage looks good—natural and balanced—but it might not have any particular mood or style. That’s where color grading comes in.
In the “Before” image below, the colors are neutral and natural-looking. It’s fine, but it doesn’t really evoke any specific feeling or atmosphere.
Now look at the “After” image. With color grading, the colors have been transformed to create a warm, sunset-like feeling. The sky has a pinkish tone, and the whole image feels more emotional and artistic. This is the magic of color grading—it takes good footage and makes it great.
How to Actually Do Color Correction and Color Grading
Now that you understand the difference, let’s talk about how you actually do these processes. We’ll go through the main techniques for both color correction and color grading.
Color Correction Techniques
Color correction is all about fixing technical issues. Here are the main things you’ll typically do:
First, you’ll adjust exposure and contrast. If your video is too dark or too bright, exposure adjustment balances the overall light level. Contrast control adds depth by enhancing the difference between light and dark areas, making details stand out better.
Next comes white balance adjustment. This ensures that white objects actually appear white, not blue or yellow. It’s especially important when you’ve shot under different lighting conditions.
You’ll also want to fix any color casts and adjust skin tones. Color casts occur when your whole footage has an overall tint (like everything looking slightly blue). Removing these ensures colors look natural. Adjusting skin tones is crucial for videos with people—you want everyone to look healthy and natural, not weirdly orange or pale.
Saturation and vibrance control help manage how intense colors appear. Saturation affects all colors equally, while vibrance specifically boosts the less dominant colors, preventing oversaturation.
Finally, noise reduction and sharpening can clean up your footage. Noise reduction removes graininess, while sharpening enhances clarity and makes edges crisper.
Color Grading Techniques
Color grading is where you get to be creative. Here are some common techniques:
Creating color themes and styles involves selecting specific color palettes to give your video a unique look. Maybe you want cool blue tones for a sci-fi feel, or warm, earthy colors for a vintage look.
Selective color adjustments let you change specific colors without affecting others. You can make the sky bluer, or make someone’s shirt pop more.
Adding film grain or textures can give your project a vintage or cinematic look, making digital footage resemble actual film.
Color bleeding and light effects involve blending colors and adding light flares or glows to create dreamy or surreal atmospheres.
Finally, you’ll want to ensure consistency across all your clips. This means making final adjustments so everything has a cohesive look from start to finish.
Using LUTs for Both Processes
You might have heard of LUTs (Look-Up Tables). These are basically presets that automatically apply a set of color adjustments to your footage. They can save you tons of time!
There are different types of LUTs for different purposes. Some are designed for color correction—like fixing log footage from professional cameras. Others are for color grading—like giving your video a specific cinematic look.
You can find LUTs online or create your own. Many editors use LUTs as a starting point, then make additional adjustments to get exactly the look they want.
The great thing about CapCut is that it makes applying LUTs super simple, which really streamlines your color grading workflow.
CapCut — Your all-in-one video & photo editing powerhouse! Experience AI auto-editing, realistic effects, a huge template library, and AI audio transformation. Easily create professional masterpieces and social media viral hits. Available on Desktop, Web, and Mobile App.

Why CapCut Desktop is Perfect for Both Color Correction and Grading
If you’re looking for software that can handle both color correction and color grading in one place, CapCut desktop video editor is an excellent choice. It’s designed to be user-friendly, so even beginners can achieve professional-looking results.
With CapCut, you can do everything from basic color fixes to advanced creative grading. You can adjust exposure, white balance, and contrast for color correction, then use tools like curves and color wheels for color grading. Applying LUTs is just a few clicks away.
One of the best things about CapCut is that everything is in one place. You don’t need to switch between different apps or tools. Whether you’re doing color correction in CapCut or exploring color grading on CapCut, all the features you need are right there.
Key Features That Make CapCut Stand Out
CapCut offers several features that make it great for color work:
You can achieve exactly the color levels you want by fine-tuning your footage until it looks just right. This attention to detail really enhances your final product.
It offers both basic and advanced color adjustment tools. You get simple sliders for temperature and hue, plus advanced options like HSL curves, color wheels, and even AI color correction for quick fixes.
Maintaining a consistent visual tone across scenes is easy with CapCut, which is especially important for longer projects like short films or vlogs.
The color editing tools are user-friendly and intuitive. Whether you’re a beginner or an expert, you can achieve professional-quality results without a steep learning curve.
How to Actually Correct and Grade Colors in CapCut
Let’s walk through the actual steps of using CapCut for color correction and color grading.
First, download and install CapCut desktop video editor if you haven’t already. It’s completely free, so you can start right away.
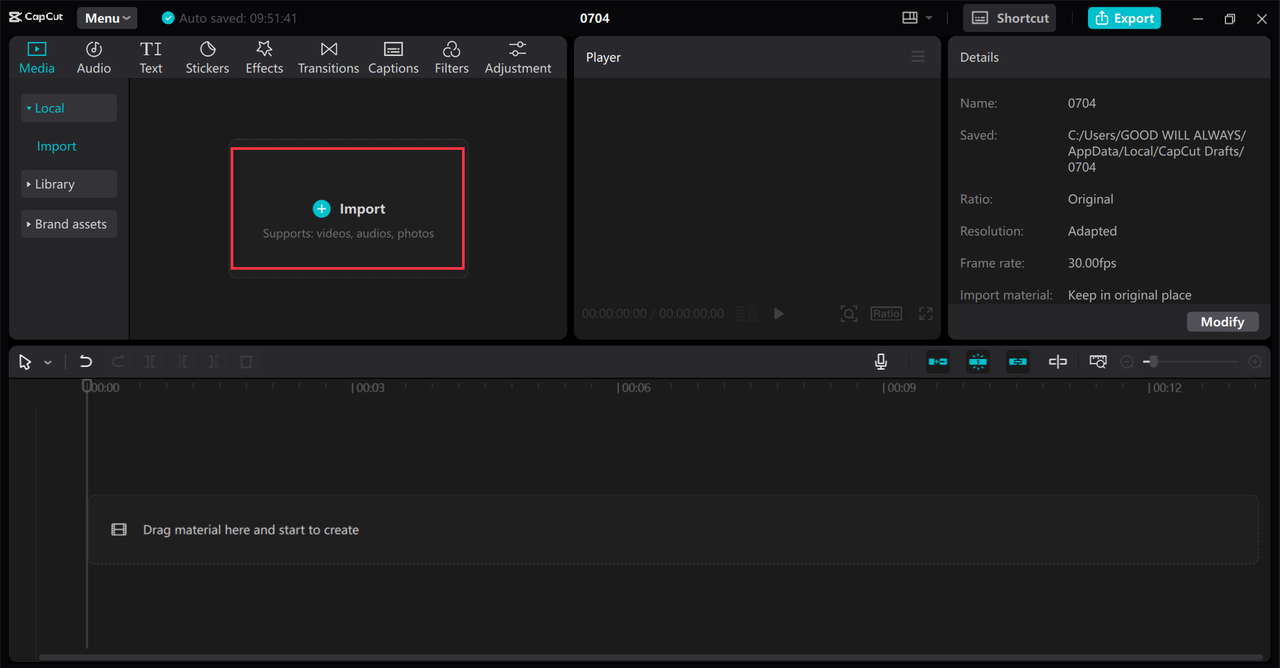
Once you open CapCut, import your video by clicking the “Import” button. You can select one or multiple clips from your computer.
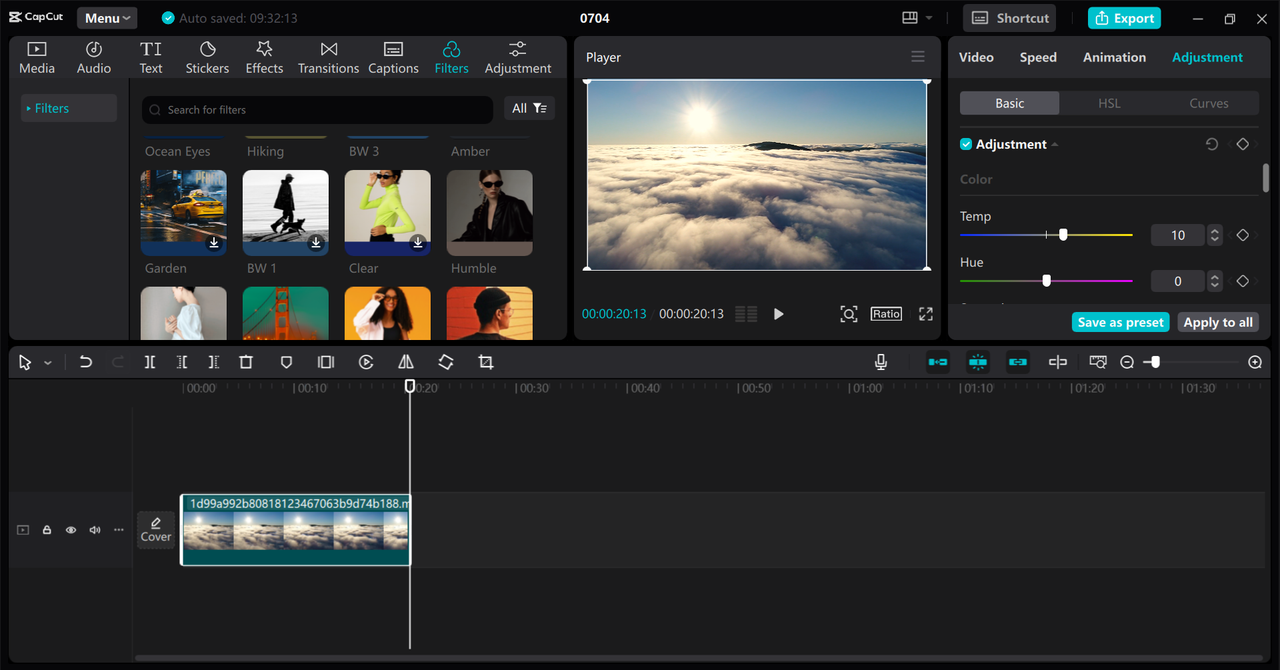
After importing, drag your video to the timeline. Then, go to the “Adjustment” tab in the top right corner. Here you’ll find all the color tools.
For color correction, start with the basic adjustments. Change the exposure if your video is too dark or bright. Adjust the white balance to fix any color tints. Use the contrast slider to add depth. You can also adjust shadows and highlights to bring out details.
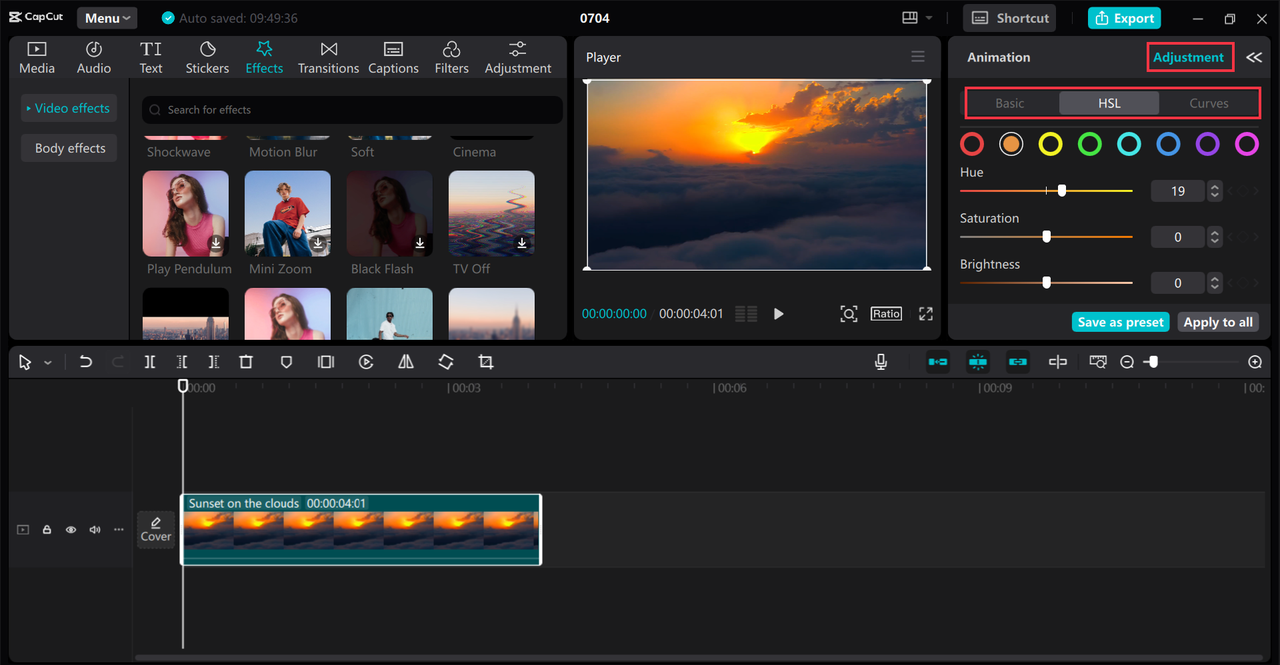
If you want to do more advanced work, explore the other tools. In the HSL section, you can change the hue, saturation, and brightness of individual colors. The curves tool lets you adjust tones with precision. The color wheel gives you control over shadows, midtones, and highlights.
For color grading, you can apply LUTs from the LUT section. CapCut comes with some built-in LUTs, or you can import your own. Even after applying a LUT, you can still make additional adjustments to get the exact look you want.
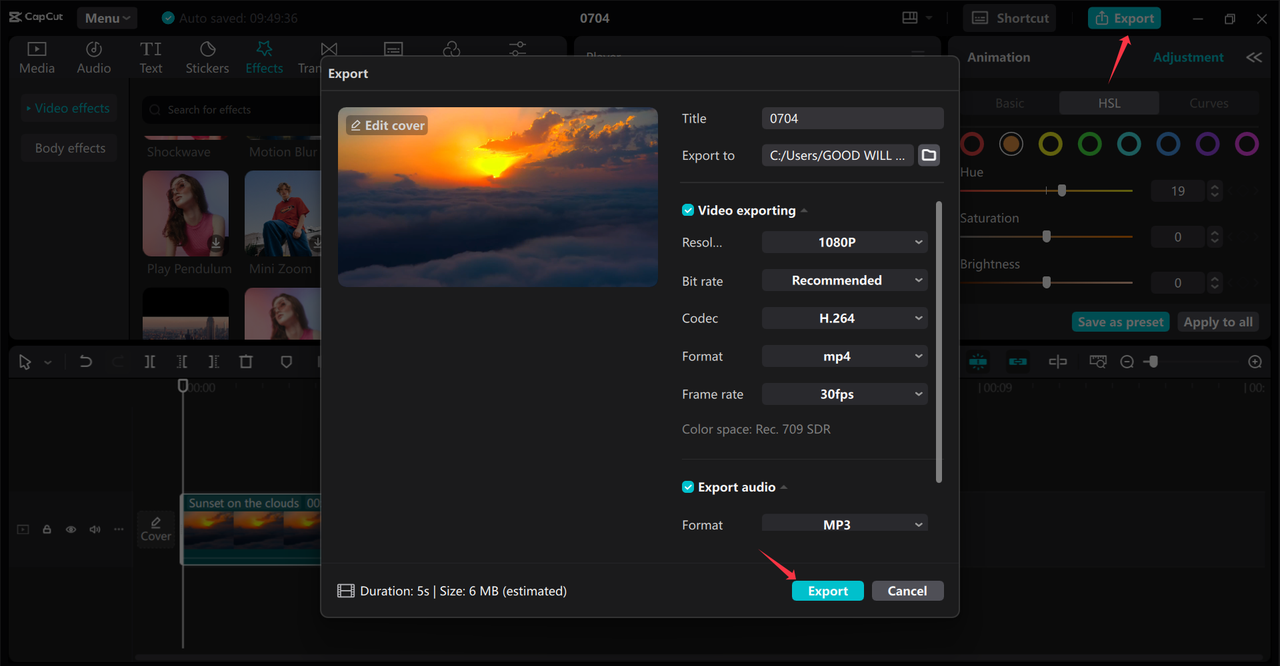
Once you’re happy with your color work, you can export the video. CapCut lets you choose the quality, format, and other settings. You can save it to your computer or share it directly to social media platforms like TikTok and YouTube.
CapCut — Your all-in-one video & photo editing powerhouse! Experience AI auto-editing, realistic effects, a huge template library, and AI audio transformation. Easily create professional masterpieces and social media viral hits. Available on Desktop, Web, and Mobile App.
Wrapping Up
So now you know the difference between color correction and color grading. Color correction is about fixing problems and making your video look natural. Color grading is about being creative and giving your video a unique style or mood.
Both are important steps in video editing, and doing them well can make your projects look much more professional.
With CapCut desktop video editor, you have a powerful yet easy-to-use tool that handles both color correction and color grading seamlessly. Whether you’re just starting out or you’ve been editing for a while, CapCut makes it simple to improve your videos.
So why not give it a try? Download CapCut and start exploring color grading on CapCut today. You might be surprised at how much better your videos can look!
Frequently Asked Questions
What’s the typical workflow for color correction and grading?
The workflow usually starts with color correction. You fix exposure, white balance, and color issues to make your footage look natural. Then, you move on to color grading, where you apply creative looks to set the mood or style. You can do this easily in CapCut, which has all the tools you need in one place.
What’s the difference between color timing and color grading?
Color timing is an older term used in film editing. It refers to adjusting color balance and exposure to make shots consistent. Color grading is a broader term that includes color timing but also adds creative styles. Today, most people use color grading to describe the whole process.
How do I know whether I need color correction or color grading?
You need color correction if your footage has technical issues like incorrect exposure, white balance, or color casts. You need color grading if you want to add a specific look or feeling to your video. Often, you’ll do both—first correction, then grading.
Can I actually do color grading in CapCut?
Absolutely! CapCut is great for color grading. It has advanced tools like curves and color wheels, and you can apply LUTs for quick styles. Whether you’re doing simple adjustments or complex looks, CapCut has you covered.
Is CapCut good for color correction too?
Yes, CapCut is also excellent for color correction. You can adjust exposure, white balance, contrast, and more. It’s a complete tool for all your color editing needs.
Some images courtesy of CapCut