TOOL HUNTER

Imagine finishing a video montage of your kid’s birthday party after hours of editing. You want to send a copy to your aunt, but she only uses her ancient DVD player. Or maybe you’ve recorded some original songs and think how cool it would be to hand out physical CDs at your next gig, just like musicians did back in the day.
Even now, burning discs is surprisingly handy. Windows 10 has tools built right in for basic jobs, but sometimes you need something stronger. Whether it’s about sharing memories, creating music discs, or locking away important files safely offline, knowing how to burn a cd in win 10 is a useful skill. Let’s figure out the best ways to do it!
Why Burning Discs Still Makes Sense Today
Handing Down Family Moments: Think about wedding videos, anniversary celebrations, or those hilarious holiday clips. Burning them onto a DVD means grandparents can watch easily on their player, no complicated tech needed. It’s a physical piece of family history.
Sharing Music the Tangible Way: For bands, solo artists, or just music fans making mixtapes, CDs are still a thing. They work in car stereos, older home systems, and feel more personal than sending a digital link. It’s about the experience.
Your Ultra-Secure Backup Plan: Here’s the big one. Unlike stuff stored online or on your computer, a CD or DVD tucked away in a drawer can’t get hacked, infected by ransomware, or accidentally deleted. Once burned, the data is frozen in time. Keep it cool and dry, and it could last decades. For irreplaceable photos, documents, or that novel you’re writing, it’s a cheap and super reliable safety net.
Getting Ready to Burn: What You’ll Need
Before you start, make sure you’ve got these four things lined up:
- Something to Burn With (Software): Windows 10 has its own basic tool. But for fancy stuff like DVD menus, you’ll want dedicated cd writer software for windows 10 (we’ll cover great options!).
- A Blank Disc: Can’t burn without one! For CDs: CD-R (use once) or CD-RW (reusable). For DVDs: DVD-R/DVD+R (use once) or DVD-RW/DVD+RW (reusable). Match it to your drive.
- A Drive That Can Write: Your computer needs a disc drive that burns, not just plays. Older laptops usually have them built-in. Newer slim ones? You’ll likely need an external USB DVD burner.
- Your Files: The photos, music tracks, documents, or videos you want to put on the disc.
Using Windows 10’s Built-in Burner (No Extra Downloads Needed)
The Free Tool Already on Your PC
The good news? For simple jobs like backing up documents or making a basic music CD, you don’t need anything extra. Windows 10 includes a disc burner.
Step-by-Step: Burning with Windows
- Power Up: Start your Windows 10 computer.
- Pop in the Blank: Insert a blank CD-R, CD-RW, DVD-R, etc., into your drive.
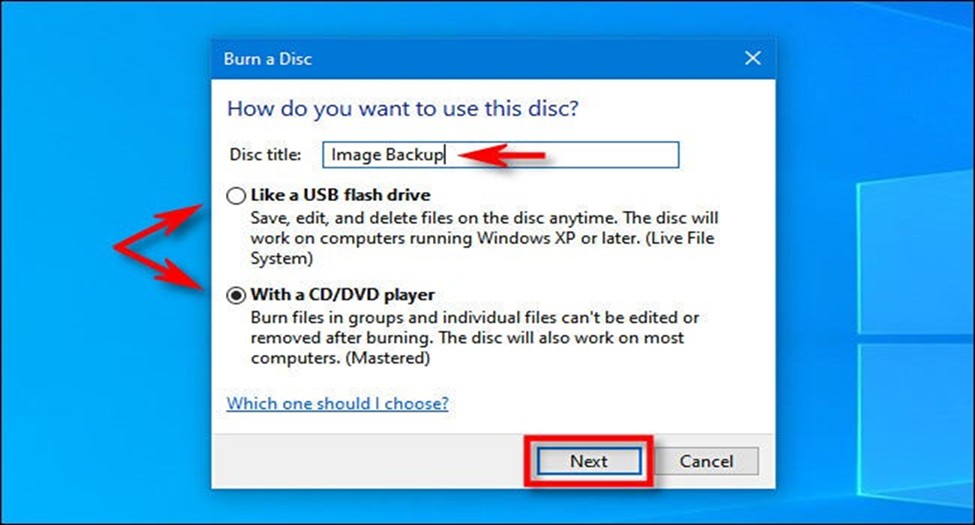
- Choose Your Method: A “Burn a Disc” window should pop up. If not, open File Explorer (folder icon on taskbar) and find your disc drive (like “DVD RW Drive (D:)”). You’ll see two choices:
- a. Like a USB Drive: Add or remove files anytime, just like a flash drive. Heads up: On a CD-R (write-once), deleting just hides the file – space isn’t freed. CD-RW/DVD-RW let you truly delete and reuse. Might not work on super old players.
- b. With a CD/DVD Player (Mastered): The classic way. Gather all files first, then burn in one go. No adding later. Best for music CDs or max compatibility with other devices. For how to burn a cd in win 10 reliably, this is often the pick.
- Pick What Suits You: Click the option that fits your needs.
- Name Your Disc: Type a name in the “Disc title” box. Click “Next”.
What happens next depends on your choice:
Burning Like a USB Drive
- A File Explorer window opens showing your blank disc drive.
- Drag files/folders in, or copy and paste them. Windows writes them as you go.
- Delete files later if using rewritable discs (CD-RW/DVD-RW).
- Done? Right-click the drive in File Explorer and choose “Eject”.
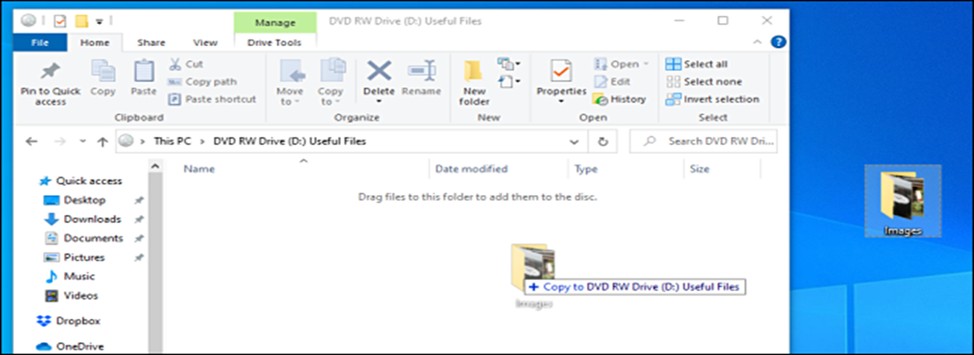
Burning the Mastered Way (With a CD/DVD Player)
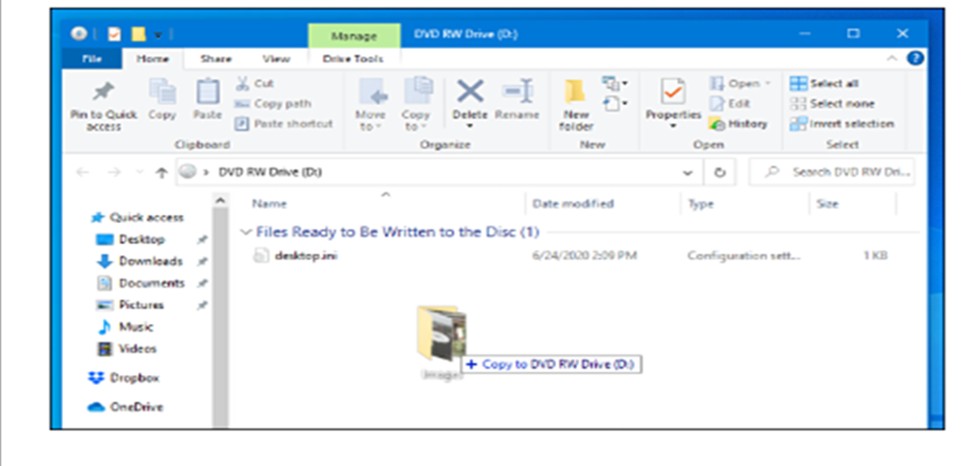
- File Explorer opens showing “Files Ready to be Written to the Disc”.
- Add Files: Drag, drop, copy, or paste files here. Crucial: They’re just staged on your hard drive, not burned yet!
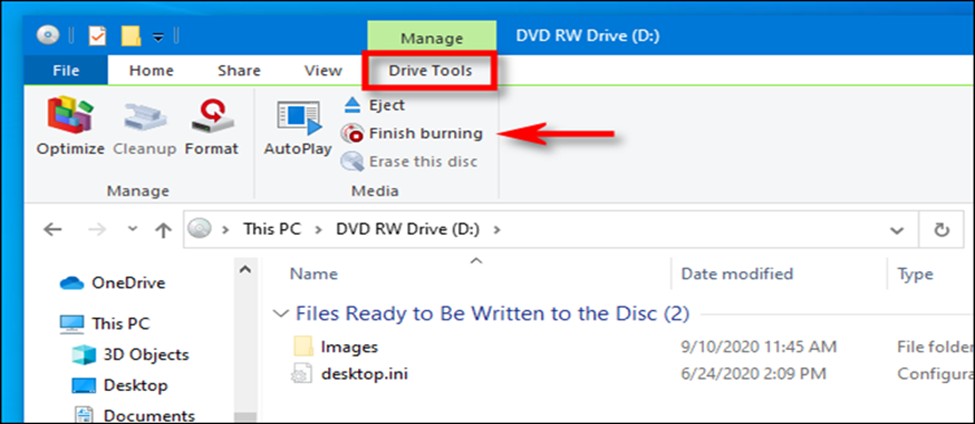
- Start the Burn: When all files are added:
- Click the “Drive Tools” tab at the top.
- Click “Finish burning”.
- Or: Right-click the disc drive in the left pane and select “Burn to disc”.
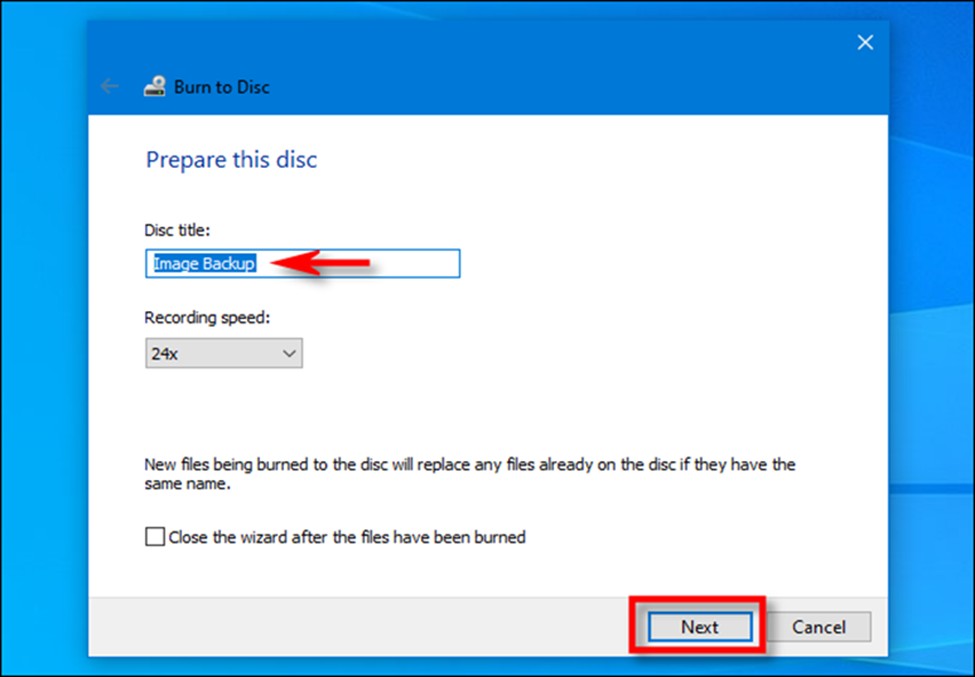
- Final Settings: A new window pops up:
- Check your disc title.
- Pick a recording speed. Slower speeds (4x, 8x) are often more reliable, especially for audio/video.
- Click “Next” to start.
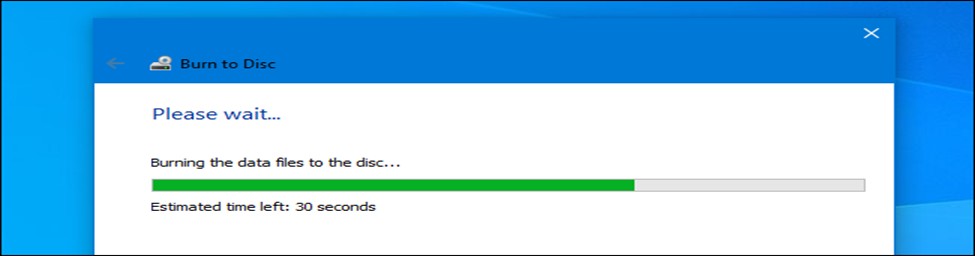
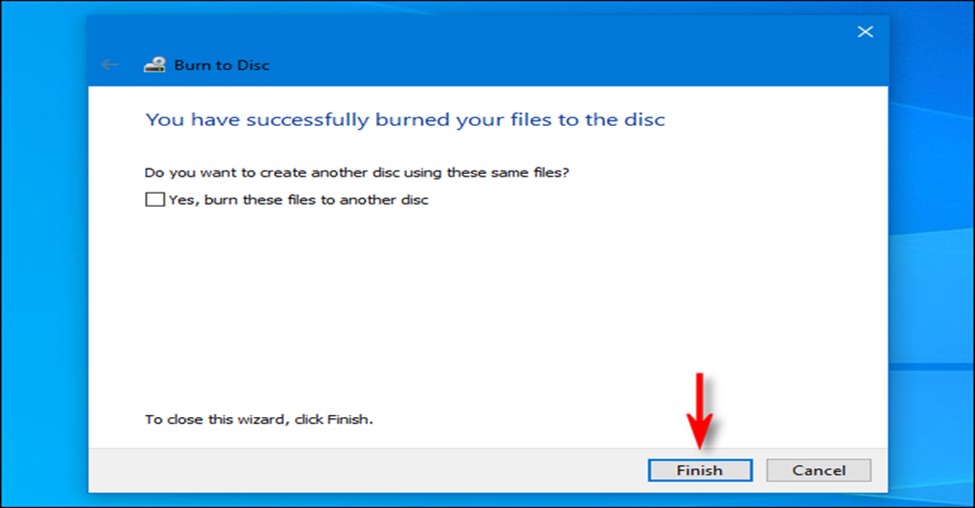
- Burning: A progress bar shows the burn. Avoid heavy computer use during this.
- All Done!: The disc usually ejects itself. A window asks if you want another copy. Click “No”, then “Finish”. Your disc is ready to use!
 Files copied to staging area, ready to burn.
 Starting the burn process.
 Choosing a recording speed.
 Burning in progress.
 Burn successful!
Leveling Up: Top Software for Burning on Windows 10
Windows’ tool is okay for basics, but it’s limited. No DVD menus, minimal control over quality or settings, and not ideal for pro audio/video. If you need more power, flexibility, or want to burn video DVDs/Blu-rays, specialized cd writer software for windows 10 is essential. Here’s a rundown of top picks, including a powerhouse option:
DVDFab DVD Creator (For Pro-Level Video DVDs & Blu-rays)
Want your vacation video to look like a real movie with a custom menu? DVDFab DVD Creator is a top-tier dvd burner for windows 10. It eats almost any video format and gives you serious control.
Create DVD discs, ISO files, or folders from any video. Freely customize the built-in templates to create your own DVD menu.
Get Windows Version | Get Mac Version | Use the Time-Limited Promotional Campaign

Why Pick It:
- Creates DVDs/Blu-rays with pro, customizable menus (titles, chapters, music, backgrounds).
- Burns high-quality discs that play smoothly on any player.
- Handles tons of formats (MP4, MKV, AVI, MOV, etc.).
- Burns multiple discs in a row (batch burning).
- Tweaks video quality and burn speed for best results.
Downside: It’s paid software. But for professional-looking discs, it’s worth considering. For a full-featured dvd burner for windows 10, it’s a leader.
Making a DVD with DVDFab DVD Creator:
- Get It: Download and install DVDFab DVD Creator.
- Open & Choose: Launch the program. Find the “Creator” section and pick “DVD Creator” (or “Blu-ray Creator” if you have a Blu-ray burner/disc).
- Add Your Video: Click the big “+” or drag your video file into the window.
- Make the Menu Awesome (Recommended):
- Click “Advanced Settings” (usually a gear icon).
- Go to the “Menu” tab. Pick a template you like.
- Customize! Change background images/videos, menu title text, button styles, background music. Make it yours!
- Edit if Needed: Trim the video or add subtitles using the editing tools (scissors/pencil icons).
- Load Blank Disc: Insert a blank DVD (or Blu-ray) into your drive. Check DVDFab shows the correct drive letter at the bottom (“Save to”).
- Hit Burn: Click the “Start” button. DVDFab converts (if needed) and burns your disc with the menu. Time for a coffee!
- Finished! The disc ejects when done. Your pro-looking DVD is ready for any player!
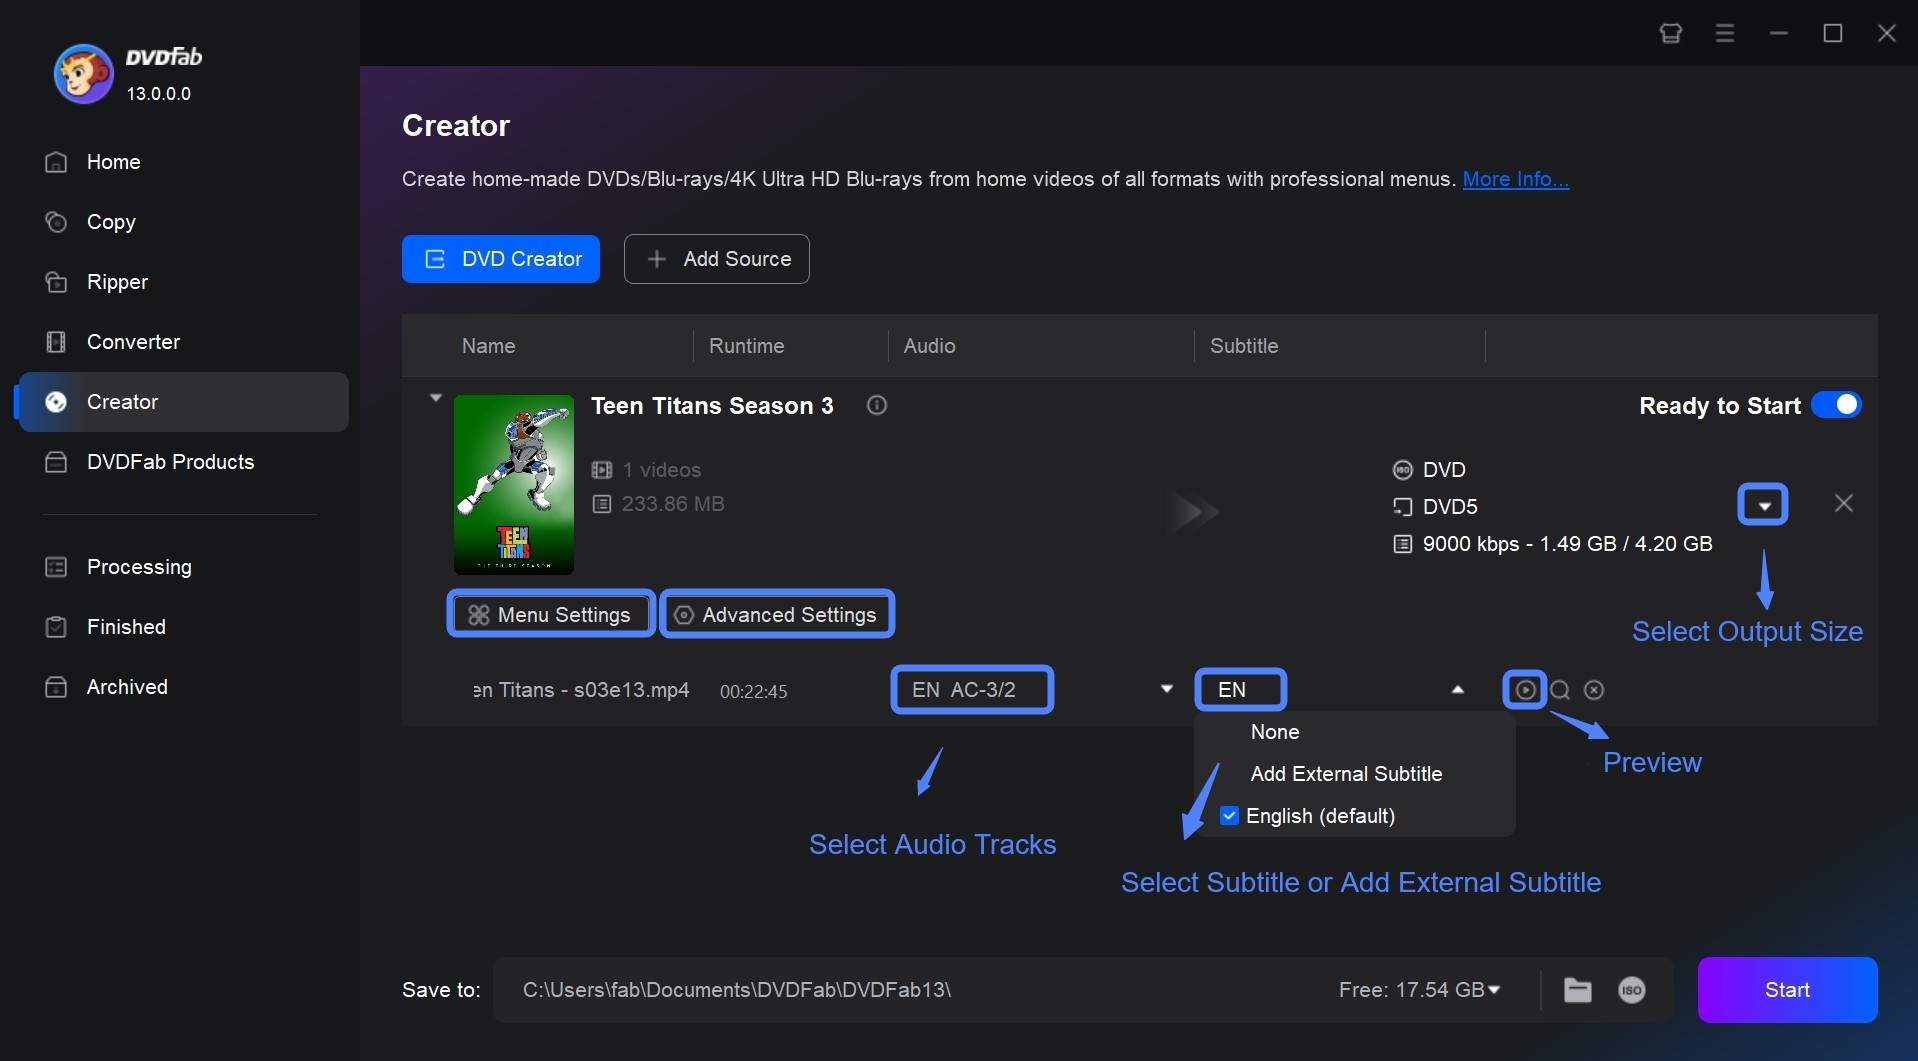 DVDFab DVD Creator interface showing video import and menu customization.
CDBurnerXP (Solid Free Choice)
CDBurnerXP is a trusted, free cd writer software for windows 10. It’s straightforward for data discs, music CDs, or making ISO files.
The Good:
- Totally free!
- Simple, easy-to-use interface.
- Burns data CDs/DVDs, makes music CDs, creates/copies ISO files.
- Works on lots of Windows versions.
The Not-So-Good: Looks a bit dated. No video DVD menu creation. Can’t rip music from CDs.
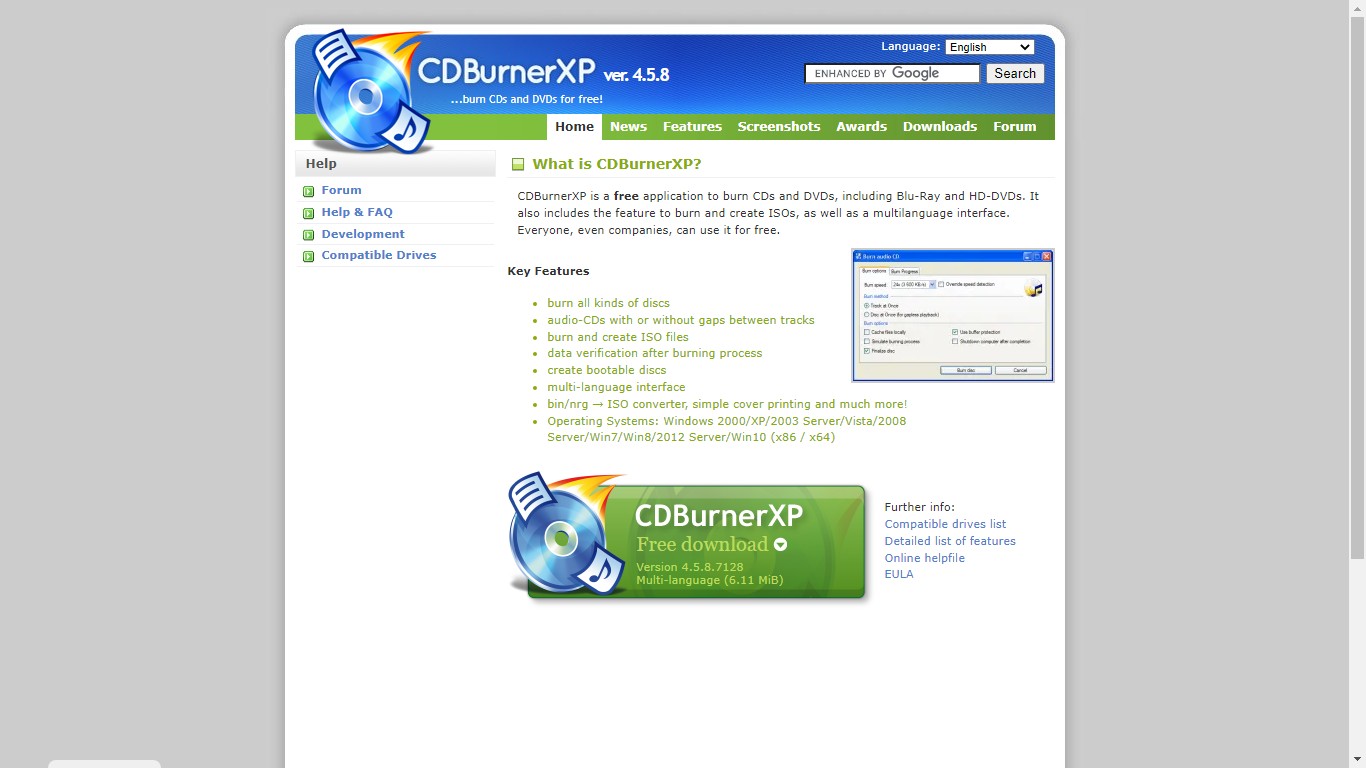 CDBurnerXP’s straightforward interface.
Burn (Simple Mac Option)
Burn is a basic, free tool, but only for Macs. Good for simple CD/DVD burning tasks.
Why Mac Users Like It:
- Free and super easy.
- Burns data, music CDs (basic CD text editing), copies discs.
- Clean, simple Mac-style look.
Limitations: Mac only. No advanced features. Not for video DVDs.
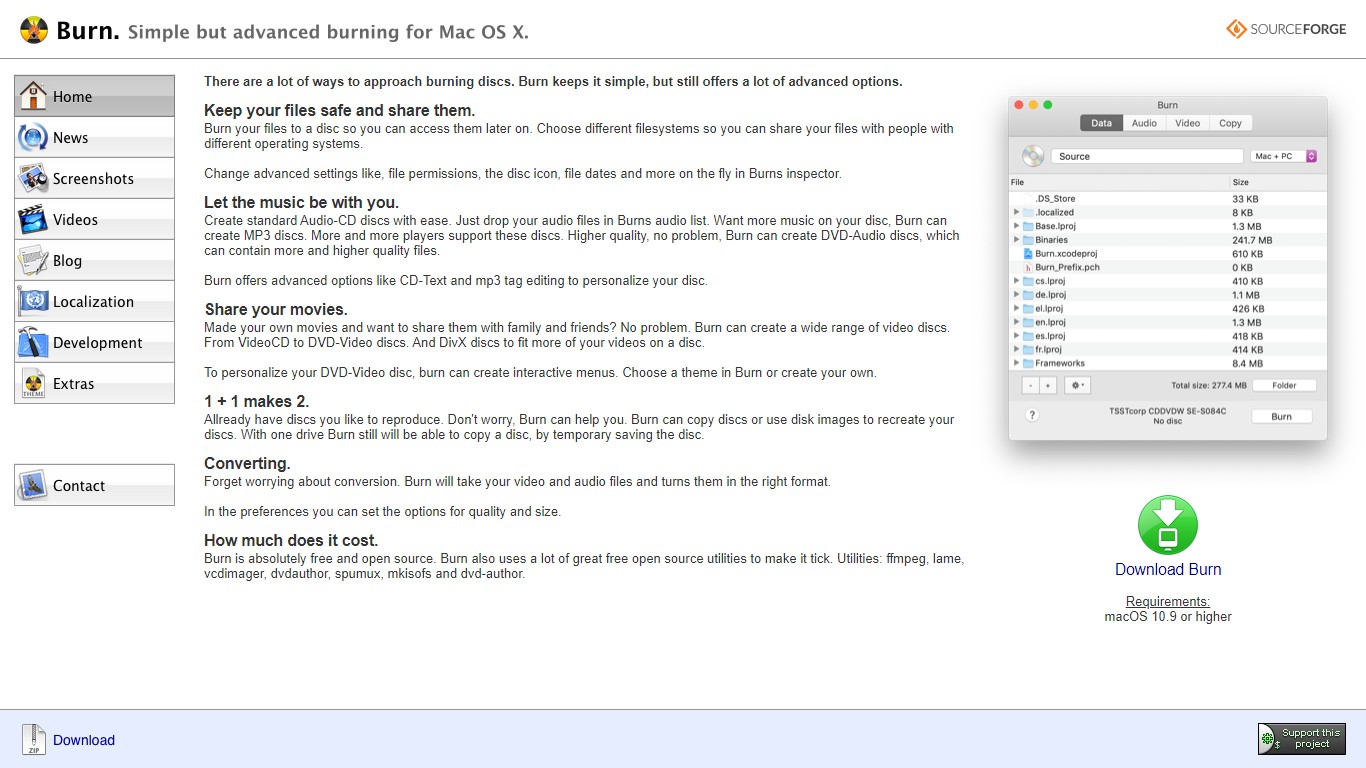 Burn application for macOS.
LiquidCD (More Features for Mac/Windows)
LiquidCD offers more control than Burn, especially for organizing files. Works on both Mac and Windows.
Pros:
- Cross-platform (Windows & Mac).
- Creates hybrid discs (special formats).
- Great for sorting files into folders before burning.
- User-friendly interface.
Cons: Big install file. Older software, updates less frequent.
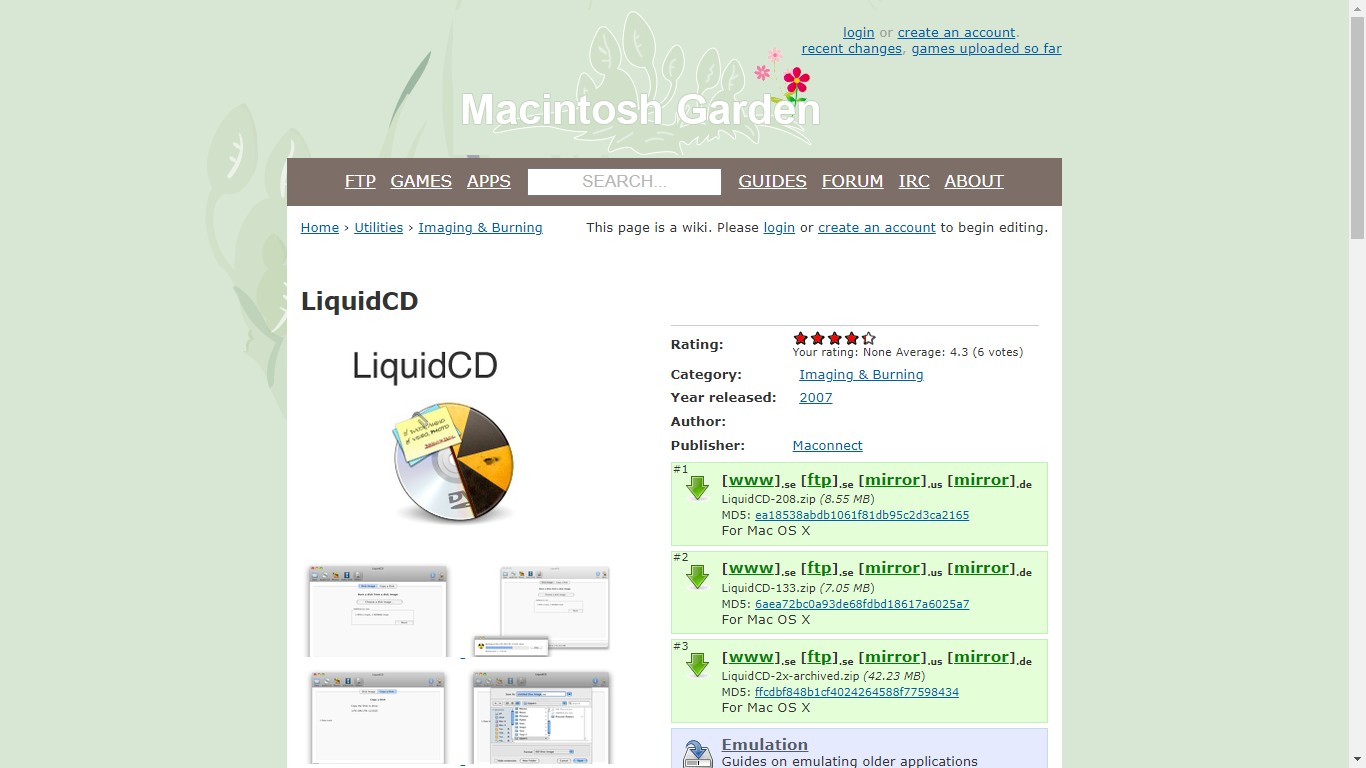 LiquidCD interface showing file organization.
ExpressBurn Free (Quick Audio/Data Burns)
ExpressBurn Free is all about speed for burning audio or data CDs (Windows & Mac).
Highlights:
- Free and very fast for simple burns.
- Makes audio CDs, evens out song volumes.
- Easy data disc burning.
Drawbacks: Free version only burns CDs (DVD/Blu-ray costs money). Limited audio format support. No ripping.
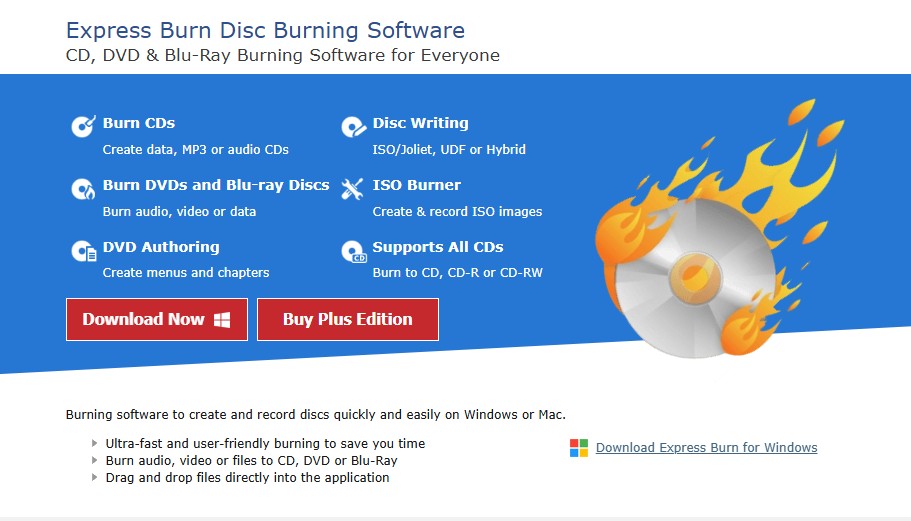 ExpressBurn Free interface.
DeepBurner Free (Super Basic & Portable)
DeepBurner Free is a no-frills, free CD burner for Windows. Can run from a USB stick without installing.
Good For:
- Completely free and portable (USB friendly).
- Dead simple for burning data CDs.
Too Basic: Free version only burns CDs (no DVD/Blu-ray). Almost zero extra features (no music/video focus). A very basic cd copy software option.
 DeepBurner Free’s minimal interface.
Ashampoo Burning Studio 22 (Feature-Packed Suite)
Ashampoo Burning Studio 22 is like a Swiss Army knife for discs on Windows. Does way more than just burn.
Why It’s Handy:
- Burns data, music CDs, video DVDs/Blu-rays, makes ISOs, copies discs.
- Also rips music CDs, backs up files, erases rewritable discs.
- Modern, easy-to-use design.
- Good for beginners and intermediates.
Considerations: Free version is capable, but cooler features need the paid version. Not quite as powerful as DVDFab for complex video projects. A versatile dvd burner for windows 10.
Create DVD discs, ISO files, or folders from any video. Freely customize the built-in templates to create your own DVD menu.
Get Windows Version | Get Mac Version | Use the Time-Limited Promotional Campaign
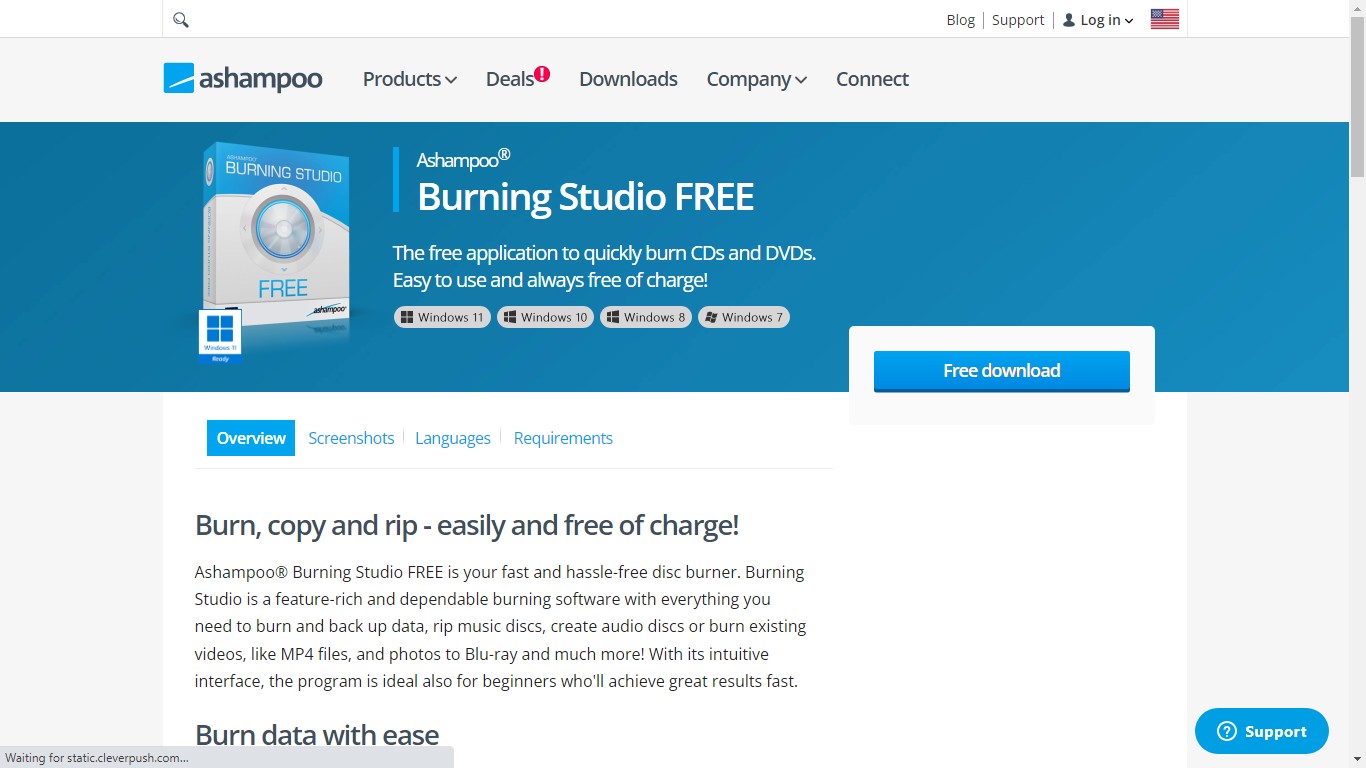 Ashampoo Burning Studio 22 showing its range of features.
Burning Questions Answered (FAQs)
How do I put music onto a CD using Windows 10?
You can use the built-in Windows “Mastered” method covered earlier. Or, use music software or dedicated burning tools (like Ashampoo or ExpressBurn):
- Open your music app or burning software.
- Find “Burn Audio CD” or similar.
- Add songs from your library.
- Insert a blank CD-R.
- Click “Burn” or “Start”. The software converts files to CD audio and burns. Remember: Use CD-R for standard CD players; CD-RW often won’t work. Dedicated cd writer software for windows 10 usually gives better control. Older Windows Media Player cd burner features also worked this way.
My CD won’t burn! What’s wrong on Windows 10?
Super frustrating! Common culprits:
- Mismatched Disc: Trying to burn a DVD on a CD-only drive? Or using a CD-RW formatted wrong? Double-check your drive specs and disc type.
- Drive Issues: Drive lens dirty? Drive broken? Drive only reads, not burns? Try a cleaning disc. For externals, swap USB ports/cables.
- Bad Disc: Disc scratched, dirty, or just cheap/low quality? Try a different one from a good brand.
- Software Hiccup: Temporary glitch in Windows or your burning app? Restart your PC. Update your software if it’s third-party.
- Speed Too High: Burning at max speed often fails. Try a slower speed like 4x, 8x, or 16x.
How do I burn an ISO file correctly?
An ISO is a complete disc snapshot. Burning it makes an exact copy:
- Insert Blank Disc: Use a blank CD, DVD, or Blu-ray matching the ISO size.
- Find the ISO: Locate the .ISO file on your PC.
- Burn with Windows (Easy):
- Right-click the .ISO file.
- Select “Burn disc image”.
- Choose your burner drive.
- Optional: Tick “Verify disc after burning” (takes longer, but safer).
- Click “Burn”.
- Burn with Software (More Options): Open your cd writer software for windows 10 (CDBurnerXP, Ashampoo, DVDFab, ImgBurn). Find “Burn ISO Image” or similar. Pick the ISO, choose drive/speed (slower like 4x-8x is better), start burn.
- Verify (Smart Move): After burning, use the software’s “Verify” option if available. It checks the disc perfectly matches the ISO file.
Wrapping It Up
Burning CDs and DVDs on Windows 10 is definitely still a skill worth having. For quick file backups or simple music CDs, the tools already in Windows work just fine. Pop in a disc, drag your stuff over, and you’re done.
But if you want to create proper video DVDs with menus, have more control over music