TOOL HUNTER

Ever wondered how to keep your photos safe online? Whether you’re a professional photographer, a social media lover, or just someone who enjoys taking pictures, learning how to add a watermark to your photos is super important. It’s like putting your name on your creations so everyone knows they belong to you.
The best part? You don’t need expensive software to do it! There are easy, fast, and completely free ways to protect your images. Let me show you how you can start safeguarding your photos today.

Table of Contents
- Why Watermarks Matter for Your Photos
- Discover the Perfect Tool: CapCut Online Watermark Solutions
- How to Add Watermark in CapCut: Easy Step-by-Step Guide
- Creative Ways to Enhance Your Watermarked Photos
- Different Watermark Approaches for Different Photo Types
- Final Thoughts on Photo Watermarking
- Common Questions About Watermarking
Why Watermarks Matter for Your Photos
So why should you care about watermarks? When you add a watermark to a photo, you’re doing more than just putting your name on it. You’re protecting your creative work and making sure people know who made it. It’s like saying “This is mine!” in a nice but clear way.
Let me explain why this is so important for anyone who creates photos.
First, it’s about ownership. In today’s world, images get shared around the internet really fast. Sometimes, your name can get separated from your photos. But when you learn how to put a watermark on a photo, your name stays with the image no matter where it goes online.
Watermarks also help prevent people from using your photos without asking. It’s like having a friendly reminder that says “Please don’t use this without permission.” It’s not mean or aggressive – just a gentle way to protect your work.
But here’s the tricky part: you need to find the right balance. A watermark that’s too big or in the wrong place can actually ruin your photo. That’s why learning how to apply watermark to photos properly is so important. You want it to protect your image without making it look bad.
In the photography world, using watermarks is pretty normal. It shows that you’re professional and that you take your work seriously. It tells people that you respect your own creations and the rules of the industry.
How you put a watermark on a photo can make a big difference. You want it to be visible enough to protect your work, but not so obvious that it distracts from the image itself.

Discover the Perfect Tool: CapCut Online Watermark Solutions
Now that you know why watermarks are important, you might be wondering what tool to use. There are lots of options out there, but CapCut Online is definitely one of the best choices available. It’s especially great if you want to add a capcut watermark to your images.
Here’s what makes CapCut Online so special for watermarking.
It’s not just a simple watermark tool – it’s a complete photo editing package. While it’s amazing for adding watermarks, it can do so much more than that. You get access to all kinds of editing features that can help make your photos look even better.
One of the best things about CapCut Online is how easy it is to use. If you’re trying to figure out how to put a watermark on an image, this tool makes it really simple. The interface is designed to be user-friendly, so even if you’ve never edited photos before, you’ll be able to figure it out quickly.

The tool also includes some really smart features. With AI technology and unlimited editing options, CapCut Online is much more than just a basic watermark adder. You can adjust how see-through your watermark is, change its size, and experiment with different placements. You have complete control over how your watermark looks on your photos.
Another great feature is the cloud storage. If you’re someone who’s always on the go, you’ll appreciate being able to add a watermark to an image from anywhere. Your photos and watermark designs are stored safely in the cloud, so you can access them whenever you need to.
CapCut — Your all-in-one video & photo editing powerhouse! Experience AI auto-editing, realistic effects, a huge template library, and AI audio transformation. Easily create professional masterpieces and social media viral hits. Available on Desktop, Web, and Mobile App.

Download App | Sign Up for Free
How to Add Watermark in CapCut: Easy Step-by-Step Guide
If you’re asking yourself “How do I add a watermark to a photo?”, don’t worry. It’s actually really simple with CapCut. Here’s a straightforward guide on how to add watermark in capcut that anyone can follow.
Let’s walk through the process together.
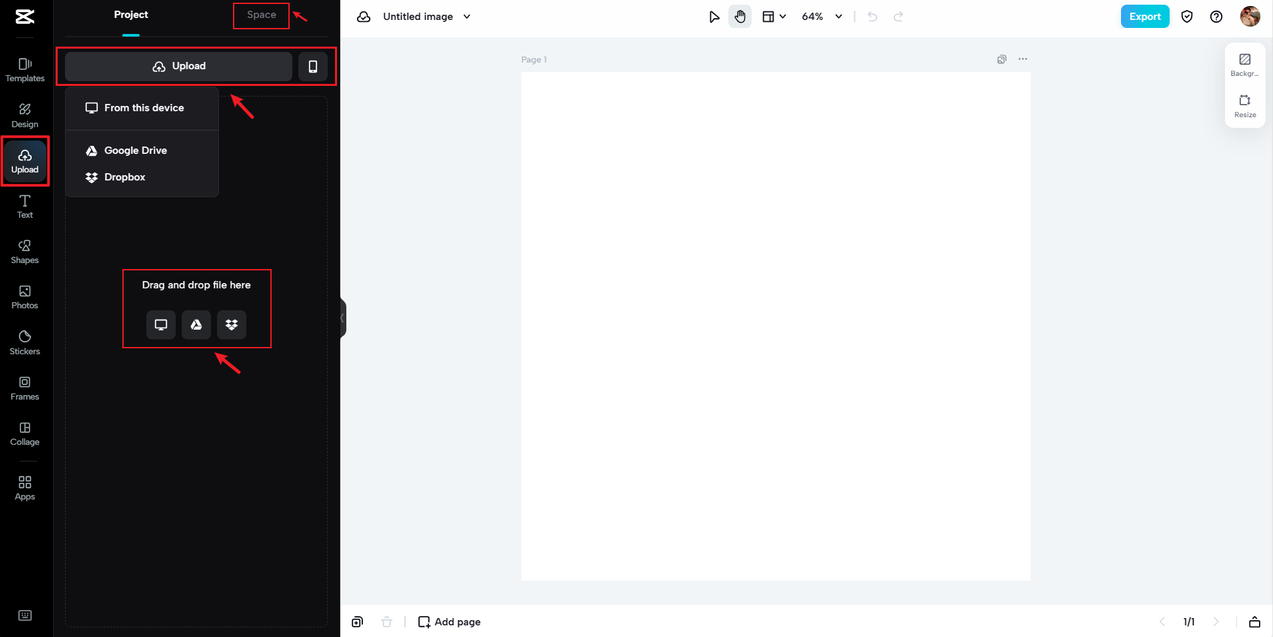
Step 1: Create Account and Upload Your Image
First, you’ll need to create a CapCut Online account. The good news is it’s completely free! Just visit their website and choose how you want to sign up. You can use your Facebook, Google, or TikTok account to make it quick and easy.
Once you’re logged in, you’ll see a button that says ‘New image’. Click on that, and you can choose what size you want your photo to be. There are options for all kinds of uses – social media posts, marketing materials, school projects, and more.
Next, it’s time to upload the photo you want to watermark. You can simply drag the image from your computer and drop it right into the CapCut window. It couldn’t be easier!
Step 2: Creating and Placing Your Watermark
This is the main part where you learn how to add watermarks on capcut.
Look at the left side of your screen, and you’ll see a menu with different options. Click on the one that says ‘Text’. A text box will appear right on your image. Here, you can type whatever you want your watermark to say – your name, your website, your brand, anything you like.
On the right side of the screen, you’ll find options to customize how your text looks. You can choose different fonts, make the text bigger or smaller, and pick whatever color you want. This is how you create your own personalized watermark.
Maybe you already have a logo that you want to use as a watermark instead of text. That works great too! Instead of clicking ‘Text’, you can upload your own image. Just find the ‘Uploads’ option and select your logo file from your computer.
After your logo is uploaded, you can drag it onto your photo and place it exactly where you want it. You can make it larger or smaller depending on your needs. A good professional tip is to adjust the opacity, which makes the watermark somewhat see-through. This makes it look more professional and less distracting from your actual photo.


Step 3: Save and Share Your Protected Photo
You’re almost done! Now that your watermark looks perfect, it’s time to save your work.
Look at the top right corner of the screen for the ‘Export’ button. Click on it, and you’ll see several options. You can download the watermarked photo directly to your computer, or you can share it straight to your social media accounts if you prefer.
You can also choose what file format you want, like JPEG or PNG. Then just hit download, and you’re all finished!

See? That wasn’t hard at all. Now you know exactly how to add watermark on capcut and keep your pictures protected.
Your photos are valuable, especially when you share them online. They’re like digital treasures that represent your creativity and hard work. A watermark is a powerful but subtle way to show that you own them, to discourage people from using them without permission, and to keep your work safe. Now you’ll never have to wonder “How do I add a watermark to a photo?” again.
Creative Ways to Enhance Your Watermarked Photos
Once you’ve mastered the basics of how to make a watermark in capcut, you can start getting creative! CapCut has tons of features that can make your watermarked photos look even more amazing.
You can use the frame feature to add beautiful borders around your photos. You can even integrate your watermark into the border design itself. This looks really artistic while still protecting your image.

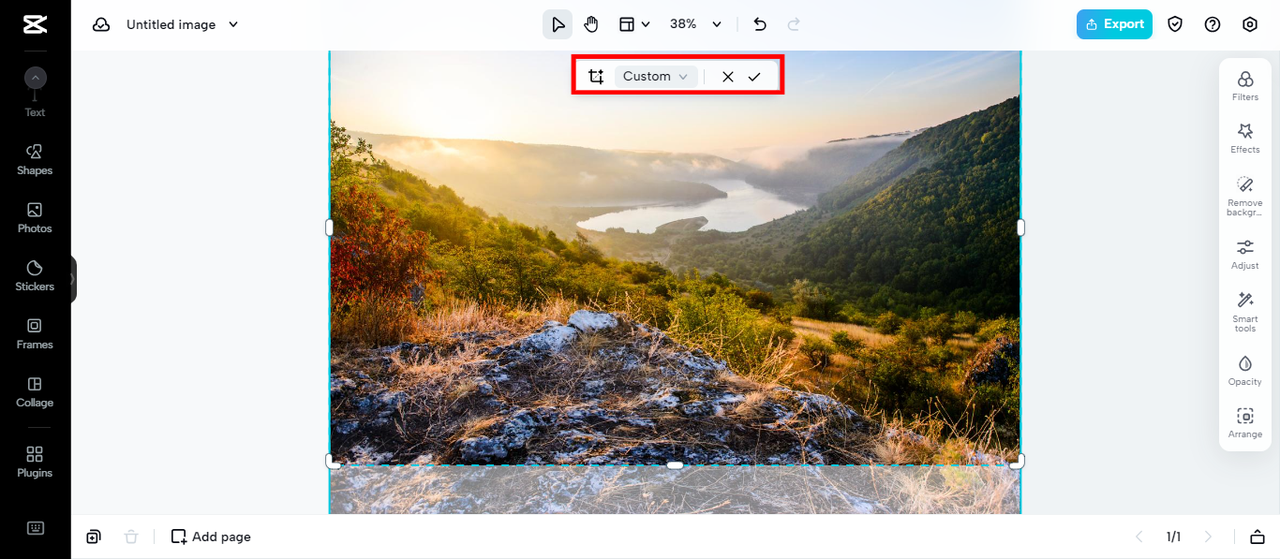
There’s also a cropping tool that can help you position your watermark perfectly. Sometimes, cropping your photo a certain way can create the perfect spot for your watermark where it doesn’t interfere with the main subject.
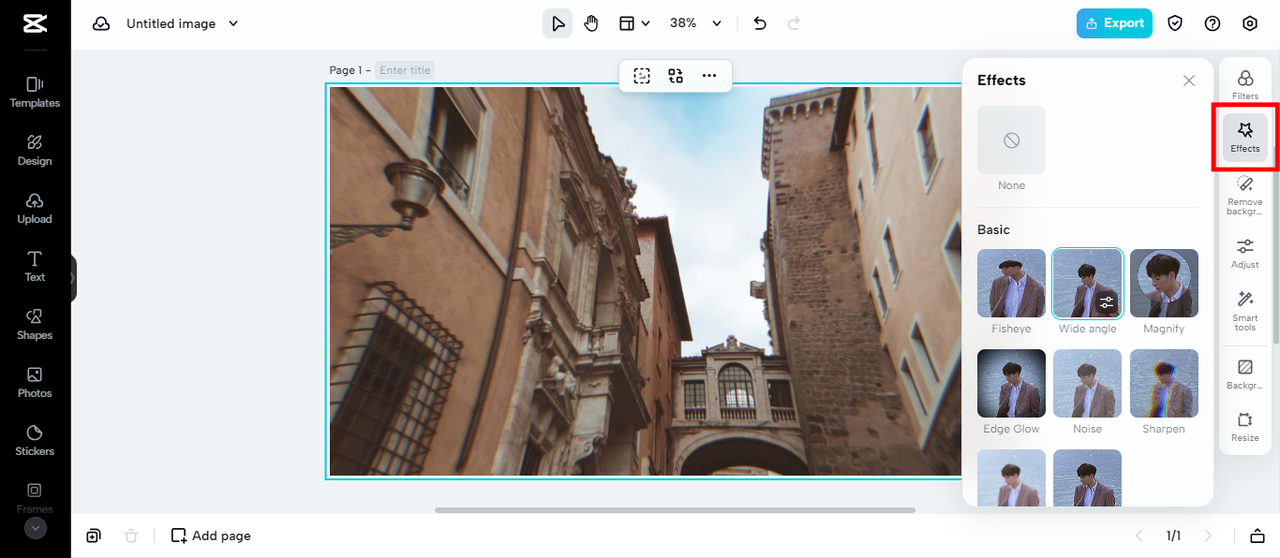
Want to make your watermark stand out in a cool way? You can add special effects to it. CapCut offers different effects ranging from soft and subtle to bold and attention-grabbing. You can pick one that matches the style and mood of your photo.
And it’s not just about the watermark itself. You can add additional text to your images too. Use the text editor to include titles, captions, or personal messages on your photos. This gives them a more personalized touch.

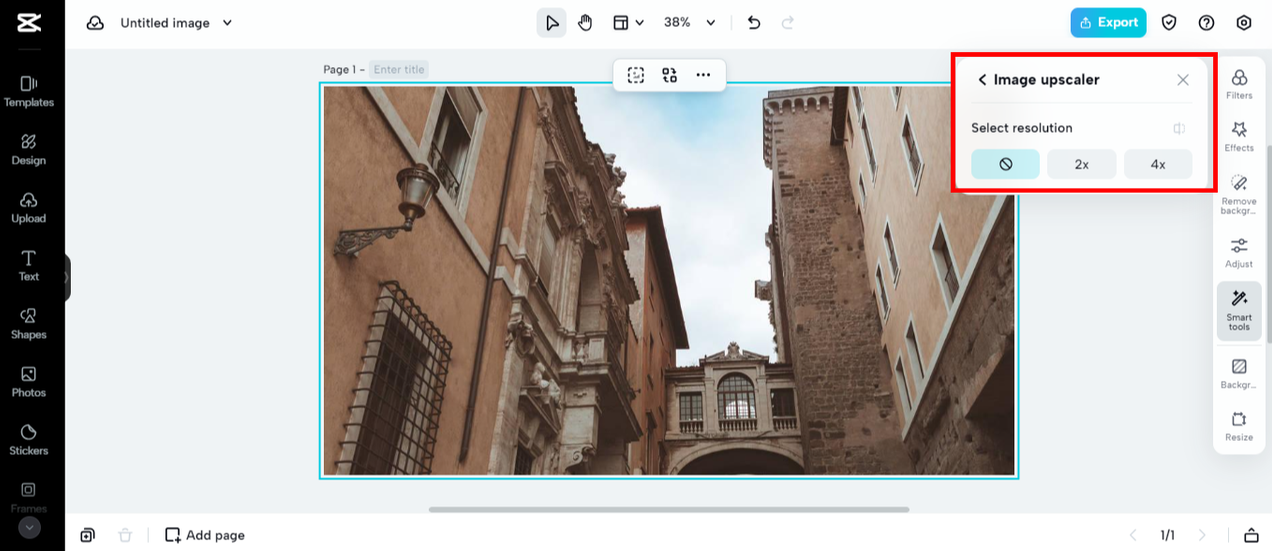
One of the most impressive features is the image upscaler. If you need to make your photo larger, you might worry that the watermark will become pixelated or blurry. But with the upscaler, your watermark stays sharp and clear no matter how much you enlarge your image.
Don’t be afraid to experiment with all these tools. You’ll discover countless ways to make your photos unique and protected at the same time.
CapCut — Your all-in-one video & photo editing powerhouse! Experience AI auto-editing, realistic effects, a huge template library, and AI audio transformation. Easily create professional masterpieces and social media viral hits. Available on Desktop, Web, and Mobile App.
Download App | Sign Up for Free
Different Watermark Approaches for Different Photo Types
Did you know that the best way to add a watermark can vary depending on what type of photo you’re working with? Let’s talk about how to approach watermarking for different photography styles.
If you’re taking landscape photos, you’ll want to be subtle with your watermark. Place it in a bottom corner where it won’t block the beautiful scenery. The goal is to protect your image without taking away from the natural beauty you’ve captured.
For portraits and people photos, you need to be more careful. You don’t want the watermark to distract from the person’s face or expression. A good approach is to place it lightly in the background area. This way, the focus remains on the person while still protecting your work.
Product photography requires special consideration too. Clients need to see the product details clearly, so you’ll want to use a light, translucent watermark placed over a plain area of the background. This protects the image without hiding any important product features.

If you’re creating artistic or creative photos, you can have more fun with your watermark. Try to make it part of the artwork itself by placing it over patterns or textures in the image. This way, it blends in while still serving its protective purpose.
Each photography style requires a slightly different approach to watermarking. Whether you’re working with peaceful landscapes or vibrant portraits, the goal is always the same: protect your work without compromising its visual appeal. CapCut Online gives you the flexibility to adapt your watermarking technique for each unique photo.
Final Thoughts on Photo Watermarking
And that’s everything you need to know about protecting your photos with watermarks! Learning how to add a watermark to your images is an essential skill for anyone who creates visual content. This guide has shown you just how simple it can be when you use CapCut Online.
The process boils down to three easy steps: create an account, add your watermark, and export your protected photo. The tool is designed for everyone, regardless of your experience level with photo editing.
Are you ready to make your photos more secure and professional-looking? Just sign up for CapCut Online and give it a try. You’ll be amazed at how much you can do with this powerful yet user-friendly tool.
Common Questions About Watermarking
How do I put a watermark on my photos?
Putting a watermark on your photos is really straightforward with CapCut Online. Just open the tool, upload your photo, and choose whether you want to add text or upload a logo for your watermark. You can adjust the size, position, and transparency until it looks just right. CapCut is designed to be user-friendly, so even beginners can create professional-looking watermarks without any trouble.
How do I put a logo on a photo?
Adding a logo to a photo is simple with CapCut Online. First, upload your photo into the editor. Then, use the ‘Uploads’ feature to add your logo file from your computer. Just drag the logo to your desired position on the photo. You can resize it and adjust the transparency to get the perfect look. This is ideal for businesses or individuals who want to brand their images consistently.
How can I add a watermark to a JPEG for free?
You can add a watermark to a JPEG file completely free using CapCut Online. After creating your free account, just upload your JPEG image. Use the text tool to create your watermark, or upload a logo image if you prefer. You can position it wherever you want, change the font and size, and adjust the opacity until it looks perfect. This is how you protect your images without spending any money.
Some images courtesy of CapCut