TOOL HUNTER

Summary: This guide provides a comprehensive look at how to take a screenshot on a Dell computer, with a special focus on the versatile snip tool on Dell systems. We’ll explore multiple methods, from simple keyboard shortcuts to built-in Windows applications, ensuring you can capture your screen exactly how you need. Whether you’re a new Dell user or just looking for a refresher, you’ll find the perfect snip tool dell solution here.
Dell computers are incredibly popular worldwide, found in homes, schools, and offices. One of the most common tasks users need to perform is capturing what’s on their screen. Maybe you need to save an error message, share a funny meme, or keep a record of an online receipt. Knowing how to screenshot dell computer efficiently is a fundamental digital skill. While the process is generally similar across Windows PCs, this guide is tailored specifically for Dell users, covering all the tools at your disposal.

How to Screenshot Dell Computer Using Keyboard Shortcuts
The quickest and most universal method to capture your screen doesn’t require any software at all. It relies on the keys already on your Dell keyboard. This is often the first method people learn when figuring out how to screenshot in dell computer.
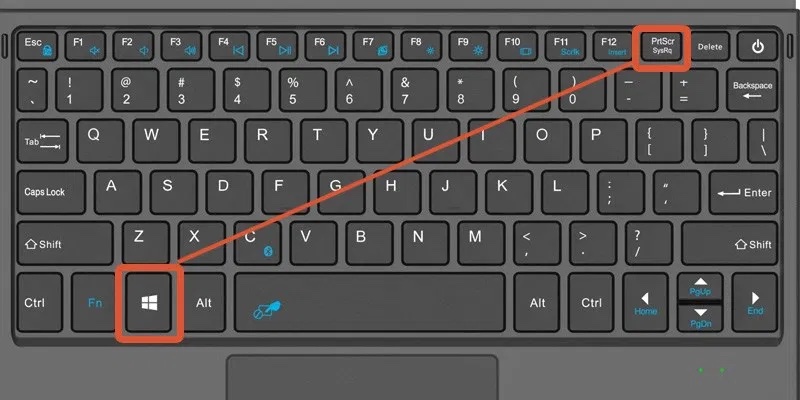
Almost every Dell keyboard comes with a dedicated Print Screen key, usually abbreviated as “PrtScn” or “PrtSc”. This key is your gateway to instant screen captures. The basic function copies an image of your entire screen to your computer’s clipboard. From there, you can paste it into any application that accepts images, like Microsoft Word, an email, or an image editor like Paint.
Here’s a simple step-by-step process using Paint, which comes pre-installed on all Windows machines:
- Navigate to the screen you want to capture. It could be your desktop, a specific window, or a webpage.
- Press the
PrtScnkey. On some Dell laptops, you might need to hold theFnkey simultaneously if the Print Screen function is a secondary feature on another key. - This action copies a snapshot of your entire screen to the clipboard. Nothing will visibly happen, but the image is stored temporarily.
- Open the Paint application. You can find it by typing “Paint” in the Windows search bar next to the Start menu.
- Inside Paint, press
Ctrl + Von your keyboard to paste the screenshot from the clipboard. - You can now crop, annotate, or simply save the image. Go to File > Save As, choose a location, give it a filename, and select a format like PNG or JPG.
For a more advanced shortcut, try Alt + PrtScn. This combination captures only the currently active window, not the entire screen. It’s perfect for when you have multiple programs open and only want a shot of one. The pasting process into Paint or another app remains the same.
Windows 10 and 11 also introduced a fantastic shortcut: Windows Key + Shift + S. Pressing these keys dims your screen and brings up a small toolbar at the top, letting you choose a rectangular snip, a freeform snip, window snip, or fullscreen snip. The image goes to your clipboard and a notification pops up, allowing for quick editing. This is essentially a keyboard shortcut to launch the modern snipping experience.
Using the Snip Tool on Dell for Flexible Captures
For more control over your screenshots, the built-in Snipping Tool is a classic choice. It’s been a part of Windows for many years and offers modes that go beyond a simple full-screen grab. Learning to use the snip tool on dell machines gives you precision.
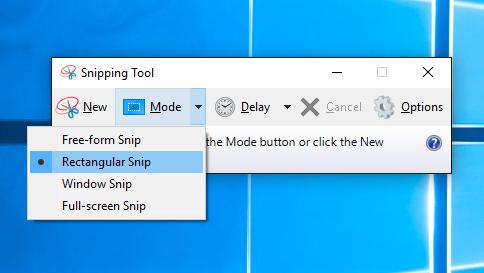
The Snipping Tool provides four distinct modes:
- Free-form Snip: Lets you draw any shape around the area you want to capture with your mouse.
- Rectangular Snip: The most common option, allowing you to drag a rectangle to select an area.
- Window Snip: Captures a selected application window with a single click.
- Full-screen Snip: Takes a screenshot of your entire display, similar to the
PrtScnkey.
To launch the Snipping Tool on your Dell computer:
- Click the Start button or press the Windows key.
- Type “Snipping Tool” into the search bar.
- Select the app from the search results. In newer versions of Windows 11, it might be listed under “Snipping Tool & Sketch.”
Once open, click “New” to start a snip. If you choose Rectangular or Free-form mode, your screen will freeze, and you can drag your cursor to select the region. For Window Snip, just click on the window you want. After capturing, the screenshot opens in the Snipping Tool editor window. Here, you can use the pen and highlighter tools to draw on the image, an eraser to remove markings, and then save it directly. You can also set a timer delay, which is useful for capturing tooltips or dropdown menus.
It’s worth noting that Microsoft has been gradually replacing the classic Snipping Tool with a newer app called Snip & Sketch (now often just called Snipping Tool in Windows 11). The functionality is very similar and often more integrated, with the Windows Key + Shift + S shortcut directly linked to it. The principles of using this snip tool dell variant remain user-friendly and powerful.
How to Screenshot in Dell Computer with Web-Based Tools
What if you need to take a screenshot but don’t want to use any installed software? Or perhaps you’re using a borrowed computer? Web-based screenshot tools are a brilliant alternative. These run directly in your web browser like Chrome or Edge.
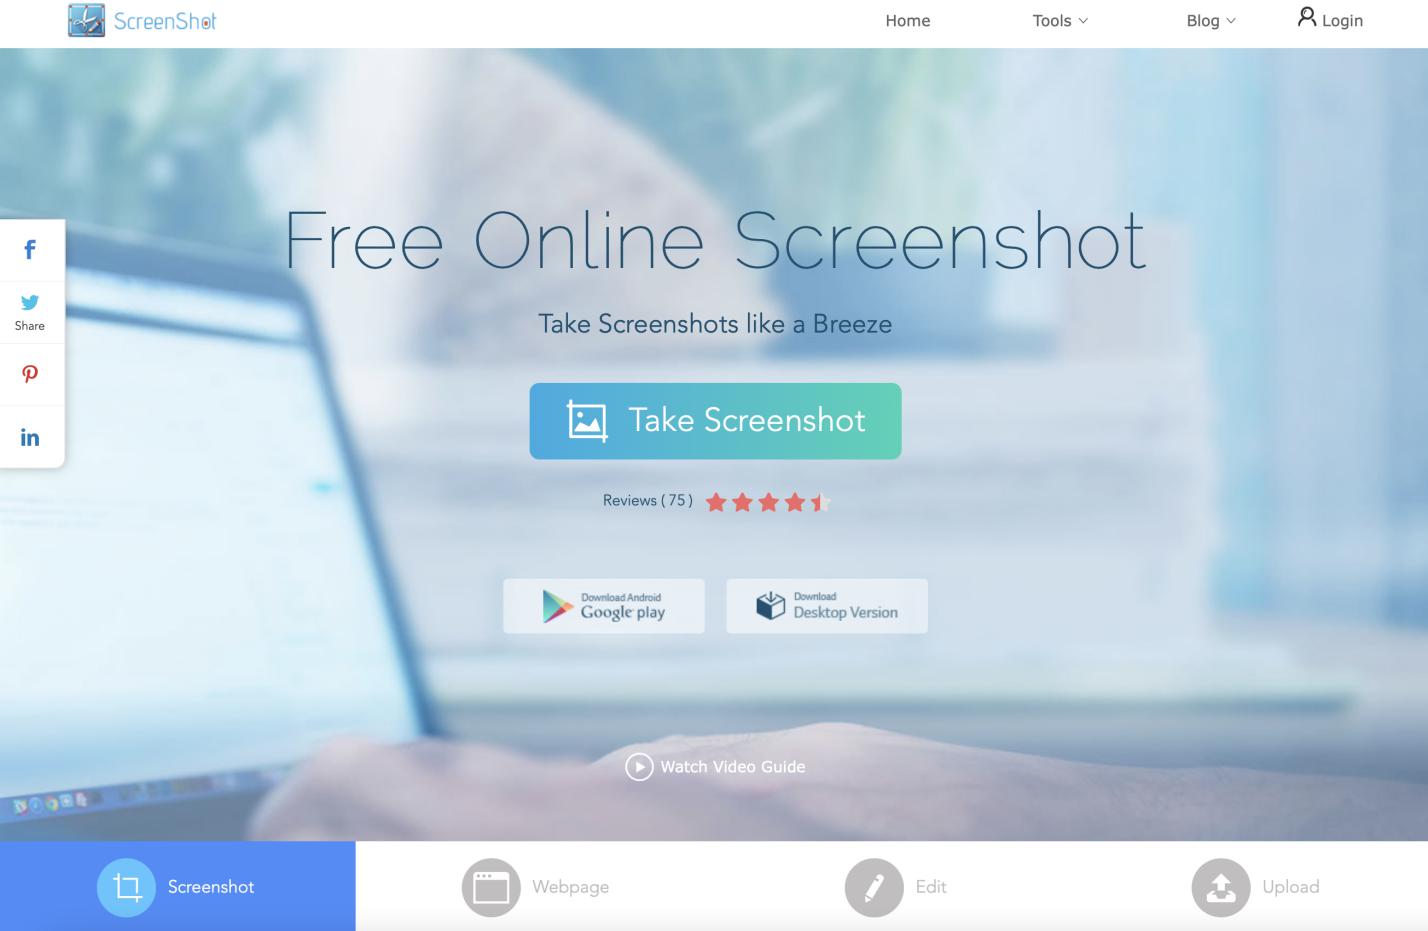
One popular example is a website like Screenshot.net. These online tools are versatile because they often don’t require installation and can work across different operating systems. They are perfect for quick, one-off captures, especially of web content.
The general process for using a web-based snip tool on dell is straightforward:
- Open your preferred web browser on your Dell computer.
- Navigate to the website of the online screenshot tool.
- Typically, you’ll find a large button labeled “Take Screenshot” or “Capture Now.”
- Clicking it often activates a crosshair or selection tool over your entire screen, allowing you to choose the area to capture.
- After selection, the image usually opens in the browser where you can crop, annotate, and download it.
The major advantage is convenience and accessibility. However, remember that these tools require an active internet connection and may have limitations compared to desktop applications, such as not being able to capture certain secure windows or drop-down menus. They are, however, a fantastic option to know about when exploring how to screenshot dell computer without installing anything new.
Capturing Media Screenshots with a Dedicated Player
Sometimes, you need to take a screenshot from a video or a movie you’re watching. Standard methods like PrtScn might not work well with protected content or full-screen video players, often resulting in a black box. For this specific task, using media player software with a built-in snapshot function is the best approach.
Certain media players, like Leawo Blu-ray Player, include a dedicated screenshot feature designed to capture high-quality frames directly from video files, DVDs, or Blu-rays during playback. This ensures you get a perfect, full-resolution image without any playback interference.

Here’s a conceptual look at how such a tool works for taking a screenshot on your Dell:
- First, you import your video file or insert your disc into the Dell computer’s drive.
- Open the media file within the player software and start playback.
- Pause at the exact moment you want to capture.
- Look for a camera or snapshot icon in the player’s controls, or use a designated keyboard shortcut (commonly something like
Ctrl + SorShift + S). - Click the button or press the keys. The player will save a still image from that exact video frame to a folder on your computer, usually in PNG or JPG format.

This method is invaluable for students needing to capture frames for analysis, designers looking for inspiration, or anyone who wants to save a perfect still from their favorite movie. It solves the problem of how to screenshot in dell computer when the content is a playing video.
Try Leawo Blu-ray Player right now! 100% Free 4K UHD Blu-ray/DVD/4K HD Video Player in the World!
Get the Windows version | Get the Mac version | Use the time-limited promotional campaign

Choosing the Right Method for Your Needs
Now that you know several methods, how do you choose? It depends on what you’re trying to capture and how you plan to use it.
- For Speed and Simplicity: Use the
PrtScnkey orAlt + PrtScnfor a fast, full-screen or single-window capture. It’s unbeatable for quick shares. - For Precision and Editing: The Snipping Tool on Dell (or Snip & Sketch) is your best friend. The ability to select a specific region and draw on it immediately is incredibly useful for tutorials and feedback.
- For No-Installation Flexibility: A web-based tool is perfect if you’re on a restricted computer or just don’t want to open another app.
- For Video Content: Always use the screenshot function built into your media player to avoid black screens and get the best quality.
Mastering these techniques ensures you’ll never be stuck wondering how to screenshot dell computer again. Each method for using the snip tool dell systems offer has its own strengths, making you a more efficient and capable computer user.
Try Leawo Screen Recorder right now! Record all activities on your computer screen as HD screencast, webcam video, system and microphone audio, and capture screenshots effortlessly, perfect for tutorials, online classes, presentations, gameplay, and meetings.
[Get the Windows version](https://