TOOL HUNTER

Summary: This comprehensive guide details several effective methods for how to transfer photos from iPhone to Google Drive. Whether you prefer using apps directly on your phone or involving a computer, you’ll find a suitable solution to backup your precious memories and free up valuable storage space on your device. We cover everything from the Google Drive app to using iCloud and computer transfers.
If you’re constantly getting the ‘Storage Almost Full’ alert on your iPhone or just want a secure backup of your pictures, learning how to save photos to Google Drive on iPhone is an essential skill. Google Drive offers a reliable and accessible cloud storage option. This guide will walk you through multiple techniques, ensuring you can choose the one that fits your workflow best. Let’s dive into the various ways you can upload photo to Google Drive from iPhone.
Table of Contents
Upload Pictures Directly Using the Google Drive App
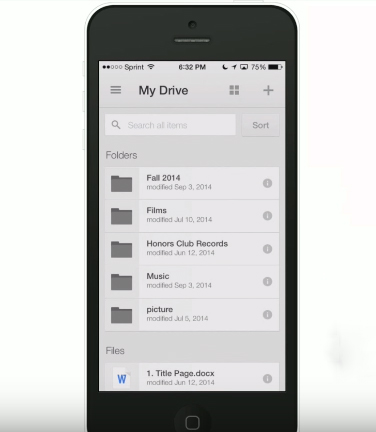
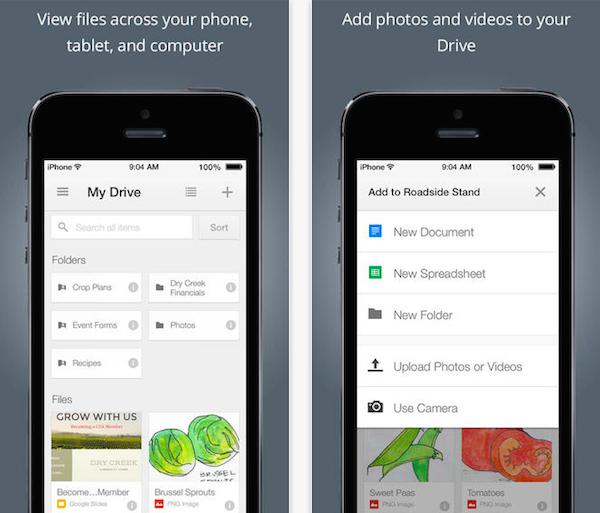
The most straightforward method to backup iPhone photos on Google Drive is by using the official Google Drive application. This app provides a dedicated and intuitive interface for managing your cloud files right from your iPhone.
- Begin by downloading the Google Drive app from the Apple App Store. Once installed, open the app and sign in with your Google account credentials.
- Inside the app, tap the ‘+’ (plus) icon located at the bottom right of the screen. From the menu that appears, select ‘Folder’ to create a new folder. You might name it something like ‘iPhone Backup’ or ‘Camera Roll’ for easy organization later. This is the first step in how to transfer photos from iPhone to Google Drive in an organized manner.
- Open the newly created folder. Tap the ‘+’ icon again, but this time select ‘Upload’.
- You will be prompted to choose the source of your files. Select ‘Photos and Videos’ or ‘Browse’ to access your iPhone’s photo library.
- Navigate through your albums, select the photos or videos you wish to backup, and then tap ‘Upload’ in the top corner. The app will begin transferring your selected media to Google Drive. The time this takes depends on the number of items and your internet connection speed.
This method is perfect for when you want to upload photo to Google Drive from iPhone selectively. It gives you full control over which images get backed up.
Share Photos to Google Drive from the iPhone Photos App
Your iPhone’s built-in Photos app has a powerful sharing feature that can send pictures directly to many services, including Google Drive. This is another handy way to how to save photos to Google Drive on iPhone without constantly switching between apps.
- Ensure the Google Drive app is installed on your iPhone (you don’t need to have it open).
- Open the Photos app and navigate to the album containing the pictures you want to backup.
- Tap ‘Select’ in the top right, then choose the specific photos you wish to transfer.
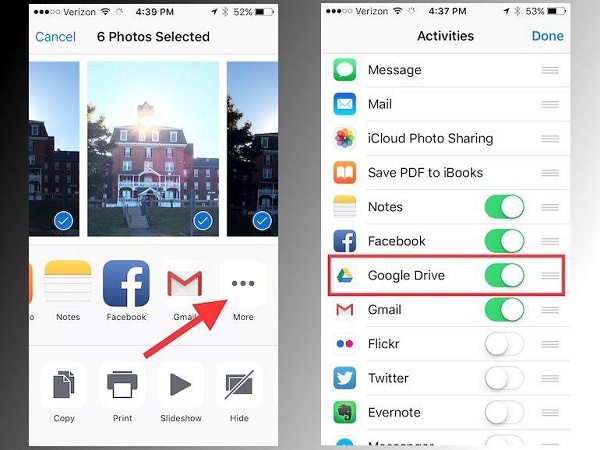
- Tap the share icon (a square with an arrow pointing up) at the bottom left.
- Scroll through the row of app icons. If you don’t see the Google Drive icon, swipe all the way to the end and tap ‘More’.
- In the activities list, find ‘Google Drive’ and make sure its toggle is switched on. You can also press and hold the three-line handle next to it to drag it higher in your list for easier access in the future.
- Now, tap the Google Drive icon from the share sheet.
- The Google Drive app will open briefly. You can choose the destination folder within your Drive and then confirm the upload.
This method seamlessly integrates with your existing photo management routine, making it simple to backup iPhone photos on Google Drive as you browse your library.
Use iCloud.com as a Transfer Bridge
For users who have iCloud Photos enabled, you can use the iCloud website as an intermediate step. This method is useful if you want to download a large batch of photos from iCloud to your computer first, then upload them to Google Drive. It’s a two-step process for how to transfer photos from iPhone to Google Drive via the web.
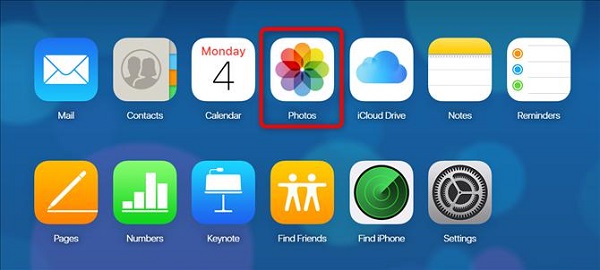
- On a computer’s web browser, go to icloud.com and sign in with your Apple ID.
- Click on the ‘Photos’ icon to access your iCloud Photo Library.
- Select the photos you want to move to Google Drive. You can hold Shift (or Cmd on Mac) to select multiple items.
- Click the download button (a cloud with a downward arrow) in the top toolbar. iCloud will prepare and download a .zip file of your selected photos to your computer.
- Unzip the downloaded file on your computer.
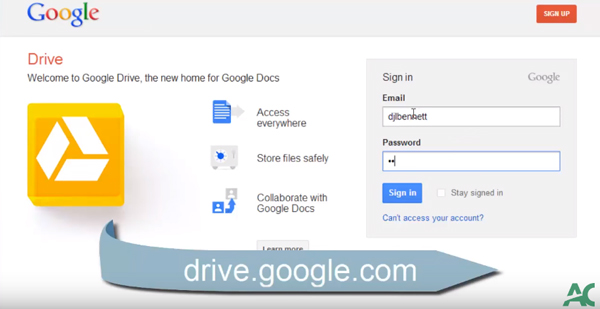
- Now, open a new browser tab and go to drive.google.com. Sign in with your Google account.
- Click ‘New’ on the left, then select ‘File upload’ or ‘Folder upload’.
- Navigate to the unzipped photos on your computer and select them to begin the upload to Google Drive.
This approach is excellent for creating a secondary backup or for users who manage their photos primarily through Apple’s ecosystem but want a copy on Google Drive.
Access Google Drive via Your iPhone’s Web Browser
Did you know you can also upload photo to Google Drive from iPhone using just the Safari or Chrome browser? The mobile version of the Google Drive website offers full functionality.
- Open your preferred web browser on your iPhone and go to drive.google.com.
- Log in to your Google account if prompted.
- Once you see your Drive files, look for a button that says ‘New’ or an upload icon (usually a ‘+’ or a cloud with an up arrow). Tap it.
- Select ‘File upload’ from the menu.
- This will open your iPhone’s file picker. Tap ‘Browse’ and navigate to ‘Photos’. You may need to grant the browser permission to access your photos the first time.
- Select the images you want to upload and tap ‘Add’. The upload will commence in the background.

This browser-based method is a great alternative if you prefer not to install another app or if you need quick, one-time access to upload files. It’s a direct way to how to save photos to Google Drive on iPhone using tools you already have.
Transfer Photos to a Computer First, Then to Google Drive
Sometimes, the most reliable method involves using a computer as a middleman. This is especially true for transferring a very large volume of photos or when you want to organize them on a larger screen before uploading. Here’s a reliable way to backup iPhone photos on Google Drive using this computer-assisted method.
Step 1: Moving Photos from iPhone to Computer
You need to get your photos onto your computer first. You can do this using the built-in Photos app on Windows, the Image Capture app on Mac, or via a direct file transfer through the Finder (for Macs with macOS Catalina or later). For a more robust transfer experience with additional management features, some users opt for dedicated transfer software.
The process generally involves connecting your iPhone to your computer with a USB cable, trusting the computer on your phone, and then using the appropriate application to import selected photos or your entire camera roll.
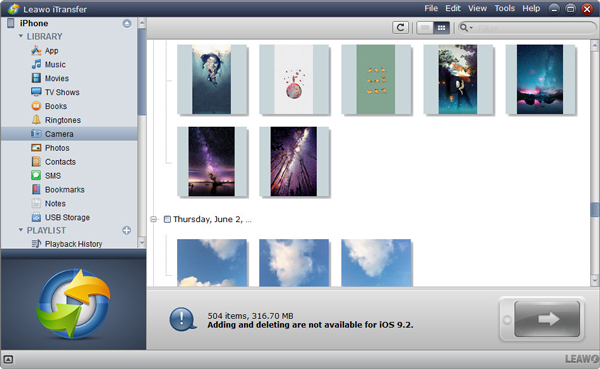
Try Leawo iTransfer right now! 100% Safe and Reliable on Transferring Photos/Music/Contacts/SMS… between iOS Devices, iTunes, and Computer.
Get the Windows version | Get the Mac version | Use the time-limited promotional campaign

Step 2: Uploading from Computer to Google Drive
Once your photos are safely on your computer’s hard drive, uploading them to Google Drive is simple.
- Open your web browser and go to drive.google.com. Sign in.
- You can either drag and drop the folder of photos directly into the browser window, or click ‘New’ > ‘File upload’ / ‘Folder upload’ and select the files.
- Google Drive will upload the files. You can monitor the progress in the bottom right corner.
This two-step computer method is powerful because it often allows for faster transfers (especially over USB) and gives you a local backup on your computer in addition to the cloud backup on Google Drive. It’s a comprehensive strategy for how to transfer photos from iPhone to Google Drive securely.
Choosing the Best Method for You
Now that you know several ways to upload photo to Google Drive from iPhone, how do you choose? Consider your needs:
- For quick, selective uploads: Use the Google Drive app or the Share Sheet from the Photos app.
- For automating backups: While not covered in detail here, you can explore apps like Google Photos (which offers unlimited high-quality storage) set to auto-backup, which syncs with your Google Drive storage.
- For large, one-time transfers: Using a computer as an intermediary is often the fastest and most stable.
- For accessing photos across Apple and Google ecosystems: The iCloud.com bridge method works well.
Learning how to save photos to Google Drive on iPhone effectively can free up gigabytes of space on your device and give you peace of mind knowing your memories are duplicated in a safe place. Whether you’re trying to backup iPhone photos on Google Drive after a vacation or performing routine digital housekeeping, one of these methods will suit your style.
Some images are sourced from the internet.