TOOL HUNTER

Adding text to your videos is one of the most effective ways to make them more engaging and informative. Whether you’re creating YouTube content, social media videos, or professional presentations, knowing how to add text in Adobe Premiere Pro can significantly enhance your video production quality. Many beginners find Premiere Pro’s text features somewhat challenging to master, but with the right guidance, you’ll be creating professional-looking titles and animations in no time.
How to Add Text in Adobe Premiere Pro: Three Different Methods
Adobe Premiere Pro offers several approaches for adding text to your videos. Each method serves different purposes, from simple titles to complex animated text sequences. Let’s explore the three primary ways to add text in Premiere Pro.
Basic Text Addition in Premiere Pro
Learning how to add text in Premiere Pro starts with the fundamental process. This method is perfect for creating simple titles and captions that appear throughout your video.
Start by launching Adobe Premiere Pro and creating a new project. Give your project a descriptive name that will help you identify it later. Import your video footage by either dragging it into the project panel or using the import function from the file menu. Once imported, drag your video clip to the timeline where you’ll be doing most of your editing work.
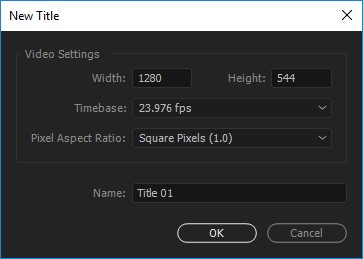
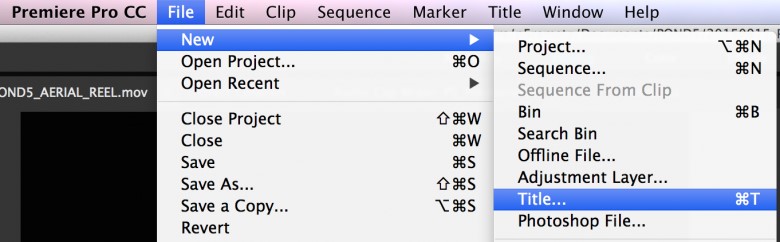
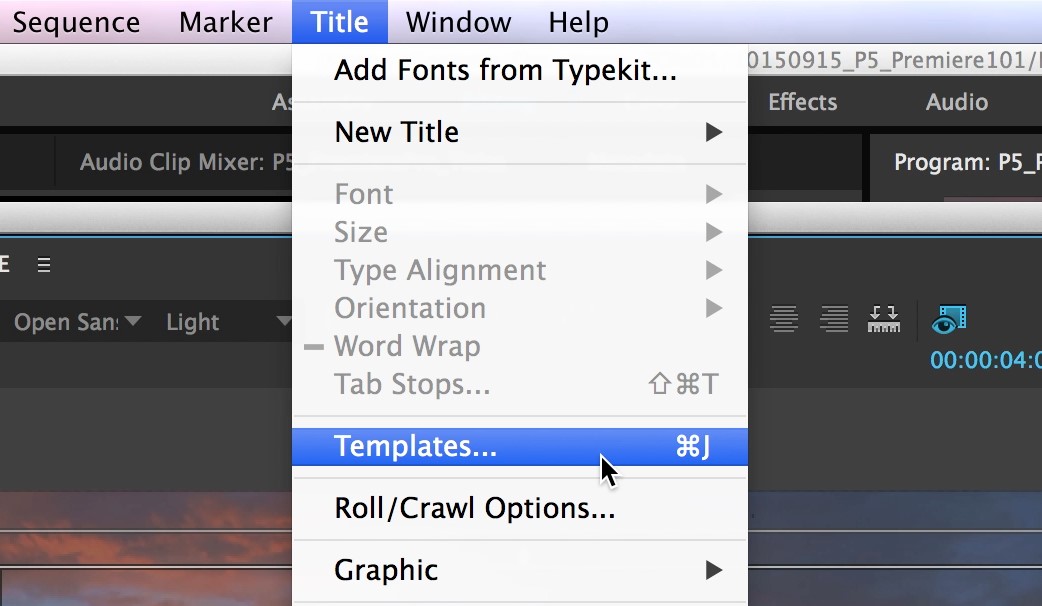
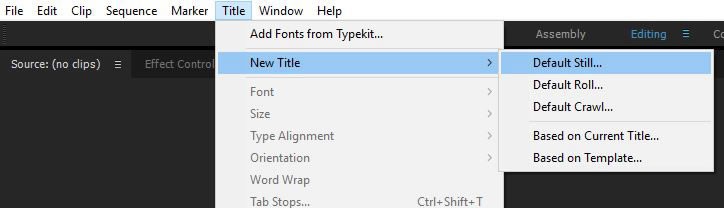
Navigate to the toolbar and locate the “Titles” option. Click on it and select “New Title” followed by “Default Still.” Alternatively, you can use the keyboard shortcut Ctrl+T (Windows) or Cmd+T (Mac) to quickly access the title creation window. A dialog box will appear where you can name your title and adjust basic settings. Click “OK” to proceed.
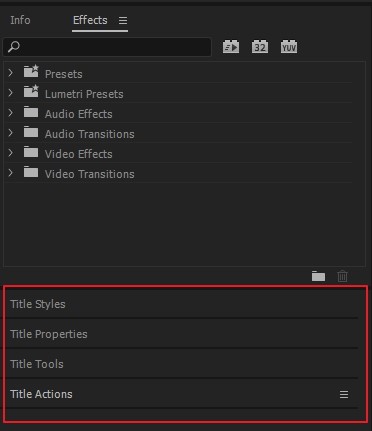
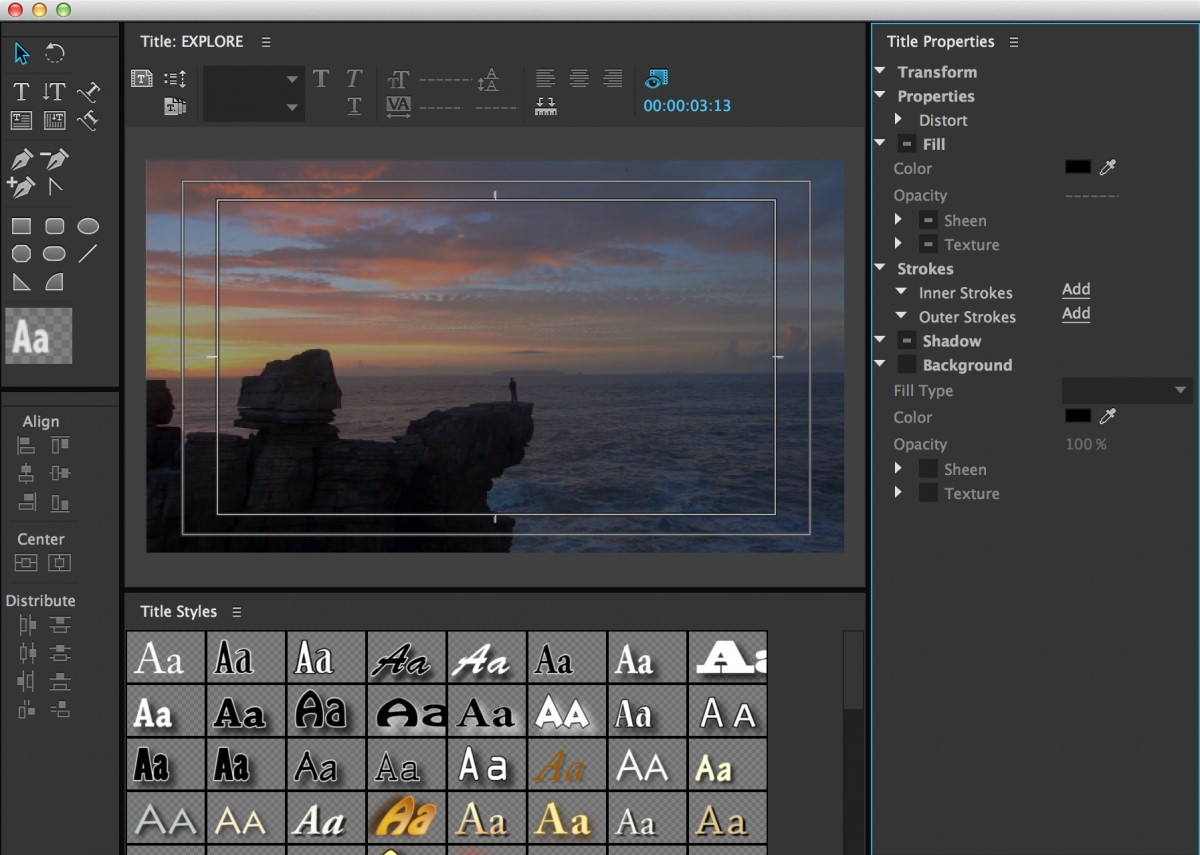
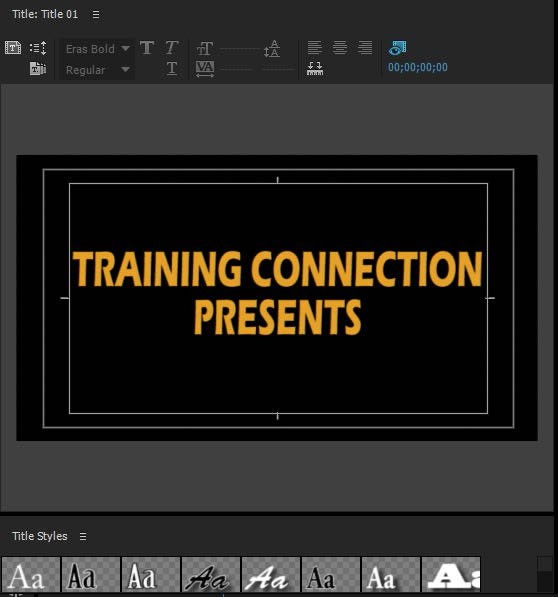
The title designer window will open, presenting you with various text customization options. Here you can choose your font style, size, color, alignment, and other typographic properties. The left panel contains tools for creating different types of text boxes, while the right panel offers detailed styling options.
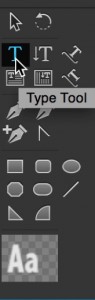
Select the “Type Tool” from the toolbar, which looks like a capital T. Click on the area of the screen where you want your text to appear and start typing. You can create point text that stays on a single line or area text that wraps within a defined box. The preview monitor shows exactly how your text will appear over your video footage.
Customize your text using the properties panel. Adjust the font family, size, color, tracking, leading, and other typographic settings until you’re satisfied with the appearance. For more advanced styling, you can add strokes, shadows, or backgrounds to make your text stand out.

To add animation to your text, locate the Effects Control panel. Here you can create keyframe animations for position, scale, rotation, and opacity. Set your playhead at the point where you want the animation to start, click the stopwatch icon next to the property you want to animate, move the playhead to where you want the animation to end, and adjust the property value. Premiere Pro will automatically create a smooth transition between these points.
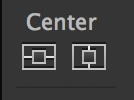
Use the alignment tools to perfectly position your text on the screen. The title designer includes options for horizontal and vertical alignment, as well as tools to center your text both horizontally and vertically with a single click.

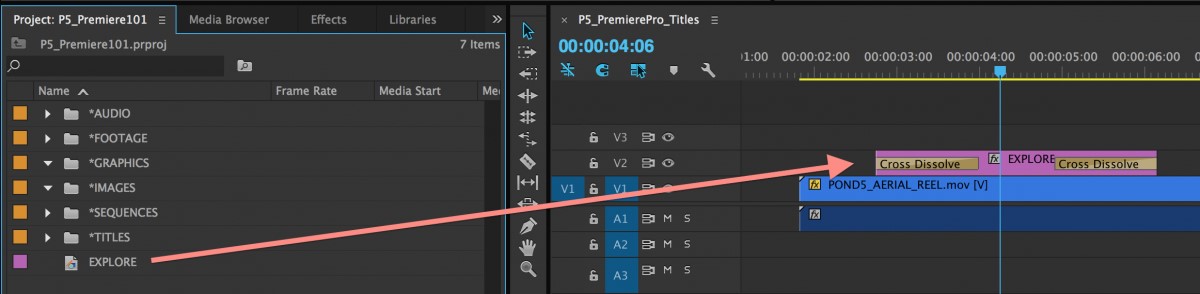
Once you’re satisfied with your text, close the title designer window. Your title will appear in the project panel. Drag it from the project panel to your timeline, placing it on a track above your video footage. You can adjust the duration of your text by dragging the edges of the clip in the timeline. Preview your video to ensure the text appears as expected, then export your final project.
Creating Professional Titles in Premiere Pro
The title creation method offers more advanced options for designing professional-looking titles and lower thirds. This approach gives you greater control over the styling and positioning of your text elements.
Begin by selecting “File” from the main menu, then choose “New” and “Title.” A dialog box will appear prompting you to name your title. Choose a descriptive name that will help you identify it later in your project.
The title tool window provides a comprehensive set of text design features. This interface includes tools for creating and manipulating text, along with extensive styling options for creating professional-looking titles.
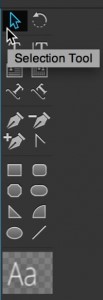
Select the type tool from the toolbar and click on the canvas to create a text box. Type your desired text, then use the selection tool (arrow icon) to move and position your text precisely where you want it on the screen. For precise alignment, use the alignment tools located in the title properties panel.
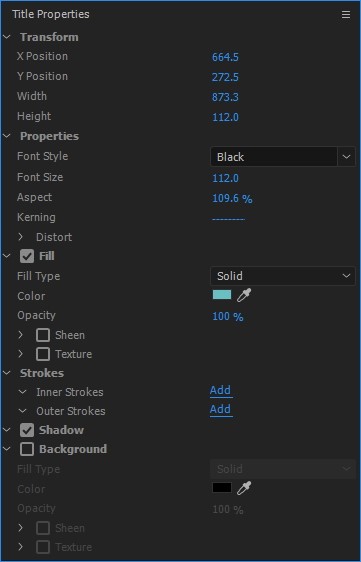
Explore the text properties panel to customize your title’s appearance. You can adjust font family, size, color, tracking, leading, and alignment. Additional styling options include adding strokes, shadows, and backgrounds to make your text more visually appealing and readable.
For more complex title designs, you can create multiple text boxes and arrange them in relation to each other. The title tool includes distribution and alignment options that make it easy to create balanced, professional-looking title layouts.
Once you’ve finished designing your title, close the title tool window. Your title will appear in the project panel, ready to be used in your timeline. Drag it to a video track above your main footage to overlay it on your video.
You can adjust the duration of your title directly in the timeline by dragging the edges of the title clip. To create consistent titles throughout your project, you can save your title design as a template for future use.
Creating Reusable Text Templates
If you frequently use similar text styles throughout your projects, creating text templates can save you significant time. Templates allow you to maintain consistency while avoiding the need to recreate the same text styles repeatedly.
Open Premiere Pro and navigate to the title menu. Select “New Title” and then “Default Still” to create a new title template.
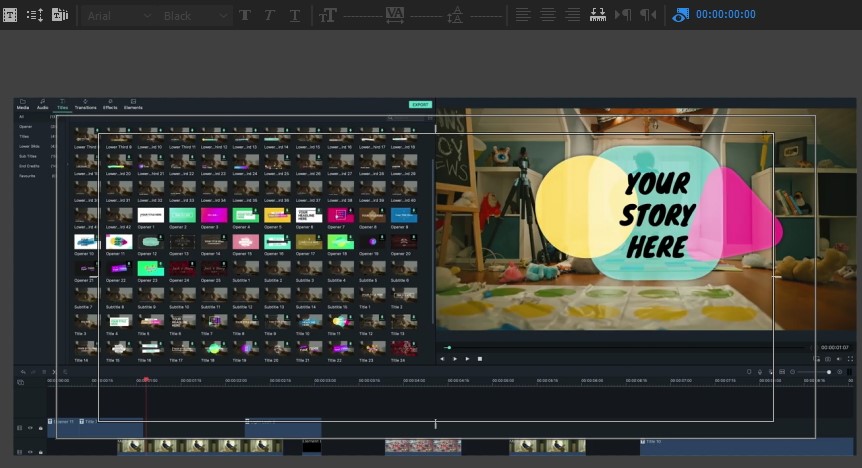
Name your title template appropriately, then use the title editor to design your text exactly as you want it to appear in your templates. Consider creating templates for common text elements like lower thirds, main titles, subtitles, and credits.
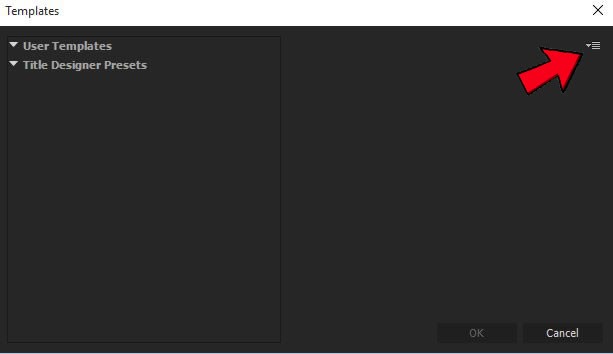
Locate the template icon in the title designer window. It typically appears as a small grid or layout icon. Click on it to access the template options, then click the menu icon in the top right corner of the template panel.
From the dropdown menu, select “Import Current Title as Template.” This will save your current title design as a reusable template that you can access quickly in future projects.
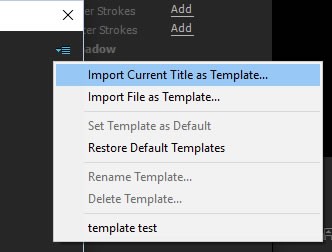
A dialog box will appear prompting you to name your template. Choose a descriptive name that clearly indicates the template’s purpose, then click “OK.” Your template will now be stored in the user template menu for future use.
While these methods provide powerful ways to add text in Premiere Pro, the process can be time-consuming for beginners. The numerous customization options and precise adjustments required can feel overwhelming when you’re just starting with video editing.
Filme – Best Video Editor for Beginners.Explore Your Creativity, Limitless

Enhancing Your Text with Visual Effects in Premiere Pro
Once you’ve mastered the basics of how to add text in Premiere Pro, you can explore various effects to make your text more dynamic and engaging. Visual effects can transform simple text into eye-catching graphic elements that enhance your video’s storytelling.
Adding Backgrounds to Text
Creating a background for your text can significantly improve readability, especially when your video footage contains busy or high-contrast areas. A well-designed background makes your text stand out while maintaining visual harmony with the rest of your composition.
Start by opening your project in Adobe Premiere Pro and ensuring your text is already added to the timeline. Deselect any currently selected items by clicking on an empty area of the timeline.
Navigate to the Graphics menu and select “New Layer,” then choose “Rectangle” from the options. This will create a rectangular shape layer that you can use as a background for your text.
Adjust the position and size of the rectangle on the canvas to create an appropriate background for your text. Make sure the rectangle is slightly larger than your text to provide adequate breathing room around the letters.
If your text appears hidden beneath the background shape, simply drag the text layer above the background layer in the timeline. The layer order in Premiere Pro determines what appears in front, with higher layers displaying above lower ones.
Select the graphics layer in the timeline, then navigate to the Effect Controls tab. Here you can customize the appearance of your background by adjusting the color, opacity, corner radius, and other visual properties. Consider using semi-transparent backgrounds or color schemes that complement your overall video aesthetic.
Creating Text Pop-Up Effects
The pop-up effect adds energy and attention-grabbing dynamics to your text. This effect makes individual letters or words appear to jump onto the screen, creating a playful and engaging visual experience.
To create this effect, you’ll need to separate your text into individual layers for each character. Start by creating your text normally, then duplicate the text layer so you have one layer for each letter in your word.
Select the first text layer and navigate to the Effect Controls panel. Locate the opacity settings and select the pen tool to create a mask. Carefully mask out all letters except the first one in your word. Repeat this process for each subsequent layer, masking all letters except the corresponding one.

For the popping animation to work correctly, each letter’s anchor point needs to be positioned at its center. Select the first letter’s layer and in the Effect Controls panel, adjust the anchor point coordinates until it’s centered on the letter.
Set the scale of the first letter to 0% to make it completely invisible. Click the stopwatch icon next to the scale property to create a keyframe at this starting point.
Move the playhead forward by 4-5 frames using the arrow keys, then increase the scale to 150%. This creates the “pop” effect where the letter briefly appears larger than its final size. Move another 4-5 frames forward and set the scale back to 100% for the letter’s final appearance.
Copy these scale keyframes and paste them to the other letter layers. You’ll need to adjust the timing slightly for each subsequent letter to create a sequential popping effect where letters appear one after another.
Finally, position each letter layer so they form the complete word when all have popped onto the screen. Preview your animation to ensure the timing feels natural and adjust as needed.
Incorporating Text Bubbles
Text bubbles add a conversational or comic book style to your videos, perfect for interviews, explanations, or creative storytelling. This effect places your text inside a speech or thought bubble graphic.
Start by sourcing or creating an appropriate bubble image. You can find numerous free bubble graphics online or create your own in graphic design software. Import your bubble image into Premiere Pro by right-clicking in the project panel and selecting “Import.”

Drag the bubble image to your timeline, placing it on a track above your video footage but below your text layer. Adjust the duration of the bubble layer to match how long you want it to appear in your video.
Resize and position the bubble on the canvas using the selection tool and effect controls. Make sure the bubble provides adequate space for your text while maintaining proper proportions.
Position your text layer above the bubble image layer in the timeline and adjust the text to fit nicely within the bubble. You may need to resize your text or adjust its positioning to create a balanced composition.
Customize the bubble’s appearance by selecting its layer and navigating to the Effect Controls tab. Here you can adjust the color, opacity, and add additional effects to make the bubble integrate seamlessly with your video’s visual style.
Creating Text Reveal Effects
Text reveal effects gradually uncover your text in creative ways, adding sophistication and visual interest to your titles. This technique works particularly well for introducing main titles or emphasizing key points in your video.
Begin by deselecting any items in your timeline, then navigate to the Graphics menu. Select “New Layer” and choose “Rectangle” to create a thin rectangular shape that will serve as your reveal element.
Position this rectangle where you want the reveal to begin—typically at the left, right, top, or bottom of the screen. The thin rectangle will act as the starting point from which your text will be revealed.
Select your text layer in the timeline and locate the opacity settings in the Effect Controls panel. Click on the rectangle icon next to opacity to create a four-point polygon mask. Adjust this mask to cover your entire text area.
Position the mask so it aligns with your thin rectangle graphic. In the mask settings, click the “Inverted” checkbox so the text becomes visible outside the mask rather than inside it.
Navigate to the “Vector Motion” settings in the Effect Controls panel. Adjust the vertical or horizontal position of your text so it’s completely hidden behind the mask. Click the stopwatch icon next to the position property to set a keyframe at this starting point.
Move the playhead to the position in your timeline where you want the text to be fully revealed. Adjust the text position so it moves completely out from behind the mask, creating a second keyframe automatically.
Play back your animation to see the text reveal effect. You can adjust the timing and easing of the movement to create different reveal speeds and styles.
Implementing Text Slide Animations
Slide animations create smooth, professional text movements that guide the viewer’s attention across the screen. This effect works well for lower thirds, captions, and any text that needs to enter or exit the frame gracefully.
Select your text layer in the timeline and navigate to the Effect Control tab. Expand the text settings to access the animation properties.
Position the playhead at the point where you want the slide animation to begin. Set the initial position of your text—typically just outside the visible frame for an entrance animation.
Click the stopwatch icon next to the position property to create your first keyframe. This marks the starting point of your animation.
Move the playhead to where you want the animation to complete—usually with the text in its final on-screen position. Adjust the position coordinates to move the text to this location, automatically creating a second keyframe.
Play back your animation to see the smooth sliding motion. You can adjust the timing between keyframes to create faster or slower movements, and add additional keyframes for more complex motion paths.
Centering Text Precisely in Adobe Premiere Pro
Proper text alignment is crucial for professional-looking videos. Centered text creates balance and focus, making your content more visually appealing and easier to read. Here’s how to perfectly center text in Premiere Pro.
Open your Premiere Pro project and import your video footage if you haven’t already. Drag the video to the timeline to begin working with it.
Navigate to the Graphics tab and select the text tool. Click on the canvas and type the text you want